Page Summary
-
reCAPTCHA API version 1.0 is no longer supported; users should upgrade to version 2.0.
-
reCAPTCHA offers standard themes (red, white) and custom theming for user interface customization.
-
Developers can control the appearance of reCAPTCHA using custom theming and CSS classes.
-
reCAPTCHA supports built-in and custom translations to internationalize the widget.
-
RecaptchaOptionsallows developers to configure theme, language, and custom settings.
Important: Version 1.0 of the reCAPTCHA API is no longer supported, please upgrade to Version 2.0. Learn more
Once you've successfully installed reCAPTCHA on your site, you may want to change the way it looks. This page explains: (1) how to choose one of the standard reCAPTCHA themes; (2) how to fully customize the appearance of reCAPTCHA; and (3) how to internationalize reCAPTCHA by changing the language of the Widget.
Standard Themes
To make the reCAPTCHA widget display a different theme, you first need to add the following code in your main HTML page anywhere before the <form> element where reCAPTCHA appears (this will not work if placed after the main script where reCAPTCHA is first invoked):
 <script type="text/javascript">
 var RecaptchaOptions = {
    theme : 'theme_name'
 };
 </script>
To use a standard theme, you need to replace 'theme_name' by one of the following four theme
names:
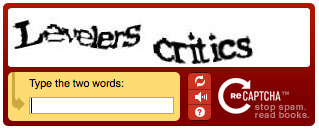
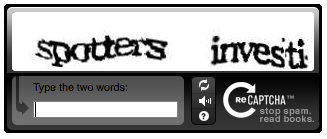
| 'red' (default theme) | 'white' |
|---|---|

|

|
| 'blackglass' | 'clean' |

|

|
Custom Theming
Custom theming allows you to control exactly how the reCAPTCHA image appears. (Here is a demo of custom theming.) In order to use
custom theming, you must first set the theme property of the RecaptchaOptions to 'custom'. This
tells reCAPTCHA that it should not create a user interface of its own. reCAPTCHA will rely on the presence of
HTML elements with the following IDs to display the CAPTCHA to the user:
-
An empty div with ID
recaptcha_image. This is where the actual image will be placed. The div will be 300x57 pixels. -
A text input with ID and name both set
to
recaptcha_response_field. This is where the user can enter their answer. -
Optionally, a div which contains the entire reCAPTCHA
widget. This ID div should be placed into
the
custom_theme_widgetand the style of the div should be set todisplay:none. After the reCAPTCHA theming code has fully loaded, it will make the div visible. This element avoids making the page flicker while it loads.
To implement all of this this, first place the following code in your main HTML page anywhere before the <form> element where reCAPTCHA appears:
 <script type="text/javascript">
 var RecaptchaOptions = {
    theme : 'custom',
    custom_theme_widget: 'recaptcha_widget'
 };
Then, inside the <form> element where you want reCAPTCHA to appear, place:
 <div id="recaptcha_widget" style="display:none">

   <div id="recaptcha_image"></div>
   <div class="recaptcha_only_if_incorrect_sol" style="color:red">Incorrect please try again</div>

   <span class="recaptcha_only_if_image">Enter the words above:</span>
   <span class="recaptcha_only_if_audio">Enter the numbers you hear:</span>

   <input type="text" id="recaptcha_response_field" name="recaptcha_response_field" />

   <div><a href="javascript:Recaptcha.reload()">Get another CAPTCHA</a></div>
   <div class="recaptcha_only_if_image"><a href="javascript:Recaptcha.switch_type('audio')">Get an audio CAPTCHA</a></div>
   <div class="recaptcha_only_if_audio"><a href="javascript:Recaptcha.switch_type('image')">Get an image CAPTCHA</a></div>

   <div><a href="javascript:Recaptcha.showhelp()">Help</a></div>

 </div>

 <script type="text/javascript"
    src="http://www.google.com/recaptcha/api/challenge?k=your_public_key">
 </script>
 <noscript>
   <iframe src="http://www.google.com/recaptcha/api/noscript?k=your_public_key"
        height="300" width="500" frameborder="0"></iframe><br>
   <textarea name="recaptcha_challenge_field" rows="3" cols="40">
   </textarea>
   <input type="hidden" name="recaptcha_response_field"
        value="manual_challenge">
 </noscript>
Notice that the last few lines are simply the standard way to display reCAPTCHA explained in the introduction of this guide.
Here's what's going on in the code above. The Recaptcha JavaScript object provides methods which allow you to change the state of the CAPTCHA. The method reload displays a new CAPTCHA challenge, and the method switch_type toggles between image and audio CAPTCHAs. In order to create a full UI for reCAPTCHA, we display different information when the CAPTCHA is in different states. For instance, when the user is viewing an image CAPTCHA, a link to "Get an audio CAPTCHA" is shown. Four CSS classes are available for you to create a stateful UI:
| CSS Class | Visible when... |
|---|---|
| recaptcha_only_if_image | an image CAPTCHA is being displayed |
| recaptcha_only_if_audio | an audio CAPTCHA is being displayed |
| recaptcha_only_if_incorrect_sol | the previous solution was incorrect |
| recaptcha_only_if_no_incorrect_sol | the previous solution was not incorrect |
While theming does give you many options, you need to follow some user interface consistency rules:
- You must state that you are using reCAPTCHA near the CAPTCHA widget.
- You must provide a visible button that calls the reload function.
- You must provide a way for visually impaired users to access an audio CAPTCHA.
- You must provide alt text for any images that you use as buttons in the reCAPTCHA widget.
Internationalization: Changing the Language of the Widget
There are two ways to internationalize the reCAPTCHA widget:
Built in translations
reCAPTCHA has a number of built in translations. You can use these by setting the lang parameter of the
RecaptchaOptions:
<script type="text/javascript">
var RecaptchaOptions = {
   lang : 'fr',
};
</script>
Custom Translations
If there isn't a translation for your language, you can build your own. You need to translate all of the strings in the reCAPTCHA javascript and set the "custom_translations" variable of RecaptchaOptions. Any strings that you don't set will be taken from the default translation for your language. You can use this to override only part of a default translation (e.g., if the translation we chose doesn't fit your region). For example:
<script type= "text/javascript">
var RecaptchaOptions = {
   custom_translations : { instructions_visual : "This is my text:" }
};
</script>
Here is a working example of a custom italian translation (place this code before you call reCAPTCHA):
<script type="text/javascript">
        var RecaptchaOptions = {
                custom_translations : {
                        instructions_visual : "Scrivi le due parole:",
                        instructions_audio : "Trascrivi ci\u00f2 che senti:",
                        play_again : "Riascolta la traccia audio",
                        cant_hear_this : "Scarica la traccia in formato MP3",
                        visual_challenge : "Modalit\u00e0 visiva",
                        audio_challenge : "Modalit\u00e0 auditiva",
                        refresh_btn : "Chiedi due nuove parole",
                        help_btn : "Aiuto",
                        incorrect_try_again : "Scorretto. Riprova.",
                },
                lang : 'it', // Unavailable while writing this code (just for audio challenge)
                theme : 'red' // Make sure there is no trailing ',' at the end of the RecaptchaOptions dictionary
        };
</script>
RecaptchaOptions Reference
The following fields can be set in the RecaptchaOptions dictionary:
|
Key |
Possible values |
Default value |
Meaning |
||||||||||||||||||
|---|---|---|---|---|---|---|---|---|---|---|---|---|---|---|---|---|---|---|---|---|---|
|
theme |
'red' | 'white' | 'blackglass' | 'clean' | 'custom' |
'red' |
Defines which theme to use for reCAPTCHA. The red, white, blackglass, and clean themes
are pre-defined themes where reCAPTCHA provides the user interface. In the custom theme,
your site has full control over the reCAPTCHA appearance. |
||||||||||||||||||
|
lang |
Any supported language code. |
'en' |
Which language is used in the interface for the pre-defined
themes. The following languages are supported:
|
||||||||||||||||||
| custom_translations | A dictionary of translations | null | Use this to specify custom translations of reCAPTCHA strings. | ||||||||||||||||||
| custom_theme_widget | A string with the ID of a DOM element | null | When using custom theming, this is a div element which contains the widget. See the custom theming section for how to use this. | ||||||||||||||||||
|
tabindex |
any integer |
0 |
Sets a
tabindex
for the reCAPTCHA text box. If other elements in the form use a
tabindex, this should be set so that navigation is easier for the user |
As an example, this script tag makes the reCAPTCHA have a white theme and have tabindex 2:
<script>
var RecaptchaOptions = {
   theme : 'white',
   tabindex : 2
};
</script>
