Stay organized with collections
Save and categorize content based on your preferences.
To start using the Google Photos APIs, configure your project by enabling the Photos
APIs you need using the Google API Console and setting up an OAuth 2.0 client ID.
Your application interacts with Google Photos on behalf of a
Google Photos user. For example, when you create albums in a user's
Google Photos library or upload media items to a user's
Google Photos account, the user authorizes these API requests using the
OAuth 2.0 protocol.
The OAuth 2.0 client ID allows your application users to sign in, authenticate,
and thereby use the Photos APIs. The Photos APIs don't support
service accounts; to use these APIs, users must be signed in to a valid Google
Account.
Configure your app
First enable the API, then request an OAuth 2.0 client ID.
Enable the API
Before you can use the Photos APIs, you must enable them in your project.
From the menu bar, select a project or create a new project.
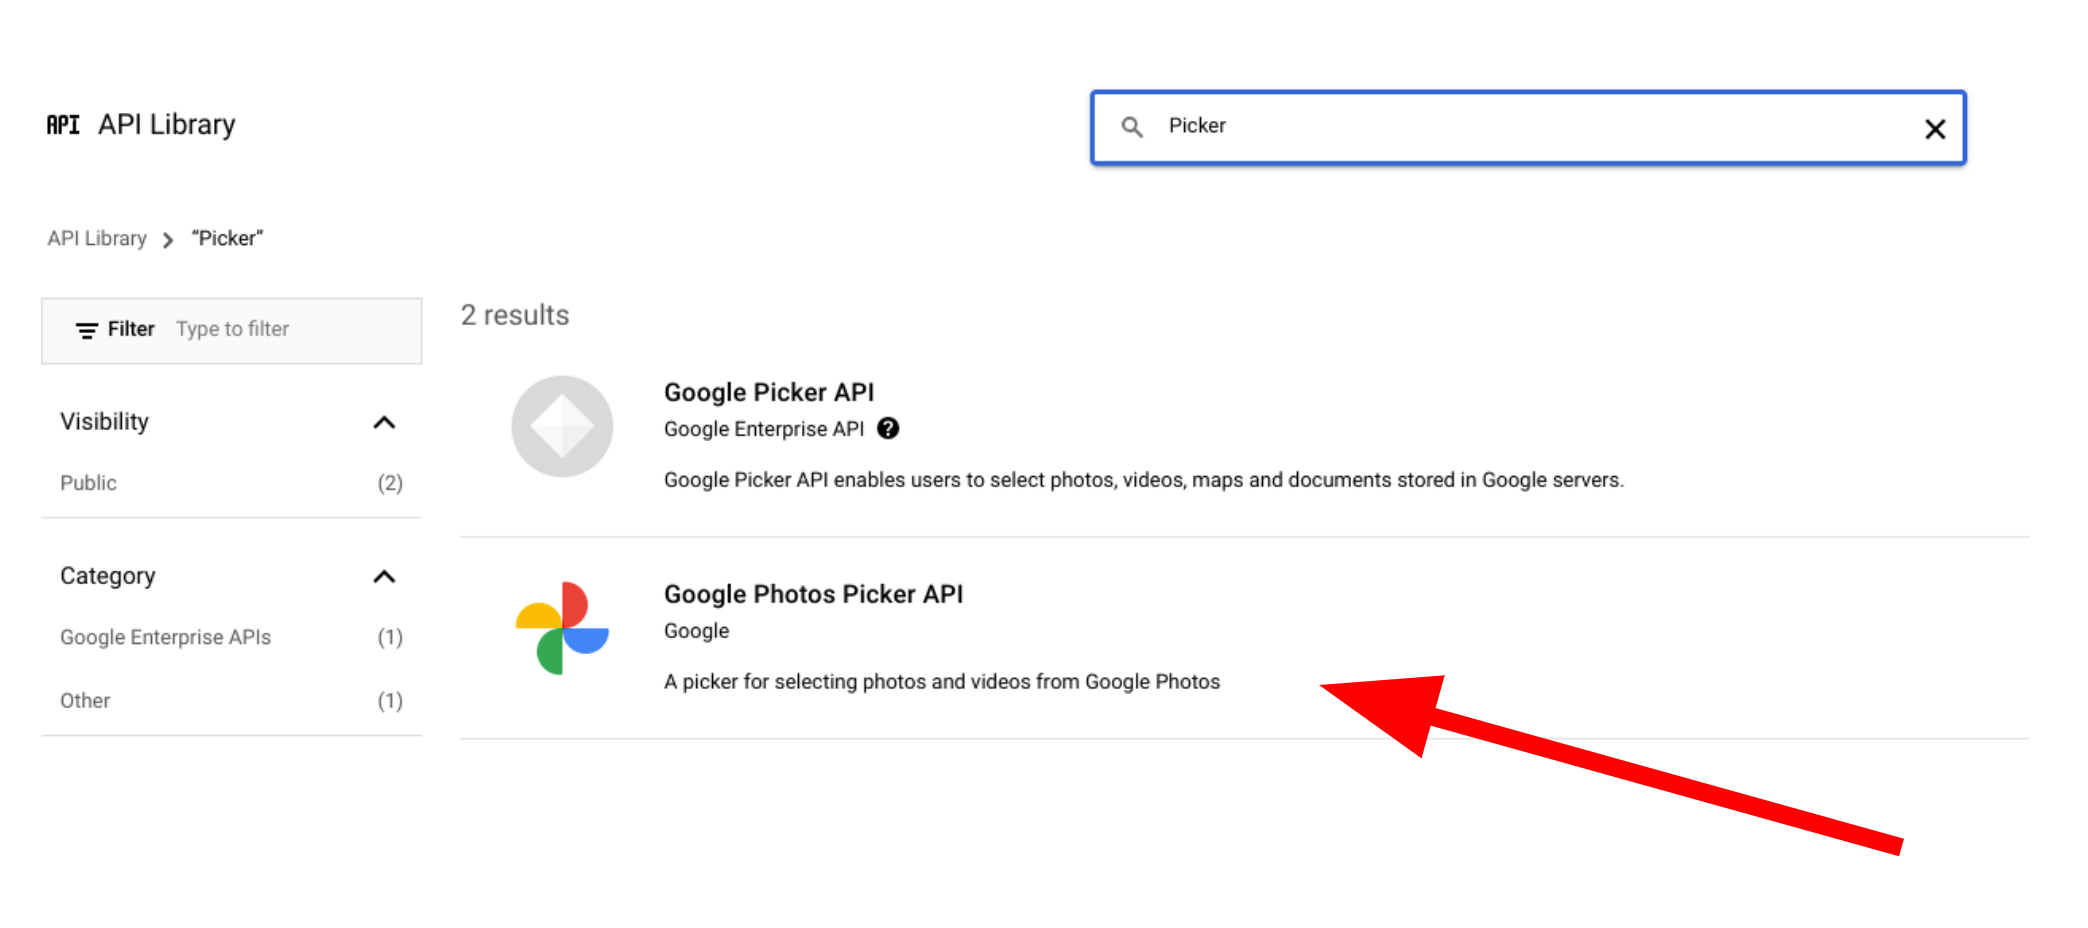
To open one of the Google Photos APIs, from the Navigation menu, select
APIs & Services > Library.
Search for "Photos". Select one or more of the Photos APIs and click
Enable.
Request an OAuth 2.0 client ID
Follow these steps to request an OAuth client ID and configure it for your
application. This example uses an application where the entire OAuth flow is
handled server-side, such as the one in our samples. The setup process may vary
for other implementation scenarios.
From the menu, select APIs & Services > Credentials.
On the Credentials page, click Create Credentials > OAuth client ID.
Select your Application type. In this example, the application type is
Web application.
Register the origins from which your app is allowed to access the Google
APIs as follows:
To identify the client ID, enter a name.
In the Authorized JavaScript origins field, enter the origin for
your app. This field doesn't allow wildcards.
You can enter multiple origins to allow your app to run on different
protocols, domains, or subdomains. The URLs you enter are allowed to
start an OAuth request.
The following example shows a local development URL (our samples use
localhost:8080) and a production URL.
The Authorized redirect URI field is the endpoint that receives
responses from the OAuth 2.0 server. Typically, this includes your
development environment and points to a path in your application.
From the resulting OAuth client dialog, copy the following:
Client ID
Client secret
Your app can access the enabled Google APIs using these values.
Before you can launch a public application that accesses the Photos APIs,
your app must be reviewed by Google. An "Unverified app" message appears on the
screen when you test your application, until it is
verified.
After you've configured your app you're ready to get started:
Resources created through any of the Google Photos APIs can only be accessed or
modified using the original client ID used to create them. For example, if you
create a session in the Picker API with a specific client ID and later change
that client ID in your app, your app will lose access to any API resources
created with the previous client ID.
Plan carefully and choose the correct client ID type for the Photos API you are
using. Only change your client ID if absolutely necessary to avoid access
issues.
[[["Easy to understand","easyToUnderstand","thumb-up"],["Solved my problem","solvedMyProblem","thumb-up"],["Other","otherUp","thumb-up"]],[["Missing the information I need","missingTheInformationINeed","thumb-down"],["Too complicated / too many steps","tooComplicatedTooManySteps","thumb-down"],["Out of date","outOfDate","thumb-down"],["Samples / code issue","samplesCodeIssue","thumb-down"],["Other","otherDown","thumb-down"]],["Last updated 2025-05-07 UTC."],[[["\u003cp\u003eTo use Google Photos APIs, enable them in your Google API Console project and set up an OAuth 2.0 client ID for user authentication.\u003c/p\u003e\n"],["\u003cp\u003eGoogle Photos APIs require user sign-in with a Google Account and do not support service accounts.\u003c/p\u003e\n"],["\u003cp\u003eBefore launching publicly, your application needs to be verified by Google to remove the "Unverified app" message.\u003c/p\u003e\n"],["\u003cp\u003eResources created with a specific client ID can only be accessed or modified using the same ID; changing it may lead to access issues.\u003c/p\u003e\n"],["\u003cp\u003eYou can get started with either the Picker API or the Library API after configuring your application.\u003c/p\u003e\n"]]],["To utilize Google Photos APIs, enable them in your project via the Google API Console. Then, request an OAuth 2.0 client ID, selecting your application type and registering authorized JavaScript origins and redirect URIs. Copy the client ID and secret for your app's use. Note that user sign-in via a valid Google Account is necessary. Applications must be verified by Google before public launch, and client ID changes can cause access issues to previously created resources.\n"],null,["To start using the Google Photos APIs, configure your project by enabling the Photos\nAPIs you need using the Google API Console and setting up an OAuth 2.0 client ID.\n\nYour application interacts with Google Photos on behalf of a\nGoogle Photos user. For example, when you create albums in a user's\nGoogle Photos library or upload media items to a user's\nGoogle Photos account, the user authorizes these API requests using the\n[OAuth 2.0](/identity/protocols/OAuth2) protocol.\n\nThe OAuth 2.0 client ID allows your application users to sign in, authenticate,\nand thereby use the Photos APIs. The Photos APIs don't support\nservice accounts; to use these APIs, users must be signed in to a valid Google\nAccount.\n\nConfigure your app\n\nFirst enable the API, then request an OAuth 2.0 client ID.\n\nEnable the API\n\nBefore you can use the Photos APIs, you must enable them in your project.\n\n1. Go to the [Google API Console](https://console.developers.google.com/apis/library).\n2. From the menu bar, select a project or create a new project.\n3. To open one of the Google Photos APIs, from the Navigation menu, select **APIs \\& Services \\\u003e Library**.\n4. Search for \"Photos\". Select one or more of the Photos APIs and click **Enable**.\n\n| **Note:** When searching Google APIs, you may also see the \"Google Picker API\", which is different from the Google Photos Picker API.\n\nRequest an OAuth 2.0 client ID\n\nFollow these steps to request an OAuth client ID and configure it for your\napplication. This example uses an application where the entire OAuth flow is\nhandled server-side, such as the one in our samples. The setup process may vary\nfor other [implementation scenarios](/identity/protocols/OAuth2).\n\n1. Go to the [Google API Console](https://console.developers.google.com/apis/library) and select your project.\n2. From the menu, select **APIs \\& Services \\\u003e Credentials**.\n3. On the **Credentials** page, click **Create Credentials \\\u003e OAuth client ID**.\n\n | **Note:** If you're setting up a new project, you may be prompted to configure your project's consent screen.\n4. Select your **Application type** . In this example, the application type is\n **Web application**.\n\n5. Register the origins from which your app is allowed to access the Google\n APIs as follows:\n\n 1. To identify the client ID, enter a name.\n 2. In the **Authorized JavaScript origins** field, enter the origin for\n your app. This field doesn't allow wildcards.\n\n You can enter multiple origins to allow your app to run on different\n protocols, domains, or subdomains. The URLs you enter are allowed to\n start an OAuth request.\n\n The following example shows a local development URL (our samples use\n `localhost:8080`) and a production URL. \n\n http://localhost:8080\n https://myproductionurl.example.com\n\n 3. The **Authorized redirect URI** field is the endpoint that receives\n responses from the OAuth 2.0 server. Typically, this includes your\n development environment and points to a path in your application.\n\n http://localhost:8080/auth/google/callback\n https://myproductionurl.example.com/auth/google/callback\n\n 4. Click **Create**.\n\n\u003c!-- --\u003e\n\n6. From the resulting OAuth client dialog, copy the following:\n\n - Client ID\n - Client secret\n\n Your app can access the enabled Google APIs using these values.\n\nBefore you can launch a public application that accesses the Photos APIs,\nyour app must be reviewed by Google. An \"Unverified app\" message appears on the\nscreen when you test your application, until it is\n[verified](https://support.google.com/cloud/answer/7454865).\n\nAfter you've configured your app you're ready to get started:\n\n- [Get started with the Picker API](/photos/picker/guides/get-started-picker)\n- [Get started with the Library API](/photos/library/guides/get-started-library)\n\nChanging your client ID\n\nResources created through any of the Google Photos APIs can only be accessed or\nmodified using the original client ID used to create them. For example, if you\ncreate a `session` in the Picker API with a specific client ID and later change\nthat client ID in your app, your app will lose access to any API resources\ncreated with the previous client ID.\n\nPlan carefully and choose the correct client ID type for the Photos API you are\nusing. Only change your client ID if absolutely necessary to avoid access\nissues."]]