
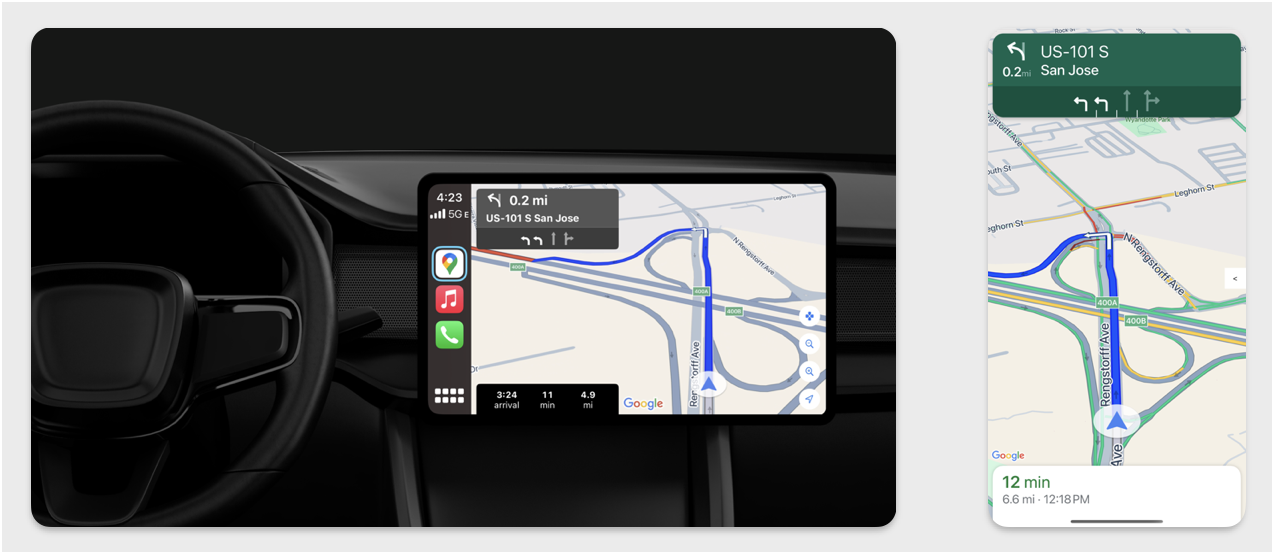
In diesem Abschnitt wird beschrieben, wie Sie das Navigation SDK mit der Apple CarPlay-Bibliothek verwenden können, um die Navigation Ihrer App auf Infotainmentsystemen im Armaturenbrett anzuzeigen. Wenn das Infotainmentsystem eines Fahrers CarPlay unterstützt, kann er Ihre App direkt auf dem Display seines Autos verwenden, indem er sein Smartphone mit dem Infotainmentsystem verbindet. Die Sprachführung kann auch über die Lautsprecher des Autos erfolgen.
Sie erstellen Ihre CarPlay-App aus einer Reihe von UI-Vorlagen, die von Apple bereitgestellt werden. Ihre App ist dafür verantwortlich, die anzuzeigende Vorlage auszuwählen und die Daten darin bereitzustellen.
Das In-Dashboard-System zeigt die sicherheitsgeprüften interaktiven Elemente an, damit der Fahrer sicher zu seinem Ziel navigieren kann, ohne unnötig abgelenkt zu werden. Sie können Ihre App auch so programmieren, dass der Fahrer mit Ihren app-spezifischen Funktionen interagieren kann, z. B. um Bestellungen anzunehmen oder abzulehnen oder den Standort des Kunden auf einer Karte anzusehen. Updates zum Bestellstatus können auch so programmiert werden, dass sie auf dem In-Dash-Gerät angezeigt werden.
Einrichtung
Mit CarPlay starten
Machen Sie sich zuerst mit der Apple-Dokumentation vertraut:
Navigation SDK einrichten
- Nachdem Sie die Apple-Dokumentation gelesen haben, können Sie mit dem Navigation SDK arbeiten.
- Richten Sie Ihr Projekt ein, falls Sie das Navigation SDK noch nicht in Ihre App eingebunden haben.
- Aktivieren Sie den Feed für die Turn-by-Turn-Navigation für Ihre App.
- Optional. Generierte Symbole aus dem Navigation SDK verwenden.
- Zeichnen Sie die Karte mit der Klasse
GMSMapView, die in der Klasse „UIView“ enthalten ist. Weitere Informationen finden Sie unter Routen planen. Füllen SieCPNavigationSessionmit den Daten aus der TurnByTurn-Bibliothek.
Karte und Benutzeroberfläche für die Navigation zeichnen
Mit der Klasse GMSMapView wird eine Karte gerendert und mit der Klasse CPMapTemplate wird die Benutzeroberfläche auf CarPlay-Bildschirmen gerendert. Sie bietet viele der Funktionen der GMSMapView für Smartphones, aber mit eingeschränkter Interaktivität.
Swift
init(window: CPWindow) {
    super.init(nibName: nil, bundle: nil)
    self.window = window

    // More CPMapTemplate initialization

}

override func viewDidLoad() {
    super.viewDidLoad()

    let mapViewOptions = GMSMapViewOptions()
    mapViewOptions.screen = window.screen
    mapViewOptions.frame = self.view.bounds

    mapView = GMSMapView(options: mapViewOptions)
    mapView.autoresizingMask = [.flexibleHeight, .flexibleWidth]
    mapView.settings.isNavigationHeaderEnabled = false
    mapView.settings.isNavigationFooterEnabled = false

    // Disable buttons: in CarPlay, no part of the map is clickable.
    // The app should instead place these buttons in the appropriate slots of the CarPlay template.
    mapView.settings.compassButton = false
    mapView.settings.isRecenterButtonEnabled = false
    mapView.shouldDisplaySpeedometer = false
    mapView.isMyLocationEnabled = true

    self.view.addSubview(mapView)
}
Objective-C
- (instancetype)initWithWindow:(CPWindow *)window {
  self = [super initWithNibName:nil bundle:nil];
  if (self) {
    _window = window;

  // More CPMapTemplate initialization
  }
}

- (void)viewDidLoad {
  [super viewDidLoad];
  GMSMapViewOptions *options = [[GMSMapViewOptions alloc] init];
  options.screen = _window.screen;
  options.frame = self.view.bounds;
  _mapView = [[GMSMapView alloc] initWithOptions:options];
  _mapView.autoresizingMask = UIViewAutoresizingFlexibleHeight | UIViewAutoresizingFlexibleWidth;
  _mapView.settings.navigationHeaderEnabled = NO;
  _mapView.settings.navigationFooterEnabled = NO;

  // Disable buttons: in CarPlay, no part of the map is clickable.
  // The app should instead place these buttons in the appropriate slots of the CarPlay template.
  _mapView.settings.compassButton = NO;
  _mapView.settings.recenterButtonEnabled = NO;

  _mapView.shouldDisplaySpeedometer = NO;
  _mapView.myLocationEnabled = YES;

  [self.view addSubview:_mapView];
}
Karteninteraktion aktivieren
Aus Sicherheitsgründen für den Fahrer beschränkt CarPlay die Interaktion mit dem Display auf eine Reihe von CPMapTemplateDelegate-Methoden. Mit diesen Rückrufen können Sie die eingeschränkte Interaktion des Fahrers mit der Karte auf einem Armaturenbrettdisplay unterstützen.
Wenn Sie zusätzliche Nutzeraktionen unterstützen möchten, erstellen Sie ein Array von CPMapButton und weisen Sie es CPMapTemplate.mapButtons zu.
Mit dem folgenden Code werden Schwenkinteraktionen und Schaltflächen zum Schwenken, Ein- und Auszoomen sowie zum Anzeigen des Standorts des Nutzers erstellt.
Schwenkinteraktionen
Swift
// MARK: CPMapTemplateDelegate
func mapTemplate(_ mapTemplate: CPMapTemplate, panBeganWith direction: CPMapTemplate.PanDirection) {

}

func mapTemplate(_ mapTemplate: CPMapTemplate, panWith direction: CPMapTemplate.PanDirection) {
    let scrollAmount = scrollAmount(for: direction)
    let scroll = GMSCameraUpdate.scrollBy(x: scrollAmount.x, y: scrollAmount.y)
    mapView.animate(with: scroll)
}

func mapTemplate(_ mapTemplate: CPMapTemplate, panEndedWith direction: CPMapTemplate.PanDirection) {
}

func scrollAmount(for panDirection: CPMapTemplate.PanDirection) -> CGPoint {
    let scrollDistance = 80.0
    var scrollAmount = CGPoint(x: 0, y: 0)
    switch panDirection {
        case .left:
            scrollAmount.x -= scrollDistance
            break;
        case .right:
            scrollAmount.x += scrollDistance
            break;
        case .up:
            scrollAmount.y += scrollDistance
            break;
        case .down:
            scrollAmount.y -= scrollDistance
            break;
        default:
            break;
    }
    if scrollAmount.x != 0 && scrollAmount.y != 0 {
        // Adjust length if scrolling diagonally.
        scrollAmount = CGPointMake(scrollAmount.x * sqrt(1.0/2.0), scrollAmount.y * sqrt(1.0/2.0))
    }
    return scrollAmount
}
Objective-C
#pragma mark - CPMapTemplateDelegate

- (void)mapTemplate:(CPMapTemplate *)mapTemplate panBeganWithDirection:(CPPanDirection)direction {
}

- (void)mapTemplate:(CPMapTemplate *)mapTemplate panWithDirection:(CPPanDirection)direction {
CGPoint scrollAmount = [self scrollAmountForPanDirection:direction];
GMSCameraUpdate *scroll = [GMSCameraUpdate scrollByX:scrollAmount.x Y:scrollAmount.y];
[_mapView animateWithCameraUpdate:scroll];
}

- (void)mapTemplate:(CPMapTemplate *)mapTemplate panEndedWithDirection:(CPPanDirection)direction {
}
- (CGPoint)scrollAmountForPanDirection:(CPPanDirection)direction {
  static const CGFloat scrollDistance = 80.;
  CGPoint scrollAmount = {0., 0.};
  if (direction & CPPanDirectionLeft) {
    scrollAmount.x = -scrollDistance;
  }
  if (direction & CPPanDirectionRight) {
    scrollAmount.x = scrollDistance;
  }
  if (direction & CPPanDirectionUp) {
    scrollAmount.y = -scrollDistance;
  }
  if (direction & CPPanDirectionDown) {
    scrollAmount.y = scrollDistance;
  }
  if (scrollAmount.x != 0 && scrollAmount.y != 0) {
  // Adjust length if scrolling diagonally.
  scrollAmount =
    CGPointMake(scrollAmount.x * (CGFloat)M_SQRT1_2, scrollAmount.y * (CGFloat)M_SQRT1_2);
  }
  return scrollAmount;
}
Häufige Schaltflächenverwendungen
Swift
// MARK: Create Buttons

func createMapButtons() -> [CPMapButton] {
    let panButton = mapButton(systemImageName: "dpad.fill") { [weak self] in
        self?.didTapPanButton()
    }

    let zoomOutButton = mapButton(systemImageName: "minus.magnifyingglass") { [weak self] in
        self?.didTapZoomOutButton()
    }

    let zoomInButton = mapButton(systemImageName: "plus.magnifyingglass") { [weak self] in
        self?.didTapZoomInButton()
    }

    let myLocationButton = mapButton(systemImageName: "location") { [weak self] in
        self?.didTapMyLocationButton()
    }

    let mapButtons = [panButton, zoomOutButton, zoomInButton, myLocationButton]
    return mapButtons
}

func mapButton(systemImageName: String, handler: @escaping () -> Void) -> CPMapButton {

}


// MARK: Button callbacks

@objc func didTapPanButton() {
    mapTemplate?.showPanningInterface(animated: true)
}

@objc func didTapZoomOutButton() {
    mapView.animate(with: GMSCameraUpdate.zoomOut())
}

@objc func didTapZoomInButton() {
    mapView.animate(with: GMSCameraUpdate.zoomIn())
}

@objc func didTapMyLocationButton() {
    if let lastLocation = lastLocation {
        let cameraPosition = GMSCameraPosition(target: lastLocation.coordinate, zoom: 15)
        mapView.animate(to: cameraPosition)
    }
}
Objective-C
#pragma mark - Create Buttons

- (NSArray<CPMapButton *>*)createMapButtons {
    NSMutableArray<CPMapButton *> *mapButtons = [NSMutableArray<CPMapButton *> array];

    __weak __typeof__(self) weakSelf = self;
    CPMapButton *panButton = [self mapButtonWithSystemImageNamed:@"dpad.fill"
                                                        handler:^(CPMapButton *_) {
                                                        [weakSelf didTapPanButton];
                                                        }];
    [mapButtons addObject:panButton];

    CPMapButton *zoomOutButton =
        [self mapButtonWithSystemImageNamed:@"minus.magnifyingglass"
                                    handler:^(CPMapButton *_Nonnull mapButon) {
                                    [weakSelf didTapZoomOutButton];
                                    }];
    [mapButtons addObject:zoomOutButton];

    CPMapButton *zoomInButton =
        [self mapButtonWithSystemImageNamed:@"plus.magnifyingglass"
                                    handler:^(CPMapButton *_Nonnull mapButon) {
                                    [weakSelf didTapZoomInButton];
                                    }];
    [mapButtons addObject:zoomInButton];

    CPMapButton *myLocationButton =
        [self mapButtonWithSystemImageNamed:@"location"
                                    handler:^(CPMapButton *_Nonnull mapButton) {
                                    [weakSelf didTapMyLocationButton];
                                    }];
    [mapButtons addObject:myLocationButton];
    return mapButtons;
}

#pragma mark - Button Callbacks

- (void)didTapZoomOutButton {
[_mapView animateWithCameraUpdate:[GMSCameraUpdate zoomOut]];
}

- (void)didTapZoomInButton {
[_mapView animateWithCameraUpdate:[GMSCameraUpdate zoomIn]];
}

- (void)didTapMyLocationButton {
CLLocation *location = self.lastLocation;
if (location) {
    GMSCameraPosition *position =
        [[GMSCameraPosition alloc] initWithTarget:self.lastLocation.coordinate zoom:15.];
    [_mapView animateToCameraPosition:position];
}
}

- (void)didTapPanButton {
[_mapTemplate showPanningInterfaceAnimated:YES];
_isPanningInterfaceEnabled = YES;
}

- (void)didTapStopPanningButton {
[_mapTemplate dismissPanningInterfaceAnimated:YES];
_isPanningInterfaceEnabled = NO;
}
Hinweis:Auf dem CarPlay-Display können keine alternativen Routen ausgewählt werden. Sie müssen auf dem Smartphone ausgewählt werden, bevor CarPlay gestartet wird.
Routenplaner anzeigen
In diesem Abschnitt wird beschrieben, wie Sie einen Listener für einen Datenfeed einrichten und die Navigationsanweisungen in den Feldern für die Routenführung und die Schätzung der Fahrtzeit einfügen. Weitere Informationen finden Sie im CarPlay App Programming Guide im Abschnitt Build a CarPlay Navigation App.
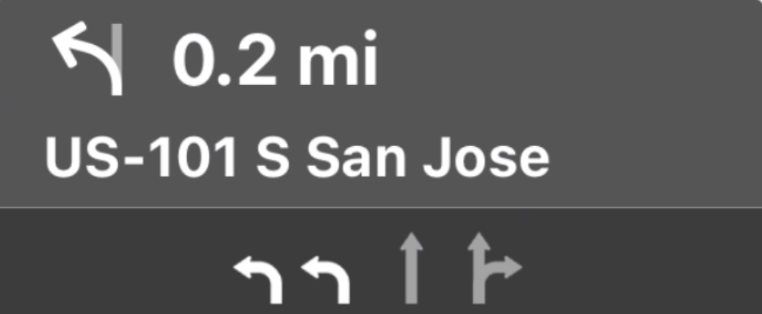
In den Bereichen für Wegbeschreibungen und Kostenvoranschläge wird eine Navigationskarte mit Navigationsinformationen für die aktuelle Fahrt angezeigt. Die TurnByTurn-Bibliothek im Navigation SDK kann einige dieser Informationen liefern, z. B. Symbol, Text und verbleibende Zeit.
Listener einrichten
Folgen Sie der Anleitung zum Einrichten eines Event-Listeners unter Details zum Datenfeed für die Turn-by-Turn-Navigation.
Navigationsinformationen eingeben
Im ersten Teil des folgenden Codebeispiels wird gezeigt, wie Sie Reisezeitprognosen für CarPlay erstellen, indem Sie GMSNavigationNavInfo.timeToCurrentStepSeconds in CPTravelEstimate übersetzen. Weitere Informationen zu diesen und anderen Anzeigeelementen finden Sie unter Details zum Datenfeed für die Turn-by-Turn-Navigation.
Im zweiten Teil des Beispiels wird gezeigt, wie ein Objekt erstellt und im Feld userInfo von CPManuevers gespeichert wird. Dadurch wird die CPManeuverDisplayStyle festgelegt, die auch für Informationen zur Fahrspurführung verwendet wird. Weitere Informationen finden Sie im CarPlay App Programming Guide von Apple.
Swift
// Get a CPTravelEstimate from GMSNavigationNavInfo
func getTravelEstimates(from navInfo:GMSNavigationNavInfo) -> CPTravelEstimates {
    let distanceRemaining = navInfo.roundedDistance(navInfo.distanceToCurrentStepMeters)
    let timeRemaining = navInfo.roundedTime(navInfo.timeToCurrentStepSeconds)
    let travelEstimates = CPTravelEstimates(distanceRemaining: distanceRemaining, timeRemaining: timeRemaining)
    return travelEstimates
}

//  Create an object to be stored in the userInfo field of CPManeuver to determine the CPManeuverDisplayStyle.

/** An object to be stored in the userInfo field of a CPManeuver. */

struct ManeuverUserInfo {
    var stepInfo: GMSNavigationStepInfo
    var isLaneGuidance: Bool
}

func mapTemplate(_ mapTemplate: CPMapTemplate, displayStyleFor maneuver: CPManeuver) -> CPManeuverDisplayStyle {
    let userInfo = maneuver.userInfo
    if let maneuverUserInfo = userInfo as? ManeuverUserInfo {
        return maneuverUserInfo.isLaneGuidance ? .symbolOnly : .leadingSymbol
    }
    return .leadingSymbol
}

// Get a CPManeuver with instructionVariants and symbolImage from GMSNavigationStepInfo
func getManeuver(for stepInfo: GMSNavigationStepInfo) -> CPManeuver {
    let maneuver = CPManeuver()
    maneuver.userInfo = ManeuverUserInfo(stepInfo: stepInfo, isLaneGuidance: false)
    switch stepInfo.maneuver {
        case .destination:
            maneuver.instructionVariants = ["Your destination is ahead."]
            break
        case .destinationLeft:
            maneuver.instructionVariants = ["Your destination is ahead on your left."]
            break
        case .destinationRight:
            maneuver.instructionVariants = ["Your destination is ahead on your right."]
            break
        default:
            maneuver.attributedInstructionVariants = currentNavInfo?.instructions(forStep: stepInfo, options: instructionOptions)
            break
    }
    maneuver.symbolImage = stepInfo.maneuverImage(with: instructionOptions.imageOptions)
    return maneuver
}

// Get the lane image for a CPManeuver from GMSNavigationStepInfo
func laneGuidanceManeuver(for stepInfo: GMSNavigationStepInfo) -> CPManeuver? {
    let maneuver = CPManeuver()
    maneuver.userInfo = ManeuverUserInfo(stepInfo: stepInfo, isLaneGuidance: true)
    let lanesImage = stepInfo.lanesImage(with: imageOptions)
    guard let lanesImage = lanesImage else { return nil }
    maneuver.symbolImage = lanesImage
    return maneuver
}
Objective-C
// Get a CPTravelEstimate from GMSNavigationNavInfo
- (nonull CPTravelEstimates *)travelEstimates:(GMSNavigationNavInfo *_Nonnull navInfo) {
NSMeasurement<NSUnitLength *> *distanceRemaining = [navInfo roundedDistance:navInfo.distanceToCurrentStepMeters];
NSTimeInterval timeRemaining = [navInfo roundedTime:navInfo.timeToCurrentStepSeconds];
CPTravelEstimate* travelEstimate = [[CPTravelEstimates alloc] initWithDistanceRemaining:distanceRemaining
                                                timeRemaining:timeRemaining];
}
//  Create an object to be stored in the userInfo field of CPManeuver to determine the CPManeuverDisplayStyle.

/** An object to be stored in the userInfo field of a CPManeuver. */
@interface ManeuverUserInfo : NSObject

@property(nonatomic, readonly, nonnull) GMSNavigationStepInfo *stepInfo;
@property(nonatomic, readonly, getter=isLaneGuidance) BOOL laneGuidance;

- (nonnull instancetype)initWithStepInfo:(GMSNavigationStepInfo *)stepInfo
                        isLaneGuidance:(BOOL)isLaneGuidance NS_DESIGNATED_INITIALIZER;

- (instancetype)init NS_UNAVAILABLE;

@end

- (CPManeuverDisplayStyle)mapTemplate:(CPMapTemplate *)mapTemplate
            displayStyleForManeuver:(nonnull CPManeuver *)maneuver {
ManeuverUserInfo *userInfo = maneuver.userInfo;
return userInfo.laneGuidance ? CPManeuverDisplayStyleSymbolOnly : CPManeuverDisplayStyleDefault;
}
// Get a CPManeuver with instructionVariants and symbolImage from GMSNavigationStepInfo
- (nonnull CPManeuver *)maneuverForStep:(nonnull GMSNavigationStepInfo *)stepInfo {
CPManeuver *maneuver = [[CPManeuver alloc] init];
maneuver.userInfo = [[ManeuverUserInfo alloc] initWithStepInfo:stepInfo isLaneGuidance:NO];
switch (stepInfo.maneuver) {
    case GMSNavigationManeuverDestination:
    maneuver.instructionVariants = @[ @"Your destination is ahead." ];
    break;
    case GMSNavigationManeuverDestinationLeft:
    maneuver.instructionVariants = @[ @"Your destination is ahead on your left." ];
    break;
    case GMSNavigationManeuverDestinationRight:
    maneuver.instructionVariants = @[ @"Your destination is ahead on your right." ];
    break;
    default: {
    maneuver.attributedInstructionVariants =
        [_currentNavInfo instructionsForStep:stepInfo options:_instructionOptions];
    break;
    }
}
maneuver.symbolImage = [stepInfo maneuverImageWithOptions:_instructionOptions.imageOptions];
return maneuver;
}
// Get the lane image for a CPManeuver from GMSNavigationStepInfo
- (nullable CPManeuver *)laneGuidanceManeuverForStep:(nonnull GMSNavigationStepInfo *)stepInfo {
CPManeuver *maneuver = [[CPManeuver alloc] init];
maneuver.userInfo = [[ManeuverUserInfo alloc] initWithStepInfo:stepInfo isLaneGuidance:YES];
UIImage *lanesImage = [stepInfo lanesImageWithOptions:_imageOptions];
if (!lanesImage) {
    return nil;
}
maneuver.symbolImage = lanesImage;
return maneuver;
}
Manöver
CarPlay verwendet die Klasse CPManeuver, um eine detaillierte Wegbeschreibung bereitzustellen. Weitere Informationen zu Manövern und Fahrspuranweisungen finden Sie unter Details zum Datenfeed für detaillierte Wegbeschreibungen.
Weitere Dokumentation
- https://developer.apple.com/carplay/
- https://developer.apple.com/carplay/documentation/CarPlay-App-Programming-Guide.pdf
- https://developer.apple.com/design/human-interface-guidelines/carplay
- Details zum Datenfeed für die Turn-by-Turn-Navigation
- Route navigieren