
Page Summary
-
This guide demonstrates how to create a basic map in your Android application using the Maps SDK for Android and a
SupportMapFragment. -
Code samples are provided in both Kotlin and Java, showing how to display a map with a marker.
-
Before running the sample code, you need to configure your development environment, including cloning the sample repository and importing the project into Android Studio.
-
You will also need to obtain an API key and add it to your project's configuration files to enable map functionality.
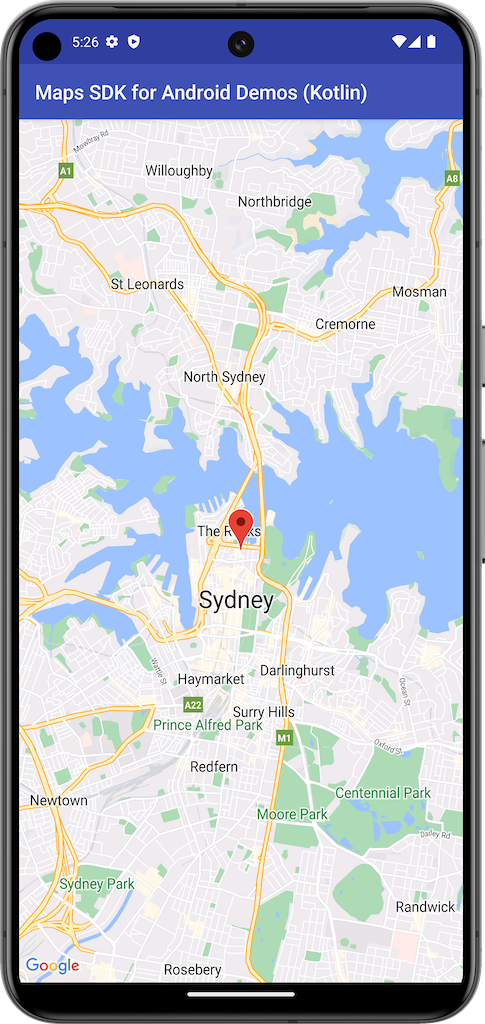
This example creates a map using a SupportMapFragment from the
Maps SDK for Android.
For more information, see the documentation.
Get started
Before you can try the sample code, you must configure your development environment. For more information, see Maps SDK for Android code samples.
View the code
Kotlin
class BasicMapDemoActivity : SamplesBaseActivity(), OnMapReadyCallback { val SYDNEY = LatLng(-33.862, 151.21) val ZOOM_LEVEL = 13f override fun onCreate(savedInstanceState: Bundle?) { super.onCreate(savedInstanceState) setContentView(com.example.common_ui.R.layout.basic_demo) val mapFragment : SupportMapFragment? = supportFragmentManager.findFragmentById(com.example.common_ui.R.id.map) as? SupportMapFragment mapFragment?.getMapAsync(this) } /** * This is where we can add markers or lines, add listeners or move the camera. In this case, * we just move the camera to Sydney and add a marker in Sydney. */ override fun onMapReady(googleMap: GoogleMap) { with(googleMap) { moveCamera(CameraUpdateFactory.newLatLngZoom(SYDNEY, ZOOM_LEVEL)) addMarker(MarkerOptions().position(SYDNEY)) } } }
Java
public class BasicMapDemoActivity extends SamplesBaseActivity implements OnMapReadyCallback { @Override protected void onCreate(Bundle savedInstanceState) { super.onCreate(savedInstanceState); setContentView(com.example.common_ui.R.layout.basic_demo); SupportMapFragment mapFragment = (SupportMapFragment) getSupportFragmentManager().findFragmentById(com.example.common_ui.R.id.map); mapFragment.getMapAsync(this); applyInsets(findViewById(com.example.common_ui.R.id.map_container)); } /** * This is where we can add markers or lines, add listeners or move the camera. In this case, * we * just add a marker near Africa. */ @Override public void onMapReady(GoogleMap map) { map.addMarker(new MarkerOptions().position(new LatLng(0, 0)).title("Marker")); } }
Clone and run the samples
Git is required to run this sample locally. The following command clones the sample application repository.
git clone git@github.com:googlemaps-samples/android-samples.git
Import the sample project into Android Studio:
- In Android Studio, select File > New > Import Project.
Go to the location where you saved the repository and select the project directory for Kotlin or Java:
- Kotlin:
PATH-REPO/android-samples/ApiDemos/kotlin - Java:
PATH-REPO/android-samples/ApiDemos/java
- Kotlin:
- Select Open. Android Studio builds your project, using the Gradle build tool.
- Create a blank
secrets.propertiesfile in the same directory as your project'slocal.propertiesfile. For more information about this file, see Add your API key to the project. - Get an API key from your project with the Maps SDK for Android enabled.
Add the following string to
secrets.properties, replacing YOUR_API_KEY with the value of your API key:MAPS_API_KEY=YOUR_API_KEY- Run the app.