2009 年 1 月
目標
本教學課程說明如何使用附有地理標記的相片建立 KML PhotoOverlays。雖然範例程式碼是以 Python 編寫,但其他程式設計語言也有許多類似的程式庫,因此將這段程式碼翻譯成其他語言應該不會有問題。本文中的程式碼會使用開放原始碼 Python 程式庫 EXIF.py。
簡介
數位相機是相當神奇的產品,許多使用者可能沒注意到,但他們不只是拍照和錄影,並為這些影片和相片加上相機和設定的中繼資料標記。近幾年來,使用者已找到方法,可將地理資料新增至這類資訊中,例如透過相機製造商 (如 Ricoh 和 Nikon) 內建的功能,或使用 GPS 記錄器和 EyeFi Explore 等裝置。iPhone 等照相手機和使用 Android 作業系統的手機 (例如 T-Mobile 的 G1) 會自動嵌入這類資料。部分相片上傳網站 (例如 Panoramio、Picasa 網路相簿和 Flickr) 會自動剖析 GPS 資料,並用來為相片加上地理標記。然後在動態消息中取回該資料。但這樣有什麼樂趣呢?本文將說明如何自行取得這類資料。
Exif 標頭
將資料嵌入圖片檔案最常見的方式是使用可交換圖像檔案格式 (EXIF)。資料會以二進位形式儲存在 EXIF 標頭中。如果您瞭解 EXIF 標頭的規格,可以自行剖析這些標頭。幸好,有人已經為您完成這項艱鉅的工作,並編寫了 Python 模組。EXIF.py 開放原始碼程式庫是讀取 JPEG 檔案標頭的絕佳工具。
《行為準則》
本文的程式碼範例位於 exif2kml.py 檔案中。如要直接使用,請下載該模組和 EXIF.py,並將兩者放在同一目錄中。執行 python exif2kml.py foo.jpg,並將 foo.jpg 替換為已加上地理標記的相片路徑。這會產生名為 test.kml 的檔案。
剖析 Exif 標頭
EXIF.py 提供簡單的介面,可擷取 Exif 標頭。只要執行 process_file() 函式,就會以 dict 物件的形式傳回標頭。
def GetHeaders(the_file):
  """Handles getting the Exif headers and returns them as a dict.

  Args:
    the_file: A file object

  Returns:
    a dict mapping keys corresponding to the Exif headers of a file.
  """

  data = EXIF.process_file(the_file, 'UNDEF', False, False, False)
  return data
取得 Exif 標頭後,您需要擷取 GPS 座標。EXIF.py 會將這些視為 Ratio 物件,也就是儲存值分子和分母的物件。這樣一來,系統會設定精確比例,而非依據浮點數。不過,KML 預期的是十進位數字,而非比例。因此,您要擷取每個座標,並將分子和分母轉換為單一浮點數,以取得十進位度數:
def DmsToDecimal(degree_num, degree_den, minute_num, minute_den,
                 second_num, second_den):
  """Converts the Degree/Minute/Second formatted GPS data to decimal degrees.

  Args:
    degree_num: The numerator of the degree object.
    degree_den: The denominator of the degree object.
    minute_num: The numerator of the minute object.
    minute_den: The denominator of the minute object.
    second_num: The numerator of the second object.
    second_den: The denominator of the second object.

  Returns:
    A deciminal degree.
  """

  degree = float(degree_num)/float(degree_den)
  minute = float(minute_num)/float(minute_den)/60
  second = float(second_num)/float(second_den)/3600
  return degree + minute + second


def GetGps(data):
  """Parses out the GPS coordinates from the file.

  Args:
    data: A dict object representing the Exif headers of the photo.

  Returns:
    A tuple representing the latitude, longitude, and altitude of the photo.
  """

  lat_dms = data['GPS GPSLatitude'].values
  long_dms = data['GPS GPSLongitude'].values
  latitude = DmsToDecimal(lat_dms[0].num, lat_dms[0].den,
                          lat_dms[1].num, lat_dms[1].den,
                          lat_dms[2].num, lat_dms[2].den)
  longitude = DmsToDecimal(long_dms[0].num, long_dms[0].den,
                           long_dms[1].num, long_dms[1].den,
                           long_dms[2].num, long_dms[2].den)
  if data['GPS GPSLatitudeRef'].printable == 'S': latitude *= -1
  if data['GPS GPSLongitudeRef'].printable == 'W': longitude *= -1
  altitude = None

  try:
    alt = data['GPS GPSAltitude'].values[0]
    altitude = alt.num/alt.den
    if data['GPS GPSAltitudeRef'] == 1: altitude *= -1

  except KeyError:
    altitude = 0

  return latitude, longitude, altitude
取得座標後,即可輕鬆為每張相片建立簡單的 PhotoOverlay:
def CreatePhotoOverlay(kml_doc, file_name, the_file, file_iterator):
  """Creates a PhotoOverlay element in the kml_doc element.

  Args:
    kml_doc: An XML document object.
    file_name: The name of the file.
    the_file: The file object.
    file_iterator: The file iterator, used to create the id.

  Returns:
    An XML element representing the PhotoOverlay.
  """

  photo_id = 'photo%s' % file_iterator
  data = GetHeaders(the_file)
  coords = GetGps(data)

  po = kml_doc.createElement('PhotoOverlay')
  po.setAttribute('id', photo_id)
  name = kml_doc.createElement('name')
  name.appendChild(kml_doc.createTextNode(file_name))
  description = kml_doc.createElement('description')
  description.appendChild(kml_doc.createCDATASection('<a href="#%s">'
                                                     'Click here to fly into '
                                                     'photo</a>' % photo_id))
  po.appendChild(name)
  po.appendChild(description)

  icon = kml_doc.createElement('icon')
  href = kml_doc.createElement('href')
  href.appendChild(kml_doc.createTextNode(file_name))

  camera = kml_doc.createElement('Camera')
  longitude = kml_doc.createElement('longitude')
  latitude = kml_doc.createElement('latitude')
  altitude = kml_doc.createElement('altitude')
  tilt = kml_doc.createElement('tilt')

  # Determines the proportions of the image and uses them to set FOV.
  width = float(data['EXIF ExifImageWidth'].printable)
  length = float(data['EXIF ExifImageLength'].printable)
  lf = str(width/length * -20.0)
  rf = str(width/length * 20.0)

  longitude.appendChild(kml_doc.createTextNode(str(coords[1])))
  latitude.appendChild(kml_doc.createTextNode(str(coords[0])))
  altitude.appendChild(kml_doc.createTextNode('10'))
  tilt.appendChild(kml_doc.createTextNode('90'))
  camera.appendChild(longitude)
  camera.appendChild(latitude)
  camera.appendChild(altitude)
  camera.appendChild(tilt)

  icon.appendChild(href)

  viewvolume = kml_doc.createElement('ViewVolume')
  leftfov = kml_doc.createElement('leftFov')
  rightfov = kml_doc.createElement('rightFov')
  bottomfov = kml_doc.createElement('bottomFov')
  topfov = kml_doc.createElement('topFov')
  near = kml_doc.createElement('near')
  leftfov.appendChild(kml_doc.createTextNode(lf))
  rightfov.appendChild(kml_doc.createTextNode(rf))
  bottomfov.appendChild(kml_doc.createTextNode('-20'))
  topfov.appendChild(kml_doc.createTextNode('20'))
  near.appendChild(kml_doc.createTextNode('10'))
  viewvolume.appendChild(leftfov)
  viewvolume.appendChild(rightfov)
  viewvolume.appendChild(bottomfov)
  viewvolume.appendChild(topfov)
  viewvolume.appendChild(near)

  po.appendChild(camera)
  po.appendChild(icon)
  po.appendChild(viewvolume)
  point = kml_doc.createElement('point')
  coordinates = kml_doc.createElement('coordinates')
  coordinates.appendChild(kml_doc.createTextNode('%s,%s,%s' %(coords[1],
                                                              coords[0],
                                                              coords[2])))
  point.appendChild(coordinates)

  po.appendChild(point)

  document = kml_doc.getElementsByTagName('Document')[0]
  document.appendChild(po)
您可以看到我們只使用標準 W3C DOM 方法,因為這些方法適用於大多數程式設計語言。如要瞭解整體運作方式,請從這裡下載程式碼。
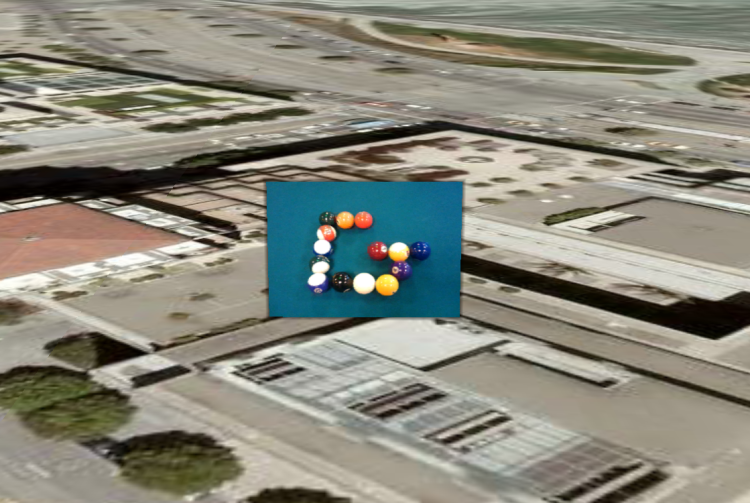
這個範例並未充分運用 PhotoOverlays 的強大功能,您可藉此深入探索高解析度相片。但這段影片確實示範了如何以看板風格在 Google 地球上懸掛相片。以下是使用這段程式碼建立的 KML 檔案範例:
<?xml version="1.0" encoding="utf-8"?>
<kml xmlns="http://www.opengis.net/kml/2.2">
  <Document>
    <PhotoOverlay id="photo0">
      <name>
        1228258523134.jpg
      </name>
      <description>
<![CDATA[<a href="#photo0">Click here to fly into photo</a>]]>      </description>
      <Camera>
      	<longitude>
          -122.3902159196034
        </longitude>
        <latitude>
           37.78961266330473
        </latitude>
        <altitude>
          10
        </altitude>
        <tilt>
          90
        </tilt>
      </Camera>
      <Icon>
        <href>
          1228258523134.jpg
        </href>
      </Icon>
      <ViewVolume>
        <leftFov>
          -26.6666666667
        </leftFov>
        <rightFov>
          26.6666666667
        </rightFov>
        <bottomFov>
          -20
        </bottomFov>
        <topFov>
          20
        </topFov>
        <near>
          10
        </near>
      </ViewVolume>
      <Point>
        <coordinates>
          -122.3902159196034,37.78961266330473,0
        </coordinates>
      </Point>
    </PhotoOverlay>
  </Document>
</kml>
Google 地球中的顯示畫面如下:

注意事項
相片地理標記功能仍處於起步階段。
請注意以下事項:
- GPS 裝置並非一律 100% 準確,尤其是相機內建的 GPS 裝置,因此請務必檢查相片的位置。
- 許多裝置不會追蹤海拔高度,而是將其設為 0。如果海拔高度對您很重要,請改用其他方式擷取這項資料。
- GPS 位置是相機的位置,而非相片主體的位置。因此,這個範例會將 Camera 元素放在 GPS 位置,而實際相片則會遠離該位置。
- Exif 不會擷取相機的拍攝方向資訊,因此你可能需要調整
PhotoOverlays。好消息是,部分裝置 (例如搭載 Android 作業系統的手機) 允許你直接擷取羅盤方向和傾斜角度等資料,只是不會顯示在 Exif 標頭中。
儘管如此,這仍是強大的相片視覺化方式。希望不久的將來,我們能看到越來越多準確的相片地理標記。
後續步驟
現在您已開始使用 EXIF 標頭,不妨探索 EXIF 規格。其中儲存了許多其他資料,您可能會想擷取這些資料,並將其放入說明氣球。您也可以考慮使用 ImagePyramids 建立更豐富的 PhotoOverlays。請參閱 PhotoOverlays 的開發人員指南文章,瞭解如何使用這些功能。
