
Page Summary
-
This page outlines the process of publishing apps, both public and private, to the Google Workspace Marketplace.
-
Before publishing, developers need to prepare their app by defining its target audience (public or private) and ensuring it meets Google's requirements if intended for public access.
-
Publishing involves steps like creating a Google Cloud project, configuring OAuth, testing functionality, enabling the Marketplace SDK, and crafting a store listing.
-
Private apps are immediately available within the organization, while public apps undergo a Google review before being listed on the Marketplace.
-
App installation settings control whether all users or only administrators can install the app, regardless of its public or private status.
This page explains the steps to publish an app to the Google Workspace Marketplace.
Prepare for the publishing process
This section explains how to prepare and plan for publishing your app to the Marketplace.
Decide what you want to publish
To be listed on the Marketplace, the app that you build must extend at least one Google Workspace application. To learn about the types of apps you can build and publish, see App integrations.
Determine the audience for your app
Marketplace apps can either be public or private:
- Public: Public apps can be viewed and installed by anyone who uses the Marketplace. Public apps have additional publishing requirements to be listed on the Marketplace.
- Private: If you built your app using a Google Workspace account, you can publish the app privately to your Google Workspace organization. Private apps are only available to users in your organization, and are also listed in the Internal Apps section of the Marketplace.
After you publish your app as either public or private, you can't change this setting. Before you publish your app, make sure you've accurately determined your audience.
Configure access for Google Workspace organizations
Some Google Workspace organizations use allowlists to manage which apps users can install. If you want to publish an app to an organization that uses an allowlist, contact an administrator to add your app to the allowlist.
Google Workspace organizations can also restrict the use of Google Chat apps. To manage access, see Allow users to install Chat apps.
Public apps: Review additional publishing requirements
To distribute and share your app to users outside of your Google Workspace organization, you must publish it publicly. Public apps require a review from the Marketplace team. Before submitting your app for review, make sure your app meets the following Marketplace requirements:
- Your app must comply with the Google Workspace Marketplace terms and policies.
- Your app must meet all Marketplace review criteria. To learn more, see App review process and requirements.
Publish your app
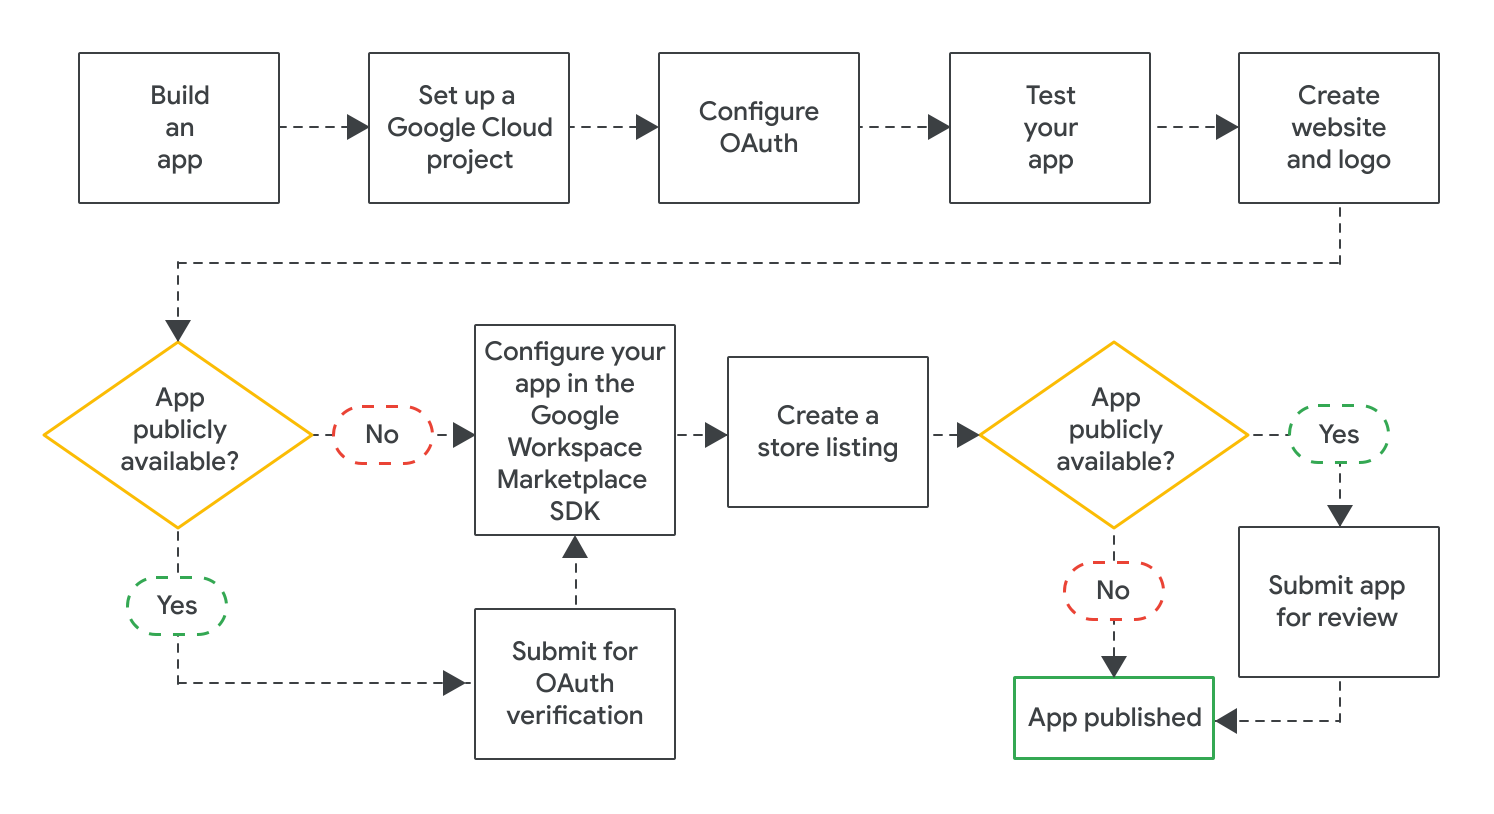
After you've built your app, you can publish it by completing the following steps:
- Create a Google Cloud project to configure and manage your listing on the Marketplace. If you've already created a Cloud project for your app, then you should use this Cloud project for your listing.
- Configure OAuth for your app. For public apps, you might need to submit your app for an OAuth review.
- Test that your app is working properly. To test public apps, you can use the review criteria related to app functionality and user experience. You should also make sure you have a website and logo for your app because you'll need these assets for your app's listing in the Marketplace.
- Enable the Google Workspace Marketplace SDK to configure your app for things like its visibility, installation settings, and which Google Workspace applications it extends.
- Create a store listing that explains and promotes your app to users. If your app listing is marked as private, you must still create a store listing.
After you configure and save all required settings in the Google Workspace Marketplace SDK, submit your app to be published. Depending on the app's audience, your app is published immediately or undergoes a final review:
For public apps, your app is reviewed by Google. After Google approves your app, your app listing is available to everyone in the Marketplace. To learn about the status of a public app, see Check your app listing's publication status.
For private apps, your app listing is immediately available to everyone in your Google Workspace organization.
For all apps, the app installation settings determine whether all users or only Google Workspace administrators can install the app.
Related topics
- Update or unpublish a Google Workspace Marketplace listing
- App review process and requirements for the Google Workspace Marketplace