
במדריך הזה נסביר איך להשתמש ב-method create() במשאב Message של Google Chat API כדי לבצע את הפעולות הבאות:
- שליחת הודעות שמכילות טקסט, כרטיסים וווידג'טים אינטראקטיביים.
- לשלוח הודעות באופן פרטי למשתמש ספציפי ב-Chat.
- להתחיל שרשור של הודעות או לענות לשרשור.
- לתת שם להודעה, כדי שתוכלו לציין אותה בבקשות אחרות ל-Chat API.
גודל ההודעה המקסימלי (כולל טקסט או כרטיסים) הוא 32,000 בייטים. כדי לשלוח הודעה שגדולה מהגודל הזה, אפליקציית Chat צריכה לשלוח כמה הודעות במקום זאת.
בנוסף לקריאה ל-Chat API כדי ליצור הודעות, אפליקציות ל-Chat יכולות ליצור ולשלוח הודעות בתגובה לאינטראקציות של משתמשים, למשל פרסום הודעת פתיחה אחרי שמשתמש מוסיף את אפליקציית Chat למרחב משותף. כשאפליקציות Chat מגיבים לאינטראקציות, הן יכולות להשתמש בסוגים אחרים של תכונות שליחת הודעות, כולל תיבת דו-שיח אינטראקטיבית וממשקי תצוגה מקדימה של קישורים. כדי להשיב למשתמש, אפליקציית Chat מחזירה את ההודעה באופן סינכרוני, בלי להפעיל את Chat API. במאמר קבלת אינטראקציות ותגובה להן באמצעות אפליקציית Google Chat מוסבר איך שולחים הודעות בתגובה לאינטראקציות.
איך מערכת Chat מציגה ומשייכת הודעות שנוצרו באמצעות Chat API
אפשר להפעיל את השיטה create() באמצעות אימות אפליקציה ואימות משתמש.
מערכת Chat משייכת את שולח ההודעה באופן שונה בהתאם לסוג האימות שבו אתם משתמשים.
כשאתם מבצעים אימות בתור אפליקציית Chat, היא שולחת את ההודעה.

App לצד השם שלו.כשאתם מבצעים אימות כמשתמשים, אפליקציית Chat שולחת את ההודעה בשם המשתמש. בנוסף, שם האפליקציה מוצג בהודעה כדי לשייך אותה ל-Chat.

סוג האימות קובע גם אילו ממשקים ותכונות של הודעות תוכלו לכלול בהודעה. באמצעות אימות האפליקציה, אפליקציות Chat יכולות לשלוח הודעות שמכילות טקסט עשיר, ממשקים מבוססי כרטיסים וווידג'טים אינטראקטיביים. משתמשי Chat יכולים לשלוח רק טקסט בהודעות שלהם, ולכן אפשר לכלול טקסט רק כשיוצרים הודעות באמצעות אימות משתמשים. למידע נוסף על תכונות ההודעות שזמינות ב-Chat API, ראו סקירה כללית על הודעות ב-Google Chat.
במדריך הזה נסביר איך להשתמש בכל סוג אימות כדי לשלוח הודעה באמצעות Chat API.
דרישות מוקדמות
Node.js
- חשבון Google Workspace בתוכנית Business או Enterprise עם גישה ל-Google Chat.
- מגדירים את הסביבה:
- יוצרים פרויקט ב-Google Cloud.
- מגדירים את מסך ההסכמה של OAuth.
- מפעילים ומגדירים את Google Chat API עם שם, סמל ותיאור לאפליקציית Chat.
- מתקינים את ספריית הלקוח של Cloud ל-Node.js.
- יוצרים את פרטי הכניסה בהתאם לאופן שבו רוצים לבצע אימות בבקשה ל-Google Chat API:
- כדי לבצע אימות כמשתמש ב-Chat, צריך ליצור פרטי כניסה של מזהה לקוח OAuth ולשמור את פרטי הכניסה כקובץ JSON בשם
credentials.jsonבספרייה המקומית. - כדי לבצע אימות בתור אפליקציית Chat, צריך ליצור פרטי כניסה לחשבון שירות ולשמור את פרטי הכניסה כקובץ JSON בשם
credentials.json.
- כדי לבצע אימות כמשתמש ב-Chat, צריך ליצור פרטי כניסה של מזהה לקוח OAuth ולשמור את פרטי הכניסה כקובץ JSON בשם
- בוחרים היקף הרשאה בהתאם לכך אם רוצים לבצע אימות כמשתמש או כאפליקציית Chat.
- מרחב ב-Google Chat שבו המשתמש המאומת או אפליקציית Chat שבאמצעותה מתבצעת השיחה הם חברים. כדי לבצע אימות באמצעות אפליקציית Chat, מוסיפים את אפליקציית Chat למרחב המשותף.
Python
- חשבון Google Workspace בתוכנית Business או Enterprise עם גישה ל-Google Chat.
- מגדירים את הסביבה:
- יוצרים פרויקט ב-Google Cloud.
- מגדירים את מסך ההסכמה של OAuth.
- מפעילים ומגדירים את Google Chat API עם שם, סמל ותיאור לאפליקציית Chat.
- מתקינים את ספריית הלקוח של Cloud ב-Python.
- יוצרים את פרטי הכניסה בהתאם לאופן שבו רוצים לבצע אימות בבקשה ל-Google Chat API:
- כדי לבצע אימות כמשתמש ב-Chat, צריך ליצור פרטי כניסה של מזהה לקוח OAuth ולשמור את פרטי הכניסה כקובץ JSON בשם
credentials.jsonבספרייה המקומית. - כדי לבצע אימות בתור אפליקציית Chat, צריך ליצור פרטי כניסה לחשבון שירות ולשמור את פרטי הכניסה כקובץ JSON בשם
credentials.json.
- כדי לבצע אימות כמשתמש ב-Chat, צריך ליצור פרטי כניסה של מזהה לקוח OAuth ולשמור את פרטי הכניסה כקובץ JSON בשם
- בוחרים היקף הרשאה בהתאם לכך אם רוצים לבצע אימות כמשתמש או כאפליקציית Chat.
- מרחב ב-Google Chat שבו המשתמש המאומת או אפליקציית Chat שבאמצעותה מתבצעת השיחה הם חברים. כדי לבצע אימות באמצעות אפליקציית Chat, מוסיפים את אפליקציית Chat למרחב המשותף.
Java
- חשבון Google Workspace בתוכנית Business או Enterprise עם גישה ל-Google Chat.
- מגדירים את הסביבה:
- יוצרים פרויקט ב-Google Cloud.
- מגדירים את מסך ההסכמה של OAuth.
- מפעילים ומגדירים את Google Chat API עם שם, סמל ותיאור לאפליקציית Chat.
- מתקינים את ספריית הלקוח של Cloud עבור Java.
- יוצרים את פרטי הכניסה בהתאם לאופן שבו רוצים לבצע אימות בבקשה ל-Google Chat API:
- כדי לבצע אימות כמשתמש ב-Chat, צריך ליצור פרטי כניסה של מזהה לקוח OAuth ולשמור את פרטי הכניסה כקובץ JSON בשם
credentials.jsonבספרייה המקומית. - כדי לבצע אימות בתור אפליקציית Chat, צריך ליצור פרטי כניסה לחשבון שירות ולשמור את פרטי הכניסה כקובץ JSON בשם
credentials.json.
- כדי לבצע אימות כמשתמש ב-Chat, צריך ליצור פרטי כניסה של מזהה לקוח OAuth ולשמור את פרטי הכניסה כקובץ JSON בשם
- בוחרים היקף הרשאה בהתאם לכך אם רוצים לבצע אימות כמשתמש או כאפליקציית Chat.
- מרחב ב-Google Chat שבו המשתמש המאומת או אפליקציית Chat שבאמצעותה מתבצעת השיחה הם חברים. כדי לבצע אימות באמצעות אפליקציית Chat, מוסיפים את אפליקציית Chat למרחב המשותף.
Apps Script
- חשבון Google Workspace בתוכנית Business או Enterprise עם גישה ל-Google Chat.
- מגדירים את הסביבה:
- יוצרים פרויקט ב-Google Cloud.
- מגדירים את מסך ההסכמה של OAuth.
- מפעילים ומגדירים את Google Chat API עם שם, סמל ותיאור לאפליקציית Chat.
- יוצרים פרויקט נפרד של Apps Script ומפעילים את שירות הצ'אט המתקדם.
- במדריך הזה צריך להשתמש באימות משתמשים או אימות אפליקציות. כדי לבצע אימות בתור אפליקציית Chat, יוצרים פרטי כניסה של חשבון שירות. במאמר אימות והרשאה כאפליקציה של Google Chat מוסבר איך לעשות זאת.
- בוחרים היקף הרשאה בהתאם לכך אם רוצים לבצע אימות כמשתמש או כאפליקציית Chat.
- מרחב ב-Google Chat שבו המשתמש המאומת או אפליקציית Chat שבאמצעותה מתבצעת השיחה הם חברים. כדי לבצע אימות באמצעות אפליקציית Chat, מוסיפים את אפליקציית Chat למרחב המשותף.
שליחת הודעה כאפליקציית Chat
בקטע הזה מוסבר איך שולחים הודעות שמכילות טקסט, כרטיסים וווידג'טים של אביזרים אינטראקטיביים באמצעות אימות אפליקציה.

כדי לקרוא לשיטה CreateMessage() באמצעות אימות אפליקציה, צריך לציין את השדות הבאים בבקשה:
chat.botהיקף ההרשאה.- המשאב
Spaceשבו רוצים לפרסם את ההודעה. אפליקציית Chat צריכה להיות חברה במרחב המשותף. - המשאב
Messageשיצרתם. כדי להגדיר את תוכן ההודעה, אפשר לכלול טקסט עשיר (text), ממשק כרטיס אחד או יותר (cardsV2) או את שניהם.
אפשר גם לכלול את הפרטים הבאים:
- השדה
accessoryWidgetsכדי לכלול לחצנים אינטראקטיביים בתחתית ההודעה. - השדה
privateMessageViewerכדי לשלוח את ההודעה באופן פרטי למשתמש מסוים. - השדה
messageId, שמאפשר לתת שם להודעה לשימוש בבקשות API אחרות. - השדות
thread.threadKeyו-messageReplyOptionכדי להתחיל שרשור או לענות לשרשור. אם במרחב המשותף לא נעשה שימוש בשרשור, המערכת מתעלמת מהשדה הזה.
הקוד הבא מראה דוגמה לאופן שבו אפליקציית Chat יכולה לשלוח הודעה שמתפרסמת כאפליקציית Chat, ומכילה טקסט, כרטיס ולחצן שניתן ללחוץ עליו בתחתית ההודעה:
Node.js
Python
Java
Apps Script
כדי להריץ את הדוגמה הזו, מחליפים את SPACE_NAME במזהה שמופיע בשדה name של המרחב המשותף. אפשר לקבל את המזהה על ידי קריאה ל-method ListSpaces() או מכתובת ה-URL של המרחב המשותף.
הוספת ווידג'טים אינטראקטיביים בחלק התחתון של הודעה
בדוגמת הקוד הראשונה במדריך הזה, בהודעה באפליקציית Chat מוצג לחצן שניתן ללחוץ עליו בתחתית ההודעה, שנקרא ווידג'ט נלווה. ווידג'טים נלווים מופיעים אחרי טקסט או כרטיסים בהודעה. אתם יכולים להשתמש בווידג'טים האלה כדי לעודד את המשתמשים לבצע פעולות שונות שקשורות להודעה, כולל:
- לדרג את הדיוק או את מידת שביעות הרצון מההודעה.
- מדווחים על בעיה בהודעה או באפליקציית Chat.
- פתיחת קישור לתוכן קשור, כמו מסמכי עזרה.
- אפשר לסגור או להשהות הודעות דומות באפליקציית Chat למשך פרק זמן מסוים.
כדי להוסיף ווידג'טים נלווים, צריך לכלול את השדה accessoryWidgets[] בגוף הבקשה ולציין ווידג'ט אחד או יותר שרוצים לכלול.
בתמונה הבאה מוצגת אפליקציית Chat שמצרפת להודעת טקסט ווידג'טים נלווים כדי שהמשתמשים יוכלו לדרג את החוויה שלהם עם אפליקציית Chat.
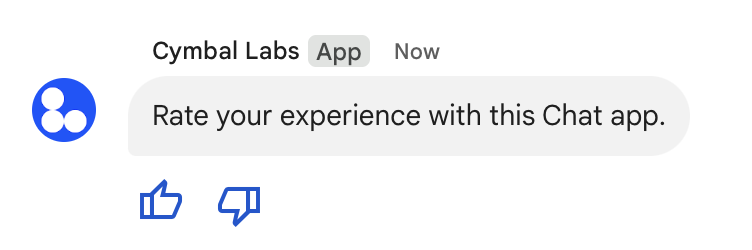
בהמשך מוצג גוף הבקשה ליצירת הודעת טקסט עם שני לחצני אביזרים. כשמשתמש לוחץ על לחצן, הפונקציה המתאימה (למשל doUpvote) מעבדת את האינטראקציה:
{
  text: "Rate your experience with this Chat app.",
  accessoryWidgets: [{ buttonList: { buttons: [{
    icon: { material_icon: {
      name: "thumb_up"
    }},
    color: { red: 0, blue: 255, green: 0 },
    onClick: { action: {
      function: "doUpvote"
    }}
  }, {
    icon: { material_icon: {
      name: "thumb_down"
    }},
    color: { red: 0, blue: 255, green: 0 },
    onClick: { action: {
      function: "doDownvote"
    }}
  }]}}]
}
שליחת הודעה באופן פרטי
אפליקציות צ'אט יכולות לשלוח הודעות באופן פרטי, כך שההודעה תהיה גלויה רק למשתמש ספציפי במרחב המשותף. כשמשתמשים באפליקציית Chat שולחים הודעה פרטית, מופיעה בה תווית שמציינת שההודעה גלויה רק להם.
כדי לשלוח הודעה באופן פרטי באמצעות Chat API, צריך לציין את השדה privateMessageViewer בגוף הבקשה. כדי לציין את המשתמש, מגדירים את הערך למשאב User שמייצג את המשתמש ב-Chat. אפשר גם להשתמש בשדה name של המשאב User, כפי שמתואר בדוגמה הבאה:
{
  text: "Hello private world!",
  privateMessageViewer: {
    name: "users/USER_ID"
  }
}
כדי להשתמש בדוגמה הזו, מחליפים את USER_ID במזהה ייחודי של המשתמש, כמו 12345678987654321 או hao@cymbalgroup.com. מידע נוסף על ציון משתמשים זמין במאמר זיהוי וציון משתמשים ב-Google Chat.
כדי לשלוח הודעה באופן פרטי, אסור לכלול בבקשה את הפרטים הבאים:
שליחת הודעת טקסט מטעם משתמש
בקטע הזה מוסבר איך שולחים הודעות מטעם משתמש באמצעות אימות משתמש. כשהמשתמשים מאומתים, תוכן ההודעה יכול להכיל רק טקסט, וצריך להשמיט תכונות של העברת הודעות שזמינות רק לאפליקציות צ'אט, כולל ממשקי כרטיסים וווידג'טים אינטראקטיביים.

כדי לקרוא לשיטה CreateMessage() באמצעות אימות משתמש, צריך לציין את השדות הבאים בבקשה:
- היקף הרשאה שתומך באימות משתמשים בשיטה הזו. בדוגמה הבאה נעשה שימוש בהיקף
chat.messages.create. - המשאב
Spaceשבו רוצים לפרסם את ההודעה. המשתמש המאומת חייב להיות חבר במרחב המשותף. - המשאב
Messageשיצרתם. כדי להגדיר את תוכן ההודעה, צריך לכלול את השדהtext.
אפשר גם לכלול את הפרטים הבאים:
- השדה
messageId, שמאפשר לתת שם להודעה לשימוש בבקשות API אחרות. - השדות
thread.threadKeyו-messageReplyOptionכדי להתחיל שרשור או לענות לשרשור. אם במרחב המשותף לא נעשה שימוש בשרשור, המערכת מתעלמת מהשדה הזה.
הקוד הבא מראה דוגמה לאופן שבו אפליקציית Chat יכולה לשלוח הודעת טקסט במרחב משותף מסוים בשם משתמש מאומת:
Node.js
Python
Java
Apps Script
כדי להריץ את הדוגמה הזו, מחליפים את SPACE_NAME במזהה שמופיע בשדה name של המרחב המשותף. אפשר לקבל את המזהה על ידי קריאה ל-method ListSpaces() או מכתובת ה-URL של המרחב המשותף.
התחלת שרשור או מענה לשרשור
במרחבים משותפים שמחולקים לשרשורים, תוכלו לציין אם הודעה חדשה תתחיל שרשור או תשיב לשרשור קיים.
כברירת מחדל, הודעות שאתם יוצרים באמצעות Chat API יוצרות שרשור חדש. כדי לזהות את השרשור ולהשיב לו מאוחר יותר, אפשר לציין מפתח שרשור בבקשה:
- מציינים את השדה
thread.threadKeyבגוף הבקשה. - מציינים את פרמטר השאילתה
messageReplyOptionכדי לקבוע מה יקרה אם המפתח כבר קיים.
כדי ליצור הודעה שתהיה תשובה לשרשור קיים:
- עליכם לכלול את השדה
threadבגוף הבקשה. אם מגדירים את הפרמטר, אפשר לציין את הערך שלthreadKeyשיצרתם. אחרת, צריך להשתמש בnameשל השרשור. - מציינים את פרמטר השאילתה
messageReplyOption.
הקוד הבא מראה דוגמה לאופן שבו אפליקציית Chat יכולה לשלוח הודעת טקסט שמתחילה או עונה לשרשור מסוים שמזוהה באמצעות מפתח של מרחב משותף מסוים, בשם משתמש מאומת:
Node.js
Python
Java
Apps Script
כדי להריץ את הדוגמה הזו, מחליפים את הפרטים הבאים:
THREAD_KEY: מפתח של שיחה קיימת במרחב המשותף, או שם ייחודי לשיחה חדשה.SPACE_NAME: המזהה מהשדהnameשל המרחב המשותף. אפשר לקבל את המזהה על ידי קריאה ל-methodListSpaces()או מכתובת ה-URL של המרחב המשותף.
איך נותנים שם להודעה
כדי לאחזר או לציין הודעה בקריאות עתידיות ל-API, אפשר לתת לה שם על ידי הגדרת השדה messageId בבקשה.
מתן שם להודעה מאפשר לכם לציין את ההודעה בלי לאחסן את המזהה שהמערכת הקצתה משם המשאב של ההודעה (שמיוצג בשדה name).
לדוגמה, כדי לאחזר הודעה באמצעות השיטה get(), משתמשים בשם המשאב כדי לציין איזו הודעה לאחזר. שם המשאב מוגדר בפורמט spaces/{space}/messages/{message}, כאשר {message} מייצג את המזהה שהמערכת הקצתה או את השם המותאם אישית שהגדרתם כשיצרתם את ההודעה.
כדי לתת שם להודעה, מציינים מזהה מותאם אישית בשדה messageId כשיוצרים את ההודעה. השדה messageId מגדיר את הערך בשדה clientAssignedMessageId של המשאב Message.
אפשר לתת שם להודעה רק כשאתם יוצרים אותה. אי אפשר לתת שם למזהה מותאם אישית של הודעות קיימות או לשנות אותו. המזהה המותאם אישית צריך לעמוד בדרישות הבאות:
- מתחיל ב-
client-. לדוגמה, הערךclient-custom-nameהוא מזהה מותאם אישית חוקי, אבל הערךcustom-nameלא. - מכיל עד 63 תווים, ורק אותיות קטנות, מספרים ומקפים.
- ייחודי במרחב המשותף. אי אפשר להשתמש באותו מזהה מותאם אישית להודעות שונות באפליקציית צ'אט.
הקוד הבא מראה דוגמה לאופן שבו אפליקציית Chat יכולה לשלוח הודעת טקסט עם מזהה למרחב משותף מסוים בשם משתמש מאומת:
Node.js
Python
Java
Apps Script
כדי להריץ את הדוגמה הזו, מחליפים את הפרטים הבאים:
SPACE_NAME: המזהה מהשדהnameשל המרחב המשותף. אפשר לקבל את המזהה על ידי קריאה ל-methodListSpaces()או מכתובת ה-URL של המרחב המשותף.MESSAGE-ID: שם להודעה שמתחיל ב-custom-. השם צריך להיות ייחודי ושונה משמות של הודעות אחרות שנוצרו על ידי אפליקציית Chat במרחב המשותף שצוין.
פתרון בעיות
כשכרטיס או אפליקציה של Google Chat מחזירים שגיאה, בממשק של Chat מופיעה ההודעה "משהו השתבש". או "לא ניתן לעבד את הבקשה שלך". לפעמים בממשק המשתמש של Chat לא מוצגת הודעת שגיאה, אבל באפליקציה או בכרטיס של Chat מתקבלת תוצאה לא צפויה. לדוגמה, יכול להיות שלא תוצג הודעה בכרטיס.
יכול להיות שהודעת שגיאה לא תוצג בממשק המשתמש של Chat, אבל כשיומני השגיאות של אפליקציות Chat מופעלים, יהיו זמינות הודעות שגיאה תיאוריות ונתוני יומנים שיעזרו לכם לתקן שגיאות. במאמר פתרון בעיות ושגיאות ב-Google Chat מוסבר איך מציגים, מאתרים באגים ומתקנים שגיאות.
נושאים קשורים
- שימוש בכלי ליצירת כרטיסים כדי לעצב הודעות בכרטיסי JSON ולראות תצוגה מקדימה שלהן באפליקציות Chat.
- עיצוב הודעות.
- לקבלת פרטים על הודעה
- הצגת רשימה של ההודעות במרחב המשותף.
- לעדכן הודעה.
- למחוק הודעה.
- זיהוי משתמשים בהודעות ב-Google Chat
- שליחת הודעות ל-Google Chat באמצעות webhooks נכנסים.