Embedded Connect
Embedded Connect reduces friction and improves the conversion funnel when users are attempting to connect AdSense with your platform.
Embedded Connect is a small JavaScript library that determines the best starting point for a given user and guides them through a customized AdSense sign-up flow which helps them through all the required steps to become able to serve ads. It handles scenarios including determining if the user has an AdSense account, if they have signed the AdSense terms and conditions, if they have added your platform site to their AdSense account, and if the site's status is "Ready".
Embedded Connect with the Google-managed UX option can also handle the UX involved in showing account and site statuses to the user, guiding them to the correct place in AdSense to resolve any potential issues.
To help the developer experience, the library also issues callbacks to your platform containing the user's AdSense publisher ID which is needed for setting up ad serving correctly.
Embedded Connect offers two options for what the user experience looks like:
- Google-managed UX. Use the Embedded Connect widget, which manages all the UX. The widget will help users through a sign-up flow and show the user information about their account and site status inside the widget. This option provides a callback with the AdSense publisher ID triggered when the user first connects an AdSense account.
- Custom UX. Use the Embedded Connect
adsenseEmbeddedConnect.connect(...)method, which triggers the sign-up flow in a new window. This option provides a callback with the AdSense publisher ID and an access token that can be used to fetch additional information from the AdSense account using the AdSense Management API. This option requires you to design the UX yourself.
Implementing Embedded Connect
In order to use Embedded Connect, you'll need to follow these steps:
- Create a project in Google Cloud (or use an existing one)
- Create an OAuth client ID
- Configure your OAuth client ID for use with Embedded Connect
- (Optional) Customize your OAuth consent screen
- Add the Embedded Connect JavaScript library to the page
- Implement the Embedded Connect code
Step 1: Create a new Google Cloud project (or use an existing one)
If you have an existing Google Cloud project, feel free to use that. Otherwise, follow the guide below on setting up a new project:
https://cloud.google.com/resource-manager/docs/creating-managing-projects
Step 2: Create an OAuth client ID
Google Cloud projects will have a default OAuth client ID that you can use. You can find this by visiting APIs & Services > Credentials.
If you'd like to create a dedicated OAuth client ID, follow these steps:
- Go to APIs & Services > Credentials
- Click on "+ Create Credentials" at the top of the page, then select OAuth client ID
- Your application type will be "Web application"
- Give your client ID a name and click "Create"
Step 3: Configure your OAuth client ID for use with Embedded Connect
Once you've decided which OAuth client ID you'd like to use for the Embedded Connect integration, you'll need to configure it.
Follow these steps:
- From the Credentials page, click the pencil icon for the client ID you'd like to configure
- In the Authorized JavaScript origins section, add the URIs that are allowed to issue requests using your client ID. Normally URIs for your development server and local environment are added (e.g. https://dev.example.com and http://localhost:5000). You should additionally add a URI for your production environment (e.g. https://example.com)
(Optional) Step 4: Customize your OAuth consent screen
The OAuth consent screen is where uses will grant your client ID access to their AdSense data. This is an essential part of how Embedded Connect works. You can customize this screen to include your platform's name, your logo, etc. Visit the OAuth consent screen page to configure your customizations. Click on "Edit app" at the top of the page and follow the wizard.
Step 5: Implement the Embedded Connect JavaScript library
This library contains the various methods used to initiate Embedded connect and provide you with the callbacks needed for you to retrieve and forget the user's publisher ID. Implement this towards the head of the page.
For Google-managed UX:
<script src="https://www.google.com/adsense/js/embedded-connect.js?load=initEmbeddedConnect&hl={language}" async defer></script>
For Custom UX:
<script src="https://www.google.com/adsense/js/embedded-connect.js?load=initEmbeddedConnect&hl={language}&headless=true" async defer></script>
Ensure you provide an implementation for your JavaScript function name passed
into the load parameter. The function will be called when the
adsenseEmbeddedConnect API is ready to use.
Script Tag Attributes
Notice in the example above that several attributes are set on the script tag. The following is an explanation of each attribute.
src: The URL where the Embedded Connect API is loaded from. The URL may contain several query parameters, documented below.async: Asks the browser to asynchronously download and execute the script. When the script is executed, it will call the function specified using theloadparameter.defer: when set, the browser will download the Embedded Connect JavaScript in parallel to parsing the page, and will execute it after the page has finished parsing.
src parameters
The src attribute contains several query parameters that are needed to initiate Embedded Connect. See below the use of each parameter.
loadis the name of a global JavaScript function that will be called when the API has loaded completely. You can choose any name for this function.hlspecifies the language to use for all localization, including (for example) the text on the sign-up popup. It's an optional query parameter, and when not present, or if the language isn't supported by AdSense, the widget will default to US English. See the languages that AdSense supports. Thehlparameter value has to follow BCP 47, for example for British English users, the string will been-GB.headless=trueindicates that Embedded Connect will be used with the Custom UX option instead of the Google-managed UX.
Now that you have chosen between Google-managed UX and Custom UX, proceed to see the code examples for each approach below.
Step 6: Implement the Embedded Connect code
As stated above, there are two options for what the user experience looks like:
Choose the implementation option that best suits your platform's needs.
Google-managed UX
Follow these steps to have Google render the widget which triggers the sign-up flow and shows the user relevant information about the state of their account and site.
There are two components of the Embedded Connect code. The first is an empty <div> which specifies where Embedded Connect should render the sign-up widget. And the second is the code where configurations are set and callbacks are managed.
The HTML element where the Embedded Connect widget renders
Place this HTML on the page where you'd like the Embedded Connect widget to render:
<div id="adsenseEmbeddedConnect"></div>
The Embedded Connect code
Next, below the Embedded Connect library but above the div element, place the configuration code:
function initEmbeddedConnect() {
    adsenseEmbeddedConnect.init({
        // <div> to show the Embedded Connect widget in
        'divId': 'adsenseEmbeddedConnect',

        // OAuth client ID from step 2
        'clientId': 'xxxxxxxxxxxxxxxxxxxx.apps.googleusercontent.com',

        // Access token from the Google Identity APIs, see
        // https://developers.google.com/identity/oauth2/web/guides/use-token-model
        // Use the following scope when requesting the access token:
        // https://www.googleapis.com/auth/adsense.readonly
        'accessToken': 'xxxxxxxxxxxxxxxxxxxxxxx',

        // Login hint, an optional parameter which suppresses the account
        // chooser and either pre-fills the email box on the sign-in form,
        // or selects the proper session (if the user is using multiple
        // sign-in)
        'loginHint': 'user@example.com',

        // Child site (which is added to AdSense as part of the Embedded Connect flow)
        // Consult with your account manager to ensure this value is set correctly for your platform
        'siteUrl': 'site.example.com',

        // Optional parameter, the publisher ID of the user.
        // When set, the Embedded Connect widget will display the state of the user's AdSense account.
        // When unset, the Embedded Connect widget will show the default state which triggers the connection flow.
        'publisherId': "pub-0000000000000000",

        'onConnect': function(pid) {
          // Your custom code to send the publisher ID (pid) to your server for it to be saved.
          // The onConnect function is called when the user has completed all the onboarding steps
        },
        'onDisconnect': function() {
          // Your custom code to forget the publisher ID.
          // This onDisconnect function is called when the user has clicked the "Disconnect" button in the Embedded Connect widget
        },
    });
};
Screenshots
The Embedded Connect widget has four main states:
- (Default) Connect to AdSense
- Connecting to AdSense
- Reviewing site info
- Issues detected
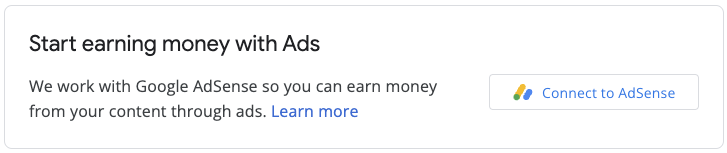
1. (Default) Connect to AdSense
This is the default state, shown to users when the publisherId field in the Embedded Connect code is not present. It initiates the connection flow (popup) and upon the successful completion of the flow by the user, will trigger the onConnect callback.
2. Connecting to AdSense
This state is shown to users when they initiate the connection flow (and the popup is present). Upon closure of the popup, or completion of the flow, this state is changed to one of the other states.

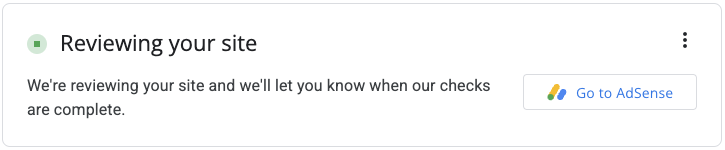
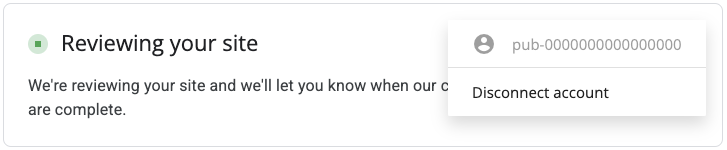
3. Reviewing site info
Once a new site has been submitted to AdSense, a review process will take place. Ads cannot serve during this time.
A critical component of the review is an ownership check, which can be passed in a number of ways including:
- the child account publisher ID is present in the ads.txt file
- the child account publisher ID is present in an ad tag on the user's site
- the google-adsense-child-account meta tag is present on the user's site. For the best results ensure that it is present on the homepage of the user's site.
The best approach will depend on your URL structure and some other factors. Please consult with your account manager for the best approach for your platform.
4. Issues detected
Should the user's account or site have any issues that need to be resolved, this state will be shown to users.


Custom UX
Follow these steps if you'd like to manage the UX yourself, and use API calls to trigger the sign-up method manually.
The Embedded connect JavaScript library
In order to use the Custom UX option, the headless=true parameter needs to be set in the src attribute. For example:
<script src="https://www.google.com/adsense/js/embedded-connect.js?load=initEmbeddedConnect&hl={language}&headless=true" async defer></script>
Provide connect and disconnect buttons
Once the adsenseEmbeddedConnect API is ready to use (as verified by the
JavaScript function passed into the load parameter), provide an implementation
for connecting and disconnecting from Adsense. For example, by providing two
buttons:
<button onclick="connectAdSense()">Connect to AdSense</button>
<button onclick="disconnectAdSense()">Disconnect account</button>
Depending on whether or not you have a publisher ID saved from your user, you can choose which button to display.
The connect code
function connectAdSense(){
    adsenseEmbeddedConnect.connect({
        // OAuth client ID
        'clientId': 'xxxxxxxxxxxxxxxxxxxx.apps.googleusercontent.com',

        // Access token from the Google Identity APIs, see
        // https://developers.google.com/identity/oauth2/web/guides/use-token-model
        // Use the following scope when requesting the access token:
        // https://www.googleapis.com/auth/adsense.readonly
        'accessToken': 'xxxxxxxxxxxxxxxxxxxxxxx',

        // Child site (which is added to AdSense as part of the Embedded Connect flow)
        // Consult with your account manager to ensure this value is set correctly for your platform
        'siteUrl': 'site.example.com',

        'onConnect': function(response) {
            // Your custom code to send the publisher ID (response[publisherId]) to your server for it to be saved.
            // The onConnect function is called when the user has completed all the onboarding steps
            // Note that you'll additionally receive an OAuth2 access token (response[token]) which can be used with the AdSense Management API to perform other operations
        },
        'onCancel': function() {
            // This callback is called if the user closes the popup window without completing the sign-up flow
        }
    });
}
The disconnect code
function disconnectAdSense(){
    // Your custom code to forget the publisherId from your server.
}