
Panduan memulai ini mengajarkan cara membuat langkah kustom untuk Alur Kerja Workspace menggunakan Google Apps Script. Langkah kustom mengambil dua angka dan operasi aritmatika sebagai input, melakukan penghitungan, dan menghasilkan output.
Tujuan
- Buat langkah kustom untuk Workspace Flows dengan Google Apps Script.
- Deploy langkah kustom ke organisasi Google Workspace Anda sendiri.
- Uji langkah alur kustom di Workspace Flows.
Prasyarat
- Akun Google dengan akses ke Alur Kerja Workspace melalui program Gemini Alpha.
Menyiapkan skrip
Untuk menyiapkan skrip, buat project Apps Script baru lalu hubungkan ke project Cloud Anda.
Klik tombol berikut untuk membuka project Apps Script Mulai cepat kalkulator alur.
Klik Ringkasan.
Di halaman ringkasan, klik
 Buat salinan.
Beri nama salinan project Apps Script Anda:
Klik Copy of Flows calculator quickstart.
Di Project title, ketik
Flows calculator quickstart.Klik Ganti nama.
Opsional: Meninjau kode panduan memulai
Di bagian sebelumnya, Anda menyalin seluruh project Apps Script yang berisi semua kode aplikasi yang diperlukan untuk langkah kustom alur Anda, sehingga tidak perlu menyalin dan menempel setiap file.
Atau, Anda dapat meninjau setiap file yang Anda salin di bagian sebelumnya di sini:
appsscript.jsonFile manifes. File JSON khusus yang menentukan informasi project dasar yang diperlukan Apps Script untuk menjalankan skrip.
Lihat kode
appsscript.json{ "timeZone": "America/Los_Angeles", "exceptionLogging": "STACKDRIVER", "runtimeVersion": "V8", "addOns": { "common": { "name": "Calculator", "logoUrl": "https://www.gstatic.com/images/branding/productlogos/calculator_search/v1/web-24dp/logo_calculator_search_color_1x_web_24dp.png", "useLocaleFromApp": true }, "flows": { "workflowElements": [ { "id": "actionElement", "state": "ACTIVE", "name": "Calculate", "description": "Asks the user for two values and a math operation, then performs the math operation on the values and outputs the result.", "workflowAction": { "inputs": [ { "id": "value1", "description": "value1", "cardinality": "SINGLE", "dataType": { "basicType": "INTEGER" } }, { "id": "value2", "description": "value2", "cardinality": "SINGLE", "dataType": { "basicType": "INTEGER" } }, { "id": "operation", "description": "operation", "cardinality": "SINGLE", "dataType": { "basicType": "STRING" } } ], "outputs": [ { "id": "result", "description": "Calculated result", "cardinality": "SINGLE", "dataType": { "basicType": "INTEGER" } }, { "id": "log", "description": "Logged result of flow event.", "cardinality": "SINGLE", "dataType": { "basicType": "STRING" } } ], "onConfigFunction": "onConfigCalculateFunction", "onExecuteFunction": "onExecuteCalculateFunction" } } ] } } }
Calculator.gsMenentukan langkah kustom untuk Google Workspace Flows. Langkah, yang diberi nama "Calculate", mengambil dua angka dan satu operasi sebagai input, lalu menampilkan hasil penghitungan.
Lihat kode
Calculator.gs/** * This script defines a custom step for Google Workspace Flows. * The step, named "Calculate", takes two numbers and an operation as input * and returns the result of the calculation. * * The script includes functions to: * * 1. Define the configuration UI for the step using Card objects: * * - `onConfigCalculateFunction()`: Generates the main configuration card. * - Helper functions like `pushCard()`, `saveButton()` to build card components. * * 2. Handle the execution of the step. * * - `onExecuteCalculateFunction()`: Retrieves inputs, performs the calculation, * and returns outputs. * * To learn more, see the following quickstart guide: * https://developers.google.com/workspace/add-ons/workflows/quickstart */ /** * Creates an action response to push a new card onto the card stack. * * This function generates an action object that, when returned, causes the * provided card to be pushed onto the card stack, making it the currently * displayed card in the configuration UI. * @param {Object} card The Card object to push. * @return {Object} The action response object. */ function pushCard(card) { return { "action": { "navigations": [{ "push_card": card } ] } }; } /** * Creates an action response to update the currently displayed card. * * This function generates an action object that, when returned, causes the * currently displayed card to be replaced with the provided card in the * configuration UI. * @param {Object} card The Card object to update. * @return {Object} The render actions object. */ function updateCard(card) { return { "render_actions": { "action": { "navigations": [{ "update_card": card } ] } } }; } /** * Creates a button configuration object for saving the workflow. * * This function generates a button definition that, when clicked, triggers * a save action for the current workflow configuration. * @return {Object} The button widget object. */ function saveButton() { return { "text": "Save", "onClick": { "hostAppAction" : { "workflowAction" : { "saveWorkflowAction" : {} } } }, }; } /** * Creates a button configuration object for a refresh action. * * This function generates a button definition that, when clicked, triggers * a function to refresh the current card. * @param {string} functionName The name of the Apps Script function to call on click. * @return {Object} The button widget object. */ function refreshButton(functionName) { return { "text": "Refresh", "onClick": { "action" : { "function" : functionName } }, }; } /** * Generates and displays a configuration card for the sample calculation action. * * This function creates a card with input fields for two values and a dropdown * for selecting an arithmetic operation. The card also includes a "Save" * button to save the action configuration for the workflow. * * The input fields are configured to let the user select outputs from previous * workflow steps as input values using the `hostAppDataSource` property. * This function is called when the user adds or edits the "Calculate" step in the Flows UI. * @return {Object} The action response object containing the card to display. */ function onConfigCalculateFunction() { var card = { "sections": [ { "header": "Action sample: Calculate", "widgets": [ { "textInput": { "name": "value1", "label": "First value", "hostAppDataSource" : { "workflowDataSource" : { "includeVariables" : true } } } }, { "selectionInput": { "name": "operation", "label": "Operation", "type": "DROPDOWN", "items": [ { "text": "+", "value": "+", }, { "text": "-", "value": "-", }, { "text": "x", "value": "x", }, { "text": "/", "value": "/", } ] } }, { "textInput": { "name": "value2", "label": "Second value", "hostAppDataSource" : { "workflowDataSource" : { "includeVariables" : true } } } } ] } ] }; return pushCard(card); } /** * Gets an integer value from variable data, handling both string and integer formats. * * This function attempts to extract an integer value from the provided variable data. * It checks if the data contains string values and, if so, parses the first string * as an integer. If integer values are present, it returns the first integer. * @param {Object} variableData The variable data object from the event. * @return {number} The extracted integer value. */ function getIntValue(variableData) { if (variableData.stringValues) { return parseInt(variableData.stringValues[0]); } return variableData.integerValues[0]; } /** * Executes the calculation action based on the inputs from a workflow event. * * This function retrieves input values ("value1", "value2") and the "operation" * from the workflow event, performs the calculation, and returns the "result" and * "log" as output variables. * This function is called when the workflow execution reaches this custom step. * @param {Object} event The event object passed by the Flows runtime. * @return {Object} The output variables object. */ function onExecuteCalculateFunction(event) { console.log("output: " + JSON.stringify(event)); var calculatedValue = 0; var value1 = getIntValue(event.workflow.actionInvocation.inputs["value1"]); var value2 = getIntValue(event.workflow.actionInvocation.inputs["value2"]); var operation = event.workflow.actionInvocation.inputs["operation"].stringValues[0]; if (operation == "+") { calculatedValue = value1 + value2; } else if (operation == "-") { calculatedValue = value1 - value2; } else if (operation == "x") { calculatedValue = value1 * value2; } else if (operation == "/") { calculatedValue = value1 / value2; } var renderAction = { "hostAppAction" : { "workflowAction" : { "returnOutputVariablesAction" : { "variableValues" : [ { "variableId": "result", "integerValues": [ calculatedValue ] } ] } } } }; }
Men-deploy dan menguji langkah Anda
Untuk menguji langkah, siapkan deployment pengujian untuk add-on, tambahkan langkah ke alur, lalu jalankan alur.
Siapkan deployment pengujian untuk add-on Anda:
- Buka project skrip di editor Apps Script.
- Klik Deploy > Test deployments.
- Klik Instal.
- Di bagian bawah, klik Selesai.
Anda dapat mengizinkan pengguna lain menguji add-on dengan membagikan project Apps Script ke akun mereka (akses edit diperlukan). Kemudian, minta pengguna untuk mengikuti langkah-langkah sebelumnya.
Setelah diinstal, add-on akan langsung tersedia di Alur. Anda mungkin perlu memuat ulang Flows sebelum add-on muncul. Anda juga harus memberikan otorisasi add-on sebelum menggunakannya.
Untuk mempelajari lebih lanjut deployment pengujian, lihat Menginstal add-on yang belum dipublikasikan.
Buka Alur.
Buat alur yang menyertakan langkah Anda:
- Klik Alur baru.
- Pilih cara memulai alur. Saat menguji langkah, pilih pemicu yang dapat Anda aktifkan sendiri, seperti mengirim email ke diri Anda sendiri. Jika langkah Anda memerlukan variabel input, konfigurasikan variabel input sebagai bagian dari output starter.
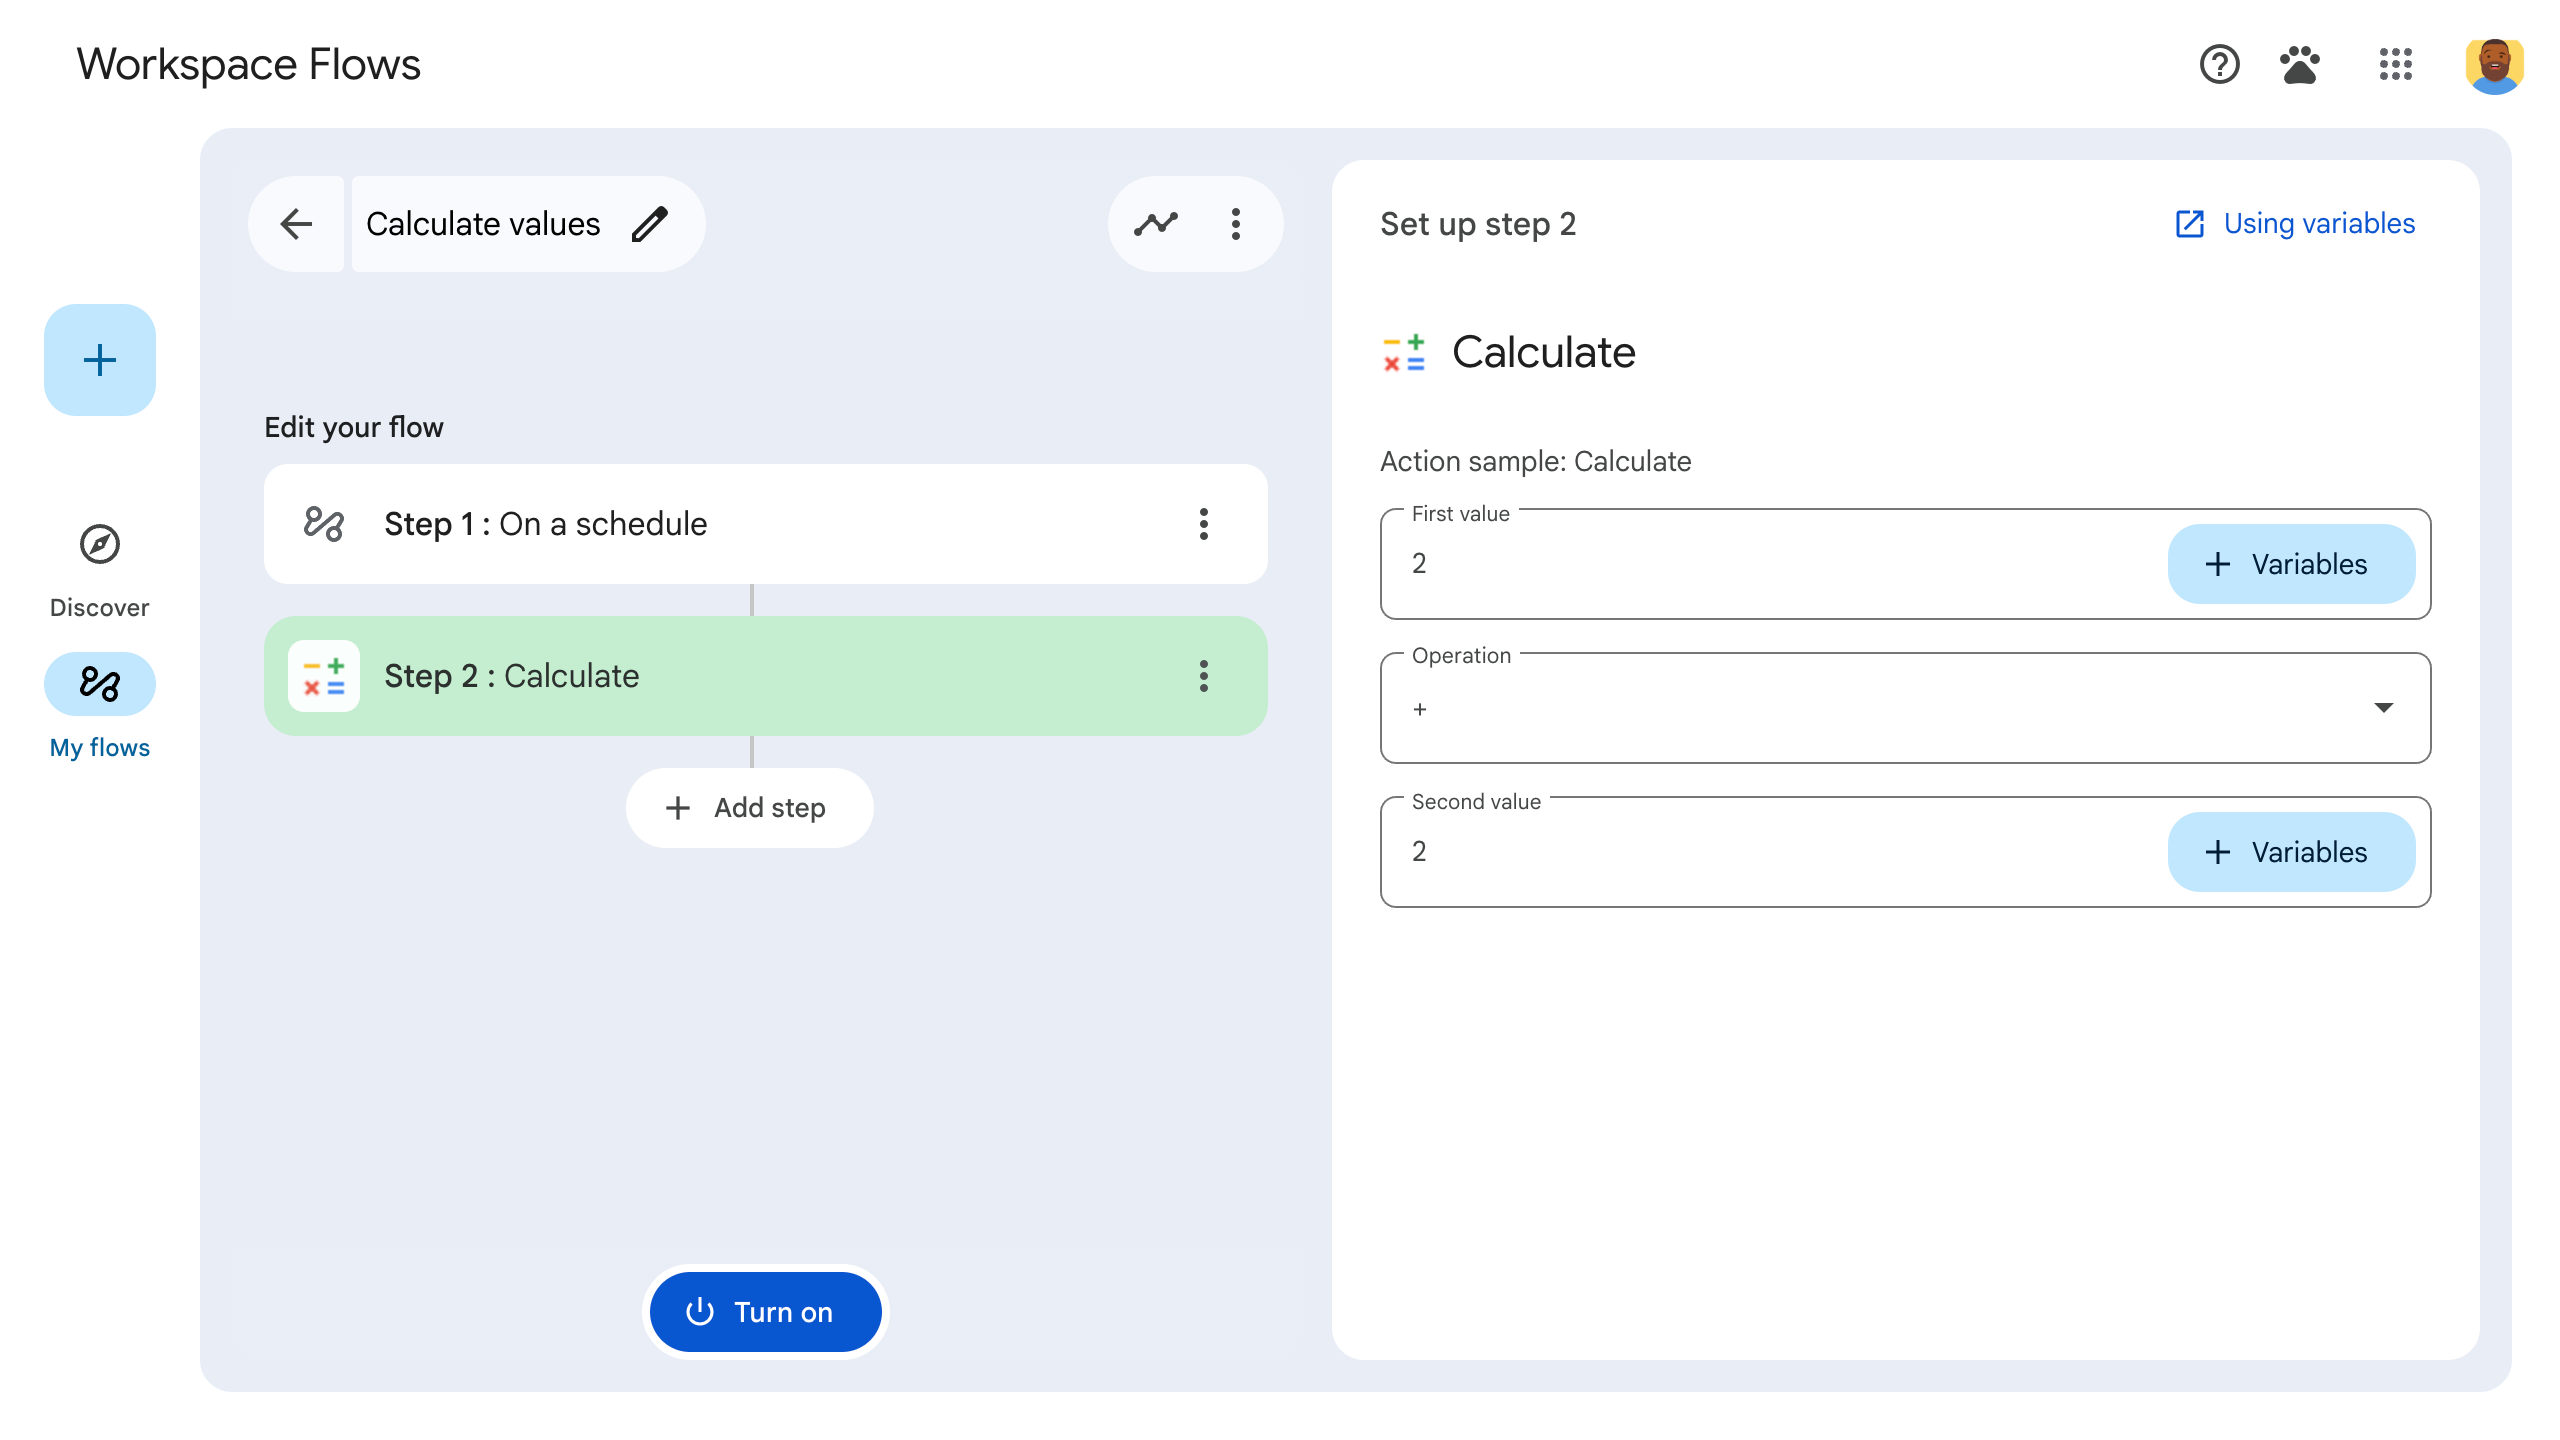
- Klik Tambahkan langkah. Pilih langkah yang Anda buat atau perbarui, yang disebut Calculate.
- Konfigurasi langkah Anda. Untuk langkah penghitungan, pilih dua nilai dan operasi matematika. Langkah akan disimpan secara otomatis.
- Untuk menguji output langkah, tambahkan langkah lain. Misalnya, untuk menambahkan output ke pesan email, Anda dapat menambahkan langkah Kirim pesan Gmail. Di Pesan, klik Variabel, lalu pilih output langkah Anda. Untuk langkah penghitungan, pilih Variabel > Langkah 2: Hasil yang dihitung > Hasil yang dihitung. Variabel muncul sebagai chip di kolom Pesan.
- Klik Aktifkan. Alur Anda siap dijalankan.
Jalankan alur dengan memicu pemicu alur. Misalnya, jika alur Anda dimulai saat Anda menerima email, kirim email ke diri Anda sendiri.
Verifikasi bahwa alur berjalan seperti yang diharapkan. Periksa log dengan membuka tab Aktivitas di builder alur. Untuk mempelajari cara membuat log kustom di tab Aktivitas, lihat Log aktivitas.
Langkah berikutnya
Anda telah berhasil membuat dan menguji langkah alur kustom untuk Workspace Flows. Kini Anda dapat:
Lanjutkan penyesuaian langkah dengan meminta Gemini membantu Anda menerapkan logika yang lebih kompleks.
Buat kartu konfigurasi untuk menyesuaikan konfigurasi langkah.
Mencatat aktivitas dan error untuk merekam dan memecahkan masalah langkah-langkah Anda.
Tinjau objek peristiwa alur untuk meninjau payload JSON yang dikirim dan diterima alur saat alur berjalan.