
Bu hızlı başlangıç kılavuzunda, Google Apps Komut Dosyası'nı kullanarak Workspace Studio için nasıl özel bir adım oluşturacağınız açıklanmaktadır. Özel adım, giriş olarak iki sayı ve bir aritmetik işlem alır, hesaplamayı yapar ve sonucu verir.
Hedefler
- Google Apps Komut Dosyası ile Workspace Studio için özel bir adım oluşturun.
- Özel adımı kendi Google Workspace kuruluşunuza dağıtın.
- Workspace Studio'da özel adımı test edin.
Ön koşullar
- Workspace Studio'ya erişimi olan bir Google Hesabı
Komut dosyasını ayarlama
Komut dosyasını ayarlamak için yeni bir Apps Komut Dosyası projesi oluşturun ve ardından bunu Cloud projenize bağlayın.
Calculator quickstart (Hesap Makinesi hızlı başlangıç) Apps Komut Dosyası projesini açmak için aşağıdaki düğmeyi tıklayın.
Genel bakış'ı tıklayın.
Genel bakış sayfasında
 Kopya oluştur'u tıklayın.
Apps Komut Dosyası projesinin kopyanıza ad verin:
Copy of Calculator quickstart'ı (Hesap Makinesi hızlı başlangıç kopyası) tıklayın.
Proje başlığı'na
Calculator quickstartyazın.Yeniden adlandır'ı tıklayın.
İsteğe bağlı: Hızlı başlangıç kodunu inceleme
Önceki bölümde, akışınızın özel adımı için gerekli tüm uygulama kodunu içeren bir Apps Komut Dosyası projesinin tamamını kopyaladınız. Bu nedenle, her dosyayı kopyalayıp yapıştırmanız gerekmez.
Dilerseniz önceki bölümde kopyaladığınız her dosyayı buradan inceleyebilirsiniz:
appsscript.jsonManifest dosyası. Apps Komut Dosyası'nın komut dosyasını çalıştırmak için ihtiyaç duyduğu temel proje bilgilerini belirten özel bir JSON dosyası.
appsscript.jsonkodunu görüntüleme{ "timeZone": "America/Los_Angeles", "exceptionLogging": "STACKDRIVER", "runtimeVersion": "V8", "addOns": { "common": { "name": "Calculator", "logoUrl": "https://www.gstatic.com/images/branding/productlogos/calculator_search/v1/web-24dp/logo_calculator_search_color_1x_web_24dp.png", "useLocaleFromApp": true }, "flows": { "workflowElements": [ { "id": "actionElement", "state": "ACTIVE", "name": "Calculate", "description": "Asks the user for two values and a math operation, then performs the math operation on the values and outputs the result.", "workflowAction": { "inputs": [ { "id": "value1", "description": "value1", "cardinality": "SINGLE", "dataType": { "basicType": "INTEGER" } }, { "id": "value2", "description": "value2", "cardinality": "SINGLE", "dataType": { "basicType": "INTEGER" } }, { "id": "operation", "description": "operation", "cardinality": "SINGLE", "dataType": { "basicType": "STRING" } } ], "outputs": [ { "id": "result", "description": "Calculated result", "cardinality": "SINGLE", "dataType": { "basicType": "INTEGER" } } ], "onConfigFunction": "onConfigCalculateFunction", "onExecuteFunction": "onExecuteCalculateFunction" } } ] } } }
Calculator.gsGoogle Workspace Studio için özel bir adım tanımlar. "Hesapla" adlı adım, giriş olarak iki sayı ve bir işlem alır ve hesaplamanın sonucunu döndürür.
Calculator.gskodunu görüntüleme/** * This script defines a custom step for Google Workspace Studio. * The step, named "Calculate", takes two numbers and an operation as input * and returns the result of the calculation. * * The script includes functions to: * * 1. Define the configuration UI for the step using Card objects: * * - `onConfigCalculateFunction()`: Generates the main configuration card. * - Helper functions like `pushCard()`, `saveButton()` to build card components. * * 2. Handle the execution of the step. * * - `onExecuteCalculateFunction()`: Retrieves inputs, performs the calculation, * and returns outputs. * * To learn more, see the following quickstart guide: * https://developers.google.com/workspace/add-ons/studio/quickstart */ /** * Creates an action response to push a new card onto the card stack. * * This function generates an action object that, when returned, causes the * provided card to be pushed onto the card stack, making it the currently * displayed card in the configuration UI. * @param {Object} card The Card object to push. * @return {Object} The action response object. */ function pushCard(card) { return { "action": { "navigations": [{ "push_card": card } ] } }; } /** * Creates an action response to update the currently displayed card. * * This function generates an action object that, when returned, causes the * currently displayed card to be replaced with the provided card in the * configuration UI. * @param {Object} card The Card object to update. * @return {Object} The render actions object. */ function updateCard(card) { return { "render_actions": { "action": { "navigations": [{ "update_card": card } ] } } }; } /** * Creates a button configuration object for saving the step. * * This function generates a button definition that, when clicked, triggers * a save action for the current step configuration. * @return {Object} The button widget object. */ function saveButton() { return { "text": "Save", "onClick": { "hostAppAction" : { "workflowAction" : { "saveWorkflowAction" : {} } } }, }; } /** * Creates a button configuration object for a refresh action. * * This function generates a button definition that, when clicked, triggers * a function to refresh the current card. * @param {string} functionName The name of the Apps Script function to call on click. * @return {Object} The button widget object. */ function refreshButton(functionName) { return { "text": "Refresh", "onClick": { "action" : { "function" : functionName } }, }; } /** * Generates and displays a configuration card for the sample calculation action. * * This function creates a card with input fields for two values and a dropdown * for selecting an arithmetic operation. The card also includes a "Save" * button to save the action configuration for the step. * * The input fields are configured to let the user select outputs from previous * steps as input values using the `hostAppDataSource` property. * This function is called when the user adds or edits the "Calculate" step in the UI. * @return {Object} The action response object containing the card to display. */ function onConfigCalculateFunction() { var card = { "sections": [ { "header": "Action sample: Calculate", "widgets": [ { "textInput": { "name": "value1", "label": "First value", "hostAppDataSource" : { "workflowDataSource" : { "includeVariables" : true } } } }, { "selectionInput": { "name": "operation", "label": "Operation", "type": "DROPDOWN", "items": [ { "text": "+", "value": "+", }, { "text": "-", "value": "-", }, { "text": "x", "value": "x", }, { "text": "/", "value": "/", } ] } }, { "textInput": { "name": "value2", "label": "Second value", "hostAppDataSource" : { "workflowDataSource" : { "includeVariables" : true } } } } ] } ] }; return pushCard(card); } /** * Gets an integer value from variable data, handling both string and integer formats. * * This function attempts to extract an integer value from the provided variable data. * It checks if the data contains string values and, if so, parses the first string * as an integer. If integer values are present, it returns the first integer. * @param {Object} variableData The variable data object from the event. * @return {number} The extracted integer value. */ function getIntValue(variableData) { if (variableData.stringValues) { return parseInt(variableData.stringValues[0]); } return variableData.integerValues[0]; } /** * Returns output variables from a step. * * This function constructs an object that, when returned, sends the * provided variable values as output from the current step. * The variable values are logged to the console for debugging purposes. */ function outputVariables(variableDataMap) { const workflowAction = AddOnsResponseService.newReturnOutputVariablesAction() .setVariableDataMap(variableDataMap); const hostAppAction = AddOnsResponseService.newHostAppAction() .setWorkflowAction(workflowAction); const renderAction = AddOnsResponseService.newRenderActionBuilder() .setHostAppAction(hostAppAction) .build(); return renderAction; } /** * Executes the calculation action based on the inputs from an event. * * This function retrieves input values ("value1", "value2") and the "operation" * from the event, performs the calculation, and returns the "result" and * "log" as output variables. * This function is called when the flow reaches this custom step. * @param {Object} event The event object passed by the runtime. * @return {Object} The output variables object. */ function onExecuteCalculateFunction(event) { console.log("output: " + JSON.stringify(event)); var calculatedValue = 0; var value1 = event.workflow.actionInvocation.inputs["value1"].integerValues[0]; var value2 = event.workflow.actionInvocation.inputs["value2"].integerValues[0]; var operation = event.workflow.actionInvocation.inputs["operation"].stringValues[0]; if (operation == "+") { calculatedValue = value1 + value2; } else if (operation == "-") { calculatedValue = value1 - value2; } else if (operation == "x") { calculatedValue = value1 * value2; } else if (operation == "/") { calculatedValue = value1 / value2; } const variableDataMap = { "result": AddOnsResponseService.newVariableData().addIntegerValue(calculatedValue) }; return outputVariables(variableDataMap); }
Adımınızı dağıtma ve test etme
Adımınızı test etmek için eklentinizde test dağıtımı oluşturun, adımı bir akışa ekleyin ve akışı çalıştırın.
Eklentiniz için test dağıtımı oluşturun:
- Komut dosyası projesini Apps Komut Dosyası Düzenleyicisi'nde açın.
- Dağıt > Dağıtımları test et'i tıklayın.
- Yükle'yi tıklayın.
- Alt tarafta Bitti'yi tıklayın.
Apps Komut Dosyası projesini hesaplarıyla paylaşarak (düzenleme erişimi gerekir) diğer kullanıcıların eklentiyi test etmesine izin verebilirsiniz. Ardından, kullanıcılardan önceki adımları uygulamalarını isteyin.
Eklenti yüklendikten sonra Akışlar'da hemen kullanılabilir. Eklentinin görünmesi için Flow'ları yenilemeniz gerekebilir. Eklentiyi kullanmadan önce yetkilendirmeniz de gerekir.
Test dağıtımları hakkında daha fazla bilgi edinmek için Yayınlanmamış bir eklentiyi yükleme başlıklı makaleyi inceleyin.
Flows'u açın.
Adımınızı içeren bir akış oluşturun:
- Yeni akış'ı tıklayın.
- Akışın nasıl başlayacağını seçin. Adımınız için bir giriş değişkeni gerekiyorsa giriş değişkenini başlatıcının çıkışının bir parçası olarak yapılandırın.
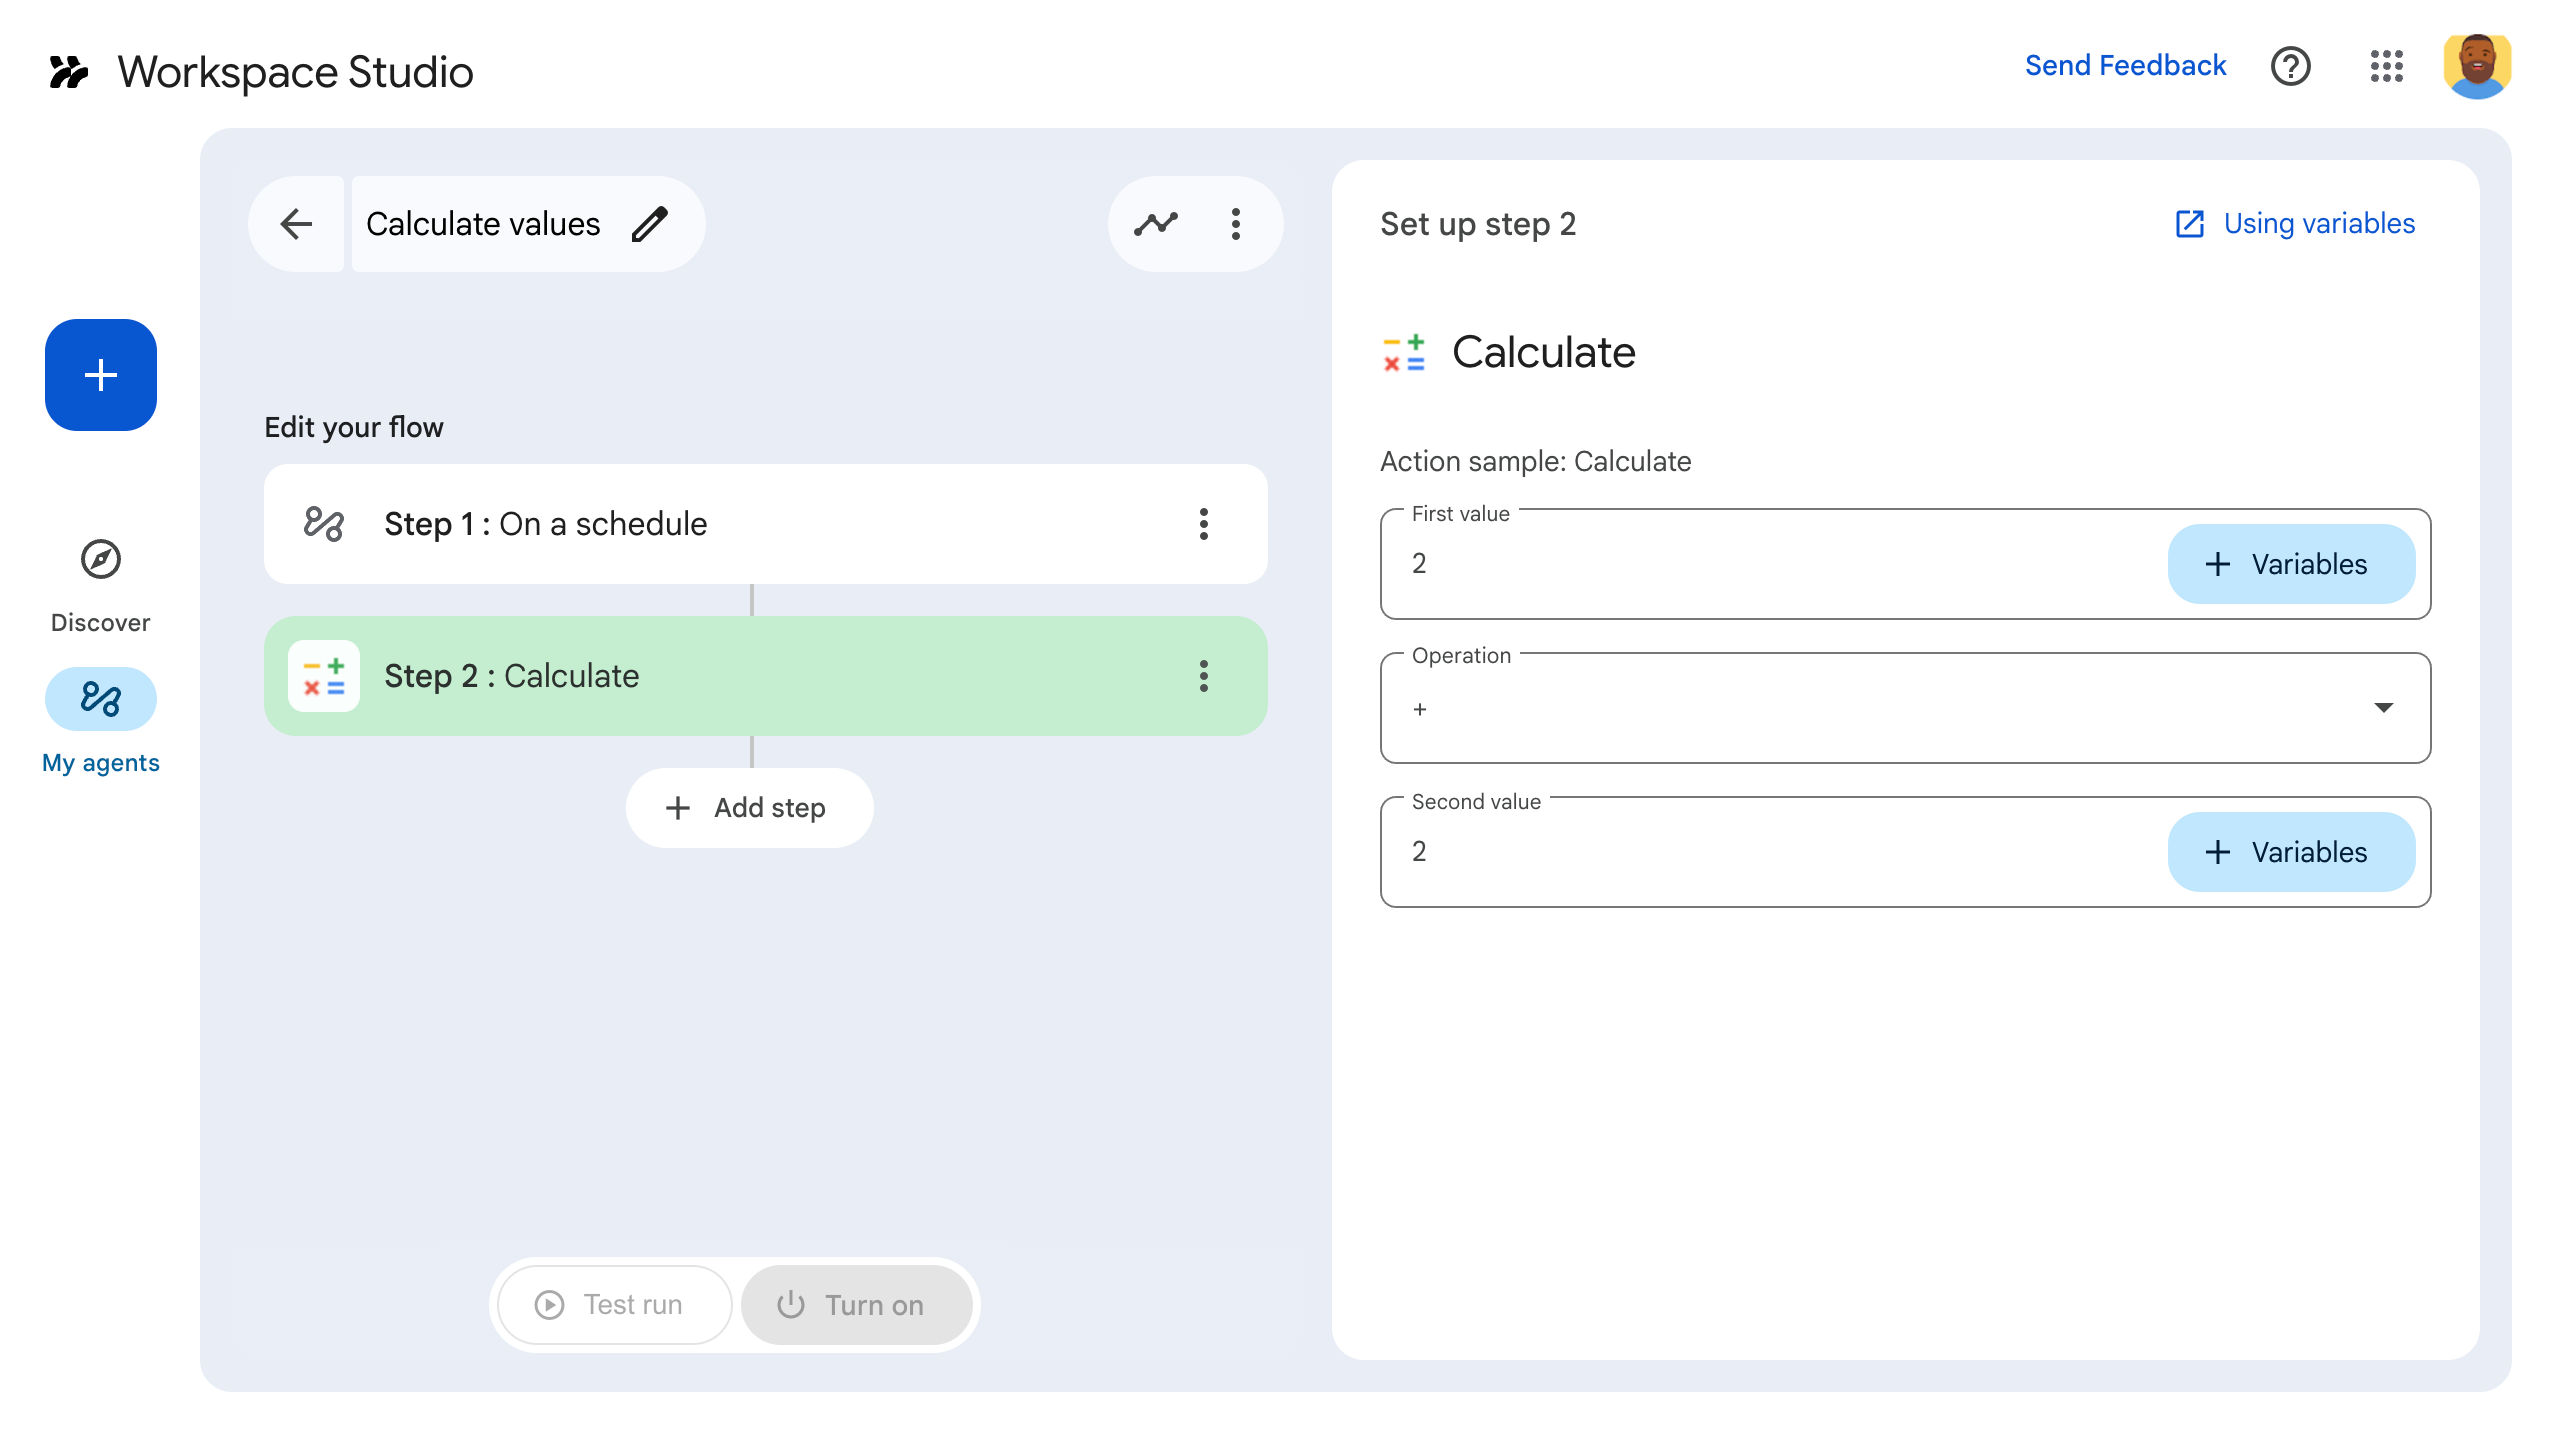
- Adım ekle'yi tıklayın. Hesapla adlı oluşturduğunuz veya güncellediğiniz adımı seçin.
- Adımınızı yapılandırın. Hesaplama adımı için iki değer ve bir matematik işlemi seçin. Adım otomatik olarak kaydedilir.
- Adımınızın çıkışını test etmek için başka bir adım ekleyin. Örneğin, bir Google Chat mesajına çıkış eklemek için Chat'in Chat'te beni bilgilendir adımını ekleyin. İleti bölümünde Değişkenler'i tıklayın ve adımınızın çıkışını seçin. Hesaplama adımı için Değişkenler > 2. Adım: Hesapla > Hesaplanmış sonuç'u seçin. Değişken, Mesaj alanında çip olarak görünür.
- Aç'ı tıklayın. Akışınız çalıştırılmaya hazır.
Akışınızın başlatıcısını tetikleyerek akışı çalıştırın. Örneğin, akışınız bir programa göre başlıyorsa belirtilen tarih ve saatte çalışır.
Akışın beklendiği gibi çalıştığını doğrulayın. Akış oluşturucunun Etkinlik sekmesini ziyaret ederek günlükleri kontrol edin. Etkinlik sekmesinde nasıl özel günlük oluşturacağınızı öğrenmek için Etkinlik günlükleri başlıklı makaleyi inceleyin.
Sonraki adımlar
Workspace Studio için özel bir adım oluşturup test ettiniz. Artık şunları yapabilirsiniz:
Gemini'dan daha karmaşık mantıklar uygulamanıza yardımcı olmasını isteyerek adımı özelleştirmeye devam edin.
Adım yapılandırmasını özelleştirmek için yapılandırma kartı oluşturun.
Adım çalıştırmalarınızı kaydetmek ve sorunlarını gidermek için etkinliği ve hataları günlüğe kaydedin.
Adımlar çalışırken akışların gönderdiği ve aldığı JSON yükünü incelemek için etkinlik nesnelerini inceleyin.