
The Google Slides API lets you create and edit tables on pages. The examples on
this page show some common table operations using the
presentations.batchUpdate
method.
These examples use the following variables:
- PRESENTATION_ID—Indicates where you provide the presentation ID. You can discover the value for this ID from the presentation URL.
- PAGE_ID—Indicates where you provide the page object IDs. You can retrieve the value for this from the URL or by using an API read request.
- TABLE_ID—Indicates where you provide the page element object ID for a table you're working with. You can specify this ID for elements you create (with some restrictions) or allow the Slides API to automatically create one. Element IDs can be retrieved through an API read request.
These examples are presented as HTTP requests to be language neutral. To learn how to implement a batch update in different languages using the Google API client libraries, see Add shapes and text.
Create a table
The following
presentations.batchUpdate
code sample shows how to use the
CreateTableRequest
method to add a table to a slide specified by the PAGE_ID.
This table has eight rows and five columns. Note that the Slides API
ignores any size or transform fields provided as part of the
elementProperties.
Instead, the API creates a table that's roughly centered on the slide and is
sized to accommodate the specified number of rows and columns, if possible.
The following is the request protocol to create a table:
POST https://slides.googleapis.com/v1/presentations/PRESENTATION_ID:batchUpdate
{
  "requests": [
    {
      "createTable": {
        "objectId": TABLE_ID,
        "elementProperties": {
          "pageObjectId": PAGE_ID,
        },
        "rows": 8,
        "columns": 5
      }
    }
  ]
}
Delete table rows or columns
The following
presentations.batchUpdate
code sample shows how to use the
DeleteTableRowRequest
method to remove the sixth row. It then uses the
DeleteTableColumnRequest
method to remove the fourth column. The table is specified by the
TABLE_ID. Both the rowIndex and the columnIndex within the
cellLocation are zero based.
The following is the request protocol to delete table rows or columns:
POST https://slides.googleapis.com/v1/presentations/PRESENTATION_ID:batchUpdate
{
  "requests": [
    {
      "deleteTableRow": {
        "tableObjectId": TABLE_ID,
        "cellLocation": {
          "rowIndex": 5
        }
      }
    },
    {
      "deleteTableColumn": {
        "tableObjectId": TABLE_ID,
        "cellLocation": {
          "columnIndex": 3
        }
      }
    }
  ]
}
Edit table data
The following
presentations.batchUpdate
code sample shows how to use the
DeleteTextRequest
method to remove all the text in a cell within the
textRange. It
then uses the
InsertTextRequest
method to replace it with the new text of "Kangaroo".
The table is specified by the TABLE_ID. The affected cell is in
the fifth row and third column. Both the rowIndex and the columnIndex within
the cellLocation are zero based.
The following is the request protocol to edit table data:
POST https://slides.googleapis.com/v1/presentations/PRESENTATION_ID:batchUpdate
{
  "requests": [
    {
      "deleteText": {
        "objectId": TABLE_ID,
        "cellLocation": {
          "rowIndex": 4,
          "columnIndex": 2
        },
        "textRange": {
          "type": "ALL",
        }
      }
    },
    {
      "insertText": {
        "objectId": TABLE_ID,
        "cellLocation": {
          "rowIndex": 4,
          "columnIndex": 2
        },
        "text": "Kangaroo",
        "insertionIndex": 0
      }
    }
  ]
}
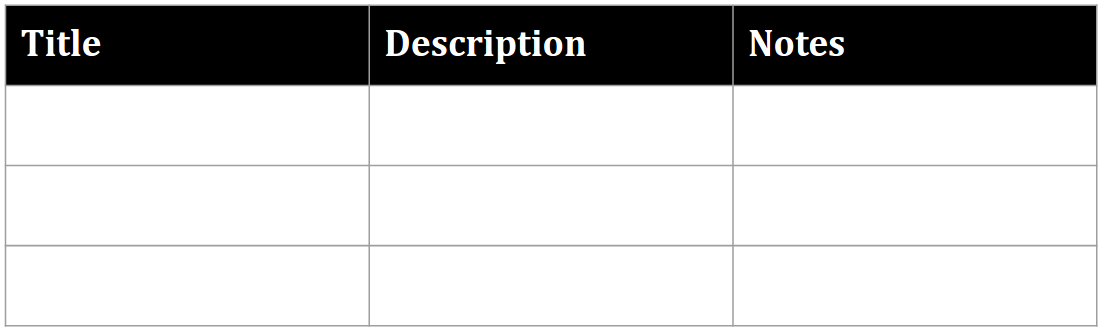
Format a table header row
The following
presentations.batchUpdate
code sample shows how to use the
UpdateTableCellPropertiesRequest
method to format the header row of a table element, within the
tableRange,
specified by the TABLE_ID. It then uses the
TableCellProperties
method to set the background color of the header row to black.
Each following request uses the
UpdateTextStyleRequest
method to set the text format in one cell of the header row to bold, white 18-pt
Cambria font within the
textRange. You
then need to repeat this request for each additional cell in the header.
Both the rowIndex and the columnIndex within the location and
cellLocation are zero based.
The following is the request protocol to format a table header row:
POST https://slides.googleapis.com/v1/presentations/PRESENTATION_ID:batchUpdate
{
  "requests": [
    {
      "updateTableCellProperties": {
        "objectId": TABLE_ID,
        "tableRange": {
          "location": {
            "rowIndex": 0,
            "columnIndex": 0
          },
          "rowSpan": 1,
          "columnSpan": 3
        },
        "tableCellProperties": {
          "tableCellBackgroundFill": {
            "solidFill": {
              "color": {
                "rgbColor": {
                  "red": 0.0,
                  "green": 0.0,
                  "blue": 0.0
                }
              }
            }
          }
        },
        "fields": "tableCellBackgroundFill.solidFill.color"
      }
    },
    {
      "updateTextStyle": {
        "objectId": TABLE_ID,
        "cellLocation": {
          "rowIndex": 0,
          "columnIndex": 0
        },
        "style": {
          "foregroundColor": {
            "opaqueColor": {
              "rgbColor": {
                "red": 1.0,
                "green": 1.0,
                "blue": 1.0
              }
            }
          },
          "bold": true,
          "fontFamily": "Cambria",
          "fontSize": {
            "magnitude": 18,
            "unit": "PT"
          }
        },
        "textRange": {
          "type": "ALL"
        },
        "fields": "foregroundColor,bold,fontFamily,fontSize"
      }
    },
    // Repeat the above request for each additional cell in the header row....
  ]
}
Here's what the formatted header row looks like after these updates:
Insert table rows or columns
The following
presentations.batchUpdate
code sample shows how to use the
InsertTableRowsRequest
method to add three rows below the sixth row. It then uses the
InsertTableColumnsRequest
method to add two columns to the left of the fourth column in the same table.
The table is specified by the TABLE_ID. Both the rowIndex and
the columnIndex within the cellLocation are zero based.
The following is the request protocol to insert table rows or columns:
POST https://slides.googleapis.com/v1/presentations/PRESENTATION_ID:batchUpdate
{
  "requests": [
    {
      "insertTableRows": {
        "tableObjectId": TABLE_ID,
        "cellLocation": {
          "rowIndex": 5
        },
        "insertBelow": true,
        "number": 3
      }
    },
    {
      "insertTableColumns": {
        "tableObjectId": TABLE_ID,
        "cellLocation": {
          "columnIndex": 3
        },
        "insertRight": false,
        "number": 2
      }
    }
  ]
}