What is DevKit?
DevKit is a starter kit and tooling package to accelerate development, improve code quality, and ensure consistency across Private Compute Infrastructure Toolkit projects. Getting a new Trusted Execution Environment project off the ground is tough enough. Between provisioning virtual machine containers and picking the right software versions, the initial setup can be a major hurdle. This friction only gets worse when you have multiple projects that need to use the same pattern but don't have a standardized template, often slowing down your development velocity and creating IDE compatibility headaches.
DevKit directly addresses these issues.
By integrating with Bazel, DevKit facilitates hermetic and reproducible builds. It offers hermetic toolchains to isolate builds from the host environment, ensuring your code compiles identically whether it's on a developer's laptop or running through a CI pipeline.
Why should you start using DevKit?
Whether you're a developer experimenting with new concepts or a seasoned professional needing to accelerate deployment, you can start using confidential computing immediately. We eliminate the initial burden of investigating and building your foundational setup, allowing you to stand up your project quickly and efficiently.
This guide is designed for intermediate developers who already have a solid grasp of a strongly typed language and an existing GitHub project that can be used as a base for bootstrapping DevKit.
If you are exploring this product, you may use an empty GitHub project.
Get Started
Prerequisites
The following are required to be installed on your local linux machine:
- Git
- A sudo-less Docker with BuildKit (buildx) plugin
- Bazelisk (optional, if you want to build code outside of DevKit)
Step #1: Get your GitHub project ready
Create a new git repository for your project and add the DevKit repository as a submodule. If you are looking for the latest release of DevKit, navigate to DevKit repository branches list for the latest release.
git submodule add \
  --name=devkit \
  --branch=release-<latest> \
  https://github.com/private-compute-infra-toolkit/devkit.git \
  .devkit
After this is completed, you should see an additional hidden directory
.devkit/ now and a .gitmodules hidden file. To access the devkit tools, add
a linux symlink to the subdirectory with entrypoint scripts.
ln -s .devkit/devkit devkit
Running ls should display the symlink in your list of available directories.
Step #2: Begin bootstrapping your project
With the symlink established, you can now start bootstrapping with DevKit. Check out the GitHub repository to understand more about the usages of bootstrap.
Assuming you want to use a C++ template and use a LLVM toolchain, you can execute the following at the root of your project. The full list of supported template languages and toolchains are referenced in our GitHub repository.
devkit/bootstrap --template cpp --args toolchain=llvm_custom_sysroot
You should be presented with a similar success notification: "Project
bootstrapped with 'cpp' template.
Verify that your current directory contains the files from the chosen template,
ready for you to start developing. To inspect what was generated, run tree:
tree
.
├── BUILD.bazel
├── checksums.txt
├── ci
│   ├── test
│   └── test_entrypoint
├── devkit -> .devkit/devkit
├── devkit.json
├── MODULE.bazel
├── MODULE.bazel.lock
└── src
    ├── BUILD.bazel
    ├── greeter.cpp
    ├── greeter.hpp
    ├── main.cpp
    └── test.cpp

4 directories, 12 files
Step #3: Running a local development environment
Start your containerized development environment
Start by starting the build container:
devkit/build
You will land in a shell, in which the bazel command will be available. Now you can build the code:
bazel build //...
The commands can be also combined into a single call that will start a container and do the build:
devkit/build bazel build //...
Starting local Bazel server (8.4.1) and connecting to it...
INFO: Analyzed 3 targets (102 packages loaded, 7137 targets configured).
INFO: Found 3 targets...
INFO: Elapsed time: 272.436s, Critical Path: 11.62s
INFO: 302 processes: 142 internal, 160 processwrapper-sandbox.
INFO: Build completed successfully, 302 total actions
This first build takes around 4.5 minutes, because the template uses the LLVM toolchain, which needs to be downloaded and extracted. Subsequent builds will be much faster.
Begin your development by spinning up a containerized local development environment from the root of your project.
devkit/dev
You should land within the containerized environment and this can be verified
that a container is running by executing docker ps in your bash terminal.
Choose an IDE
With a newly bootstrapped project, you now have access to the myriad of IDE tools to continue developing against your GitHub or any other git version-control repository.
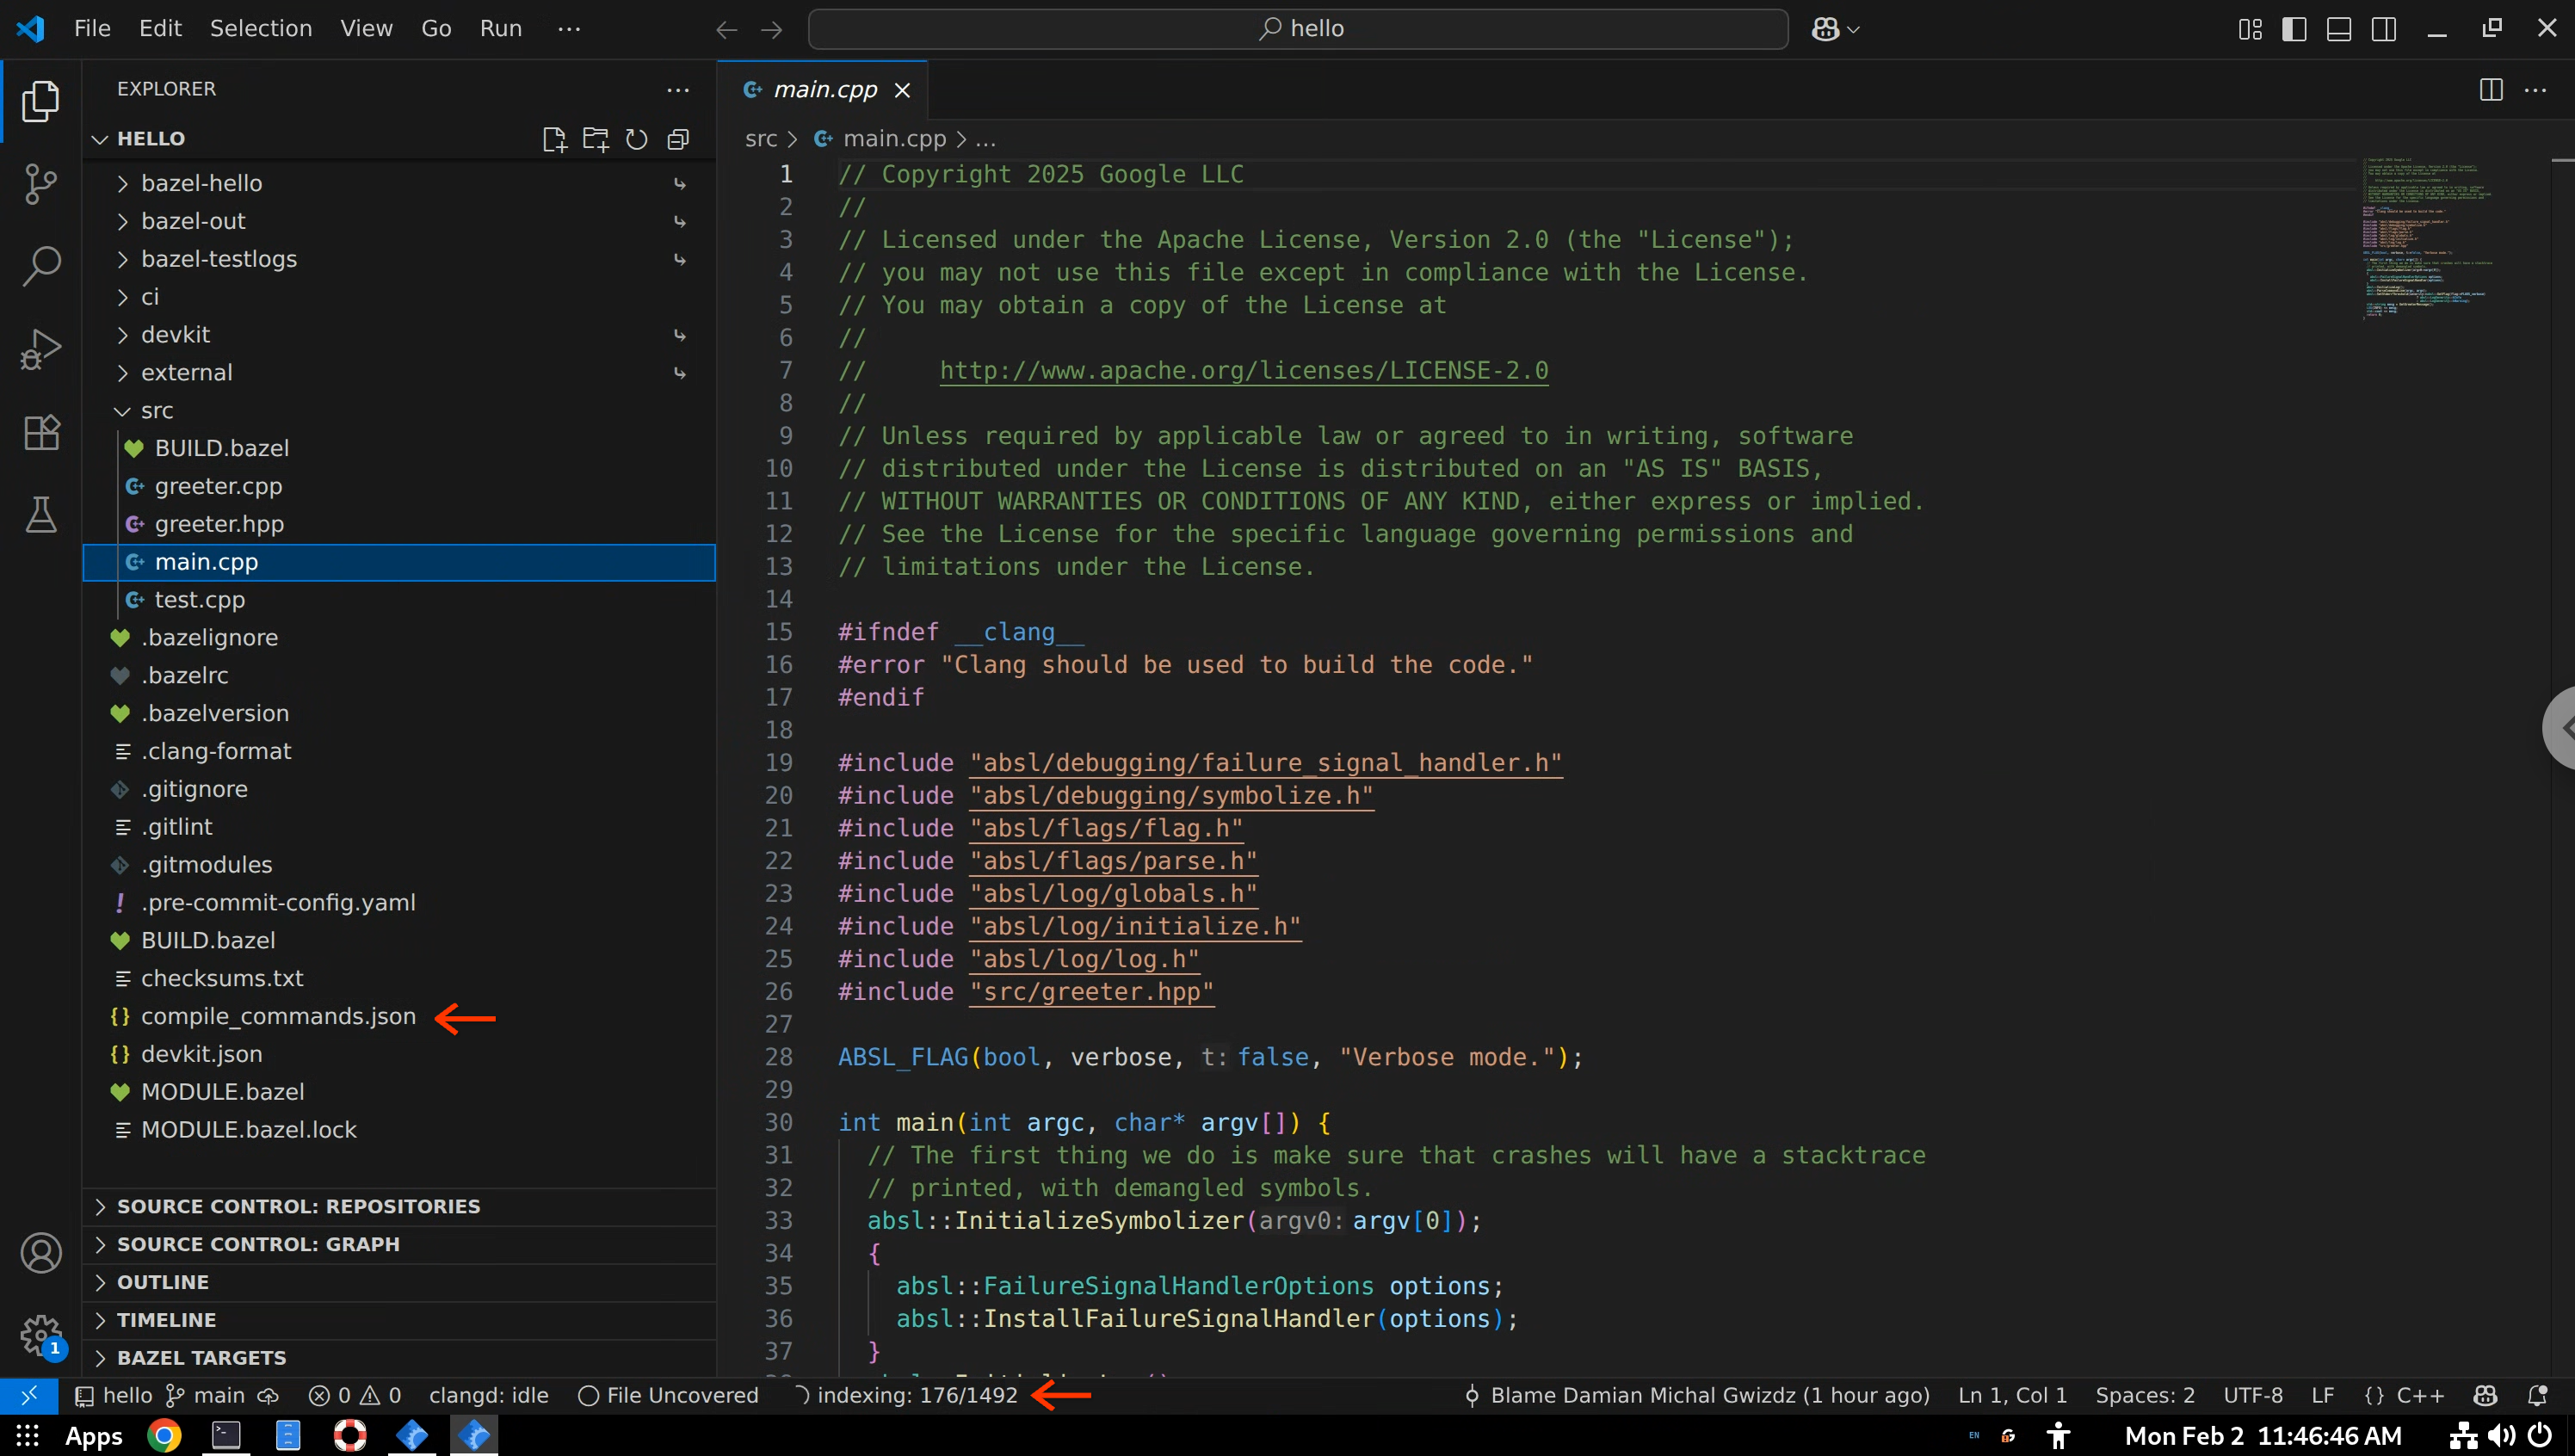
DevKit comes with pre-configured, containerized IDEs, eliminating the need for manual installation or configuration. A single command launches a fully set up IDE, ready for development:
devkit/vscode_ide
For example, after opening a project in VSCode, DevKit automatically generates the compile commands and initiates CLang indexing, requiring no manual setup:
See the list of available IDEs here.
Explore your development tools
In addition to the IDEs available to you, you will also have tools within DevKit available to you. It comes equipped with a different set of tools tailored for development tasks.
See the list of available development tools here.
Step 4: Continuous testing & development tools
Use the development tools
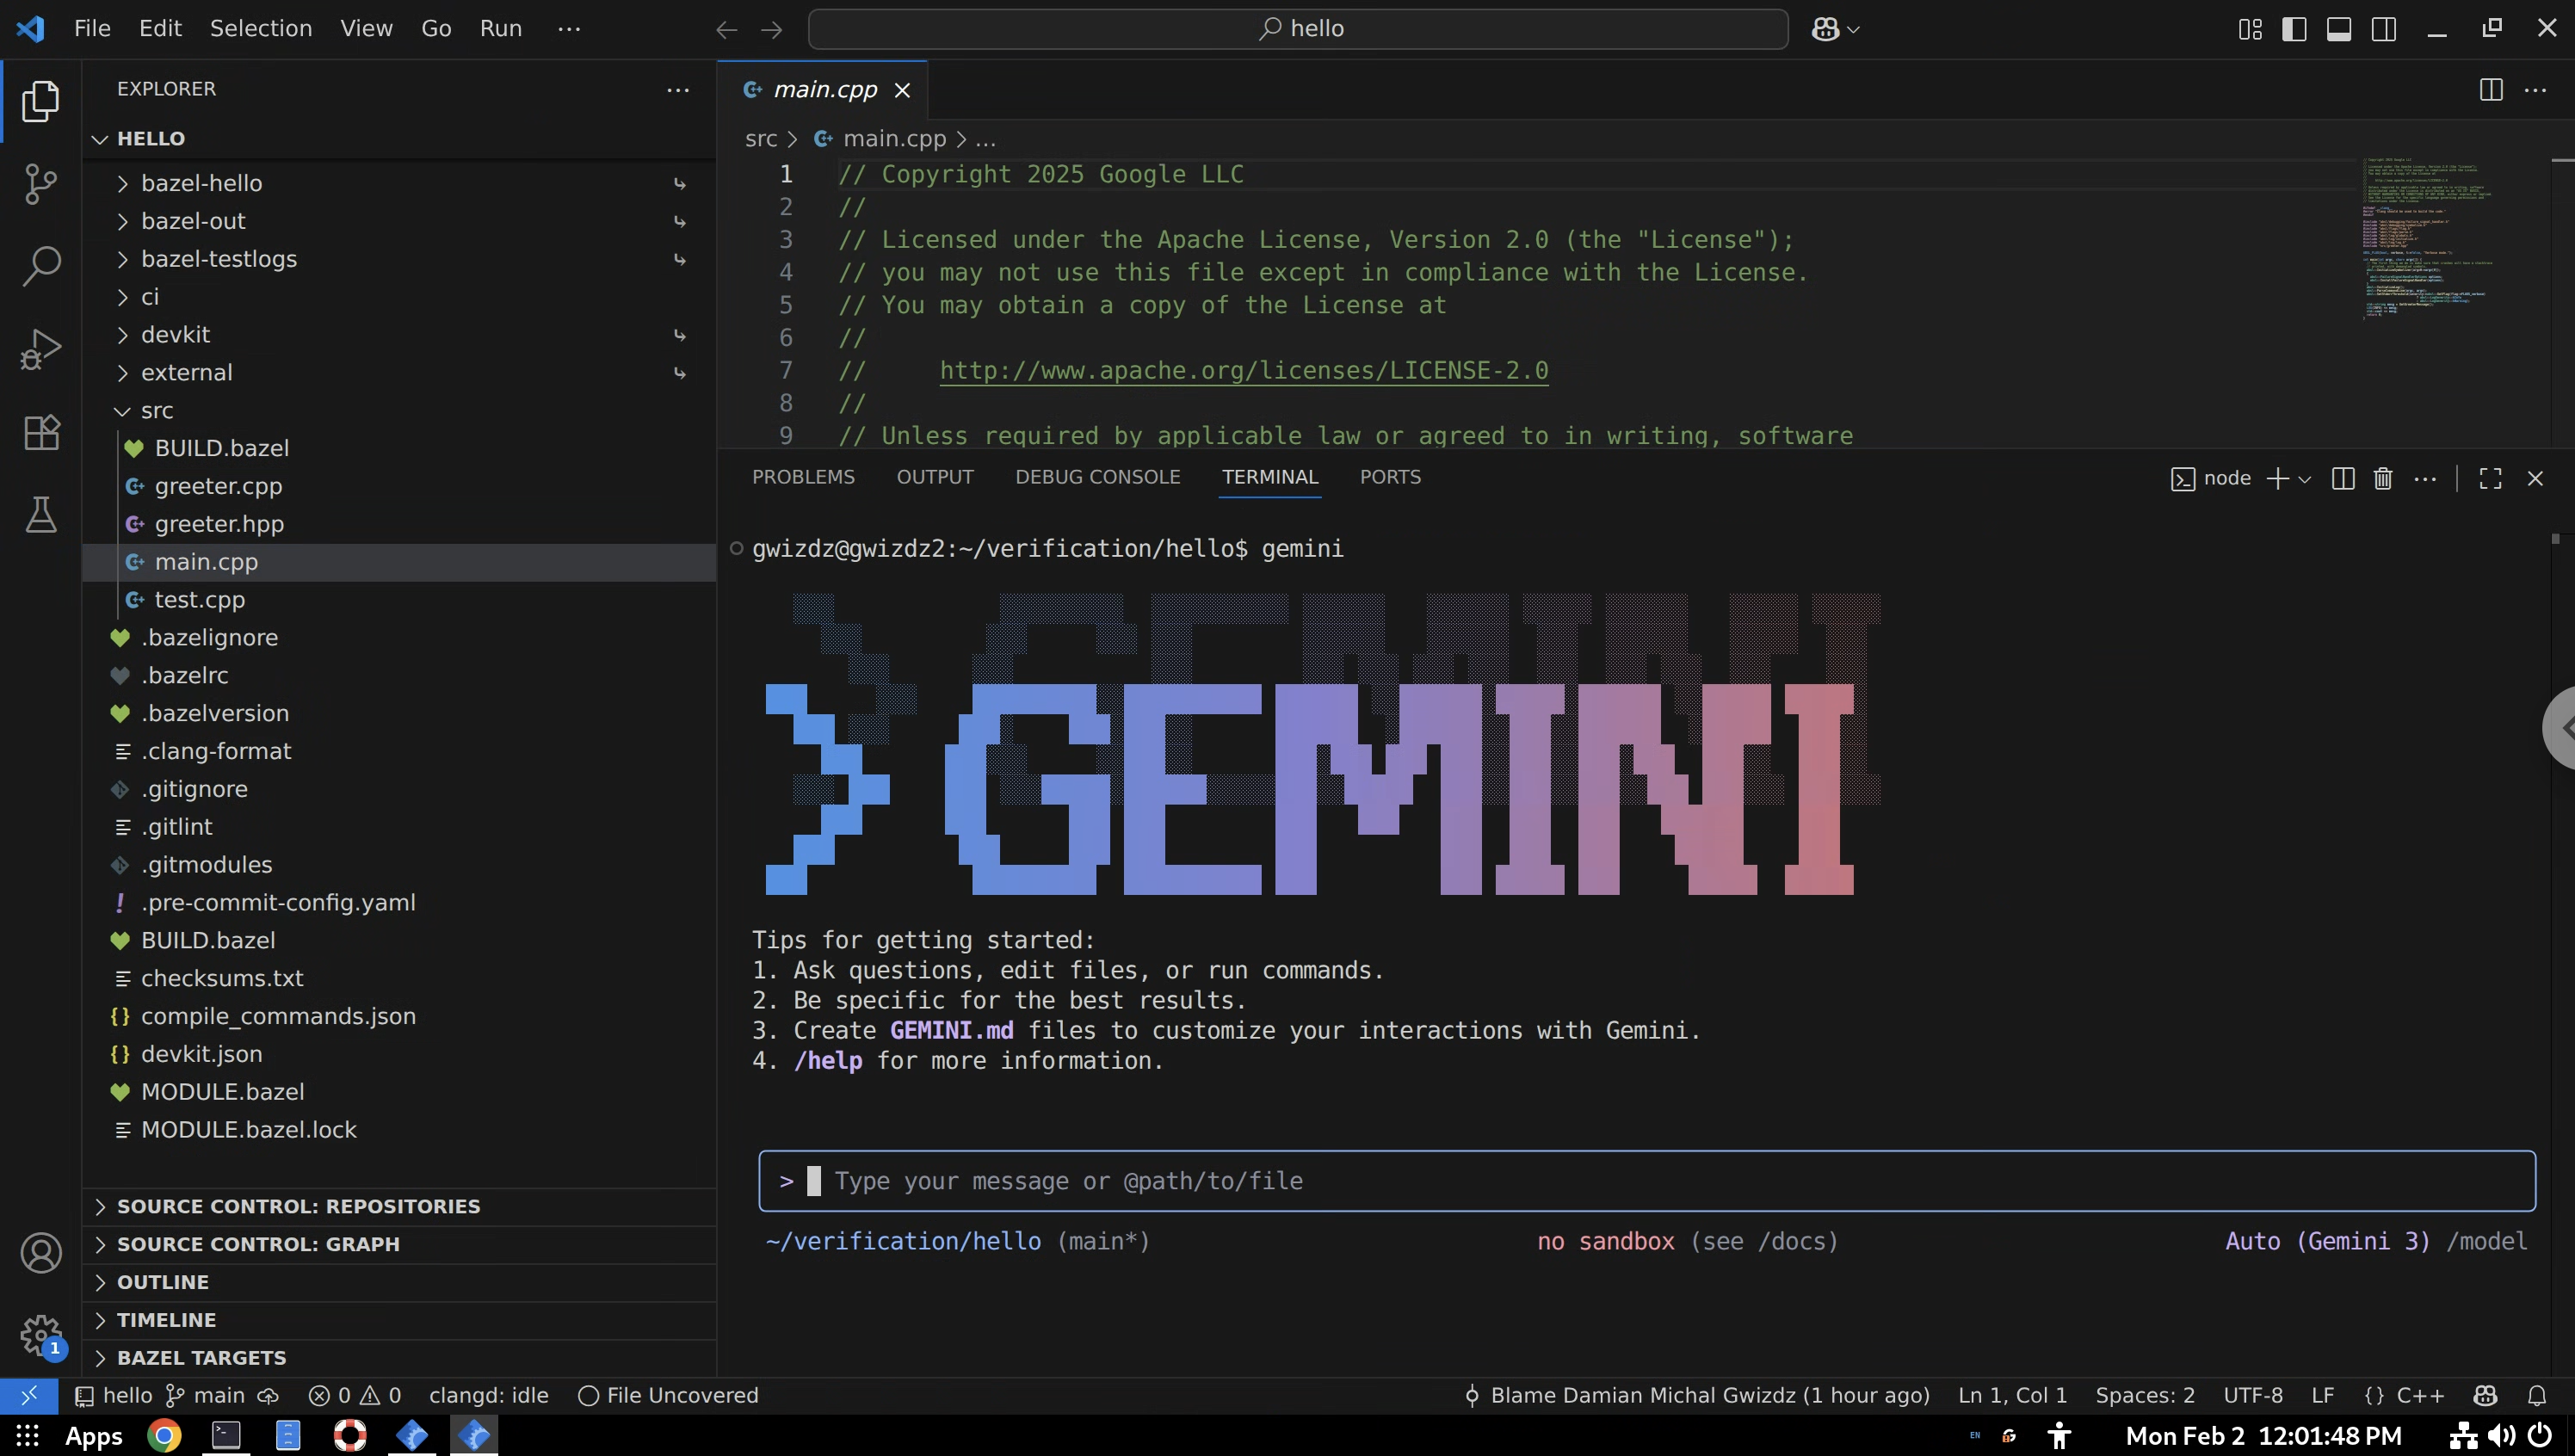
Provided within the containerized development environment dev-env, various
development tools, including pre-commit for running
checks, gitlint for enforcing commit
message conventions, and
Gemini CLI for interacting with
Google's AI models.
See the list of available CI development tools.
Next Steps
Feedback
If you have any implementation questions or feedback on these new features, file an issue in our GitHub repository.