
Page Summary
-
The turn-by-turn data feed provides navigation instructions (icons, turn numbers, road names, distances, and times) for devices without map-based navigation, suitable for scenarios like Android Auto or minimal-distraction guidance.
-
To utilize the SDK, create and register a service to receive real-time navigation updates from the Navigation SDK for Android, processing them into usable navigation details.
-
The turn-by-turn feed includes navigation card information fields (road names, maneuver icons, distances, remaining time, and lane guidance) for displaying guidance instructions.
-
You can customize the visual experience by creating icons for different maneuvers or utilize the SDK's built-in icon generation for Android Auto compatibility.
-
The Navigation SDK provides different navigation states (Enroute, Rerouting, Stopped) to inform the display of relevant information based on the current navigation status.
A turn-by-turn data feed provides navigation-only information to devices not designed for map-based navigation guidance. It provides upcoming maneuvers with elements you supply:
- icons (left, right, U-turn)
- turn numbers in roundabouts
- road names
- estimated distances and time to the next navigation step or final destination
You can use the turn-by-turn feed to create experiences where the full Navigation SDK UI is not appropriate, such as for Android Auto or for small screen displays where a full Android stack is not available. For example, you might use this for two-wheeled vehicle drivers, where you can project navigation-only guidance to help them reach their destinations faster and more confidently with minimal distractions.
To use the SDK, you'll create a service and register it with the Navigation SDK for Android so that it can receive new navigation information in real time (about once a second during navigation).
This document shows you how to create and register a navigation service that receives navigation information from the SDK and provides the navigation state to the receiving device.
Overview
This section summarizes the high-level flow for enabling the turn-by-turn feature.
Using the TurnByTurn feature
Here are the high-level steps for enabling the turn-by-turn feature. The sections that follow provide details about each step.
Create a service to receive navigation updates
The Navigation SDK binds to your TurnByTurn service and sends it navigation updates through the Android Messenger . You can create a new navigation service for these updates, or use an existing service.
The benefit of using a service to receive navigation updates is that the service can live in a separate background process.
The service in the following example receives navigation information and uses
the TurnByTurnManager to convert the data into a NavInfo object that
contains the navigation details.
/**
 *   Receives turn-by-turn navigation information forwarded from NavSDK.
 */
public class NavInfoReceivingService extends Service {
  /** The messenger used by the service to receive nav step updates. */
  private Messenger incomingMessenger;
  private TurnByTurnManager turnByTurnManager;

  private final class IncomingNavStepHandler extends Handler {
    public IncomingNavStepHandler(Looper looper) {
      super(looper);
    }

    @Override
    public void handleMessage(Message msg) {
      // Identify the message through the msg.what field.
      if (TurnByTurnManager.MSG_NAV_INFO == msg.what) {
        // Extract the NavInfo object using the TurnByTurnManager.
        NavInfo navInfo = turnByTurnManager
          .readNavInfoFromBundle(msg.getData()));
      // Do something with the NavInfo
    }
  }
}

@Nullable
@Override
public IBinder onBind(Intent intent) {
  return incomingMessenger.getBinder();
}

@Override
public void onCreate() {
  turnByTurnManager = TurnByTurnManager.createInstance();
  HandlerThread thread =
    new HandlerThread("NavInfoReceivingService",
      Process.THREAD_PRIORITY_DEFAULT);
  thread.start();
  incomingMessenger = new Messenger(
    new IncomingNavStepHandler(thread.getLooper()));
}
Message codes
NavInfo messages can be identified through the
Message.what
field of the Message class, which is set to the value of
TurnByTurnManager.MSG_NAV_INFO.
Registering the service for navigation updates
The following code snippets registers the navigation service.
boolean isNavInfoReceivingServiceRegistered =
          navigator.registerServiceForNavUpdates(
              getPackageName(), NavInfoReceivingService.class.getName(), numNextStepsToPreview);
Starting and stopping the service
The navigation service is active as long as the
Navigation SDK binds to it. You can manually call
startService() and stopService() to control the navigation service
lifecycle, but when you register your service with the
Navigation SDK, your service starts automatically, and
only stops when you unregister it. Depending on how you set up your app, you may
want to consider starting a foreground service, described in the Android
documentation Services
overview.
Unregistering the service
To stop receiving navigation updates, unregister the service from the Navigation SDK.
navigator.unregisterServiceForNavUpdates();
Understand navigation states
Use NavInfo.getNavState() to get the current state of navigation, which is one
of the following:
Enroute - The
ENROUTEstate means that guided navigation is active and the user is on the provided route. Information about the current upcoming maneuver step is available.Rerouting -
REROUTINGmeans that navigation is in progress, but the navigator is looking for a new route. The upcoming maneuver step is not available, because there's no new route yet. In the sample app, a "Rerouting..." message appears in the navigation info display. Once a route is found, aNavInfomessage is sent with the stateENROUTE.Stopped -
STOPPEDmeans navigation has ended. For example, navigation stops when the user exits navigation in the app. In the sample app, aSTOPPEDstate clears the navigation info display to prevent lingering step instructions from being displayed.
Populate the feed display
Now that you have set up your turn-by-turn service, this section covers the visual and text elements you can use to populate the guidance cards for the turn-by-turn feed.
Navigation card information fields
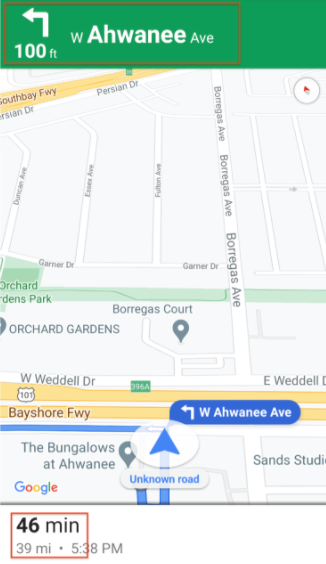
When the user enters guided navigation, a navigation card appears at the top, containing navigation data populated from the Navigation SDK. The related image shows an example of these essential navigation elements.
This table shows the fields for navigation info and where you find them.
| Fields for each navigation step | Fields for the overall trip |
|---|---|
Found in StepInfo |
Found in NavInfo |
| Full road name | Remaining time |
| The maneuver icon | Distance to destination |
| Distance to the next step | |
| Lane guidance fields |
Lane guidance
The Navigation SDK represents lanes in the navigation
turn card as
Lane
and
LaneDirection
data objects. A Lane object represents a specific lane during navigation and
has a list of LaneDirection objects which describe all the turns that can be
made from this lane.
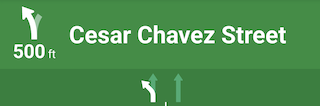
The recommended direction a user should take in a lane is marked by the isRecommended field.
Lane guidance example
The following snippet illustrates the data representation of the lanes displayed above.
// Lane 1
LaneDirections = [{/*laneShape=*/ STRAIGHT, /*isRecommended=*/ false},
                  {/*laneShape=*/ SLIGHT_LEFT, /*isRecommended=*/ true}]

// Lane 2
LaneDirections = [{/*laneShape=*/ STRAIGHT, /*isRecommended=*/ false}]
Create icons for maneuvers
The
Maneuver
enum defines each possible maneuver that could occur while navigating, and you
can get the maneuver for a given step from the StepInfo.getManeuver() method.
You must create maneuver icons and pair them with their associated maneuvers.
For some maneuvers, you can set up a one-to-one mapping to an icon, such as
DESTINATION_LEFT and DESTINATION_RIGHT. However, since some maneuvers are
similar, you might want to map more than one maneuver to a single icon. For
example TURN_LEFT and ON_RAMP_LEFT could both map to the left turn icon.
Some maneuvers contain an additional clockwise or counterclockwise label,
which the SDK determines based on the driving side of a country. For example, in
countries where driving is on the left side of the road, drivers take a
roundabout or U-turn in a clockwise direction, whereas right-side-of-the-road
countries go clockwise. The Navigation SDK detects
whether a maneuver occurs in left- or right-side traffic and outputs the
appropriate maneuver. Therefore, your maneuver icon may be different for a
clockwise versus a counterclockwise maneuver.
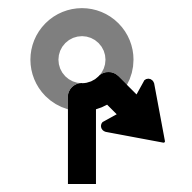
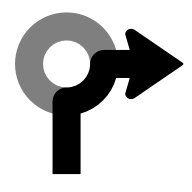
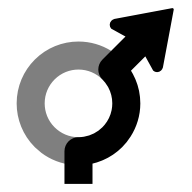
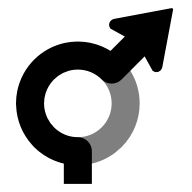
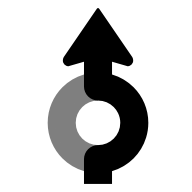
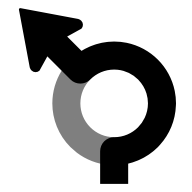
Expand to see examples icons for different maneuvers
| Sample Icon | TurnByTurn Maneuvers |
|---|---|
 |
DEPARTUNKNOWN |
 |
STRAIGHTON_RAMP_UNSPECIFIEDOFF_RAMP_UNSPECIFIEDNAME_CHANGE
|
 |
TURN_RIGHTON_RAMP_RIGHT
|
 |
TURN_LEFTON_RAMP_LEFT
|
 |
TURN_SLIGHT_RIGHTON_RAMP_SLIGHT_RIGHTOFF_RAMP_SLIGHT_RIGHT
|
 |
TURN_SLIGHT_LEFTON_RAMP_SLIGHT_LEFTOFF_RAMP_SLIGHT_LEFT
|
 |
TURN_SHARP_RIGHTON_RAMP_SHARP_RIGHTOFF_RAMP_SHARP_RIGHT
|
 |
TURN_SHARP_LEFTON_RAMP_SHARP_LEFTOFF_RAMP_SHARP_LEFT
|
 |
TURN_U_TURN_COUNTERCLOCKWISEON_RAMP_U_TURN_COUNTERCLOCKWISEOFF_RAMP_U_TURN_COUNTERCLOCKWISE
|
 |
TURN_U_TURN_CLOCKWISEON_RAMP_U_TURN_CLOCKWISEOFF_RAMP_U_TURN_CLOCKWISE
|
 |
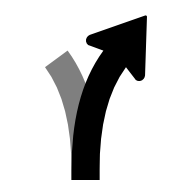
ROUNDABOUT_SHARP_RIGHT_COUNTERCLOCKWISE
|
 |
ROUNDABOUT_SHARP_RIGHT_CLOCKWISE
|
 |
ROUNDABOUT_RIGHT_COUNTERCLOCKWISE
|
 |
ROUNDABOUT_RIGHT_CLOCKWISE
|
 |
ROUNDABOUT_SLIGHT_RIGHT_COUNTERCLOCKWISE
|
 |
ROUNDABOUT_SLIGHT_RIGHT_CLOCKWISE
|
 |
ROUNDABOUT_STRAIGHT_COUNTERCLOCKWISE
|
 |
ROUNDABOUT_STRAIGHT_CLOCKWISE
|
 |
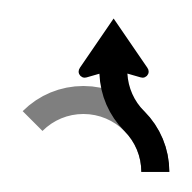
ROUNDABOUT_SLIGHT_LEFT_COUNTERCLOCKWISE
|
 |
ROUNDABOUT_SLIGHT_LEFT_CLOCKWISE
|
 |
ROUNDABOUT_LEFT_COUNTERCLOCKWISE
|
 |
ROUNDABOUT_LEFT_CLOCKWISE
|
 |
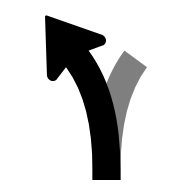
ROUNDABOUT_SHARP_LEFT_COUNTERCLOCKWISE
|
 |
ROUNDABOUT_SHARP_LEFT_CLOCKWISE
|
 |
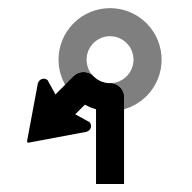
ROUNDABOUT_U_TURN_COUNTERCLOCKWISE
|
 |
ROUNDABOUT_U_TURN_CLOCKWISE
|
 |
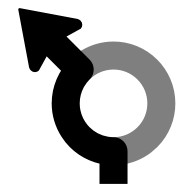
ROUNDABOUT_COUNTERCLOCKWISE
|
 |
ROUNDABOUT_CLOCKWISE
|
 |
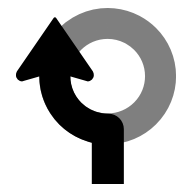
ROUNDABOUT_EXIT_COUNTERCLOCKWISE
|
 |
ROUNDABOUT_EXIT_CLOCKWISE
|
 |
MERGE_RIGHTOFF_RAMP_RIGHT
|
 |
MERGE_LEFTOFF_RAMP_LEFT
|
 |
FORK_RIGHTTURN_KEEP_RIGHTON_RAMP_KEEP_RIGHTOFF_RAMP_KEEP_RIGHT
|
 |
FORK_LEFTTURN_KEEP_LEFTON_RAMP_KEEP_LEFTOFF_RAMP_KEEP_LEFT
|
 |
MERGE_UNSPECIFIED
|
 |
DESTINATION
|
 |
DESTINATION_RIGHT
|
 |
DESTINATION_LEFT
|
 |
FERRY_BOAT
|
 |
FERRY_TRAIN
|
Use generated icons

To facilitate Android Auto use cases, the Navigation SDK supports generation of maneuver and lane guidance icons. These icons fit the image sizing guidance of the Android Auto Car App library which recommends targeting a 500 x 74 dp bounding box. See setsLaneImage and CarIcon in the Android reference documentation for details.
Icon generation example
NavigationUpdatesOptions options =
  NavigationUpdatesOptions.builder()
             .setNumNextStepsToPreview(numNextStepsToPreview)
             .setGeneratedStepImagesType(GeneratedStepImagesType.BITMAP)
             .setDisplayMetrics(getResources().getDisplayMetrics())
             .build();
boolean isRegistered =
          navigator.registerServiceForNavUpdates(
              getPackageName(),
              NavInfoReceivingService.class.getName(),
              options);
After you enable icon generation, the TurnbyTurn StepInfo object populates the
maneuverBitmap and lanesBitmap fields with the icons.
What's next
- For Android Auto apps: