1. Introduction
The OAuth 2.0 Playground is a web-based tool that helps you test Google OAuth 2.0 flows without writing any code. This codelab will show you how to setup your Google Cloud project, get credentials, initiate authorization flow with OAuth 2.0 Playground and make your first call to one of the Google Health API endpoints.
What you'll learn
- How to set up a client ID within the Google Cloud console.
- How to go through Google OAuth 2.0 authorization flow to get an access token and refresh token using OAuth 2.0 Playground.
- How to make calls to Google Health API endpoints using OAuth 2.0 Playground.
What you'll need
- A Google Account
- Fitbit mobile app
- OAuth 2.0 Playground
To set up the Fitbit mobile app:
- In either the Apple App Store or the Google Play Store, search for the Fitbit mobile app and download it.
- Select the app icon.
- Click Sign in with Google.
- Select your Google Account and press the Continue button.
2. Setup Google Cloud project
You will use the Google Cloud console to create a client ID and enable use of the Google Health API.
- Sign in into the Google Cloud console.
- To create a new project:
- Click Select a project from the project picker.
- In the upper right corner, select New Project.
- Enter your Project name.
- Enter your Location (for example, "No organization").
- Click the Create button.
- Select your project.
Enable the Google Health API
- In the upper lefthand corner, click the menu icon:

- Select APIs & Services > Library.
- Search for "Google Health API" and enable it.
Setup your OAuth credentials
If you are not in the Google Cloud console, go to Google Cloud console.
- In the upper lefthand corner, click the menu icon:
- Select APIs & Services > Credentials.
- At the top center, select + Create Credentials > OAuth client ID.
- Click the Configure consent screen button. If the message "Google Auth Platform not configured yet" appears, click the Get Started button.
- In section 1:
- Enter the App name.
- Enter the User support email.
- Click the Next button.
- In section 2:
- Select External.
- Click the Next button.
- In section 3:
- Enter your email address in the Contact Information field.
- Click the Next button.
- In section 4:
- Click the checkbox to agree to Google's API Services User Data Policy.
- Click the Create button.
- Navigate to APIs & Services > Credentials and select + Create Credentials > OAuth client ID.
- Choose the application type Web Application.
- Enter the client ID name.
- Leave Authorized JavaScript origins empty.
- Under Authorized redirect URIs, click + Add URI and add the following URIs:
https://www.google.comhttps://developers.google.com/oauthplayground
- Click the Create button.
- The Google Console will show a message that your client ID is created. Either click the Download JSON link to download the client ID and client secret, or write down the values. You won't be able to recover your client's secret afterwards.
- Click OK. You will return to the "OAuth 2.0 Client IDs" page.
- Your client ID will be added to your project. Click the client ID URL to see the details.
Add test users
- On the left pane, select Audience. You should see the "Publishing status" set to Testing, and the "User type" set to External.
- Under the section "Test users", click the + Add users button. Enter the email address for any user whose data you want to retrieve.
- Click the Save button.
Add scopes to the client ID
- On the left pane, select Data Access.
- Click the button Add or remove scopes.
- In the API column, search for "Google Health API". For this codelab we are using the scope
.../auth/googlehealth.activity_and_fitness.readonly - After selecting the scope, press the Update button to return to the Data Access page.
- Click the Save button.
You have finished setting up your client ID.
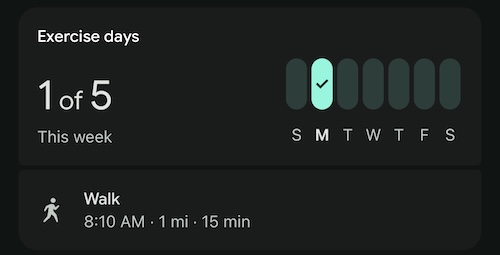
3. Add data to the Fitbit mobile app
For new users to Fitbit, you might not have data in your Fitbit account to query. We're going to manually add an exercise log which we can query through one of the endpoints. To manually record an exercise, follow these steps:
- Open the Fitbit mobile app on your device. Sign into your Fitbit account if needed.
- In the bottom right-hand corner of the screen, tap the + button.
- In the section "Manually log", tap Activity
- Search for the exercise type Walk and select it.
- Enter a start time for today.
- Change the duration to 15 minutes.
- Leave the distance 1.0 mi.
- Tap Add.
- Sync the mobile app to the Fitbit servers by long pressing on the screen and sliding it down. When you release your finger, you should see the mobile app sync.
- In the "Activity" section, you should see your manually logged Walk entry.
4. Authorize in OAuth 2.0 Playground
Go to OAuth 2.0 Playground.
The Google Health API requires that you use your own OAuth credentials with Playground.
- Click OAuth 2.0 Configuration gear icon in the top right.
- Select Use your own OAuth credentials.
- Enter OAuth Client ID and OAuth Client secret you obtained during Google Cloud project setup.
The Playground interface is divided into three main steps we will follow:
- Select & authorize APIs
- Exchange authorization code for tokens
- Send a request to the API
Select & authorize APIs
This is where you choose the API scopes you want to request.
- In Step 1, find Google Health API v4 in the list of APIs and expand it.
- Select
https://www.googleapis.com/auth/googlehealth.activity_and_fitness.readonly. If the scope you need is not displayed in the list, you can enter it manually in "Input your own scopes" field. - Click Authorize APIs.
- A request is sent to Google's OAuth 2.0 authorization endpoint, selected scopes are included in the request, and then you are redirected to the Google Account consent screen.
- Sign in with a test user account you configured in Setup Google Cloud project section (if not already signed in).
- Review the requested permissions, and click Continue to grant access.
When you grant consent, Google redirects you back to the Playground and provides an authorization code to the tool, which is used in the next step.
The Request / Response panel on the right displays the complete HTTP redirection flow.
The response from the initial authorization request is a 302 Found redirect:
HTTP/1.1 302 Found
Location: https://accounts.google.com/o/oauth2/v2/auth?redirect_uri=https%3A%2F%2Fdevelopers.google.com%2Foauthplayground&prompt=consent&response_type=code&client_id=your_client_id&scope=https%3A%2F%2Fwww.googleapis.com%2Fauth%2Fgooglehealth.activity_and_fitness.readonly&access_type=offline
The resulting request redirected back to the Playground contains the authorization code:
GET /oauthplayground/?iss=https://accounts.google.com&code=authorization_code&scope=https://www.googleapis.com/auth/googlehealth.activity_and_fitness.readonly HTTP/1.1
Host: developers.google.com
The authorization code is the alphanumeric value represented by authorization_code between code= and &scope in the GET request URL. In this example, the value is similar to: 4/0AbPOj...
Exchange authorization code for tokens
In this step, the code is exchanged for tokens that allow you to make API requests.
After completing Select & authorize APIs, the Playground automatically populates the authorization code field. To exchange it for tokens:
- Click the Exchange authorization code for tokens button in Step 2.
- The access_token and refresh_token appear in the Request/Response panel on the right.
You should see a response similar to:
{
  "access_token": "ya29.a0AFH6S....",
  "refresh_token_expires_in": 604799,
  "expires_in": 3599,
  "token_type": "Bearer",
  "scope": "https://www.googleapis.com/auth/googlehealth.activity_and_fitness.readonly",
  "refresh_token": "1/og..."
}
About refresh tokens
When you exchange the authorization code, the response may include a refresh_token in addition to the access_token. access_tokens are short-lived (typically 1 hour). When an access_token expires, you must use the refresh_token to obtain a new access_token without requiring the user to sign in or consent again. This is possible because we included access_type=offline in our authorization request.
If you don't receive a refresh_token in the response, it may be because you have already granted consent for this app and scopes. Refresh tokens are typically only issued the first time a user grants consent for your app, or when prompt=consent is added to the authorization URL to force the consent screen to appear even on subsequent authorizations.
The refresh_token is long-lived but can expire or become invalid if it is not used for 6 months, if the user revokes access to your app, or for other reasons. You should securely store refresh_token for future use.
About updating scopes
If your application later needs access to additional Google Health API scopes, you must prompt the user to re-authorize your app and request the complete set of scopes (both existing and new).
To update scopes in your application's authorization request:
- Identify the complete list of Scopes your application needs.
- Modify the
scopeparameter in the authorization URL to include the updated space-separated list of scope values. - Append
prompt=consentto your authentication URI parameters. Whenprompt=consentis included, the consent screen is displayed every time your app requests authorization of scopes, prompting the user to approve the updated list.
Once the user completes consent, you receive a new authorization code that can be exchanged for tokens covering the full set of scopes.
5. Send a request to the API
You can now use your access token to make requests to the Google Health API. In Step 3 in the Playground, configure your HTTP request by specifying the Request URI, HTTP Method, headers, and request body.
- Set HTTP Method to GET.
- Set Request URI to
https://health.googleapis.com/v4/users/me/dataTypes/exercise/dataPoints. - Click Send the request.
The response should look similar to this:
{
  "dataPoints": [
    {
      "name": "users/2515055256096816351/dataTypes/exercise/dataPoints/8896720705097069096",
      "dataSource": {
        "recordingMethod": "MANUAL",
        "platform": "FITBIT"
      },
      "exercise": {
        "interval": {
          "startTime": "2026-02-23T13:10:00Z",
          "startUtcOffset": "-18000s",
          "endTime": "2026-02-23T13:25:00Z",
          "endUtcOffset": "-18000s"
        },
        "exerciseType": "WALKING",
        "metricsSummary": {
          "caloriesKcal": 16,
          "distanceMillimiters": 1609344,
          "steps": "2038",
          "averagePaceSecondsPerMeter": 0.55923407301360051,
          "activeZoneMinutes": "0"
        },
        "exerciseMetadata": {},
        "displayName": "Walk",
        "activeDuration": "900s",
        "exerciseEvents": [
          {
            "eventTime": "2026-02-23T13:10:00Z",
            "eventUtcOffset": "-18000s",
            "exerciseEventType": "START"
          },
          {
            "eventTime": "2026-02-23T13:25:00Z",
            "eventUtcOffset": "-18000s",
            "exerciseEventType": "STOP"
          }
        ],
        "updateTime": "2026-02-24T01:19:22.450466Z"
      }
    },
    {
      "name": "users/2515055256096816351/dataTypes/exercise/dataPoints/5870930690409355408",
      "dataSource": {
        "recordingMethod": "MANUAL",
        "platform": "FITBIT"
      },
      "exercise": {
        "interval": {
          "startTime": "2026-02-23T06:00:00Z",
          "startUtcOffset": "-18000s",
          "endTime": "2026-02-23T06:15:00Z",
          "endUtcOffset": "-18000s"
        },
        "exerciseType": "WALKING",
        "metricsSummary": {
          "caloriesKcal": 17,
          "distanceMillimiters": 1609344,
          "steps": "2038",
          "averagePaceSecondsPerMeter": 0.55923407301360051,
          "averageHeartRateBeatsPerMinute": "81",
          "activeZoneMinutes": "0",
          "heartRateZoneDurations": {
            "lightTime": "900s"
          }
        },
        "exerciseMetadata": {},
        "displayName": "Walk",
        "activeDuration": "900s",
        "exerciseEvents": [
          {
            "eventTime": "2026-02-23T06:00:00Z",
            "eventUtcOffset": "-18000s",
            "exerciseEventType": "START"
          },
          {
            "eventTime": "2026-02-23T06:15:00Z",
            "eventUtcOffset": "-18000s",
            "exerciseEventType": "STOP"
          }
        ],
        "updateTime": "2026-02-23T08:29:39.480437Z"
      }
    }
  ],
  "nextPageToken": ""
}
Many endpoints support query parameters for filtering or pagination. For example, to list exercises within a specific time range, change the Request URI to include a filter parameter:
https://health.googleapis.com/v4/users/me/dataTypes/exercise/dataPoints?filter=exercise.interval.civil_start_time >= "2026-02-22T00:00:00"
Click Send the request again to see filtered results.
6. Congratulations
Congratulations!
You have completed the basic codelab and successfully learned how to use OAuth2 Playground to test OAuth 2.0 authorization and make calls to Google Health API endpoints.
We hope you enjoy building apps that integrate with the Google Health API ecosystem. For more information, explore other Google Health API endpoints in the reference documentation and learn more about Google OAuth 2.0 for Web Server Applications.