1. Introduction
Visual Studio Code (VS Code) and the Rest Client extension by Huachao Mao can allow you to test the Google OAuth consent flow and the Google Health API. This codelab will show you how to setup the Rest Client extension, how to initiate the authorization flow and make your first call to one of the Google Health API endpoints. Afterwards, you can read the Rest Client documentation and the Fitbit documentation to construct the other endpoints in your HTTP project.
If you don't want to use VS Code and the Rest Client, the API calls can be made with curl commands.
What you'll learn
- How to set up VS Code with Rest client extension.
- How to set up a client ID within the Google Cloud console.
- How to go through Google OAuth 2.0 authorization flow to get an access token and refresh token.
- How to make calls to Google Health API endpoints using Rest client.
What you'll need
- Fitbit mobile app
- Visual Studio Code
- Rest Client extension by Huacho Mao.
To set up the Fitbit mobile app:
- In either the Apple App Store or the Google Play Store, search for the Fitbit mobile app and download it.
- Select the app icon.
- Click Sign in with Google
- Select your Google Account and press the Continue button.
To install the Visual Studio tools:
- Download VS Code. Typically, the download contains the executable.
- Start VS Code.
- Install the Rest Client extension by Huachao Mao.
- Click the extension icon
 on the left hand side of the IDE.
 - Search for REST Client by Huachao Mao, and press Install.
- Click the extension icon
2. Setup Google Cloud project
You will use the Google Cloud console to create a client ID and enable use of the Google Health API.
- Sign in into the Google Cloud console.
- To create a new project:
- Click Select a project from the project picker.
- In the upper right corner, select New Project.
- Enter your Project name.
- Enter your Location (for example, "No organization").
- Click the Create button.
- Select your project.
Enable the Google Health API
- In the upper lefthand corner, click the menu icon:

- Select APIs & Services > Library.
- Search for "Google Health API" and enable it.
Setup your OAuth credentials
If you are not in the Google Cloud console, go to Google Cloud console.
- In the upper lefthand corner, click the menu icon:
- Select APIs & Services > Credentials.
- At the top center, select + Create Credentials > OAuth client ID.
- Click the Configure consent screen button. If the message "Google Auth Platform not configured yet" appears, click the Get Started button.
- In section 1:
- Enter the App name.
- Enter the User support email.
- Tap the Next button.
- In section 2:
- Select External.
- Click the Next button.
- In section 3:
- Enter your email address in the Contact Information field.
- Click the Next button.
- In section 4:
- Click the checkbox to agree to Google's API Services User Data Policy.
- Click the Create button.
- In the metrics section, press the button Create OAuth client.
- Choose the application type Web Application.
- Enter the client ID name.
- Leave Authorized JavaScript origins empty.
- Under Authorized redirect URIs, press + Add URI button. Enter "https://www.google.com" as your redirect URI.
- Click the Create button.
- The Google Console will show a message that your client ID is created. Either click the Download JSON link to download the client ID and client secret, or write down the values. You won't be able to recover your client's secret afterwards.
- Click OK. You will return to the "OAuth 2.0 Client IDs" page.
- Your client ID will be added to your project. Click the client ID URL to see the details.
Add test users
- On the left pane, select Audience. You should see the "Publishing status" set to Testing, and the "User type" set to External.
- Under the section "Test users", click the + Add users button. Enter the email address for any user whose data you want to retrieve.
- Click the Save button.
Add scopes to the client ID
- On the left pane, select Data Access.
- Click the button Add or remove scopes.
- In the API column, search for "Google Health API". For this codelab we are using the scope
.../auth/googlehealth.activity_and_fitness.readonly - After selecting the scope, press the Update button to return to the Data Access page.
- Click the Save button.
You have finished setting up your client ID.
3. Create the authorization flow
- Open the VS Code app on your machine.
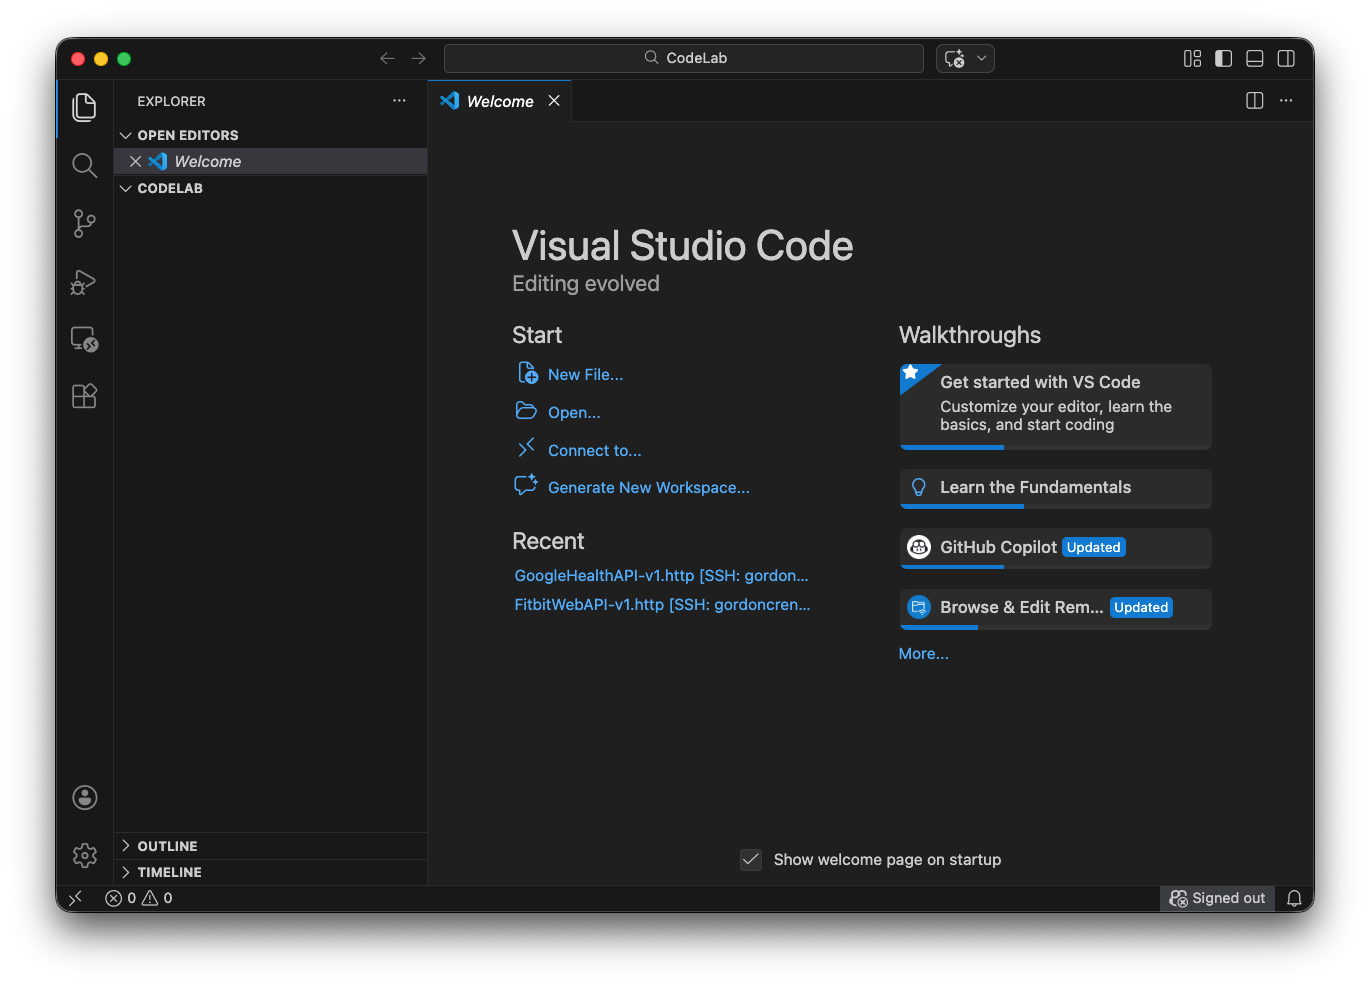
- On the Welcome screen, select Open.
- Select a folder to create this project and press Open. Your screen should look something similar to this, showing your folder or project name in the Explorer.
- From the main menu, choose File -> New Text file.
- Save the file to give it a name. From the main menu, choose File -> Save As -> Codelab.http. This should place the file in your project. The extension of the file needs to be either .http or .rest. For this codelab, we are using .http.
Throughout this project, we will use several values multiple times. Those values are:
| The client ID value from the Google console. |
| The client's secret value from the Google console. |
| An endpoint in your app which processes the authorization code. For the codelab, we are using https://www.google.com |
| The access token created for the user once the consent flow has finished. |
| The refresh token created for the user once the consent flow has finished. |
Add the following code which defines the variables used with this project. They should be located at the top of the file Codelab.http. Fill in the values for the client_id and secret.
### File Variables for the Codelab
@client_id =
@secret =
@redirect_uri = https://www.google.com
@accessToken={{user.response.body.access_token}}
@refreshToken={{user.response.body.refresh_token}}
The authorization URL, used to initiate the consent flow, will be sent to each user whose data you want to access. To build the authorization URL, we need to know what the Google OAuth endpoint is and use the query parameters to specify the client ID, the scopes we want access to, and where to redirect the user when they consent to the scopes. The full documentation for building the Google authorization string can be found in the documentation.
Google's OAuth 2.0 endpoint is at https://accounts.google.com/o/oauth2/v2/auth. This endpoint is accessible only over HTTPS. Plain HTTP connections are refused.
The Google authorization server supports many query string parameters for web server applications to customize the authorization flow. We will be using the following required query parameters: client_id, redirect_uri, response_type, and scope. The documentation provides a list of all query parameters and their description.
The values for the query parameters are
| The client ID value from the Google console |
| An endpoint in your app which processes the authorization code. For the codelab, use https://www.google.com |
|
|
| The scopes come from the Google console with the syntax https://www.googleapis.com followed by the scope name. For example, https://www.googleapis.com/auth/googlehealth.activity_and_fitness.readonly. |
After the variables, write our authorization URL as shown. The parameters defined at the top of the project cannot be used in the authorization string. Therefore, we need to include the values for the client_id and the redirect_uri. Replace the string client-id with your client ID.
### Google Health API Rest Client Example

### Authorization String
https://accounts.google.com/o/oauth2/v2/auth?client_id=client-id&redirect_uri=https://www.google.com&response_type=code&access_type=offline&scope=https://www.googleapis.com/auth/googlehealth.activity_and_fitness.readonly
When a user grants consent, Google provides an authorization code that you exchange for an access token by calling Google's token endpoint. Add the following definition for calling the token endpoint to Codelab.http below the authorization string. You will replace authorization-code with an authorization code in the next step.
### AUTHORIZATION ENDPOINTS
######################################################################
# @name user
POST https://oauth2.googleapis.com/token
Content-Type: application/x-www-form-urlencoded

code=authorization-code&client_id={{client_id}}&client_secret={{secret}}&redirect_uri={{redirect_uri}}&grant_type=authorization_code
@name user references the current user whose data you're accessing.
4. Authorize an account and obtain tokens
Now we will walk through the authorization flow to obtain authorization tokens.
The authorization string in Codelab.http is used to initiate Google's browser-based consent flow. The Rest Client extension may display a Send Request link for this URL. Don't use Send Request for this specific URL. Instead copy and paste it into your browser, or use Ctrl+Click (Windows/Linux) or Cmd+Click (Mac) in VS Code to open it in your default browser.
https://accounts.google.com/o/oauth2/v2/auth?client_id=client-id&redirect_uri=https://www.google.com&response_type=code&access_type=offline&scope=https://www.googleapis.com/auth/googlehealth.activity_and_fitness.readonly
- You will be asked to sign into your Google Account. You must sign in using one of the test user accounts you configured in the Add test users section.
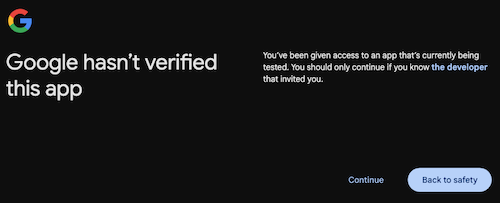
- You may be presented with a message stating the app is not verified. This is because the app has not been published. Press "Continue".
- The consent page lists the scopes being requested. The user has the opportunity to select whichever scopes they want to share with this app. Click "Continue".
After consenting to share the scopes requested, you are redirected to the redirect_uri you specified (in this codelab, https://www.google.com). Google appends an authorization code and other parameters to the redirect_uri, so the URL in your browser's address bar should look something like this:
https://www.google.com/?code=4/0Ab32j93oyGWqaXE112sP1IKmh3kV1fE4tcHIMXYJQYWgNEtAa_0-YsfkS9Ekj3Be89u3fw&scope=https://www.googleapis.com/auth/googlehealth.activity_and_fitness.readonly
The authorization code is the alphanumeric value between "code=" and "&scope". In the above example the value is:
4/0Ab32j93oyGWqaXE112sP1IKmh3kV1fE4tcHIMXYJQYWgNEtAa_0-YsfkS9Ekj3Be89u3fw
In a production app, your server would parse this from the URL parameters. For this codelab, copy the authorization code from the URL in your browser.
Now, exchange this authorization code for an access_token and refresh_token. In Codelab.http, replace authorization-code in the POST /token request body with the authorization code you copied.
POST https://oauth2.googleapis.com/token
Content-Type: application/x-www-form-urlencoded

code=authorization-code&client_id={{client_id}}&client_secret={{secret}}&redirect_uri={{redirect_uri}}&grant_type=authorization_code
Click the Send Request link just above the line POST https://oauth2.googleapis.com/token.
The response should look similar to this:
{
  "access_token": "ya29.a0ATi6K2uasci7FyyIClNLtQou6z...",
  "expires_in": 3599,
  "refresh_token": "1//05EuqYpEXjJCHCgYIA...",
  "scope": "https://www.googleapis.com/auth/googlehealth.activity_and_fitness.readonly",
  "token_type": "Bearer",
  "refresh_token_expires_in": 604799
}
When you receive this response, Rest Client automatically populates the @accessToken and @refreshToken variables defined at the top of Codelab.http for use in subsequent requests.
About refresh tokens
When you exchange the authorization code, the response may include a refresh_token in addition to the access_token. access_tokens are short-lived (typically 1 hour). When an access_token expires, you must use the refresh_token to obtain a new access_token without requiring the user to sign in or consent again. This is possible because we included access_type=offline in our authorization request.
If you don't receive a refresh_token in the response, it is likely because you have already granted consent for this app and its requested scopes. By default, Google only issues a refresh_token the first time a user authorizes your application.
To obtain a new refresh_token on subsequent requests, or when you need to update a user's granted scopes, append prompt=consent to your authorization URL. This parameter forces the consent screen to appear on every authorization attempt, even if all requested scopes were previously granted. For more details, see Update scopes.
The refresh_token is long-lived but can expire or become invalid if it is not used for 6 months, if the user revokes access to your app, or for other reasons. You should securely store refresh_token for future use.
For more details, see Refreshing an access token (offline access).
5. Add data to the Fitbit mobile app
For new users to Fitbit, you might not have data in your Fitbit account to query. We're going to manually add an exercise log which we can query through one of the endpoints. To manually record an exercise, follow these steps:
- Open the Fitbit mobile app on your device. Sign into your Fitbit account if needed.
- In the bottom right-hand corner of the screen, tap the + button.
- In the section "Manually log", tap Activity
- Search for the exercise type Walk and select it.
- Enter a start time for today.
- Change the duration to 15 minutes.
- Leave the distance 1.0 mi.
- Tap Add.
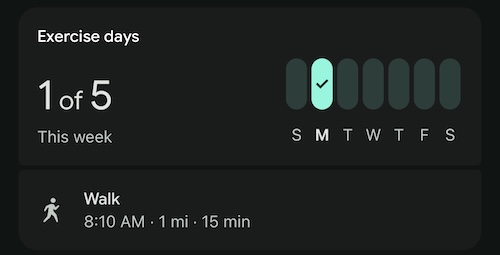
- Sync the mobile app to the Fitbit servers by long pressing on the screen and sliding it down. When you release your finger, you should see the mobile app sync.
- In the "Activity" section, you should see your manually logged Walk entry.
6. Retrieve data using the list method
To call the list method, add the following code to Codelab.http, just below the /token endpoint.
### users.dataTypes.dataPoints
#####################################################

### LIST exercise
GET https://health.googleapis.com/v4/users/me/dataTypes/exercise/dataPoints
Authorization: Bearer {{accessToken}}
Accept: application/json
This code calls the list endpoint to display the steps recorded by the user in their Fitbit account. The step count for every minute will be returned in the response, similarly to the Fitbit Web API v1 Activity Intraday endpoint.
To execute the call, press the Send Request link for the GET endpoint. Your response should look similar to this:
{
  "dataPoints": [
    {
      "name": "users/2515055256096816351/dataTypes/exercise/dataPoints/8896720705097069096",
      "dataSource": {
        "recordingMethod": "MANUAL",
        "platform": "FITBIT"
      },
      "exercise": {
        "interval": {
          "startTime": "2026-02-23T13:10:00Z",
          "startUtcOffset": "-18000s",
          "endTime": "2026-02-23T13:25:00Z",
          "endUtcOffset": "-18000s"
        },
        "exerciseType": "WALKING",
        "metricsSummary": {
          "caloriesKcal": 16,
          "distanceMillimiters": 1609344,
          "steps": "2038",
          "averagePaceSecondsPerMeter": 0.55923407301360051,
          "activeZoneMinutes": "0"
        },
        "exerciseMetadata": {},
        "displayName": "Walk",
        "activeDuration": "900s",
        "exerciseEvents": [
          {
            "eventTime": "2026-02-23T13:10:00Z",
            "eventUtcOffset": "-18000s",
            "exerciseEventType": "START"
          },
          {
            "eventTime": "2026-02-23T13:25:00Z",
            "eventUtcOffset": "-18000s",
            "exerciseEventType": "STOP"
          }
        ],
        "updateTime": "2026-02-24T01:19:22.450466Z"
      }
    },
    {
      "name": "users/2515055256096816351/dataTypes/exercise/dataPoints/5870930690409355408",
      "dataSource": {
        "recordingMethod": "MANUAL",
        "platform": "FITBIT"
      },
      "exercise": {
        "interval": {
          "startTime": "2026-02-23T06:00:00Z",
          "startUtcOffset": "-18000s",
          "endTime": "2026-02-23T06:15:00Z",
          "endUtcOffset": "-18000s"
        },
        "exerciseType": "WALKING",
        "metricsSummary": {
          "caloriesKcal": 17,
          "distanceMillimiters": 1609344,
          "steps": "2038",
          "averagePaceSecondsPerMeter": 0.55923407301360051,
          "averageHeartRateBeatsPerMinute": "81",
          "activeZoneMinutes": "0",
          "heartRateZoneDurations": {
            "lightTime": "900s"
          }
        },
        "exerciseMetadata": {},
        "displayName": "Walk",
        "activeDuration": "900s",
        "exerciseEvents": [
          {
            "eventTime": "2026-02-23T06:00:00Z",
            "eventUtcOffset": "-18000s",
            "exerciseEventType": "START"
          },
          {
            "eventTime": "2026-02-23T06:15:00Z",
            "eventUtcOffset": "-18000s",
            "exerciseEventType": "STOP"
          }
        ],
        "updateTime": "2026-02-23T08:29:39.480437Z"
      }
    }
  ],
  "nextPageToken": ""
}
Many endpoints support query parameters for filtering or pagination. For example, exercise supports the filter interval.civil_start_time. Add the following request to Codelab.http to list exercises within a specific time range:
### LIST exercise >= civil start time
GET https://health.googleapis.com/v4/users/me/dataTypes/exercise/dataPoints?filter=exercise.interval.civil_start_time >= "2026-02-22T00:00:00"
Authorization: Bearer {{accessToken}}
Accept: application/json
7. Congratulations
Congratulations!
You have completed the basic codelab and successfully learned how to use Visual Studio Code and the Rest Client extension to test OAuth 2.0 authorization and make calls to Google Health API endpoints. From here, you can add the additional endpoints just as you did at the beginning of the section Retrieve Data using the List method.
We hope you enjoy building apps that integrate with the Google Health API ecosystem. For more information, explore other Google Health API endpoints in the reference documentation and learn more about Google OAuth 2.0 for Web Server Applications.