
1. Before you begin
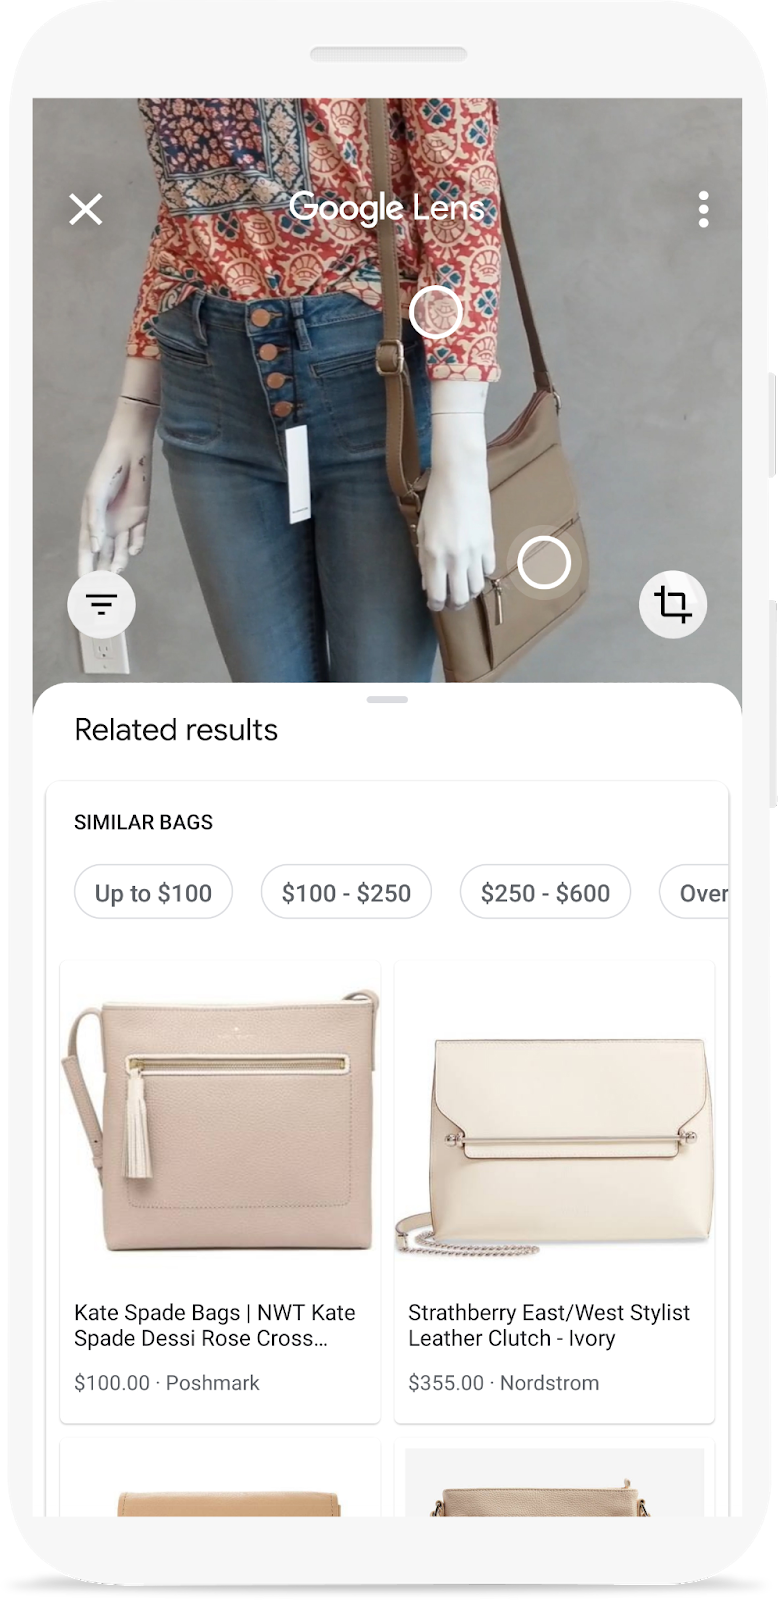
Have you seen the Google Lens demo, where you can point your phone camera to an object and find where you can buy it online? If you want to learn how you can add the same feature to your app, then this codelab is for you. It is part of a learning pathway that teaches you how to build a product image search feature into a mobile app.
In this codelab, you will learn how to call a backend built with Vision API Product Search from a mobile app. This backend can take a query image and search for visually similar products from a product catalog.
You can learn about the remaining steps of building a visual product search feature, including how to use ML Kit Object Detection and Tracking to detect objects in the query image and let users choose which product they want to search for, in the learning pathway.
What you'll build
|
|
What you'll learn
- How to call and parse the response of Vision API Product Search APIs from an Android app
What you'll need
- A recent version of Android Studio (v4.1.2+)
- Android Studio Emulator or a physical Android device
- The sample code
- Basic knowledge of Android development in Kotlin
This codelab is focused on Vision API Product Search. Non-relevant concepts and code blocks are not explored and are provided for you to simply copy and paste.
2. About Vision API Product Search
Vision API Product Search is a feature in Google Cloud that allows users to search for visually similar products from a product catalog. Retailers can create products, each containing reference images that visually describe the product from a set of viewpoints. You can then add these products to product sets (i.e. product catalog). Currently Vision API Product Search supports the following product categories: homegoods, apparel, toys, packaged goods, and general.
When users query the product set with their own images, Vision API Product Search applies machine learning to compare the product in the user's query image with the images in the retailer's product set, and then returns a ranked list of visually and semantically similar results.
3. Download and run the starter app
Download the Code
Click the following link to download all the code for this codelab:
Unpack the downloaded zip file. This will unpack a root folder (odml-pathways-main) with all of the resources you will need. For this codelab, you will only need the sources in the product-search/codelab2/android subdirectory.
The codelab2 subdirectory in the odml-pathways repository contains two directories:
 starter—Starting code that you build upon for this codelab.
- final—Completed code for the finished sample app.
The starter app here is the one that you have built in the Detect objects in images to build a visual product search: Android codelab. It uses ML Kit Object Detection and Tracking to detect objects from an image and show them on the screen.
Import the app into Android Studio
Start by importing the starter app into Android Studio.
Go to Android Studio, select Import Project (Gradle, Eclipse ADT, etc.) and choose the starter folder from the source code that you have downloaded earlier.
Run the starter app
Now that you have imported the project into Android Studio, you are ready to run the app for the first time. Connect your Android device via USB to your host or Start the Android Studio emulator, and click Run (  ) in the Android Studio toolbar.
(If this button is disabled, make sure you import only starter/app/build.gradle, not the entire repository.)
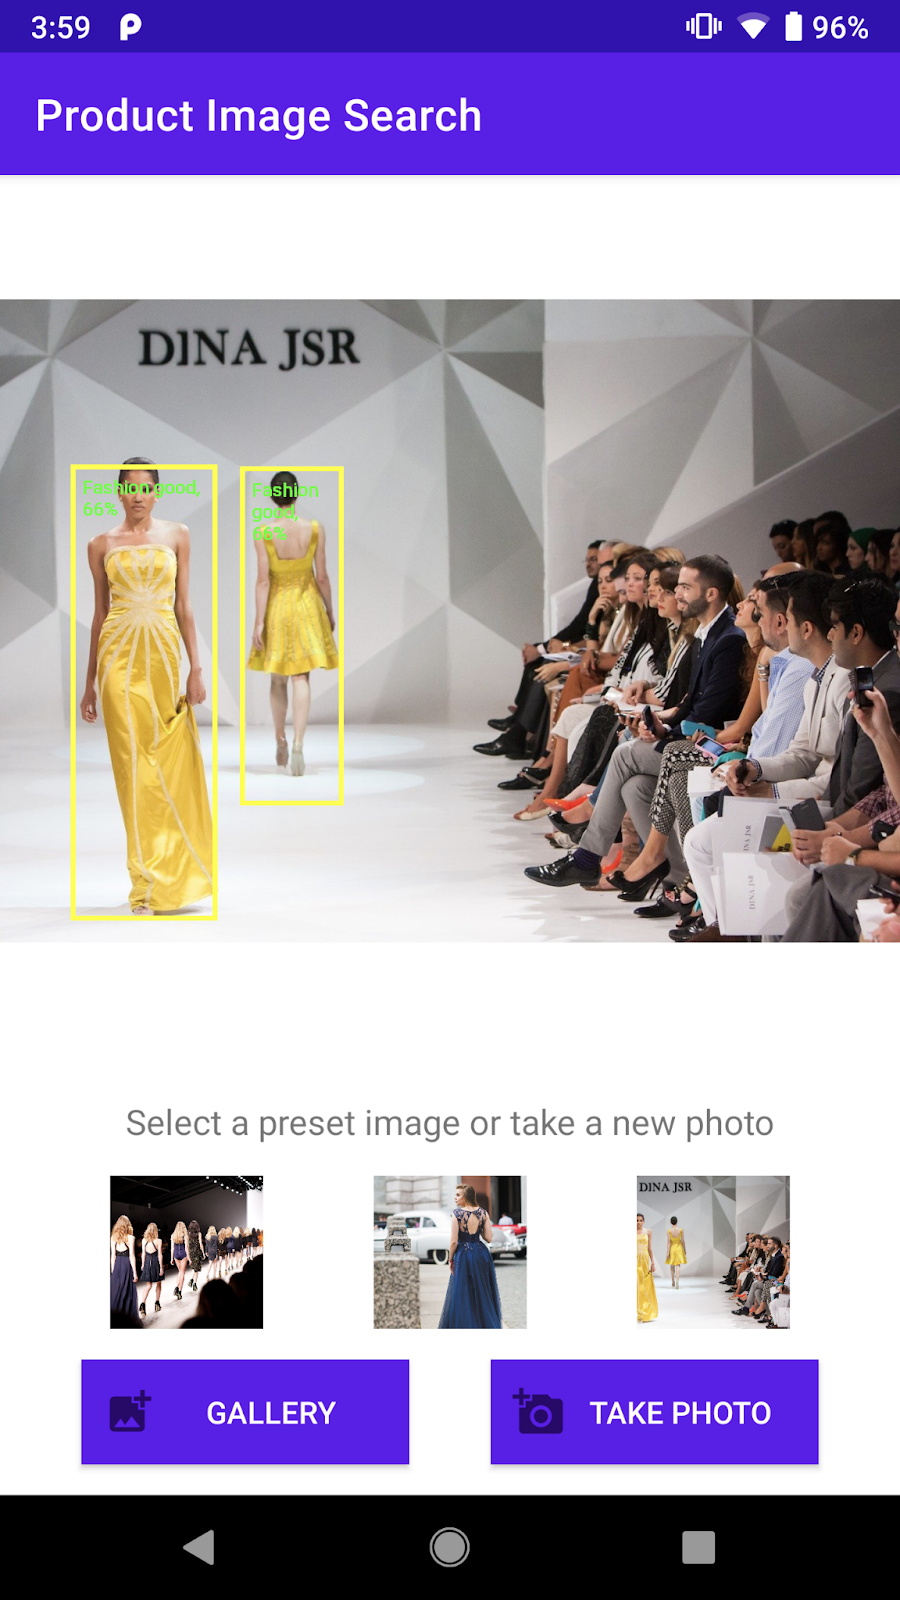
Now the app should have launched on your Android device. It already has the object detection capability: detecting fashion items from the image and showing you where they are. Try with the preset photos to confirm.
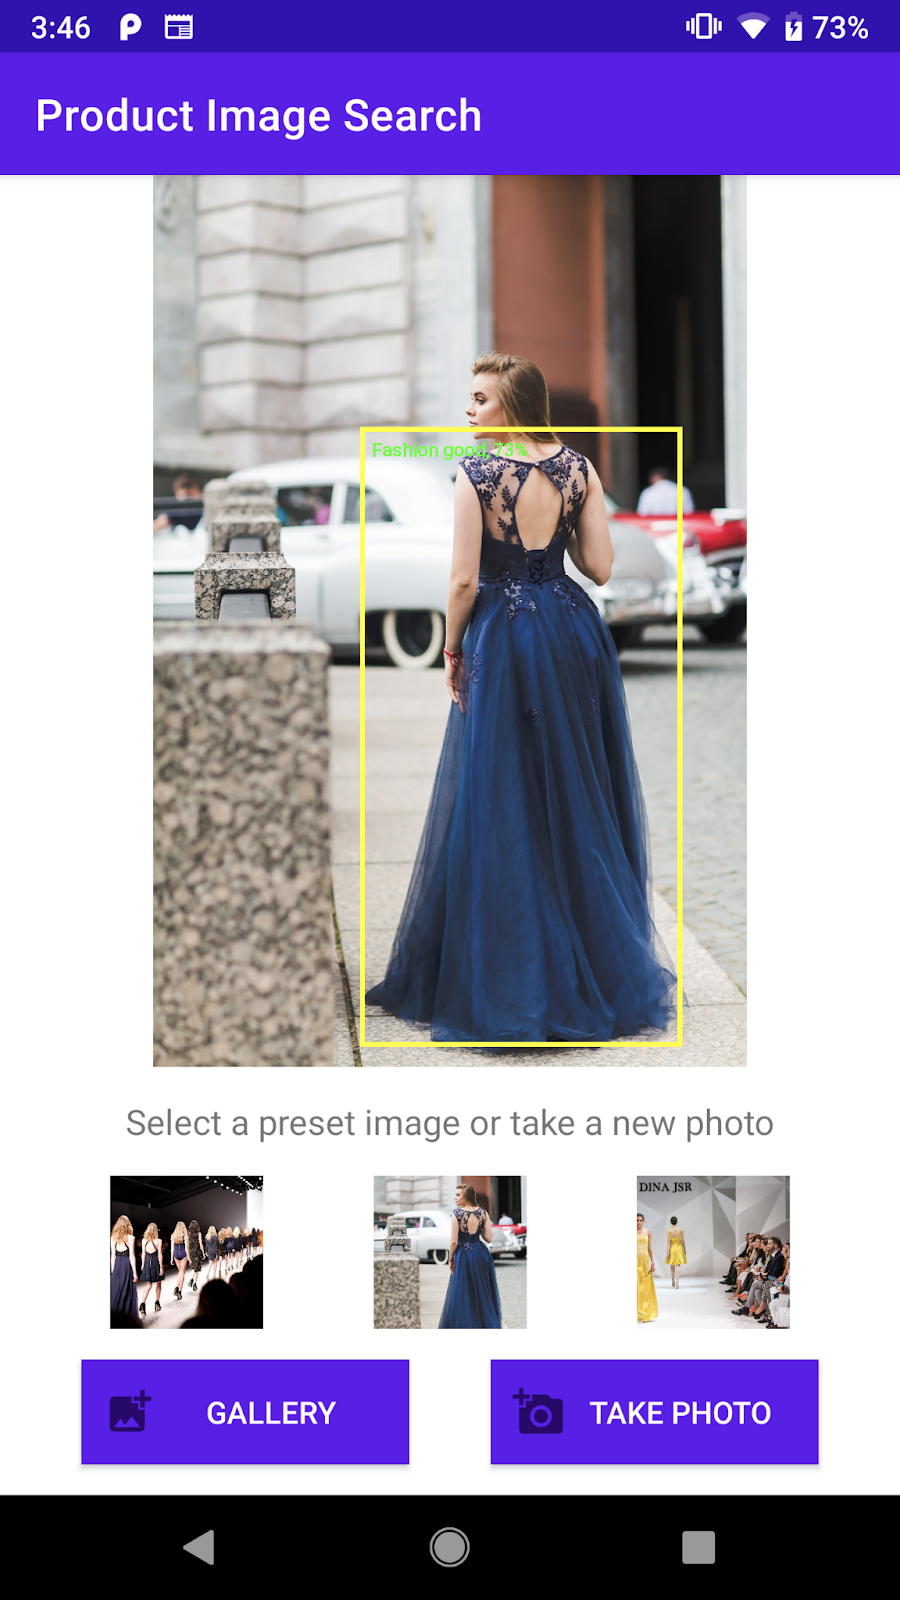
Screenshot of the starter app which can detect objects in an image
Next, you will extend the app to send the detected objects to the Vision API Product Search backend and show the search results on the screen.
4. Handle object selection
Allow users to tap on a detected object to select
Now you'll add code to allow users to select an object from the image and start the product search. The starter app already has the capability to detect objects in the image. It's possible that there are multiple objects in the image, or the detected object only occupies a small portion of the image. Therefore, you need to have the user tap on one of the detected objects to indicate which object they want to use for product search.
A screenshot of the fashion items detected from the image
To keep the codelab simple and focused on machine learning some boilerplate Android code has been implemented in the starter app to help you detect which object the user has tapped on. The view that displays the image in the main activity (ObjectDetectorActivity) is actually a custom view (ImageClickableView) that extends Android OS's default ImageView. It implements some convenient utility methods, including:
fun setOnObjectClickListener(listener: ((objectImage: Bitmap) -> Unit))This is a callback to receive the cropped image that contains only the object that the user has tapped on. You will send this cropped image to the product search backend.
Add code to handle a user tapping on the detected objects.
Go to the initViews method in the ObjectDetectorActivity class and add these lines at the end of the method: (Android Studio will tell you that it cannot find the startProductImageSearch method. Don't worry, you'll implement it a bit later.)
// Callback received when the user taps on any of the detected objects.
ivPreview.setOnObjectClickListener { objectImage ->
    startProductImageSearch(objectImage)
}
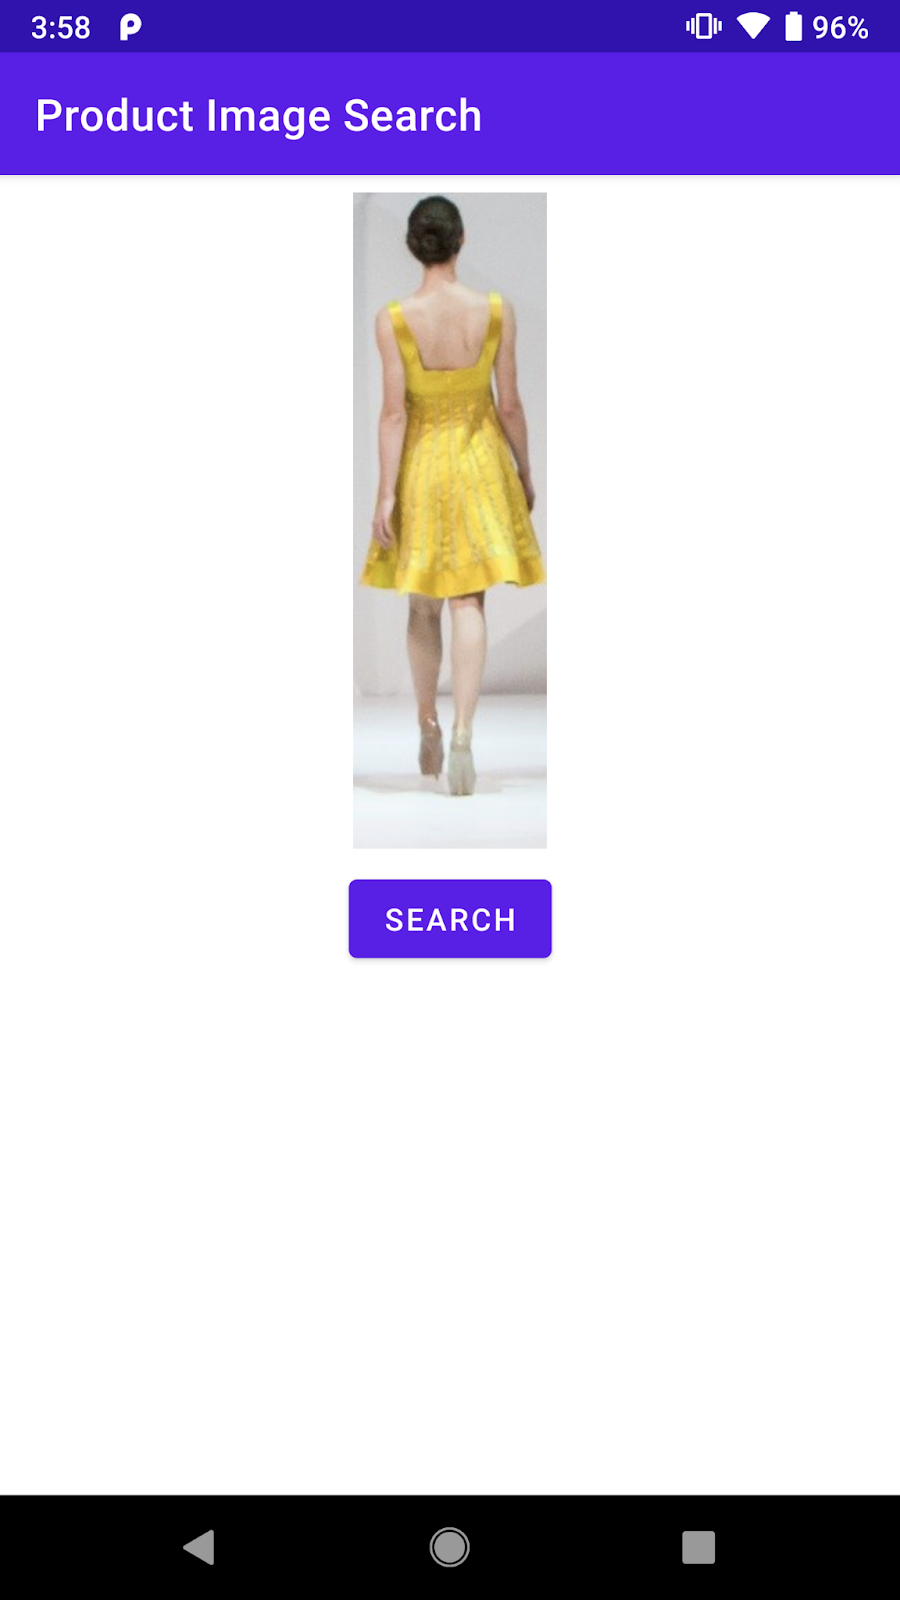
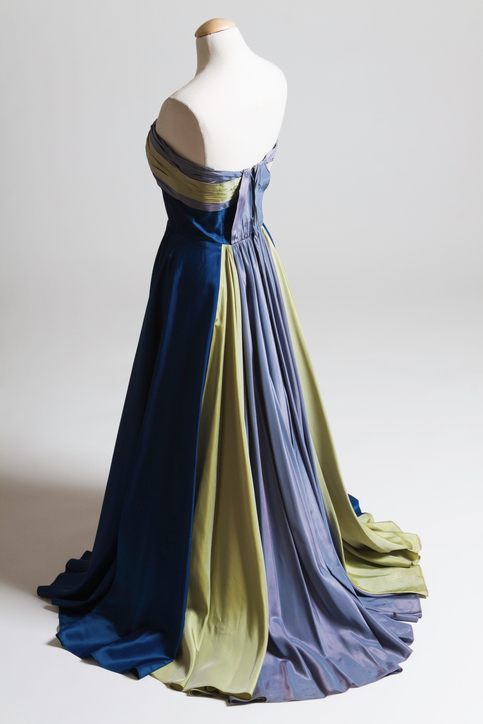
The onObjectClickListener is called whenever the user taps on any of the detected objects on the screen. It receives the cropped image that contains only the selected object. For example, if the user taps on the person wearing the dress on the right, the listener will be triggered with objectImage as below.
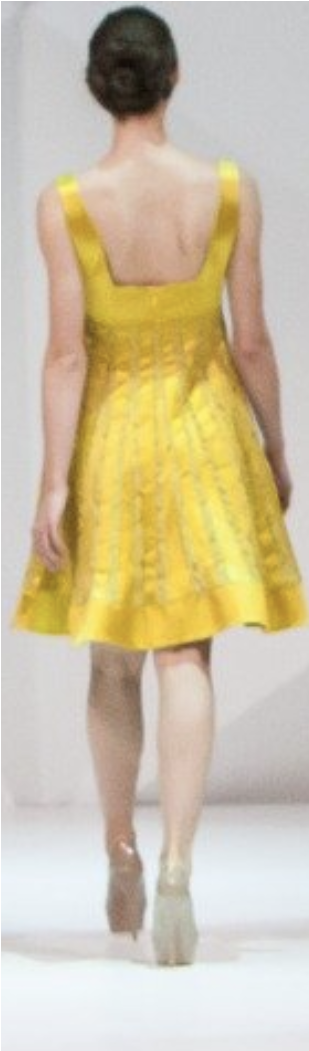
An example of the cropped image passed to the onObjectClickListener
Send the cropped image to the product search activity
Now you'll implement the logic of sending the query image to the Vision API Product Search backend in a separated activity (ProductSearchActivity).
All UI components have been implemented in advance so you can focus on writing the code to communicate with the product search backend.
A screenshot of the UI components on the ProductSearchActivity
Add code to send the object image that the user has selected to the ProductSearchActivity.
Go back to Android Studio and add this startProductImageSearch method to the ObjectDetectorActivity class:
private fun startProductImageSearch(objectImage: Bitmap) {
    try {
        // Create file based Bitmap. We use PNG to preserve the image quality
        val savedFile = createImageFile(ProductSearchActivity.CROPPED_IMAGE_FILE_NAME)
        objectImage.compress(Bitmap.CompressFormat.PNG, 100, FileOutputStream(savedFile))

        // Start the product search activity (using Vision Product Search API.).
        startActivity(
            Intent(
                    this,
                    ProductSearchActivity::class.java
            ).apply {
                // As the size limit of a bundle is 1MB, we need to save the bitmap to a file
                // and reload it in the other activity to support large query images.
                putExtra(
                    ProductSearchActivity.REQUEST_TARGET_IMAGE_PATH,
                    savedFile.absolutePath
                )
            })
    } catch (e: Exception) {
        // IO Exception, Out Of memory ....
        Toast.makeText(this, e.message, Toast.LENGTH_SHORT).show()
        Log.e(TAG, "Error starting the product image search activity.", e)
    }
}
The code snippet does 3 things:
- Takes the cropped image and serializes it to a PNG file.
- Starts the
ProductSearchActivityto execute the product search sequence. - Includes the cropped image URI in the start-activity intent so that
ProductSearchActivitycan retrieve it later to use as the query image.
There are a few things to keep in mind:
- The logic for detecting objects and querying the backend has been split into 2 activities only to make the codelab easier to understand. It's up to you to decide how to implement them in your app.
- You need to write the query image into a file and pass the image URI between activities because the query image can be larger than the 1MB size limit of an Android intent.
- You can store the query image in PNG because it's a lossless format.
Retrieve the query image in the product search activity
In the ProductSearchActivity, the code to retrieve the query image and display it on the screen has already been implemented in the starter app.
Go to the onCreate method and confirm this code is already there:
// Receive the query image and show it on the screen
intent.getStringExtra(REQUEST_TARGET_IMAGE_PATH)?.let { absolutePath ->
    viewBinding.ivQueryImage.setImageBitmap(BitmapFactory.decodeFile(absolutePath))
}
Run the app
Now click Run ( ) in the Android Studio toolbar.
Once the app loads, tap any preset images, and select one of the detected objects.
Confirm that the ProductSearchActivity shows up with the image that you tapped on. The Search button doesn't do anything yet but we will implement it next.
You should see a similar screen after tapping on one of the detected objects.
5. Explore the product search backend
Build the product image search backend
This codelab requires a product search backend built with Vision API Product Search. There are two options to achieve this:
Option 1: Use the demo backend that has been deployed for you
You can proceed with this codelab by using the product search backend that Google has already deployed for you. The demo backend can be replicated by following the Vision API Product Search quickstart.
Option 2: Create your own backend by following the Vision API Product Search quickstart
This option is recommended for those who want to learn in-depth about how to build a product search backend so that you can build one for your own product catalog later. You need to have:
- A Google Cloud account with billing enabled. (It can be a free trial account.)
- Some knowledge about Google Cloud concepts, including projects, service accounts, etc.
You can learn how to do this later in the learning pathway.
Learn the important concepts
You will come across these concepts when interacting with the product search backend:
- Product Set: A product set is a simple container for a group of products. A product catalog can be represented as a product set and its products.
- Product: After you have created a product set, you can create products and add them to the product set.
- Product's Reference Images: They are images containing various views of your products. Reference images are used to search for visually similar products.
- Search for products: Once you have created your product set and the product set has been indexed, you can query the product set using the Cloud Vision API.
Understand the preset product catalog
The product search demo backend used in this codelab was created using the Vision API Product Search and a product catalog of about a hundred shoes and dress images. Here are some images from the catalog:
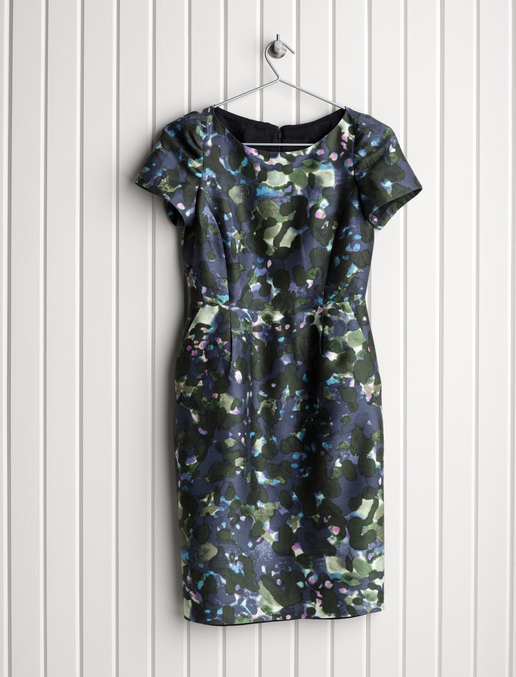

Examples from the preset product catalog
Call the product search demo backend
You can call the Vision API Product Search directly from a mobile app by setting up a Google Cloud API key and restricting access to the API key to just your app.
To keep this codelab simple, a proxy endpoint has been set up that allows you to access the demo backend without worrying about the API key and authentication. It receives the HTTP request from the mobile app, appends the API key, and forwards the request to the Vision API Product Search backend. Then the proxy receives the response from the backend and returns it to the mobile app.
- Proxy endpoint:
https://us-central1-odml-codelabs.cloudfunctions.net/productSearch - Proxy behavior: Append an appropriate authentication header and forward the API requests to the Vision API Product Search backend. For example, an API call to
https://us-central1-odml-codelabs.cloudfunctions.net/productSearch/images:annotatewill be forwarded tohttps://vision.googleapis.com/v1/images:annotate
In this codelab, you'll use two APIs of the Vision API Product Search:
- projects.locations.images.annotate: Sending the query image to the server and receiving a list of products from a preset product catalog that are visually similar to the query image.
- projects.locations.products.referenceImages.get: Getting the URIs of the product images returned in the API call above to display to the users.
6. Implement the API client
Understand the product search workflow
Follow this workflow to conduct product search with the backend:
- Encode the query image as a base64 string
- Call the projects.locations.images.annotate endpoint with the query image
- Receive the product image IDs from the previous API call and send them to the projects.locations.products.referenceImages.get endpoints to get the URIs of the product images in the search result.
Implement the API client class
Now you'll implement code to call the product search backend in a dedicated class called ProductSearchAPIClient. Some boilerplate code has been implemented for you in the starter app:
class ProductSearchAPIClient: This class is mostly empty now but it has some methods that you will implement later in this codelab.fun convertBitmapToBase64(bitmap: Bitmap): Convert a Bitmap instance into its base64 representation to send to the product search backendfun annotateImage(image: Bitmap): Task<List<ProductSearchResult>>: Call the projects.locations.images.annotate API and parse the response.fun fetchReferenceImage(searchResult: ProductSearchResult): Task<ProductSearchResult>: Call the projects.locations.products.referenceImages.get API and parse the response.SearchResult.kt: This file contains several data classes to represent the types returned by the Vision API Product Search backend.
Specify the API configurations
Go to the ProductSearchAPIClient class and you will see some configs of the product search backend already defined:
// Define the product search backend
// Option 1: Use the demo project that we have already deployed for you
const val VISION_API_URL =
    "https://us-central1-odml-codelabs.cloudfunctions.net/productSearch"
const val VISION_API_KEY = ""
const val VISION_API_PROJECT_ID = "odml-codelabs"
const val VISION_API_LOCATION_ID = "us-east1"
const val VISION_API_PRODUCT_SET_ID = "product_set0"
- VISION_API_URL is the API endpoint of Cloud Vision API. As you proceed with the demo backend, set this to the proxy endpoint. However, if you deploy your own backend, you will need to change it to the Cloud Vision API endpoint.
https://vision.googleapis.com/v1. - VISION_API_KEY is the API key of your Cloud Project. As the proxy already handles authentication, you can leave this blank.
- VISION_API_PROJECT_ID is the Cloud project ID.
odml-codelabsis the Cloud project where the demo backend is deployed. - VISION_API_LOCATION_ID is the Cloud location where the product search backend is deployed.
us-east1is where we deployed the demo backend. - VISION_API_PRODUCT_SET_ID is the ID of the product catalog (aka "product set" in the Vision API term) in which you want to search for visually similar products. You can have multiple catalogs in one Cloud project.
product_set0is the preset product catalog of the demo backend.
7. Call the product search API
Explore the API request and response format
You can find similar products to a given image by passing the image's Google Cloud Storage URI, web URL, or base64 encoded string to Vision API Product Search. In this codelab, you'll use the base64 encoded string option, as our query image only exists in the user's device.
You need to send a POST request to the projects.locations.images.annotate endpoint with this request JSON body:
{
  "requests": [
    {
      "image": {
        "content": {base64-encoded-image}
      },
      "features": [
        {
          "type": "PRODUCT_SEARCH",
          "maxResults": 5
        }
      ],
      "imageContext": {
        "productSearchParams": {
          "productSet": "projects/{project-id}/locations/{location-id}/productSets/{product-set-id}",
          "productCategories": [
               "apparel-v2"
          ],
        }
      }
    }
  ]
}
There are some parameters that need to be specified::
- base64-encoded-image: The base64 representation (ASCII string) of the query image's binary data.
- project-id: Your GCP project ID.
- location-id: A valid location identifier.
- product-set-id: The ID for the product set you want to run the operation on.
As your product catalog only contains shoes and dress images, specify the productCategories to be apparel-v2. v2 here means that we use version 2 of the apparel product search machine learning model.
If the request is successful, the server returns a 200 OK HTTP status code and the response in JSON format. The response JSON includes the two following result types:
- productSearchResults - Contains a list of matching products for the entire image.
- productGroupedResults - Contains bounding box coordinates and matching items for each product identified in the image.
As the product has already been cropped from the original image, you will parse the results in the productSearchResults list.
Here are some important fields in the product search result object:
- product.name: The unique identifier of a product in the format of
projects/{project-id}/locations/{location-id}/products/{product_id} - product.score: A value indicating how similar the search result is to the query image. Higher values mean more similarity.
- product.image: The unique identifier of the reference image of a product in the format of
projects/{project-id}/locations/{location-id}/products/{product_id}/referenceImages/{image_id}. You will need to send another API request to projects.locations.products.referenceImages.get to get the URL of this reference image so that it will display on the screen. - product.labels: A list of predefined tags of the product. This is useful if you want to filter the search results to show only one category of clothing, like dresses.
Convert the query image to base64
You need to convert the query image into its base64 string representation and attach the string to the JSON object in the request body.
Go to the ProductSearchAPIClient class, find the empty convertBitmapToBase64 method and replace it with this implementation:
private fun convertBitmapToBase64(bitmap: Bitmap): String {
    val byteArrayOutputStream = ByteArrayOutputStream()
    bitmap.compress(Bitmap.CompressFormat.PNG, 100, byteArrayOutputStream)
    val byteArray: ByteArray = byteArrayOutputStream.toByteArray()
    return Base64.encodeToString(byteArray, Base64.DEFAULT)
}
Implement the API call
Next, craft a product search API request and send it to the backend. You'll use Volley to make the API request, and return the result using the Task API.
Go back to the ProductSearchAPIClient class, find the empty annotateImage method and replace it with this implementation:
fun annotateImage(image: Bitmap): Task<List<ProductSearchResult>> {
    // Initialization to use the Task API
    val apiSource = TaskCompletionSource<List<ProductSearchResult>>()
    val apiTask = apiSource.task

    // Convert the query image to its Base64 representation to call the Product Search API.
    val base64: String = convertBitmapToBase64(image)

    // Craft the request body JSON.
    val requestJson = """
        {
          "requests": [
            {
              "image": {
                "content": """".trimIndent() + base64 + """"
              },
              "features": [
                {
                  "type": "PRODUCT_SEARCH",
                  "maxResults": $VISION_API_PRODUCT_MAX_RESULT
                }
              ],
              "imageContext": {
                "productSearchParams": {
                  "productSet": "projects/${VISION_API_PROJECT_ID}/locations/${VISION_API_LOCATION_ID}/productSets/${VISION_API_PRODUCT_SET_ID}",
                  "productCategories": [
                       "apparel-v2"
                     ]
                }
              }
            }
          ]
        }
    """.trimIndent()

    // Add a new request to the queue
    requestQueue.add(object :
        JsonObjectRequest(
            Method.POST,
            "$VISION_API_URL/images:annotate?key=$VISION_API_KEY",
            JSONObject(requestJson),
            { response ->
                // Parse the API JSON response to a list of ProductSearchResult object/
                val productList = apiResponseToObject(response)

                // Return the list.
                apiSource.setResult(productList)
            },
            // Return the error
            { error -> apiSource.setException(error) }
        ) {
        override fun getBodyContentType() = "application/json"
    }.apply {
        setShouldCache(false)
    })

    return apiTask
}
Show the search result on the UI
Now the API code in ProductSearchAPIClient is ready. Go back to activity ProductSearchActivity to implement the UI code.
The activity already has some boilerplate code that triggers the searchByImage(queryImage: Bitmap) method. Add code to call the backend and show results on the UI into this currently empty method.
apiClient.annotateImage(queryImage)
    .addOnSuccessListener { showSearchResult(it) }
    .addOnFailureListener { error ->
        Log.e(TAG, "Error calling Vision API Product Search.", error)
        showErrorResponse(error.localizedMessage)
    }
The showSearchResult method contains some boilerplate code that parses the API response and shows them on the screen for you.
Run it
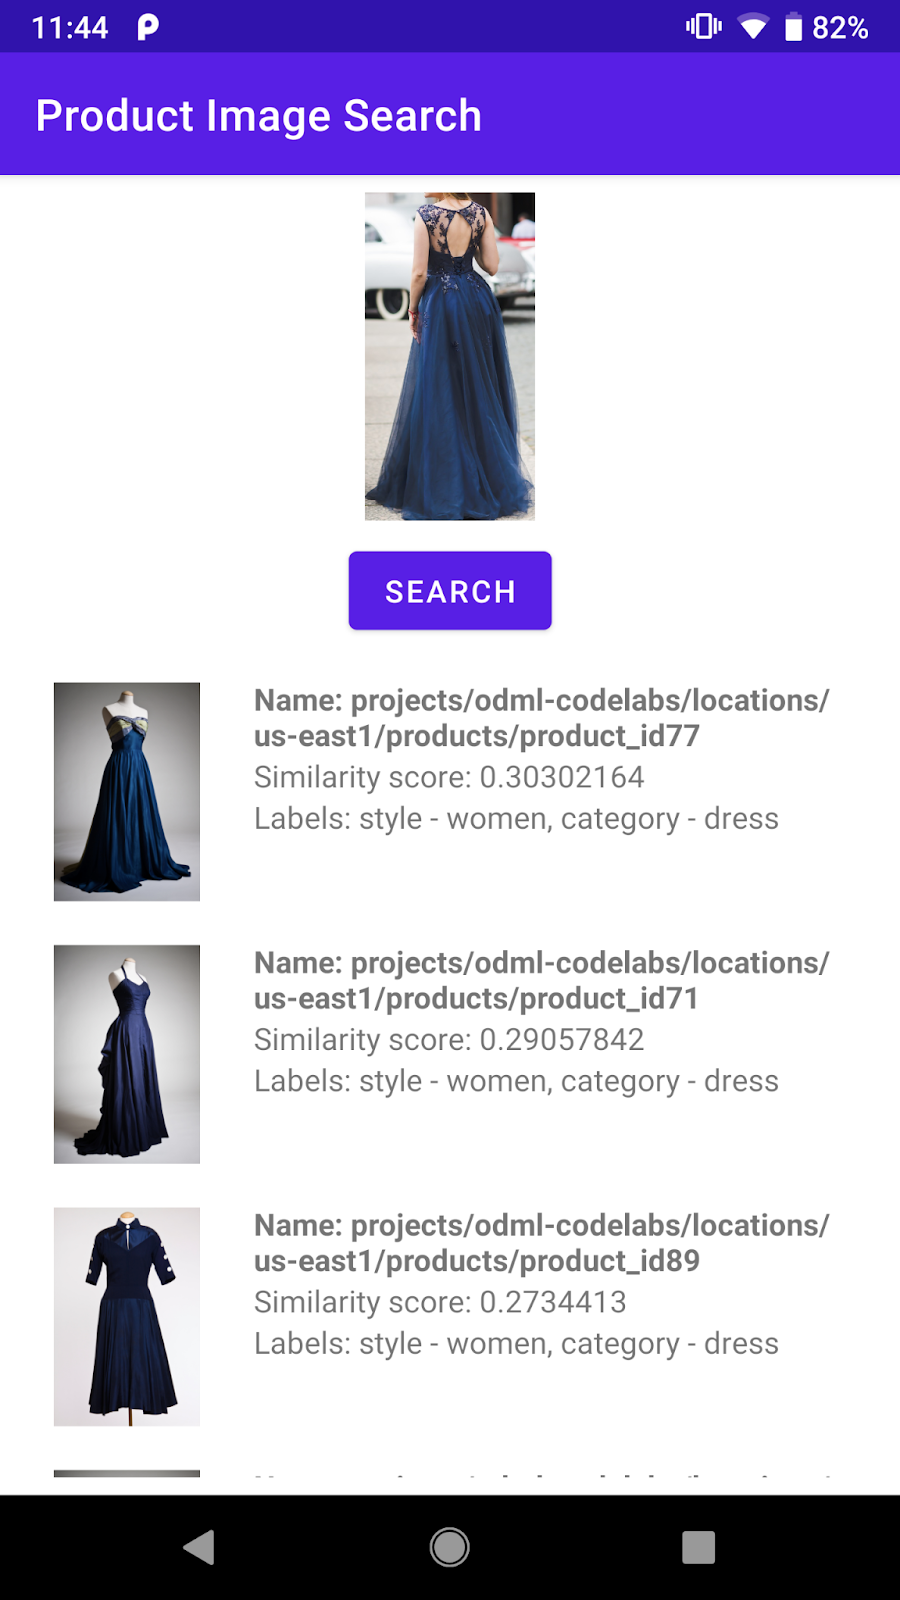
Now click Run ( ) in the Android Studio toolbar. Once the app loads, tap any preset images, select an detected object, tap the Search button and see the search results returned from the backend. You will see something like this:
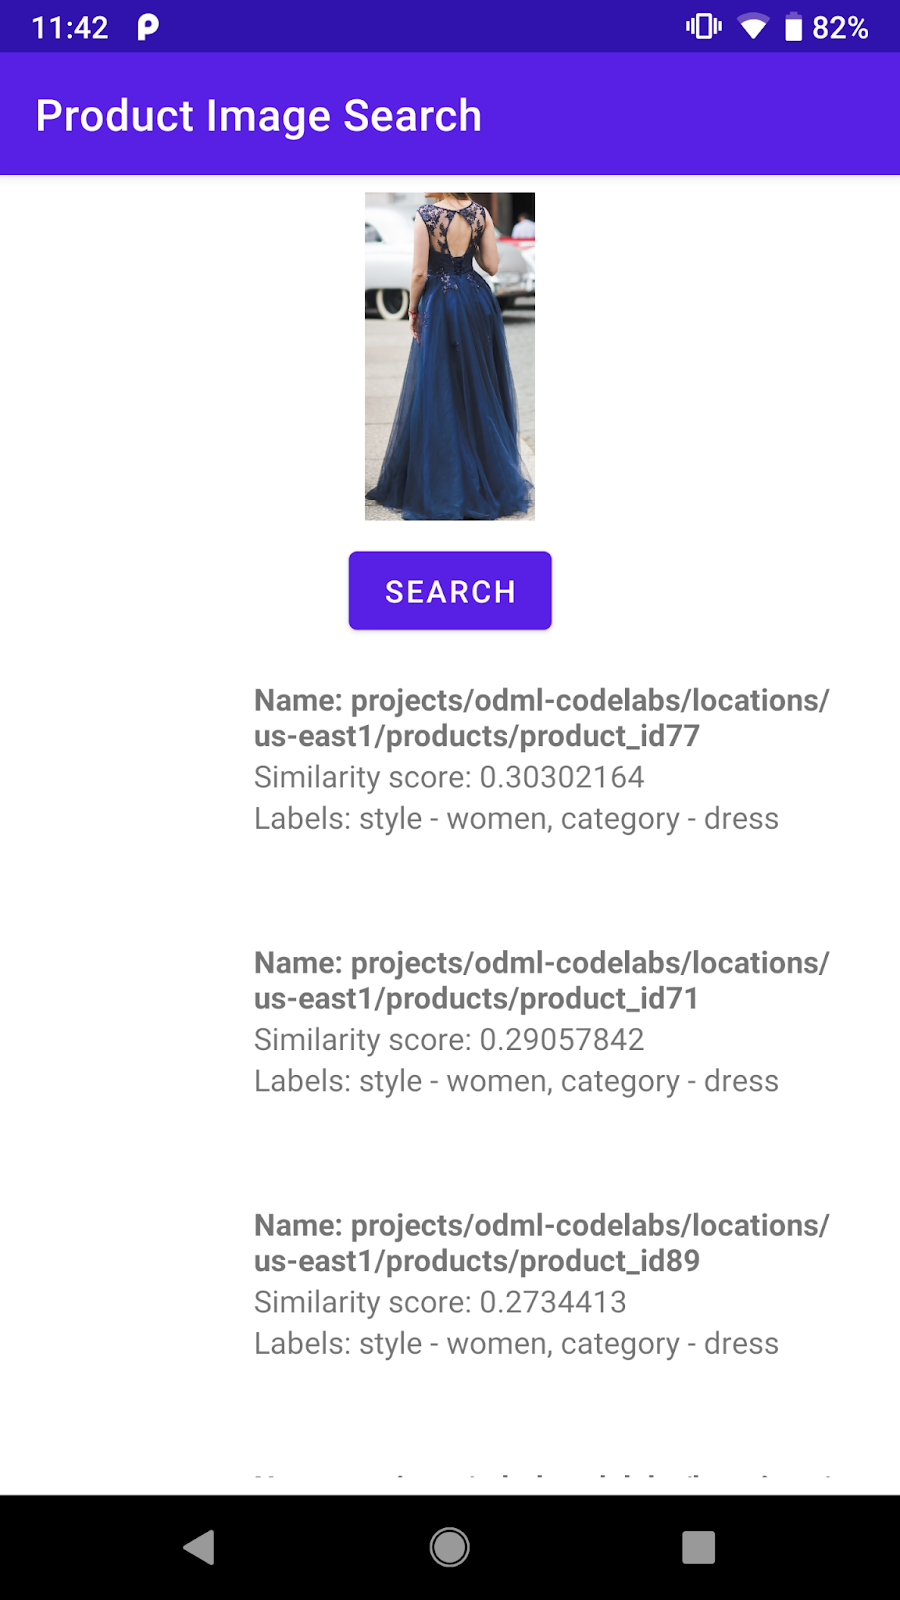
Screenshot of the product search result screen
The backend already returns a list of visually similar products from the preset product catalog. However, you can see that the product image is still empty. It is because the projects.locations.images.annotate endpoint only returns product image ids like projects/odml-codelabs/locations/us-east1/products/product_id77/referenceImages/image77. You will need to make another API call to the projects.locations.products.referenceImages.get endpoint and get the URL of this reference image to show it on the screen.
8. Get the product reference images
Explore the API request and response format
You'll send a GET HTTP request with an empty request body to the projects.locations.products.referenceImages.get endpoint to get the URIs of the product images returned by the product search endpoint.
The HTTP request looks like this:
GET $VISION_API_URL/projects/odml-codelabs/locations/us-east1/products/product_id77/referenceImages/image77?key=$VISION_API_KEY
If the request is successful, the server returns a 200 OK HTTP status code and the response in JSON format as below:
{
  "name":"projects/odml-codelabs/locations/us-east1/products/product_id77/referenceImages/image77",
  "uri":"gs://cloud-ai-vision-data/product-search-tutorial/images/46991e7370ba11e8a1bbd20059124800.jpg"
}
- name: The reference image identifier
- uri: The URI of the image on Google Cloud Storage (GCS).
The reference images of the demo product search backend was set up to have public-read permission. Therefore, you can easily convert the GCS URI to an HTTP URL and display it on the app UI. You only need to replace the gs:// prefix with https://storage.googleapis.com/.
Implement the API call
Next, craft a product search API request and send it to the backend. You'll use Volley and Task API similarly to the product search API call.
Go back to the ProductSearchAPIClient class, find the empty fetchReferenceImage method and replace it with this implementation:
private fun fetchReferenceImage(searchResult: ProductSearchResult): Task<ProductSearchResult> {
    // Initialization to use the Task API
    val apiSource = TaskCompletionSource<ProductSearchResult>()
    val apiTask = apiSource.task

    // Craft the API request to get details about the reference image of the product
    val stringRequest = object : StringRequest(
        Method.GET,
        "$VISION_API_URL/${searchResult.imageId}?key=$VISION_API_KEY",
        { response ->
            val responseJson = JSONObject(response)
            val gcsUri = responseJson.getString("uri")

            // Convert the GCS URL to its HTTPS representation
            val httpUri = gcsUri.replace("gs://", "https://storage.googleapis.com/")

            // Save the HTTPS URL to the search result object
            searchResult.imageUri = httpUri

            // Invoke the listener to continue with processing the API response (eg. show on UI)
            apiSource.setResult(searchResult)
        },
        { error -> apiSource.setException(error) }
    ) {

        override fun getBodyContentType(): String {
            return "application/json; charset=utf-8"
        }
    }
    Log.d(ProductSearchActivity.TAG, "Sending API request.")

    // Add the request to the RequestQueue.
    requestQueue.add(stringRequest)

    return apiTask
}
This method takes a searchResult: ProductSearchResult object which was returned by the product search endpoint and then follows these steps:
- Calls the reference image endpoint to get the GCS URI of the reference image.
- Converts the GCS URI to a HTTP URL.
- Updates the
httpUriproperty of thesearchResultobject with this HTTP URL.
Connect the two API requests
Go back to annotateImage and modify it to get all the reference images' HTTP URLs before returning the ProductSearchResult list to its caller.
Find this line:
// Return the list.
apiSource.setResult(productList)
Then replace it with this implementation:
// Loop through the product list and create tasks to load reference images.
// We will call the projects.locations.products.referenceImages.get endpoint
// for each product.
val fetchReferenceImageTasks = productList.map { fetchReferenceImage(it) }

// When all reference image fetches have completed,
// return the ProductSearchResult list
Tasks.whenAllComplete(fetchReferenceImageTasks)
    // Return the list of ProductSearchResult with product images' HTTP URLs.
    .addOnSuccessListener { apiSource.setResult(productList) }
    // An error occurred so returns it to the caller.
    .addOnFailureListener { apiSource.setException(it) }
The boilerplate code to display the reference images on the screen is already implemented in the ProductSearchAdapter class for you, so you can proceed to rerun the app.
Run it
Now click Run ( ) in the Android Studio toolbar. Once the app loads, tap any preset images, select an detected object, tap the Search button to see the search results, this time with the product images.
Do the product search results make sense to you?
9. Congratulations!
You have learned how to call a Vision API Product Search backend to add product image search capability to your Android app. That is all you need to get it up and running!
As you proceed, you might like to build your own backend using your product catalog. Check out the next codelab in the Product Image Search learning pathway to learn how you can build your own backend and set up the API key to call it from a mobile app.
What we've covered
- How to call the Vision API Product Search backend from an Android app
Next Steps
- Check out the Build a product image search backend with Vision API Product Search codelab to learn how to build your own backend.
- Check out other learning pathways in the On-device Machine Learning website
- Build product search feature into your own Android app