
1. 事前準備
開始編寫程式碼前,請先設定幾項必要條件。
Xcode
本教學課程會使用 Apple 的 Xcode 工具和 Objective-C 語言,建立可在模擬器中執行的簡單 iOS 應用程式。不需要實體裝置,如要取得 Xcode,請前往 https://developer.apple.com/xcode/
CocoaPods
Places SDK for iOS 以 CocoaPods Pod 的形式提供。CocoaPods 是適用於 Swift 和 Objective-C 專案的開放原始碼依附元件管理工具。如果沒有這個工具,請先安裝再繼續操作。您可以在終端機中安裝,如下所示:
sudo gem install cocoapods
如要進一步瞭解 CocoaPods,請參閱 CocoaPods 入門指南。
安裝 SDK
如要安裝 SDK,請在專案目錄中建立 Podfile,CocoaPods 會使用這個檔案下載及設定必要依附元件。最簡單的做法是在 Xcode 中建立新專案、在其中新增 Podfile,然後安裝 Pod。
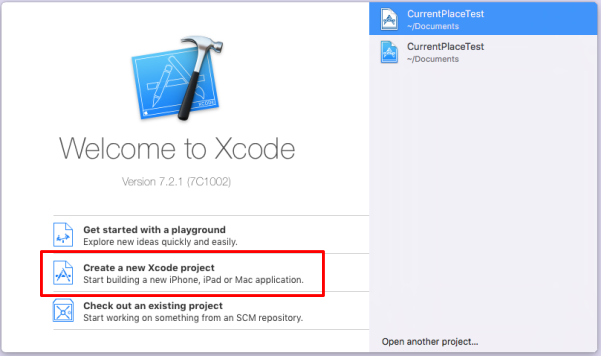
開啟 Xcode,畫面上會顯示「Welcome to Xcode」(歡迎使用 Xcode) 畫面。選取「Create a new Xcode project」(建立新的 Xcode 專案)
在下一個畫面中,系統會要求你為新專案選擇範本。選取 iOS 的「Single View Application」,然後按「Next」
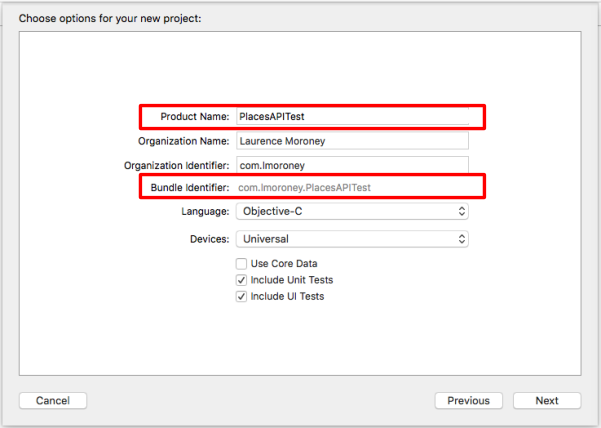
系統要求提供產品名稱時,您可以選擇任何名稱,但請務必記下系統為您產生的套裝組合 ID。稍後會用到這項資訊。
按下「下一步」,系統就會為你建立專案。請記下建立目錄的位置。關閉 Xcode,然後使用「終端機」前往該目錄。
在終端機中輸入下列指令:
pod init
系統會為您建立名為 Podfile 的檔案。編輯該檔案,加入 GoogleMaps 的 Pod,如下所示:
target '{YOUR APP NAME}' do
pod 'GoogleMaps'
end
儲存並關閉 Xcode。請務必關閉,因為您將在下一個步驟中編輯基礎專案。完成後,您會開啟不同的專案檔案,如果開發人員先前未關閉 Xcode,很容易會搞不清楚所有內容的位置!現在,請在終端機中前往專案目錄,然後執行「pod install」,如下所示:
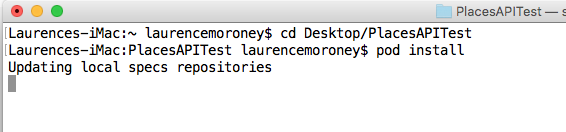
完成後,系統會安裝 Pod,並建立新的 .xcworkspace 檔案。請從現在開始使用這個專案。不過,在編寫程式碼之前,您需要先取得 API 金鑰。
2. 取得 API 金鑰
在下一個啟用步驟中,請啟用 Maps SDK for iOS。
設定 Google 地圖平台
如果您尚未建立 Google Cloud Platform 帳戶,以及啟用計費功能的專案,請參閱「開始使用 Google 地圖平台」指南,建立帳單帳戶和專案。
- 在 Cloud 控制台中,按一下專案下拉式選單,然後選取要用於本程式碼研究室的專案。

- 在 Google Cloud Marketplace 中,啟用本程式碼研究室所需的 Google 地圖平台 API 和 SDK。如要瞭解如何操作,請觀看這部影片或參閱這份說明文件。
- 在 Cloud Console 的「憑證」頁面中產生 API 金鑰。你可以按照這部影片或這份文件中的步驟操作。所有 Google 地圖平台要求都需要 API 金鑰。
3. 建立 Places API 應用程式
您已建立控制台專案,並在專案中啟用 Places API,也取得 API 金鑰,現在可以開始編寫第一個 Places API 應用程式。
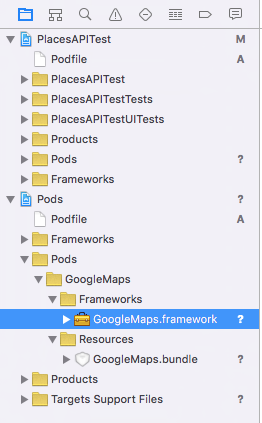
先前安裝 Pod 檔案時,系統會為您建立新的 .xcworkspace 檔案。按兩下開啟這個檔案。
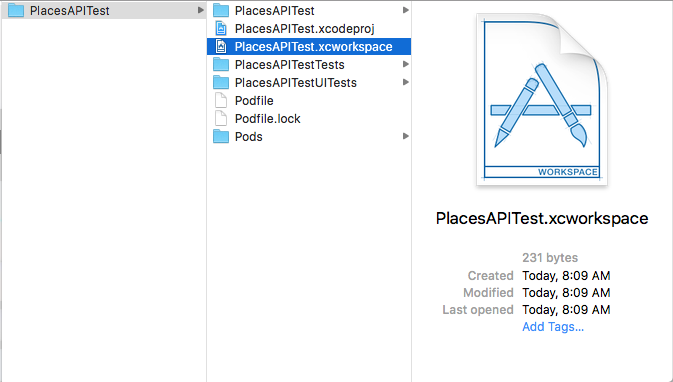
您會在專案瀏覽器中發現,現在多了一個名為「Pods」的新資料夾。如果成功,您會在該資料夾中看到 GoogleMaps 資料夾,內含架構。
4. 編輯 Info.plist 檔案。
首次執行應用程式時,iOS 會顯示對話方塊,要求使用者授予位置資訊服務的存取權。這個對話方塊會提供您定義的字串,並將其放入 Info.plist 檔案。如果沒有這個字串,系統就不會顯示對話方塊,應用程式也無法運作。
您可以在專案的檔案總管中找到 Info.plist 檔案:
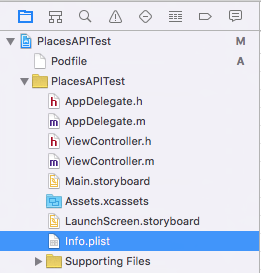
選取該檔案,系統就會顯示 plist 編輯器。
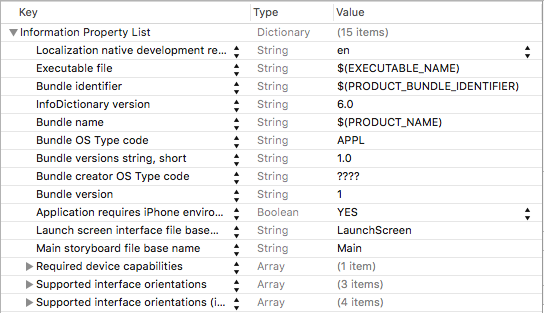
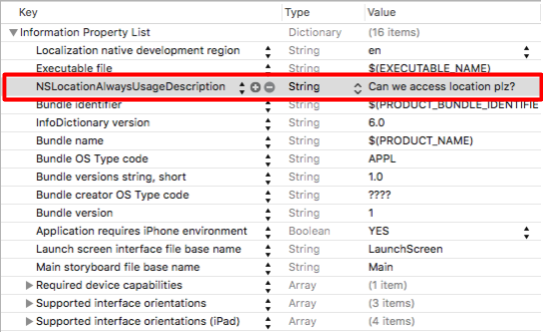
將滑鼠游標懸停在任一元素上,畫面上就會顯示「+」圖示。按下後,畫面會顯示新項目。在這個方塊中輸入值「NSLocationAlwaysUsageDescription」。
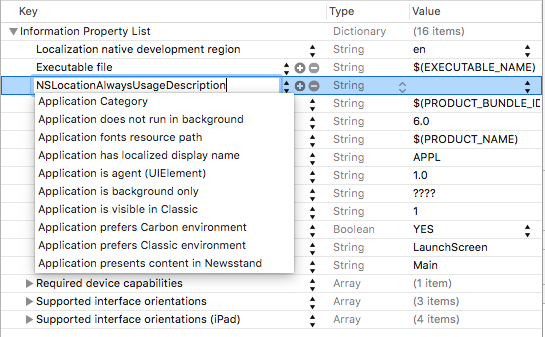
按下 Enter 鍵即可新增金鑰。然後按兩下這個鍵的「值」欄,並新增字串:
如要進一步瞭解這個字串,請參閱這份 Apple 開發人員說明文件。
5. 編輯應用程式委派項目
在專案檔案總管中,找出並開啟 AppDelegate.m。您將使用這個檔案新增 API 金鑰。
在檔案頂端,緊接在 #import 行下方新增下列程式碼:
@import GoogleMaps;
接著,在 didFinishLaunchingWithOptions: 函式中,於「return YES」行上方新增下列內容:
[GMSServices provideAPIKey:@"<Add your API Key>"];
請務必使用您先前產生的 API 金鑰。
6. 編輯腳本檔案
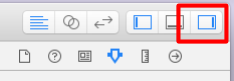
在專案總管中,開啟 Main.storyboard 檔案。按下右上角的側欄按鈕,確認側欄已啟用。
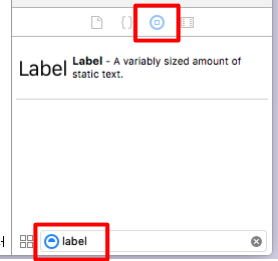
接著,請確認已選取物件資料庫,然後在側欄底部找到標籤控制項。
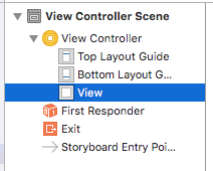
在左側的 View Controller Scene 中,確認已選取「View」:
然後將 7 個標籤拖曳至檢視畫面。如圖所示排列。請務必將大小拖曳至顯示的尺寸。如要編輯標籤中的文字,請按兩下標籤,然後輸入所需的值:
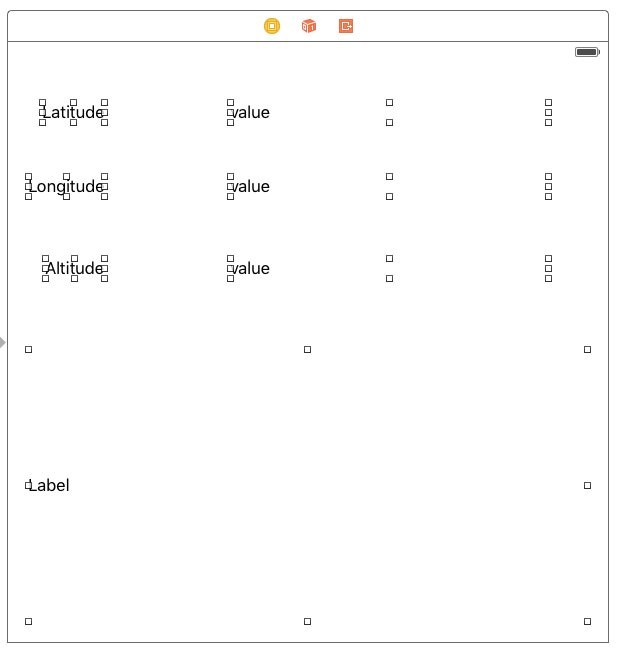
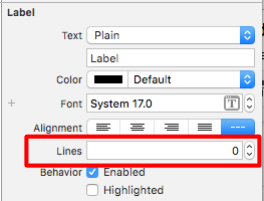
針對最底部的標籤 (非常大的標籤),請前往屬性編輯器,並確認已設為 0 行 (預設為 1 行)。這樣就能顯示多行文字。
7. 為值建立 Outlet
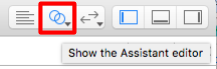
您需要為 3 個「值」標籤建立商店。這樣您就能使用程式碼變更這些值。如要執行這項操作,請先啟用助理編輯器。如要這麼做,請先點按屬性側欄的按鈕將其移除,(上一個步驟中顯示的按鈕)
接著選取 Google 助理按鈕,也就是下圖中的雙圓形按鈕:
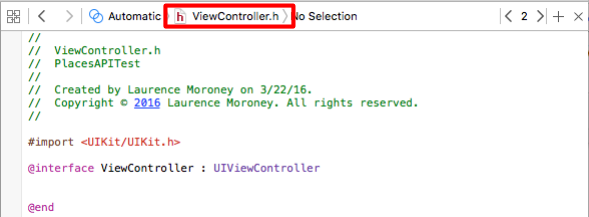
確認是否正在轉譯 ViewController.h 檔案。如果不是,請使用助理視窗頂端的編輯器變更:
然後按住 CONTROL 鍵,將每個標籤拖曳到輔助程式的 ViewController.h 檔案中,並放在 @interface 行下方。畫面上會彈出對話方塊,詢問要建立哪種連線:
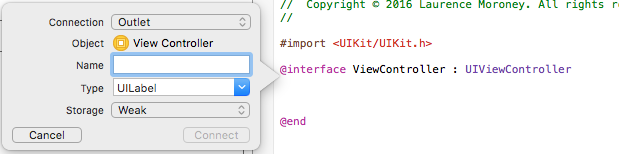
請確認設定如圖所示 (連線:Outlet;類型:UILabel;儲存空間:Weak),然後為每個設定命名。在本程式碼研究室中,我分別將經度、緯度和海拔高度標籤命名為 lblLongitude、lblLatitude 和 lblAltidude。此外,請從底部拖曳大型標籤,並將其命名為 lblPlaces。
完成後,ViewController.h 檔案應如下所示:
#import <UIKit/UIKit.h>
@import GoogleMaps;

@interface ViewController : UIViewController
@property (weak, nonatomic) IBOutlet UILabel *lblLatitude;
@property (weak, nonatomic) IBOutlet UILabel *lblLongitude;
@property (weak, nonatomic) IBOutlet UILabel *lblAltitude;
@property (weak, nonatomic) IBOutlet UILabel *lblPlaces;

@end
8. 編輯位置和 Google Client API 的標頭檔
在最後的步驟 (建構應用程式以使用地點 API) 之前,您需要在標頭檔案 (ViewController.h) 中設定幾個變數。這些是核心位置管理工具和核心位置物件:
@property (strong, nonatomic) CLLocationManager *locationManager;
@property (strong, nonatomic) CLLocation *location;
您也需要 Google API Client:
@property GMSPlacesClient *placesClient;
最後,您需要更新標頭檔,讓類別實作 CLLocationManagerDelegate:
@interface ViewController : UIViewController<CLLocationManagerDelegate>
完成後,標頭檔案應如下所示:
#import <UIKit/UIKit.h>
#import <CoreLocation/CoreLocation.h>
#import <GoogleMaps/GoogleMaps.h>


@interface ViewController : UIViewController<CLLocationManagerDelegate>
@property (strong, nonatomic) CLLocationManager *locationManager;
@property (strong, nonatomic) CLLocation *location;
@property (weak, nonatomic) IBOutlet UILabel *lblLongitude;
@property (weak, nonatomic) IBOutlet UILabel *lblLatitude;
@property (weak, nonatomic) IBOutlet UILabel *lblAltitude;
@property (weak, nonatomic) IBOutlet UILabel *lblPlaces;

@property GMSPlacesClient *placesClient;
@end
9. 編輯 View Controller
第一步是編輯 viewDidLoad 函式,初始化位置管理工具、要求使用者授權存取位置資訊,最後啟動位置管理工具,追蹤目前位置。您也會初始化 Google Places API 用戶端。
- (void)viewDidLoad {
    [super viewDidLoad];
    self.locationManager = [[CLLocationManager alloc]init];
    self.locationManager.desiredAccuracy = kCLLocationAccuracyBest;
    if([self.locationManager respondsToSelector:@selector(requestAlwaysAuthorization)]) {
        [self.locationManager requestAlwaysAuthorization];
        // Or [self.locationManager requestWhenInUseAuthorization];
    }
    [self.locationManager startUpdatingLocation];

    self.locationManager.delegate = self;
    self.location = [[CLLocation alloc] init];
    self.placesClient = [GMSPlacesClient sharedClient];
}
10. 處理位置更新
位置管理工具會呼叫 didUpdateLocations 函式,並透過位置資訊更新回呼至 View Controller。您需要將此函式新增至 ViewController.m,函式如下所示:
-(void)locationManager:(CLLocationManager *)manager didUpdateLocations:(NSArray<CLLocation *> *)locations{
    // Enter code here
}
這個函式需要執行幾項動作。
首先,系統會快取位置資訊,並使用最後收到的位置資訊:
self.location = locations.lastObject;
接著,請更新「緯度」、「經度」和「海拔高度」這三個標籤:
self.lblLatitude.text = [NSString stringWithFormat:@"%f", self.location.coordinate.latitude];

self.lblLongitude.text = [NSString stringWithFormat:@"%f", self.location.coordinate.longitude];

self.lblAltitude.text = [NSString stringWithFormat:@"%f", self.location.altitude];
接著,您將使用地點用戶端呼叫 Places API。具體做法是指定回呼函式,該函式會取得地點可能性清單。Places API 會根據您的位置資訊,判斷您是否可能位於特定地點。這項服務會傳回可能地點的名稱,以及介於 0 和 1 之間的值,其中包含您身處該地點的機率。
[self.placesClient currentPlaceWithCallback:^(GMSPlaceLikelihoodList *likelihoodList, NSError *error) {
然後實作回呼。這會逐一查看可能性清單,並加入地點和這些地點的可能性。
[self.placesClient currentPlaceWithCallback:^(GMSPlaceLikelihoodList *likelihoodList, NSError *error) {

  if (error != nil) {
    NSLog(@"Current Place error %@", [error localizedDescription]);
    return;
  }
  NSMutableString *strPlaces = [NSMutableString stringWithString:@""];

  for (GMSPlaceLikelihood *likelihood in likelihoodList.likelihoods) {
    GMSPlace* place = likelihood.place;
    NSLog(@"Current Place name %@ at likelihood %g", place.name,
            likelihood.likelihood);
    NSLog(@"Current Place address %@", place.formattedAddress);
    NSLog(@"Current Place attributions %@", place.attributions);
    NSLog(@"Current PlaceID %@", place.placeID);
    [strPlaces appendString:place.name];
    [strPlaces appendString:@" "];
    [strPlaces appendFormat:@"%g",likelihood.likelihood];
    [strPlaces appendString:@"\n"];
  }
  self.lblPlaces.text = strPlaces;
}];
完成後,didUpdateLocations 函式應如下所示:
-(void)locationManager:(CLLocationManager *)manager didUpdateLocations:(NSArray<CLLocation *> *)locations{

    self.location = locations.lastObject;
    self.lblLatitude.text = [NSString stringWithFormat:@"%f", self.location.coordinate.latitude];
    self.lblLongitude.text = [NSString stringWithFormat:@"%f", self.location.coordinate.longitude];
    self.lblAltitude.text = [NSString stringWithFormat:@"%f", self.location.altitude];

    NSLog(@"%@", self.location.description);

    [self.placesClient currentPlaceWithCallback:^(GMSPlaceLikelihoodList *likelihoodList, NSError *error) {

        if (error != nil) {
            NSLog(@"Current Place error %@", [error localizedDescription]);
            return;
        }
        NSMutableString *strPlaces = [NSMutableString stringWithString:@""];

        for (GMSPlaceLikelihood *likelihood in likelihoodList.likelihoods)
        {
            GMSPlace* place = likelihood.place;
            NSLog(@"Current Place name %@ at likelihood %g", place.name, likelihood.likelihood);
            NSLog(@"Current Place address %@", place.formattedAddress);
            NSLog(@"Current Place attributions %@", place.attributions);
            NSLog(@"Current PlaceID %@", place.placeID);
            [strPlaces appendString:place.name];
            [strPlaces appendString:@" "];
            [strPlaces appendFormat:@"%g",likelihood.likelihood];
            [strPlaces appendString:@"\n"];
        }
        self.lblPlaces.text = strPlaces;
    }];
}
現在可以執行並測試應用程式了!
11. 在模擬器中執行應用程式
您可以使用標題列中的執行按鈕執行應用程式。您也可以選取執行類型,如您所見,我正在使用模擬器在 iPhone 6 上進行測試。

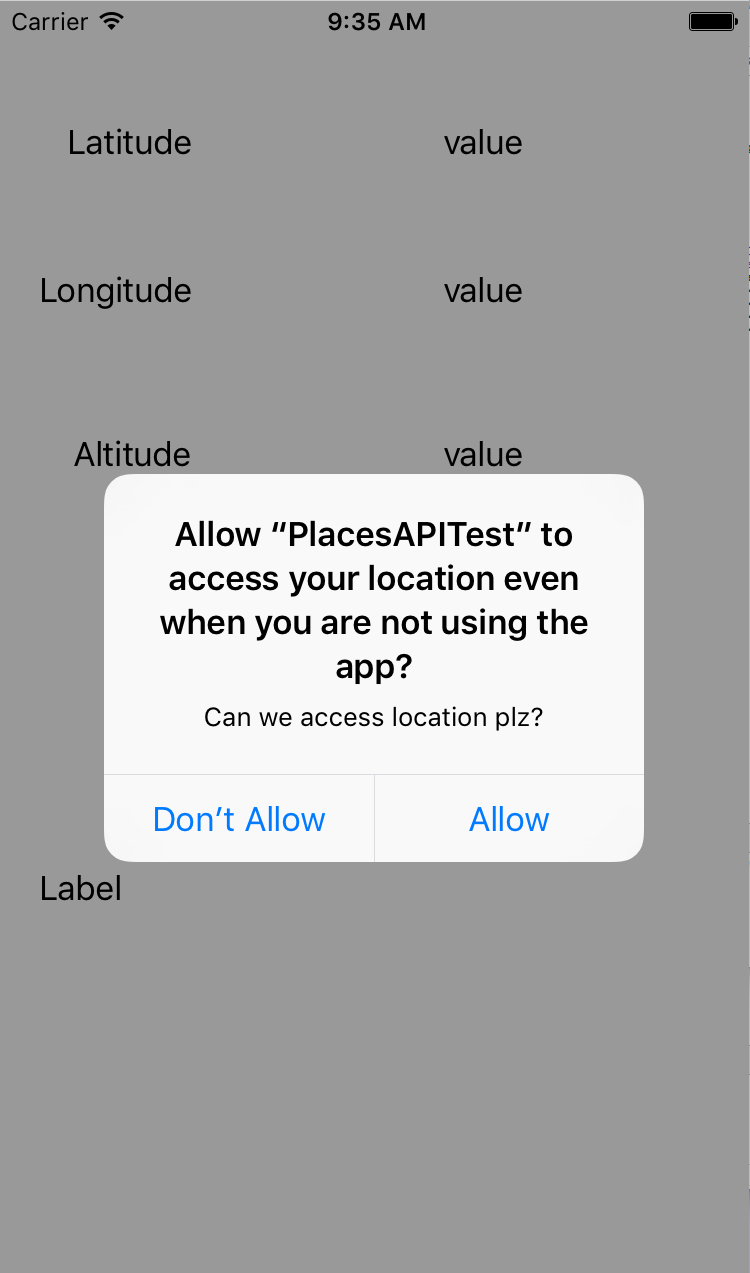
按下執行按鈕後,應用程式就會建構並啟動。系統會顯示要求,允許應用程式存取位置資訊,包括您先前指定的自訂字串。
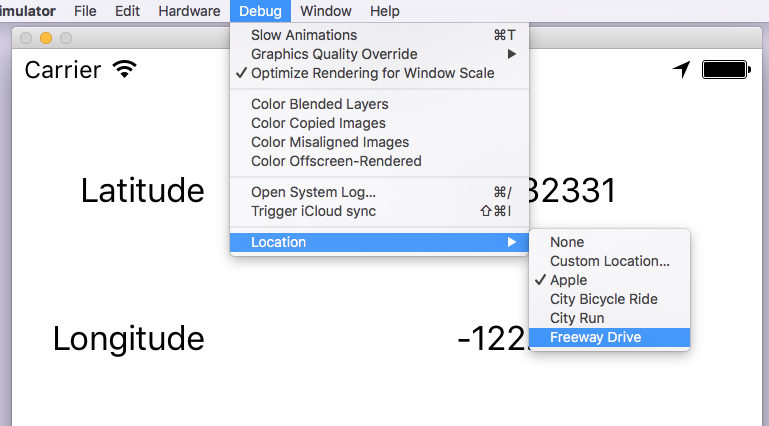
完成後,系統就會更新緯度和經度。如要變更位置,請選取「Debug」選單,然後選擇位置。例如,你可以選擇「Freeway Drive」
完成後,系統會更新位置資訊和可能的地點,模擬高速公路行車路線。
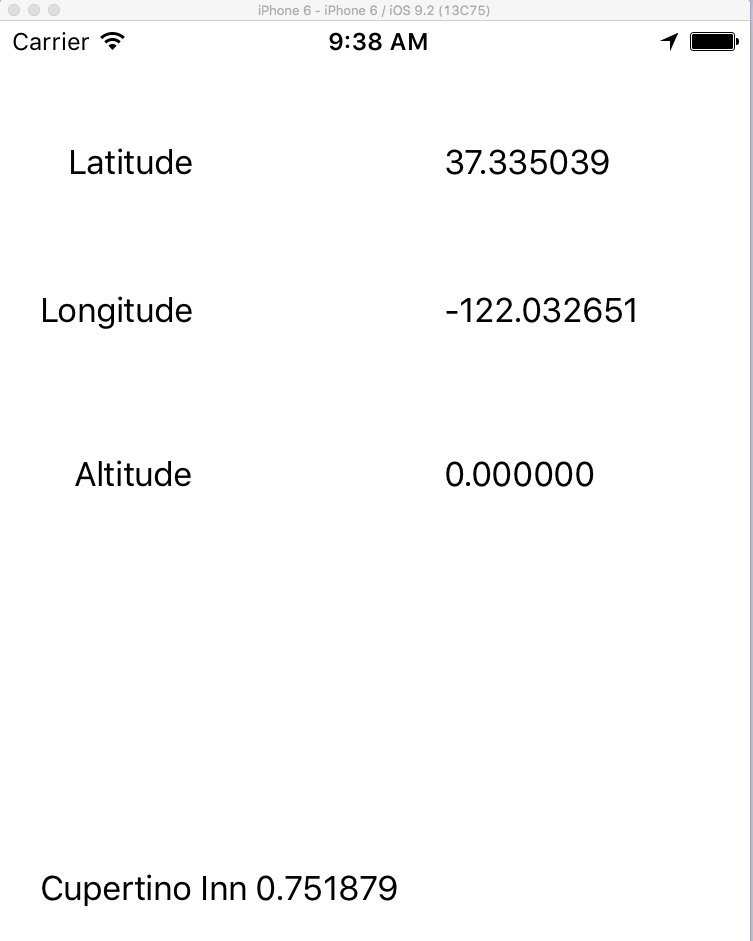
這樣就完成了!您已成功在 iOS 上使用 Google Places API 存取目前地點的詳細資料。