
1. 事前準備
網站最常見的功能之一,就是顯示 Google 地圖,醒目顯示商家、機構或其他實體存在地點的一或多個位置。這些地圖的實作方式可能因需求而異,例如地點數量和變更頻率。
在本程式碼研究室中,您會瞭解最簡單的用途,也就是地點數量不多且很少變更的情況,例如連鎖商店的店家搜尋器。在這種情況下,您可以使用相對低技術的方法,不必進行任何伺服器端程式設計。但這不代表您無法發揮創意,只要運用 GeoJSON 資料格式,即可儲存及算繪地圖上每個商店的任意資訊,並自訂標記和地圖的整體樣式。
最後,您還可以使用 Cloud Shell 開發及代管商店定位器。雖然不一定要使用這項工具,但您可以在任何執行網頁瀏覽器的裝置上開發商店定位器,並在網路上公開提供。
必要條件
- 具備 HTML 和 JavaScript 的基礎知識
執行步驟
- 顯示地圖,其中包含以 GeoJSON 格式儲存的一組商店位置和資訊。
- 自訂標記和地圖本身。
- 在使用者點選商店標記時,顯示商店的額外資訊。
- 在網頁中新增「地點自動完成」搜尋列。
- 找出距離使用者提供的起點最近的商店位置。
2. 做好準備
在下一節的步驟 3 中,為本程式碼研究室啟用下列三個 API:
- Maps JavaScript API
- Places API
- Distance Matrix API
開始使用 Google 地圖平台
如果您從未使用過 Google 地圖平台,請按照「開始使用 Google 地圖平台」指南或「開始使用 Google 地圖平台」播放清單中的操作說明,完成下列步驟:
- 建立帳單帳戶。
- 建立專案。
- 啟用 Google 地圖平台 API 和 SDK (如上一節所列)。
- 產生 API 金鑰。
啟用 Cloud Shell
在本程式碼研究室中,您會使用 Cloud Shell。Cloud Shell 是在 Google Cloud 中執行的指令列環境,可存取 Google Cloud 上執行的產品和資源,因此您完全可以透過網路瀏覽器代管及執行專案。
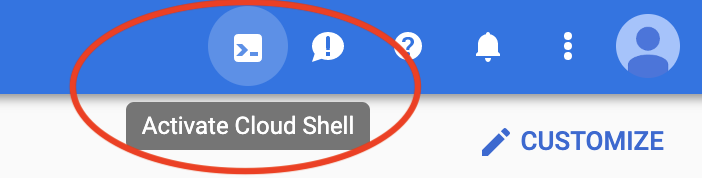
如要從 Cloud Shell 啟動 Cloud Shell,請按一下「啟用 Cloud Shell」圖示  (系統應會在幾分鐘內完成佈建作業並連線至環境)。
這會在瀏覽器底部開啟新的殼層,並可能顯示簡介插頁式廣告。

連線至 Cloud Shell 後,您應會發現自己通過驗證,且專案已設為您在設定期間選取的專案 ID。
$ gcloud auth list
Credentialed Accounts:
ACTIVE  ACCOUNT
  *     <myaccount>@<mydomain>.com
$ gcloud config list project
[core]
project = <YOUR_PROJECT_ID>
如果專案未設定,請執行下列指令:
$ gcloud config set project <YOUR_PROJECT_ID>
3. 「Hello, World!」和地圖
開始使用地圖開發應用程式
在 Cloud Shell 中,您會先建立 HTML 網頁,做為本程式碼研究室其餘部分的基礎。
- 在 Cloud Shell 的工具列中,按一下「啟動編輯器」
 ,即可在新分頁中開啟程式碼編輯器。
這個網頁版程式碼編輯器可讓您輕鬆編輯 Cloud Shell 中的檔案。

- 在程式碼編輯器中,依序點選「File」 >「New Folder」,為應用程式建立新的
store-locator目錄。
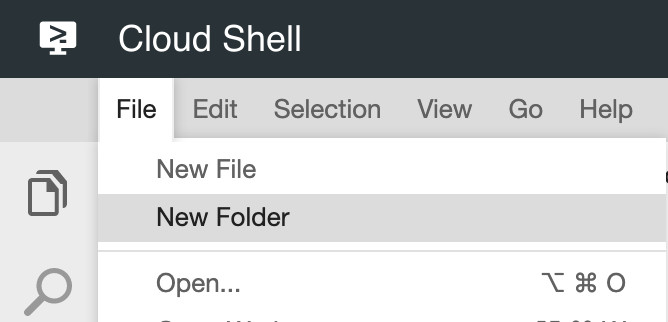
- 將新的資料夾命名為
store-locator。
接著,請建立含有地圖的網頁。
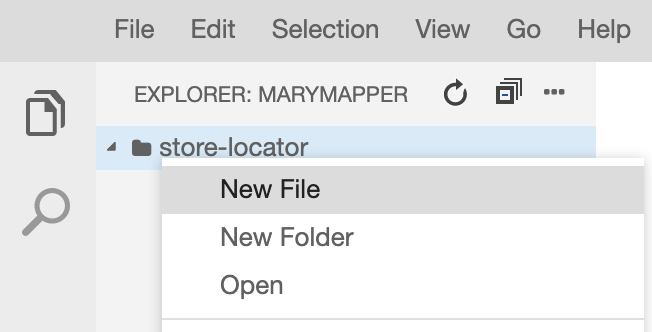
- 在
store-locator目錄中建立名為index.html的檔案。
- 將下列內容放入
index.html檔案:
index.html
<html>

<head>
    <title>Store Locator</title>
    <style>
        #map {
            height: 100%;
        }

        html,
        body {
            height: 100%;
            margin: 0;
            padding: 0;
        }
    </style>
</head>

<body>
    <!-- The div to hold the map -->
    <div id="map"></div>

    <script src="app.js"></script>
    <script async defer src="https://maps.googleapis.com/maps/api/js?key=YOUR_API_KEY&libraries=places&callback=initMap&solution_channel=GMP_codelabs_simplestorelocator_v1_a">
    </script>
</body>

</html>
這是顯示地圖的 HTML 網頁。其中包含一些 CSS,可確保地圖在視覺上佔據整個頁面、用於存放地圖的 <div> 標記,以及一對 <script> 標記。第一個指令碼標記會載入名為 app.js 的 JavaScript 檔案,其中包含所有 JavaScript 程式碼。第二個指令碼標記會載入 API 金鑰,並納入 Places Library 的使用,以便稍後新增自動完成功能,同時指定 Maps JavaScript API 載入後執行的 JavaScript 函式名稱,也就是 initMap。
- 將程式碼片段中的
YOUR_API_KEY文字,換成您在本程式碼研究室稍早產生的 API 金鑰。 - 最後,建立另一個名為
app.js的檔案,並加入下列程式碼:
app.js
function initMap() {
   // Create the map.
    const map = new google.maps.Map(document.getElementById('map'), {
        zoom: 7,
        center: { lat: 52.632469, lng: -1.689423 },
    });

}
這是建立地圖所需的最低程式碼量。您會傳遞對 <div> 標記的參照來保留地圖,並指定中心和縮放等級。
如要測試這個應用程式,您可以在 Cloud Shell 中執行簡單的 Python HTTP 伺服器。
- 前往 Cloud Shell 並輸入下列指令:
$ cd store-locator
$ python3 -m http.server 8080
您會看到幾行記錄輸出內容,顯示您確實在 Cloud Shell 中執行簡易 HTTP 伺服器,且網路應用程式正在監聽本機主機通訊埠 8080。
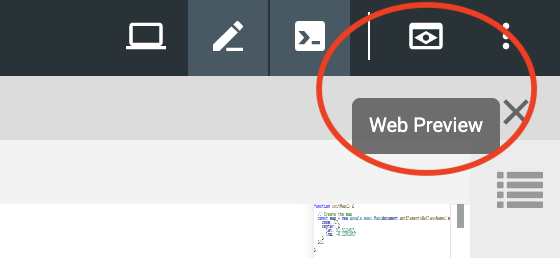
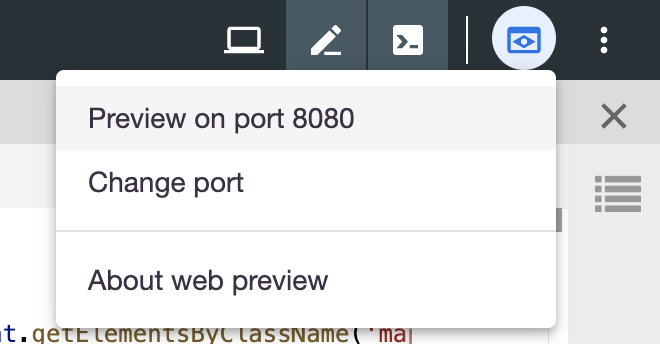
- 按一下 Cloud Shell 工具列中的「網頁預覽」
 ,然後選取「透過以下通訊埠預覽:8080」,即可在網頁瀏覽器分頁中開啟這個應用程式。
按一下這個選單項目,網路瀏覽器就會開啟新分頁,顯示從 Python 簡易 HTTP 伺服器提供的 HTML 內容。如果一切運作正常,您應該會看到以英國倫敦為中心的地圖。
如要停止簡易 HTTP 伺服器,請在 Cloud Shell 中按下 Control+C。
4. 使用 GeoJSON 填入地圖
現在,請查看商店的資料。GeoJSON 是一種資料格式,可代表地圖上的簡單地理特徵,例如點、線或多邊形。特徵也可以包含任意資料。因此,GeoJSON 非常適合用來表示商店,因為商店基本上就是地圖上的點,並附帶一些額外資料,例如商店名稱、營業時間和電話號碼。最重要的是,Google 地圖提供頂級的 GeoJSON 支援,也就是說,您可以將 GeoJSON 文件傳送至 Google 地圖,地圖就會適當算繪該文件。
- 建立名為
stores.json的新檔案,然後貼入下列程式碼:
stores.json
{
    "type": "FeatureCollection",
    "features": [{
            "geometry": {
                "type": "Point",
                "coordinates": [-0.1428115,
                    51.5125168
                ]
            },
            "type": "Feature",
            "properties": {
                "category": "patisserie",
                "hours": "10am - 6pm",
                "description": "Modern twists on classic pastries. We're part of a larger chain of patisseries and cafes.",
                "name": "Josie's Patisserie Mayfair",
                "phone": "+44 20 1234 5678",
                "storeid": "01"
            }
        },
        {
            "geometry": {
                "type": "Point",
                "coordinates": [-2.579623,
                    51.452251
                ]
            },
            "type": "Feature",
            "properties": {
                "category": "patisserie",
                "hours": "10am - 6pm",
                "description": "Come and try our award-winning cakes and pastries. We're part of a larger chain of patisseries and cafes.",
                "name": "Josie's Patisserie Bristol",
                "phone": "+44 117 121 2121",
                "storeid": "02"
            }
        },
        {
            "geometry": {
                "type": "Point",
                "coordinates": [
                    1.273459,
                    52.638072
                ]
            },
            "type": "Feature",
            "properties": {
                "category": "patisserie",
                "hours": "10am - 6pm",
                "description": "Whatever the occasion, whether it's a birthday or a wedding, Josie's Patisserie has the perfect treat for you. We're part of a larger chain of patisseries and cafes.",
                "name": "Josie's Patisserie Norwich",
                "phone": "+44 1603 123456",
                "storeid": "03"
            }
        },
        {
            "geometry": {
                "type": "Point",
                "coordinates": [-1.9912838,
                    50.8000418
                ]
            },
            "type": "Feature",
            "properties": {
                "category": "patisserie",
                "hours": "10am - 6pm",
                "description": "A gourmet patisserie that will delight your senses. We're part of a larger chain of patisseries and cafes.",
                "name": "Josie's Patisserie Wimborne",
                "phone": "+44 1202 343434",
                "storeid": "04"
            }
        },
        {
            "geometry": {
                "type": "Point",
                "coordinates": [-2.985933,
                    53.408899
                ]
            },
            "type": "Feature",
            "properties": {
                "category": "patisserie",
                "hours": "10am - 6pm",
                "description": "Spoil yourself or someone special with our classic pastries. We're part of a larger chain of patisseries and cafes.",
                "name": "Josie's Patisserie Liverpool",
                "phone": "+44 151 444 4444",
                "storeid": "05"
            }
        },
        {
            "geometry": {
                "type": "Point",
                "coordinates": [-1.689423,
                    52.632469
                ]
            },
            "type": "Feature",
            "properties": {
                "category": "patisserie",
                "hours": "10am - 6pm",
                "description": "Come and feast your eyes and tastebuds on our delicious pastries and cakes. We're part of a larger chain of patisseries and cafes.",
                "name": "Josie's Patisserie Tamworth",
                "phone": "+44 5555 55555",
                "storeid": "06"
            }
        },
        {
            "geometry": {
                "type": "Point",
                "coordinates": [-3.155305,
                    51.479756
                ]
            },
            "type": "Feature",
            "properties": {
                "category": "patisserie",
                "hours": "10am - 6pm",
                "description": "Josie's Patisserie is family-owned, and our delectable pastries, cakes, and great coffee are renowed. We're part of a larger chain of patisseries and cafes.",
                "name": "Josie's Patisserie Cardiff",
                "phone": "+44 29 6666 6666",
                "storeid": "07"
            }
        },
        {
            "geometry": {
                "type": "Point",
                "coordinates": [-0.725019,
                    52.668891
                ]
            },
            "type": "Feature",
            "properties": {
                "category": "cafe",
                "hours": "8am - 9:30pm",
                "description": "Oakham's favorite spot for fresh coffee and delicious cakes. We're part of a larger chain of patisseries and cafes.",
                "name": "Josie's Cafe Oakham",
                "phone": "+44 7777 777777",
                "storeid": "08"
            }
        },
        {
            "geometry": {
                "type": "Point",
                "coordinates": [-2.477653,
                    53.735405
                ]
            },
            "type": "Feature",
            "properties": {
                "category": "cafe",
                "hours": "8am - 9:30pm",
                "description": "Enjoy freshly brewed coffe, and home baked cakes in our homely cafe. We're part of a larger chain of patisseries and cafes.",
                "name": "Josie's Cafe Blackburn",
                "phone": "+44 8888 88888",
                "storeid": "09"
            }
        },
        {
            "geometry": {
                "type": "Point",
                "coordinates": [-0.211363,
                    51.108966
                ]
            },
            "type": "Feature",
            "properties": {
                "category": "cafe",
                "hours": "8am - 9:30pm",
                "description": "A delicious array of pastries with many flavours, and fresh coffee in an snug cafe. We're part of a larger chain of patisseries and cafes.",
                "name": "Josie's Cafe Crawley",
                "phone": "+44 1010 101010",
                "storeid": "10"
            }
        },
        {
            "geometry": {
                "type": "Point",
                "coordinates": [-0.123559,
                    50.832679
                ]
            },
            "type": "Feature",
            "properties": {
                "category": "cafe",
                "hours": "8am - 9:30pm",
                "description": "Grab a freshly brewed coffee, a decadent cake and relax in our idyllic cafe. We're part of a larger chain of patisseries and cafes.",
                "name": "Josie's Cafe Brighton",
                "phone": "+44 1313 131313",
                "storeid": "11"
            }
        },
        {
            "geometry": {
                "type": "Point",
                "coordinates": [-3.319575,
                    52.517827
                ]
            },
            "type": "Feature",
            "properties": {
                "category": "cafe",
                "hours": "8am - 9:30pm",
                "description": "Come in and unwind at this idyllic cafe with fresh coffee and home made cakes. We're part of a larger chain of patisseries and cafes.",
                "name": "Josie's Cafe Newtown",
                "phone": "+44 1414 141414",
                "storeid": "12"
            }
        },
        {
            "geometry": {
                "type": "Point",
                "coordinates": [
                    1.158167,
                    52.071634
                ]
            },
            "type": "Feature",
            "properties": {
                "category": "cafe",
                "hours": "8am - 9:30pm",
                "description": "Fresh coffee and delicious cakes in an snug cafe. We're part of a larger chain of patisseries and cafes.",
                "name": "Josie's Cafe Ipswich",
                "phone": "+44 1717 17171",
                "storeid": "13"
            }
        }
    ]
}
資料量很大,但瀏覽後會發現,每個商店的結構都相同。每個商店都以 GeoJSON Point 表示,並包含座標和 properties 鍵下所含的額外資料。有趣的是,GeoJSON 允許在 properties 金鑰下加入任意命名的金鑰。在本程式碼研究室中,這些鍵為 category、hours、description、name 和 phone。
- 現在請編輯
app.js,以便將stores.js中的 GeoJSON 載入地圖。
app.js
function initMap() {
  // Create the map.
  const map = new google.maps.Map(document.getElementById('map'), {
    zoom: 7,
    center: {lat: 52.632469, lng: -1.689423},
  });

  // Load the stores GeoJSON onto the map.
  map.data.loadGeoJson('stores.json', {idPropertyName: 'storeid'});

  const apiKey = 'YOUR_API_KEY';
  const infoWindow = new google.maps.InfoWindow();

  // Show the information for a store when its marker is clicked.
  map.data.addListener('click', (event) => {
    const category = event.feature.getProperty('category');
    const name = event.feature.getProperty('name');
    const description = event.feature.getProperty('description');
    const hours = event.feature.getProperty('hours');
    const phone = event.feature.getProperty('phone');
    const position = event.feature.getGeometry().get();
    const content = `
      <h2>${name}</h2><p>${description}</p>
      <p><b>Open:</b> ${hours}<br/><b>Phone:</b> ${phone}</p>
    `;

    infoWindow.setContent(content);
    infoWindow.setPosition(position);
    infoWindow.setOptions({pixelOffset: new google.maps.Size(0, -30)});
    infoWindow.open(map);
  });
}
在程式碼範例中,您呼叫 loadGeoJson 並傳遞 JSON 檔案的名稱,將 GeoJSON 載入地圖。您也定義了函式,在每次點選標記時執行。接著,函式就能存取使用者點選標記的商店額外資料,並在顯示的資訊視窗中使用這些資訊。如要測試這個應用程式,請使用與先前相同的指令,執行簡單的 Python HTTP 伺服器。
- 返回 Cloud Shell 並輸入下列指令:
$ python3 -m http.server 8080
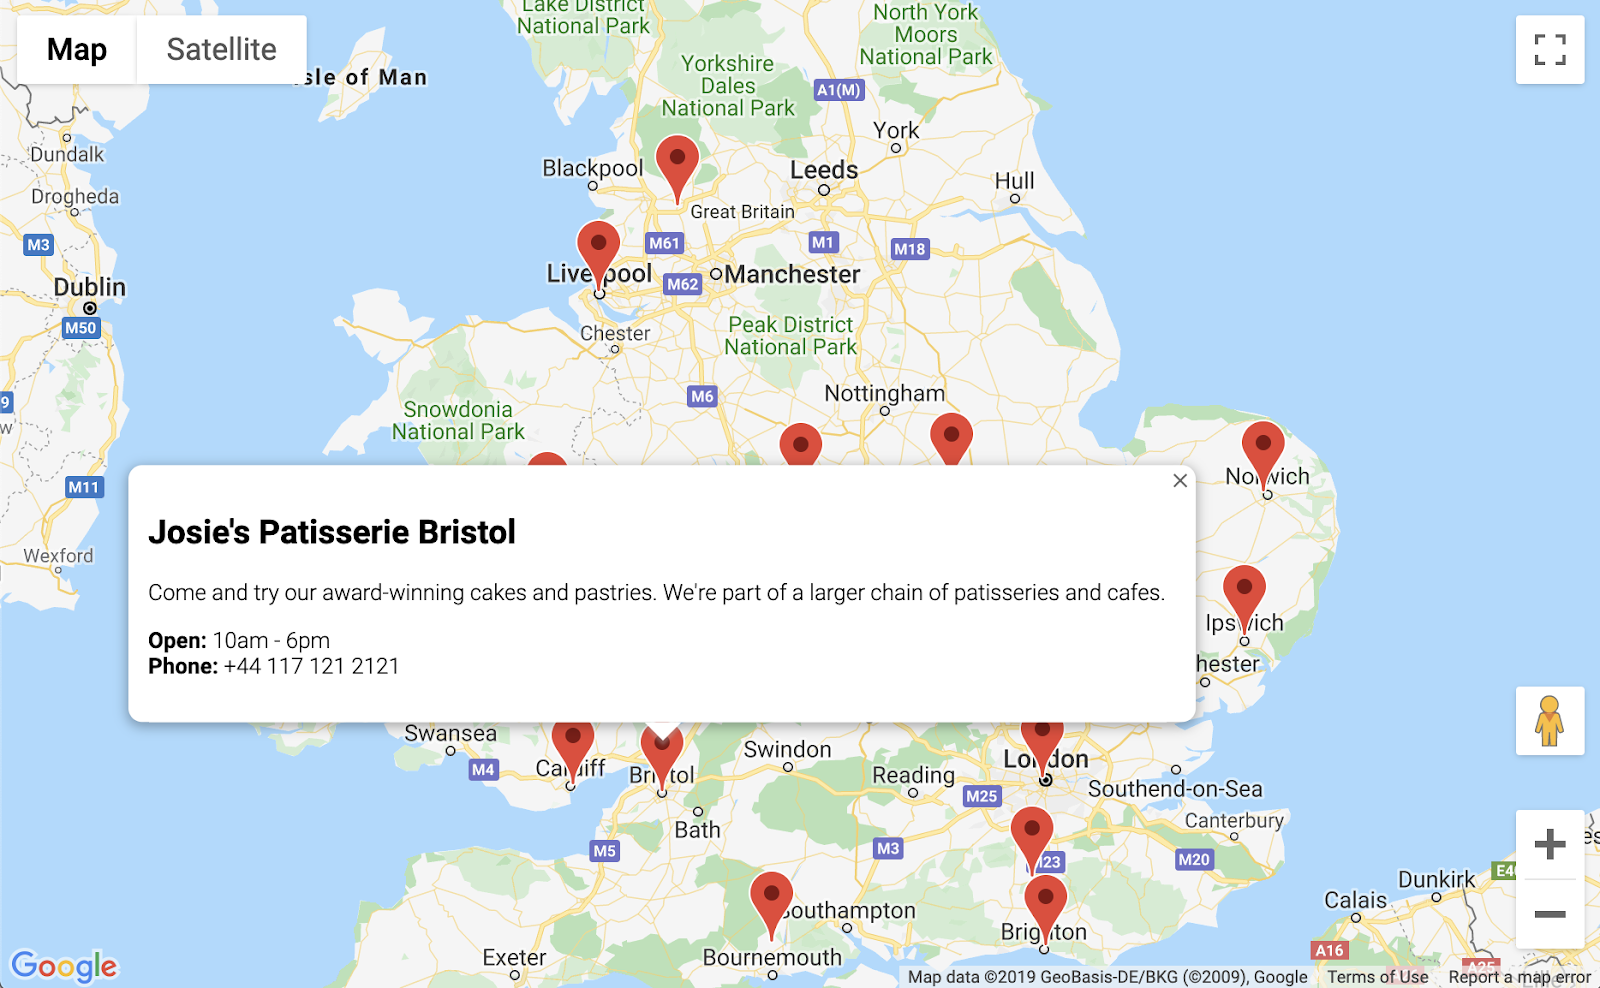
- 再次按一下「Web Preview」(網頁預覽) 「Preview on port 8080」(透過以下通訊埠預覽:8080),您應該會看到地圖上滿是標記,點選標記即可查看各家商店的詳細資料,如下例所示。進展!
5. 自訂地圖
就快大功告成了。地圖上會顯示所有商店標記,點選標記時會顯示額外資訊。但看起來就像其他 Google 地圖一樣。好無聊!加入自訂地圖樣式、標記、標誌和街景服務圖像,讓地圖更具特色。
以下是新增自訂樣式的 app.js 新版本:
app.js
const mapStyle = [{
  'featureType': 'administrative',
  'elementType': 'all',
  'stylers': [{
    'visibility': 'on',
  },
  {
    'lightness': 33,
  },
  ],
},
{
  'featureType': 'landscape',
  'elementType': 'all',
  'stylers': [{
    'color': '#f2e5d4',
  }],
},
{
  'featureType': 'poi.park',
  'elementType': 'geometry',
  'stylers': [{
    'color': '#c5dac6',
  }],
},
{
  'featureType': 'poi.park',
  'elementType': 'labels',
  'stylers': [{
    'visibility': 'on',
  },
  {
    'lightness': 20,
  },
  ],
},
{
  'featureType': 'road',
  'elementType': 'all',
  'stylers': [{
    'lightness': 20,
  }],
},
{
  'featureType': 'road.highway',
  'elementType': 'geometry',
  'stylers': [{
    'color': '#c5c6c6',
  }],
},
{
  'featureType': 'road.arterial',
  'elementType': 'geometry',
  'stylers': [{
    'color': '#e4d7c6',
  }],
},
{
  'featureType': 'road.local',
  'elementType': 'geometry',
  'stylers': [{
    'color': '#fbfaf7',
  }],
},
{
  'featureType': 'water',
  'elementType': 'all',
  'stylers': [{
    'visibility': 'on',
  },
  {
    'color': '#acbcc9',
  },
  ],
},
];

function initMap() {
  // Create the map.
  const map = new google.maps.Map(document.getElementById('map'), {
    zoom: 7,
    center: {lat: 52.632469, lng: -1.689423},
    styles: mapStyle,
  });

  // Load the stores GeoJSON onto the map.
  map.data.loadGeoJson('stores.json', {idPropertyName: 'storeid'});

  // Define the custom marker icons, using the store's "category".
  map.data.setStyle((feature) => {
    return {
      icon: {
        url: `img/icon_${feature.getProperty('category')}.png`,
        scaledSize: new google.maps.Size(64, 64),
      },
    };
  });

  const apiKey = 'YOUR_API_KEY';
  const infoWindow = new google.maps.InfoWindow();

  // Show the information for a store when its marker is clicked.
  map.data.addListener('click', (event) => {
    const category = event.feature.getProperty('category');
    const name = event.feature.getProperty('name');
    const description = event.feature.getProperty('description');
    const hours = event.feature.getProperty('hours');
    const phone = event.feature.getProperty('phone');
    const position = event.feature.getGeometry().get();
    const content = `
      <img style="float:left; width:200px; margin-top:30px" src="img/logo_${category}.png">
      <div style="margin-left:220px; margin-bottom:20px;">
        <h2>${name}</h2><p>${description}</p>
        <p><b>Open:</b> ${hours}<br/><b>Phone:</b> ${phone}</p>
        <p><img src="https://maps.googleapis.com/maps/api/streetview?size=350x120&location=${position.lat()},${position.lng()}&key=${apiKey}&solution_channel=GMP_codelabs_simplestorelocator_v1_a"></p>
      </div>
      `;

    infoWindow.setContent(content);
    infoWindow.setPosition(position);
    infoWindow.setOptions({pixelOffset: new google.maps.Size(0, -30)});
    infoWindow.open(map);
  });

}
你新增的項目如下:
mapStyle變數包含地圖樣式設定的所有資訊。(如果喜歡,你甚至可以自行建立風格)。- 您使用
map.data.setStyle方法套用了自訂標記,每個category都來自 GeoJSON。 - 您修改了
content變數,加入標誌 (同樣使用 GeoJSON 中的category) 和商店位置的街景服務圖片。
部署這項功能前,請先完成下列步驟:
- 將
app.js中的'YOUR_API_KEY'字串換成您先前的 API 金鑰 (與您貼到index.html中的金鑰相同,請保留引號),為apiKey變數設定正確的值。 - 在 Cloud Shell 中執行下列指令,下載標記和標誌圖像。確認您位於
store-locator目錄。如果簡易 HTTP 伺服器正在執行,請使用Control+C停止。
$ mkdir -p img; cd img
$ wget https://github.com/googlecodelabs/google-maps-simple-store-locator/raw/master/src/img/icon_cafe.png
$ wget https://github.com/googlecodelabs/google-maps-simple-store-locator/raw/master/src/img/icon_patisserie.png
$ wget https://github.com/googlecodelabs/google-maps-simple-store-locator/raw/master/src/img/logo_cafe.png
$ wget https://github.com/googlecodelabs/google-maps-simple-store-locator/raw/master/src/img/logo_patisserie.png
- 執行下列指令,預覽完成的商店定位器:
$ python3 -m http.server 8080
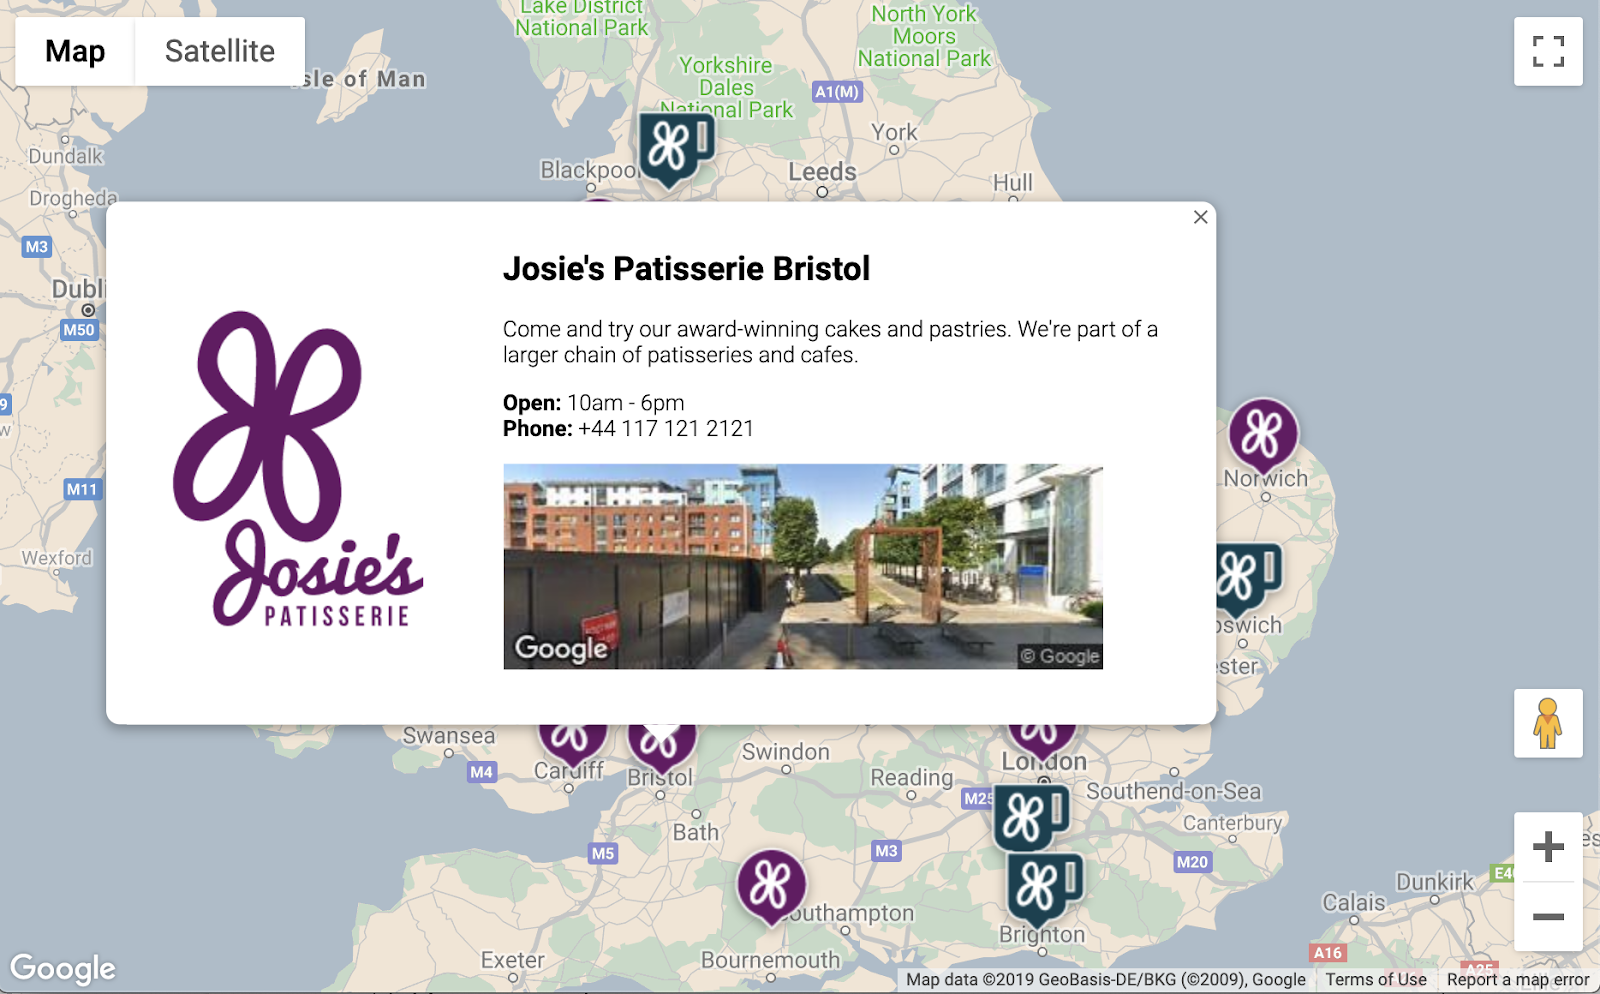
重新載入預覽畫面後,您應該會看到類似下圖的地圖,其中包含自訂樣式、自訂標記圖片、改良的資訊視窗格式,以及每個地點的街景服務圖片:
6. 取得使用者輸入內容
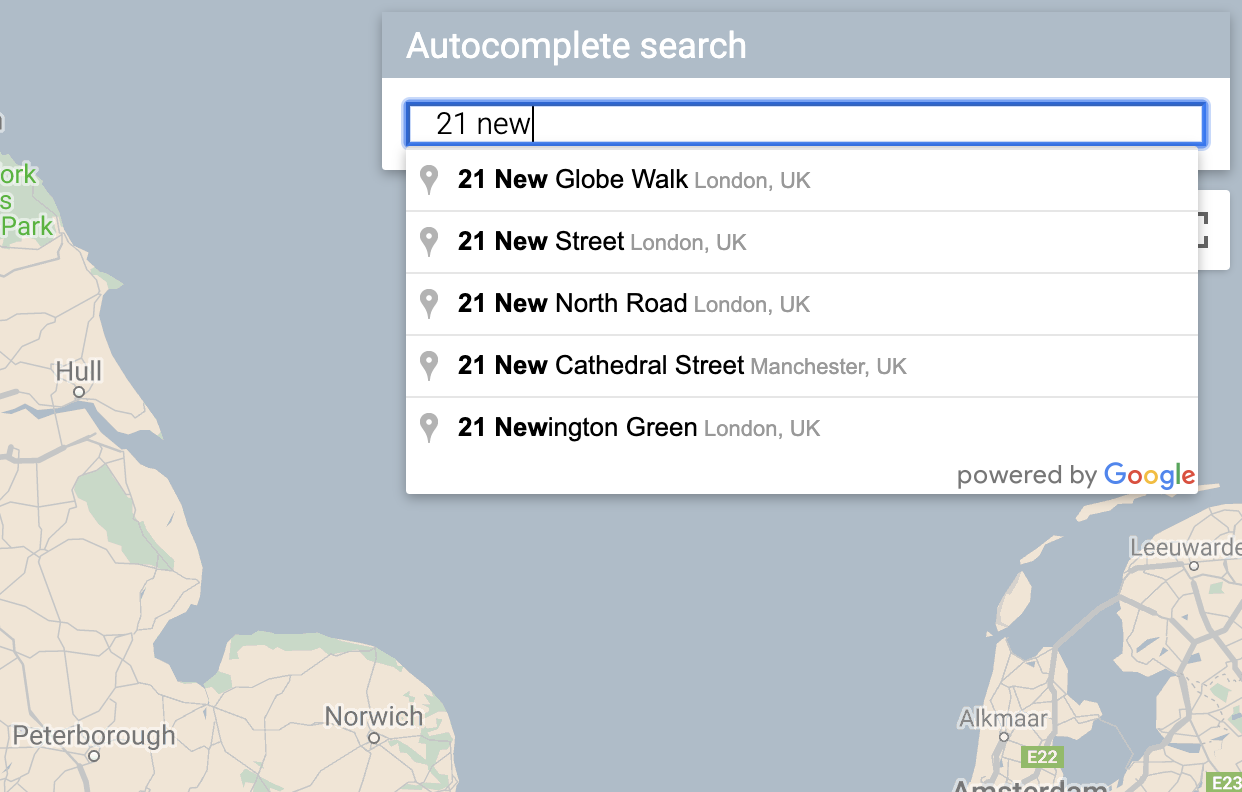
商店定位器使用者通常想知道哪間商店離自己最近,或是離他們預計出發的地點最近。新增 Place Autocomplete 搜尋列,方便使用者輕鬆輸入起始地址。Place Autocomplete 提供的預先輸入功能與其他 Google 搜尋列的 Autocomplete 功能類似,但預測結果都是 Google 地圖平台中的地點。
- 返回編輯器
index.html,為自動完成搜尋列和相關聯的結果側邊面板新增樣式。如果貼上新程式碼時覆蓋了舊程式碼,請記得替換 API 金鑰。
index.html
<html>

<head>
  <title>Store Locator</title>
  <style>
    #map {
      height: 100%;
    }

    html,
    body {
      height: 100%;
      margin: 0;
      padding: 0;
    }

    /* Styling for Autocomplete search bar */
    #pac-card {
      background-color: #fff;
      border-radius: 2px 0 0 2px;
      box-shadow: 0 2px 6px rgba(0, 0, 0, 0.3);
      box-sizing: border-box;
      font-family: Roboto;
      margin: 10px 10px 0 0;
      -moz-box-sizing: border-box;
      outline: none;
    }

    #pac-container {
      padding-top: 12px;
      padding-bottom: 12px;
      margin-right: 12px;
    }

    #pac-input {
      background-color: #fff;
      font-family: Roboto;
      font-size: 15px;
      font-weight: 300;
      margin-left: 12px;
      padding: 0 11px 0 13px;
      text-overflow: ellipsis;
      width: 400px;
    }

    #pac-input:focus {
      border-color: #4d90fe;
    }

    #title {
      color: #fff;
      background-color: #acbcc9;
      font-size: 18px;
      font-weight: 400;
      padding: 6px 12px;
    }

    .hidden {
      display: none;
    }

    /* Styling for an info pane that slides out from the left.
     * Hidden by default. */
    #panel {
      height: 100%;
      width: null;
      background-color: white;
      position: fixed;
      z-index: 1;
      overflow-x: hidden;
      transition: all .2s ease-out;
    }

    .open {
      width: 250px;
    }

    .place {
      font-family: 'open sans', arial, sans-serif;
      font-size: 1.2em;
      font-weight: 500;
      margin-block-end: 0px;
      padding-left: 18px;
      padding-right: 18px;
    }

    .distanceText {
      color: silver;
      font-family: 'open sans', arial, sans-serif;
      font-size: 1em;
      font-weight: 400;
      margin-block-start: 0.25em;
      padding-left: 18px;
      padding-right: 18px;
    }
  </style>
</head>

<body>
  <!-- The div to hold the map -->
  <div id="map"></div>

  <script src="app.js"></script>
  <script async defer src="https://maps.googleapis.com/maps/api/js?key=YOUR_API_KEY&libraries=places&callback=initMap&solution_channel=GMP_codelabs_simplestorelocator_v1_a">
  </script>
</body>

</html>
自動完成搜尋列和滑出式面板一開始都會隱藏,直到需要時才會顯示。
- 現在,請在
app.js的initMap函式結尾,也就是右大括號之前,將 Autocomplete 小工具新增至地圖。
app.js
  // Build and add the search bar
  const card = document.createElement('div');
  const titleBar = document.createElement('div');
  const title = document.createElement('div');
  const container = document.createElement('div');
  const input = document.createElement('input');
  const options = {
    types: ['address'],
    componentRestrictions: {country: 'gb'},
  };

  card.setAttribute('id', 'pac-card');
  title.setAttribute('id', 'title');
  title.textContent = 'Find the nearest store';
  titleBar.appendChild(title);
  container.setAttribute('id', 'pac-container');
  input.setAttribute('id', 'pac-input');
  input.setAttribute('type', 'text');
  input.setAttribute('placeholder', 'Enter an address');
  container.appendChild(input);
  card.appendChild(titleBar);
  card.appendChild(container);
  map.controls[google.maps.ControlPosition.TOP_RIGHT].push(card);

  // Make the search bar into a Places Autocomplete search bar and select
  // which detail fields should be returned about the place that
  // the user selects from the suggestions.
  const autocomplete = new google.maps.places.Autocomplete(input, options);

  autocomplete.setFields(
      ['address_components', 'geometry', 'name']);
這段程式碼會限制自動完成建議只傳回地址 (因為 Place Autocomplete 可以比對機構名稱和行政區位置),並將傳回的地址限制在英國境內。新增這些選用規格後,使用者只需輸入較少的字元,即可縮小預測範圍,顯示他們要尋找的地址。接著,它會將您建立的 Autocomplete div 移至地圖的右上角,並指定回應中應傳回每個地點的哪些欄位。
- 執行下列指令,重新啟動伺服器並重新整理預覽畫面:
$ python3 -m http.server 8080
現在地圖的右上角應該會顯示「自動完成」小工具,其中會顯示與您輸入內容相符的英國地址。
現在,您需要處理使用者從自動完成小工具選取預測結果的情況,並以該地點做為計算商店距離的依據。
- 在
app.js中,將下列程式碼新增至initMap結尾,並放在剛才貼上的程式碼後面。
app.js
 // Set the origin point when the user selects an address
  const originMarker = new google.maps.Marker({map: map});
  originMarker.setVisible(false);
  let originLocation = map.getCenter();

  autocomplete.addListener('place_changed', async () => {
    originMarker.setVisible(false);
    originLocation = map.getCenter();
    const place = autocomplete.getPlace();

    if (!place.geometry) {
      // User entered the name of a Place that was not suggested and
      // pressed the Enter key, or the Place Details request failed.
      window.alert('No address available for input: \'' + place.name + '\'');
      return;
    }

    // Recenter the map to the selected address
    originLocation = place.geometry.location;
    map.setCenter(originLocation);
    map.setZoom(9);
    console.log(place);

    originMarker.setPosition(originLocation);
    originMarker.setVisible(true);

    // Use the selected address as the origin to calculate distances
    // to each of the store locations
    const rankedStores = await calculateDistances(map.data, originLocation);
    showStoresList(map.data, rankedStores);

    return;
  });
這段程式碼會新增監聽器,因此當使用者點選其中一項建議時,地圖會以所選地址為中心,並將該地址設為距離計算的起點。您會在下一個步驟中實作距離計算。
7. 列出距離最近的商店
Directions API 的運作方式與在 Google 地圖應用程式中要求路線規劃的體驗非常相似,只要輸入單一起點和單一目的地,即可取得兩者之間的路線。距離矩陣 API 進一步擴展這個概念,根據交通時間和距離,找出多個可能起點和多個可能目的地之間的最佳配對。在這種情況下,如要協助使用者找出所選地址附近的商店,請提供一個起點和一系列商店位置做為目的地。
- 在
app.js中新增名為calculateDistances的函式。
app.js
async function calculateDistances(data, origin) {
  const stores = [];
  const destinations = [];

  // Build parallel arrays for the store IDs and destinations
  data.forEach((store) => {
    const storeNum = store.getProperty('storeid');
    const storeLoc = store.getGeometry().get();

    stores.push(storeNum);
    destinations.push(storeLoc);
  });

  // Retrieve the distances of each store from the origin
  // The returned list will be in the same order as the destinations list
  const service = new google.maps.DistanceMatrixService();
  const getDistanceMatrix =
    (service, parameters) => new Promise((resolve, reject) => {
      service.getDistanceMatrix(parameters, (response, status) => {
        if (status != google.maps.DistanceMatrixStatus.OK) {
          reject(response);
        } else {
          const distances = [];
          const results = response.rows[0].elements;
          for (let j = 0; j < results.length; j++) {
            const element = results[j];
            const distanceText = element.distance.text;
            const distanceVal = element.distance.value;
            const distanceObject = {
              storeid: stores[j],
              distanceText: distanceText,
              distanceVal: distanceVal,
            };
            distances.push(distanceObject);
          }

          resolve(distances);
        }
      });
    });

  const distancesList = await getDistanceMatrix(service, {
    origins: [origin],
    destinations: destinations,
    travelMode: 'DRIVING',
    unitSystem: google.maps.UnitSystem.METRIC,
  });

  distancesList.sort((first, second) => {
    return first.distanceVal - second.distanceVal;
  });

  return distancesList;
}
函式會使用傳遞給函式的起點做為單一起點,並使用商店位置做為目的地陣列,呼叫 Distance Matrix API。接著,這個函式會建構物件陣列,儲存商店 ID、以使用者可理解的字串表示的距離、以數值表示的距離 (以公尺為單位),並排序陣列。
使用者希望看到依距離排序的商店清單,從最近到最遠。使用 calculateDistances 函式傳回的清單,為每間商店填入側邊面板清單,以決定商店的顯示順序。
- 在
app.js中新增名為showStoresList的函式。
app.js
function showStoresList(data, stores) {
  if (stores.length == 0) {
    console.log('empty stores');
    return;
  }

  let panel = document.createElement('div');
  // If the panel already exists, use it. Else, create it and add to the page.
  if (document.getElementById('panel')) {
    panel = document.getElementById('panel');
    // If panel is already open, close it
    if (panel.classList.contains('open')) {
      panel.classList.remove('open');
    }
  } else {
    panel.setAttribute('id', 'panel');
    const body = document.body;
    body.insertBefore(panel, body.childNodes[0]);
  }


  // Clear the previous details
  while (panel.lastChild) {
    panel.removeChild(panel.lastChild);
  }

  stores.forEach((store) => {
    // Add store details with text formatting
    const name = document.createElement('p');
    name.classList.add('place');
    const currentStore = data.getFeatureById(store.storeid);
    name.textContent = currentStore.getProperty('name');
    panel.appendChild(name);
    const distanceText = document.createElement('p');
    distanceText.classList.add('distanceText');
    distanceText.textContent = store.distanceText;
    panel.appendChild(distanceText);
  });

  // Open the panel
  panel.classList.add('open');

  return;
}
- 執行下列指令,重新啟動伺服器並重新整理預覽畫面。
$ python3 -m http.server 8080
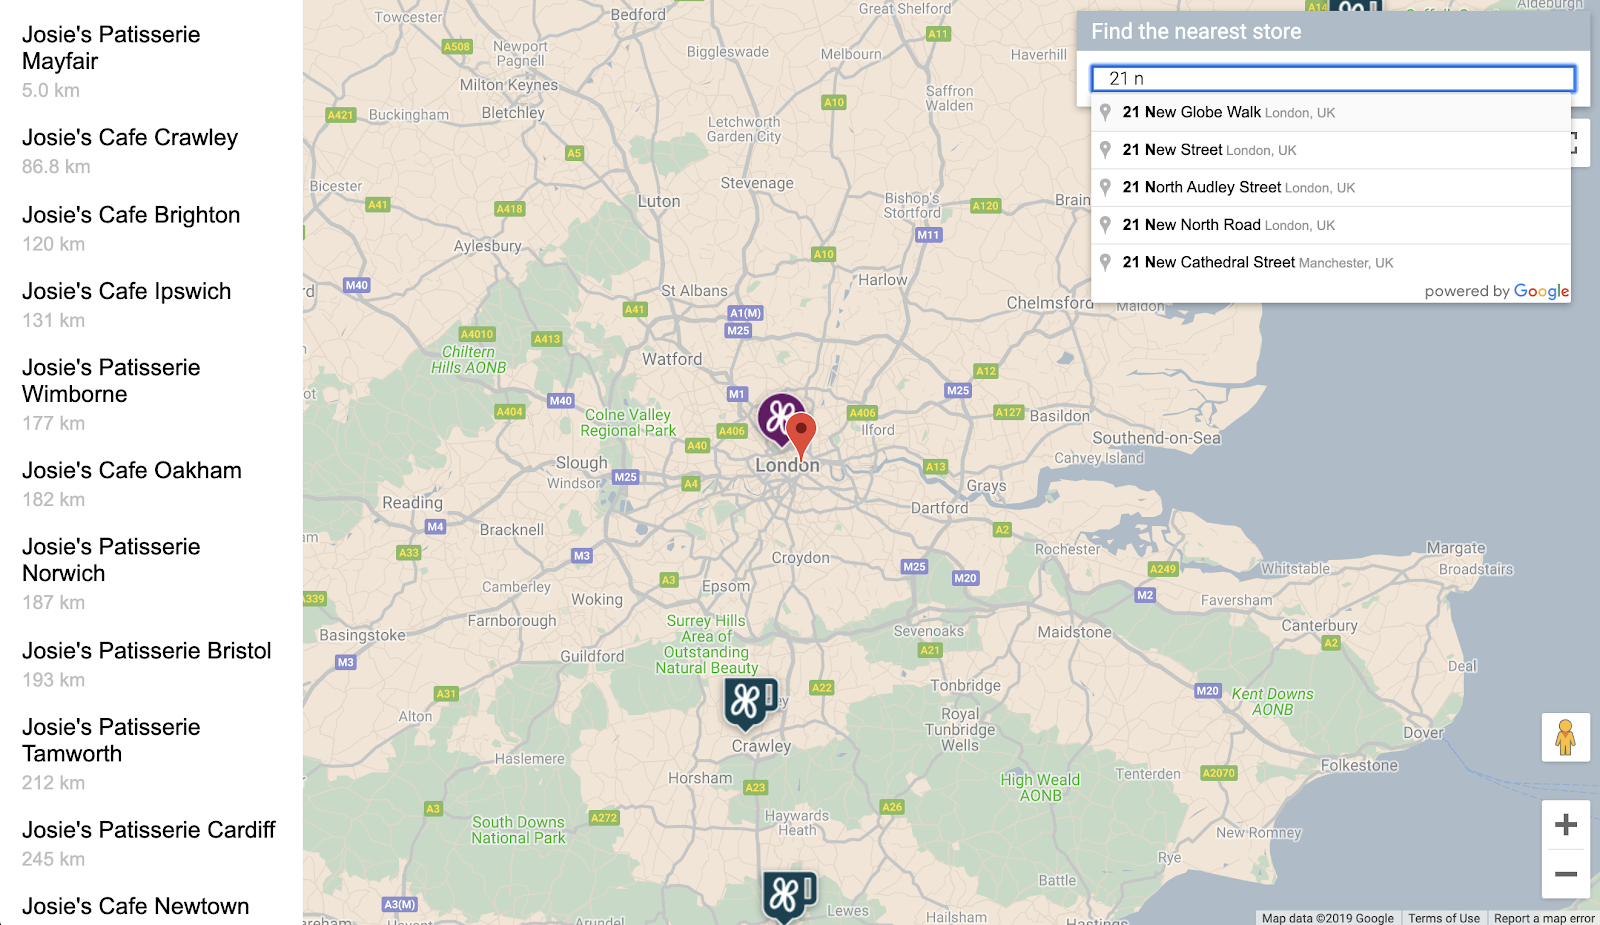
- 最後,在自動完成搜尋列中輸入英國地址,然後按一下其中一項建議。
地圖應會以該地址為中心,並顯示側欄,列出商店位置,順序是依據與所選地址的距離。範例如下圖所示:
8. 選用:代管網頁
到目前為止,您只有在主動執行 Python HTTP 伺服器時,才會看到地圖。如要查看地圖,或與他人分享地圖網址,請使用 Cloud Storage 託管網頁。Cloud Storage 是線上檔案儲存網路服務,專為儲存與存取 Google 基礎架構資料而設計。這項服務結合了 Google Cloud 的效能和可擴充性,以及進階安全性和共用功能。此外,Firebase 也提供免費方案,非常適合代管簡單的商店定位器。
Cloud Storage 會將檔案儲存在值區中,這與電腦上的目錄類似。如要代管網頁,請先建立 bucket。您必須為 bucket 選擇專屬名稱,或許可以將自己的名稱做為 bucket 名稱的一部分。
- 決定名稱後,請在 Cloud Shell 中執行下列指令:
$ gsutil mb gs://yourname-store-locator
gsutil 是與 Cloud Storage 互動的工具。mb 指令的創意名稱是「make bucket」(建立 bucket)。如要進一步瞭解所有可用指令 (包括您使用的指令),請參閱 gsutil 工具。
根據預設,Cloud Storage 上託管的值區和檔案都是私密內容。不過,您希望所有檔案都能公開,讓所有人都能透過網際網路存取商店定位器。上傳檔案後,您可以將每個檔案設為公開,但這樣很麻煩。您只需為建立的值區設定預設存取層級,上傳至該值區的所有檔案就會沿用該存取層級。
- 執行下列指令,並將
yourname-store-locator替換為您為 bucket 選擇的名稱:
$ gsutil defacl ch -u AllUsers:R gs://yourname-store-locator
- 現在,您可以使用下列指令,上傳目前目錄中的所有檔案 (目前只有
index.html和app.js檔案):
$ gsutil -h "Cache-Control:no-cache" cp * gs://yourname-store-locator
現在您應該會有一個線上地圖網頁。查看網址為 http://storage.googleapis.com/yourname-store-locator/index.html,其中 yourname-store-locator 部分同樣要替換為先前選擇的值區名稱。
清除
如要清除這個專案中建立的所有資源,最簡單的方法就是關閉您在本教學課程開始時建立的 Google Cloud 專案:
9. 恭喜
恭喜!您已完成本程式碼研究室。
您學到的內容
- 使用 Maps JavaScript API 新增自訂樣式的地圖
- 以 GeoJSON 格式將資料層載入地圖
- 使用 Street View Static API 在網頁中顯示街景圖片。
- 使用 Places Library 在網頁中新增地點自動完成搜尋列
- 使用 Distance Matrix 服務,透過單一 API 呼叫計算多個距離
- 使用以瀏覽器為基礎的 Cloud Shell 指令列介面,在 Google Cloud Platform 中管理及測試網頁開發專案
- 透過 Cloud Storage 託管網站
瞭解詳情
- 如要瞭解如何使用 Google App Engine 託管網路地圖,請參閱程式碼研究室「Mapping the NYC Subway」。
- 探索更多 Google 地圖平台程式碼研究室,例如建構「附近商家搜尋」服務。
- 請回答下列問題,協助我們製作最實用的內容:
你還想看到哪些程式碼研究室?
如果想找的程式碼研究室未列於上方,請在這裡提出新的問題。
如要進一步瞭解程式碼,請前往 https://github.com/googlecodelabs/google-maps-simple-store-locator 查看原始碼存放區。