
There are many ways to deploy web sites within Google Cloud with each solution offering different features, capabilities, and levels of control. Google Compute Engine, also referred to as GCE, offers a deep level of control over the infrastructure used to run a web site, but also requires a little more operational management compared to solutions like Google Kubernetes Engines (GKE), Google App Engine (GAE), or others. With Compute Engine, we have fine-grained control of aspects of the infrastructure, including the virtual machines, load balancers, and more. Today we will deploy a sample application, the Fancy Store ecommerce website, to show how a website can be deployed and scale easily with Compute Engine.
What you'll learn
- How to create Compute Engine instances
- How to create instance templates from source instances
- How to create managed instance groups
- How to create and test managed instance group health checks
- How to create HTTP(S) Load Balancers
- How to create load balancer health checks
- How to use a Content Delivery Network (CDN) for Caching
At the end of the Codelab, we will have instances inside managed instance groups to provide autohealing, load balancing, autoscaling, and rolling updates for our website.
Prerequisites
- For introductory overviews of concepts we will use in this lab, please check out the material below:
- Welcome to Google Cloud Platform - the Essentials of GCP
- Getting Started with Google Cloud Compute Engine
- Getting Started with Google Cloud Storage
- Getting Started: Cloud Shell
Self-paced environment setup
If you don't already have a Google Account (Gmail or Google Apps), you must create one. Sign-in to Google Cloud Platform console (console.cloud.google.com) and create a new project:


Remember the project ID, a unique name across all Google Cloud projects (the name above has already been taken and will not work for you, sorry!). It will be referred to later in this codelab as PROJECT_ID.
Next, you'll need to enable billing in the Cloud Console in order to use Google Cloud resources.
Running through this codelab shouldn't cost you more than a few dollars, but it could be more if you decide to use more resources or if you leave them running (see "cleanup" section at the end of this document).
New users of Google Cloud Platform are eligible for a $300 free trial.
Enable Compute Engine API
Next, you'll need to enable the Compute Engine API. Enabling an API requires you to accept the Terms of Service and billing responsibility for the API.
Google Cloud Shell
While Google Cloud and Kubernetes can be operated remotely from your laptop, in this codelab we will be using Google Cloud Shell, a command line environment running in the Cloud.
This Debian-based virtual machine is loaded with all the development tools you'll need. It offers a persistent 5GB home directory, and runs on the Google Cloud, greatly enhancing network performance and authentication. This means that all you will need for this codelab is a browser (yes, it works on a Chromebook).
To activate Google Cloud Shell, from the developer console simply click the button on the top right-hand side (it should only take a few moments to provision and connect to the environment):

Click the "Start Cloud Shell" button:


Once connected to the cloud shell, you should see that you are already authenticated and that the project is already set to your PROJECT_ID :
gcloud auth list
Command output
Credentialed accounts:
 - <myaccount>@<mydomain>.com (active)
gcloud config list project
Command output
[core]
project = <PROJECT_ID>
Cloud Shell also sets some environment variables by default which may be useful as you run future commands.
echo $GOOGLE_CLOUD_PROJECT
Command output
<PROJECT_ID>
If for some reason the project is not set, simply issue the following command :
gcloud config set project <PROJECT_ID>
Looking for your PROJECT_ID? Check out what ID you used in the setup steps or look it up in the console dashboard:

IMPORTANT: Finally, set the default zone and project configuration:
gcloud config set compute/zone us-central1-f
You can choose a variety of different zones. Learn more in the Regions & Zones documentation.
Create GCS Bucket
We are going to use a Google Cloud Storage bucket to house our built code as well as our startup scripts. From within Cloud Shell, execute the following to create a new GCS bucket:
gsutil mb gs://fancy-store-$DEVSHELL_PROJECT_ID
We will be using the existing Fancy Store ecommerce website based on the monolith-to-microservices repository as the basis for our website. We will clone the source code from our git repo, so we can focus on the aspects of deploying to GCE. Later on in this Codelab, we will perform a small update to the code to demonstrate the simplicity of updating on GCE.
Click the button below to clone the code repository into the project, as well as open the Cloud Shell and the built-in Code Editor.

At the Cloud Shell command prompt, run the initial build of the code to allow the application to run locally. It may take a few minutes for this script to run.
./setup.sh
Let's do our due diligence and test our application, run the following command to start our web server:
cd microservices
npm start
Output:
Products microservice listening on port 8092!
Frontend microservice listening on port 8090!
Orders microservice listening on port 8091!
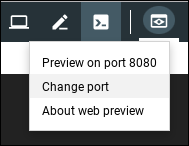
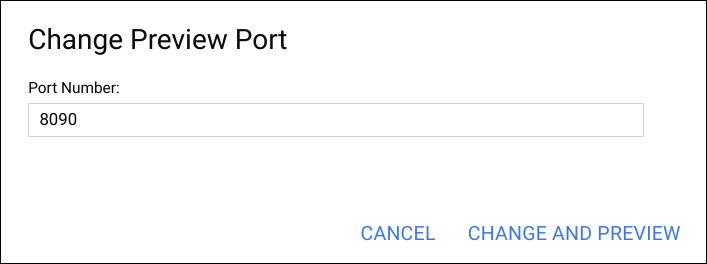
You can preview your application by clicking the web preview icon and selecting "Change port" and entering the port of the Frontend microservice: 8090. Select "Change and preview".
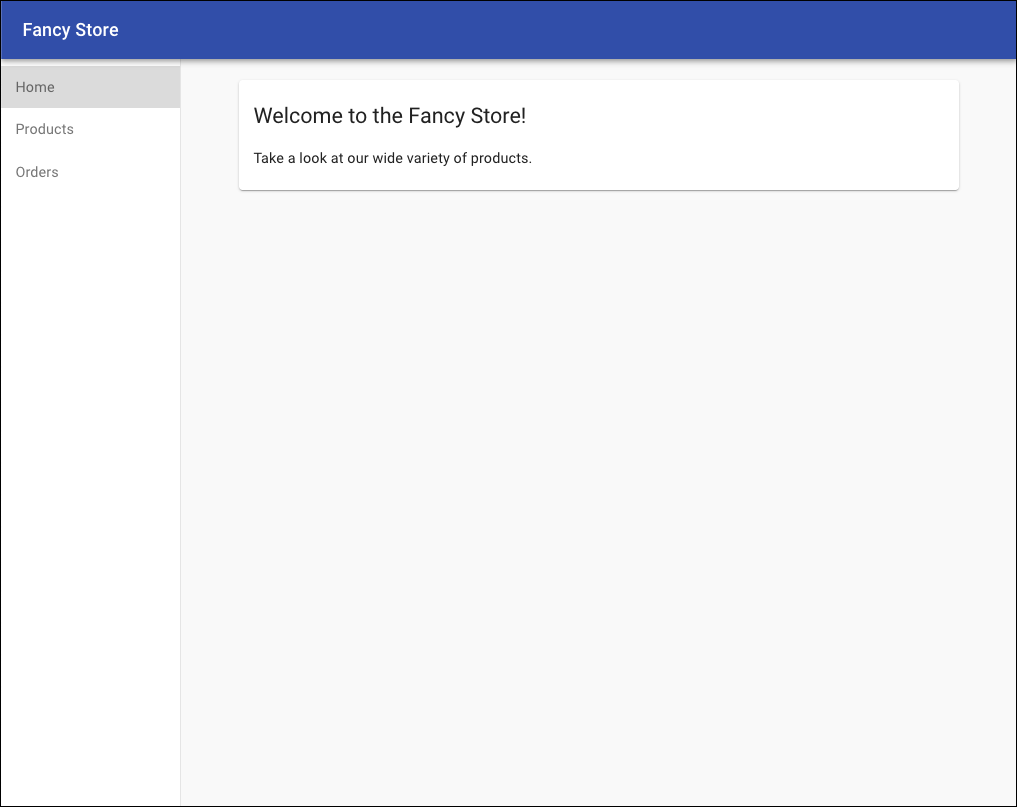
This should open a new window where you can see the frontend of the Fancy Store in action!
You can close this window after viewing the website and to stop the web server process, press CTRL+C in the terminal window.
Now that you have your working developer environment, it's time to start deploying some Compute Engine instances! The following steps will:
- Create a startup script to configure instances
- Clone source code and upload to Google Cloud Storage
- Deploy a Compute Engine instance to host the backend microservices
- Reconfigure the frontend code to utilize the backend microservices instance
- Deploy a Compute Engine instance to host the frontend microservice
- Configure the network to allow communication
Create Startup Script
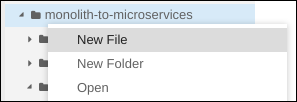
In order for the instances to automatically be configured the way we want, we will use a startup script that will instruct the instance on what to do each time it is started. Within the Code Editor inside Cloud Shell, navigate to the folder monolith-to-microservices and create a file called "startup-script.sh".
Within this new file, paste the following code. We will edit some of the code after pasted.
#!/bin/bash

# Install logging monitor. The monitor will automatically pick up logs sent to
# syslog.
curl -s "https://storage.googleapis.com/signals-agents/logging/google-fluentd-install.sh" | bash
service google-fluentd restart &

# Install dependencies from apt
apt-get update
apt-get install -yq ca-certificates git build-essential supervisor psmisc

# Install nodejs
mkdir /opt/nodejs
curl https://nodejs.org/dist/v8.12.0/node-v8.12.0-linux-x64.tar.gz | tar xvzf - -C /opt/nodejs --strip-components=1
ln -s /opt/nodejs/bin/node /usr/bin/node
ln -s /opt/nodejs/bin/npm /usr/bin/npm

# Get the application source code from the Google Cloud Storage bucket.
mkdir /fancy-store
gsutil -m cp -r gs://fancy-store-[DEVSHELL_PROJECT_ID]/monolith-to-microservices/microservices/* /fancy-store/

# Install app dependencies.
cd /fancy-store/
npm install

# Create a nodeapp user. The application will run as this user.
useradd -m -d /home/nodeapp nodeapp
chown -R nodeapp:nodeapp /opt/app

# Configure supervisor to run the node app.
cat >/etc/supervisor/conf.d/node-app.conf << EOF
[program:nodeapp]
directory=/fancy-store
command=npm start
autostart=true
autorestart=true
user=nodeapp
environment=HOME="/home/nodeapp",USER="nodeapp",NODE_ENV="production"
stdout_logfile=syslog
stderr_logfile=syslog
EOF

supervisorctl reread
supervisorctl update
Now, within the editor, find the text [DEVSHELL_PROJECT_ID] and replace it with the output from the following command:
echo $DEVSHELL_PROJECT_ID
Example output:
my-gce-codelab-253520
The line of code within startup-script.sh should now be similar to the following:
gs://fancy-store-my-gce-codelab-253520/monolith-to-microservices/microservices/* /fancy-store/The startup script performs the following tasks:
- Installs the Logging agent. The agent automatically collects logs from syslog.
- Installs Node.js and Supervisor. Supervisor runs the app as a daemon.
- Clones the app's source code from GCS Bucket and installs dependencies.
- Configures Supervisor to run the app. Supervisor makes sure the app is restarted if it exits unexpectedly or is stopped by an admin or process. It also sends the app's stdout and stderr to syslog for the Logging agent to collect.
Now copy the created startup-script.sh file into our previously created GCS bucket:
gsutil cp startup-script.sh gs://fancy-store-$DEVSHELL_PROJECT_ID
This will now be accessible at: https://storage.googleapis.com/[BUCKET_NAME]/startup-script.sh. [BUCKET_NAME] represents the name of the Cloud Storage bucket. This will only be viewable by authorized users and service accounts by default, so it will be inaccessible through a web browser. Google Compute Engine instances will automatically be able to access this through their service account.
Copy Code into GCS Bucket
When instances launch, they are going to pull code from the GCS bucket so that we can store some configuration variables within the ‘.env' file of the code.
Copy the cloned code into the GCS bucket:
cd ~
rm -rf monolith-to-microservices/*/node_modules
gsutil -m cp -r monolith-to-microservices gs://fancy-store-$DEVSHELL_PROJECT_ID/
Deploy Backend Instance
The first instance we will deploy will be the backend instance which will house the Orders and Products microservices.
Execute the following command within Cloud Shell to create an f1-micro instance that is configured to use our previously created startup script, and also is tagged as a "backend" instance so we can apply specific firewall rules to it later:
gcloud compute instances create backend \
    --machine-type=f1-micro \
    --image=debian-9-stretch-v20190905 \
    --image-project=debian-cloud \
    --tags=backend \
    --metadata=startup-script-url=https://storage.googleapis.com/fancy-store-$DEVSHELL_PROJECT_ID/startup-script.sh
Configure Connection to Backend
Before we deploy the frontend of the application, we need to update the configuration to point to the backend we just deployed.
Retrieve the external IP address of the backend, which can be viewed from the following command under the EXTERNAL_IP tab for the backend instance:
gcloud compute instances list
Example output:
NAME     ZONE           MACHINE_TYPE  PREEMPTIBLE  INTERNAL_IP  EXTERNAL_IP   STATUS
backend  us-central1-a  f1-micro                   10.128.0.2   34.68.223.88  RUNNING
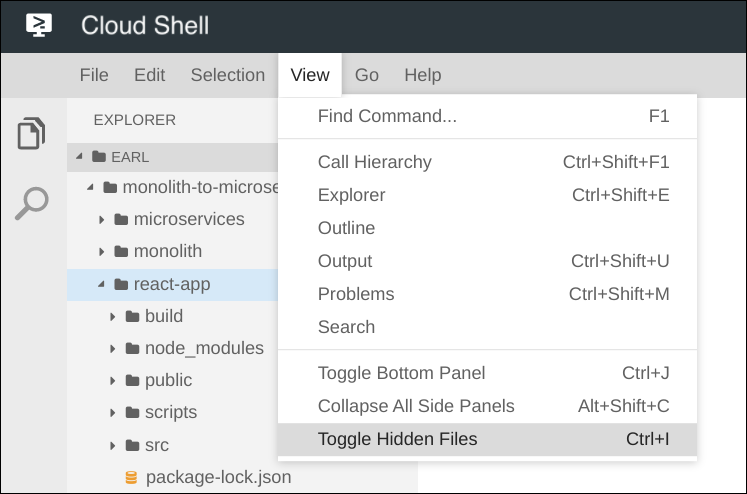
Back within Cloud Shell's Code Editor, navigate to the folder monolith-to-microservices → react-app. From the Code Editor menu, select View → Toggle Hidden Files in order to be able to see the ‘.env' file.
Edit the ‘.env' file to point to the External IP of the backend. [BACKEND_ADDRESS] below represents the External IP address of the backend instance determined from the above gcloud command.
REACT_APP_ORDERS_URL=http://[BACKEND_ADDRESS]:8091/api/orders
REACT_APP_PRODUCTS_URL=http://[BACKEND_ADDRESS]:8092/api/products
Rebuild react-app, which will update the frontend code:
npm install && npm run-script build
Copy the application code back into the GCS bucket:
cd ~
rm -rf monolith-to-microservices/*/node_modules
gsutil -m cp -r monolith-to-microservices gs://fancy-store-$DEVSHELL_PROJECT_ID/
Deploy Frontend Instance
Now that the code is configured, we can deploy the frontend instance. Execute the following to deploy the frontend instance with a similar command as before, but this instance is tagged as "frontend" for firewall purposes.
gcloud compute instances create frontend \
    --machine-type=f1-micro \
    --image=debian-9-stretch-v20190905 \
    --image-project=debian-cloud \
    --tags=frontend \
    --metadata=startup-script-url=https://storage.googleapis.com/fancy-store-$DEVSHELL_PROJECT_ID/startup-script.sh
Configure Network
Create firewall rules to allow access to port 8090 for the frontend, and ports 8091-8092 for the backend. These firewall commands use the tags assigned during instance creation for application.
gcloud compute firewall-rules create fw-fe \
    --allow tcp:8090 \
    --target-tags=frontend
gcloud compute firewall-rules create fw-be \
    --allow tcp:8091-8092 \
    --target-tags=backend
The website should now be functional. Navigate to the external IP of the frontend. This address can be determined by looking for the EXTERNAL_IP of the frontend instance:
gcloud compute instances list
Example output:
NAME      ZONE           MACHINE_TYPE  PREEMPTIBLE  INTERNAL_IP  EXTERNAL_IP      STATUS
backend   us-central1-a  f1-micro                   10.128.0.2   104.198.235.171  RUNNING
frontend  us-central1-a  f1-micro                   10.128.0.3   34.69.141.9      RUNNING
Navigate to http://[FRONTEND_ADDRESS]:8090 to access the website, where [FRONTEND_ADDRESS] is the EXTERNAL_IP determined above. It may take a couple minutes for the instance to start and be configured.
Try navigating to the Products and Orders pages; these should work successfully, as well.
To allow our application to scale, managed instance groups will be created and will use the frontend and backend instances as Instance Templates.
A managed instance group (MIG) contains identical instances that you can manage as a single entity in a single zone. Managed instance groups maintain high availability of your apps by proactively keeping your instances available, that is, in the RUNNING state. We will be using managed instance groups for our frontend and backend instances to provide autohealing, load balancing, autoscaling, and rolling updates.
Create Instance Template from Source Instance
Before we can create a managed instance group, we have to first create an instance template that will be the foundation for the group. Instance templates allow you to define the machine type, boot disk image or container image, network, and other instance properties to use when creating new VM instances. You can use instance templates to create instances in a managed instance group or even to create individual instances.
To create the instance template, we will use the existing instances we created previously. First, we must stop both instances:
gcloud compute instances stop frontend
gcloud compute instances stop backend
We can then create the instance template from the source instances:
gcloud compute instance-templates create fancy-fe \
    --source-instance=frontend \
    --source-instance-zone=us-central1-a
gcloud compute instance-templates create fancy-be \
    --source-instance=backend \
    --source-instance-zone=us-central1-a
Confirm the instance templates were created:
gcloud compute instance-templates list
Example output:
NAME      MACHINE_TYPE  PREEMPTIBLE  CREATION_TIMESTAMP
fancy-be  f1-micro                   2019-09-12T07:52:57.544-07:00
fancy-fe  f1-micro                   2019-09-12T07:52:48.238-07:00
Create Managed Instance Group
We will create two managed instance groups, one for the frontend and one for the backend. These managed instance groups will use the previously created instance templates, and will be configured for two instances each within each group to start. The instances will be automatically named based on the "base-instance-name" specified with random characters appended.
gcloud compute instance-groups managed create fancy-fe-mig \
    --base-instance-name fancy-fe \
    --size 2 \
    --template fancy-fe
gcloud compute instance-groups managed create fancy-be-mig \
    --base-instance-name fancy-be \
    --size 2 \
    --template fancy-be
For our application, the frontend microservice runs on port 8090, and the backend microservices run on port 8091 for orders and port 8092 for products. Since these are non-standard ports, we will specify named ports to identify these. Named ports are key:value pair metadata representing the service name and the port that it's running on. Named ports can be assigned to an instance group, which indicates that the service is available on all instances in the group. This information is used by the HTTP Load Balancing service that will be configured later.
gcloud compute instance-groups set-named-ports fancy-fe-mig \
    --named-ports frontend:8090
gcloud compute instance-groups set-named-ports fancy-be-mig \
    --named-ports orders:8091,products:8092
Configure Autohealing
To improve the availability of the application itself and to verify it is responding, you can configure an autohealing policy for the managed instance groups.
An autohealing policy relies on an application-based health check to verify that an app is responding as expected. Checking that an app responds is more precise than simply verifying that an instance is in a RUNNING state, which is the default behavior.
Create a health check that repairs the instance if it returns as unhealthy 3 consecutive times for the frontend and backend:
gcloud compute health-checks create http fancy-fe-hc \
    --port 8090 \
    --check-interval 30s \
    --healthy-threshold 1 \
    --timeout 10s \
    --unhealthy-threshold 3
gcloud compute health-checks create http fancy-be-hc \
    --port 8091 \
    --request-path=/api/orders \
    --check-interval 30s \
    --healthy-threshold 1 \
    --timeout 10s \
    --unhealthy-threshold 3
Create a firewall rule to allow the health check probes to connect to the microservices on ports 8090-8091:
gcloud compute firewall-rules create allow-health-check \
    --allow tcp:8090-8091 \
    --source-ranges 130.211.0.0/22,35.191.0.0/16 \
    --network default
Apply the health checks to their respective services:
gcloud compute instance-groups managed update fancy-fe-mig \
    --health-check fancy-fe-hc \
    --initial-delay 300
gcloud compute instance-groups managed update fancy-be-mig \
    --health-check fancy-be-hc \
    --initial-delay 300
Simulate Failure
In order to confirm the health check works, log in to an instance and stop the services. To find an instance name, execute the following:
gcloud compute instance-groups list-instances fancy-fe-mig
From there, secure shell into one of the instances, where INSTANCE_NAME is one of the instances from the list:
gcloud compute ssh [INSTANCE_NAME]
WIthin the instance, usesupervisorctl to stop the application:
sudo supervisorctl stop nodeapp; sudo killall node
Exit the instance:
exit
Monitor the repair operations:
watch -n 5 gcloud compute operations list \
--filter='operationType~compute.instances.repair.*'
Look for the following example output:
NAME                                                  TYPE                                       TARGET                                 HTTP_STATUS  STATUS  TIMESTAMP
repair-1568314034627-5925f90ee238d-fe645bf0-7becce15  compute.instances.repair.recreateInstance  us-central1-a/instances/fancy-fe-1vqq  200          DONE    2019-09-12T11:47:14.627-07:00
Once the repair is noticed, Ctrl+C to exit the watch command. At this point, the managed instance group will be recreating the instance to repair it.
To complement our managed instance groups, we will be using an HTTP(S) Load Balancers to serve traffic to the frontend and backend microservices, and using mappings to send traffic to the proper backend services based on pathing rules. This will expose a single load balanced IP for all services.
https://cloud.google.com/load-balancing/docs/load-balancing-overview.
Create HTTP(S) Load Balancer
Google Cloud Platform offers many different types of load balancers, but we will be using an HTTP(S) Load Balancer for our traffic. An HTTP load balancer is structured as follows:
- A forwarding rule directs incoming requests to a target HTTP proxy.
- The target HTTP proxy checks each request against a URL map to determine the appropriate backend service for the request.
- The backend service directs each request to an appropriate backend based on serving capacity, zone, and instance health of its attached backends. The health of each backend instance is verified using an HTTP health check. If the backend service is configured to use an HTTPS or HTTP/2 health check, the request will be encrypted on its way to the backend instance.
- Sessions between the load balancer and the instance can use the HTTP, HTTPS, or HTTP/2 protocol. If you use HTTPS or HTTP/2, each instance in the backend services must have an SSL certificate.
Create health checks that will be used to determine which instances are capable of serving traffic for each service.
gcloud compute http-health-checks create fancy-fe-frontend-hc \
  --request-path / \
  --port 8090
gcloud compute http-health-checks create fancy-be-orders-hc \
  --request-path /api/orders \
  --port 8091
gcloud compute http-health-checks create fancy-be-products-hc \
  --request-path /api/products \
  --port 8092
Create backend services that are the target for load-balanced traffic. This backend services will use the health checks and named ports we created.
gcloud compute backend-services create fancy-fe-frontend \
  --http-health-checks fancy-fe-frontend-hc \
  --port-name frontend \
  --global
gcloud compute backend-services create fancy-be-orders \
  --http-health-checks fancy-be-orders-hc \
  --port-name orders \
  --global
gcloud compute backend-services create fancy-be-products \
  --http-health-checks fancy-be-products-hc \
  --port-name products \
  --global
Add the backend services:
gcloud compute backend-services add-backend fancy-fe-frontend \
  --instance-group fancy-fe-mig \
  --instance-group-zone us-central1-a \
  --global
gcloud compute backend-services add-backend fancy-be-orders \
  --instance-group fancy-be-mig \
  --instance-group-zone us-central1-a \
  --global
gcloud compute backend-services add-backend fancy-be-products \
  --instance-group fancy-be-mig \
  --instance-group-zone us-central1-a \
  --global
Create a URL map. The URL map defines which URLs are directed to which backend services.
gcloud compute url-maps create fancy-map \
  --default-service fancy-fe-frontend
Create a path matcher to allow the ‘/api/orders' and ‘/api/products' paths to route to their respective services:
gcloud compute url-maps add-path-matcher fancy-map \
   --default-service fancy-fe-frontend \
   --path-matcher-name orders \
   --path-rules "/api/orders=fancy-be-orders,/api/products=fancy-be-products"
Create the proxy which ties to the created URL map.
gcloud compute target-http-proxies create fancy-proxy \
  --url-map fancy-map
Create a global forwarding rule that ties a public IP address and port to the proxy.
gcloud compute forwarding-rules create fancy-http-rule \
  --global \
  --target-http-proxy fancy-proxy \
  --ports 80
Update Configuration
Now that we have a new static IP address, we need to update the code on the frontend to point to this new address instead of the ephemeral address used earlier that pointed to the backend instance.
From within Cloud Shell, change to the react-app folder which houses the ‘.env' file that holds the configuration :
cd ~/monolith-to-microservices/react-app/
Find the IP address for the Load Balancer:
gcloud compute forwarding-rules list --global
Example output:
NAME                    REGION  IP_ADDRESS     IP_PROTOCOL  TARGET
fancy-http-rule          34.102.237.51  TCP          fancy-proxy
Edit .env with your preferred text editor (e.g. nano) to point to Public IP of Load Balancer. [LB_IP] represents the External IP address of the backend instance determined above.
REACT_APP_ORDERS_URL=http://[LB_IP]/api/orders
REACT_APP_PRODUCTS_URL=http://[LB_IP]/api/productsRebuild react-app, which will update the frontend code:
npm install && npm run-script build
Copy the application code back into the GCS bucket:
cd ~
rm -rf monolith-to-microservices/*/node_modules
gsutil -m cp -r monolith-to-microservices gs://fancy-store-$DEVSHELL_PROJECT_ID/
Update the Frontend Instances
Now that there is new code and configuration, we want the frontend instances within the managed instance group to pull this new code. Since our instances pull the code at startup, we can issue a rolling restart command:
gcloud compute instance-groups managed rolling-action restart fancy-fe-mig \
    --max-unavailable 100%
Test the Website
Check the status of the managed instance group until instances appear in the list:
watch -n 5 gcloud compute instance-groups list-instances fancy-fe-mig
Once items appear in the list, exit the watch command by pressing Ctrl+C.
Confirm the service is listed as healthy:
gcloud compute backend-services get-health fancy-fe-frontend --global
Example output:
---
backend: https://www.googleapis.com/compute/v1/projects/my-gce-codelab/zones/us-central1-a/instanceGroups/fancy-fe-mig
status:
  healthStatus:
  - healthState: HEALTHY
    instance: https://www.googleapis.com/compute/v1/projects/my-gce-codelab/zones/us-central1-a/instances/fancy-fe-x151
    ipAddress: 10.128.0.7
    port: 8090
  - healthState: HEALTHY
    instance: https://www.googleapis.com/compute/v1/projects/my-gce-codelab/zones/us-central1-a/instances/fancy-fe-cgrt
    ipAddress: 10.128.0.11
    port: 8090
  kind: compute#backendServiceGroupHealth
The application will then be accessible via http://[LB_IP] where [LB_IP] is the IP_ADDRESS specified for the Load Balancer, which can be found with the following command:
gcloud compute forwarding-rules list --global
So far, we have created two managed instance groups with two instances each; this configuration is fully functional, but a static configuration regardless of load. We are now going to create an autoscaling policy based on utilization to automatically scale each managed instance group.
Automatically Resize by Utilization
To create the autoscaling policy, execute the following within Cloud Shell. These commands create an autoscaler on the managed instance groups that automatically add instances when utilization is above 60% utilization, and also removes instances when the load balancer is below 60% utilization.
gcloud compute instance-groups managed set-autoscaling \
  fancy-fe-mig \
  --max-num-replicas 5 \
  --target-load-balancing-utilization 0.60
gcloud compute instance-groups managed set-autoscaling \
  fancy-be-mig \
  --max-num-replicas 5 \
  --target-load-balancing-utilization 0.60
Enable Content Delivery Network
Another feature that can help with scaling is to enable Cloud CDN, which is a Content Delivery Network service, to provide caching for the frontend. To do this, we can execute the following command on our frontend service:
gcloud compute backend-services update fancy-fe-frontend \
    --enable-cdn --global
Now, when a user requests content from the HTTP(S) load balancer, the request arrives at a Google Front End (GFE) which first looks in the Cloud CDN cache for a response to the user's request. If the GFE finds a cached response, the GFE sends the cached response to the user. This is called a cache hit.
Otherwise, if the GFE can't find a cached response for the request, the GFE makes a request directly to the backend. If the response to this request is cacheable, the GFE stores the response in the Cloud CDN cache so that the cache can be used for subsequent requests.
Updating Instance Template
Existing instance templates are not editable; however, since our instances are stateless and all configuration is done through the startup script, we'd only really need to change our instance template if we want to change the core image itself. To demonstrate this process, we're going to make a simple change and push that out.
Within this section, we will update the frontend instance, which acts as the basis for our instance template. During the update, we will put a file on the updated version of the instance template's image and then update the instance template, roll out the new template, and then confirm the file now exists on the managed instance group instances.
Start up the frontend instance, if it is not already running:
gcloud compute instances start frontend
Secure shell into the instance:
gcloud compute ssh frontend
Inside the instance, let's create a file to prove it was updated:
echo "Updated" > ~/updated_proof
Exit the instance:
exit
Shutdown the instance:
gcloud compute instances stop frontend
Create the new Instance Template:
gcloud compute instance-templates create fancy-fe-new \
    --source-instance=frontend \
    --source-instance-zone=us-central1-a
Roll out the updated instance template to the Managed Instance Group:
gcloud compute instance-groups managed rolling-action start-update fancy-fe-mig \
    --version template=fancy-fe-new
Monitor the status of the update:
gcloud compute instance-groups managed list-instances fancy-fe-mig
Once an instance is in status RUNNING with INSTANCE_TEMPLATE set to fancy-fe-new, log in to the newly created instance and check to see if the ‘updated_proof' file is there, where [VM_NAME] is the newly created instance:
gcloud compute ssh [VM_NAME]
If the ‘updated_proof' file is now on the managed group instances, the update has successfully been pushed out.
Make Changes to the Websites
Your marketing team has asked you to change the homepage for your site. They think it should be more informative of who your company is and what you actually sell. In this section, we will add some text to the homepage to make the marketing team happy! It looks like one of our developers have already created the changes with the file name index.js.new. We can just copy this file to index.js and our changes should be reflected. Follow the instructions below to make the appropriate changes.
Run the following commands copy the updated file to the correct file name and then print its contents to verify the changes:
cd ~/monolith-to-microservices/react-app/src/pages/Home
mv index.js.new index.js
cat ~/monolith-to-microservices/react-app/src/pages/Home/index.js
The resulting code should look like this:
/*
Copyright 2019 Google LLC
Licensed under the Apache License, Version 2.0 (the "License");
you may not use this file except in compliance with the License.
You may obtain a copy of the License at
https://www.apache.org/licenses/LICENSE-2.0
Unless required by applicable law or agreed to in writing, software
distributed under the License is distributed on an "AS IS" BASIS,
WITHOUT WARRANTIES OR CONDITIONS OF ANY KIND, either express or implied.
See the License for the specific language governing permissions and
limitations under the License.
*/
import React from "react";
import { makeStyles } from "@material-ui/core/styles";
import Paper from "@material-ui/core/Paper";
import Typography from "@material-ui/core/Typography";
const useStyles = makeStyles(theme => ({
root: {
flexGrow: 1
},
paper: {
width: "800px",
margin: "0 auto",
padding: theme.spacing(3, 2)
}
}));
export default function Home() {
const classes = useStyles();
return (
<div className={classes.root}>
<Paper className={classes.paper}>
<Typography variant="h5">
Fancy Fashion & Style Online
</Typography>
<br />
<Typography variant="body1">
Tired of mainstream fashion ideas, popular trends and societal norms?
This line of lifestyle products will help you catch up with the Fancy trend and express your personal style.
Start shopping Fancy items now!
</Typography>
</Paper>
</div>
);
}We updated the React components, but we need to build the React app to generate the static files. Run the following command to build the React app and copy it into the monolith public directory:
cd ~/monolith-to-microservices/react-app
npm install && npm run-script build
We then re-push this code to our GCS bucket:
cd ~
rm -rf monolith-to-microservices/*/node_modules
gsutil -m cp -r monolith-to-microservices gs://fancy-store-$DEVSHELL_PROJECT_ID/
Push Changes with Rolling Updates
We can now force all instances to restart to pull the update:
gcloud compute instance-groups managed rolling-action restart fancy-fe-mig
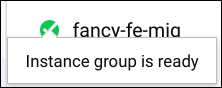
This rolling restart will now restart the instances while leaving a buffer so that access is not impacted. Monitor the cycling of the instances through the Console. While updating, the status will be in transforming; once complete, the managed instance group will show as ready under Compute Engine -> Instance Groups:
Once ready, the easiest way to cleanup all activities performed is to delete the Project. Deleting the project deletes all load balancers, instances, templates, etc. that were created within this Codelab to ensure no unexpected recurring charges occur. Execute the following within Cloud Shell, where PROJECT_ID is the full Project ID and not just the Project Name.
gcloud projects delete [PROJECT_ID]
Confirm deletion by entering "Y" when prompted.
You successfully deployed, scaled, and updated your website on GCE. You are now experienced with Compute Engine, Managed Instance Groups, Load Balancers, and Health Checks!