
1. ภาพรวม
โค้ดแล็บนี้จะช่วยให้คุณได้ทัวร์ชม API แมชชีนเลิร์นนิง 2-3 รายการอย่างรวดเร็ว คุณจะต้องใช้สิ่งต่อไปนี้
- Cloud Vision เพื่อทำความเข้าใจเนื้อหาของรูปภาพ
- Cloud Speech-to-Text เพื่อถอดเสียงเป็นข้อความ
- Cloud Translation เพื่อแปลสตริงใดก็ได้เป็นภาษาที่รองรับ
- Cloud Natural Language เพื่อดึงข้อมูลจากข้อความ
สิ่งที่คุณจะสร้าง
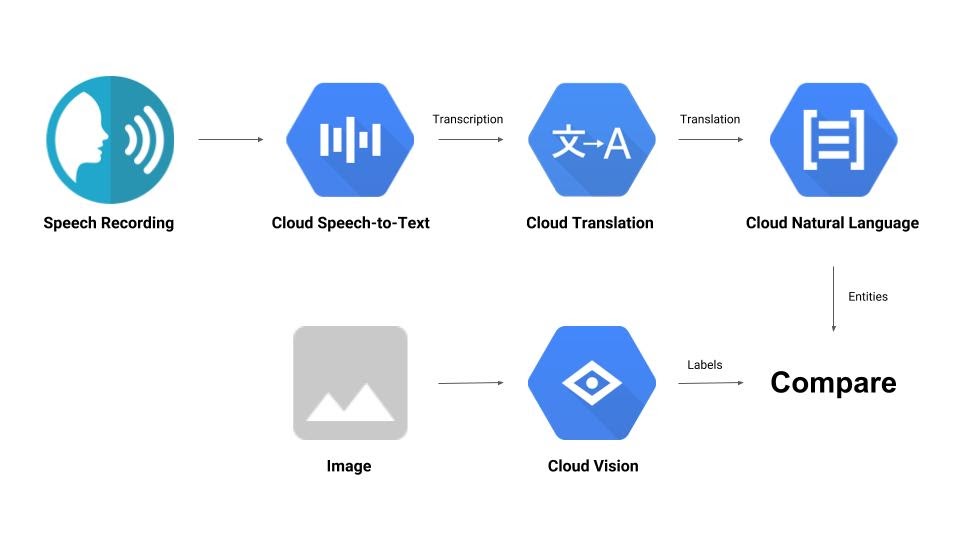
คุณจะสร้างไปป์ไลน์ที่เปรียบเทียบไฟล์บันทึกเสียงกับรูปภาพ และพิจารณาความเกี่ยวข้องของทั้ง 2 อย่าง มาดูตัวอย่างวิธีดำเนินการกัน
สิ่งที่คุณจะได้เรียนรู้
- วิธีใช้ Vision, Speech-to-Text, Translation และ Natural Language API
- ตำแหน่งที่ค้นหาตัวอย่างโค้ด
สิ่งที่คุณต้องมี
2. การตั้งค่าและข้อกำหนด
การตั้งค่าสภาพแวดล้อมแบบเรียนรู้ด้วยตนเอง
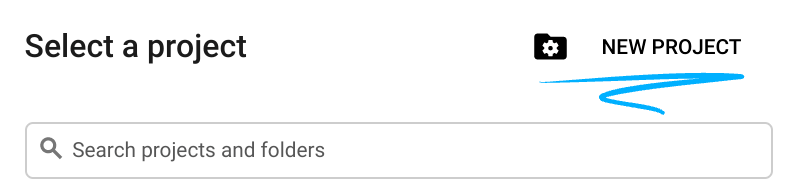
- ลงชื่อเข้าใช้ Cloud Console แล้วสร้างโปรเจ็กต์ใหม่หรือใช้โปรเจ็กต์ที่มีอยู่ซ้ำ หากยังไม่มีบัญชี Gmail หรือ Google Workspace คุณต้องสร้างบัญชี

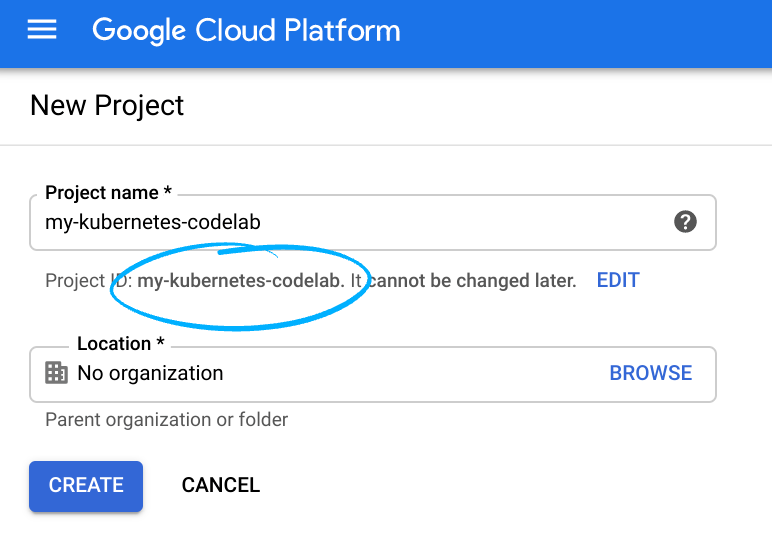
โปรดจดจำรหัสโปรเจ็กต์ ซึ่งเป็นชื่อที่ไม่ซ้ำกันในโปรเจ็กต์ Google Cloud ทั้งหมด (ชื่อด้านบนถูกใช้ไปแล้วและจะใช้ไม่ได้ ขออภัย) ซึ่งจะเรียกว่า PROJECT_ID ในภายหลังใน Codelab นี้
- จากนั้นคุณจะต้องเปิดใช้การเรียกเก็บเงินใน Cloud Console เพื่อใช้ทรัพยากร Google Cloud
การทำตาม Codelab นี้ไม่ควรมีค่าใช้จ่ายมากนัก หรืออาจไม่มีค่าใช้จ่ายเลย โปรดทำตามวิธีการในส่วน "การล้างข้อมูล" ซึ่งจะแนะนำวิธีปิดทรัพยากรเพื่อไม่ให้มีการเรียกเก็บเงินนอกเหนือจากบทแนะนำนี้ ผู้ใช้ใหม่ของ Google Cloud มีสิทธิ์เข้าร่วมโปรแกรมช่วงทดลองใช้ฟรีมูลค่า$300 USD
เปิดใช้ API
คุณคลิกลิงก์นี้เพื่อเปิดใช้ API ที่จำเป็นทั้งหมดได้ หลังจากดำเนินการดังกล่าวแล้ว คุณไม่ต้องสนใจวิธีการตั้งค่าการตรวจสอบสิทธิ์ เราจะดำเนินการในอีกสักครู่ หรือจะเปิดใช้ API แต่ละรายการแยกกันก็ได้ โดยคลิกไอคอนเมนูที่ด้านซ้ายบนของหน้าจอ

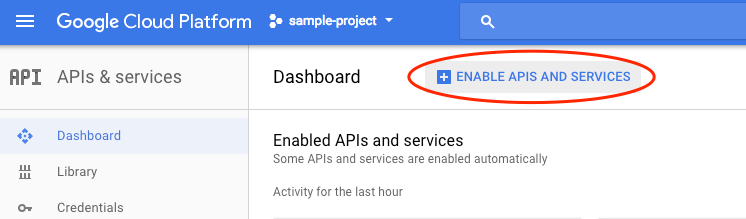
เลือก API และบริการจากเมนูแบบเลื่อนลง แล้วคลิกแดชบอร์ด
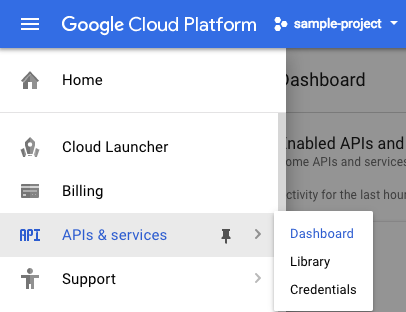
คลิกเปิดใช้ API และบริการ
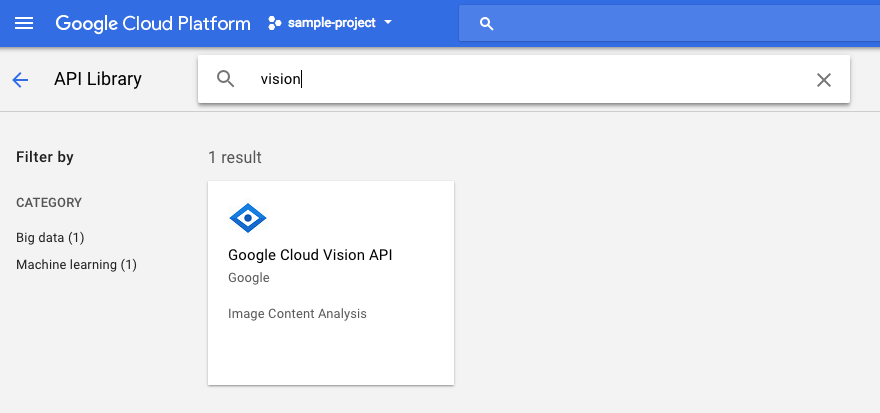
จากนั้นค้นหา "การมองเห็น" ในช่องค้นหา คลิก Google Cloud Vision API
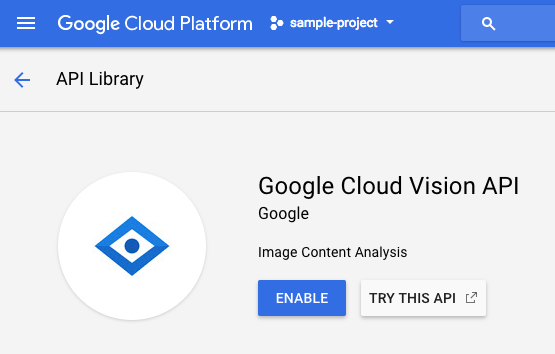
คลิกเปิดใช้เพื่อเปิดใช้ Cloud Vision API
รอสักครู่เพื่อให้ระบบเปิดใช้ คุณจะเห็นข้อความต่อไปนี้เมื่อเปิดใช้
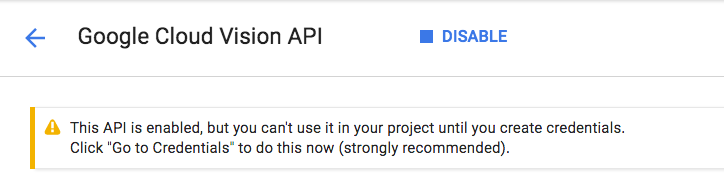
ทำกระบวนการเดียวกันซ้ำเพื่อเปิดใช้ Cloud Speech, Cloud Translation และ Cloud Natural Language API
Cloud Shell
Google Cloud Shell คือ สภาพแวดล้อมบรรทัดคำสั่งที่ทำงานในระบบคลาวด์ เครื่องเสมือนที่ใช้ Debian นี้มาพร้อมเครื่องมือพัฒนาทั้งหมดที่คุณต้องการ (gcloud, bq, git และอื่นๆ) และมีไดเรกทอรีแรกขนาด 5 GB แบบถาวร เราจะใช้ Cloud Shell เพื่อสร้างคำขอไปยังแมชชีนเลิร์นนิง API
หากต้องการเริ่มต้นใช้งาน Cloud Shell ให้คลิกไอคอน "เปิดใช้งาน Google Cloud Shell"  ที่มุมขวาบนของแถบส่วนหัว

เซสชัน Cloud Shell จะเปิดในเฟรมใหม่ที่ด้านล่างของคอนโซลและแสดงข้อความแจ้งบรรทัดคำสั่ง รอจนกว่าพรอมต์ user@project:~$ จะปรากฏขึ้น
ไม่บังคับ: ตัวแก้ไขโค้ด
คุณอาจต้องการคลิกไอคอน "เปิดตัวโปรแกรมแก้ไขโค้ด"  ที่มุมขวาบนของแถบ Cloud Shell ทั้งนี้ขึ้นอยู่กับความสะดวกในการใช้บรรทัดคำสั่ง

บัญชีบริการ
คุณจะต้องมีบัญชีบริการเพื่อตรวจสอบสิทธิ์ หากต้องการสร้าง ให้แทนที่ [NAME] ด้วยชื่อบัญชีบริการที่ต้องการ แล้วเรียกใช้คำสั่งต่อไปนี้ใน Cloud Shell
gcloud iam service-accounts create [NAME]
ตอนนี้คุณจะต้องสร้างคีย์เพื่อใช้บัญชีบริการนั้น แทนที่ [FILE_NAME] ด้วยชื่อคีย์ที่ต้องการ [NAME] ด้วยชื่อบัญชีบริการจากด้านบน และ [PROJECT_ID] ด้วยรหัสโปรเจ็กต์ คำสั่งต่อไปนี้จะสร้างและดาวน์โหลดคีย์เป็น [FILE_NAME].json
gcloud iam service-accounts keys create [FILE_NAME].json --iam-account [NAME]@[PROJECT_ID].iam.gserviceaccount.com
หากต้องการใช้บัญชีบริการ คุณจะต้องตั้งค่าตัวแปร GOOGLE_APPLICATION_CREDENTIALS เป็นเส้นทางของคีย์ โดยเรียกใช้คำสั่งต่อไปนี้หลังจากแทนที่ [PATH_TO_FILE] และ [FILE_NAME]
export GOOGLE_APPLICATION_CREDENTIALS=[PATH_TO_FILE]/[FILE_NAME].json
3. Cloud Vision
ไคลเอ็นต์ Python
คุณจะต้องมีไคลเอ็นต์ Python สำหรับ Cloud Vision หากต้องการติดตั้ง ให้พิมพ์คำสั่งต่อไปนี้ใน Cloud Shell
pip install --upgrade google-cloud-vision --user
มาลองกันเลย
มาดูตัวอย่างโค้ดสำหรับ Cloud Vision API กัน เราสนใจที่จะดูสิ่งที่อยู่ในรูปภาพที่ระบุ detect.py ดูเหมือนจะมีประโยชน์สำหรับกรณีนี้ ดังนั้นเรามาใช้กัน วิธีหนึ่งคือการคัดลอกเนื้อหาของ detect.py สร้างไฟล์ใหม่ใน Cloud Shell ชื่อ vision.py แล้ววางโค้ดทั้งหมดลงใน vision.py คุณทำได้ด้วยตนเองในตัวแก้ไขโค้ด Cloud Shell หรือเรียกใช้คำสั่ง curl นี้ใน Cloud Shell
curl https://raw.githubusercontent.com/GoogleCloudPlatform/python-docs-samples/master/vision/cloud-client/detect/detect.py -o vision.py
หลังจากดำเนินการดังกล่าวแล้ว ให้ใช้ API โดยเรียกใช้คำสั่งต่อไปนี้ใน Cloud Shell
python vision.py labels-uri gs://cloud-samples-data/ml-api-codelab/birds.jpg
คุณควรเห็นเอาต์พุตเกี่ยวกับนกและนกกระจอกเทศ เนื่องจากนี่คือรูปภาพที่วิเคราะห์ https://storage.googleapis.com/cloud-samples-data/ml-api-codelab/birds.jpg
เกิดอะไรขึ้น
คุณส่งอาร์กิวเมนต์ 2 รายการไปยัง vision.py ดังนี้
- labels-uri จะเลือก
detect_labels_uri()ฟังก์ชันที่จะเรียกใช้ - gs://cloud-samples-data/ml-api-codelab/birds.jpg คือตำแหน่งของรูปภาพใน Google Cloud Storage และจะส่งเป็น uri ไปยัง
detect_labels_uri()
มาดูรายละเอียดของ detect_labels_uri() กันเลย โปรดสังเกตความคิดเห็นเพิ่มเติมที่แทรกไว้
def detect_labels_uri(uri):
    """Detects labels in the file located in Google Cloud Storage or on the
    Web."""
    # relevant import from above
    # from google.cloud import vision

    # create ImageAnnotatorClient object
    client = vision.ImageAnnotatorClient()

    # create Image object
    image = vision.types.Image()

    # specify location of image
    image.source.image_uri = uri

    # get label_detection response by passing image to client
    response = client.label_detection(image=image)

    # get label_annotations portion of response
    labels = response.label_annotations
    print('Labels:')

    for label in labels:
        # print the label descriptions
        print(label.description)
4. Cloud Speech-to-Text
ไคลเอ็นต์ Python
คุณจะต้องมีไคลเอ็นต์ Python สำหรับ Cloud Speech-to-Text หากต้องการติดตั้ง ให้พิมพ์คำสั่งต่อไปนี้ใน Cloud Shell
sudo pip install --upgrade google-cloud-speech
มาลองกันเลย
ไปที่ตัวอย่างโค้ดสำหรับ Cloud Speech-to-Text กัน เราสนใจที่จะถอดเสียงพูด transcribe.py ดูเหมือนจะเป็นจุดเริ่มต้นที่ดี ดังนั้นเรามาใช้ transcribe.py กัน คัดลอกเนื้อหาของ transcribe.py สร้างไฟล์ใหม่ใน Cloud Shell ชื่อ speech2text.py แล้ววางโค้ดทั้งหมดลงใน speech2text.py คุณทำได้ด้วยตนเองในตัวแก้ไขโค้ด Cloud Shell หรือเรียกใช้คำสั่ง curl นี้ใน Cloud Shell
curl https://raw.githubusercontent.com/GoogleCloudPlatform/python-docs-samples/master/speech/cloud-client/transcribe.py -o speech2text.py
หลังจากดำเนินการดังกล่าวแล้ว ให้ใช้ API โดยเรียกใช้คำสั่งต่อไปนี้ใน Cloud Shell
python speech2text.py gs://cloud-samples-data/ml-api-codelab/tr-ostrich.wav
ควรมีข้อผิดพลาดที่แจ้งเกี่ยวกับการเข้ารหัสและอัตราเฮิรตซ์ของตัวอย่างที่ไม่ถูกต้อง ไม่ต้องกังวล ให้ไปที่ transcribe_gcs() ในโค้ด แล้วลบการตั้งค่า encoding และ sampe_hertz_rate ออกจาก RecognitionConfig() ในขณะเดียวกัน ให้เปลี่ยนรหัสภาษาเป็น "tr-TR" เนื่องจาก tr-ostrich.wav เป็นการบันทึกเสียงพูดภาษาตุรกี
config = types.RecognitionConfig(language_code='tr-TR')
ตอนนี้ให้เรียกใช้ speech2text.py อีกครั้ง เอาต์พุตควรเป็นข้อความภาษาตุรกีเนื่องจากเป็นเสียงที่วิเคราะห์ https://storage.googleapis.com/cloud-samples-data/ml-api-codelab/tr-ostrich.wav
เกิดอะไรขึ้น
คุณส่ง gs://cloud-samples-data/ml-api-codelab/tr-ostrich.wav ซึ่งเป็นตำแหน่งของไฟล์เสียงใน Google Cloud Storage ไปยัง speech2text.py จากนั้นระบบจะส่งเป็น gcs_uri ไปยัง transcribe_uri()
มาดูรายละเอียดของ transcribe_uri() ที่เราแก้ไขกัน
def transcribe_gcs(gcs_uri):
    """Transcribes the audio file specified by the gcs_uri."""

    from google.cloud import speech
    # enums no longer used
    # from google.cloud.speech import enums
    from google.cloud.speech import types

    # create ImageAnnotatorClient object
    client = speech.SpeechClient()

    # specify location of speech
    audio = types.RecognitionAudio(uri=gcs_uri)

    # set language to Turkish
    # removed encoding and sample_rate_hertz
    config = types.RecognitionConfig(language_code='tr-TR')

    # get response by passing config and audio settings to client
    response = client.recognize(config, audio)

    # Each result is for a consecutive portion of the audio. Iterate through
    # them to get the transcripts for the entire audio file.
    for result in response.results:
        # The first alternative is the most likely one for this portion.
        # get the transcript of the first alternative
        print(u'Transcript: {}'.format(result.alternatives[0].transcript))
5. Cloud Translation
ไคลเอ็นต์ Python
คุณจะต้องมีไคลเอ็นต์ Python สำหรับ Cloud Translation หากต้องการติดตั้ง ให้พิมพ์คำสั่งต่อไปนี้ใน Cloud Shell
sudo pip install --upgrade google-cloud-translate
มาลองกันเลย
ตอนนี้เรามาดูตัวอย่างโค้ดสำหรับ Cloud Translation กัน สำหรับ Codelab นี้ เราต้องการแปลข้อความเป็นภาษาอังกฤษ snippets.py ดูเหมือนสิ่งที่เราต้องการ คัดลอกเนื้อหาของ snippets.py สร้างไฟล์ใหม่ใน Cloud Shell ชื่อ translate.py แล้ววางโค้ดทั้งหมดลงใน translate.py คุณทำได้ด้วยตนเองในตัวแก้ไขโค้ด Cloud Shell หรือเรียกใช้คำสั่ง curl นี้ใน Cloud Shell
curl https://raw.githubusercontent.com/GoogleCloudPlatform/python-docs-samples/master/translate/cloud-client/snippets.py -o translate.py
หลังจากดำเนินการดังกล่าวแล้ว ให้ใช้ API โดยเรียกใช้คำสั่งต่อไปนี้ใน Cloud Shell
python translate.py translate-text en '你有沒有帶外套'
คำแปลควรเป็น "คุณมีเสื้อแจ็คเก็ตไหม"
เกิดอะไรขึ้น
คุณส่งอาร์กิวเมนต์ 3 รายการไปยัง translate.py ดังนี้
- translate-text จะเลือกฟังก์ชัน
translate_text()เพื่อเรียกใช้ - en จะส่งเป็น target ไปยัง
translate_text()และใช้เพื่อระบุภาษาที่จะแปล - "你有沒有帶外套" คือสตริงที่จะแปลและส่งเป็น text ไปยัง
translate_text()
มาดูรายละเอียดของ translate_text() กันเลย โปรดทราบว่ามีการเพิ่มความคิดเห็นแล้ว
def translate_text(target, text):
    """Translates text into the target language.

    Target must be an ISO 639-1 language code.
    See https://g.co/cloud/translate/v2/translate-reference#supported_languages
    """
    # relevant imports from above
    # from google.cloud import translate
    # import six

    # create Client object
    translate_client = translate.Client()

    # decode text if it's a binary type
    # six is a python 2 and 3 compatibility library
    if isinstance(text, six.binary_type):
        text = text.decode('utf-8')

    # get translation result by passing text and target language to client
    # Text can also be a sequence of strings, in which case this method
    # will return a sequence of results for each text.
    result = translate_client.translate(text, target_language=target)

    # print original text, translated text and detected original language
    print(u'Text: {}'.format(result['input']))
    print(u'Translation: {}'.format(result['translatedText']))
    print(u'Detected source language: {}'.format(
        result['detectedSourceLanguage']))
6. Cloud Natural Language
ไคลเอ็นต์ Python
คุณจะต้องมีไคลเอ็นต์ Python สำหรับ Cloud Natural Language หากต้องการติดตั้ง ให้พิมพ์คำสั่งต่อไปนี้ใน Cloud Shell
sudo pip install --upgrade google-cloud-language
มาลองกันเลย
สุดท้ายนี้ มาดูตัวอย่างโค้ดสำหรับ Cloud Natural Language API กัน เราต้องการตรวจหาเอนทิตีในข้อความ snippets.py ดูเหมือนจะมีโค้ดที่ทำเช่นนั้น คัดลอกเนื้อหาของ snippets.py สร้างไฟล์ใหม่ใน Cloud Shell ชื่อ natural_language.py แล้ววางโค้ดทั้งหมดลงใน natural_language.py คุณทำได้ด้วยตนเองในตัวแก้ไขโค้ด Cloud Shell หรือเรียกใช้คำสั่ง curl นี้ใน Cloud Shell
curl https://raw.githubusercontent.com/GoogleCloudPlatform/python-docs-samples/master/language/cloud-client/v1/snippets.py -o natural_language.py
หลังจากดำเนินการดังกล่าวแล้ว ให้ใช้ API โดยเรียกใช้คำสั่งต่อไปนี้ใน Cloud Shell
python natural_language.py entities-text 'where did you leave my bike'
API ควรระบุ "จักรยาน" เป็นเอนทิตี เอนทิตีอาจเป็นคำนามเฉพาะ (บุคคลสาธารณะ สถานที่สำคัญ ฯลฯ) หรือคำนามทั่วไป (ร้านอาหาร สนามกีฬา ฯลฯ)
เกิดอะไรขึ้น
คุณส่งอาร์กิวเมนต์ 2 รายการไปยัง natural_language.py ดังนี้
- entities-text เลือกฟังก์ชัน
entities_text()ที่จะเรียกใช้ - "คุณจอดจักรยานของฉันไว้ที่ไหน" คือสตริงที่จะวิเคราะห์เพื่อหาเอนทิตีและส่งเป็น text ไปยัง
entities_text()
มาดูรายละเอียดของ entities_text() กันเลย โปรดสังเกตความคิดเห็นใหม่ที่แทรกไว้
def entities_text(text):
    """Detects entities in the text."""
    # relevant imports from above
    # from google.cloud import language
    # from google.cloud.language import enums
    # from google.cloud.language import types
    # import six

    # create LanguageServiceClient object
    client = language.LanguageServiceClient()

    # decode text if it's a binary type
    # six is a python 2 and 3 compatibility library
    if isinstance(text, six.binary_type):
        text = text.decode('utf-8')

    # Instantiates a plain text document.
    document = types.Document(
        content=text,
        type=enums.Document.Type.PLAIN_TEXT)

    # Detects entities in the document. You can also analyze HTML with:
    #   document.type == enums.Document.Type.HTML
    entities = client.analyze_entities(document).entities

    # entity types from enums.Entity.Type
    entity_type = ('UNKNOWN', 'PERSON', 'LOCATION', 'ORGANIZATION',
                   'EVENT', 'WORK_OF_ART', 'CONSUMER_GOOD', 'OTHER')

    # print information for each entity found
    for entity in entities:
        print('=' * 20)
        print(u'{:<16}: {}'.format('name', entity.name))
        print(u'{:<16}: {}'.format('type', entity_type[entity.type]))
        print(u'{:<16}: {}'.format('metadata', entity.metadata))
        print(u'{:<16}: {}'.format('salience', entity.salience))
        print(u'{:<16}: {}'.format('wikipedia_url',
              entity.metadata.get('wikipedia_url', '-')))
7. มาผสานรวมกัน
มาทบทวนกันว่าคุณกำลังสร้างอะไร
ตอนนี้เรามาสรุปทุกอย่างกัน สร้างไฟล์ solution.py คัดลอกและวาง detect_labels_uri(), transcribe_gcs(), translate_text() และ entities_text() จากขั้นตอนก่อนหน้าลงใน solution.py
นำเข้าใบแจ้งยอด
ยกเลิกการแสดงความคิดเห็นและย้ายคำสั่งนำเข้าไปไว้ด้านบน โปรดทราบว่าระบบจะนำเข้าทั้ง speech.types และ language.types ซึ่งจะทำให้เกิดข้อขัดแย้ง ดังนั้นเราจะนำออกและเปลี่ยนแต่ละอินสแตนซ์ของ types ใน transcribe_gcs() และ entities_text() เป็น speech.types และ language.types ตามลำดับ คุณควรมีสิ่งต่อไปนี้
from google.cloud import vision
from google.cloud import speech
from google.cloud import translate
from google.cloud import language
from google.cloud.language import enums
import six
ผลลัพธ์การคืนสินค้า
ให้ฟังก์ชันแสดงผลลัพธ์แทนการพิมพ์ คุณควรมีข้อมูลคล้ายกับตัวอย่างต่อไปนี้
# import statements

def detect_labels_uri(uri):
    # code

    # we only need the label descriptions
    label_descriptions = []
    for label in labels:
        label_descriptions.append(label.description)

    return label_descriptions

def transcribe_gcs(gcs_uri):
    # code

    # naive assumption that audio file is short
    return response.results[0].alternatives[0].transcript

def translate_text(target, text):
    # code

    # only interested in translated text
    return result['translatedText']

def entities_text(text):
    # code

    # we only need the entity names
    entity_names = []
    for entity in entities:
        entity_names.append(entity.name)

    return entity_names
ใช้ฟังก์ชัน
หลังจากทำงานอย่างหนักแล้ว คุณก็สามารถเรียกใช้ฟังก์ชันเหล่านั้นได้ เริ่มเลย เช่น
def compare_audio_to_image(audio, image):
    """Checks whether a speech audio is relevant to an image."""

    # speech audio -> text
    transcription = transcribe_gcs(audio)

    # text of any language -> english text
    translation = translate_text('en', transcription)

    # text -> entities
    entities = entities_text(translation)

    # image -> labels
    labels = detect_labels_uri(image)

    # naive check for whether entities intersect with labels
    has_match = False
    for entity in entities:
        if entity in labels:
            # print result for each match
            print('The audio and image both contain: {}'.format(entity))
            has_match = True

    # print if there are no matches
    if not has_match:
        print('The audio and image do not appear to be related.')
รองรับหลายภาษา
ก่อนหน้านี้เราได้ฮาร์ดโค้ดภาษาตุรกีลงใน transcribe_gcs() มาเปลี่ยนกันเพื่อให้ระบุภาษาจาก compare_audio_to_image() ได้ การเปลี่ยนแปลงที่จำเป็นมีดังนี้
def transcribe_gcs(language, gcs_uri):
    ...
    config = speech.types.RecognitionConfig(language_code=language)
def compare_audio_to_image(language, audio, image):
    transcription = transcribe_gcs(language, audio)
ลองใช้เลย
คุณดูโค้ดสุดท้ายได้ใน solution.py ของที่เก็บ GitHub นี้ คำสั่ง curl สำหรับดึงข้อมูลดังกล่าวมีดังนี้
curl https://raw.githubusercontent.com/googlecodelabs/integrating-ml-apis/master/solution.py -O
เวอร์ชันใน GitHub มี argparse ซึ่งช่วยให้ทำสิ่งต่อไปนี้จากบรรทัดคำสั่งได้
python solution.py tr-TR gs://cloud-samples-data/ml-api-codelab/tr-ball.wav gs://cloud-samples-data/ml-api-codelab/football.jpg
สำหรับแต่ละรายการที่พบ โค้ดควรแสดงผล "เสียงและรูปภาพมีทั้งคู่: " ในตัวอย่างข้างต้น โค้ดจะแสดงผล "เสียงและรูปภาพมีทั้งคู่: ลูกบอล"
โบนัส: ลองอีก
ต่อไปนี้คือตำแหน่งไฟล์เสียงและรูปภาพเพิ่มเติมที่คุณลองใช้ได้
8. ยินดีด้วย
คุณได้สำรวจและผสานรวม API แมชชีนเลิร์นนิง 4 รายการเพื่อพิจารณาว่าตัวอย่างคำพูดพูดถึงรูปภาพที่ระบุหรือไม่ นี่เป็นเพียงจุดเริ่มต้นเท่านั้น เพราะยังมีอีกหลายวิธีที่จะปรับปรุงไปป์ไลน์นี้
สิ่งที่เราได้พูดถึง
- การส่งคำขอไปยัง Cloud Vision API
- การส่งคำขอไปยัง Cloud Speech-to-Text API
- การส่งคำขอไปยัง Cloud Translation API
- การส่งคำขอไปยัง Cloud Natural Language API
- การใช้ API ทั้งหมดข้างต้นร่วมกัน
ขั้นตอนถัดไป
- โปรดดู word2vec เพื่อเปรียบเทียบคำให้ดียิ่งขึ้น
- ดู Codelab แบบเจาะลึกเพิ่มเติมเกี่ยวกับ Vision API, Speech-to-Text API, Translation API และ Natural Language API
- ลองใช้ Cloud Video Intelligence แทน Cloud Vision
- สังเคราะห์เสียงพูดด้วย Cloud Text-to-Speech API
- ดูวิธีอัปโหลดออบเจ็กต์ไปยัง Cloud Storage