
1. סקירה כללית
ב-codelab הזה תקבלו סיור קצר בכמה ממשקי API של למידת מכונה. תצטרכו להשתמש ב:
- Cloud Vision כדי להבין את התוכן של תמונה
- Cloud Speech-to-Text לתמלול אודיו לטקסט
- Cloud Translation כדי לתרגם מחרוזת שרירותית לכל שפה נתמכת
- Cloud Natural Language לחילוץ מידע מטקסט
מה תפַתחו
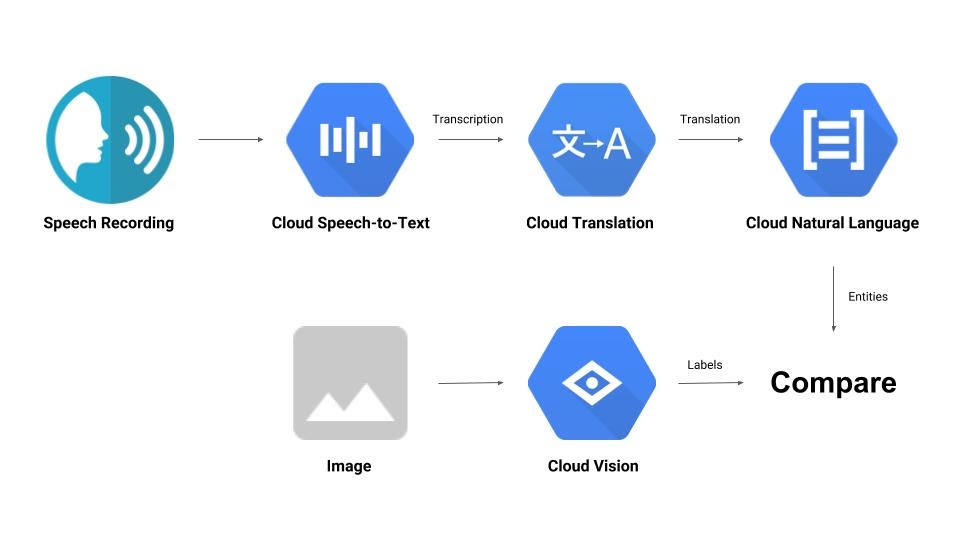
תבנו צינור שמשווה בין הקלטת אודיו לבין תמונה וקובע את הרלוונטיות שלהם זה לזה. הנה הצצה לאופן שבו תעשו את זה:
מה תלמדו
- איך משתמשים בממשקי Vision, Speech-to-Text, Translation ו-Natural Language
- איפה אפשר למצוא דוגמאות קוד
מה נדרש
2. הגדרה ודרישות
הגדרת סביבה בקצב אישי
- נכנסים אל Cloud Console ויוצרים פרויקט חדש או משתמשים בפרויקט קיים. אם עדיין אין לכם חשבון Gmail או חשבון Google Workspace, אתם צריכים ליצור חשבון.

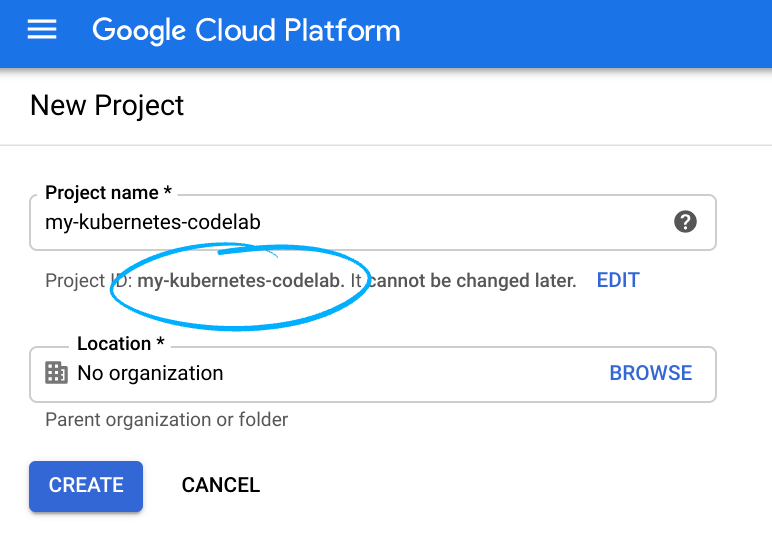
חשוב לזכור את מזהה הפרויקט, שהוא שם ייחודי בכל הפרויקטים ב-Google Cloud (השם שמופיע למעלה כבר תפוס ולא יתאים לכם, מצטערים!). בהמשך ה-codelab הזה, נתייחס אליו כאל PROJECT_ID.
- לאחר מכן, תצטרכו להפעיל את החיוב ב-Cloud Console כדי להשתמש במשאבים של Google Cloud.
העלות של התרגול הזה לא אמורה להיות גבוהה, ואולי אפילו לא תהיה עלות בכלל. חשוב לפעול לפי ההוראות שבקטע 'ניקוי' כדי להשבית את המשאבים, וכך לא תחויבו אחרי שתסיימו את המדריך הזה. משתמשים חדשים ב-Google Cloud זכאים לתוכנית תקופת ניסיון בחינם בשווי 300$.
הפעלת ממשקי ה-API
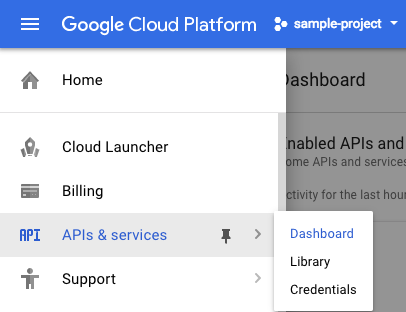
אפשר ללחוץ על הקישור הזה כדי להפעיל את כל ממשקי ה-API הנדרשים. אחרי שתעשו את זה, תוכלו להתעלם מההוראות להגדרת אימות – אנחנו נבצע את זה בהמשך. אפשרות אחרת היא להפעיל כל API בנפרד. כדי לעשות את זה, לוחצים על סמל התפריט בפינה השמאלית העליונה.

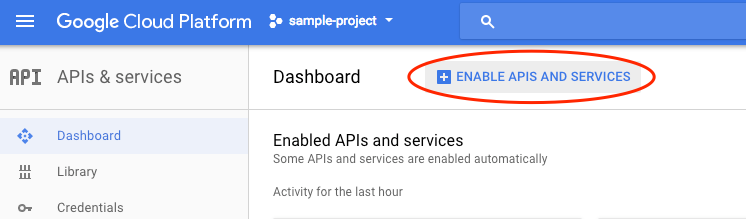
ברשימה הנפתחת לוחצים על APIs & services ואז על Dashboard.
לוחצים על Enable APIs and services.
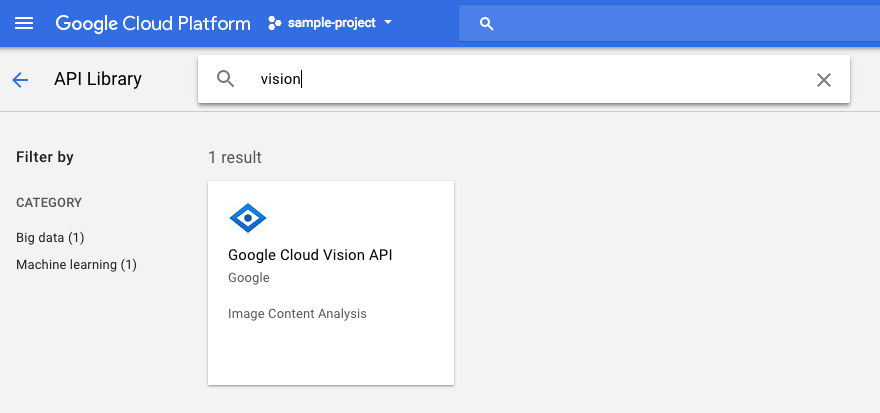
לאחר מכן, מחפשים את האפשרות 'ראייה' בתיבת החיפוש. לוחצים על Google Cloud Vision API:
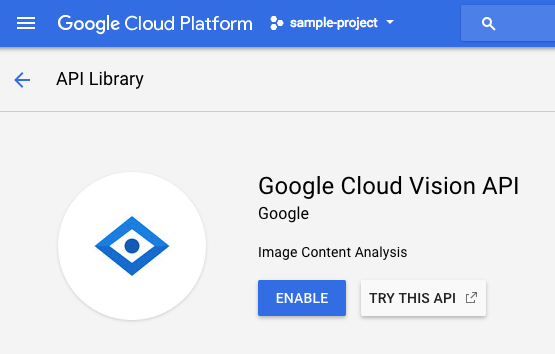
לוחצים על הפעלה כדי להפעיל את Cloud Vision API:
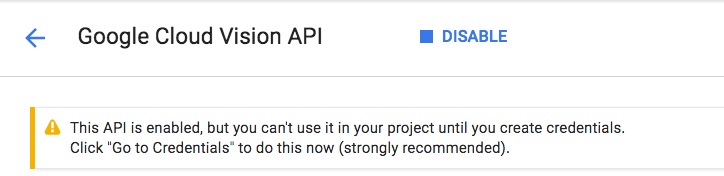
מחכים כמה שניות עד שהאפשרות תופעל. אחרי ההפעלה, תראו את ההודעה הבאה:
חוזרים על אותו תהליך כדי להפעיל את Cloud Speech API, Cloud Translation API ו-Cloud Natural Language API.
Cloud Shell
Google Cloud Shell היא סביבת שורת פקודה שפועלת בענן. המכונה הווירטואלית הזו מבוססת על Debian, וטעונים בה כל הכלים הדרושים למפתחים (gcloud, bq, git וכלים אחרים), ועם ספריית בית בעלת אחסון מתמיד בגודל 5GB. נשתמש ב-Cloud Shell כדי ליצור את הבקשה שלנו לממשקי ה-API של למידת המכונה.
כדי להתחיל להשתמש ב-Cloud Shell, לוחצים על הסמל 'הפעלת Google Cloud Shell'  בפינה השמאלית העליונה של סרגל הכותרת.

בחלק התחתון של המסוף ייפתח סשן של Cloud Shell בתוך מסגרת חדשה ותופיע הודעה של שורת הפקודה. ממתינים עד שמופיעה ההנחיה user@project:~$ .
אופציונלי: עורך קוד
אם אתם מעדיפים להשתמש בשורת הפקודה, אתם יכולים ללחוץ על סמל 'הפעלת עורך קוד'  בפינה השמאלית העליונה של סרגל Cloud Shell.

חשבון שירות
תצטרכו חשבון שירות כדי לבצע אימות. כדי ליצור חשבון שירות, מחליפים את [NAME] בשם הרצוי של חשבון השירות ומריצים את הפקודה הבאה ב-Cloud Shell:
gcloud iam service-accounts create [NAME]
עכשיו צריך ליצור מפתח כדי להשתמש בחשבון השירות הזה. מחליפים את [FILE_NAME] בשם הרצוי של המפתח, את [NAME] בשם של חשבון השירות שצוין למעלה ואת [PROJECT_ID] במזהה הפרויקט. הפקודה הבאה תיצור את המפתח ותוריד אותו כקובץ [FILE_NAME].json:
gcloud iam service-accounts keys create [FILE_NAME].json --iam-account [NAME]@[PROJECT_ID].iam.gserviceaccount.com
כדי להשתמש בחשבון השירות, צריך להגדיר את המשתנה GOOGLE_APPLICATION_CREDENTIALS לנתיב של המפתח. כדי לעשות את זה, מריצים את הפקודה הבאה אחרי שמחליפים את [PATH_TO_FILE] ואת [FILE_NAME]:
export GOOGLE_APPLICATION_CREDENTIALS=[PATH_TO_FILE]/[FILE_NAME].json
3. Cloud Vision
לקוח Python
תצטרכו את לקוח Python ל-Cloud Vision. כדי להתקין, מקלידים את הפקודה הבאה ב-Cloud Shell:
pip install --upgrade google-cloud-vision --user
רוצים לנסות?
בואו נסתכל על דוגמאות הקוד של Cloud Vision API. אנחנו רוצים לדעת מה יש בתמונה מסוימת. נראה ש-detect.py יכול לעזור כאן, אז נשתמש בו. אפשרות אחת היא להעתיק את התוכן של detect.py, ליצור קובץ חדש ב-Cloud Shell בשם vision.py ולהדביק את כל הקוד ב-vision.py. אפשר לעשות את זה באופן ידני בעורך הקוד של Cloud Shell, או להריץ את פקודת ה-curl הבאה ב-Cloud Shell:
curl https://raw.githubusercontent.com/GoogleCloudPlatform/python-docs-samples/master/vision/cloud-client/detect/detect.py -o vision.py
אחרי שמבצעים את הפעולה הזו, משתמשים ב-API על ידי הרצת הפקודה הבאה ב-Cloud Shell:
python vision.py labels-uri gs://cloud-samples-data/ml-api-codelab/birds.jpg
הפלט שיוצג יכלול מידע על ציפורים ועל יענים, כי זו התמונה שנותחה: https://storage.googleapis.com/cloud-samples-data/ml-api-codelab/birds.jpg
מה הבעיה?
העברת 2 ארגומנטים אל vision.py:
- labels-uri בוחר את הפונקציה
detect_labels_uri()להפעלה - gs://cloud-samples-data/ml-api-codelab/birds.jpg הוא המיקום של תמונה ב-Google Cloud Storage, והוא מועבר כ-uri אל
detect_labels_uri()
בואו נבחן את detect_labels_uri(). שימו לב לתגובות הנוספות שנוספו.
def detect_labels_uri(uri):
    """Detects labels in the file located in Google Cloud Storage or on the
    Web."""
    # relevant import from above
    # from google.cloud import vision

    # create ImageAnnotatorClient object
    client = vision.ImageAnnotatorClient()

    # create Image object
    image = vision.types.Image()

    # specify location of image
    image.source.image_uri = uri

    # get label_detection response by passing image to client
    response = client.label_detection(image=image)

    # get label_annotations portion of response
    labels = response.label_annotations
    print('Labels:')

    for label in labels:
        # print the label descriptions
        print(label.description)
4. Cloud Speech-to-Text
Python client
תצטרכו את לקוח Python ל-Cloud Speech-to-Text. כדי להתקין, מקלידים את הפקודה הבאה ב-Cloud Shell:
sudo pip install --upgrade google-cloud-speech
רוצים לנסות?
נעבור אל דוגמאות הקוד ל-Cloud Speech-to-Text. אנחנו רוצים לתמלל אודיו של דיבור. נראה ש-transcribe.py הוא מקום טוב להתחיל בו, אז נשתמש בו. מעתיקים את התוכן של transcribe.py, יוצרים קובץ חדש ב-Cloud Shell בשם speech2text.py ומדביקים את כל הקוד ב-speech2text.py. אפשר לעשות את זה באופן ידני בעורך הקוד של Cloud Shell, או להריץ את פקודת ה-curl הבאה ב-Cloud Shell:
curl https://raw.githubusercontent.com/GoogleCloudPlatform/python-docs-samples/master/speech/cloud-client/transcribe.py -o speech2text.py
אחרי שמבצעים את הפעולה הזו, משתמשים ב-API על ידי הרצת הפקודה הבאה ב-Cloud Shell:
python speech2text.py gs://cloud-samples-data/ml-api-codelab/tr-ostrich.wav
צריכות להיות שגיאות שמתייחסות לקידוד השגוי ולשיעור הרץ לדוגמה. אל דאגה, צריך להיכנס אל transcribe_gcs() בקוד ולמחוק את ההגדרות של encoding ושל sampe_hertz_rate מ-RecognitionConfig(). בנוסף, כדאי לשנות את קוד השפה ל-tr-TR כי tr-ostrich.wav הוא הקלטת דיבור בטורקית.
config = types.RecognitionConfig(language_code='tr-TR')
עכשיו מריצים שוב את הפקודה speech2text.py. הפלט צריך להיות טקסט בטורקית, כי זה האודיו שנותח: https://storage.googleapis.com/cloud-samples-data/ml-api-codelab/tr-ostrich.wav
מה קורה?
העברתם את gs://cloud-samples-data/ml-api-codelab/tr-ostrich.wav, המיקום של קובץ אודיו ב-Google Cloud Storage, אל speech2text.py, שמועבר בתור gcs_uri אל transcribe_uri()
נבחן מקרוב את transcribe_uri() שעבר שינוי.
def transcribe_gcs(gcs_uri):
    """Transcribes the audio file specified by the gcs_uri."""

    from google.cloud import speech
    # enums no longer used
    # from google.cloud.speech import enums
    from google.cloud.speech import types

    # create ImageAnnotatorClient object
    client = speech.SpeechClient()

    # specify location of speech
    audio = types.RecognitionAudio(uri=gcs_uri)

    # set language to Turkish
    # removed encoding and sample_rate_hertz
    config = types.RecognitionConfig(language_code='tr-TR')

    # get response by passing config and audio settings to client
    response = client.recognize(config, audio)

    # Each result is for a consecutive portion of the audio. Iterate through
    # them to get the transcripts for the entire audio file.
    for result in response.results:
        # The first alternative is the most likely one for this portion.
        # get the transcript of the first alternative
        print(u'Transcript: {}'.format(result.alternatives[0].transcript))
5. Cloud Translation
Python client
תצטרכו את לקוח Python ל-Cloud Translation. כדי להתקין, מקלידים את הפקודה הבאה ב-Cloud Shell:
sudo pip install --upgrade google-cloud-translate
רוצים לנסות?
עכשיו נבדוק את דוגמאות הקוד של Cloud Translation. ב-codelab הזה, אנחנו רוצים לתרגם טקסט לאנגלית. snippets.py נראה כמו מה שאנחנו רוצים. מעתיקים את התוכן של snippets.py, יוצרים קובץ חדש ב-Cloud Shell בשם translate.py ומדביקים את כל הקוד ב-translate.py. אפשר לעשות את זה באופן ידני בעורך הקוד של Cloud Shell, או להריץ את פקודת ה-curl הבאה ב-Cloud Shell:
curl https://raw.githubusercontent.com/GoogleCloudPlatform/python-docs-samples/master/translate/cloud-client/snippets.py -o translate.py
אחרי שמבצעים את הפעולה הזו, משתמשים ב-API על ידי הרצת הפקודה הבאה ב-Cloud Shell:
python translate.py translate-text en '你有沒有帶外套'
התרגום צריך להיות 'Do you have a jacket?'.
מה קורה?
העברת 3 ארגומנטים אל translate.py:
- translate-text בוחר את הפונקציה
translate_text()להפעלה - en מועבר כ-target אל
translate_text()ומשמש לציון השפה שאליה יתורגם הטקסט - ‘你有沒有帶外套' היא המחרוזת שצריך לתרגם, והיא מועברת כ-text אל
translate_text()
בואו נבחן את translate_text(). שימו לב לתגובות שנוספו.
def translate_text(target, text):
    """Translates text into the target language.

    Target must be an ISO 639-1 language code.
    See https://g.co/cloud/translate/v2/translate-reference#supported_languages
    """
    # relevant imports from above
    # from google.cloud import translate
    # import six

    # create Client object
    translate_client = translate.Client()

    # decode text if it's a binary type
    # six is a python 2 and 3 compatibility library
    if isinstance(text, six.binary_type):
        text = text.decode('utf-8')

    # get translation result by passing text and target language to client
    # Text can also be a sequence of strings, in which case this method
    # will return a sequence of results for each text.
    result = translate_client.translate(text, target_language=target)

    # print original text, translated text and detected original language
    print(u'Text: {}'.format(result['input']))
    print(u'Translation: {}'.format(result['translatedText']))
    print(u'Detected source language: {}'.format(
        result['detectedSourceLanguage']))
6. Cloud Natural Language
Python client
תצטרכו את לקוח Python ל-Cloud Natural Language. כדי להתקין, מקלידים את הפקודה הבאה ב-Cloud Shell:
sudo pip install --upgrade google-cloud-language
רוצים לנסות?
לבסוף, נסתכל על דוגמאות הקוד ל-Cloud Natural Language API. אנחנו רוצים לזהות ישויות בטקסט. נראה ש-snippets.py מכיל קוד שעושה את זה. מעתיקים את התוכן של snippets.py, יוצרים קובץ חדש ב-Cloud Shell בשם natural_language.py ומדביקים את כל הקוד ב-natural_language.py. אפשר לעשות את זה באופן ידני בעורך הקוד של Cloud Shell, או להריץ את פקודת ה-curl הבאה ב-Cloud Shell:
curl https://raw.githubusercontent.com/GoogleCloudPlatform/python-docs-samples/master/language/cloud-client/v1/snippets.py -o natural_language.py
אחרי שמבצעים את הפעולה הזו, משתמשים ב-API על ידי הרצת הפקודה הבאה ב-Cloud Shell:
python natural_language.py entities-text 'where did you leave my bike'
ממשק ה-API צריך לזהות את המילה bike (אופניים) כישות. ישויות יכולות להיות שמות עצם פרטיים (דמויות ציבוריות, ציוני דרך וכו') או שמות עצם כלליים (מסעדה, אצטדיון וכו').
מה קורה?
העברת 2 ארגומנטים אל natural_language.py:
- entities-text בוחר את הפונקציה
entities_text()להפעלה - 'where did you leave my bike' היא המחרוזת שתנותח כדי לזהות ישויות, והיא מועברת כtext אל
entities_text()
בואו נבחן את entities_text(). שימו לב לתגובות החדשות שנוספו.
def entities_text(text):
    """Detects entities in the text."""
    # relevant imports from above
    # from google.cloud import language
    # from google.cloud.language import enums
    # from google.cloud.language import types
    # import six

    # create LanguageServiceClient object
    client = language.LanguageServiceClient()

    # decode text if it's a binary type
    # six is a python 2 and 3 compatibility library
    if isinstance(text, six.binary_type):
        text = text.decode('utf-8')

    # Instantiates a plain text document.
    document = types.Document(
        content=text,
        type=enums.Document.Type.PLAIN_TEXT)

    # Detects entities in the document. You can also analyze HTML with:
    #   document.type == enums.Document.Type.HTML
    entities = client.analyze_entities(document).entities

    # entity types from enums.Entity.Type
    entity_type = ('UNKNOWN', 'PERSON', 'LOCATION', 'ORGANIZATION',
                   'EVENT', 'WORK_OF_ART', 'CONSUMER_GOOD', 'OTHER')

    # print information for each entity found
    for entity in entities:
        print('=' * 20)
        print(u'{:<16}: {}'.format('name', entity.name))
        print(u'{:<16}: {}'.format('type', entity_type[entity.type]))
        print(u'{:<16}: {}'.format('metadata', entity.metadata))
        print(u'{:<16}: {}'.format('salience', entity.salience))
        print(u'{:<16}: {}'.format('wikipedia_url',
              entity.metadata.get('wikipedia_url', '-')))
7. בואו נשלב אותם
בוא נזכיר לעצמנו מה אתה בונה.
עכשיו נסכם את כל מה שלמדנו. יוצרים קובץ solution.py, מעתיקים ומדביקים את detect_labels_uri(), transcribe_gcs(), translate_text() ו-entities_text() מהשלבים הקודמים אל solution.py.
ייבוא של דפי בנק
מבטלים את ההערה ומעבירים את הצהרות הייבוא לחלק העליון. שימו לב שמתבצע ייבוא של speech.types וגם של language.types. זה יגרום לקונפליקט, אז פשוט נסיר אותם ונשנה כל מופע בודד של types ב-transcribe_gcs() וב-entities_text() ל-speech.types ול-language.types בהתאמה. אלה הקבצים שצריכים להישאר:
from google.cloud import vision
from google.cloud import speech
from google.cloud import translate
from google.cloud import language
from google.cloud.language import enums
import six
החזרת תוצאות
במקום להדפיס, אפשר להגדיר שהפונקציות יחזירו את התוצאות. התוצאה אמורה להיות דומה לזו:
# import statements

def detect_labels_uri(uri):
    # code

    # we only need the label descriptions
    label_descriptions = []
    for label in labels:
        label_descriptions.append(label.description)

    return label_descriptions

def transcribe_gcs(gcs_uri):
    # code

    # naive assumption that audio file is short
    return response.results[0].alternatives[0].transcript

def translate_text(target, text):
    # code

    # only interested in translated text
    return result['translatedText']

def entities_text(text):
    # code

    # we only need the entity names
    entity_names = []
    for entity in entities:
        entity_names.append(entity.name)

    return entity_names
שימוש בפונקציות
אחרי כל העבודה הקשה הזו, אפשר לקרוא לפונקציות האלה. קדימה, תעשה את זה! לדוגמה:
def compare_audio_to_image(audio, image):
    """Checks whether a speech audio is relevant to an image."""

    # speech audio -> text
    transcription = transcribe_gcs(audio)

    # text of any language -> english text
    translation = translate_text('en', transcription)

    # text -> entities
    entities = entities_text(translation)

    # image -> labels
    labels = detect_labels_uri(image)

    # naive check for whether entities intersect with labels
    has_match = False
    for entity in entities:
        if entity in labels:
            # print result for each match
            print('The audio and image both contain: {}'.format(entity))
            has_match = True

    # print if there are no matches
    if not has_match:
        print('The audio and image do not appear to be related.')
תמיכה במספר שפות
בעבר, קידדנו את השפה הטורקית ב-transcribe_gcs(). בואו נשנה את זה כך שאפשר יהיה לציין את השפה מ-compare_audio_to_image(). אלה השינויים שנדרשים:
def transcribe_gcs(language, gcs_uri):
    ...
    config = speech.types.RecognitionConfig(language_code=language)
def compare_audio_to_image(language, audio, image):
    transcription = transcribe_gcs(language, audio)
רוצים לנסות?
הקוד הסופי מופיע בקובץ solution.py במאגר הזה ב-GitHub. הנה פקודת curl להשגת הנתונים:
curl https://raw.githubusercontent.com/googlecodelabs/integrating-ml-apis/master/solution.py -O
הגרסה ב-GitHub כוללת argparse, שמאפשרת לבצע את הפעולות הבאות משורת הפקודה:
python solution.py tr-TR gs://cloud-samples-data/ml-api-codelab/tr-ball.wav gs://cloud-samples-data/ml-api-codelab/football.jpg
לכל פריט שנמצא, הקוד צריך להפיק את הפלט 'האודיו והתמונה מכילים: '. בדוגמה שלמעלה, הפלט יהיה 'האודיו והתמונה מכילים: כדור'.
בונוס: אפשר לנסות עוד
הנה עוד מיקומים של קובצי אודיו ותמונות שאפשר לנסות.
8. מעולה!
הכרתם ארבעה ממשקי API של למידת מכונה ושילבתם אותם כדי לקבוע אם דגימת דיבור מתייחסת לתמונה שסופקה. זו רק ההתחלה, ויש עוד הרבה דרכים לשפר את תהליך העבודה הזה.
מה למדנו
- שליחת בקשות ל-Cloud Vision API
- שליחת בקשות ל-Cloud Speech-to-Text API
- שליחת בקשות אל Cloud Translation API
- שליחת בקשות ל-Cloud Natural Language API
- שימוש בכל ממשקי ה-API שלמעלה ביחד
השלבים הבאים
- כדי להשוות מילים בצורה טובה יותר, כדאי לעיין ב-word2vec
- מומלץ לעיין ב-codelabs המפורטים יותר בנושאים Vision API, Speech-to-Text API, Translation API ו-Natural Language API
- אפשר לנסות להשתמש ב-Cloud Video Intelligence במקום ב-Cloud Vision
- סינתזה של אודיו של דיבור באמצעות Cloud Text-to-Speech API
- איך מעלים אובייקטים ל-Cloud Storage