1. 總覽
本程式碼研究室將教您如何修改現有的 iOS 影片應用程式,在支援 Google Cast 的裝置上投放內容。
什麼是 Google Cast?
使用者可以透過 Google Cast,將行動裝置中的內容投放到電視上。使用者就能將行動裝置當成遙控器,控制電視上的媒體播放。
Google Cast SDK 可擴充應用程式,控制支援 Google Cast 的裝置 (例如電視或音響系統)。您可以根據 Google Cast 設計檢查清單,使用 Cast SDK 新增必要的使用者介面元件。
我們提供 Google Cast 設計檢查清單,確保所有支援的平台都能提供簡單易懂的 Cast 使用者體驗。
我們要建構什麼內容?
完成本程式碼研究室後,您將擁有一個 iOS 影片應用程式,可將影片投放到 Google Cast 裝置。
課程內容
- 如何將 Google Cast SDK 新增至範例影片應用程式。
- 如何新增 Cast 按鈕,選取 Google Cast 裝置。
- 如何連線至 Cast 裝置並啟動媒體接收器。
- 如何投放影片。
- 如何在應用程式中加入 Cast 迷你遙控器。
- 如何新增展開的控制器。
- 如何提供簡介疊加層。
- 如何自訂 Google Cast 小工具。
- 如何整合 Cast Connect
軟硬體需求
- 最新版 Xcode。
- 搭載 iOS 9 以上版本的行動裝置 (或 Xcode 模擬器)。
- USB 資料傳輸線,用於將行動裝置連接至開發電腦 (如果使用裝置)。
- 已設定網路連線的 Google Cast 裝置,例如 Chromecast 或 Android TV。
- 具備 HDMI 輸入端的電視或螢幕。
- 如要測試 Cast Connect 整合,必須使用 Chromecast (支援 Google TV),但其餘程式碼研究室內容則不一定需要。如果沒有,請略過本教學課程結尾的「新增 Cast Connect 支援」步驟。
體驗
- 須具備先前的 iOS 開發知識。
- 你還需要具備觀看電視的相關知識 :)
您會如何使用本教學課程?
您對建構 iOS 應用程式的體驗滿意嗎?
你對觀看電視的體驗滿意嗎?
2. 取得程式碼範例
您可以將所有範例程式碼下載至電腦...
並解壓縮下載的 ZIP 檔案。
3. 執行範例應用程式

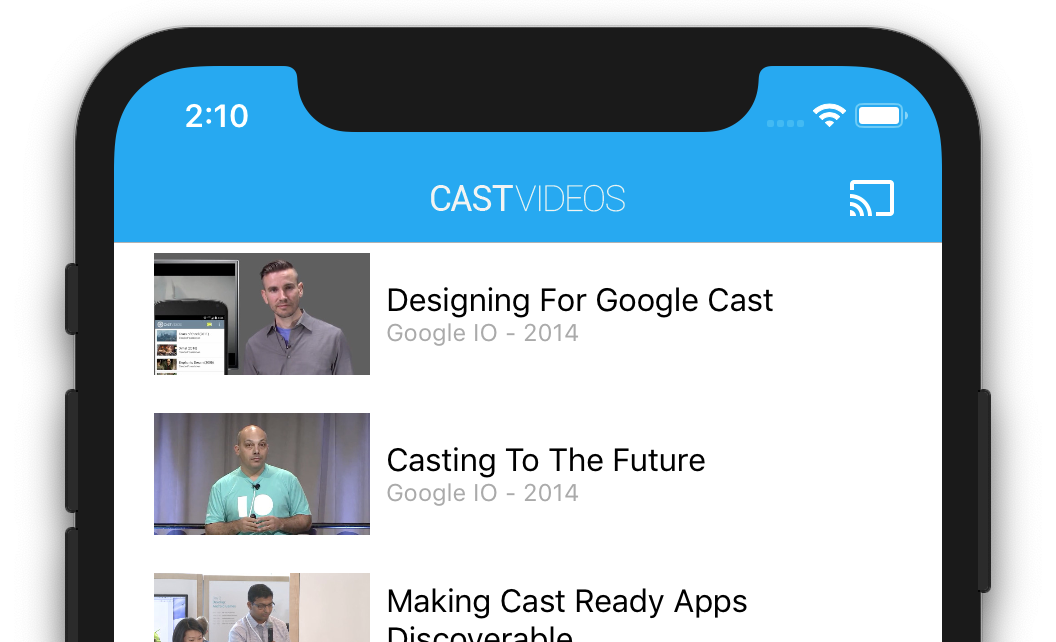
首先,我們來看看完成的範例應用程式。這個應用程式是基本影片播放器。使用者可以從清單中選取影片,然後在裝置上播放影片,或將影片投放到 Google Cast 裝置。
下載程式碼後,請按照下列操作說明,在 Xcode 中開啟並執行完成的範例應用程式:
常見問題
設定 CocoaPods
如要設定 CocoaPods,請前往控制台,然後使用 macOS 預設的 Ruby 安裝:
sudo gem install cocoapods
如有任何問題,請參閱官方說明文件,下載並安裝依附元件管理工具。
專案設定
- 前往終端機,然後前往程式碼研究室目錄。
- 從 Podfile 安裝依附元件。
cd app-done
pod update
pod install
- 開啟 Xcode,然後選取「Open another project...」
- 從範例程式碼資料夾的

app-done目錄中選取CastVideos-ios.xcworkspace檔案。
執行應用程式
選取目標和模擬器,然後執行應用程式:

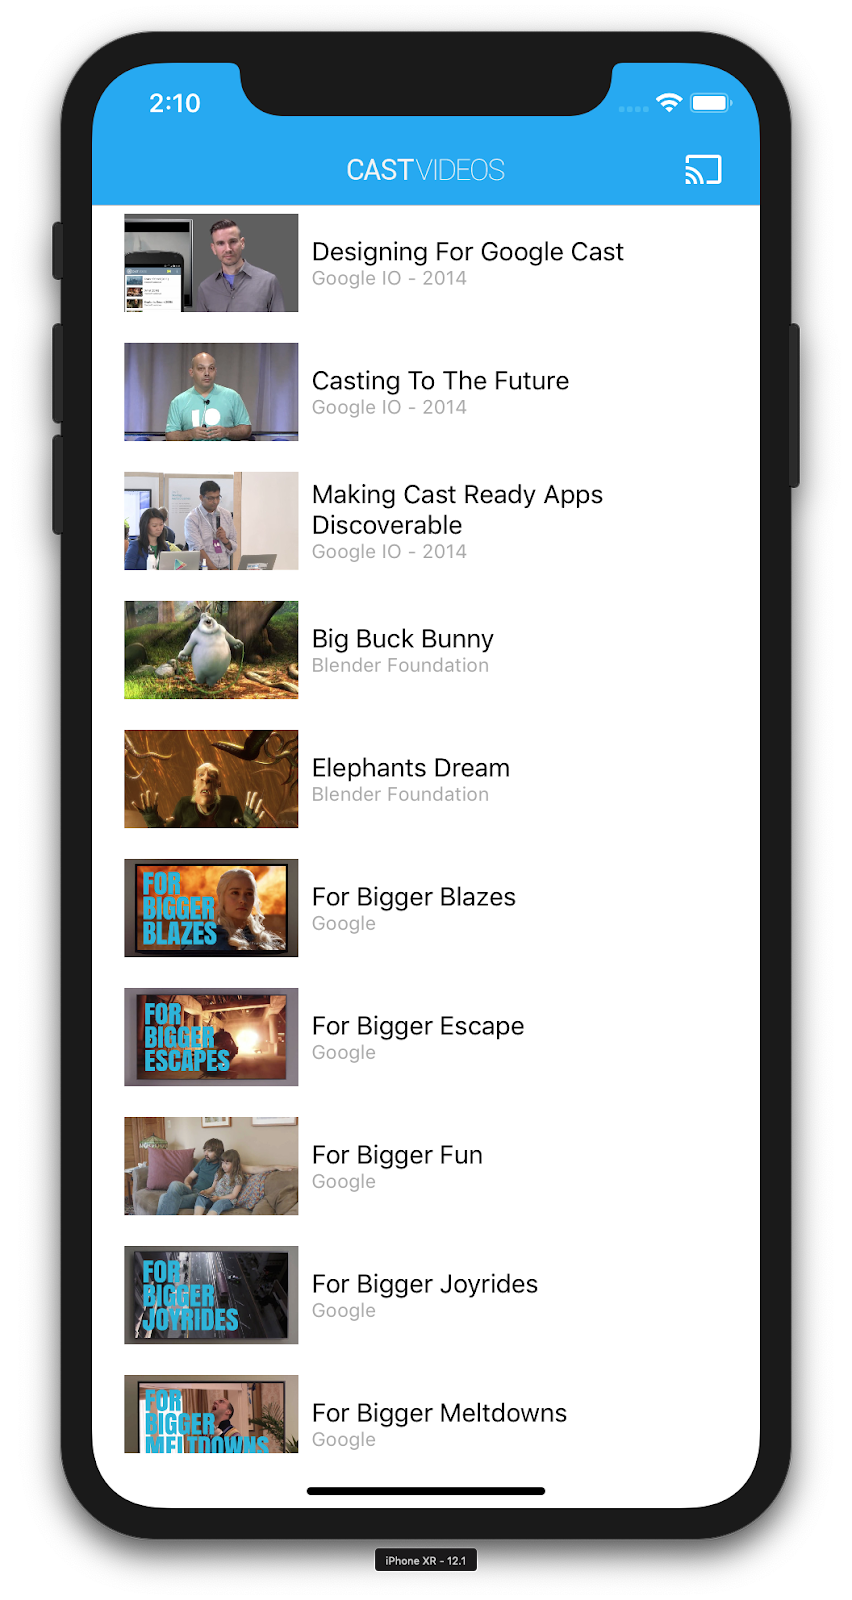
幾秒後,你應該會看到影片應用程式。
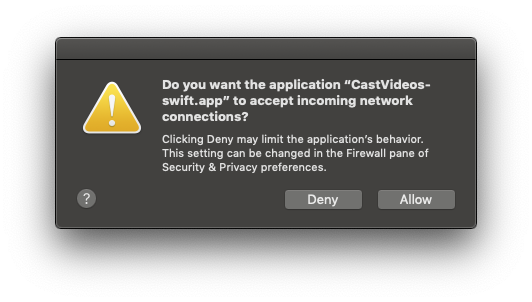
當系統顯示接受連入網路連線的通知時,請務必點選「允許」。如果未接受這項選項,就不會顯示「投放」圖示。
按一下「投放」按鈕,然後選取 Google Cast 裝置。
選取影片,然後按一下播放按鈕。
影片就會開始在 Google Cast 裝置上播放。
畫面會顯示展開的控制器。你可以使用播放/暫停按鈕控制播放。
返回影片清單。
畫面底部會顯示迷你遙控器。
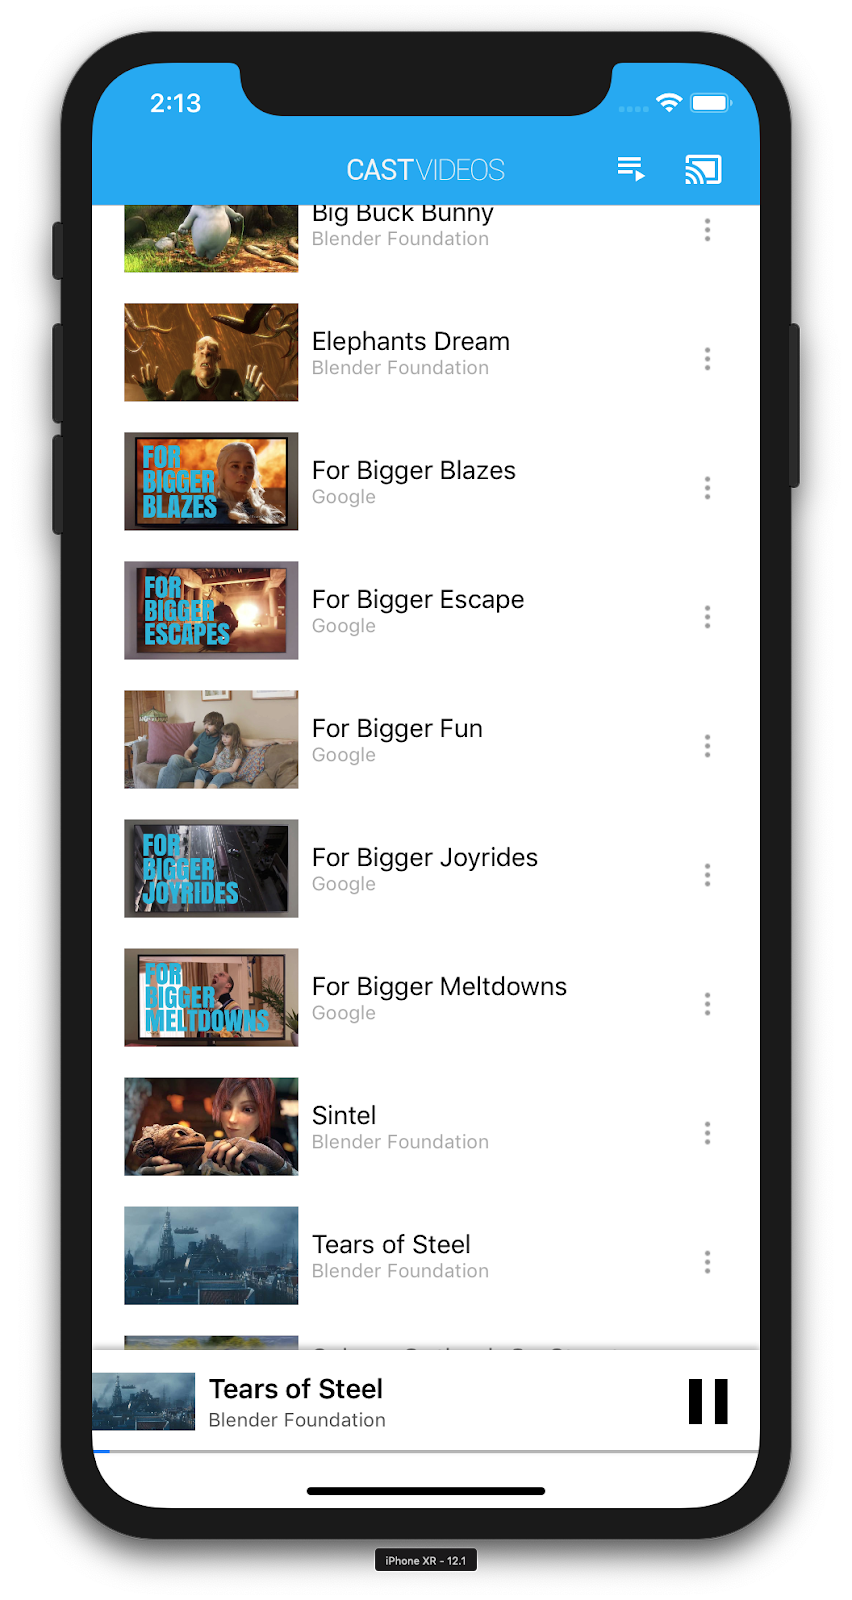
按一下迷你遙控器中的暫停按鈕,即可暫停接收器上的影片。按一下迷你控制器中的「播放」按鈕,即可繼續播放影片。
按一下「投放」按鈕,即可停止將內容投放到 Google Cast 裝置。
4. 準備啟動專案
我們需要為您下載的啟動應用程式新增 Google Cast 支援。以下是我們在本程式碼研究室中會使用的 Google Cast 術語:
- 傳送者應用程式在行動裝置或筆電上執行,
- Google Cast 裝置上執行接收端應用程式。
專案設定
現在,您可以使用 Xcode,在範例專案的基礎上進行建構:
- 前往終端機,然後前往程式碼研究室目錄。
- 從 Podfile 安裝依附元件。
cd app-start
pod update
pod install
- 開啟 Xcode,然後選取「Open another project...」
- 從範例程式碼資料夾的
app-start目錄中選取CastVideos-ios.xcworkspace檔案。
應用程式設計
應用程式會從遠端網路伺服器擷取影片清單,並提供清單供使用者瀏覽。使用者可以選取影片查看詳細資料,或在行動裝置上播放影片。
這個應用程式包含兩個主要檢視畫面控制器:MediaTableViewController 和 MediaViewController.
MediaTableViewController
這個 UITableViewController 會顯示 MediaListModel 執行個體的影片清單。影片清單和相關中繼資料會以 JSON 檔案的形式,存放在遠端伺服器上。MediaListModel 會擷取這個 JSON,並進行處理,以建構 MediaItem 物件清單。
MediaItem 物件會模擬影片及其相關聯的中繼資料,例如標題、說明、圖片網址和串流網址。
MediaTableViewController 會建立 MediaListModel 執行個體,然後將自己註冊為 MediaListModelDelegate,以便在媒體中繼資料下載完成時收到通知,進而載入表格檢視畫面。
系統會向使用者顯示影片縮圖清單,並附上每部影片的簡短說明。選取項目時,對應的 MediaItem 會傳遞至 MediaViewController。
MediaViewController
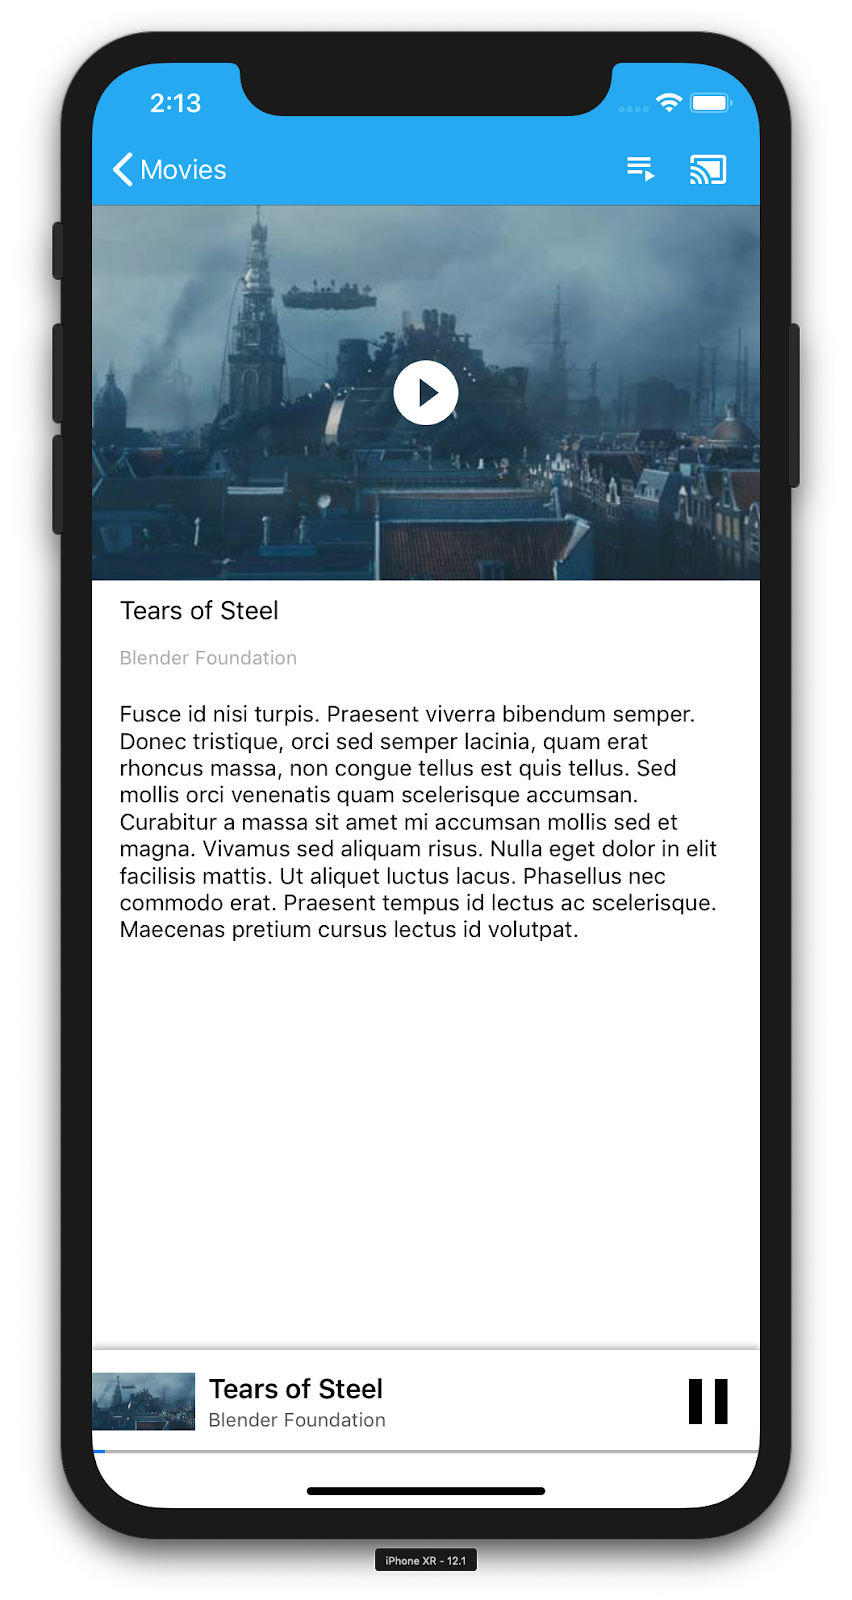
這個檢視畫面控制器會顯示特定影片的中繼資料,並允許使用者在行動裝置上播放影片。
檢視畫面控制器會代管 LocalPlayerView、一些媒體控制項,以及顯示所選影片說明的文字區域。播放器會遮住螢幕頂端,下方則會顯示影片的詳細說明。使用者可以播放/暫停或搜尋本機影片。
常見問題
5. 新增「投放」按鈕
支援 Cast 的應用程式會在每個檢視畫面控制器中顯示「投放」按鈕。按一下「投放」按鈕,即可選取要使用的 Cast 裝置。如果使用者在傳送端裝置上播放本機內容,選取 Cast 裝置後,系統就會在該裝置上開始或繼續播放內容。在 Cast 工作階段期間,使用者隨時可以按一下「投放」按鈕,停止將應用程式投放到 Cast 裝置。如 Google Cast 設計檢查清單所述,使用者必須能在應用程式的任何畫面中連線或中斷與 Cast 裝置的連線。
設定
啟動專案需要與完成的範例應用程式相同的依附元件和 Xcode 設定。請返回該節,按照相同步驟將 GoogleCast.framework 新增至啟動應用程式專案。
初始化
Cast 架構具有全域單例模式物件 GCKCastContext,可協調所有架構活動。這個物件必須在應用程式生命週期的早期階段 (通常是在應用程式委派的 application(_:didFinishLaunchingWithOptions:) 方法中) 初始化,這樣才能在傳送端應用程式重新啟動時正確觸發自動工作階段續傳,並開始掃描裝置。
初始化 GCKCastContext 時,必須提供 GCKCastOptions 物件。這個類別包含會影響架構行為的選項。其中最重要的是接收器應用程式 ID,這個 ID 可用來篩選 Cast 裝置探索結果,並在啟動 Cast 工作階段時啟動接收器應用程式。
您也可以使用 application(_:didFinishLaunchingWithOptions:) 方法設定記錄委派,接收 Cast 架構的記錄訊息。這些資訊有助於偵錯和疑難排解。
開發支援 Cast 的應用程式時,您必須先註冊成為 Cast 開發人員,然後取得應用程式的應用程式 ID。在本程式碼研究室中,我們將使用範例應用程式 ID。
在 AppDelegate.swift 中加入下列程式碼,使用使用者預設值中的應用程式 ID 初始化 GCKCastContext,並為 Google Cast 架構新增記錄器:
import GoogleCast

@UIApplicationMain
class AppDelegate: UIResponder, UIApplicationDelegate {
  fileprivate var enableSDKLogging = true

  ...

  func application(_: UIApplication,
                   didFinishLaunchingWithOptions _: [UIApplication.LaunchOptionsKey: Any]?) -> Bool {

    ...
    let options = GCKCastOptions(discoveryCriteria: GCKDiscoveryCriteria(applicationID: kReceiverAppID))
    options.physicalVolumeButtonsWillControlDeviceVolume = true
    GCKCastContext.setSharedInstanceWith(options)

    window?.clipsToBounds = true
    setupCastLogging()
    ...
  }
  ...
  func setupCastLogging() {
    let logFilter = GCKLoggerFilter()
    let classesToLog = ["GCKDeviceScanner", "GCKDeviceProvider", "GCKDiscoveryManager", "GCKCastChannel",
                        "GCKMediaControlChannel", "GCKUICastButton", "GCKUIMediaController", "NSMutableDictionary"]
    logFilter.setLoggingLevel(.verbose, forClasses: classesToLog)
    GCKLogger.sharedInstance().filter = logFilter
    GCKLogger.sharedInstance().delegate = self
  }
}

...

// MARK: - GCKLoggerDelegate

extension AppDelegate: GCKLoggerDelegate {
  func logMessage(_ message: String,
                  at _: GCKLoggerLevel,
                  fromFunction function: String,
                  location: String) {
    if enableSDKLogging {
      // Send SDK's log messages directly to the console.
      print("\(location): \(function) - \(message)")
    }
  }
}
投放按鈕
GCKCastContext 初始化完成後,我們需要新增 Cast 按鈕,讓使用者選取 Cast 裝置。Cast SDK 提供名為 GCKUICastButton 的 Cast 按鈕元件,做為 UIButton 子類別。只要將其包裝在 UIBarButtonItem 中,即可新增至應用程式的標題列。我們需要在 MediaTableViewController 和 MediaViewController 中新增 Cast 按鈕。
在 MediaTableViewController.swift 和 MediaViewController.swift 中加入下列程式碼:
import GoogleCast

@objc(MediaTableViewController)
class MediaTableViewController: UITableViewController, GCKSessionManagerListener,
  MediaListModelDelegate, GCKRequestDelegate {
  private var castButton: GCKUICastButton!
  ...
  override func viewDidLoad() {
    print("MediaTableViewController - viewDidLoad")
    super.viewDidLoad()

    ...
    castButton = GCKUICastButton(frame: CGRect(x: CGFloat(0), y: CGFloat(0),
                                               width: CGFloat(24), height: CGFloat(24)))
    // Overwrite the UIAppearance theme in the AppDelegate.
    castButton.tintColor = UIColor.white
    navigationItem.rightBarButtonItem = UIBarButtonItem(customView: castButton)

    ...
  }
  ...
}
接著,將下列程式碼加到 MediaViewController.swift:
import GoogleCast

@objc(MediaViewController)
class MediaViewController: UIViewController, GCKSessionManagerListener, GCKRemoteMediaClientListener,
  LocalPlayerViewDelegate, GCKRequestDelegate {
  private var castButton: GCKUICastButton!
  ...
  override func viewDidLoad() {
    super.viewDidLoad()
    print("in MediaViewController viewDidLoad")
    ...
    castButton = GCKUICastButton(frame: CGRect(x: CGFloat(0), y: CGFloat(0),
                                               width: CGFloat(24), height: CGFloat(24)))
    // Overwrite the UIAppearance theme in the AppDelegate.
    castButton.tintColor = UIColor.white
    navigationItem.rightBarButtonItem = UIBarButtonItem(customView: castButton)

    ...
  }
  ...
}
現在執行應用程式,應用程式的導覽列中應該會顯示「投放」按鈕。按一下該按鈕後,系統會列出區域網路中的 Cast 裝置。裝置探索功能由 GCKCastContext 自動管理。選取 Cast 裝置,範例接收器應用程式就會載入至 Cast 裝置。您可以在瀏覽活動和本機播放器活動之間切換,且「投放」按鈕狀態會保持同步。
我們尚未支援媒體播放功能,因此你還無法在 Cast 裝置上播放影片。按一下「投放」按鈕即可停止投放。
6. 投放影片內容
我們會擴充範例應用程式,以便在 Cast 裝置上遠端播放影片。為此,我們需要監聽 Cast 架構產生的各種事件。
投放媒體
整體來說,如要在 Cast 裝置上播放媒體,必須執行下列操作:
- 從 Cast SDK 建立
GCKMediaInformation物件,模擬媒體項目。 - 使用者連線至 Cast 裝置,啟動接收器應用程式。
- 將
GCKMediaInformation物件載入接收器,然後播放內容。 - 追蹤媒體狀態。
- 根據使用者互動,將播放指令傳送至接收器。
步驟 1 是將一個物件對應至另一個物件;GCKMediaInformation 是 Cast SDK 可解讀的內容,而 MediaItem 是媒體項目的應用程式封裝內容,我們可以輕鬆將 MediaItem 對應至 GCKMediaInformation。我們已在上一個章節中完成步驟 2。使用 Cast SDK 即可輕鬆完成步驟 3。
範例應用程式 MediaViewController 已使用這個列舉,區分本機和遠端播放:
enum PlaybackMode: Int {
  case none = 0
  case local
  case remote
}

private var playbackMode = PlaybackMode.none
在本程式碼研究室中,您不必瞭解所有範例播放器邏輯的確切運作方式。請務必瞭解,您必須修改應用程式的媒體播放器,才能以類似的方式辨識這兩個播放位置。
目前本機播放器一律處於本機播放狀態,因為播放器還不瞭解投放狀態。我們需要根據 Cast 架構中發生的狀態轉換更新 UI。舉例來說,如果開始投放,我們需要停止本機播放並停用部分控制項。同樣地,如果我們在這個檢視畫面控制器中停止投放,就需要轉換為本機播放。如要處理這類情況,我們需要監聽 Cast 架構產生的各種事件。
管理 Cast 工作階段
在 Cast 架構中,Cast 工作階段會結合連線至裝置、啟動 (或加入)、連線至接收器應用程式,以及視需要初始化媒體控制項管道等步驟。媒體控制管道是 Cast 架構用來傳送及接收接收器媒體播放器訊息的方式。
使用者選取 Cast 按鈕中的裝置後,系統就會自動啟動 Cast 工作階段,並在使用者中斷連線時自動停止。如果發生網路問題,Cast 架構也會自動重新連線至接收器工作階段。
Cast 工作階段是由 GCKSessionManager 管理,可透過 GCKCastContext.sharedInstance().sessionManager 存取。GCKSessionManagerListener 回呼可用於監控工作階段事件,例如建立、暫停、繼續和終止。
首先,我們需要註冊工作階段接聽程式,並初始化一些變數:
class MediaViewController: UIViewController, GCKSessionManagerListener,
  GCKRemoteMediaClientListener, LocalPlayerViewDelegate, GCKRequestDelegate {

  ...
  private var sessionManager: GCKSessionManager!
  ...

  required init?(coder: NSCoder) {
    super.init(coder: coder)

    sessionManager = GCKCastContext.sharedInstance().sessionManager

    ...
  }

  override func viewWillAppear(_ animated: Bool) {
    ...

    let hasConnectedSession: Bool = (sessionManager.hasConnectedSession())
    if hasConnectedSession, (playbackMode != .remote) {
      populateMediaInfo(false, playPosition: 0)
      switchToRemotePlayback()
    } else if sessionManager.currentSession == nil, (playbackMode != .local) {
      switchToLocalPlayback()
    }

    sessionManager.add(self)

    ...
  }

  override func viewWillDisappear(_ animated: Bool) {
    ...

    sessionManager.remove(self)
    sessionManager.currentCastSession?.remoteMediaClient?.remove(self)
    ...
    super.viewWillDisappear(animated)
  }

  func switchToLocalPlayback() {
    ...

    sessionManager.currentCastSession?.remoteMediaClient?.remove(self)

    ...
  }

  func switchToRemotePlayback() {
    ...

    sessionManager.currentCastSession?.remoteMediaClient?.add(self)

    ...
  }


  // MARK: - GCKSessionManagerListener

  func sessionManager(_: GCKSessionManager, didStart session: GCKSession) {
    print("MediaViewController: sessionManager didStartSession \(session)")
    setQueueButtonVisible(true)
    switchToRemotePlayback()
  }

  func sessionManager(_: GCKSessionManager, didResumeSession session: GCKSession) {
    print("MediaViewController: sessionManager didResumeSession \(session)")
    setQueueButtonVisible(true)
    switchToRemotePlayback()
  }

  func sessionManager(_: GCKSessionManager, didEnd _: GCKSession, withError error: Error?) {
    print("session ended with error: \(String(describing: error))")
    let message = "The Casting session has ended.\n\(String(describing: error))"
    if let window = appDelegate?.window {
      Toast.displayMessage(message, for: 3, in: window)
    }
    setQueueButtonVisible(false)
    switchToLocalPlayback()
  }

  func sessionManager(_: GCKSessionManager, didFailToStartSessionWithError error: Error?) {
    if let error = error {
      showAlert(withTitle: "Failed to start a session", message: error.localizedDescription)
    }
    setQueueButtonVisible(false)
  }

  func sessionManager(_: GCKSessionManager,
                      didFailToResumeSession _: GCKSession, withError _: Error?) {
    if let window = UIApplication.shared.delegate?.window {
      Toast.displayMessage("The Casting session could not be resumed.",
                           for: 3, in: window)
    }
    setQueueButtonVisible(false)
    switchToLocalPlayback()
  }

  ...
}
在 MediaViewController 中,我們希望在連線或中斷與 Cast 裝置的連線時收到通知,以便切換至本機播放器或從本機播放器切換。請注意,不只是在行動裝置上執行的應用程式執行個體會中斷連線,在其他行動裝置上執行的應用程式 (或另一個應用程式) 執行個體也可能中斷連線。
目前有效的工作階段可透過 GCKCastContext.sharedInstance().sessionManager.currentCastSession 存取。系統會根據使用者在 Cast 對話方塊中的手勢,自動建立及終止工作階段。
正在載入媒體
在 Cast SDK 中,GCKRemoteMediaClient 提供一組便利的 API,可管理接收端上的遠端媒體播放作業。對於支援媒體播放的 GCKCastSession,SDK 會自動建立 GCKRemoteMediaClient 的執行個體。可做為 GCKCastSession 例項的 remoteMediaClient 屬性存取。
在 MediaViewController.swift 中新增下列程式碼,在接收器上載入目前所選影片:
@objc(MediaViewController)
class MediaViewController: UIViewController, GCKSessionManagerListener,
  GCKRemoteMediaClientListener, LocalPlayerViewDelegate, GCKRequestDelegate {
  ...

  @objc func playSelectedItemRemotely() {
    loadSelectedItem(byAppending: false)
  }

  /**
   * Loads the currently selected item in the current cast media session.
   * @param appending If YES, the item is appended to the current queue if there
   * is one. If NO, or if
   * there is no queue, a new queue containing only the selected item is created.
   */
  func loadSelectedItem(byAppending appending: Bool) {
    print("enqueue item \(String(describing: mediaInfo))")
    if let remoteMediaClient = sessionManager.currentCastSession?.remoteMediaClient {
      let mediaQueueItemBuilder = GCKMediaQueueItemBuilder()
      mediaQueueItemBuilder.mediaInformation = mediaInfo
      mediaQueueItemBuilder.autoplay = true
      mediaQueueItemBuilder.preloadTime = TimeInterval(UserDefaults.standard.integer(forKey: kPrefPreloadTime))
      let mediaQueueItem = mediaQueueItemBuilder.build()
      if appending {
        let request = remoteMediaClient.queueInsert(mediaQueueItem, beforeItemWithID: kGCKMediaQueueInvalidItemID)
        request.delegate = self
      } else {
        let queueDataBuilder = GCKMediaQueueDataBuilder(queueType: .generic)
        queueDataBuilder.items = [mediaQueueItem]
        queueDataBuilder.repeatMode = remoteMediaClient.mediaStatus?.queueRepeatMode ?? .off

        let mediaLoadRequestDataBuilder = GCKMediaLoadRequestDataBuilder()
        mediaLoadRequestDataBuilder.mediaInformation = mediaInfo
        mediaLoadRequestDataBuilder.queueData = queueDataBuilder.build()

        let request = remoteMediaClient.loadMedia(with: mediaLoadRequestDataBuilder.build())
        request.delegate = self
      }
    }
  }
  ...
}
現在請更新各種現有方法,使用 Cast 工作階段邏輯支援遠端播放:
required init?(coder: NSCoder) {
  super.init(coder: coder)
  ...
  castMediaController = GCKUIMediaController()
  ...
}

func switchToLocalPlayback() {
  print("switchToLocalPlayback")
  if playbackMode == .local {
    return
  }
  setQueueButtonVisible(false)
  var playPosition: TimeInterval = 0
  var paused: Bool = false
  var ended: Bool = false
  if playbackMode == .remote {
    playPosition = castMediaController.lastKnownStreamPosition
    paused = (castMediaController.lastKnownPlayerState == .paused)
    ended = (castMediaController.lastKnownPlayerState == .idle)
    print("last player state: \(castMediaController.lastKnownPlayerState), ended: \(ended)")
  }
  populateMediaInfo((!paused && !ended), playPosition: playPosition)
  sessionManager.currentCastSession?.remoteMediaClient?.remove(self)
  playbackMode = .local
}

func switchToRemotePlayback() {
  print("switchToRemotePlayback; mediaInfo is \(String(describing: mediaInfo))")
  if playbackMode == .remote {
    return
  }
  // If we were playing locally, load the local media on the remote player
  if playbackMode == .local, (_localPlayerView.playerState != .stopped), (mediaInfo != nil) {
    print("loading media: \(String(describing: mediaInfo))")
    let paused: Bool = (_localPlayerView.playerState == .paused)
    let mediaQueueItemBuilder = GCKMediaQueueItemBuilder()
    mediaQueueItemBuilder.mediaInformation = mediaInfo
    mediaQueueItemBuilder.autoplay = !paused
    mediaQueueItemBuilder.preloadTime = TimeInterval(UserDefaults.standard.integer(forKey: kPrefPreloadTime))
    mediaQueueItemBuilder.startTime = _localPlayerView.streamPosition ?? 0
    let mediaQueueItem = mediaQueueItemBuilder.build()

    let queueDataBuilder = GCKMediaQueueDataBuilder(queueType: .generic)
    queueDataBuilder.items = [mediaQueueItem]
    queueDataBuilder.repeatMode = .off

    let mediaLoadRequestDataBuilder = GCKMediaLoadRequestDataBuilder()
    mediaLoadRequestDataBuilder.queueData = queueDataBuilder.build()

    let request = sessionManager.currentCastSession?.remoteMediaClient?.loadMedia(with: mediaLoadRequestDataBuilder.build())
    request?.delegate = self
  }
  _localPlayerView.stop()
  _localPlayerView.showSplashScreen()
  setQueueButtonVisible(true)
  sessionManager.currentCastSession?.remoteMediaClient?.add(self)
  playbackMode = .remote
}

/* Play has been pressed in the LocalPlayerView. */
func continueAfterPlayButtonClicked() -> Bool {
  let hasConnectedCastSession = sessionManager.hasConnectedCastSession
  if mediaInfo != nil, hasConnectedCastSession() {
    // Display an alert box to allow the user to add to queue or play
    // immediately.
    if actionSheet == nil {
      actionSheet = ActionSheet(title: "Play Item", message: "Select an action", cancelButtonText: "Cancel")
      actionSheet?.addAction(withTitle: "Play Now", target: self,
                             selector: #selector(playSelectedItemRemotely))
    }
    actionSheet?.present(in: self, sourceView: _localPlayerView)
    return false
  }
  return true
}
現在,請在行動裝置上執行應用程式。連線至 Google Cast 裝置,然後開始播放影片。接收裝置上應該會開始播放影片。
7. 迷你遙控器
根據「投放裝置設計檢查清單」規定,使用者離開目前的內容頁面時,所有投放裝置應用程式都必須提供迷你遙控器。迷你控制器可讓您即時存取目前的 Cast 工作階段,並顯示提醒。
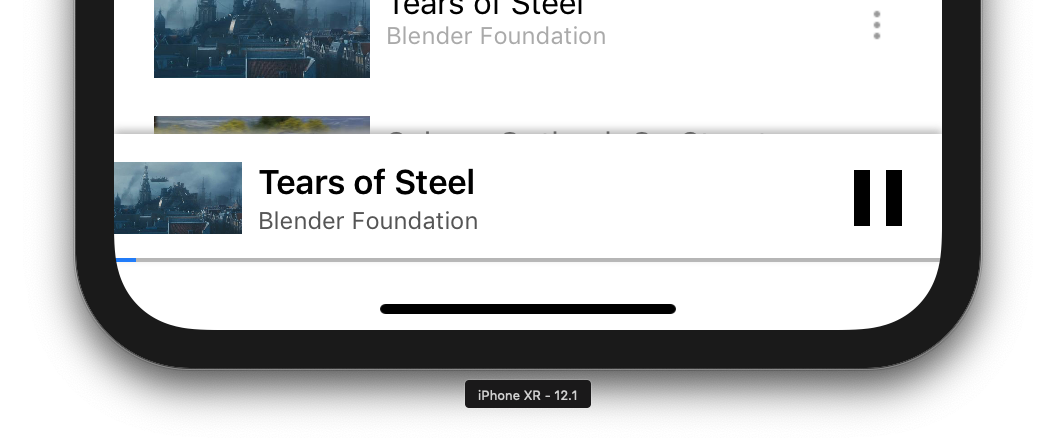
Cast SDK 提供控制列 GCKUIMiniMediaControlsViewController,可新增至要顯示持續性控制項的場景。
在範例應用程式中,我們將使用 GCKUICastContainerViewController,這個檢視區塊會包裝另一個檢視控制器,並在底部新增 GCKUIMiniMediaControlsViewController。
修改 AppDelegate.swift 檔案,然後在下列方法中新增 if useCastContainerViewController 條件的程式碼:
func application(_: UIApplication,
                 didFinishLaunchingWithOptions _: [UIApplication.LaunchOptionsKey: Any]?) -> Bool {
  ...
  let appStoryboard = UIStoryboard(name: "Main", bundle: nil)
  guard let navigationController = appStoryboard.instantiateViewController(withIdentifier: "MainNavigation")
    as? UINavigationController else { return false }
  let castContainerVC = GCKCastContext.sharedInstance().createCastContainerController(for: navigationController)
    as GCKUICastContainerViewController
  castContainerVC.miniMediaControlsItemEnabled = true
  window = UIWindow(frame: UIScreen.main.bounds)
  window?.rootViewController = castContainerVC
  window?.makeKeyAndVisible()
  ...
}
新增這個屬性和 setter/getter,即可控制迷你控制器的顯示狀態 (我們會在後續章節中使用這些項目):
var isCastControlBarsEnabled: Bool {
    get {
      if useCastContainerViewController {
        let castContainerVC = (window?.rootViewController as? GCKUICastContainerViewController)
        return castContainerVC!.miniMediaControlsItemEnabled
      } else {
        let rootContainerVC = (window?.rootViewController as? RootContainerViewController)
        return rootContainerVC!.miniMediaControlsViewEnabled
      }
    }
    set(notificationsEnabled) {
      if useCastContainerViewController {
        var castContainerVC: GCKUICastContainerViewController?
        castContainerVC = (window?.rootViewController as? GCKUICastContainerViewController)
        castContainerVC?.miniMediaControlsItemEnabled = notificationsEnabled
      } else {
        var rootContainerVC: RootContainerViewController?
        rootContainerVC = (window?.rootViewController as? RootContainerViewController)
        rootContainerVC?.miniMediaControlsViewEnabled = notificationsEnabled
      }
    }
  }
執行應用程式並投放影片。在接收裝置上開始播放後,每個場景底部都會顯示迷你遙控器。你可以使用迷你控制器控制遠端播放。在瀏覽活動和本機播放器活動之間切換時,迷你遙控器狀態應與接收器媒體播放狀態保持同步。
8. 入門重疊廣告
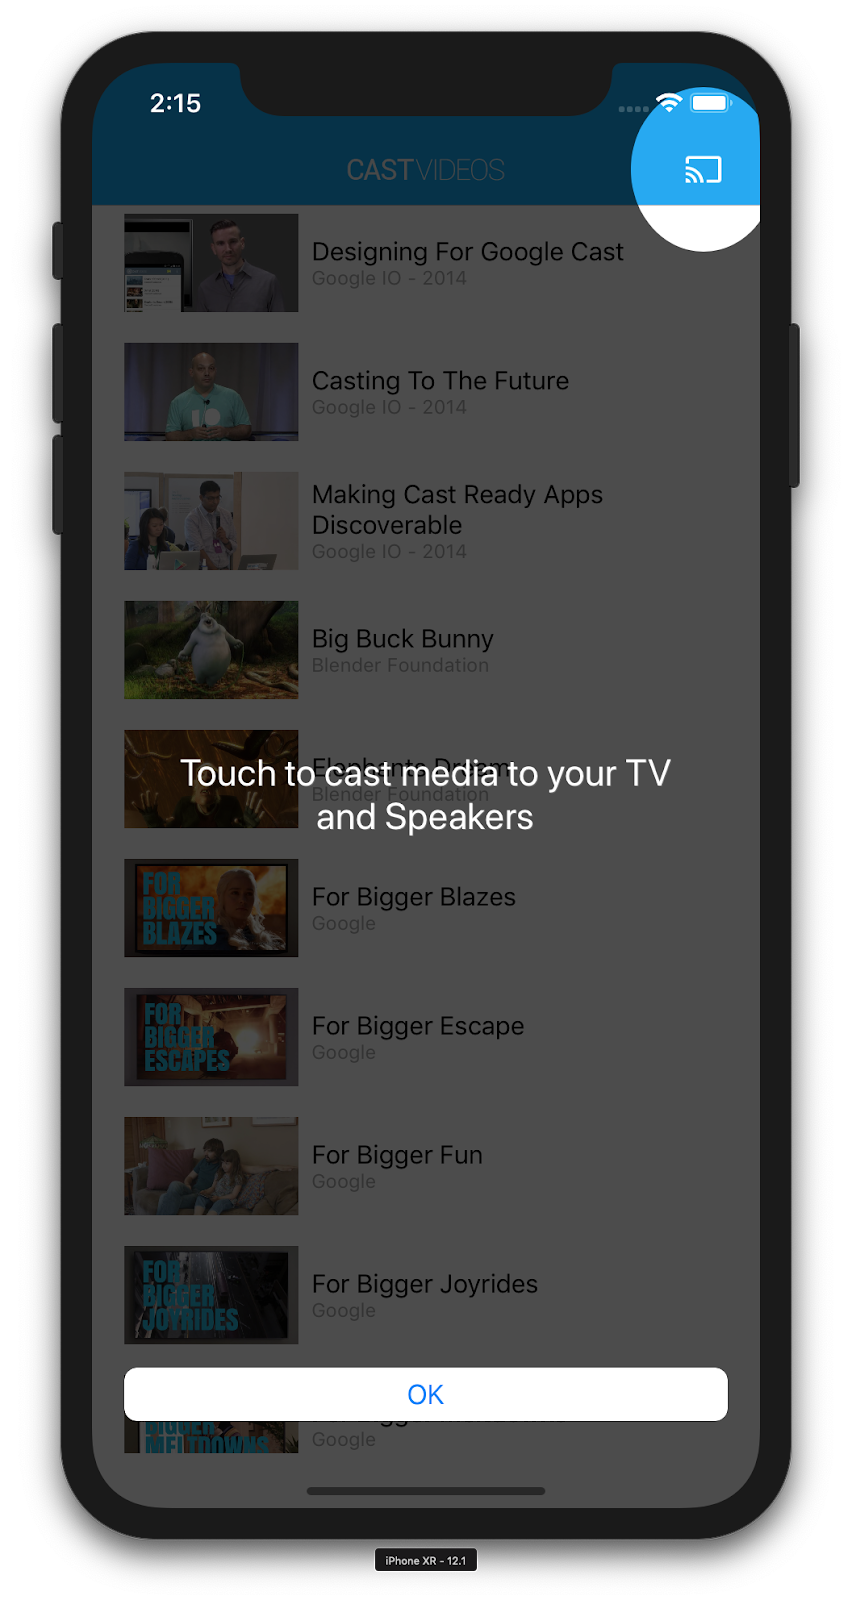
Google Cast 設計檢查清單要求傳送端應用程式向現有使用者介紹 Cast 按鈕,讓他們知道傳送端應用程式現在支援 Cast,同時協助不熟悉 Google Cast 的使用者。
GCKCastContext 類別有一個 presentCastInstructionsViewControllerOnce 方法,可在首次向使用者顯示 Cast 按鈕時,醒目顯示該按鈕。在 MediaViewController.swift 和 MediaTableViewController.swift 中加入下列程式碼:
override func viewDidLoad() {
  ...

  NotificationCenter.default.addObserver(self, selector: #selector(castDeviceDidChange),
                                         name: NSNotification.Name.gckCastStateDidChange,
                                         object: GCKCastContext.sharedInstance())
}

@objc func castDeviceDidChange(_: Notification) {
  if GCKCastContext.sharedInstance().castState != .noDevicesAvailable {
    // You can present the instructions on how to use Google Cast on
    // the first time the user uses you app
    GCKCastContext.sharedInstance().presentCastInstructionsViewControllerOnce(with: castButton)
  }
}
在行動裝置上執行應用程式,您應該會看到簡介疊加層。
9. 擴充控制器
Google Cast 設計檢查清單規定,傳送器應用程式必須為投放的媒體提供擴充控制器。展開的控制器是迷你控制器的全螢幕版本。
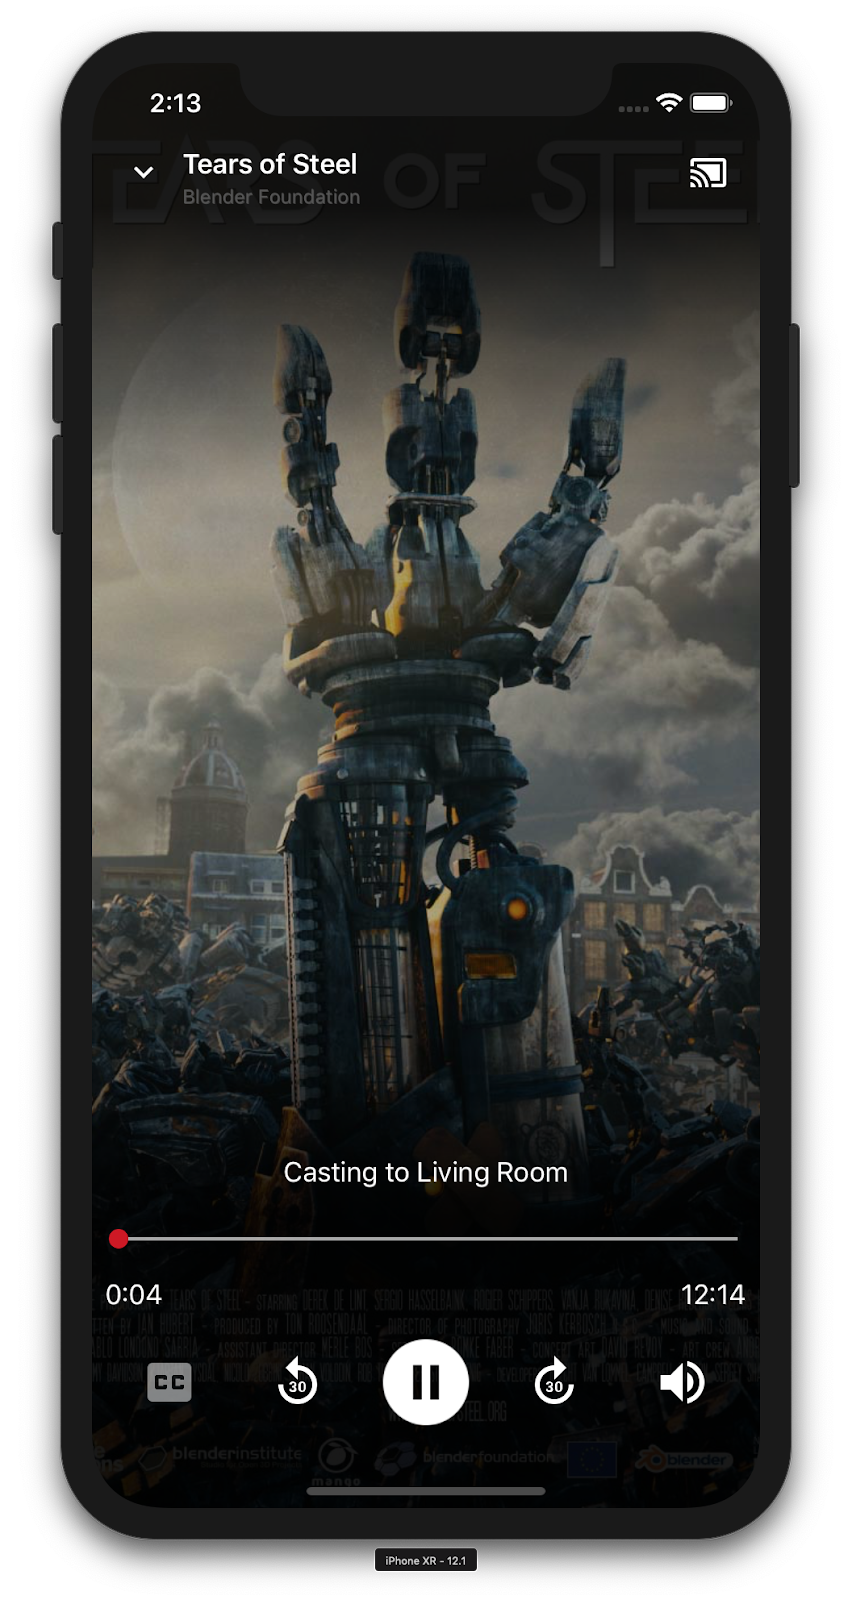
展開的遙控器會以全螢幕顯示,方便你全面控制遠端媒體播放作業。這個檢視畫面應允許投放應用程式管理投放工作階段的所有可管理層面,但接收器音量控制和工作階段生命週期 (連線/停止投放) 除外。還會提供媒體工作階段的所有狀態資訊 (例如:藝術作品、名稱、副標題等)。
這個檢視區塊的功能是由 GCKUIExpandedMediaControlsViewController 類別實作。
首先,您必須在 Cast 內容中啟用預設的擴充控制器。修改 AppDelegate.swift,啟用預設的展開控制器:
import GoogleCast

@UIApplicationMain
class AppDelegate: UIResponder, UIApplicationDelegate {
  ...

  func application(_: UIApplication,
                   didFinishLaunchingWithOptions _: [UIApplication.LaunchOptionsKey: Any]?) -> Bool {
    ...
    // Add after the setShareInstanceWith(options) is set.
    GCKCastContext.sharedInstance().useDefaultExpandedMediaControls = true
    ...
  }
  ...
}
在 MediaViewController.swift 中加入下列程式碼,在使用者開始投放影片時載入擴充控制器:
@objc func playSelectedItemRemotely() {
  ...
  appDelegate?.isCastControlBarsEnabled = false
  GCKCastContext.sharedInstance().presentDefaultExpandedMediaControls()
}
使用者輕觸迷你控制器時,系統也會自動啟動展開的控制器。
執行應用程式並投放影片。您應該會看到展開的控制器。返回影片清單,然後點選迷你控制器,系統就會再次載入展開的控制器。
10. 新增 Cast Connect 支援
現有的發送端應用程式可透過 Cast Connect 程式庫,使用 Cast 協定與 Android TV 應用程式通訊。Cast Connect 以 Cast 基礎架構為基礎,Android TV 應用程式則做為接收器。
依附元件
在 Podfile 中,請確認 google-cast-sdk 指向 4.4.8 以上版本,如下所示。如果您修改了檔案,請從控制台執行 pod update,將變更同步至專案。
pod 'google-cast-sdk', '>=4.4.8'
GCKLaunchOptions
如要啟動 Android TV 應用程式 (又稱 Android 接收器),我們需要在 GCKLaunchOptions 物件中將 androidReceiverCompatible 標記設為 true。這個 GCKLaunchOptions 物件會決定接收器啟動方式,並傳遞至使用 GCKCastContext.setSharedInstanceWith 在共用例項中設定的 GCKCastOptions。
在 AppDelegate.swift 中新增下列程式碼:
let options = GCKCastOptions(discoveryCriteria:
                          GCKDiscoveryCriteria(applicationID: kReceiverAppID))
...
/** Following code enables CastConnect */
let launchOptions = GCKLaunchOptions()
launchOptions.androidReceiverCompatible = true
options.launchOptions = launchOptions

GCKCastContext.setSharedInstanceWith(options)
設定啟動憑證
在傳送端,您可以指定 GCKCredentialsData 代表加入工作階段的使用者。credentials 是使用者可定義的字串,只要 ATV 應用程式能解讀即可。GCKCredentialsData 只會在啟動或加入時傳遞至 Android TV 應用程式。如果連線時重新設定,系統不會將密碼傳送至 Android TV 應用程式。
設定啟動憑證 GCKCredentialsData 時,必須先設定 GCKLaunchOptions。為說明這點,我們將為「Creds」按鈕新增邏輯,以便在建立工作階段時設定要傳遞的憑證。將下列程式碼加到 MediaTableViewController.swift:
class MediaTableViewController: UITableViewController, GCKSessionManagerListener, MediaListModelDelegate, GCKRequestDelegate {
  ...
  private var credentials: String? = nil
  ...
  override func viewDidLoad() {
    ...
    navigationItem.leftBarButtonItem = UIBarButtonItem(title: "Creds", style: .plain,
                                                       target: self, action: #selector(toggleLaunchCreds))
    ...
    setLaunchCreds()
  }
  ...
  @objc func toggleLaunchCreds(_: Any){
    if (credentials == nil) {
        credentials = "{\"userId\":\"id123\"}"
    } else {
        credentials = nil
    }
    Toast.displayMessage("Launch Credentials: "+(credentials ?? "Null"), for: 3, in: appDelegate?.window)
    print("Credentials set: "+(credentials ?? "Null"))
    setLaunchCreds()
  }
  ...
  func setLaunchCreds() {
    GCKCastContext.sharedInstance()
        .setLaunch(GCKCredentialsData(credentials: credentials))
  }
}
在載入要求中設定憑證
如要在網頁和 Android TV Receiver 應用程式中處理 credentials,請在 loadSelectedItem 函式下方的 MediaTableViewController.swift 類別中新增下列程式碼:
let mediaLoadRequestDataBuilder = GCKMediaLoadRequestDataBuilder()
...
mediaLoadRequestDataBuilder.credentials = credentials
...
視傳送端投放的接收端應用程式而定,SDK 會自動將上述憑證套用至進行中的工作階段。
測試 Cast Connect
在 Chromecast (支援 Google TV) 上安裝 Android TV APK 的步驟
- 找出 Android TV 裝置的 IP 位址。通常可以在「設定」>「網路與網際網路」>「(裝置連上的網路名稱)」下方找到。右側會顯示詳細資料和裝置在網路上的 IP。
- 使用裝置的 IP 位址,透過終端機以 ADB 連線至裝置:
$ adb connect <device_ip_address>:5555
- 在終端機視窗中,前往本程式碼研究室開頭下載的程式碼研究室範例頂層資料夾。例如:
$ cd Desktop/ios_codelab_src
- 執行下列指令,將這個資料夾中的 .apk 檔案安裝到 Android TV:
$ adb -s <device_ip_address>:5555 install android-tv-app.apk
- 現在 Android TV 裝置的「你的應用程式」選單中,應該會顯示名為「投放影片」的應用程式。
- 完成後,請在模擬器或行動裝置上建構並執行應用程式。與 Android TV 裝置建立投放工作階段後,Android TV 應該會啟動 Android Receiver 應用程式。從 iOS 行動裝置傳送器播放影片時,影片應會在 Android 接收器上啟動,且你可以使用 Android TV 裝置的遙控器控制播放。
11. 自訂 Google Cast 小工具
初始化
首先從「App-Done」資料夾開始。在 AppDelegate.swift 檔案的 applicationDidFinishLaunchingWithOptions 方法中新增下列內容。
func application(_: UIApplication,
                 didFinishLaunchingWithOptions _: [UIApplication.LaunchOptionsKey: Any]?) -> Bool {
  ...
  let styler = GCKUIStyle.sharedInstance()
  ...
}
如要套用本程式碼研究室其餘部分所述的一或多項自訂項目,請呼叫下列程式碼來提交樣式:
styler.apply()
自訂 Cast 檢視畫面
您可以透過所有檢視區塊的預設樣式指引,自訂 Cast 應用程式架構管理的所有檢視區塊。舉例來說,我們來變更圖示色調顏色。
styler.castViews.iconTintColor = .lightGray
如有需要,您可以覆寫每個畫面的預設值。舉例來說,如要覆寫圖示色調的 lightGrayColor,僅適用於展開的媒體控制器。
styler.castViews.mediaControl.expandedController.iconTintColor = .green
變更顏色
您可以自訂所有檢視畫面的背景顏色 (或個別自訂每個檢視畫面)。下列程式碼會將所有 Cast 應用程式架構提供的檢視區塊背景顏色設為藍色。
styler.castViews.backgroundColor = .blue
styler.castViews.mediaControl.miniController.backgroundColor = .yellow
變更字型
你可以自訂投放畫面中不同標籤的字型。為方便說明,我們將所有字型設為「Courier-Oblique」。
styler.castViews.headingTextFont = UIFont.init(name: "Courier-Oblique", size: 16) ?? UIFont.systemFont(ofSize: 16)
styler.castViews.mediaControl.headingTextFont = UIFont.init(name: "Courier-Oblique", size: 6) ?? UIFont.systemFont(ofSize: 6)
變更預設按鈕圖片
將自訂圖片新增至專案,並將圖片指派給按鈕,為按鈕設定樣式。
let muteOnImage = UIImage.init(named: "yourImage.png")
if let muteOnImage = muteOnImage {
  styler.castViews.muteOnImage = muteOnImage
}
變更 Cast 按鈕主題
您也可以使用 UIAppearance 協定設定 Cast 小工具的主題。下列程式碼會為顯示 GCKUICastButton 的所有檢視區塊設定主題:
GCKUICastButton.appearance().tintColor = UIColor.gray
12. 恭喜
您現在已瞭解如何使用 iOS 上的 Cast SDK 小工具,為影片應用程式啟用 Cast 功能。
詳情請參閱 iOS 傳送器開發人員指南。