Google Chat, Vertex AI ও Google Apps Script-এর মাধ্যমে ঘটনার উত্তর দেওয়া

এই টিউটোরিয়াল আপনাকে দেখাবে কীভাবে এমন একটি Google Chat অ্যাপ তৈরি করতে হয় যা রিয়েল-টাইমে ঘটনার উত্তর দেয়। কোনও ঘটনার উত্তর দেওয়ার সময়, অ্যাপটি একটি চ্যাট স্পেস তৈরি ও পপুলেট করে, মেসেজ, অ্যাপ কমান্ড ও ডায়ালগের মাধ্যমে ঘটনার সমাধান করতে সাহায্য করে এবং Google Docs ডকুমেন্টে ঘটনার উত্তরকে সংক্ষিপ্ত সার হিসেবে দেখাতে AI ব্যবহার করে।

এই টিউটোরিয়ালে অনুমোদনের এমন স্কোপ ব্যবহার করা হয়েছে যা https://www.googleapis.com/auth/chat.app.* দিয়ে শুরু হয়। Chat অ্যাপকে সেইসব স্কোপ ব্যবহার করতে দিতে, আপনাকে অবশ্যই একবার অ্যাডমিনিস্ট্রেটরের অনুমোদন নিতে হবে।

ইনসিডেন্ট হল এমন একটি ঘটনা যা সমাধান করার জন্য লোকজনের একটি টিমকে অবিলম্বে মনোযোগ দিতে হবে। ঘটনার উদাহরণের মধ্যে এগুলি অন্তর্ভুক্ত:

  • গ্রাহক সম্পর্ক ম্যানেজমেন্ট (CRM) প্ল্যাটফর্মে সময়-সংবেদনশীল কেস তৈরি করা হয়, যার জন্য সমাধান করতে পরিষেবা প্রদানকারী টিমকে একসাথে কাজ করতে হয়।
  • কোনও সিস্টেম অফলাইন হয়ে গেলে, সাইট নির্ভরযোগ্যতা ইঞ্জিনিয়ারদের (SRE) একটি গ্রুপকে সতর্ক করা হয়, যাতে তারা একসাথে কাজ করে সেটি আবার অনলাইন করতে পারেন।
  • ভূমিকম্পের তীব্রতা বেশি হলে, জরুরি কর্মীদের উদ্ধারকার্য পরিচালনা করার জন্য নিজেদের মধ্যে সমন্বয় করতে হয়।

এই টিউটোরিয়ালের উদ্দেশ্য হল, কোনও ব্যক্তি ওয়েবপেজ থেকে বোতামে ক্লিক করে ঘটনা সম্পর্কে অভিযোগ জানালে, ঘটনা সংক্রান্ত সতর্কতা শুরু হয়। ওয়েবপেজটি ব্যবহারকারীদের থেকে প্রাথমিক ঘটনার তথ্য: শিরোনাম, বিবরণ ও উত্তরদাতাদের ইমেল আইডি প্রবেশ করতে বলার মাধ্যমে একটি ঘটনার সিমুলেশন করে।

ইনসিডেন্ট ম্যানেজমেন্ট চ্যাট অ্যাপের ব্যবহার দেখুন:

  • যে ওয়েবসাইট থেকে কোনও ঘটনার সূত্রপাত হয়।
    ছবি ১. যে ওয়েবসাইটে গিয়ে কেউ কোনও ঘটনার ব্যাপারে অভিযোগ জানাতে পারেন।
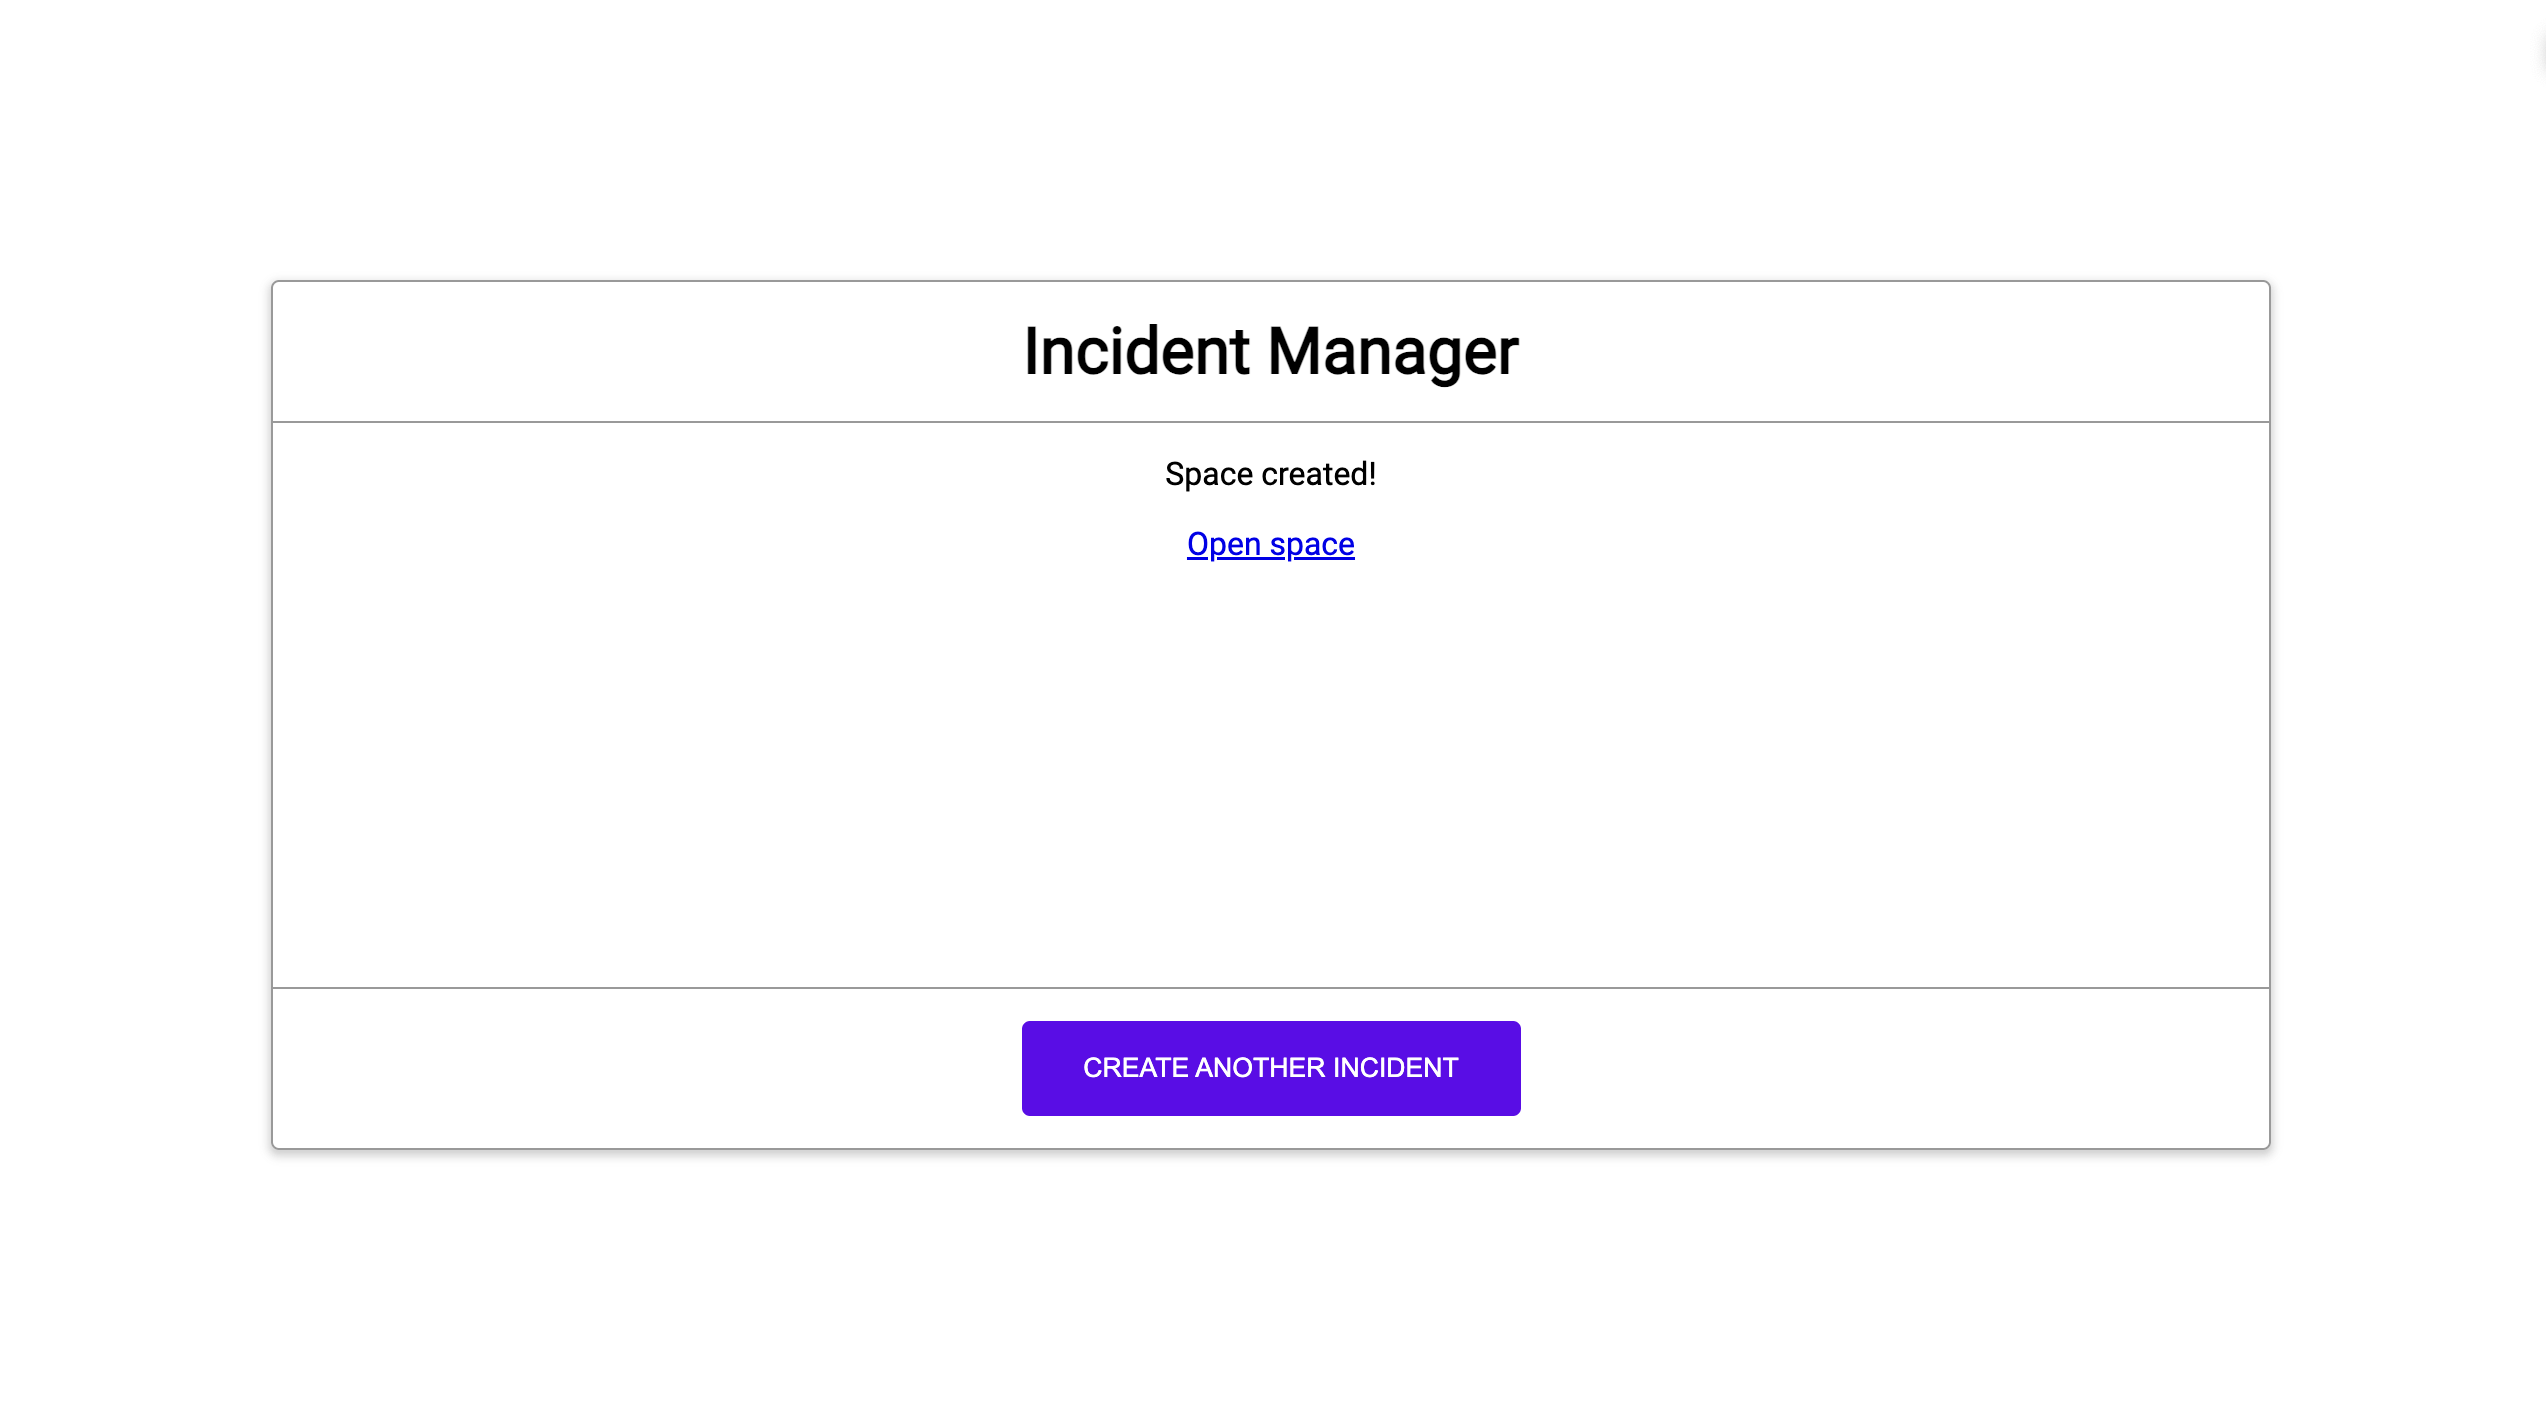
  • ঘটনা সংক্রান্ত চ্যাট স্পেস তৈরি করা হয়েছে, এই বিজ্ঞপ্তি।
    ছবি ২. ঘটনা সংক্রান্ত চ্যাট স্পেস তৈরি করা হয়েছে, এই বিজ্ঞপ্তি।
  • ইনসিডেন্ট রেসপন্স Chat স্পেস।
    ছবি ৩. ইনসিডেন্ট রেসপন্স Chat স্পেস।
  • স্ল্যাশ কমান্ডের মাধ্যমে ঘটনার সমাধান করা।
    ছবি ৪. স্ল্যাশ কমান্ডের মাধ্যমে ঘটনার সমাধান করা।
  • সমস্যার সমাধান সংক্রান্ত ডায়ালগ।
    ছবি ৫. ঘটনার সমাধান সংক্রান্ত ডায়ালগ।
  • স্পেসে ঘটনার সমাধান সংক্রান্ত Google Docs ডকুমেন্ট শেয়ার করা হয়েছে।
    ছবি ৬. স্পেসে ঘটনার সমাধান সংক্রান্ত Google Docs ডকুমেন্ট শেয়ার করা হয়েছে।
  • AI সারসংক্ষেপ ইনসিডেন্ট সমাধান সংক্রান্ত Google Doc.
    ছবি ৭. AI সারসংক্ষেপ সংক্রান্ত ঘটনার সমাধান সম্পর্কিত Google Docs ডকুমেন্ট।

পূর্বশর্ত

আপনার সংস্থার জন্য এইসব পূর্বশর্তের কোনওটি চালু করার প্রয়োজন হলে, আপনার Google Workspace অ্যাডমিনিস্ট্রেটরকে সেগুলি চালু করতে বলুন:

  • Business বা Enterprise Google Workspace অ্যাকাউন্ট, যার Google Chat-এ অ্যাক্সেস আছে।
  • Google Workspace-এর জন্য ডিরেক্টরি (পরিচিতি শেয়ারিং) চালু থাকতে হবে। ঘটনা অ্যাপ ঘটনার উত্তরদাতাদের পরিচিতির তথ্য, যেমন নাম ও ইমেল আইডি খুঁজতে ডিরেক্টরি ব্যবহার করে। ইনসিডেন্ট রেসপন্ডারদের অবশ্যই আপনার Google Workspace সংস্থায় Chat অ্যাকাউন্ট থাকতে হবে।

উদ্দেশ্য

  • ইনসিডেন্টের উত্তর দেয় এমন একটি চ্যাট অ্যাপ তৈরি করো।
  • নিচে উল্লেখ করা বিষয়গুলি করে ব্যবহারকারীদের ইনসিডেন্টের উত্তর দিতে সাহায্য করুন:
    • ইনসিডেন্ট রেসপন্স স্পেস তৈরি করা।
    • ঘটনা ও তার উত্তর সংক্ষিপ্ত আকারে লিখে পোস্ট করা।
    • ইন্টার‍্যাক্টিভ চ্যাট অ্যাপ ফিচারের মাধ্যমে কোলাবরেশনকে সহায়তা করা।
  • Vertex AI-এর মাধ্যমে কথোপকথন ও সমাধানগুলির সারসংক্ষেপ তৈরি করা।

আর্কিটেকচার

নিম্নলিখিত ডায়াগ্রামে Google Workspace-এর আর্কিটেকচার এবং ইনসিডেন্ট রেসপন্স চ্যাট অ্যাপের ব্যবহার করা Google Cloud রিসোর্স দেখানো হয়েছে।

ইনসিডেন্ট রেসপন্স Chat অ্যাপের আর্কিটেকচার

আর্কিটেকচার থেকে বোঝা যায় যে কীভাবে ইনসিডেন্ট রেসপন্স চ্যাট অ্যাপ কোনও ঘটনা ও তার সমাধান প্রসেস করে।

  1. কোনও ব্যবহারকারী Apps Script-এ হোস্ট করা এক্সটার্নাল ওয়েবসাইট থেকে কোনও ইনসিডেন্ট শুরু করেন।

  2. Apps Script-এ হোস্ট করা Chat অ্যাপে ওয়েবসাইট একটি অ্যাসিঙ্ক্রোনাস HTTP অনুরোধ পাঠায়।

  3. ইনসিডেন্ট রেসপন্স Chat অ্যাপ অনুরোধটি প্রসেস করে:

    1. Apps Script Admin SDK পরিষেবা টিম মেম্বার সম্পর্কিত তথ্য পায়, যেমন ব্যবহারকারীর আইডি ও ইমেল আইডি।

    2. Apps Script Advanced Chat পরিষেবা ব্যবহার করে Chat API-তে HTTP অনুরোধের একটি সেট সহ, ঘটনার প্রতিক্রিয়া Chat অ্যাপ একটি ঘটনার Chat স্পেস তৈরি করে, এতে টিমের সদস্যদের যোগ করে এবং স্পেসে একটি মেসেজ পাঠায়।

  4. টিম মেম্বাররা Chat স্পেসে ঘটনাটি নিয়ে আলোচনা করেন।

  5. টিমের কোনও সদস্য ঘটনার সমাধান হয়ে গেছে তা বোঝাতে একটি কুইক কমান্ড ইনভোক করেন।

    1. Apps Script ব্যবহার করে Chat API-তে HTTP কল করলে উন্নত Chat পরিষেবা সব Chat স্পেসের মেসেজ তালিকাভুক্ত করে।

    2. Vertex AI তালিকাভুক্ত মেসেজগুলি পায় এবং একটি সারসংক্ষেপ তৈরি করে।

    3. Apps Script DocumentApp পরিষেবা একটি Docs ডকুমেন্ট তৈরি করে এবং Vertex AI-এর সারসংক্ষেপ ডকুমেন্টে যোগ করে।

    4. ইনসিডেন্ট রেসপন্স চ্যাট অ্যাপ সারসংক্ষেপের লিঙ্ক শেয়ার করে মেসেজ পাঠানোর জন্য Docs ডকুমেন্ট, Chat API-কে কল করে।

পরিবেশ প্রস্তুত করা

এই বিভাগে দেখানো হয়েছে যে কীভাবে Chat অ্যাপের জন্য Google Cloud প্রোজেক্ট তৈরি ও কনফিগার করতে হয়।

Google Cloud প্রোজেক্ট তৈরি করা

Google API Console

  1. Google API Console-এ, 'মেনু > IAM ও অ্যাডমিন > প্রোজেক্ট তৈরি করুন' বিকল্পে যান।

    'প্রোজেক্ট তৈরি করুন' বিকল্পে যান

  2. প্রোজেক্টের নাম ফিল্ডে, আপনার প্রোজেক্টের জন্য একটি বর্ণনামূলক নাম লিখুন।

    ঐচ্ছিক: প্রোজেক্ট আইডি এডিট করতে, এডিট করুন বিকল্পে ক্লিক করুন। প্রোজেক্ট তৈরি হয়ে যাওয়ার পরে প্রোজেক্ট আইডি পরিবর্তন করা যায় না। তাই এমন একটি আইডি বেছে নিন যা প্রোজেক্টের সম্পূর্ণ মেয়াদ জুড়ে আপনার প্রয়োজন পূরণ করতে পারে।

  3. লোকেশন ফিল্ডে, আপনার প্রোজেক্টের সম্ভাব্য লোকেশন দেখাতে ব্রাউজ করুন বিকল্পে ক্লিক করুন। তারপরে, বেছে নিন বিকল্পে ক্লিক করুন।
  4. তৈরি করুন বিকল্পে ক্লিক করুন। Google API কনসোল ড্যাশবোর্ড পৃষ্ঠায় নেভিগেট করে এবং আপনার প্রোজেক্ট কয়েক মিনিটের মধ্যে তৈরি হয়ে যায়।

gcloud CLI

নিম্নলিখিত ডেভেলপমেন্ট এনভায়রনমেন্টের মধ্যে একটিতে, Google Cloud CLI (gcloud) অ্যাক্সেস করুন:

  • Cloud Shell: আগে থেকেই সেট-আপ করা gcloud CLI-এর সাথে অনলাইন টার্মিনাল ব্যবহার করতে Cloud Shell অ্যাক্টিভেট করুন।
    Cloud Shell চালু করুন
  • লোকাল শেল: লোকাল ডেভেলপমেন্ট এনভায়রনমেন্ট ব্যবহার করতে, gcloud CLI ইনস্টল ও ইনিশিয়ালাইজ করুন।
    Cloud প্রোজেক্ট তৈরি করতে, gcloud projects create কমান্ড ব্যবহার করুন:
    gcloud projects create PROJECT_ID
    আপনি যে প্রোজেক্ট তৈরি করতে চান তার আইডি সেট করে PROJECT_ID পরিবর্তন করুন।

Cloud প্রোজেক্টের জন্য বিলিং চালু করুন

Google API Console

  1. Google API কনসোলে, বিলিং বিকল্পে যান। মেনু > বিলিং > আমার প্রোজেক্ট বিকল্পে ক্লিক করুন।

    আমার প্রোজেক্টের বিলিংয়ে যান

  2. কোনও সংস্থা বেছে নিন বিকল্পে গিয়ে, আপনার Google Cloud প্রোজেক্টের সাথে যুক্ত সংস্থাটি বেছে নিন।
  3. প্রোজেক্টের সারিতে, অ্যাকশন মেনু খুলুন (), বিলিং পরিবর্তন করুন বিকল্পে ক্লিক করুন এবং Cloud Billing অ্যাকাউন্ট বেছে নিন।
  4. অ্যাকাউন্ট সেট করুন বিকল্পে ক্লিক করুন।

gcloud CLI

  1. উপলভ্য বিলিং অ্যাকাউন্টের তালিকা পেতে, এগুলি রান করান:
    gcloud billing accounts list
  2. Google Cloud প্রোজেক্টের সাথে বিলিং অ্যাকাউন্ট লিঙ্ক করুন:
    gcloud billing projects link PROJECT_ID --billing-account=BILLING_ACCOUNT_ID

    নিম্নলিখিত বিষয়গুলি পরিবর্তন করুন:

    • PROJECT_ID হল প্রোজেক্ট আইডি যার জন্য আপনি বিলিং চালু করতে চান।
    • BILLING_ACCOUNT_ID হল বিলিং অ্যাকাউন্ট আইডি যা Google Cloud প্রোজেক্টের সাথে লিঙ্ক করতে হবে।

API চালু করুন

Google API Console

  1. Google API কনসোলে, Google Chat API, Google Docs API, Admin SDK API, Google Workspace Marketplace SDK এবং Vertex AI API চালু করুন।

    API চালু করুন

  2. আপনি সঠিক Cloud প্রোজেক্টে API চালু করছেন কিনা তা কনফার্ম করুন, তারপর পরবর্তী বোতামে ক্লিক করুন।

  3. আপনি সঠিক API চালু করছেন কিনা তা কনফার্ম করুন, তারপর চালু করুন বিকল্পে ক্লিক করুন।

gcloud CLI

  1. প্রয়োজন হলে, বর্তমান Cloud প্রোজেক্টকে সেই প্রোজেক্টে সেট করুন যেটি আপনি gcloud config set project কমান্ডের মাধ্যমে তৈরি করেছেন:

    gcloud config set project PROJECT_ID

    PROJECT_ID-এর জায়গায় আপনার তৈরি করা Cloud প্রোজেক্টের প্রোজেক্ট আইডি লিখুন।

  2. gcloud services enable কমান্ডের মাধ্যমে Google Chat API, Google Docs API, Admin SDK API, Google Workspace Marketplace SDK এবং Vertex AI API চালু করুন:

    gcloud services enable chat.googleapis.com docs.googleapis.com admin.googleapis.com aiplatform.googleapis.com appsmarket-component.googleapis.com

যাচাইকরণ ও অনুমোদন সেট-আপ করা

Chat অ্যাপ, Chat অ্যাপের ক্রেডেনশিয়াল ব্যবহার করে Google Chat API অ্যাক্সেস করে। অ্যাপটি ব্যবহারকারীর ক্রেডেনশিয়াল সহ Admin SDK API এবং Google Docs API অ্যাক্সেস করে।

ব্যবহারকারীর পরিচয় যাচাইকরণ ও অনুমোদন সেট-আপ করা

যাচাইকরণ ও অনুমোদন, কোনও ঘটনার উত্তর প্রসেস করার জন্য Chat অ্যাপকে Google Workspace ও Google Cloud-এর রিসোর্স অ্যাক্সেস করতে দেয়। বিশেষত, Docs API ও Admin SDK API কল করার জন্য ব্যবহারকারী যাচাইকরণ ব্যবহার করা হয়।

এই টিউটোরিয়ালে, আপনি নিজের Workspace ডোমেনে ইন্টার্নালি অ্যাপ প্রকাশ করেন, তাই প্লেসহোল্ডার তথ্য ব্যবহার করা যায়। এক্সটার্নালি অ্যাপ প্রকাশ করার আগে, সম্মতি স্ক্রিনে প্লেসহোল্ডার তথ্যের পরিবর্তে আসল তথ্য দিন।

  1. Google API কনসোলে, 'মেনু > Google Auth প্ল্যাটফর্ম > ব্র্যান্ডিং' বিকল্পে যান।

    ব্র্যান্ডিংয়ে যান

  2. আপনি যদি আগে থেকেই Google Auth প্ল্যাটফর্ম কনফিগার করে থাকেন, তাহলে আপনি ব্র্যান্ডিং, দর্শক, এবং ডেটা অ্যাক্সেস-এ নিম্নলিখিত OAuth-এর সম্মতি সংক্রান্ত স্ক্রিন সেটিংস কনফিগার করতে পারবেন। আপনি যদি এমন কোনও মেসেজ দেখতে পান যা বলে Google Auth প্ল্যাটফর্ম এখনও কনফিগার করা হয়নি, শুরু করুন বিকল্পে ক্লিক করুন:

    1. অ্যাপ সম্পর্কিত তথ্য বিকল্পের মধ্যে, অ্যাপের নাম বিকল্পে গিয়ে Incident Management টাইপ করুন।
    2. ব্যবহারকারীর সহায়তা সংক্রান্ত ইমেল বিকল্পে, আপনার ইমেল আইডি বা উপযুক্ত Google গ্রুপ বেছে নিন।
    3. পরবর্তী বিকল্পে ক্লিক করুন।
    4. দর্শক বিকল্পের মধ্যে, ইন্টার্নাল বিকল্প বেছে নিন। আপনি ইন্টার্নাল বেছে নিতে না পারলে, এক্সটার্নাল বেছে নিন।
    5. পরবর্তী বিকল্পে ক্লিক করুন।
    6. যোগাযোগের তথ্য বিকল্পের মধ্যে, এমন একটি ইমেল আইডি লিখুন যেখানে আপনার প্রোজেক্টে কোনও পরিবর্তন হলে আপনাকে জানানো যাবে।
    7. পরবর্তী বিকল্পে ক্লিক করুন।
    8. সম্পূর্ণ করুন বিকল্পের অধীনে, Google API পরিষেবা সংক্রান্ত ব্যবহারকারীর ডেটা নীতি পর্যালোচনা করুন এবং আপনি সম্মতি জানালে, Google API পরিষেবা সংক্রান্ত ব্যবহারকারীর ডেটা নীতিতে আমি সম্মতি জানাচ্ছি বিকল্প বেছে নিন।
    9. চালিয়ে যান বিকল্পে ক্লিক করুন।
    10. তৈরি করুন বিকল্পে ক্লিক করুন।
    11. ব্যবহারকারীর ধরন হিসেবে এক্সটার্নাল বেছে নিলে, টেস্ট ব্যবহারকারী যোগ করুন:
      1. দর্শক বিকল্পে ক্লিক করুন।
      2. টেস্ট ব্যবহারকারী বিকল্পের মধ্যে, ব্যবহারকারী যোগ করুন বিকল্পে ক্লিক করুন।
      3. আপনার ইমেল আইডি ও অন্য কোনও অনুমোদিত টেস্ট ব্যবহারকারীর ইমেল আইডি লিখুন, তারপর সেভ করুন বিকল্পে ক্লিক করুন।
  3. ডেটা অ্যাক্সেস > স্কোপ যোগ করুন বা সরিয়ে দিন বিকল্পে ক্লিক করুন। আপনার Google Cloud প্রোজেক্টে চালু করা প্রতিটি API-এর জন্য স্কোপের তালিকা সহ একটি প্যানেল দেখানো হয়।

    1. ম্যানুয়ালি স্কোপ যোগ করুন বিকল্পের অধীনে, নিম্নলিখিত স্কোপ পেস্ট করুন:

      • https://www.googleapis.com/auth/documents
      • https://www.googleapis.com/auth/admin.directory.user.readonly
      • https://www.googleapis.com/auth/script.external_request
      • https://www.googleapis.com/auth/userinfo.email
      • https://www.googleapis.com/auth/cloud-platform
    2. টেবিলে যোগ করুন বিকল্পে ক্লিক করুন।

    3. আপডেট করুন বিকল্পে ক্লিক করুন।

    4. আপনার অ্যাপের প্রয়োজনীয় স্কোপ বেছে নেওয়ার পরে, ডেটা অ্যাক্সেস পৃষ্ঠায়, সেভ করুন বিকল্পে ক্লিক করুন।

অ্যাপ যাচাইকরণ ও অনুমোদন সেট-আপ করা

Chat API কল করার জন্য অ্যাপ যাচাইকরণ ব্যবহার করা হয়।

Google Cloud Console-এ পরিষেবা অ্যাকাউন্ট তৈরি করা

পরিষেবা অ্যাকাউন্ট তৈরি করতে, এইসব ধাপ অনুসরণ করুন:

Google Cloud Console

  1. Google Cloud Console-এ, 'মেনু > IAM ও অ্যাডমিন > পরিষেবা অ্যাকাউন্ট' বিকল্পে যান।

    পরিষেবা অ্যাকাউন্টে যান

    বাকি ধাপগুলি Google Cloud Console-এ দেখা যাবে।

  2. Google Cloud প্রোজেক্ট বেছে নিন।
  3. পরিষেবার অ্যাকাউন্ট তৈরি করুন-এ ক্লিক করুন।
  4. Google Cloud Console-এ দেখানোর জন্য একটি পরিষেবা অ্যাকাউন্টের নাম লিখুন।
  5. আপনি এখন অ্যাক্সেস কন্ট্রোল সেট করতে না চাইলে, পরিষেবা অ্যাকাউন্ট তৈরি করা সম্পূর্ণ করতে হয়ে গেছে বিকল্পে ক্লিক করুন। এখনই অ্যাক্সেস কন্ট্রোল সেট করতে, তৈরি করুন ও চালিয়ে যান বিকল্পে ক্লিক করে পরবর্তী ধাপে যান।
  6. ঐচ্ছিক: Google Workspace রিসোর্স ছাড়াও আপনার Google Cloud প্রোজেক্টের রিসোর্সে অ্যাক্সেস দিতে, আপনার পরিষেবা অ্যাকাউন্টে ভূমিকা অ্যাসাইন করুন। আরও বিবরণের জন্য, প্রোজেক্ট, ফোল্ডার ও সংস্থার অ্যাক্সেস ম্যানেজ করা দেখুন।
  7. চালিয়ে যান বিকল্পে ক্লিক করুন।
  8. ঐচ্ছিক: এই পরিষেবা অ্যাকাউন্ট ম্যানেজ করতে ও অ্যাকশন পারফর্ম করতে পারবেন এমন ব্যবহারকারী বা গ্রুপ লিখুন। আরও বিবরণের জন্য, পরিষেবা অ্যাকাউন্টের ছদ্মবেশীতা দেখুন।
  9. পরিষেবা অ্যাকাউন্ট তৈরি করা সম্পূর্ণ করতে হয়ে গেছে বিকল্পে ক্লিক করুন।

    পরিষেবা অ্যাকাউন্টের ইমেল আইডি লিখে রাখুন।

gcloud CLI

  1. পরিষেবা অ্যাকাউন্ট তৈরি করুন:
    gcloud iam service-accounts create SERVICE_ACCOUNT_NAME \
      --display-name="SERVICE_ACCOUNT_NAME"
  2. ঐচ্ছিক: Google Workspace রিসোর্স ছাড়াও আপনার Google Cloud প্রোজেক্টের রিসোর্সে অ্যাক্সেস দিতে, আপনার পরিষেবা অ্যাকাউন্টে ভূমিকা অ্যাসাইন করুন। আরও বিবরণের জন্য, প্রোজেক্ট, ফোল্ডার ও সংস্থার অ্যাক্সেস ম্যানেজ করা দেখুন।

পরিষেবা অ্যাকাউন্টের পৃষ্ঠায় পরিষেবা অ্যাকাউন্টটি দেখা যাবে। এরপরে, পরিষেবা অ্যাকাউন্টের জন্য একটি ব্যক্তিগত কী তৈরি করুন।

প্রাইভেট কী তৈরি করা

পরিষেবা অ্যাকাউন্টের জন্য ব্যক্তিগত কী তৈরি ও ডাউনলোড করতে, এইসব ধাপ অনুসরণ করুন:

  1. Google Cloud Console-এ, 'মেনু > IAM ও অ্যাডমিন > পরিষেবা অ্যাকাউন্ট' বিকল্পে যান।

    পরিষেবা অ্যাকাউন্টে যান

    বাকি ধাপগুলি Google Cloud Console-এ দেখা যাবে।

  2. Google Cloud প্রোজেক্ট বেছে নিন।
  3. আপনি যে পরিষেবা অ্যাকাউন্টের জন্য কী তৈরি করতে চান সেটির ইমেল আইডিতে ক্লিক করুন।
  4. কী ট্যাবে ক্লিক করুন।
  5. কী যোগ করুন ড্রপ-ডাউন মেনুতে ক্লিক করে নতুন কী তৈরি করুন বিকল্প বেছে নিন।
  6. কীয়ের ধরন হিসেবে JSON বেছে নিন এবং তৈরি করুন বিকল্পে ক্লিক করুন।

    আপনার নতুন পাবলিক/প্রাইভেট কী পেয়ার তৈরি করা হয় এবং আপনার মেশিনে পরিষেবা অ্যাকাউন্ট কী ফাইল হিসেবে ডাউনলোড করা হয়। ডাউনলোড করা JSON ফাইলটি আপনার ওয়ার্কিং ডিরেক্টরিতে credentials.json হিসেবে সেভ করুন। এই ফাইলটিই হল এই কী-এর একমাত্র কপি। আপনি কী ফাইল ডাউনলোড করার পরে সেটি আর ডাউনলোড করতে পারবেন না। আপনার কী নিরাপদে স্টোর করার পদ্ধতি সম্পর্কে তথ্য পেতে, পরিষেবা অ্যাকাউন্টের কী ম্যানেজ করার পেশাদার পদ্ধতি দেখুন।

পরিষেবা অ্যাকাউন্ট সম্পর্কে আরও জানতে, Google Cloud IAM ডকুমেন্টেশনে পরিষেবা অ্যাকাউন্ট দেখুন।

Google Workspace Marketplace-এর সাথে মানানসই OAuth ক্লায়েন্ট তৈরি করা

Google Workspace Marketplace-এর সাথে মানানসই OAuth ক্লায়েন্ট তৈরি করতে, এইসব ধাপ অনুসরণ করুন:

  1. Google API কনসোলে, 'মেনু' > IAM ও অ্যাডমিন > পরিষেবা অ্যাকাউন্ট' বিকল্পে যান।

    পরিষেবা অ্যাকাউন্টে যান

  2. আপনার Chat অ্যাপের জন্য তৈরি করা পরিষেবা অ্যাকাউন্টে ক্লিক করুন।

  3. উন্নত সেটিংস বিকল্পে ক্লিক করুন।

  4. Google Workspace Marketplace-এর সাথে মানানসই OAuth ক্লায়েন্ট তৈরি করুন বিকল্পে ক্লিক করুন।

  5. চালিয়ে যান বিকল্পে ক্লিক করুন।

একটি কনফার্মেশন মেসেজ দেখানো হয় যাতে বলা হয় যে Google Workspace Marketplace-এর সাথে মানানসই OAuth ক্লায়েন্ট তৈরি করা হয়েছে।

Chat অ্যাপ তৈরি ও ডেপ্লয় করা

নিম্নলিখিত বিভাগে, আপনি একটি সম্পূর্ণ অ্যাপ স্ক্রিপ্ট প্রোজেক্ট কপি ও আপডেট করেন, যার মধ্যে আপনার Chat অ্যাপের জন্য প্রয়োজনীয় সব অ্যাপ্লিকেশন কোড থাকে, তাই প্রতিটি ফাইল কপি ও পেস্ট করার প্রয়োজন হয় না।

কিছু ফাংশনের নামের শেষে আন্ডারস্কোর থাকে, যেমন concatenateAllSpaceMessages_() from ChatApp.gs. ব্রাউজারে খোলা হলে, আন্ডারস্কোরটি ইনসিডেন্ট ইনিশিয়ালাইজেশন ওয়েবপেজ থেকে ফাংশনটি লুকিয়ে রাখে। আরও তথ্যের জন্য, প্রাইভেট ফাংশন দেখুন।

Apps Script-এ দু'টি ফাইলের ধরন কাজ করে, .gs স্ক্রিপ্ট ও .html ফাইল। এই সহায়তা মেনে চলতে, অ্যাপের ক্লায়েন্ট-সাইড জাভাস্ক্রিপ্ট <script /> ট্যাগের মধ্যে এবং এর CSS HTML ফাইলের মধ্যে <style /> ট্যাগের মধ্যে অন্তর্ভুক্ত থাকে।

ঐচ্ছিকভাবে, আপনি GitHub-এ সম্পূর্ণ প্রোজেক্ট দেখতে পারেন।

GitHub-এ দেখুন

প্রতিটি ফাইলের ওভারভিউ এখানে দেওয়া হল:

Consts.gs

অন্যান্য কোড ফাইল দ্বারা রেফারেন্স করা ধ্রুবকগুলিকে সংজ্ঞায়িত করে, এর মধ্যে আপনার Cloud প্রোজেক্ট আইডি, Vertex AI লোকেশন আইডি, পরিষেবা অ্যাকাউন্টের জন্য অ্যাপ ক্রেডেনশিয়াল এবং কোনও ইনসিডেন্ট বন্ধ করার জন্য কুইক কমান্ড আইডি অন্তর্ভুক্ত।

Consts.gs কোড দেখুন

apps-script/chat/incident-response-app-auth/Consts.gs
const PROJECT_ID = 'replace-with-your-project-id';
const APP_CREDENTIALS = 'replace-with-your-app-credentials';
const APP_CREDENTIALS_SCOPES = 'https://www.googleapis.com/auth/chat.bot https://www.googleapis.com/auth/chat.app.memberships https://www.googleapis.com/auth/chat.app.spaces.create';
const VERTEX_AI_LOCATION_ID = 'us-central1';
const CLOSE_INCIDENT_COMMAND_ID = 1;
const MODEL_ID = 'gemini-2.5-flash-lite';
ChatApp.gs

এতে চ্যাট ইন্টার‍্যাকশন ইভেন্ট ম্যানেজ করা হয়, যার মধ্যে রয়েছে মেসেজ, বোতামে ক্লিক, অ্যাপ কমান্ড (onAppCommand) ও ডায়ালগ। ঘটনা সমাধানের বিবরণ সংগ্রহ করতে ডায়ালগ খুলে Close incident দ্রুত কমান্ডের উত্তর দেয়। Chat API-তে spaces.messages.list মেথড কল করে স্পেসের মেসেজ পড়ে। Apps Script-এ Admin SDK ডিরেক্টরি পরিষেবা ব্যবহার করে ব্যবহারকারীর আইডি পায়।

ChatApp.gs কোড দেখুন

apps-script/chat/incident-response-app-auth/ChatApp.gs
/**
 * Responds to a MESSAGE event in Google Chat.
 * 
 * It always responds with a simple "Hello" text message.
 *
 * @param {Object} event the event object from Google Chat
 */
function onMessage(event) {
  return { hostAppDataAction: { chatDataAction: { createMessageAction: { message: {
    text: "Hello from Incident Response app!"
  }}}}};
}

/**
 * Responds to an APP_COMMAND event in Google Chat.
 *
 * @param {Object} event the event object from Google Chat
 */
function onAppCommand(event) {
  if (event.chat.appCommandPayload.appCommandMetadata.appCommandId != CLOSE_INCIDENT_COMMAND_ID) {
    return { hostAppDataAction: { chatDataAction: { createMessageAction: { message: {
      text: "Command not recognized. Use the quick command `Close incident` to close the incident managed by this space."
    }}}}};
  }
  return { action: { navigations: [{ pushCard: { sections: [{
    header: "Close Incident",
    widgets: [{
      textInput: {
        label: "Please describe the incident resolution",
        type: "MULTIPLE_LINE",
        name: "description"
      }
    }, {
      buttonList: { buttons: [{
        text: "Close Incident",
        onClick: { action: { function: "closeIncident" }}
      }]}
    }]
  }]}}]}};
}

/**
 * Responds to a BUTTON_CLICKED event in Google Chat from Close Incident dialog.
 *
 * @param {Object} event the event object from Google Chat
 */
function closeIncident(event) {
  if (event.chat.buttonClickedPayload.isDialogEvent) {
    if (event.chat.buttonClickedPayload.dialogEventType == 'SUBMIT_DIALOG') {
      return processSubmitDialog_(event);
    }
    return { action: { navigations: [{ endNavigation: {
      action: "CLOSE_DIALOG" }
    }]}};
  }
}

/**
 * Responds to a BUTTON_CLICKED event in Google Chat from Close Incident dialog submission.
 *
 * It creates a Doc with a summary of the incident information and posts a message
 * to the space with a link to the Doc.
 *
 * @param {Object} event the event object from Google Chat
 */
function processSubmitDialog_(event) {
  const resolution = event.commonEventObject.formInputs.description.stringInputs.value[0];
  const space = event.chat.buttonClickedPayload.space;
  const chatHistory = concatenateAllSpaceMessages_(space.name);
  const chatSummary = summarizeChatHistory_(chatHistory);
  const docUrl = createDoc_(space.displayName, resolution, chatHistory, chatSummary);
  return { hostAppDataAction: { chatDataAction: { createMessageAction: { message: {
    text: `Incident closed with the following resolution: ${resolution}\n\nHere is the automatically generated post-mortem:\n${docUrl}`
  }}}}};
}

/**
 * Lists all the messages in the Chat space, then concatenate all of them into
 * a single text containing the full Chat history.
 *
 * For simplicity for this demo, it only fetches the first 100 messages.
 *
 * @return {string} a text containing all the messages in the space in the format:
 *          Sender's name: Message
 */
function concatenateAllSpaceMessages_(spaceName) {
  // Call Chat API method spaces.messages.list
  const response = Chat.Spaces.Messages.list(spaceName, { 'pageSize': 100 });
  const messages = response.messages;
  // Fetch the display names of the message senders and returns a text
  // concatenating all the messages.
  let userMap = new Map();
  return messages
    .map(message => `${getUserDisplayName_(userMap, message.sender.name)}: ${message.text}`)
    .join('\n');
}

/**
 * Obtains the display name of a user by using the Admin Directory API.
 *
 * The fetched display name is cached in the provided map, so we only call the API
 * once per user.
 *
 * If the user does not have a display name, then the full name is used.
 *
 * @param {Map} userMap a map containing the display names previously fetched
 * @param {string} userName the resource name of the user
 * @return {string} the user's display name
 */
function getUserDisplayName_(userMap, userName) {
  if (userMap.has(userName)) {
    return userMap.get(userName);
  }
  let displayName = 'Unknown User';
  try {
    const user = AdminDirectory.Users.get(
      userName.replace("users/", ""),
      { projection: 'BASIC', viewType: 'domain_public' });
    displayName = user.name.displayName ? user.name.displayName : user.name.fullName;
  } catch (e) {
    // Ignore error if the API call fails (for example, because it's an
    // out-of-domain user or Chat app) and just use 'Unknown User'.
  }
  userMap.set(userName, displayName);
  return displayName;
}
ChatSpaceCreator.gs

ঘটনা সংক্রান্ত প্রাথমিক ওয়েবপেজে ব্যবহারকারীরা যে ফর্ম ডেটা লেখেন তা পায় এবং সেটি ব্যবহার করে একটি Chat স্পেস সেট-আপ করে, সেটি তৈরি ও পপুলেট করে এবং তারপর ঘটনাটি সম্পর্কে একটি মেসেজ পোস্ট করে।

ChatSpaceCreator.gs কোড দেখুন

apps-script/chat/incident-response-app-auth/ChatSpaceCreator.gs
/**
 * Handles an incident by creating a chat space with the provided title and members, and posting a message.
 * All the actions are done using application credentials.
 *
 * @param {Object} formData - The data submitted by the user. It should contain the fields:
 *                           - title: The display name of the chat space.
 *                           - description: The description of the incident.
 *                           - users: A comma-separated string of user emails to be added to the space.
 * @return {string} The resource name of the new space.
 */
function handleIncident(formData) {
  const users = formData.users.trim().length > 0 ? formData.users.split(',') : [];
  const service = getService_();
  if (!service.hasAccess()) {
    console.error(service.getLastError());
    return;
   }
  const spaceName = createChatSpace_(formData.title, service);
  createHumanMembership_(spaceName, getUserEmail(), service);
  for (const user of users ){
    createHumanMembership_(spaceName, user, service);
  }
  createMessage_(spaceName, formData.description, service);
  return spaceName;
}

/**
 * Creates a chat space.
 *
 * @param {string} displayName - The name of the chat space.
 * @param {object} service - The credentials of the service account.
 * @returns {string} The resource name of the new space.
*/
function createChatSpace_(displayName, service) {
  try {
    // For private apps, the alias can be used
    const my_customer_alias = "customers/my_customer";
    // Specify the space to create.
    const space = {
        displayName: displayName,
        spaceType: 'SPACE',                
        customer: my_customer_alias
    };
    // Call Chat API with a service account to create a message.
    const createdSpace = Chat.Spaces.create(
        space,
        {},
        // Authenticate with the service account token.
        {'Authorization': 'Bearer ' + service.getAccessToken()});
    return createdSpace.name;
  } catch (err) {
    // TODO (developer) - Handle exception.
    console.log('Failed to create space with error %s', err.message);
  }
}


/**
 * Creates a human membership in a chat space.
 *
 * @param {string} spaceName - The resource name of the space.
 * @param {string} email - The email of the user to be added.
 * @param {object} service - The credentials of the service account.
 */
function createHumanMembership_(spaceName, email, service){
  try{
    const membership = {
      member: {
        name: 'users/'+email,
        // User type for the membership
        type: 'HUMAN'
      }
    };
    const result = Chat.Spaces.Members.create(
      membership,
      spaceName,
      {},
      {'Authorization': 'Bearer ' + service.getAccessToken()}
    );
  } catch (err){
    console.log('Failed to create membership with error %s', err.message)
  }

}

/**
 * Creates a chat message.
 *
 * @param {string} spaceName - The resource name of the space.
 * @param {string} message - The text to be posted.
 * @param {object} service - The credentials of the service account.
 * @return {string} the resource name of the new message.
 */
function createMessage_(spaceName, message, service) {
  try {
    const request = {
      text: message
    };
    // Call Chat API with a service account to create a message.
    const result = Chat.Spaces.Messages.create(
        request,
        spaceName,
        {},
        // Authenticate with the service account token.
        {'Authorization': 'Bearer ' + service.getAccessToken()});
    return result.name;
  } catch (err) {
    // TODO (developer) - Handle exception.
    console.log('Failed to create message with error %s', err.message);
  }
}

/**
 * Creates a service for the service account.
 * @return {object}  - The credentials of the service account.
 */
function getService_() {
  return OAuth2.createService(APP_CREDENTIALS.client_email)
      .setTokenUrl('https://oauth2.googleapis.com/token')
      .setPrivateKey(APP_CREDENTIALS.private_key)
      .setIssuer(APP_CREDENTIALS.client_email)
      .setSubject(APP_CREDENTIALS.client_email)
      .setScope(APP_CREDENTIALS_SCOPES)
      .setPropertyStore(PropertiesService.getScriptProperties());
}
DocsApi.gs

ব্যবহারকারীর Google Drive-এ Docs ডকুমেন্ট তৈরি করতে Docs API-কে কল করে এবং VertexAiApi.gs-এ তৈরি হওয়া ঘটনার তথ্যের সারসংক্ষেপ ডকুমেন্টে লেখে।

DocsApi.gs কোড দেখুন

apps-script/chat/incident-response-app-auth/DocsApi.gs
/**
 * Creates a Doc in the user's Google Drive and writes a summary of the incident information to it.
 *
 * @param {string} title The title of the incident
 * @param {string} resolution Incident resolution described by the user
 * @param {string} chatHistory The whole Chat history be included in the document
 * @param {string} chatSummary A summary of the Chat conversation to be included in the document
 * @return {string} the URL of the created Doc
 */
function createDoc_(title, resolution, chatHistory, chatSummary) {
  let doc = DocumentApp.create(title);
  let body = doc.getBody();
  body.appendParagraph(`Post-Mortem: ${title}`).setHeading(DocumentApp.ParagraphHeading.TITLE);
  body.appendParagraph("Resolution").setHeading(DocumentApp.ParagraphHeading.HEADING1);
  body.appendParagraph(resolution);
  body.appendParagraph("Summary of the conversation").setHeading(DocumentApp.ParagraphHeading.HEADING1);
  body.appendParagraph(chatSummary);
  body.appendParagraph("Full Chat history").setHeading(DocumentApp.ParagraphHeading.HEADING1);
  body.appendParagraph(chatHistory);
  return doc.getUrl();
}
VertexAiApi.gs

Vertex AI API ব্যবহার করে Chat space-এ কথোপকথনের সারসংক্ষেপ করে। এই সারসংক্ষেপটি DocsAPI.gs-এ বিশেষভাবে তৈরি করা ডকুমেন্টে পোস্ট করা হয়েছে।

VertexAiApi.gs কোড দেখুন

apps-script/chat/incident-response-app-auth/VertexAiApi.gs
/**
 * Summarizes a Chat conversation using the Vertex AI text prediction API.
 *
 * @param {string} chatHistory The Chat history that will be summarized.
 * @return {string} The content from the text prediction response.
 */
function summarizeChatHistory_(chatHistory) {
  const API_ENDPOINT = `https://${VERTEX_AI_LOCATION_ID}-aiplatform.googleapis.com/v1/projects/${PROJECT_ID}/locations/${VERTEX_AI_LOCATION_ID}/publishers/google/models/${MODEL_ID}:generateContent`;
  const prompt =
    "Summarize the following conversation between Engineers resolving an incident"
      + " in a few sentences. Use only the information from the conversation.\n\n"
      + chatHistory;
  // Get the access token.
  const accessToken = ScriptApp.getOAuthToken();

  const headers = {
    'Authorization': 'Bearer ' + accessToken,
    'Content-Type': 'application/json',
  };
  const payload = {
    'contents': {
      'role': 'user',
      'parts' : [
        {
          'text': prompt
        }
      ]
    }
  }
  const options = {
    'method': 'post',
    'headers': headers,
    'payload': JSON.stringify(payload),
    'muteHttpExceptions': true,
  };
  try {
    const response = UrlFetchApp.fetch(API_ENDPOINT, options);
    const responseCode = response.getResponseCode();
    const responseText = response.getContentText();

    if (responseCode === 200) {
      const jsonResponse = JSON.parse(responseText);
      console.log(jsonResponse)
      if (jsonResponse.candidates && jsonResponse.candidates.length > 0) {
        return jsonResponse.candidates[0].content.parts[0].text; // Access the summarized text
      } else {
        return "No summary found in response.";
      }

    } else {
      console.error("Vertex AI API Error:", responseCode, responseText);
      return `Error: ${responseCode} - ${responseText}`;
    }
  } catch (e) {
    console.error("UrlFetchApp Error:", e);
    return "Error: " + e.toString();
  }
}
WebController.gs

ঘটনা শুরু করার ওয়েবসাইট পরিবেশন করে।

WebController.gs কোড দেখুন

apps-script/chat/incident-response-app-auth/WebController.gs
/**
 * Serves the web page from Index.html.
 */
function doGet() {
  return HtmlService
    .createTemplateFromFile('Index')
    .evaluate();
}

/**
 * Serves the web content from the specified filename.
 */
function include(filename) {
  return HtmlService
    .createHtmlOutputFromFile(filename)
    .getContent();
}

/**
 * Returns the email address of the user running the script.
 */
function getUserEmail() {
  return Session.getActiveUser().getEmail();
}
Index.html

ঘটনা শুরু করার ওয়েবসাইটের HTML।

Index.html কোড দেখুন

apps-script/chat/incident-response-app-auth/Index.html
<!DOCTYPE html>
<html>
  <head>
    <base target="_top">
    <link href='https://fonts.googleapis.com/css?family=Roboto' rel='stylesheet'>
    <?!= include('Stylesheet'); ?>
  </head>
  <body>
    <div class="container">
      <div class="content">
        <h1>Incident Manager</h1>
        <form id="incident-form" onsubmit="handleFormSubmit(this)">
          <div id="form">
            <p>
              <label for="title">Incident title</label><br/>
              <input type="text" name="title" id="title" />
            </p>
            <p>
              <label for="users">Incident responders</label><br/>
              <small>
                Please enter a comma-separated list of email addresses of the users
                that should be added to the space.
                Do not include <?= getUserEmail() ?> as it will be added automatically.
              </small><br/>
              <input type="text" name="users" id="users" />
            </p>
            <p>
              <label for="description">Initial message</label></br>
              <small>This message will be posted after the space is created.</small><br/>
              <textarea name="description" id="description"></textarea>
            </p>
            <p class="text-center">
              <input type="submit" value="CREATE CHAT SPACE" />
            </p>
          </div>
          <div id="output" class="hidden"></div>
          <div id="clear" class="hidden">
            <input type="reset" value="CREATE ANOTHER INCIDENT" onclick="onReset()" />
          </div>
        </form>
      </div>
    </div>
    <?!= include('JavaScript'); ?>
  </body>
</html>
JavaScript.html

ইনসিডেন্ট ইনিশিয়ালাইজেশন ওয়েবসাইটের জন্য জমা দেওয়া, সমস্যা ও মুছে দেওয়া সহ ফর্মের আচরণ ম্যানেজ করে। এটি WebController.gs-এর কাস্টম include ফাংশনের মাধ্যমে Index.html-এ অন্তর্ভুক্ত করা হয়েছে।

JavaScript.html কোড দেখুন

apps-script/chat/incident-response-app-auth/JavaScript.html
<script>
  var formDiv = document.getElementById('form');
  var outputDiv = document.getElementById('output');
  var clearDiv = document.getElementById('clear');

  function handleFormSubmit(formObject) {
    event.preventDefault();
    outputDiv.innerHTML = 'Please wait while we create the space...';
    hide(formDiv);
    show(outputDiv);
    google.script.run
      .withSuccessHandler(updateOutput)
      .withFailureHandler(onFailure)
      .handleIncident(formObject);
  }

  function updateOutput(response) {
    var spaceId = response.replace('spaces/', '');
    outputDiv.innerHTML =
      '<p>Space created!</p><p><a href="https://mail.google.com/chat/#chat/space/'
        + spaceId
        + '" target="_blank">Open space</a></p>';
    show(outputDiv);
    show(clearDiv);
  }

  function onFailure(error) {
    outputDiv.innerHTML = 'ERROR: ' + error.message;
    outputDiv.classList.add('error');
    show(outputDiv);
    show(clearDiv);
  }

  function onReset() {
    outputDiv.innerHTML = '';
    outputDiv.classList.remove('error');
    show(formDiv);
    hide(outputDiv);
    hide(clearDiv);
  }

  function hide(element) {
    element.classList.add('hidden');
  }

  function show(element) {
    element.classList.remove('hidden');
  }
</script>
Stylesheet.html

ইনসিডেন্ট ইনিশিয়ালাইজেশন ওয়েবসাইটের CSS. এটি WebController.gs-এ কাস্টম include ফাংশনের মাধ্যমে Index.html-এ অন্তর্ভুক্ত করা হয়েছে।

Stylesheet.html কোড দেখুন

apps-script/chat/incident-response-app-auth/Stylesheet.html
<style>
  * {
    box-sizing: border-box;
  }
  body {
    font-family: Roboto, Arial, Helvetica, sans-serif;
  }
  div.container {
    display: flex;
    justify-content: center;
    align-items: center;
    position: absolute;
    top: 0; bottom: 0; left: 0; right: 0;
  }
  div.content {
    width: 80%;
    max-width: 1000px;
    padding: 1rem;
    border: 1px solid #999;
    border-radius: 0.25rem;
    box-shadow: 0 2px 2px 0 rgba(66, 66, 66, 0.08), 0 2px 4px 2px rgba(66, 66, 66, 0.16);
  }
  h1 {
    text-align: center;
    padding-bottom: 1rem;
    margin: 0 -1rem 1rem -1rem;
    border-bottom: 1px solid #999;
  }
 #output {
    text-align: center;
    min-height: 250px;
  }
  div#clear {
    text-align: center;
    padding-top: 1rem;
    margin: 1rem -1rem 0 -1rem;
    border-top: 1px solid #999;
  }
  input[type=text], textarea {
    width: 100%;
    padding: 1rem 0.5rem;
    margin: 0.5rem 0;
    border: 0;
    border-bottom: 1px solid #999;
    background-color: #f0f0f0;
  }
  textarea {
    height: 5rem;
  }
  small {
    color: #999;
  }
  input[type=submit], input[type=reset] {
    padding: 1rem;
    border: none;
    background-color: #6200ee;
    color: #fff;
    border-radius: 0.25rem;
    width: 25%;
  }
  .hidden {
    display: none;
  }
  .text-center {
    text-align: center;
  }
  .error {
    color: red;
  }
</style>

আপনার ক্লাউড প্রোজেক্ট নম্বর ও আইডি খুঁজে পাওয়া

  1. Google API কনসোলে, আপনার Cloud প্রোজেক্টে যান।

    Google API কনসোলে যান

  2. 'সেটিংস ও ইউটিলিটি > প্রোজেক্ট সেটিংস' বিকল্পে ক্লিক করুন।

  3. প্রোজেক্ট নম্বর ও প্রোজেক্ট আইডি ফিল্ডে থাকা ভ্যালুগুলি নোট করুন। আপনি নিচের বিভাগে সেগুলি ব্যবহার করতে পারেন।

Apps স্ক্রিপ্ট প্রোজেক্ট তৈরি করা

Apps Script প্রোজেক্ট তৈরি করতে এবং আপনার ক্লাউড প্রোজেক্টের সাথে কানেক্ট করতে:

  1. Google Chat-এর মাধ্যমে ঘটনার উত্তর দিন Apps Script প্রজেক্ট খুলতে, নিচের বোতামে ক্লিক করুন।
    প্রোজেক্ট খুলুন
  2. এক নজরে বিকল্পে ক্লিক করুন।
  3. 'এক নজরে' পৃষ্ঠায়, কপি তৈরি করার আইকন কপি তৈরি করুন বিকল্পে ক্লিক করুন।
  4. Apps স্ক্রিপ্ট প্রোজেক্টের কপিকে নাম দিন:

    1. Google Chat-এর মাধ্যমে ঘটনার উত্তর দিন বিকল্পে ক্লিক করুন।

    2. প্রোজেক্টের নাম বক্সে Incident Management Chat app লিখুন।

    3. নাম পরিবর্তন করুন বিকল্পে ক্লিক করুন।

  5. Apps Script প্রজেক্টের আপনার কপিতে, Consts.gs ফাইলে যান এবং YOUR_PROJECT_ID-এর জায়গায় আপনার Cloud প্রজেক্টের আইডি লিখুন।

Apps স্ক্রিপ্ট প্রোজেক্টের Cloud প্রোজেক্ট সেট করা

  1. আপনার Apps স্ক্রিপ্ট প্রোজেক্টে, প্রোজেক্ট সেটিংসের আইকন প্রোজেক্ট সেটিংস বিকল্পে ক্লিক করুন।
  2. Google Cloud Platform (GCP) প্রোজেক্ট বিকল্পের মধ্যে, প্রোজেক্ট পরিবর্তন করুন বিকল্পে ক্লিক করুন।
  3. GCP প্রোজেক্ট নম্বরে, আপনার ক্লাউড প্রোজেক্টের নম্বর পেস্ট করুন।
  4. প্রোজেক্ট সেট করুন বিকল্পে ক্লিক করুন। Cloud প্রোজেক্ট ও Apps Script প্রোজেক্ট এখন কানেক্ট করা হয়েছে।

Apps স্ক্রিপ্ট ডিপ্লয়মেন্ট তৈরি করা

এখন যেহেতু সব কোড লেখা হয়ে গেছে, তাই Apps Script প্রোজেক্ট ডিপ্লয় করুন। Google Cloud-এ Chat অ্যাপ কনফিগার করার সময় আপনি ডিপ্লয়মেন্ট আইডি ব্যবহার করেন।

  1. Apps Script-এ, ঘটনার প্রতিক্রিয়া অ্যাপের প্রোজেক্ট খুলুন।

    Apps স্ক্রিপ্টে যান

  2. ডেপ্লয় করুন > নতুন ডেপ্লয়মেন্ট বিকল্পে ক্লিক করুন।

  3. অ্যাড-অন ও ওয়েব অ্যাপ আগে থেকেই বেছে নেওয়া না থাকলে, ধরন বেছে নিন বিকল্পের পাশে, ডিপ্লয়মেন্টের ধরন প্রোজেক্ট সেটিংসের আইকন বিকল্পে ক্লিক করে অ্যাড-অন ও ওয়েব অ্যাপ বেছে নিন।

  4. বিবরণ বিভাগে, এই ভার্সনের জন্য একটি বিবরণ লিখুন, যেমন Complete version of incident management app।

  5. এই হিসেবে এক্সিকিউট করুন বিকল্পে গিয়ে ওয়েব অ্যাপ অ্যাক্সেস করা ব্যবহারকারী বিকল্প বেছে নিন

  6. কার অ্যাক্সেস আছে বিকল্পে গিয়ে আপনার Workspace প্রতিষ্ঠানের মধ্যে থাকা যেকোনও ব্যক্তি বিকল্প বেছে নিন, যেখানে "আপনার Workspace প্রতিষ্ঠান" হল আপনার Google Workspace প্রতিষ্ঠানের নাম।

  7. ডেপ্লয় করুন বিকল্পে ক্লিক করুন। Apps Script সফল ডেপ্লয়মেন্টের রিপোর্ট করে এবং ঘটনার প্রাথমিক ওয়েব পেজের জন্য একটি ডেপ্লয়মেন্ট আইডি ও URL প্রদান করে।

  8. কোনও ঘটনা শুরু করার সময় পরে ভিজিট করার জন্য ওয়েব অ্যাপ URL লিখে রাখুন। ডেপ্লয়মেন্ট আইডি কপি করুন। Google API কনসোলে Chat অ্যাপ কনফিগার করার সময় আপনি এই আইডি ব্যবহার করেন।

  9. হয়ে গেছে বিকল্পে ক্লিক করুন।

Google API কনসোলে Chat অ্যাপ কনফিগার করা

এই বিভাগে, আপনার Apps Script প্রোজেক্ট থেকে এইমাত্র তৈরি করা ডিপ্লয়মেন্টের আইডি সহ আপনার Chat অ্যাপ সম্পর্কে তথ্য সহ Google API কনসোলে Google Chat API কীভাবে কনফিগার করতে হয় তা দেখানো হয়েছে।

  1. Google API Console-এ, মেনু > API ও পরিষেবা > চালু API ও পরিষেবা > Google Chat API > কনফিগারেশন বিকল্পে ক্লিক করুন।

    Chat API কনফিগারেশনে যান

  2. অ্যাপের নাম বিকল্পে Incident Management টাইপ করুন।

  3. অবতার URL-এ https://developers.google.com/chat/images/quickstart-app-avatar.png টাইপ করুন।

  4. বিবরণ অংশে, Responds to incidents. টাইপ করুন।

  5. ইন্টার‍্যাক্টিভ ফিচার চালু করুন টগল বোতামে ক্লিক করে সেটি চালু করুন।

  6. কার্যকারিতা বিকল্পের মধ্যে, স্পেস ও গ্রুপ কথোপকথনে যোগ দিন বিকল্প বেছে নিন।

  7. কানেকশন সেটিংস বিকল্পের মধ্যে, Apps স্ক্রিপ্ট বেছে নিন।

  8. ডিপ্লয়মেন্ট আইডি-তে, Apps স্ক্রিপ্ট ডিপ্লয়মেন্ট আইডি পেস্ট করুন যা আপনি আগে Apps স্ক্রিপ্ট প্রোজেক্ট ডিপ্লয়মেন্ট থেকে কপি করেছেন।

  9. ট্রিগার বিকল্পের মধ্যে, অ্যাপ কমান্ড ট্রিগারের জন্য onAppCommand কনফিগার করুন।

  10. সম্পূর্ণভাবে প্রয়োগ করা Chat অ্যাপ ব্যবহার করে এমন একটি দ্রুত কমান্ড রেজিস্টার করুন:

    1. কমান্ড বিকল্পের মধ্যে, কমান্ড যোগ করুন বিকল্পে ক্লিক করুন।

    2. কমান্ড আইডিতে 1 টাইপ করুন।

    3. বিবরণ বিভাগে, টাইপ করুন Closes the incident being discussed in the space.

    4. কমান্ডের ধরন বিকল্পের মধ্যে থেকে দ্রুত কমান্ড বিকল্প বেছে নিন।

    5. দ্রুত কমান্ডের নাম বিকল্পে Close incident টাইপ করুন।

    6. ডায়ালগ খোলে (বা ডায়ালগ) বিকল্প বেছে নিন।

    7. হয়ে গেছে বিকল্পে ক্লিক করুন। কমান্ডটি রেজিস্টার করা এবং তালিকাভুক্ত করা হয়েছে।

  11. দৃশ্যমানতা বিকল্পের মধ্যে থেকে, এইসব বিকল্প বেছে নিন: আপনার Workspace ডোমেনে নির্দিষ্ট ব্যক্তি ও গ্রুপের জন্য এই Chat অ্যাপ উপলভ্য করুন এবং আপনার ইমেল আইডি লিখুন।

  12. লগ বিকল্পের মধ্যে, লগিংয়ে লগ সংক্রান্ত সমস্যা বিকল্প বেছে নিন।

  13. সেভ করুন বিকল্পে ক্লিক করুন। কনফিগারেশন সেভ করা হয়েছে মেসেজটি দেখা যাবে, এর অর্থ হল অ্যাপটি পরীক্ষা করার জন্য রেডি।

অ্যাডমিনিস্ট্রেটরের অনুমোদন পাওয়া

অ্যাডমিনিস্ট্রেটরের অনুমোদন পেতে, আপনাকে Google Workspace Marketplace SDK-তে Chat অ্যাপ কনফিগার করতে হবে।

Google Workspace Marketplace SDK-তে Chat অ্যাপ কনফিগার করা

Google Workspace Marketplace SDK-তে Chat অ্যাপ কনফিগার করতে, এইসব ধাপ অনুসরণ করুন:

  1. Google API কনসোলে, মেনু > API ও পরিষেবা > চালু থাকা API ও পরিষেবা > Google Workspace Marketplace SDK > অ্যাপ কনফিগারেশন বিকল্পে যান।

    অ্যাপ কনফিগারেশনে যান

  2. অ্যাপ কনফিগারেশন পৃষ্ঠাটি সম্পূর্ণ করুন। আপনি কীভাবে নিজের Chat অ্যাপ কনফিগার করবেন তা আপনার টার্গেট দর্শক ও অন্যান্য বিষয়ের উপর নির্ভর করে। অ্যাপ কনফিগারেশন পৃষ্ঠা সম্পূর্ণ করার ব্যাপারে সাহায্য পেতে, SDK-তে আপনার অ্যাপ কনফিগার করুন দেখুন। এই নির্দেশিকার উদ্দেশ্যে, নিম্নলিখিত তথ্য লিখুন:

    1. অ্যাপের দৃশ্যমানতা বিকল্পের মধ্যে, ব্যক্তিগত বিকল্প বেছে নিন।
    2. ইনস্টলেশন সেটিংস বিকল্পের মধ্যে, অ্যাডমিন ইনস্টল বিকল্প বেছে নিন।
    3. অ্যাপ ইন্টিগ্রেশন বিকল্পের মধ্যে থেকে, চ্যাট অ্যাপ বেছে নিন।
    4. OAuth স্কোপ বিকল্পের মধ্যে, নিম্নলিখিত স্কোপ লিখুন:
      • https://www.googleapis.com/auth/chat.app.spaces
      • https://www.googleapis.com/auth/chat.app.memberships
    5. ডেভেলপার সংক্রান্ত তথ্য বিকল্পের অধীনে, আপনার ডেভেলপারের নাম, ডেভেলপারের ওয়েবসাইটের URL এবং ডেভেলপারের ইমেল আইডি লিখুন।
    6. ড্রাফ্ট সেভ করুন বিকল্পে ক্লিক করুন।

অ্যাপ কনফিগার করার পরে, স্টোর লিস্টিং আপডেট করুন:

  1. Google Cloud কনসোলে, মেনু > API ও পরিষেবা > চালু করা API ও পরিষেবা > Google Workspace Marketplace SDK > স্টোর তালিকা বিকল্পে যান।
  2. অ্যাপের বিবরণ থেকে, বিভাগ হিসেবে ওয়েব ডেভেলপমেন্ট বেছে নিন।
  3. গ্রাফিক অ্যাসেটে, অনুরোধ করা ফর্ম্যাটে অ্যাপ্লিকেশন আইকন আপলোড করুন।
  4. স্ক্রিনশট বিভাগে, অ্যাপ্লিকেশনের একটি স্ক্রিনশট আপলোড করুন।
  5. সহায়তা লিঙ্ক-এ, পরিষেবার শর্তাবলী URL, গোপনীয়তা URL ও সহায়তা URL যোগ করুন।
  6. ডিস্ট্রিবিউশন বিকল্পে, এই অ্যাপ্লিকেশনটি উপলভ্য হবে এমন অঞ্চল বেছে নিন।
  7. প্রকাশ করুন বিকল্পে ক্লিক করুন।

অ্যাডমিনিস্ট্রেটরের অনুমোদন পাওয়া

যেহেতু আপনার পরিষেবা অ্যাকাউন্ট অ্যাডমিনিস্ট্রেটরের অনুমোদন পাওয়ার জন্য কনফিগার করা হয়েছে, তাই Google Workspace অ্যাডমিনিস্ট্রেটরের থেকে সেটি পান যিনি Chat অ্যাপের জন্য অনুমোদন সেট-আপ করুন লিঙ্কে দেওয়া ধাপগুলি অনুসরণ করে অনুমোদন দিতে পারবেন।

Chat অ্যাপ পরীক্ষা করা

ইনসিডেন্ট ম্যানেজমেন্ট Chat অ্যাপ পরীক্ষা করতে, ওয়েবপেজ থেকে ইনসিডেন্ট শুরু করুন এবং যাচাই করুন যে Chat অ্যাপ প্রত্যাশিতভাবে কাজ করছে কিনা:

  1. Apps Script ডিপ্লয়মেন্ট ওয়েব অ্যাপ URL-এ যান।

  2. Apps Script আপনার ডেটা অ্যাক্সেস করার অনুমতি চাইলে, অনুমতি পর্যালোচনা করুন বিকল্পে ক্লিক করুন, আপনার Google Workspace ডোমেনে উপযুক্ত Google অ্যাকাউন্ট দিয়ে সাইন-ইন করুন এবং অনুমতি দিন বিকল্পে ক্লিক করুন।

  3. ইনসিডেন্ট ইনিশিয়ালাইজেশন ওয়েবপেজ খুলে যায়। পরীক্ষা সংক্রান্ত তথ্য লিখুন:

    1. ঘটনার নাম বিকল্পে The First Incident টাইপ করুন।
    2. বিকল্প হিসেবে, ঘটনা সংক্রান্ত উত্তরদাতা বিকল্পে, আপনার সহকর্মী ঘটনা সংক্রান্ত উত্তরদাতাদের ইমেল আইডি লিখুন। তাদের অবশ্যই আপনার Google Workspace সংস্থা বা স্পেসে Google Chat অ্যাকাউন্ট থাকতে হবে, তা না হলে স্পেস তৈরি করা যাবে না। আপনার নিজের ইমেল আইডি লিখবেন না, কারণ এটি অটোমেটিক যোগ করা হয়।
    3. প্রাথমিক মেসেজে, Testing the incident management Chat app. টাইপ করুন
  4. Chat স্পেস তৈরি করুন বিকল্পে ক্লিক করুন। একটি creating space মেসেজ দেখা যায়।

  5. স্পেস তৈরি হওয়ার পরে, একটি Space created! মেসেজ দেখা যাবে। স্পেস খুলুন বিকল্পে ক্লিক করুন, এটি Chat-এ নতুন ট্যাবে স্পেস খুলবে।

  6. বিকল্প হিসেবে, আপনি ও ঘটনার অন্যান্য উত্তরদাতারা স্পেসে মেসেজ পাঠাতে পারেন। Vertex AI ব্যবহার করে অ্যাপটি এইসব মেসেজের সারসংক্ষেপ তৈরি করে এবং রেট্রোস্পেক্টিভ ডকুমেন্ট শেয়ার করে।

  7. ঘটনার প্রতিক্রিয়া শেষ করতে এবং সমস্যার সমাধান করার প্রসেস শুরু করতে, চ্যাট স্পেসে, 'দ্রুত কমান্ড' Close incident চালু করুন। ইনসিডেন্ট ম্যানেজমেন্ট ডায়ালগ খোলে।

  8. ঘটনা বন্ধ করুন বিকল্পে, ঘটনার সমাধানের বিবরণ লিখুন, যেমন Test complete।

  9. ঘটনা বন্ধ করুন বিকল্পে ক্লিক করুন।

ইনসিডেন্ট ম্যানেজমেন্ট অ্যাপ স্পেসের মেসেজ তালিকাভুক্ত করে, Vertex AI-এর সাহায্যে সেগুলির সারসংক্ষেপ করে , Google Docs ডকুমেন্টে সারসংক্ষেপ পেস্ট করে এবং স্পেসে ডকুমেন্ট শেয়ার করে।

অপ্রয়োজনীয়গুলি মুছুন

এই টিউটোরিয়ালে ব্যবহৃত রিসোর্সের জন্য আপনার Google Cloud অ্যাকাউন্টে চার্জ যাতে না লাগে, তার জন্য আমরা Cloud প্রোজেক্টটি মুছে দেওয়ার সাজেস্ট করি।

  1. Google API কনসোলে, রিসোর্স ম্যানেজ করুন পৃষ্ঠায় যান। মেনু > IAM ও অ্যাডমিন > রিসোর্স ম্যানেজ করুন বিকল্পে ক্লিক করুন।

    রিসোর্স ম্যানেজারে যান

  2. প্রোজেক্টের তালিকা থেকে, যে প্রোজেক্টটি মুছতে চান সেটি বেছে নিন এবং তারপরে মুছুন বিকল্পে ক্লিক করুন।
  3. ডায়ালগে, প্রোজেক্ট আইডি টাইপ করুন এবং তারপর প্রোজেক্ট মুছে দিতে বন্ধ করুন বিকল্পে ক্লিক করুন ।
  • API কল করতে এবং Chat API ও Vertex AI API-এর মতো Google Cloud পরিষেবা ইনভোক করতে, ইনসিডেন্ট রেসপন্স অ্যাপ ব্যবহারকারীর ক্রেডেনশিয়াল দিয়ে যাচাই করে। এর অর্থ হল, যে ব্যবহারকারী কোনও ইনসিডেন্ট শুরু করছেন, তাকে অবশ্যই এইসব পরিষেবা অ্যাক্সেস করতে দিতে হবে। অ্যাপটিকে আরও শক্তিশালী করতে, Close incident কুইক কমান্ড ইনভোক করা ব্যবহারকারীর ব্যবহারকারীর ক্রেডেনশিয়ালের পরিবর্তে পরিষেবা অ্যাকাউন্টের সাথে Vertex AI API কল করার কথা বিবেচনা করুন। Vertex AI API-এর জন্য পরিষেবা অ্যাকাউন্ট কনফিগার করার ব্যাপারে সাহায্য পেতে, কাস্টম পরিষেবা অ্যাকাউন্ট ব্যবহার করুন দেখুন।

অ্যাড-অন নয় এমন চ্যাট অ্যাপ: Google Chat, Vertex AI ও Google Apps Script (অ্যাপ প্রমাণীকরণ) ব্যবহার করে ঘটনার উত্তর দিন

নিম্নলিখিত নির্দেশাবলী ও কোড স্যাম্পেল এমন Chat অ্যাপের ক্ষেত্রে প্রযোজ্য যা Google Workspace অ্যাড-অন নয় (GitHub-এ দেখুন)।

Apps স্ক্রিপ্ট প্রোজেক্ট তৈরি ও কনফিগার করা

  1. অ্যাড-অন নয় এমন Chat অ্যাপের জন্য Google Chat-এর মাধ্যমে ঘটনার উত্তর দিন Apps স্ক্রিপ্ট প্রোজেক্ট খুলুন এবং একটি কপি তৈরি করুন।
  2. Google API কনসোলে Chat API কনফিগার করার সময়: এই Chat অ্যাপকে Google Workspace অ্যাড-অন হিসেবে তৈরি করুন বিকল্পটি থেকে টিকচিহ্ন সরিয়ে দিন। আপনাকে কনফার্ম করতে বলে একটি ডায়ালগ খুলবে। ডায়ালগে, বন্ধ করুন বিকল্পে ক্লিক করুন।
  3. কোনও ঘটনার সমাধান করতে /closeIncident স্ল্যাশ কমান্ড (কমান্ড আইডি 1, একটি ডায়ালগ খোলে বেছে নিন) রেজিস্টার করুন এবং স্পেসে /closeIncident টাইপ করুন।

সোর্স কোড

Consts.gs
apps-script/incident-response-app-auth/Consts.gs
const PROJECT_ID = 'replace-with-your-project-id';
const CLOSE_INCIDENT_COMMAND_ID = 1;
const APP_CREDENTIALS = 'replace-with-your-app-credentials';
const APP_CREDENTIALS_SCOPES = 'https://www.googleapis.com/auth/chat.bot https://www.googleapis.com/auth/chat.app.memberships https://www.googleapis.com/auth/chat.app.spaces.create';
const VERTEX_AI_LOCATION_ID = 'us-central1';
const MODEL_ID = 'gemini-1.5-flash-002';
ChatApp.gs
apps-script/incident-response-app-auth/ChatApp.gs
/**
 * Responds to a MESSAGE event in Google Chat.
 *
 * This app only responds to a slash command with the ID 1 ("/closeIncident").
 * It will respond to any other message with a simple "Hello" text message.
 *
 * @param {Object} event the event object from Google Chat
 */
function onMessage(event) {
  if (event.message.slashCommand) {
    return processSlashCommand_(event);
  }
  return { "text": "Hello from Incident Response app!" };
}

/**
 * Responds to a CARD_CLICKED event in Google Chat.
 *
 * This app only responds to one kind of dialog (Close Incident).
 *
 * @param {Object} event the event object from Google Chat
 */
function onCardClick(event) {
  if (event.isDialogEvent) {
    if (event.dialogEventType == 'SUBMIT_DIALOG') {
      return processSubmitDialog_(event);
    }
    return {
      actionResponse: {
        type: "DIALOG",
        dialogAction: {
          actionStatus: "OK"
        }
      }
    };
  }
}

/**
 * Responds to a MESSAGE event with a Slash command in Google Chat.
 *
 * This app only responds to a slash command with the ID 1 ("/closeIncident")
 * by returning a Dialog.
 *
 * @param {Object} event the event object from Google Chat
 */
function processSlashCommand_(event) {
  if (event.message.slashCommand.commandId != CLOSE_INCIDENT_COMMAND_ID) {
    return {
      "text": "Command not recognized. Use the command `/closeIncident` to close the incident managed by this space."
    };
  }
  const sections = [
    {
      header: "Close Incident",
      widgets: [
        {
          textInput: {
            label: "Please describe the incident resolution",
            type: "MULTIPLE_LINE",
            name: "description"
          }
        },
        {
          buttonList: {
            buttons: [
              {
                text: "Close Incident",
                onClick: {
                  action: {
                    function: "closeIncident"
                  }
                }
              }
            ]
          }
        }
      ]
    }
  ];
  return {
    actionResponse: {
      type: "DIALOG",
      dialogAction: {
        dialog: {
          body: {
            sections,
          }
        }
      }
    }
  };
}

/**
 * Responds to a CARD_CLICKED event with a Dialog submission in Google Chat.
 *
 * This app only responds to one kind of dialog (Close Incident).
 * It creates a Doc with a summary of the incident information and posts a message
 * to the space with a link to the Doc.
 *
 * @param {Object} event the event object from Google Chat
 */
function processSubmitDialog_(event) {
  const resolution = event.common.formInputs.description[""].stringInputs.value[0];
  const chatHistory = concatenateAllSpaceMessages_(event.space.name);
  const chatSummary = summarizeChatHistory_(chatHistory);
  const docUrl = createDoc_(event.space.displayName, resolution, chatHistory, chatSummary);
  return {
    actionResponse: {
      type: "NEW_MESSAGE",
    },
    text: `Incident closed with the following resolution: ${resolution}\n\nHere is the automatically generated post-mortem:\n${docUrl}`
  };
}

/**
 * Lists all the messages in the Chat space, then concatenate all of them into
 * a single text containing the full Chat history.
 *
 * For simplicity for this demo, it only fetches the first 100 messages.
 *
 * Messages with slash commands are filtered out, so the returned history will
 * contain only the conversations between users and not app command invocations.
 *
 * @return {string} a text containing all the messages in the space in the format:
 *          Sender's name: Message
 */
function concatenateAllSpaceMessages_(spaceName) {
  // Call Chat API method spaces.messages.list
  const response = Chat.Spaces.Messages.list(spaceName, { 'pageSize': 100 });
  const messages = response.messages;
  // Fetch the display names of the message senders and returns a text
  // concatenating all the messages.
  let userMap = new Map();
  return messages
    .filter(message => message.slashCommand === undefined)
    .map(message => `${getUserDisplayName_(userMap, message.sender.name)}: ${message.text}`)
    .join('\n');
}

/**
 * Obtains the display name of a user by using the Admin Directory API.
 *
 * The fetched display name is cached in the provided map, so we only call the API
 * once per user.
 *
 * If the user does not have a display name, then the full name is used.
 *
 * @param {Map} userMap a map containing the display names previously fetched
 * @param {string} userName the resource name of the user
 * @return {string} the user's display name
 */
function getUserDisplayName_(userMap, userName) {
  if (userMap.has(userName)) {
    return userMap.get(userName);
  }
  let displayName = 'Unknown User';
  try {
    const user = AdminDirectory.Users.get(
      userName.replace("users/", ""),
      { projection: 'BASIC', viewType: 'domain_public' });
    displayName = user.name.displayName ? user.name.displayName : user.name.fullName;
  } catch (e) {
    // Ignore error if the API call fails (for example, because it's an
    // out-of-domain user or Chat app)) and just use 'Unknown User'.
  }
  userMap.set(userName, displayName);
  return displayName;
}
ChatSpaceCreator.gs
apps-script/incident-response-app-auth/ChatSpaceCreator.gs
/**
 * Handles an incident by creating a chat space, adding members, and posting a message.
 * All the actions are done using application credentials.
 *
 * @param {Object} formData - The data submitted by the user. It should contain the fields:
 *                           - title: The display name of the chat space.
 *                           - description: The description of the incident.
 *                           - users: A comma-separated string of user emails to be added to the space.
 * @return {string} The resource name of the new space.
 */
function handleIncident(formData) {
  const users = formData.users.trim().length > 0 ? formData.users.split(',') : [];
  const service = getService_();
  if (!service.hasAccess()) {
    console.error(service.getLastError());
    return;
   }
  const spaceName = createChatSpace_(formData.title, service);
  createHumanMembership_(spaceName, getUserEmail(), service);
  for (const user of users ){
    createHumanMembership_(spaceName, user, service);
  }
  createMessage_(spaceName, formData.description, service);
  return spaceName;
}
/**
 * Creates a chat space with application credentials.
 *
 * @param {string} displayName - The name of the chat space.
 * @param {object} service - The credentials of the service account.
 * @returns {string} The resource name of the new space.
*/
function createChatSpace_(displayName, service) {
  try {
    // For private apps, the alias can be used
    const my_customer_alias = "customers/my_customer";
    // Specify the space to create.
    const space = {
        displayName: displayName,
        spaceType: 'SPACE',                
        customer: my_customer_alias
    };
    // Call Chat API with a service account to create a message.
    const createdSpace = Chat.Spaces.create(
        space,
        {},
        // Authenticate with the service account token.
        {'Authorization': 'Bearer ' + service.getAccessToken()});
    return createdSpace.name;
  } catch (err) {
    // TODO (developer) - Handle exception.
    console.log('Failed to create space with error %s', err.message);
  }
}
/*
 * Creates a chat message with application credentials.
 *
 * @param {string} spaceName - The resource name of the space.
 * @param {string} message - The text to be posted.
 * @param {object} service - The credentials of the service account.
 * @return {string} the resource name of the new space.
 */
function createMessage_(spaceName, message, service) {
  try {
    // Call Chat API with a service account to create a message.
    const result = Chat.Spaces.Messages.create(
        {'text': message},
        spaceName,
        {},
        // Authenticate with the service account token.
        {'Authorization': 'Bearer ' + service.getAccessToken()});

  } catch (err) {
    // TODO (developer) - Handle exception.
    console.log('Failed to create message with error %s', err.message);
  }
}
/**
 * Creates a human membership in a chat space with application credentials.
 *
 * @param {string} spaceName - The resource name of the space.
 * @param {string} email - The email of the user to be added.
 * @param {object} service - The credentials of the service account.
 */
function createHumanMembership_(spaceName, email, service){
  try{
    const membership = {
      member: {
        name: 'users/'+email,
        // User type for the membership
        type: 'HUMAN'
      }
    };
    const result = Chat.Spaces.Members.create(
      membership,
      spaceName,
      {},
      {'Authorization': 'Bearer ' + service.getAccessToken()}
    );
  } catch (err){
    console.log('Failed to create membership with error %s', err.message)
  }

}

 /*
 * Creates a service for the service account.
 * @return {object}  - The credentials of the service account.
 */
function getService_() {
  return OAuth2.createService(APP_CREDENTIALS.client_email)
      .setTokenUrl('https://oauth2.googleapis.com/token')
      .setPrivateKey(APP_CREDENTIALS.private_key)
      .setIssuer(APP_CREDENTIALS.client_email)
      .setSubject(APP_CREDENTIALS.client_email)
      .setScope(APP_CREDENTIALS_SCOPES)
      .setPropertyStore(PropertiesService.getScriptProperties());
}
DocsApi.gs
apps-script/incident-response-app-auth/DocsApi.gs
/**
 * Creates a Doc in the user's Google Drive and writes a summary of the incident information to it.
 *
 * @param {string} title The title of the incident
 * @param {string} resolution Incident resolution described by the user
 * @param {string} chatHistory The whole Chat history be included in the document
 * @param {string} chatSummary A summary of the Chat conversation to be included in the document
 * @return {string} the URL of the created Doc
 */
function createDoc_(title, resolution, chatHistory, chatSummary) {
  let doc = DocumentApp.create(title);
  let body = doc.getBody();
  body.appendParagraph(`Post-Mortem: ${title}`).setHeading(DocumentApp.ParagraphHeading.TITLE);
  body.appendParagraph("Resolution").setHeading(DocumentApp.ParagraphHeading.HEADING1);
  body.appendParagraph(resolution);
  body.appendParagraph("Summary of the conversation").setHeading(DocumentApp.ParagraphHeading.HEADING1);
  body.appendParagraph(chatSummary);
  body.appendParagraph("Full Chat history").setHeading(DocumentApp.ParagraphHeading.HEADING1);
  body.appendParagraph(chatHistory);
  return doc.getUrl();
}
VertexAiApi.gs
apps-script/incident-response-app-auth/VertexAiApi.gs
/**
 * Summarizes a Chat conversation using the Vertex AI text prediction API.
 *
 * @param {string} chatHistory The Chat history that will be summarized.
 * @return {string} The content from the text prediction response.
 */


function summarizeChatHistory_(chatHistory) {

  const API_ENDPOINT = `https://${VERTEX_AI_LOCATION_ID}-aiplatform.googleapis.com/v1/projects/${PROJECT_ID}/locations/${VERTEX_AI_LOCATION_ID}/publishers/google/models/${MODEL_ID}:generateContent`;
  const prompt = "Summarize the following conversation between Engineers resolving an incident"
      + " in a few sentences. Use only the information from the conversation.\n\n" + chatHistory;
  // Get the access token.
  const accessToken = ScriptApp.getOAuthToken();

  const headers = {
    'Authorization': 'Bearer ' + accessToken,
    'Content-Type': 'application/json',
  };
  const payload = {
    'contents': {
      'role': 'user',
      'parts' : [
        {
          'text': prompt
        }
      ]
    }
  }
  const options = {
    'method': 'post',
    'headers': headers,
    'payload': JSON.stringify(payload),
    'muteHttpExceptions': true,
  };
  try {
    const response = UrlFetchApp.fetch(API_ENDPOINT, options);
    const responseCode = response.getResponseCode();
    const responseText = response.getContentText();

    if (responseCode === 200) {
      const jsonResponse = JSON.parse(responseText);
      console.log(jsonResponse)
      if (jsonResponse.candidates && jsonResponse.candidates.length > 0) {
        return jsonResponse.candidates[0].content.parts[0].text; // Access the summarized text
      } else {
        return "No summary found in response.";
      }

    } else {
      console.error("Vertex AI API Error:", responseCode, responseText);
      return `Error: ${responseCode} - ${responseText}`;
    }
  } catch (e) {
    console.error("UrlFetchApp Error:", e);
    return "Error: " + e.toString();
  }
}
WebController.gs
apps-script/incident-response-app-auth/WebController.gs
/**
 * Serves the web page from Index.html.
 */
function doGet() {
  return HtmlService
    .createTemplateFromFile('Index')
    .evaluate();
}

/**
 * Serves the web content from the specified filename.
 */
function include(filename) {
  return HtmlService
    .createHtmlOutputFromFile(filename)
    .getContent();
}

/**
 * Returns the email address of the user running the script.
 */
function getUserEmail() {
  return Session.getActiveUser().getEmail();
}
Index.html
apps-script/incident-response-app-auth/Index.html
<!DOCTYPE html>
<html>
  <head>
    <base target="_top">
    <link href='https://fonts.googleapis.com/css?family=Roboto' rel='stylesheet'>
    <?!= include('Stylesheet'); ?>
  </head>
  <body>
    <div class="container">
      <div class="content">
        <h1>Incident Manager</h1>
        <form id="incident-form" onsubmit="handleFormSubmit(this)">
          <div id="form">
            <p>
              <label for="title">Incident title</label><br/>
              <input type="text" name="title" id="title" />
            </p>
            <p>
              <label for="users">Incident responders</label><br/>
              <small>
                Please enter a comma-separated list of email addresses of the users
                that should be added to the space.
                Do not include <?= getUserEmail() ?> as it will be added automatically.
              </small><br/>
              <input type="text" name="users" id="users" />
            </p>
            <p>
              <label for="description">Initial message</label></br>
              <small>This message will be posted after the space is created.</small><br/>
              <textarea name="description" id="description"></textarea>
            </p>
            <p class="text-center">
              <input type="submit" value="CREATE CHAT SPACE" />
            </p>
          </div>
          <div id="output" class="hidden"></div>
          <div id="clear" class="hidden">
            <input type="reset" value="CREATE ANOTHER INCIDENT" onclick="onReset()" />
          </div>
        </form>
      </div>
    </div>
    <?!= include('JavaScript'); ?>
  </body>
</html>
JavaScript.html
apps-script/incident-response-app-auth/JavaScript.html
<script>
  var formDiv = document.getElementById('form');
  var outputDiv = document.getElementById('output');
  var clearDiv = document.getElementById('clear');

  function handleFormSubmit(formObject) {
    event.preventDefault();
    outputDiv.innerHTML = 'Please wait while we create the space...';
    hide(formDiv);
    show(outputDiv);
    google.script.run
      .withSuccessHandler(updateOutput)
      .withFailureHandler(onFailure)
      .handleIncident(formObject);
  }

  function updateOutput(response) {
    var spaceId = response.replace('spaces/', '');
    outputDiv.innerHTML =
      '<p>Space created!</p><p><a href="https://mail.google.com/chat/#chat/space/'
        + spaceId
        + '" target="_blank">Open space</a></p>';
    show(outputDiv);
    show(clearDiv);
  }

  function onFailure(error) {
    outputDiv.innerHTML = 'ERROR: ' + error.message;
    outputDiv.classList.add('error');
    show(outputDiv);
    show(clearDiv);
  }

  function onReset() {
    outputDiv.innerHTML = '';
    outputDiv.classList.remove('error');
    show(formDiv);
    hide(outputDiv);
    hide(clearDiv);
  }

  function hide(element) {
    element.classList.add('hidden');
  }

  function show(element) {
    element.classList.remove('hidden');
  }
</script>
Stylesheet.html
apps-script/incident-response-app-auth/Stylesheet.html
<style>
  * {
    box-sizing: border-box;
  }
  body {
    font-family: Roboto, Arial, Helvetica, sans-serif;
  }
  div.container {
    display: flex;
    justify-content: center;
    align-items: center;
    position: absolute;
    top: 0; bottom: 0; left: 0; right: 0;
  }
  div.content {
    width: 80%;
    max-width: 1000px;
    padding: 1rem;
    border: 1px solid #999;
    border-radius: 0.25rem;
    box-shadow: 0 2px 2px 0 rgba(66, 66, 66, 0.08), 0 2px 4px 2px rgba(66, 66, 66, 0.16);
  }
  h1 {
    text-align: center;
    padding-bottom: 1rem;
    margin: 0 -1rem 1rem -1rem;
    border-bottom: 1px solid #999;
  }
 #output {
    text-align: center;
    min-height: 250px;
  }
  div#clear {
    text-align: center;
    padding-top: 1rem;
    margin: 1rem -1rem 0 -1rem;
    border-top: 1px solid #999;
  }
  input[type=text], textarea {
    width: 100%;
    padding: 1rem 0.5rem;
    margin: 0.5rem 0;
    border: 0;
    border-bottom: 1px solid #999;
    background-color: #f0f0f0;
  }
  textarea {
    height: 5rem;
  }
  small {
    color: #999;
  }
  input[type=submit], input[type=reset] {
    padding: 1rem;
    border: none;
    background-color: #6200ee;
    color: #fff;
    border-radius: 0.25rem;
    width: 25%;
  }
  .hidden {
    display: none;
  }
  .text-center {
    text-align: center;
  }
  .error {
    color: red;
  }
</style>