
В этом руководстве показано, как создать приложение Google Chat, которое поможет пользователям Google Chat управлять своими личными и деловыми контактами. Для сбора информации приложение Chat предлагает пользователям заполнить контактную форму в карточках сообщений и диалогах.
Посмотрите, как работает приложение «Чат»:
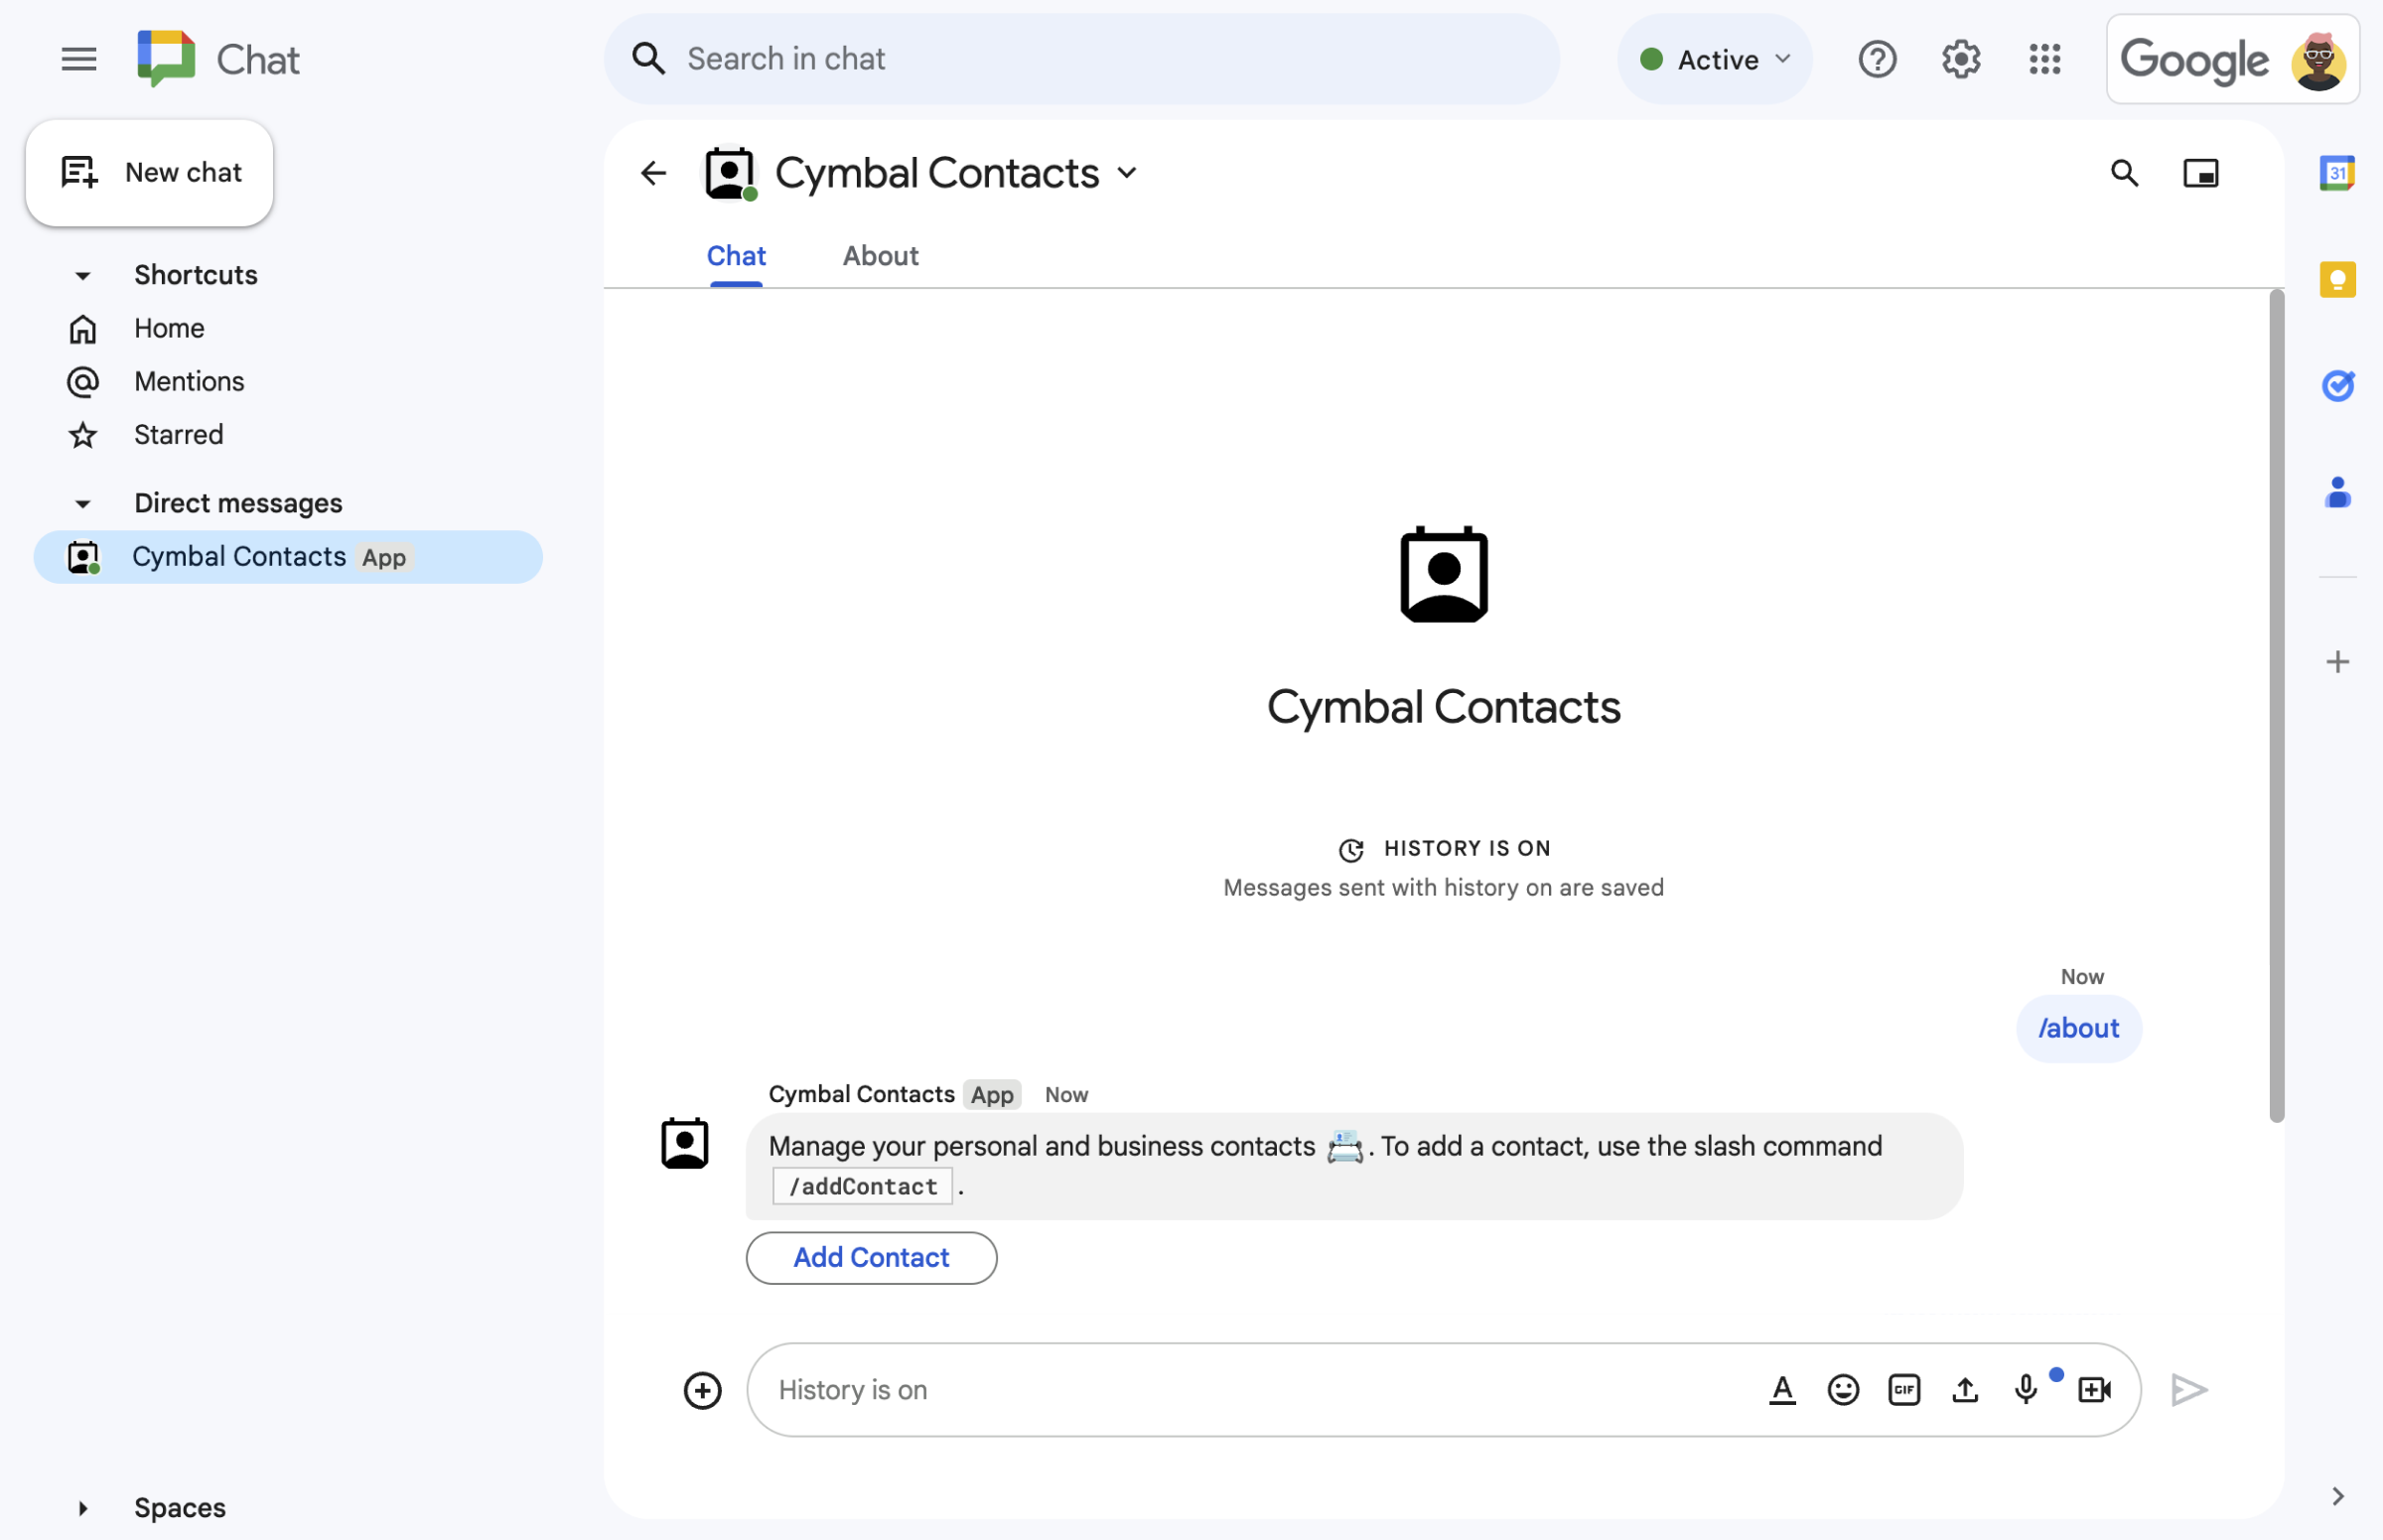
Рисунок 1. Приложение «Чат» отвечает на команду /aboutтекстовым сообщением и кнопкой, открывающей форму обратной связи.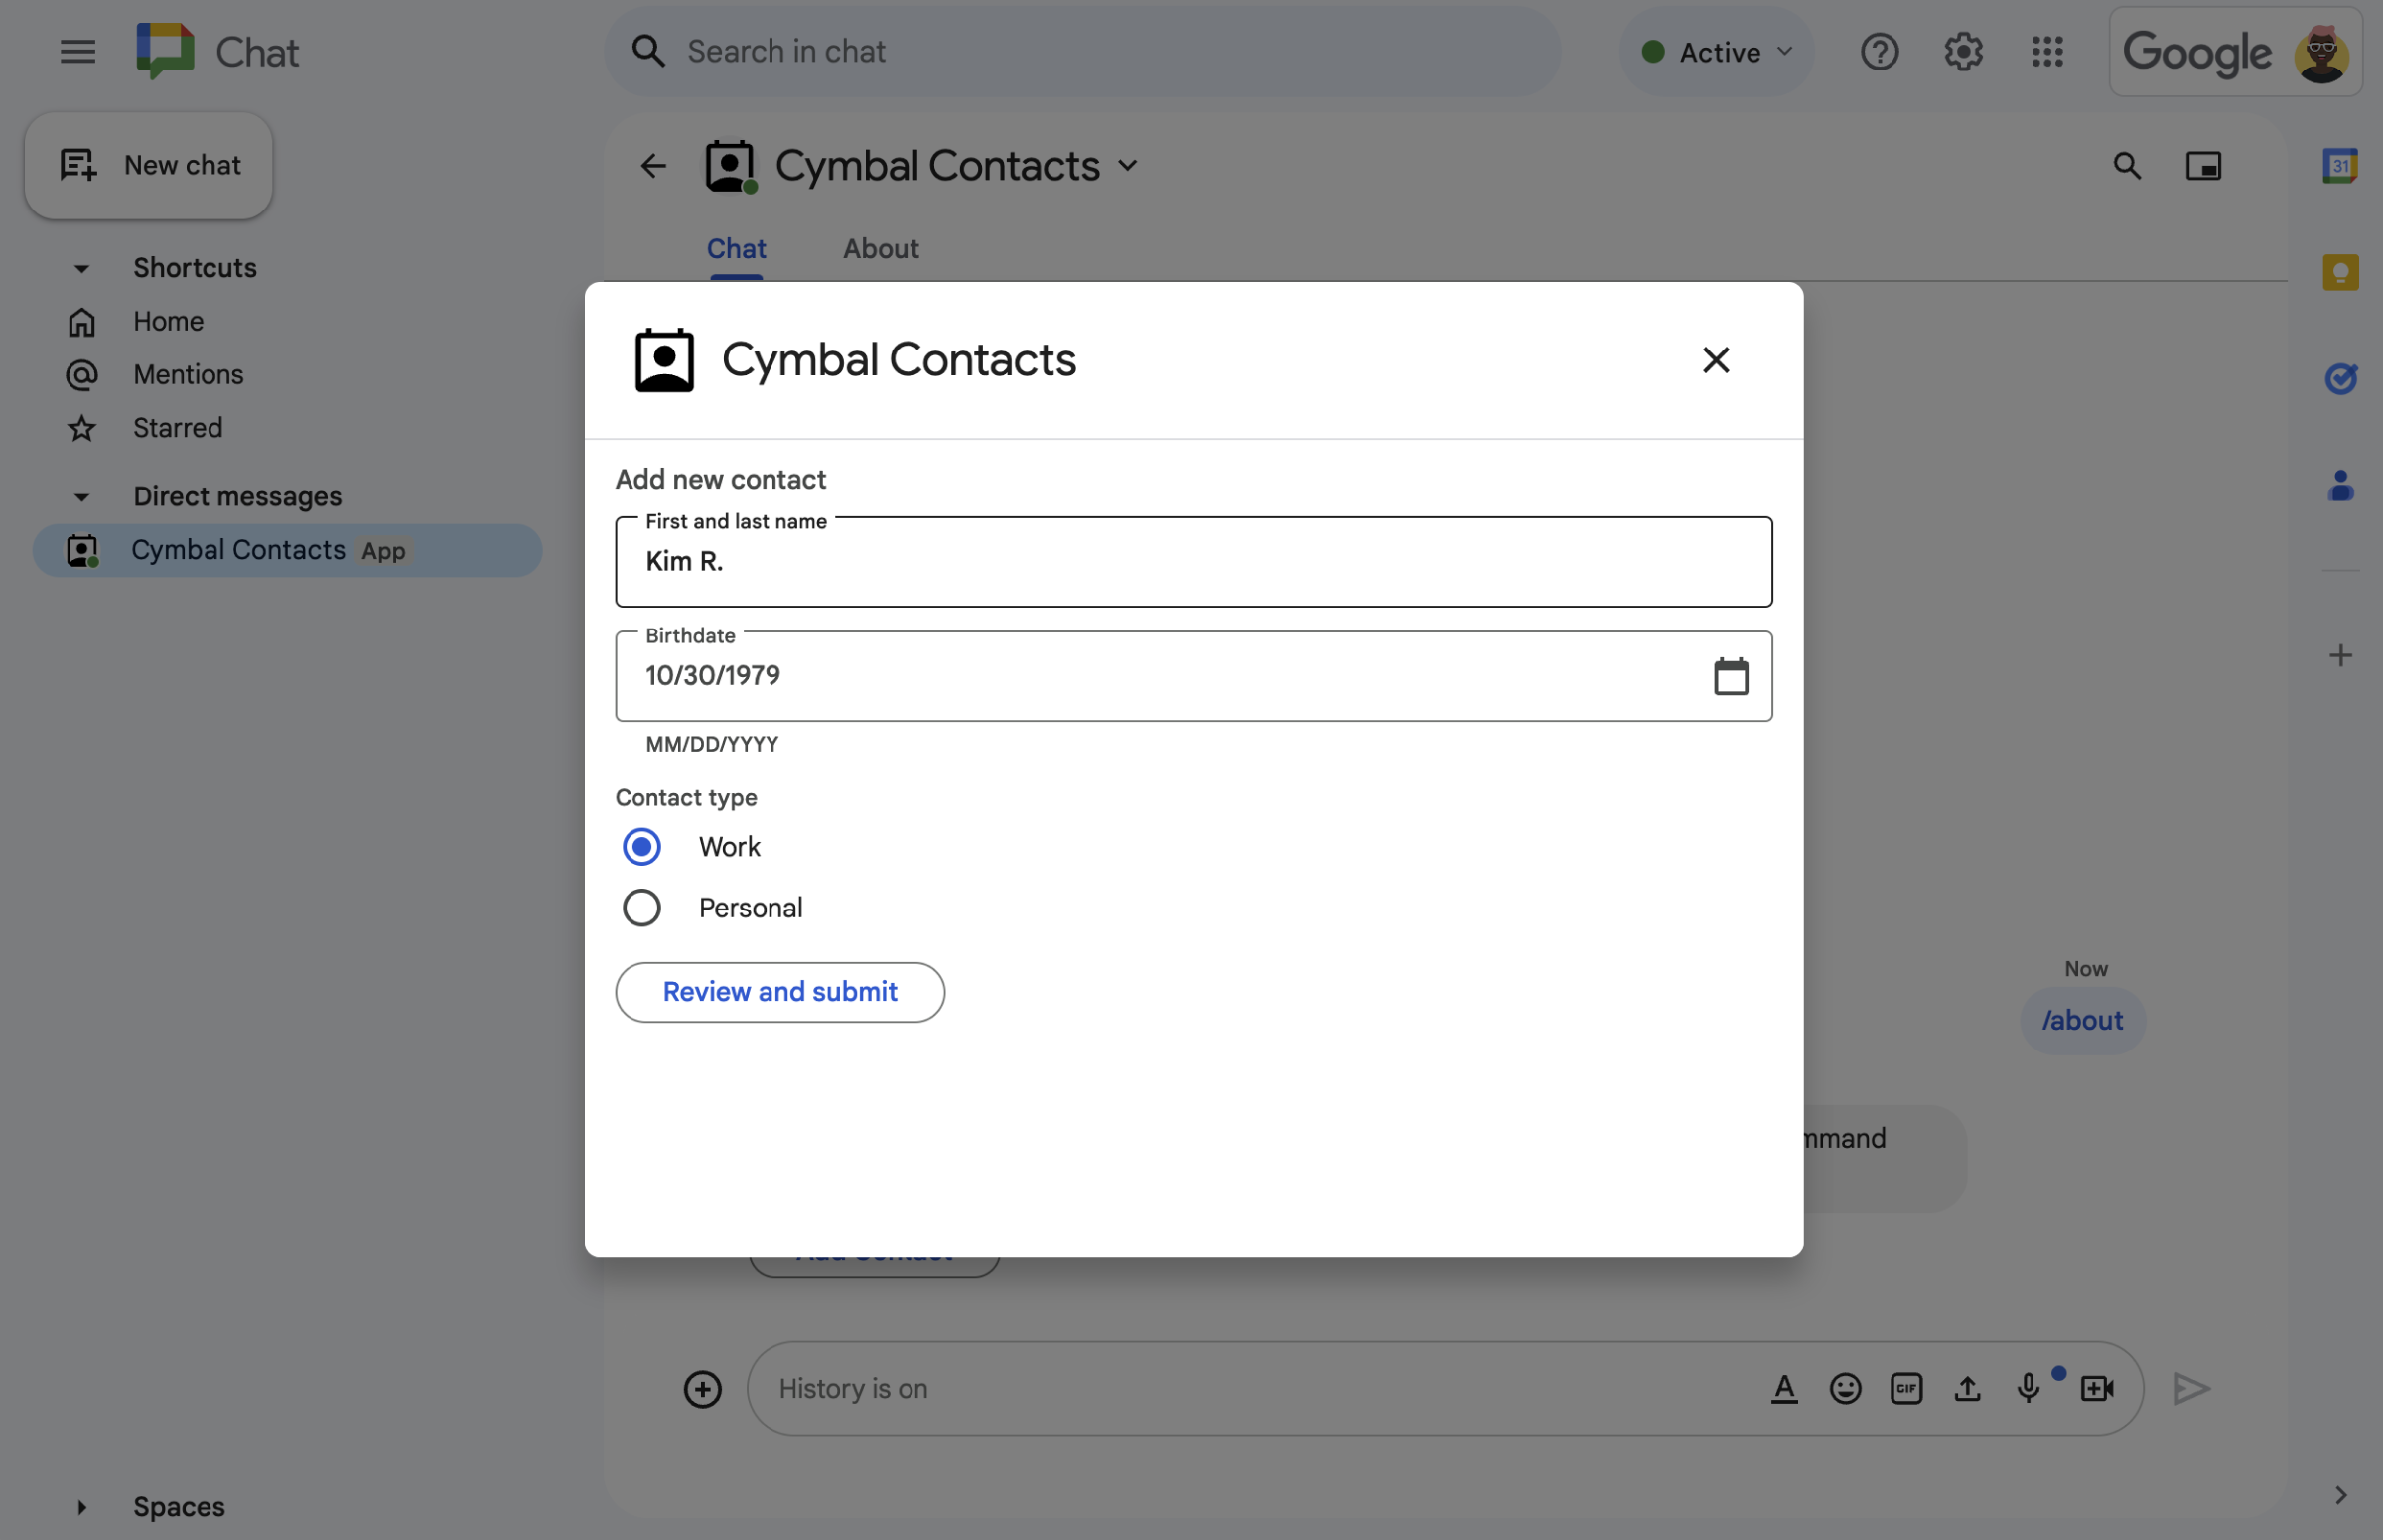
Рисунок 2. Приложение «Чат» открывает диалоговое окно, в котором пользователи могут ввести информацию о контакте. 
Рисунок 3. Приложение «Чат» возвращает диалоговое окно подтверждения, чтобы пользователи могли просмотреть и подтвердить информацию перед отправкой. 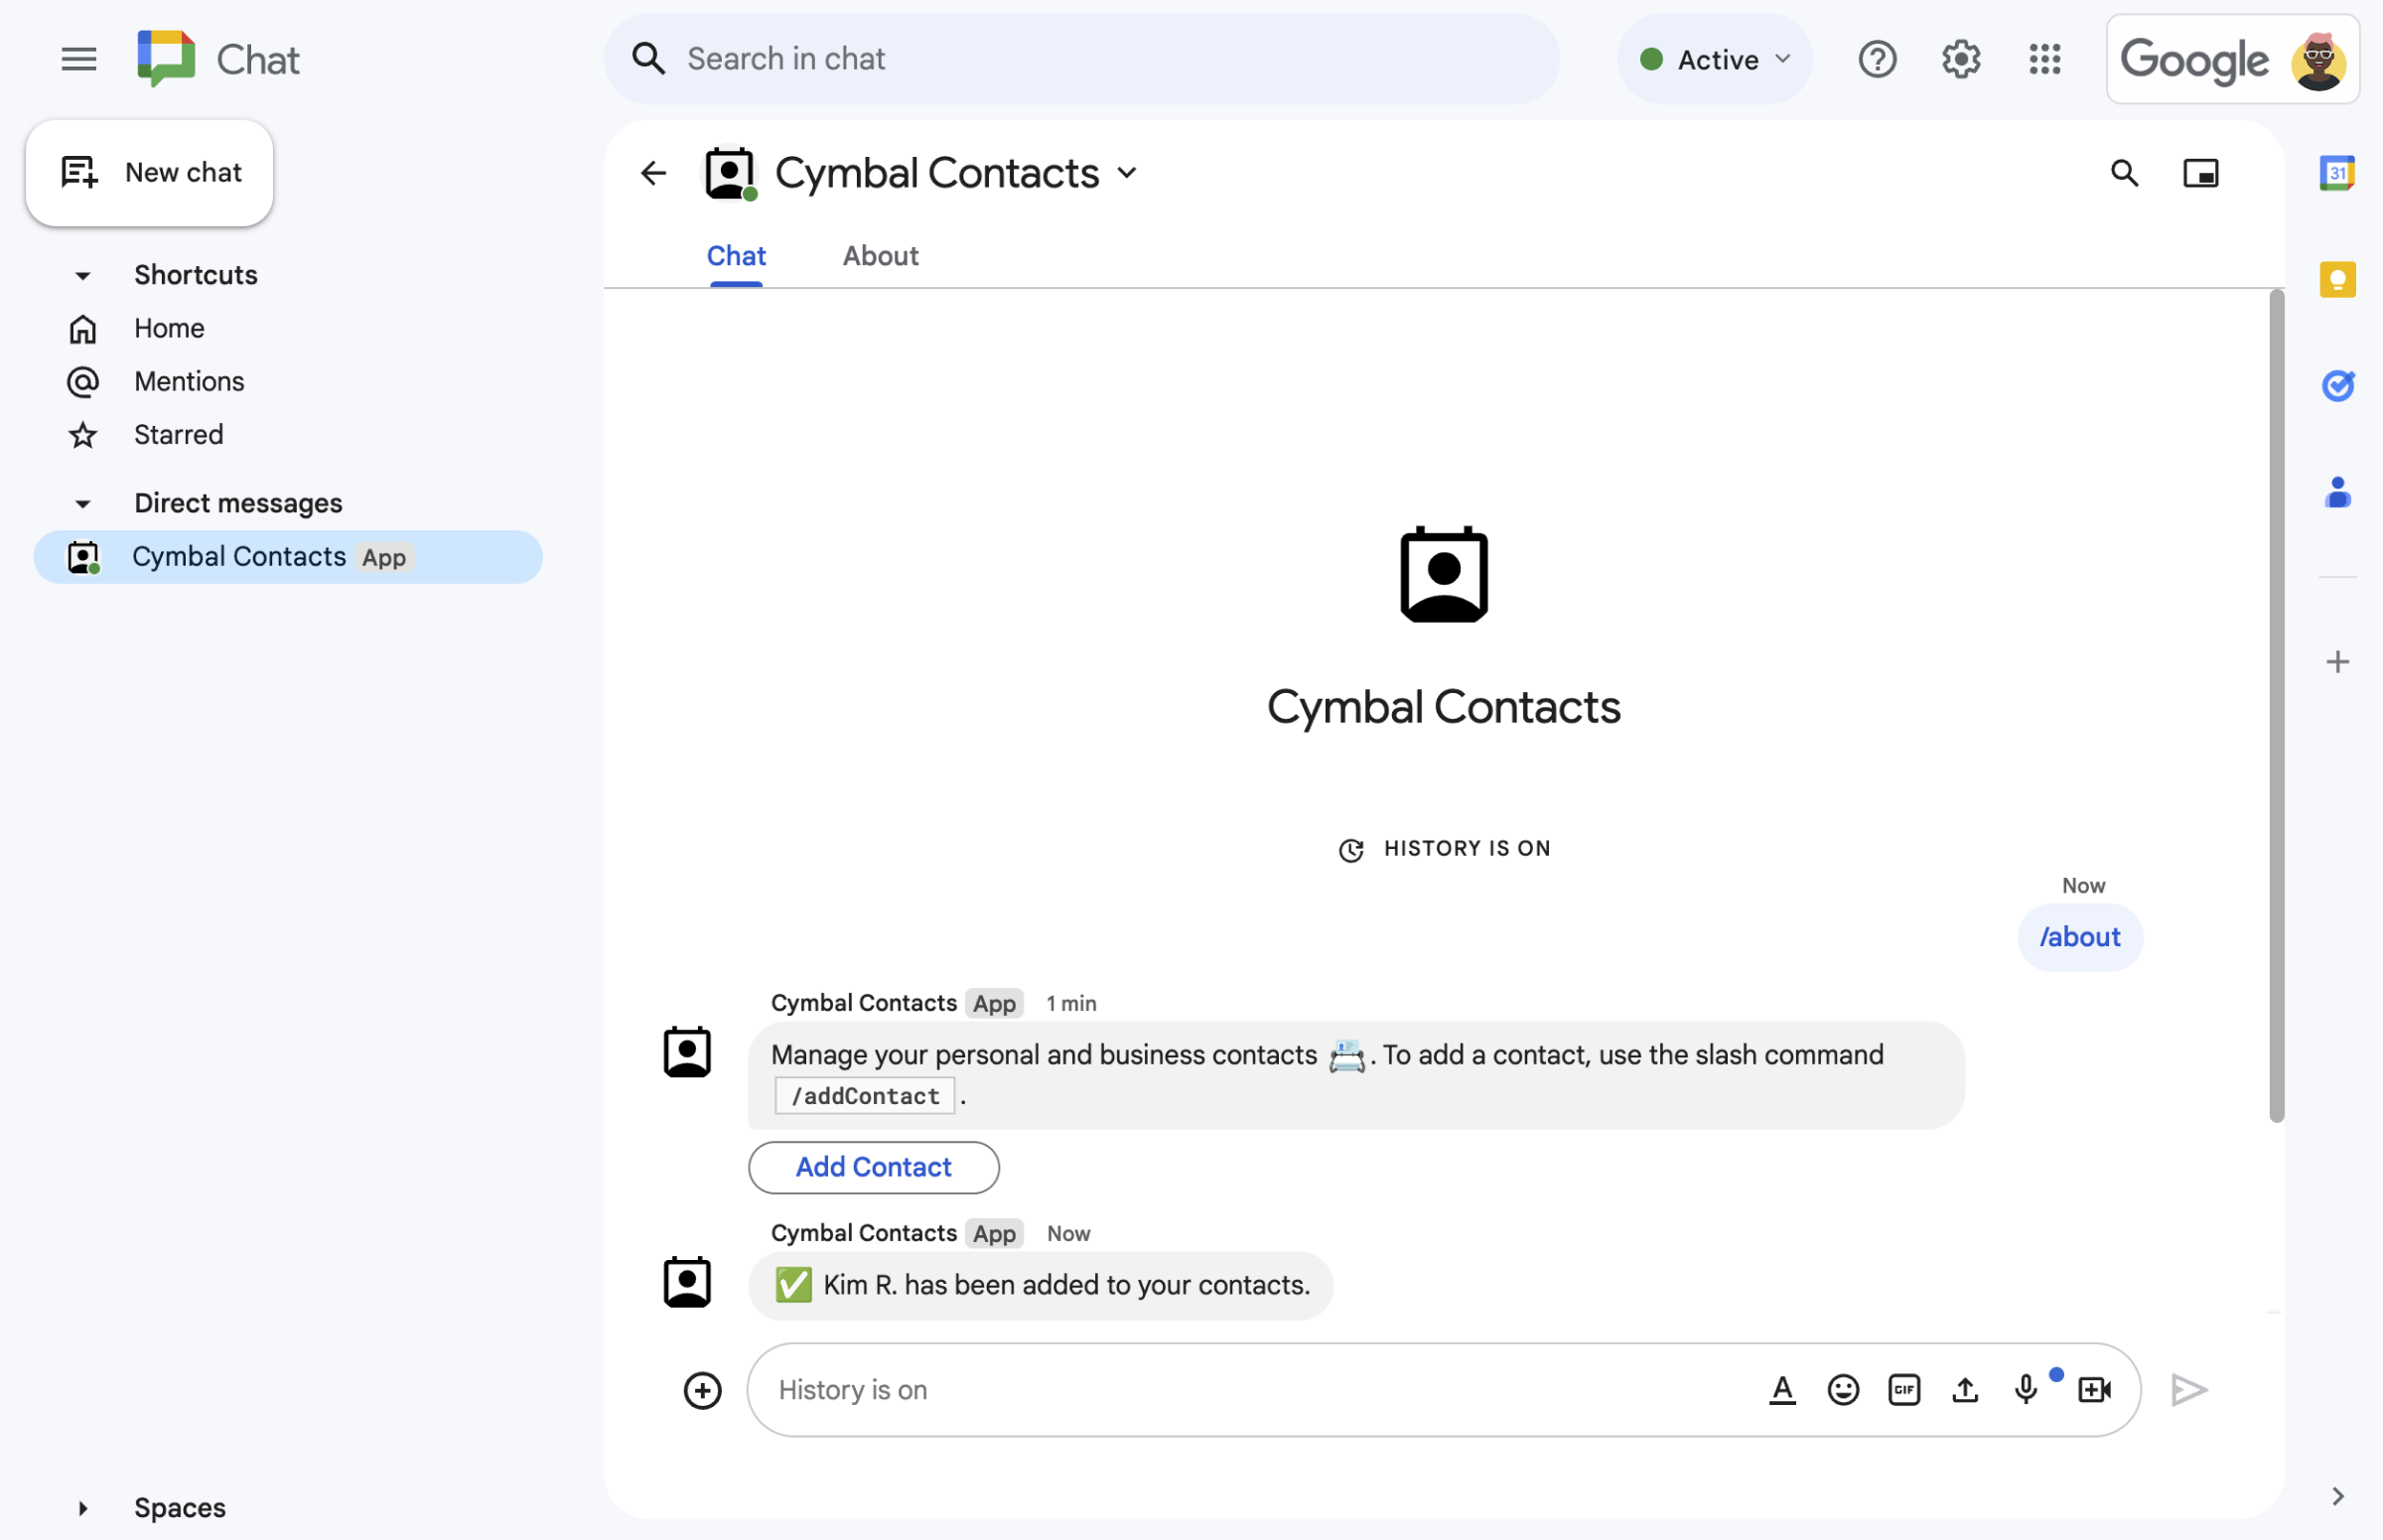
Рисунок 4. После отправки пользователем формы приложение «Чат» отправляет личное текстовое сообщение для подтверждения отправки. 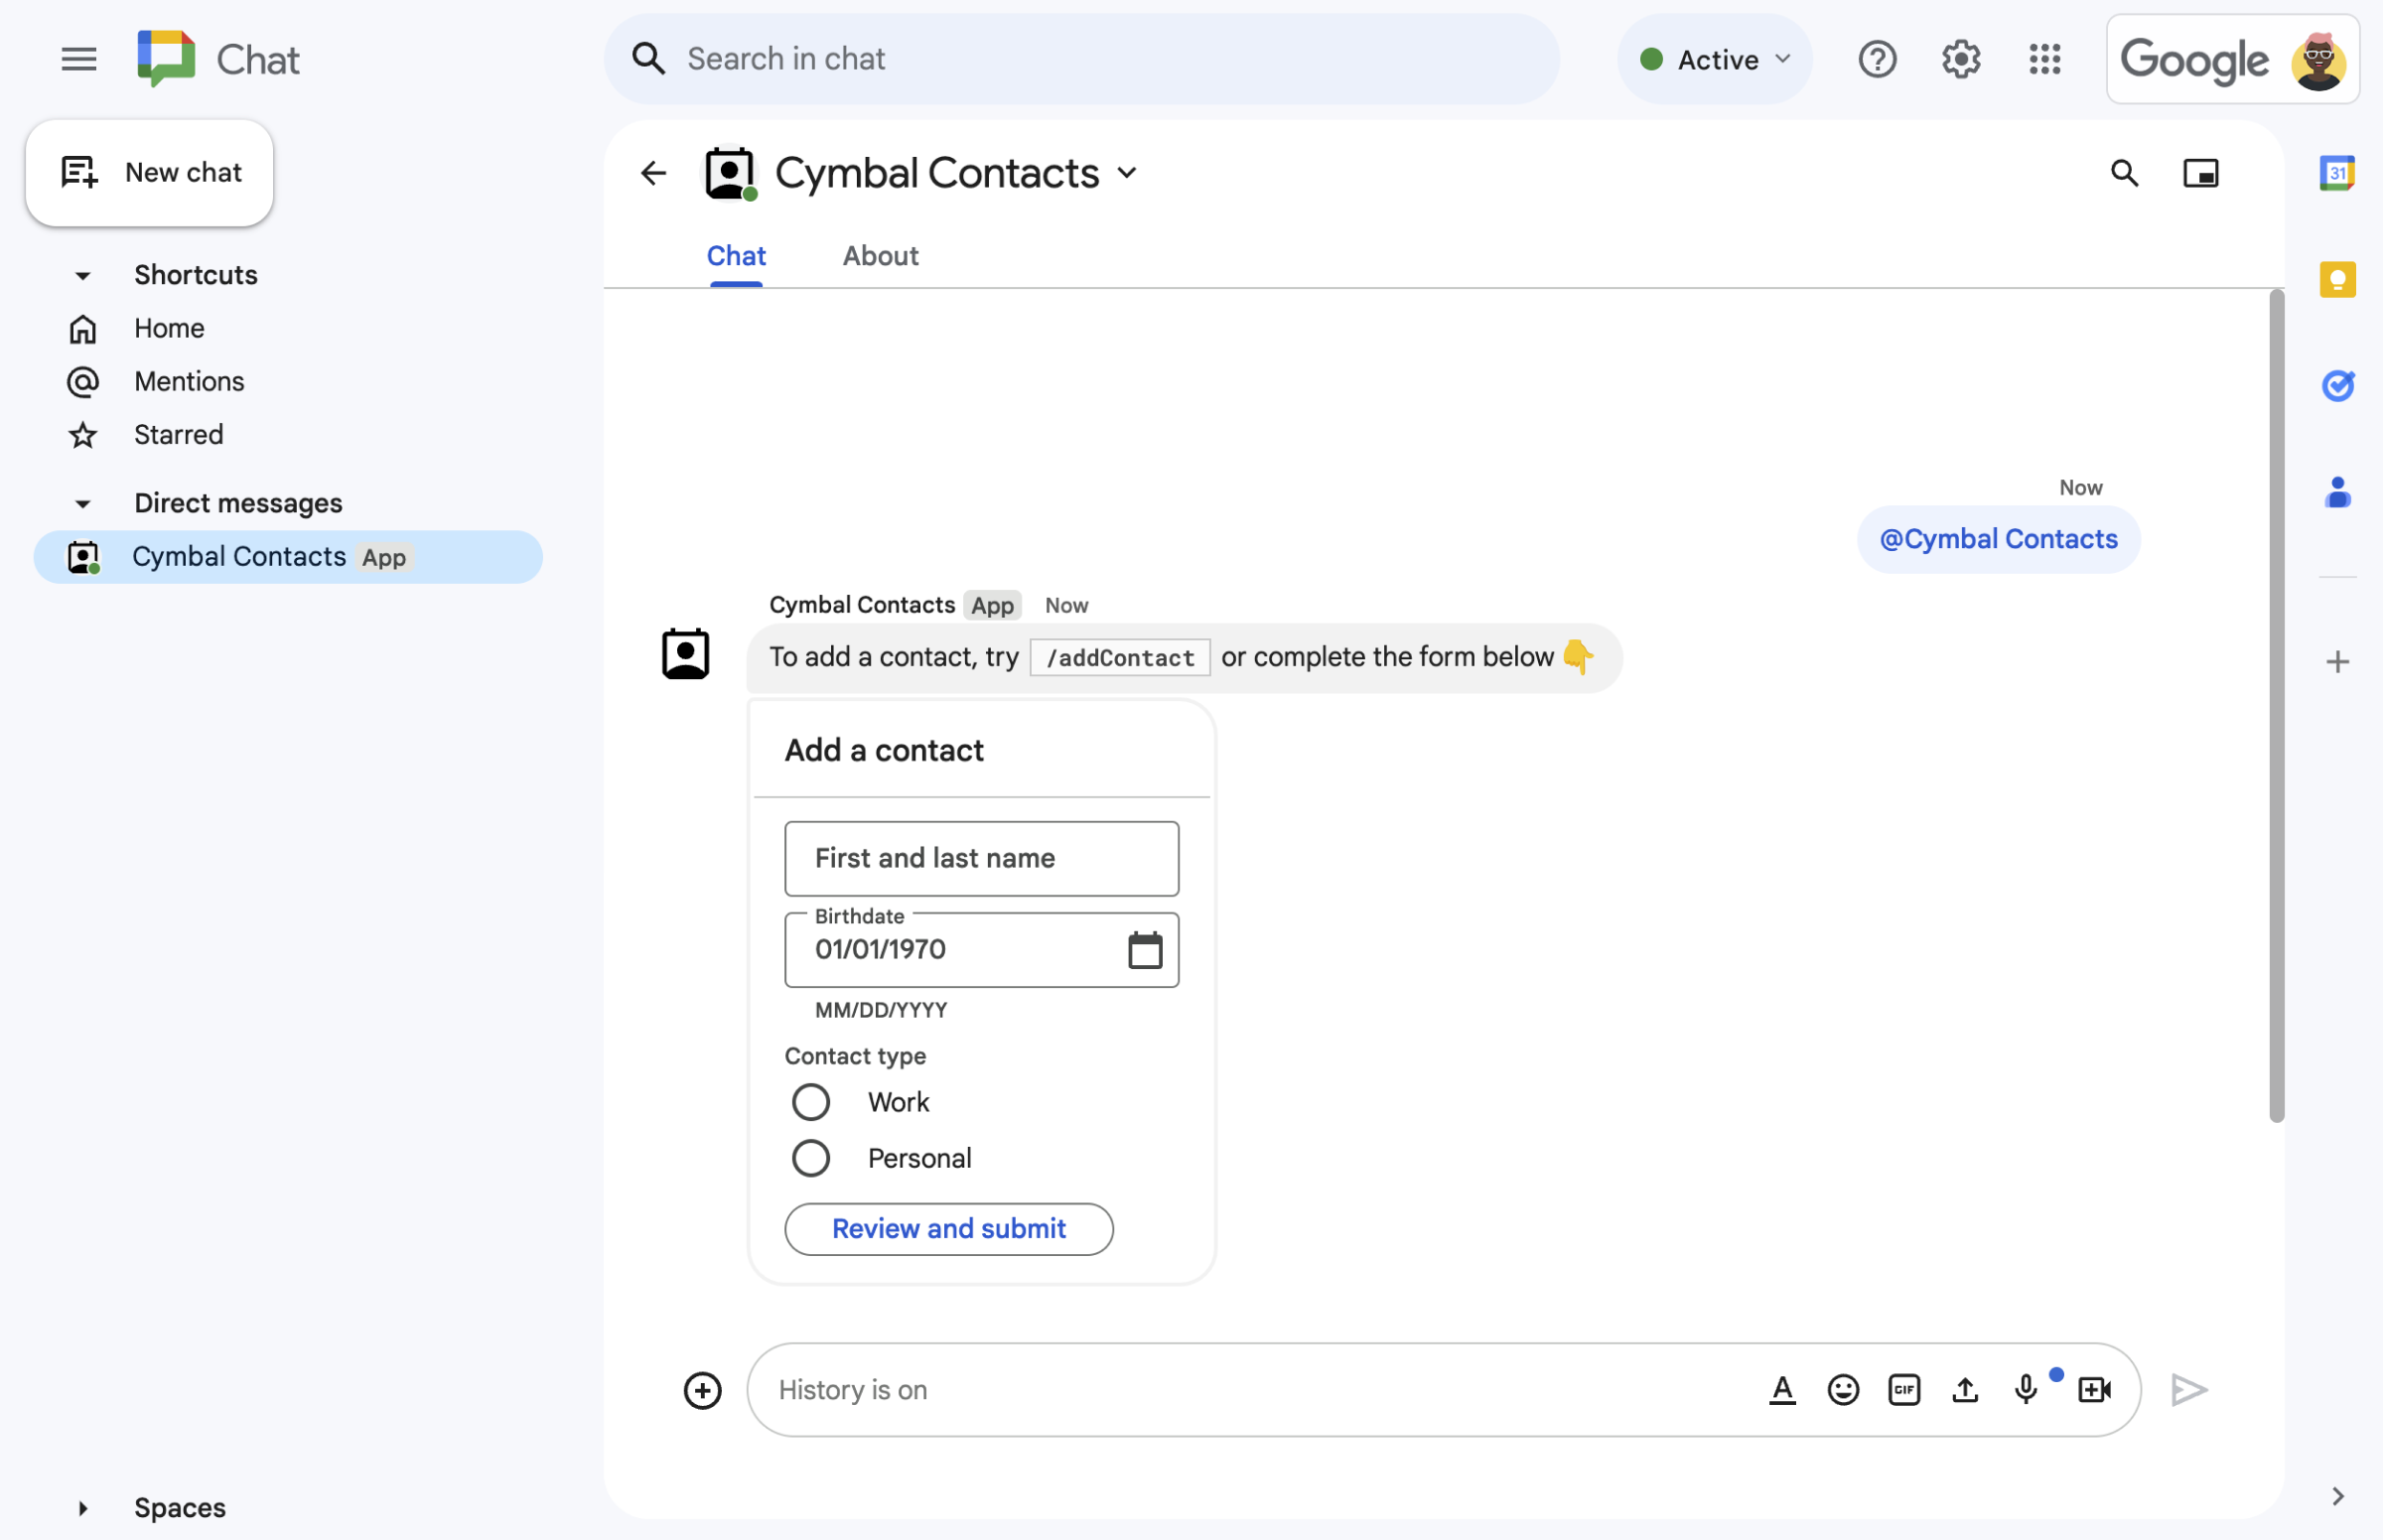
Рисунок 5. Приложение «Чат» также предлагает пользователям добавить контакт из карточки в сообщение.
Предварительные требования
- Корпоративный аккаунт Google Workspace с доступом к Google Chat .
- Создайте проект в Google Cloud .
Цели
- Разрабатывайте и создавайте пользовательские интерфейсы (UI) в виде
cardобъектов и отображайте их в сообщениях и диалогах. - Получать и обрабатывать информацию, которую пользователи предоставляют с помощью виджетов ввода форм .
- Отвечайте на команды сообщениями, содержащими текст, карточки и дополнительные виджеты.
Архитектура
Приложение «Чат» создано на основе Google Apps Script и использует события взаимодействия для обработки и ответа пользователям чата.
Ниже показано, как пользователь обычно взаимодействует с приложением «Чат»:
Пользователь открывает личное сообщение в приложении «Чат» или добавляет приложение «Чат» в уже существующее пространство.
Приложение «Чат» предлагает пользователю добавить контакт, создавая и отображая контактную форму в виде
card. Для отображения контактной формы приложение «Чат» отвечает пользователям следующими способами:- Отвечает на упоминания (@mentions) и личные сообщения с помощью карточки, содержащей форму обратной связи.
- В ответ на команду
/addContactоткрывается диалоговое окно с формой обратной связи. - В ответ на команду
/aboutотправляется текстовое сообщение, содержащее кнопку « Добавить контакт» , при нажатии на которую пользователь может открыть диалоговое окно с формой обратной связи.
При появлении контактной формы пользователь вводит контактную информацию в следующие поля и виджеты:
- Имя и фамилия : виджет
textInput, принимающий строковые значения. - Дата рождения : виджет
dateTimePicker, принимающий только даты. - Тип контакта : виджет
selectionInputс переключателями, позволяющий пользователям выбирать и отправлять одно строковое значение (PersonalилиWork). - Кнопка «Проверить и отправить» : массив
buttonList, содержащий виджетbutton, на который пользователь нажимает для отправки введенных им значений.
- Имя и фамилия : виджет
Приложение Google Chat обрабатывает событие взаимодействия
CARD_CLICKEDдля обработки значений, введенных пользователем, и отображает эти значения в карточке подтверждения.Пользователь просматривает подтверждающую карточку и нажимает кнопку «Отправить» , чтобы завершить ввод контактной информации.
Приложение Google Chat отправляет личное текстовое сообщение, подтверждающее отправку.
Подготовьте окружающую среду
В этом разделе показано, как настроить проект Google Cloud для приложения «Чат».
Откройте свой облачный проект в консоли Google API.
Если проект Cloud, который вы собираетесь использовать в этом примере, еще не открыт, откройте его:
- В консоли Google API перейдите на страницу «Выберите проект» .
- Выберите проект Google Cloud, который хотите использовать. Или нажмите «Создать проект» и следуйте инструкциям на экране. Если вы создаете проект Google Cloud, вам может потребоваться включить оплату для этого проекта .
Настройте аутентификацию и авторизацию.
Для приложений Google Chat необходимо настроить экран согласия OAuth , чтобы пользователи могли авторизовать ваше приложение в приложениях Google Workspace, включая Google Chat.
В этом руководстве вы развернете приложение чата, предназначенное только для тестирования и внутреннего использования, поэтому допустимо использовать информацию-заполнитель для экрана согласия. Перед публикацией приложения чата замените любую информацию-заполнитель реальной информацией.
В консоли Google API перейдите в > Платформа аутентификации Google > Брендинг .
Если вы уже настроили платформу Google Auth, вы можете настроить следующие параметры экрана согласия OAuth в разделах «Брендинг» , «Аудитория» и «Доступ к данным» . Если вы видите сообщение о том, что платформа Google Auth еще не настроена , нажмите «Начать» :
- В разделе «Информация о приложении» в поле «Название приложения» введите
Contact Manager. - В разделе «Электронная почта службы поддержки пользователей» выберите свой адрес электронной почты или соответствующую группу Google.
- Нажмите «Далее» .
- В разделе «Аудитория» выберите «Внутренняя» . Если выбрать «Внутренняя» невозможно, выберите «Внешняя» .
- Нажмите «Далее» .
- В поле «Контактная информация» укажите адрес электронной почты , на который вы сможете получать уведомления об изменениях в вашем проекте.
- Нажмите «Далее» .
- В разделе «Завершить» ознакомьтесь с Политикой использования пользовательских данных сервисов Google API и, если вы согласны, выберите «Я согласен с Политикой использования пользовательских данных сервисов Google API» .
- Нажмите «Продолжить» .
- Нажмите «Создать» .
- Если для типа пользователя выбран «Внешний» , добавьте тестовых пользователей:
- Нажмите «Аудитория» .
- В разделе «Проверка пользователей» нажмите «Добавить пользователей» .
- Введите свой адрес электронной почты и имена других авторизованных пользователей, участвующих в тестировании, затем нажмите «Сохранить» .
- В разделе «Информация о приложении» в поле «Название приложения» введите
Создайте и разверните приложение «Чат».
В следующем разделе вы скопируете и обновите весь проект Apps Script, содержащий весь необходимый код приложения для вашего чат-приложения, поэтому нет необходимости копировать и вставлять каждый файл по отдельности.
При желании вы можете посмотреть весь проект на GitHub.
Вот краткий обзор каждого файла:
-
main.gs Обрабатывает всю логику приложения, включая события взаимодействия, связанные с отправкой пользователями сообщений в приложение чата, нажатием кнопок в сообщениях приложения чата, а также открытием и закрытием диалоговых окон.
Просмотреть код
main.gs-
contactForm.gs Содержит виджеты, получающие данные из форм от пользователей. Эти виджеты ввода данных из форм отображаются в карточках, которые появляются в сообщениях и диалогах.
Просмотреть код
contactForm.gs-
appsscript.json Манифест Apps Script , определяющий и настраивающий проект Apps Script для приложения «Чат».
Просмотреть код
appsscript.json
Создайте проект Apps Script.
Для создания проекта Apps Script:
- Нажмите следующую кнопку, чтобы открыть проект « Управление контактами в Google Chat Apps Script».
Откройте проект - Нажмите на Overview .
- На странице обзора нажмите
 Сделайте копию .
 Назовите свою копию проекта Apps Script:
Нажмите «Копировать» в разделе «Управление контактами» в Google Chat .
В поле «Название проекта» введите
Contact Manager - Google Chat appНажмите «Переименовать» .
В будущем, если вы захотите использовать определенные API Google или опубликовать свое приложение, вам необходимо будет связать свой проект Cloud с проектом Apps Script. В этом руководстве это делать не требуется. Для получения дополнительной информации см. руководство по проектам Google Cloud .
Создайте развертывание Apps Script.
Теперь, когда весь код готов, разверните проект Apps Script. Идентификатор развертывания используется при настройке приложения «Чат» в Google Cloud.
В Apps Script откройте проект приложения «Чат».
Нажмите «Развернуть» > «Новое развертывание» .
Если параметр «Дополнение» еще не выбран, рядом с пунктом «Выберите тип » нажмите «Типы развертывания».
 и выберите «Дополнение» .
В поле «Описание» введите описание для этой версии, например,
Test of Contact Manager.Нажмите «Развернуть» . Apps Script сообщит об успешном развертывании и предоставит идентификатор развертывания.
Нажмите кнопку « Копировать , чтобы скопировать идентификатор развертывания, а затем нажмите «Готово» .
Настройте приложение «Чат» в консоли Google API.
В этом разделе показано, как настроить Google Chat API в консоли Google API, используя информацию о вашем приложении чата, включая идентификатор развертывания, которое вы только что создали из своего проекта Apps Script.
В консоли Google API перейдите > API и сервисы > Включенные API и сервисы > Google Chat API > Конфигурация .
Нажмите «Отключить ». Создайте это приложение чата как надстройку для Google Workspace . Откроется диалоговое окно с запросом подтверждения. В диалоговом окне нажмите «Отключить» .
В поле «Название приложения» введите
Contact Manager.В поле "URL аватара" введите
https://developers.google.com/chat/images/contact-icon.png.В поле «Описание» введите
Manage your personal and business contacts.Переведите переключатель «Включить интерактивные функции» в положение «Вкл.».
В разделе «Функциональность» выберите «Присоединяйтесь к пространствам и групповым беседам» .
В разделе «Настройки подключения» выберите «Apps Script» .
В поле «Идентификатор развертывания» вставьте идентификатор развертывания Apps Script, который вы скопировали в предыдущем разделе при создании развертывания Apps Script.
В разделе «Команды» настройте команды с косой чертой
/aboutи/addContact:- Нажмите «Добавить команду с косой чертой» , чтобы задать первую команду с косой чертой.
- В поле «Имя» введите
About. - В поле «Идентификатор команды» введите
1. - В поле «Описание» введите «
Learn how to use this Chat app to manage your contacts. - В поле «Тип команды» выберите
Slash command. - В командной строке (слэш) введите
/about. - Выберите «Открыть диалоговое окно» .
- Нажмите «Готово» .
- Нажмите «Добавить команду» , чтобы настроить еще одну команду, использующую косую черту.
- В поле «Имя» введите
Add a contact. - В поле «Идентификатор команды» введите
2. - В поле «Описание» введите
Submit information about a contact. - В поле «Тип команды» выберите
Slash command. - В командной строке введите
/addContact. - Выберите «Открыть диалоговое окно» .
- Нажмите «Готово» .
В разделе «Видимость» установите флажок « Сделать это приложение чата доступным для определенных людей и групп в YOUR DOMAIN и введите свой адрес электронной почты.
В разделе «Журналы» выберите « Записывать ошибки в журнал» и перейдите в раздел «Ведение журнала» .
Нажмите «Сохранить» . Появится сообщение о сохранении конфигурации.
Приложение «Чат» готово к установке и тестированию в приложении «Чат».
Протестируйте приложение для чата
Чтобы протестировать приложение «Чат», откройте личное сообщение в приложении «Чат» и отправьте сообщение:
Откройте Google Chat, используя учетную запись Google Workspace, которую вы указали при добавлении себя в качестве доверенного тестировщика.
- Нажмите новый чат» .
- В поле «Добавить 1 или более человек» введите название вашего приложения для чата.
Выберите ваше приложение для чата из результатов поиска. Откроется личное сообщение.
В новом личном сообщении в приложении «Чат» введите
/addContactи нажмите Enter .В открывшемся диалоговом окне введите контактную информацию:
- В текстовых полях «Имя» и «Фамилия» введите имя.
- В окне выбора даты рождения выберите нужную дату.
- В разделе «Тип контакта» выберите переключатель «Рабочий» или «Личный» .
Нажмите «Просмотреть и отправить» .
В диалоговом окне подтверждения проверьте предоставленную информацию и нажмите «Отправить» . Приложение «Чат» ответит текстовым сообщением:
✅ CONTACT NAME has been added to your contacts.При желании вы также можете протестировать и отправить форму обратной связи следующими способами:
- Используйте команду
/about. Приложение чата ответит текстовым сообщением и дополнительной кнопкой виджета «Add a contact. Нажав на эту кнопку, вы откроете диалоговое окно с формой обратной связи. - Отправьте в приложение «Чат» прямое сообщение без слэша, например,
Hello. Приложение «Чат» ответит текстом и карточкой, содержащей форму обратной связи.
- Используйте команду
Уборка
Чтобы избежать списания средств с вашего аккаунта Google Cloud за ресурсы, использованные в этом руководстве, мы рекомендуем удалить проект Cloud.
- В консоли Google API перейдите на страницу «Управление ресурсами» > IAM и администрирование > Управление ресурсами .
- В списке проектов выберите проект, который хотите удалить, и нажмите кнопку «Удалить .
- В диалоговом окне введите идентификатор проекта, а затем нажмите «Завершить» , чтобы удалить проект.
Связанные темы
- Реагировать на команды
- Сбор и обработка информации от пользователей Google Chat
- Открыть интерактивные диалоги
- Ознакомьтесь с другими примерами приложений Google Chat.