
این آموزش سریع به شما آموزش میدهد که چگونه با استفاده از Google Apps Script یک گام سفارشی برای Workspace Flows ایجاد کنید. این گام سفارشی دو عدد و یک عملیات حسابی را به عنوان ورودی دریافت میکند، محاسبه را انجام میدهد و نتیجه را در خروجی نمایش میدهد.
اهداف
- با استفاده از اسکریپت Google Apps، یک گام سفارشی برای Workspace Flows ایجاد کنید.
- مرحله سفارشی را در سازمان Google Workspace خود مستقر کنید.
- مرحله جریان سفارشی را در Workspace Flows آزمایش کنید.
پیشنیازها
- یک حساب گوگل با دسترسی به Workspace Flows از طریق برنامه Gemini Alpha .
اسکریپت را تنظیم کنید
برای تنظیم اسکریپت، یک پروژه جدید Apps Script ایجاد کنید و سپس آن را به پروژه Cloud خود متصل کنید.
برای باز کردن پروژه اسکریپت برنامههای شروع سریع ماشین حساب Flows calculator، روی دکمه زیر کلیک کنید.
روی نمای کلی کلیک کنید.
در صفحه مرور کلی، کلیک کنید
 یک کپی تهیه کنید .
نام نسخه خود از پروژه Apps Script را بنویسید:
روی شروع سریع کپی محاسبهگر جریانها کلیک کنید.
در عنوان پروژه ،
Flows calculator quickstartتایپ کنید.روی تغییر نام کلیک کنید.
اختیاری: کد شروع سریع را بررسی کنید
در بخش قبلی، شما کل یک پروژه Apps Script را که شامل تمام کد برنامه مورد نیاز برای مرحله سفارشی جریان شما است، کپی کردید، بنابراین نیازی به کپی و چسباندن تک تک فایلها نیست.
در صورت تمایل، میتوانید هر فایلی را که در بخش قبل کپی کردهاید، اینجا مرور کنید:
-
appsscript.json فایل مانیفست. یک فایل JSON ویژه که اطلاعات اولیه پروژه را که Apps Script برای اجرای اسکریپت به آن نیاز دارد، مشخص میکند.
مشاهده کد
appsscript.json{ "timeZone": "America/Los_Angeles", "exceptionLogging": "STACKDRIVER", "runtimeVersion": "V8", "addOns": { "common": { "name": "Calculator", "logoUrl": "https://www.gstatic.com/images/branding/productlogos/calculator_search/v1/web-24dp/logo_calculator_search_color_1x_web_24dp.png", "useLocaleFromApp": true }, "flows": { "workflowElements": [ { "id": "actionElement", "state": "ACTIVE", "name": "Calculate", "description": "Asks the user for two values and a math operation, then performs the math operation on the values and outputs the result.", "workflowAction": { "inputs": [ { "id": "value1", "description": "value1", "cardinality": "SINGLE", "dataType": { "basicType": "INTEGER" } }, { "id": "value2", "description": "value2", "cardinality": "SINGLE", "dataType": { "basicType": "INTEGER" } }, { "id": "operation", "description": "operation", "cardinality": "SINGLE", "dataType": { "basicType": "STRING" } } ], "outputs": [ { "id": "result", "description": "Calculated result", "cardinality": "SINGLE", "dataType": { "basicType": "INTEGER" } }, { "id": "log", "description": "Logged result of flow event.", "cardinality": "SINGLE", "dataType": { "basicType": "STRING" } } ], "onConfigFunction": "onConfigCalculateFunction", "onExecuteFunction": "onExecuteCalculateFunction" } } ] } } }
-
Calculator.gs یک مرحله سفارشی برای جریانهای فضای کاری گوگل تعریف میکند. این مرحله که "محاسبه" نام دارد، دو عدد و یک عملیات را به عنوان ورودی دریافت کرده و نتیجه محاسبه را برمیگرداند.
مشاهده کد
Calculator.gs/** * This script defines a custom step for Google Workspace Flows. * The step, named "Calculate", takes two numbers and an operation as input * and returns the result of the calculation. * * The script includes functions to: * * 1. Define the configuration UI for the step using Card objects: * * - `onConfigCalculateFunction()`: Generates the main configuration card. * - Helper functions like `pushCard()`, `saveButton()` to build card components. * * 2. Handle the execution of the step. * * - `onExecuteCalculateFunction()`: Retrieves inputs, performs the calculation, * and returns outputs. * * To learn more, see the following quickstart guide: * https://developers.google.com/workspace/add-ons/workflows/quickstart */ /** * Creates an action response to push a new card onto the card stack. * * This function generates an action object that, when returned, causes the * provided card to be pushed onto the card stack, making it the currently * displayed card in the configuration UI. * @param {Object} card The Card object to push. * @return {Object} The action response object. */ function pushCard(card) { return { "action": { "navigations": [{ "push_card": card } ] } }; } /** * Creates an action response to update the currently displayed card. * * This function generates an action object that, when returned, causes the * currently displayed card to be replaced with the provided card in the * configuration UI. * @param {Object} card The Card object to update. * @return {Object} The render actions object. */ function updateCard(card) { return { "render_actions": { "action": { "navigations": [{ "update_card": card } ] } } }; } /** * Creates a button configuration object for saving the workflow. * * This function generates a button definition that, when clicked, triggers * a save action for the current workflow configuration. * @return {Object} The button widget object. */ function saveButton() { return { "text": "Save", "onClick": { "hostAppAction" : { "workflowAction" : { "saveWorkflowAction" : {} } } }, }; } /** * Creates a button configuration object for a refresh action. * * This function generates a button definition that, when clicked, triggers * a function to refresh the current card. * @param {string} functionName The name of the Apps Script function to call on click. * @return {Object} The button widget object. */ function refreshButton(functionName) { return { "text": "Refresh", "onClick": { "action" : { "function" : functionName } }, }; } /** * Generates and displays a configuration card for the sample calculation action. * * This function creates a card with input fields for two values and a dropdown * for selecting an arithmetic operation. The card also includes a "Save" * button to save the action configuration for the workflow. * * The input fields are configured to let the user select outputs from previous * workflow steps as input values using the `hostAppDataSource` property. * This function is called when the user adds or edits the "Calculate" step in the Flows UI. * @return {Object} The action response object containing the card to display. */ function onConfigCalculateFunction() { var card = { "sections": [ { "header": "Action sample: Calculate", "widgets": [ { "textInput": { "name": "value1", "label": "First value", "hostAppDataSource" : { "workflowDataSource" : { "includeVariables" : true } } } }, { "selectionInput": { "name": "operation", "label": "Operation", "type": "DROPDOWN", "items": [ { "text": "+", "value": "+", }, { "text": "-", "value": "-", }, { "text": "x", "value": "x", }, { "text": "/", "value": "/", } ] } }, { "textInput": { "name": "value2", "label": "Second value", "hostAppDataSource" : { "workflowDataSource" : { "includeVariables" : true } } } } ] } ] }; return pushCard(card); } /** * Gets an integer value from variable data, handling both string and integer formats. * * This function attempts to extract an integer value from the provided variable data. * It checks if the data contains string values and, if so, parses the first string * as an integer. If integer values are present, it returns the first integer. * @param {Object} variableData The variable data object from the event. * @return {number} The extracted integer value. */ function getIntValue(variableData) { if (variableData.stringValues) { return parseInt(variableData.stringValues[0]); } return variableData.integerValues[0]; } /** * Executes the calculation action based on the inputs from a workflow event. * * This function retrieves input values ("value1", "value2") and the "operation" * from the workflow event, performs the calculation, and returns the "result" and * "log" as output variables. * This function is called when the workflow execution reaches this custom step. * @param {Object} event The event object passed by the Flows runtime. * @return {Object} The output variables object. */ function onExecuteCalculateFunction(event) { console.log("output: " + JSON.stringify(event)); var calculatedValue = 0; var value1 = getIntValue(event.workflow.actionInvocation.inputs["value1"]); var value2 = getIntValue(event.workflow.actionInvocation.inputs["value2"]); var operation = event.workflow.actionInvocation.inputs["operation"].stringValues[0]; if (operation == "+") { calculatedValue = value1 + value2; } else if (operation == "-") { calculatedValue = value1 - value2; } else if (operation == "x") { calculatedValue = value1 * value2; } else if (operation == "/") { calculatedValue = value1 / value2; } var renderAction = { "hostAppAction" : { "workflowAction" : { "returnOutputVariablesAction" : { "variableValues" : [ { "variableId": "result", "integerValues": [ calculatedValue ] } ] } } } }; }
مرحله خود را مستقر و آزمایش کنید
برای آزمایش مرحله خود، یک استقرار آزمایشی برای افزونه خود تنظیم کنید، مرحله را به یک جریان اضافه کنید و سپس جریان را اجرا کنید.
یک استقرار آزمایشی برای افزونه خود تنظیم کنید:
- پروژه اسکریپت را در ویرایشگر Apps Script باز کنید.
- روی استقرار > آزمایش استقرارها کلیک کنید.
- روی نصب کلیک کنید.
- در پایین، روی «تمام» کلیک کنید.
شما میتوانید با اشتراکگذاری پروژه Apps Script با حساب کاربری سایر کاربران، به آنها اجازه دهید افزونه را آزمایش کنند (دسترسی ویرایش لازم است). سپس از کاربران بخواهید مراحل قبلی را دنبال کنند.
پس از نصب، افزونه بلافاصله در Flows در دسترس قرار میگیرد. ممکن است لازم باشد Flows را قبل از نمایش افزونه، بهروزرسانی کنید. همچنین قبل از استفاده از افزونه، باید آن را تأیید کنید.
برای کسب اطلاعات بیشتر در مورد استقرارهای آزمایشی، به نصب یک افزونه منتشر نشده مراجعه کنید.
جریانهای باز.
جریانی ایجاد کنید که شامل مراحل شما باشد:
- روی جریان جدید کلیک کنید.
- نحوه شروع جریان را انتخاب کنید. هنگام آزمایش یک مرحله، یک شروعکننده انتخاب کنید که بتوانید خودتان آن را تنظیم کنید، مانند ارسال یک ایمیل به خودتان. اگر مرحله شما به یک متغیر ورودی نیاز دارد، متغیر ورودی را به عنوان بخشی از خروجی شروعکننده پیکربندی کنید.
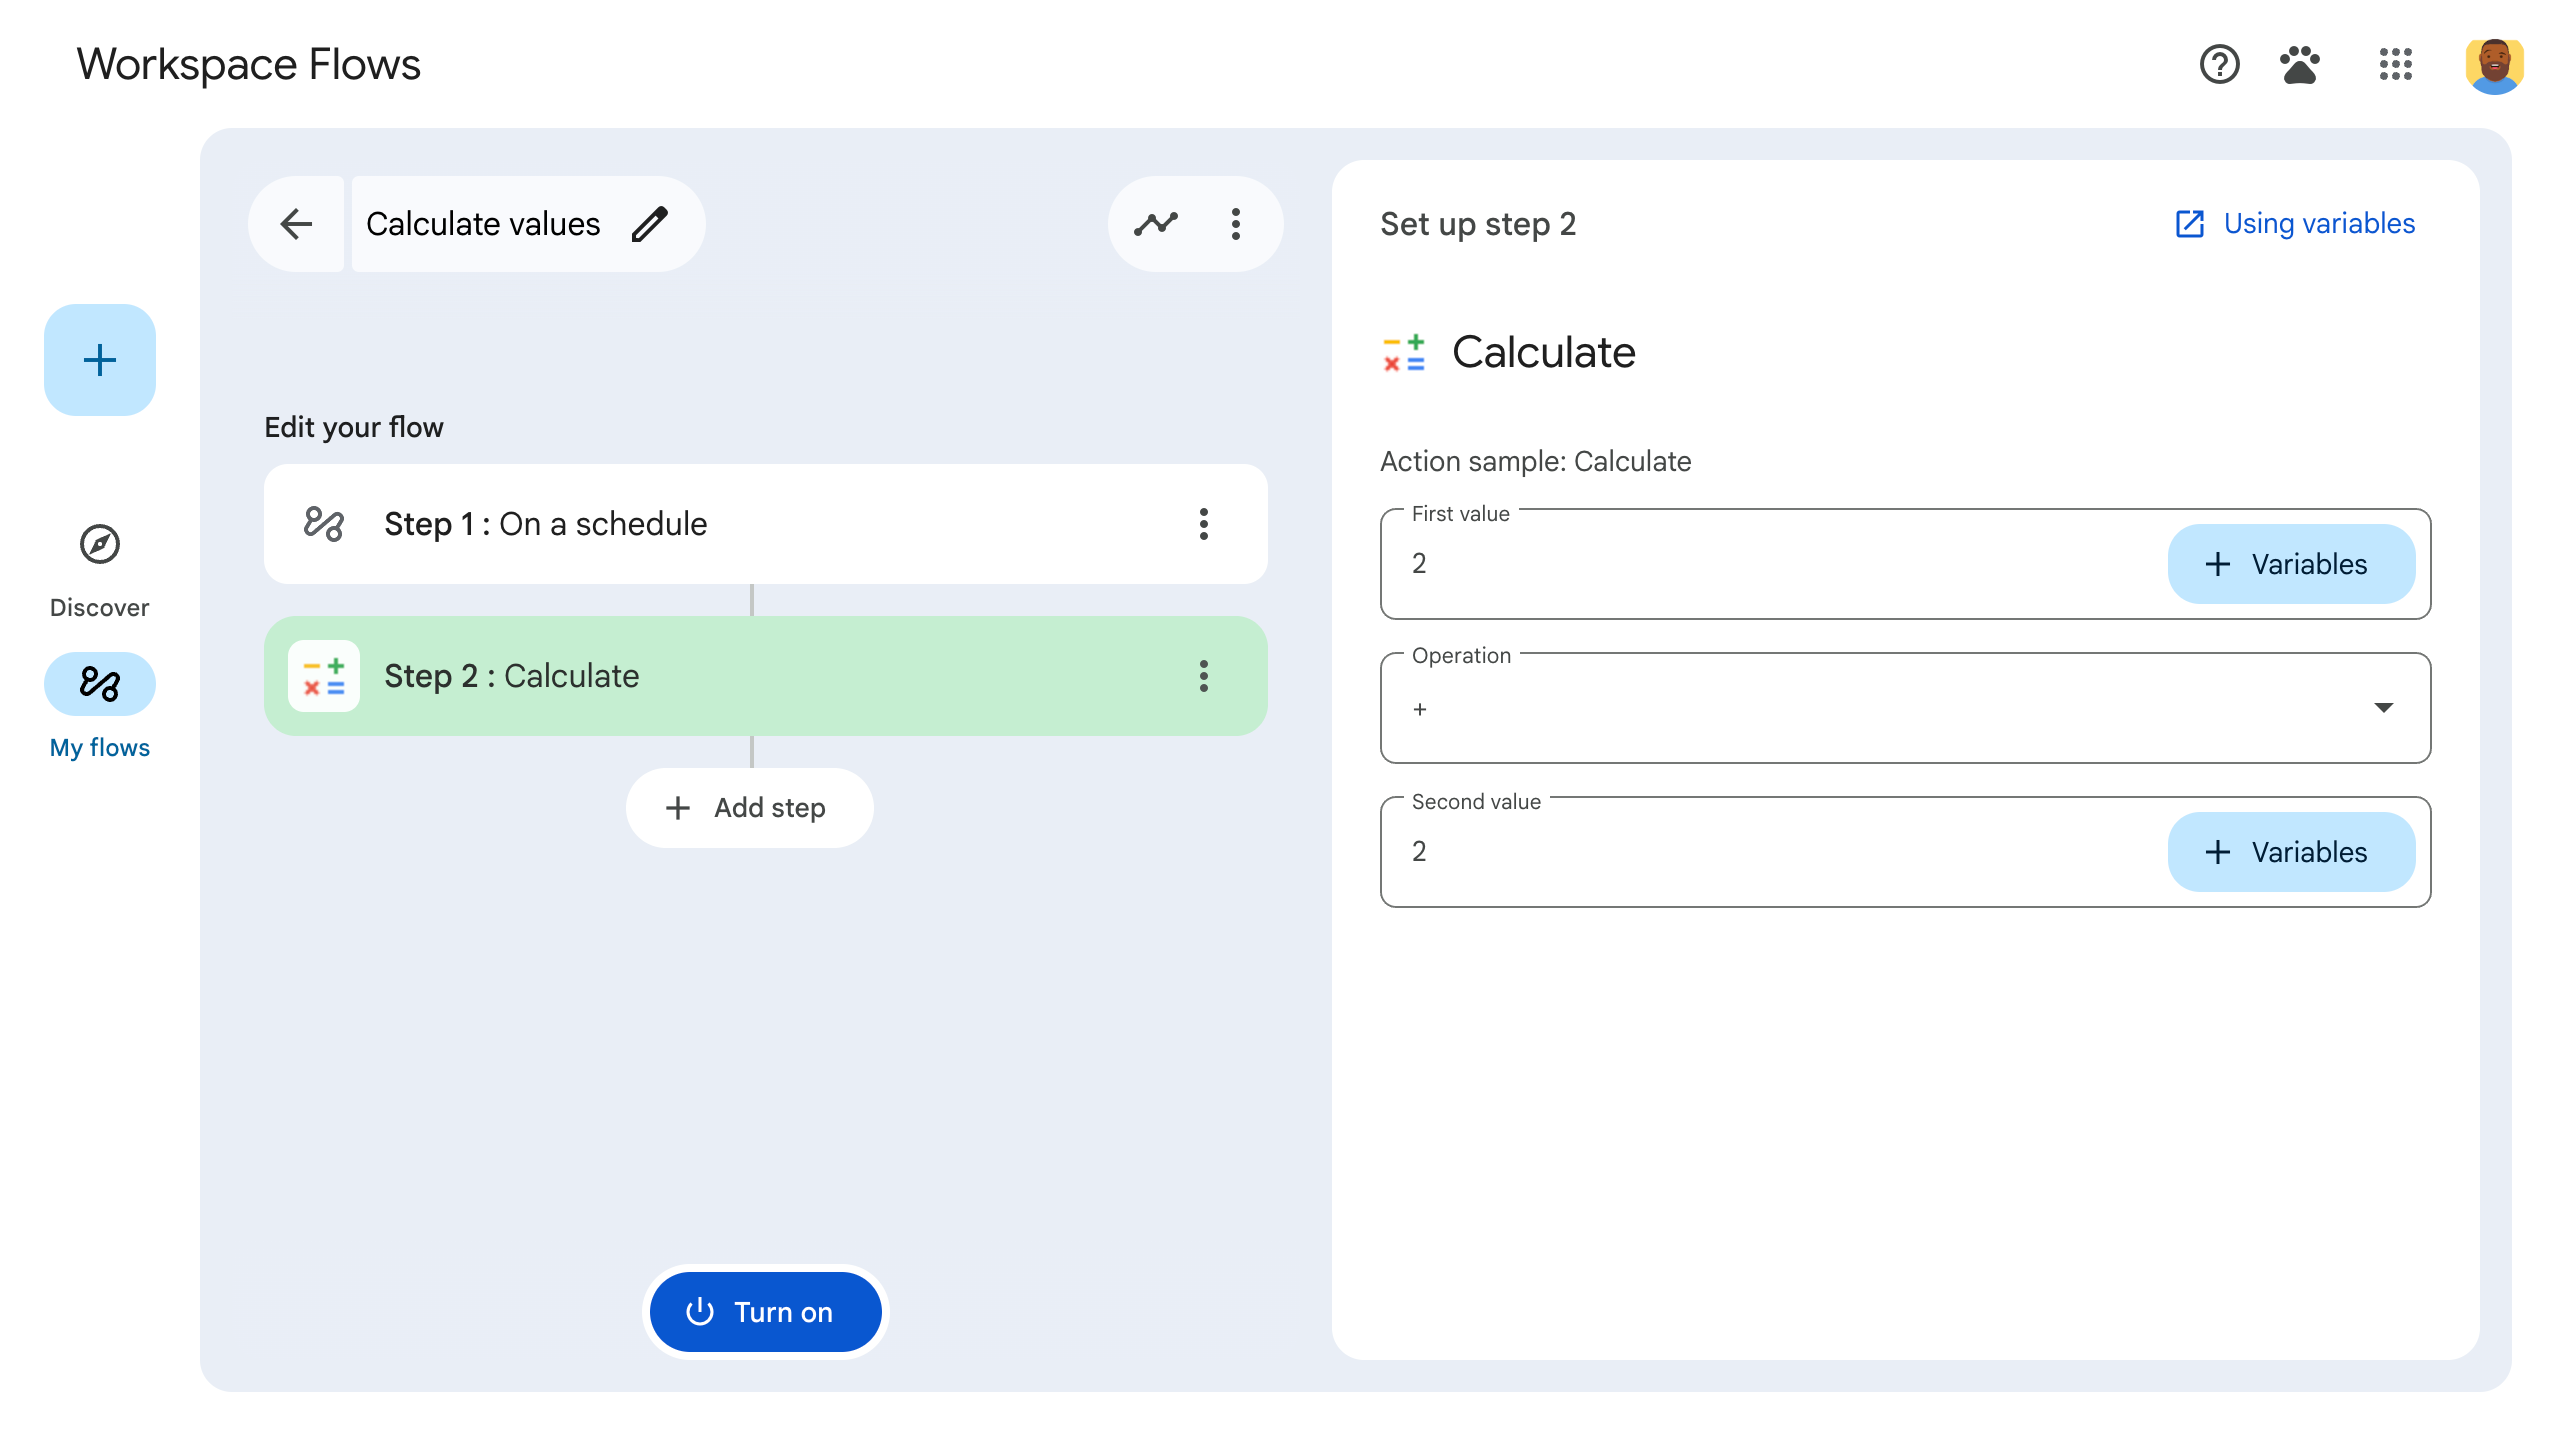
- روی مرحله کلیک کنید. مرحلهای را که ساخته یا بهروزرسانی کردهاید، با نام محاسبه ، انتخاب کنید.
- مرحله خود را پیکربندی کنید. برای مرحله محاسبه، دو مقدار و یک عملیات ریاضی انتخاب کنید. مرحله به طور خودکار ذخیره میشود.
- برای آزمایش خروجی مرحله خود، یک مرحله دیگر اضافه کنید. برای مثال، برای افزودن خروجی به یک پیام ایمیل، میتوانید مرحله ارسال پیام Gmail را اضافه کنید. در پیام ، روی متغیرها کلیک کنید و خروجی مرحله خود را انتخاب کنید. برای مرحله محاسبه، گزینه متغیرها > مرحله 2: نتیجه محاسبه شده > نتیجه محاسبه شده را انتخاب کنید. متغیر به صورت یک تراشه در فیلد پیام ظاهر میشود.
- روی روشن کردن کلیک کنید. جریان شما آماده اجرا است.
با شروع جریان خود، جریان را به جریان بیندازید. برای مثال، اگر جریان شما با دریافت ایمیل شروع میشود، برای خودتان یک ایمیل بفرستید.
تأیید کنید که جریان مطابق انتظار اجرا میشود. با مراجعه به برگه فعالیت سازنده جریان، گزارشها را بررسی کنید. برای یادگیری نحوه ایجاد گزارشهای سفارشی در برگه فعالیت، به گزارشهای فعالیت مراجعه کنید.
مراحل بعدی
شما با موفقیت یک مرحله جریان سفارشی برای Workspace Flows ایجاد و آزمایش کردهاید. اکنون میتوانید:
با درخواست از Gemini برای کمک به شما در پیادهسازی منطق پیچیدهتر، به سفارشیسازی این مرحله ادامه دهید.
برای سفارشیسازی پیکربندی پلهها ، یک کارت پیکربندی بسازید .
فعالیتها و خطاها را ثبت کنید تا مراحل گامبرداری خود را ثبت و عیبیابی کنید.
اشیاء رویداد جریان را بررسی کنید تا بار داده JSON که جریانها هنگام اجرای جریانها ارسال و دریافت میکنند را بررسی کنید.