
1. Introduction
Device Access program provides the Smart Device Management API, a REST API for developers to control Google Nest devices from their applications. Users need to give consent for third party access to their Nest devices.
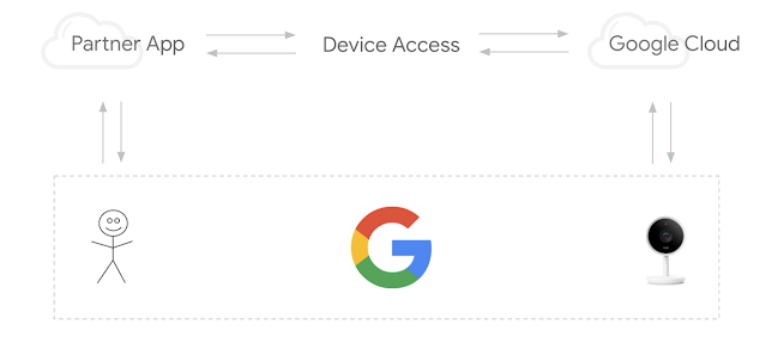
There are three key steps for a successful Device Access integration:
- Project Creation - Create a project in Google Cloud Platform and sign up as a developer in Device Access Console.
- Account Linking - Get users through account linking flow and retrieve an access code. Exchange the code for an access token.
- Device Control - Make Smart Device Management API requests to control devices by sending commands with the access token.
In this Codelab we will take a deep dive into how Device Access works by building a web application handling authentication and making Smart Device Management API calls. We will also explore deploying a simple proxy server using Node.js and Express to route the Device Access requests.
Before you begin, it would be nice to brush up on common web technologies we'll use in this Codelab, such as authenticating with OAuth 2.0 or building a web app with Node.js, though they are not prerequisites.
What You'll Need
- Node.js 8 or above
- Google Account with a linked Nest Thermostat
What You'll Learn
- Setting up a Firebase project hosting static web pages and cloud functions
- Issuing device access requests through a browser based web application
- Building a proxy server with Node.js and Express to route your requests
2. Project Creation
Developers need to create a Google Cloud Platform (GCP) project to set up Device Access integration. A Client Id and Client Secret generated within the GCP project will be used as part of the OAuth flow between the developer's application and Google Cloud. Developers also need to visit the Device Access Console to create a project to access the Smart Device Management API.
Google Cloud Platform
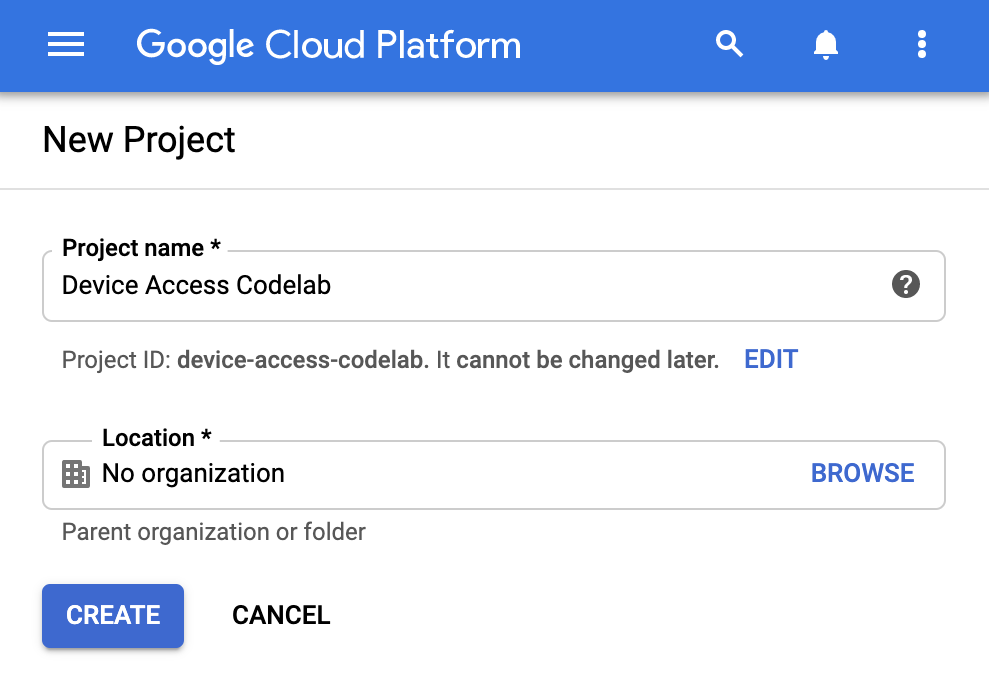
Go to Google Cloud Platform. Click create a new project and provide a project name. A project ID [GCP-Project-Id] for Google Cloud will also be displayed, please record it as we will use it during Firebase setup. (We will refer to this ID as [GCP-Project-Id] throughout this Codelab.)
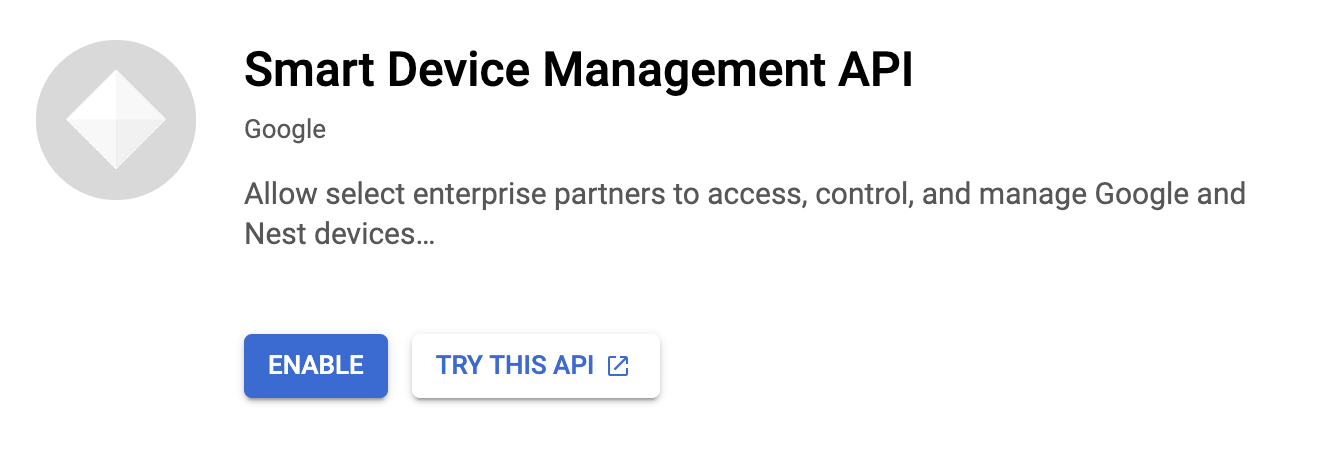
First step is to enable the necessary API Library on our project. Go to APIs & Services > Library and search for Smart Device Management API. You need to enable this API to authorize your project to make requests to Device Access API calls.
Before we move on to create OAuth credentials, we need to configure the OAuth consent screen for our project. Go to APIs & Services > OAuth consent screen. For User Type, choose external. Provide a name and a support email for your app, as well as developer contact information to complete the first screen. When asked for Test Users, make sure to provide the email address with linked devices at this step.
Once you configure your OAuth consent screen, go to APIs & Services > Credentials. Click +Create Credentials and select OAuth client ID. For application type, select Web application.
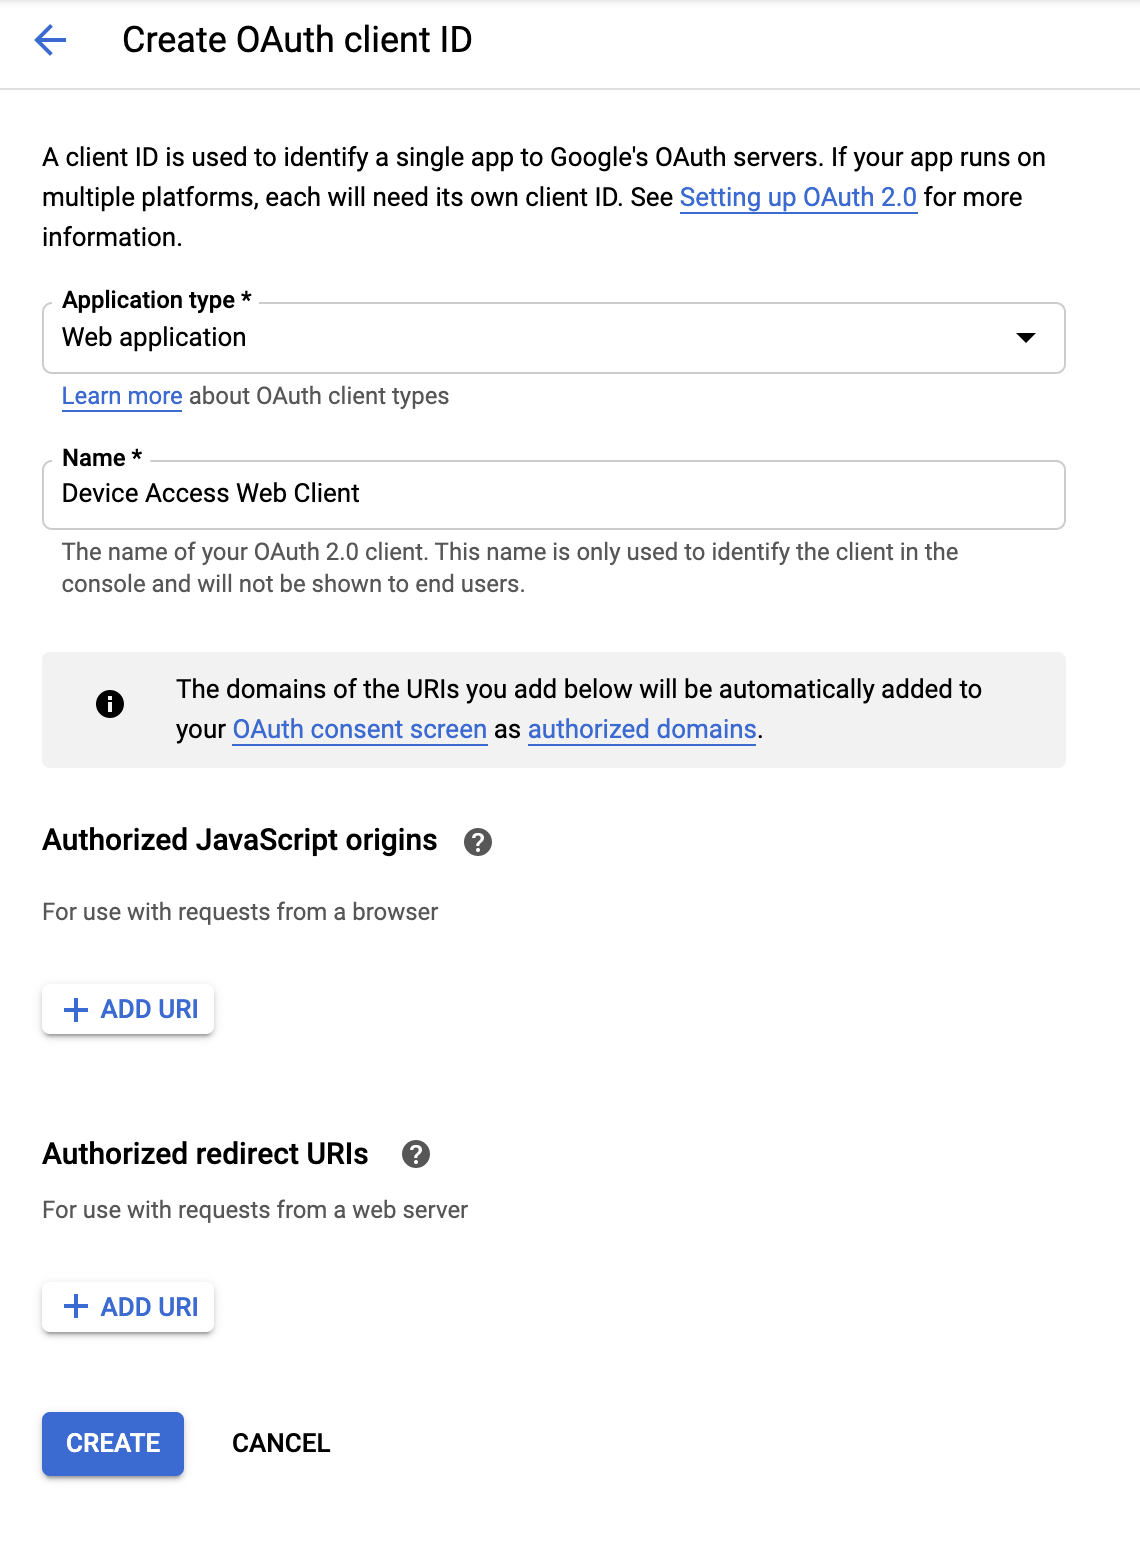
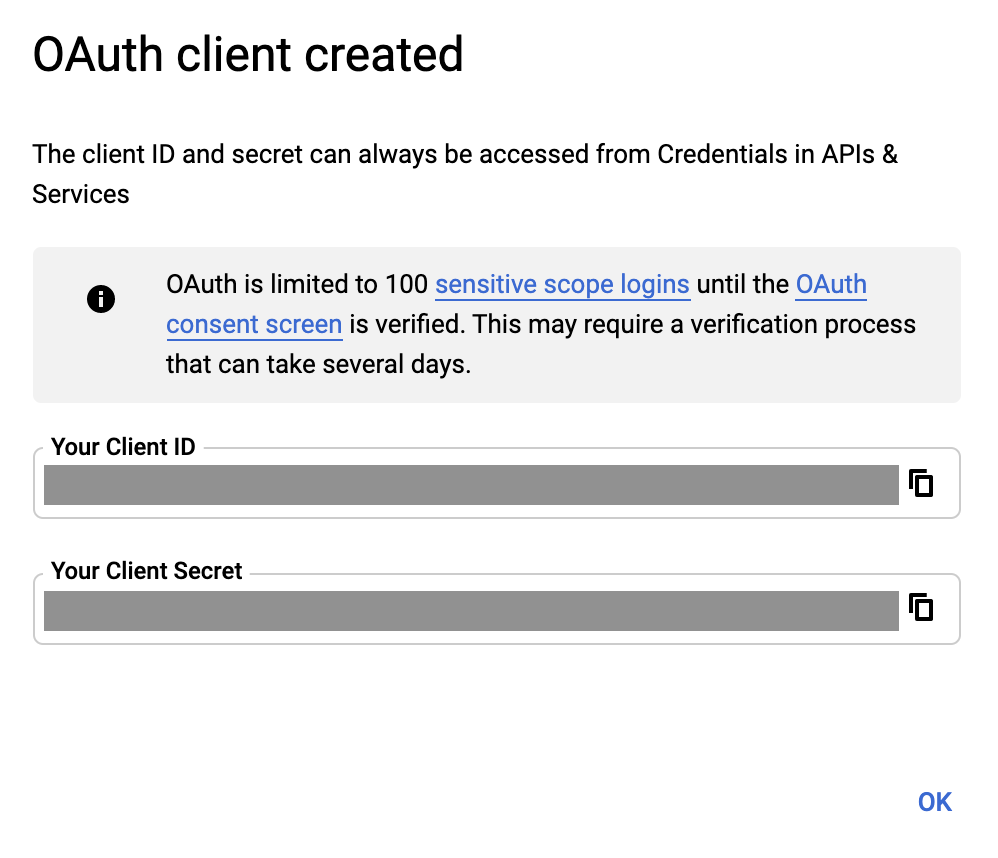
Provide a name for your client and click CREATE. We will add an Authorized JavaScript origin and Authorized redirect URI later on. Completing this process will bring up the [Client-Id] and [Client-Secret] associated with this OAuth 2.0 Client.
Device Access Console
Go to the Device Access Console. If you have not used the Device Access Console before, you will be greeted with Terms of Service agreement, and a $5 registration fee.
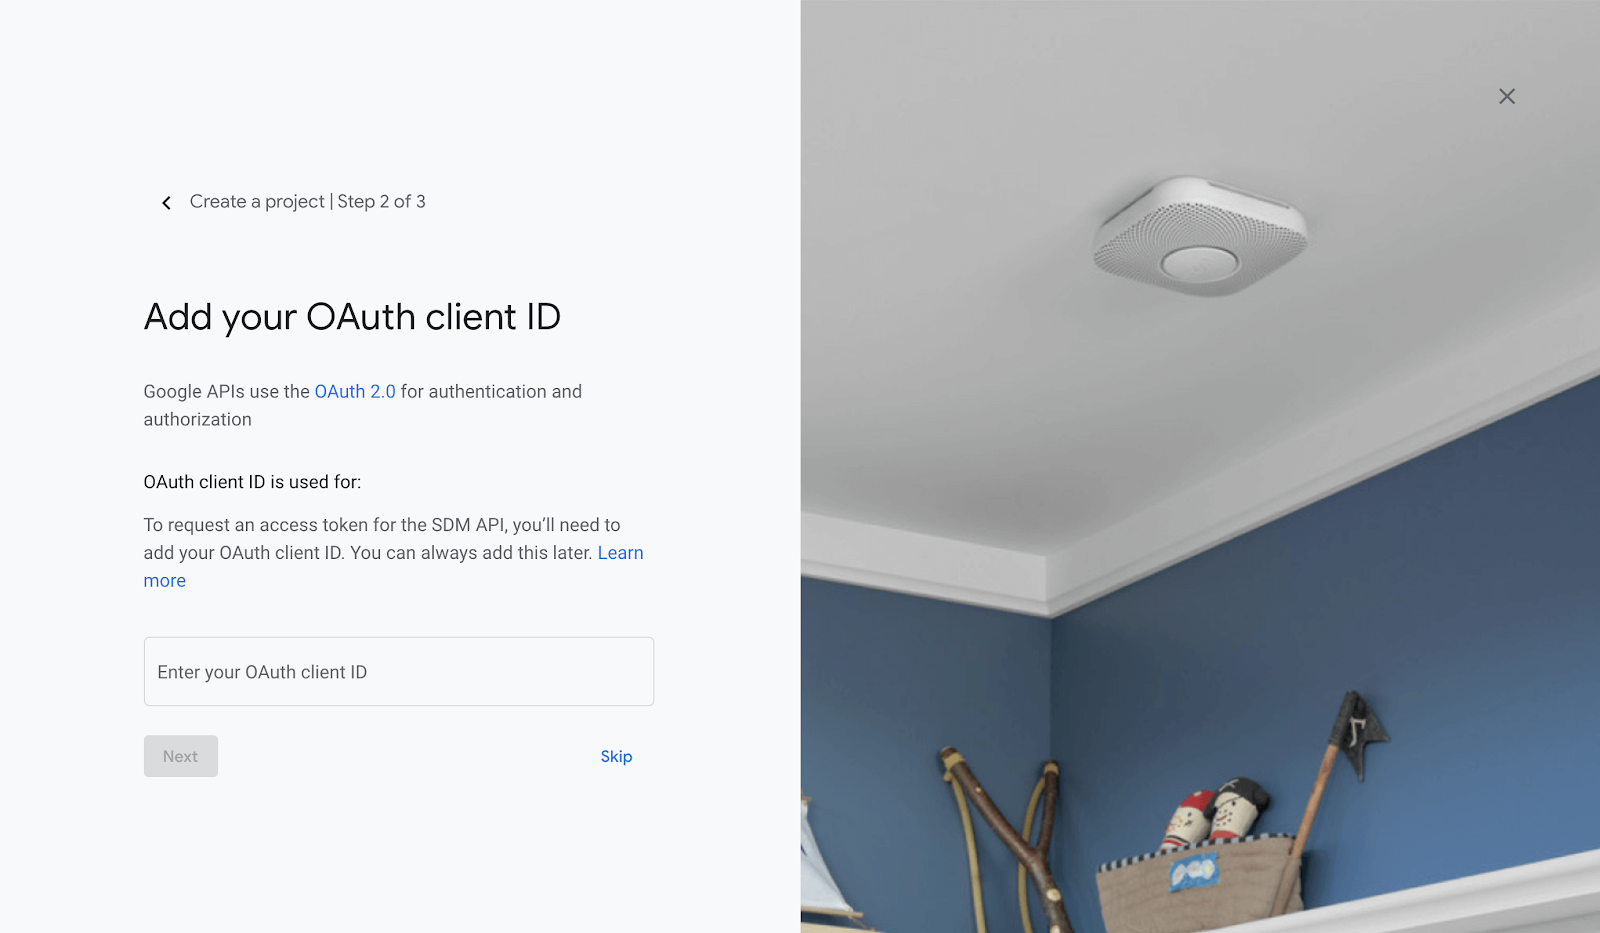
Create a new project and give it a project name. In the next window, provide the [Client-Id] that you received from GCP in the previous step.
Enabling events and finishing up the project creation steps will take you to the homepage for your project. Your [Project-Id] will be listed under the name you have given to your project.
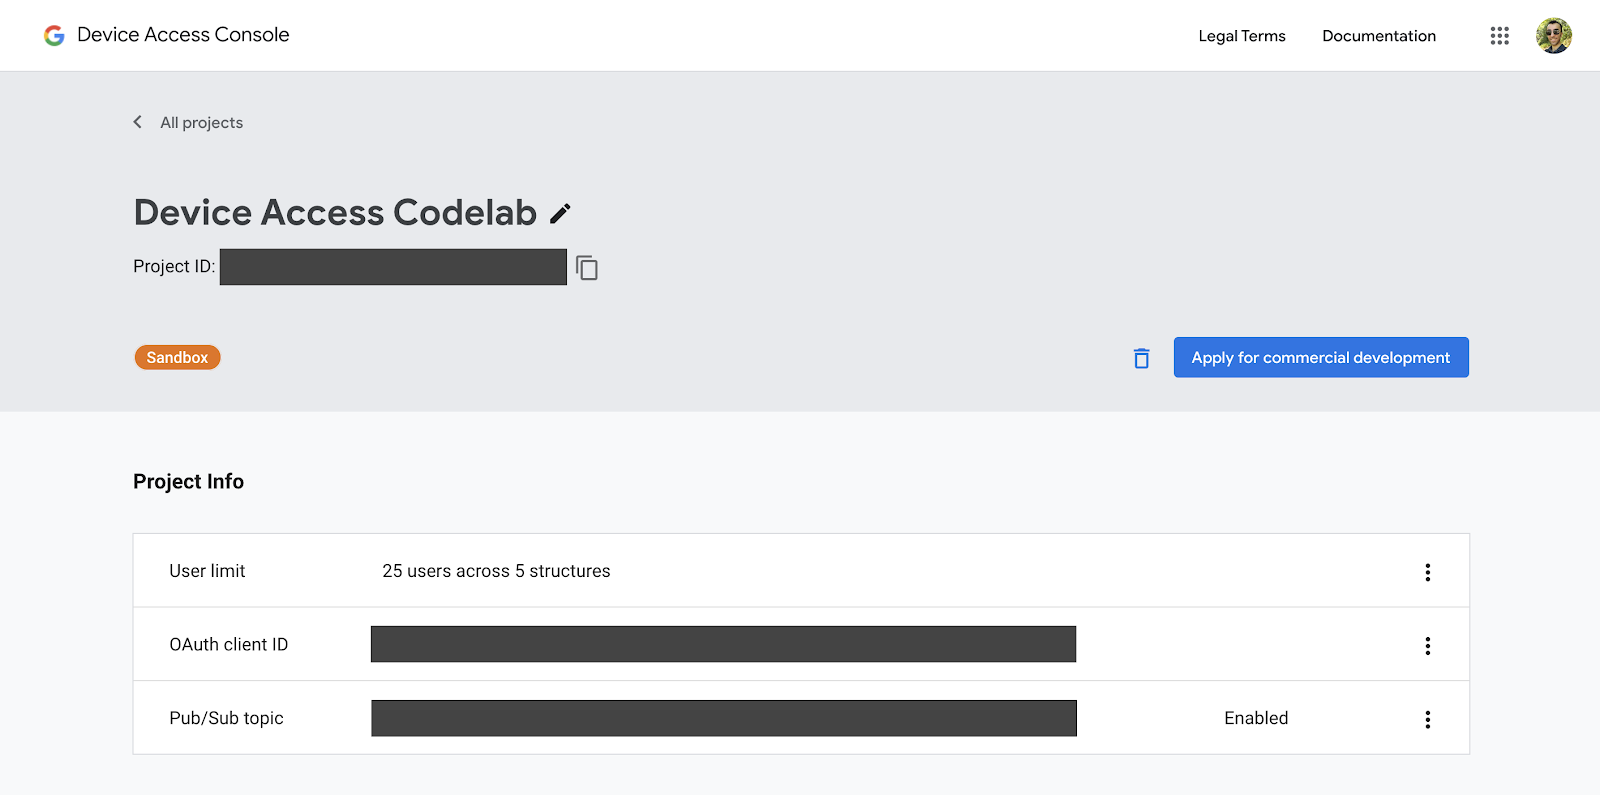
Please note your [Project-Id] as we will use it when sending requests to the Smart Device Management API.
3. Firebase Setup
Firebase gives developers a quick and easy way to deploy web applications. We will be developing a client side web application for our Device Access integration using Firebase.
Create a Firebase Project
Go to Firebase Console. Click Add Project, then select the project that you have created at Project Creation step. This will create a Firebase project, which will be linked to your GCP project [GCP-Project-Id].
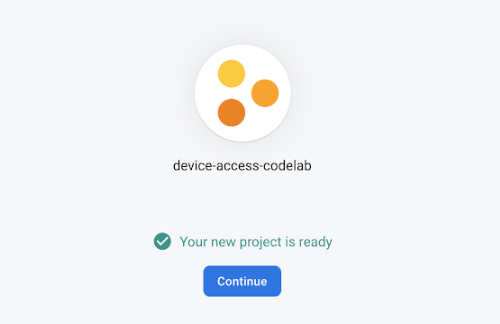
Once the Firebase project is created successfully, you should see the following screen:
Install Firebase Tools
Firebase provides a set of CLI tools to build and deploy your app. To install these tools, open up a new terminal window and run the following command. This will install Firebase tools globally.
$ npm i -g firebase-tools
To verify the firebase tools are correctly installed, check the version info.
$ firebase --version
You can log-in to Firebase CLI tools with your Google account with the login command.
$ firebase login
Initialize Hosting Project
Once you are able to log in, the next step is to initialize a hosting project for your web application. From the terminal, navigate into the folder where you want to create your project and run the following command:
$ firebase init hosting
Firebase will ask you a set of questions to get you started with a hosting project:
- Please select an option — Use an existing project
- Select a default Firebase project for this directory — Choose ***[GCP-Project-Id]***
- What do you want to use as your public directory? — Public
- Configure as a single page app? — Yes
- Set up automatic builds and deploys with GitHub? — No
Once your project is initialized, you can deploy it to firebase with the following command:
$ firebase deploy
Firebase will scan your project and deploy the necessary files to cloud hosting.
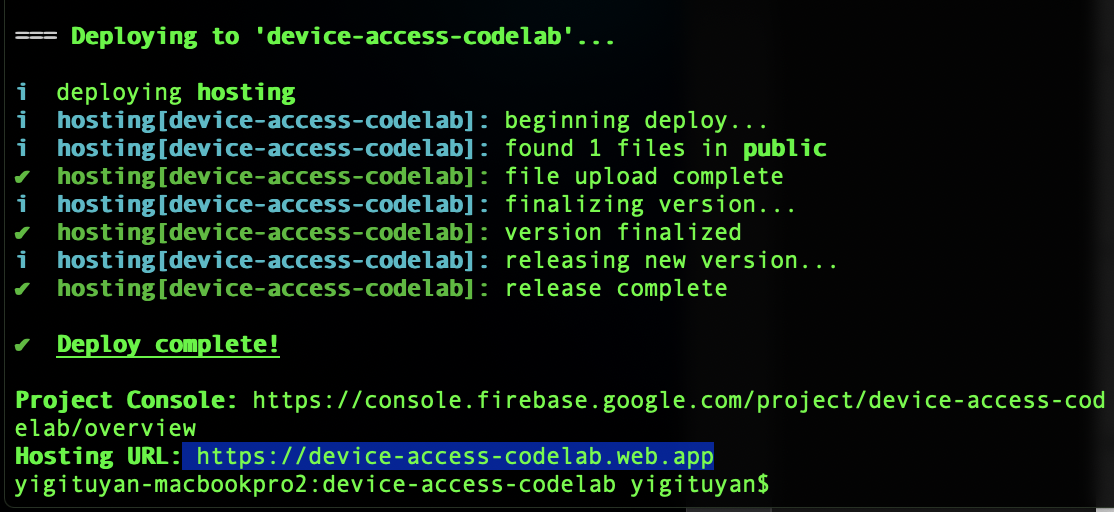
When you open up the Hosting URL in a browser, you should see the page you just deployed:
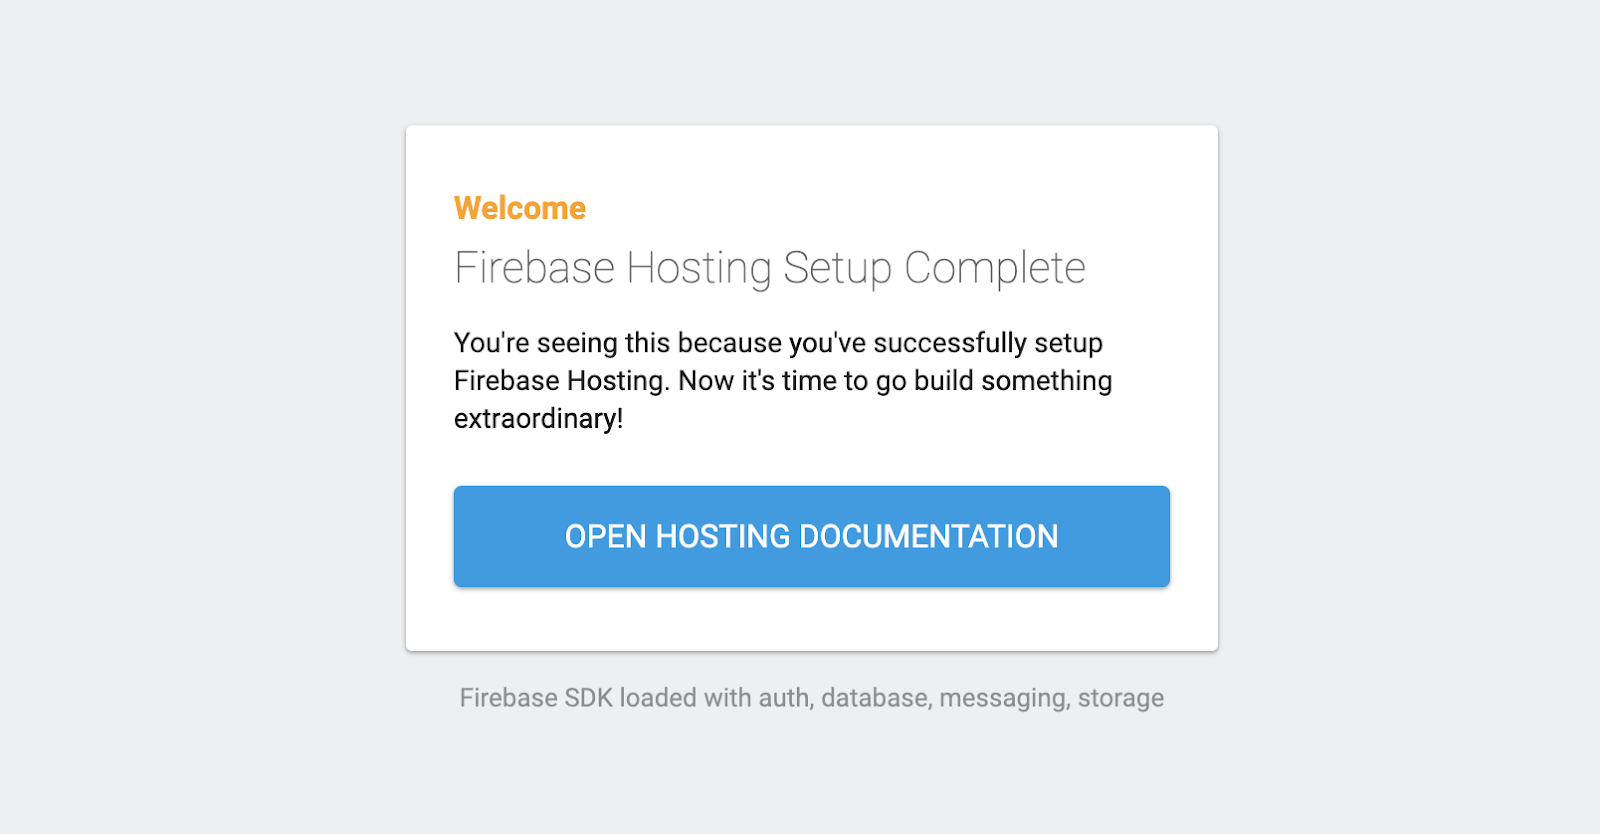
Now that you know the basics on how to deploy a web page with Firebase, let's get to deploying our Codelab sample!
4. Codelab Sample
You can clone the codelab repository hosted on GitHub, using the command below:
$ git clone https://github.com/google/device-access-codelab-web-app.git
In this repository we are providing samples in two separate folders. The codelab-start folder has the necessary files to get you started from the current point at this Codelab. codelab-done folder contains a complete version of this Codelab, with the fully functional client and node.js server.
We will be using the files from the codelab-start folder throughout this codelab, though if you feel stuck at any time feel free to reference the codelab-done version as well.
Codelab Sample Files
The file structure of the codelab-start folder is as follows:
public
├───index.html
├───scripts.js
├───style.css
firebase.json
Public folder contains static pages of our application. firebase.json is responsible for routing web requests to our app. In the codelab-done version, you will also see a functions directory, containing logic for our proxy server (express) to be deployed on Google Cloud functions.
Deploy Codelab Sample
Copy the files from the codelab-start into your project's directory.
$ firebase deploy
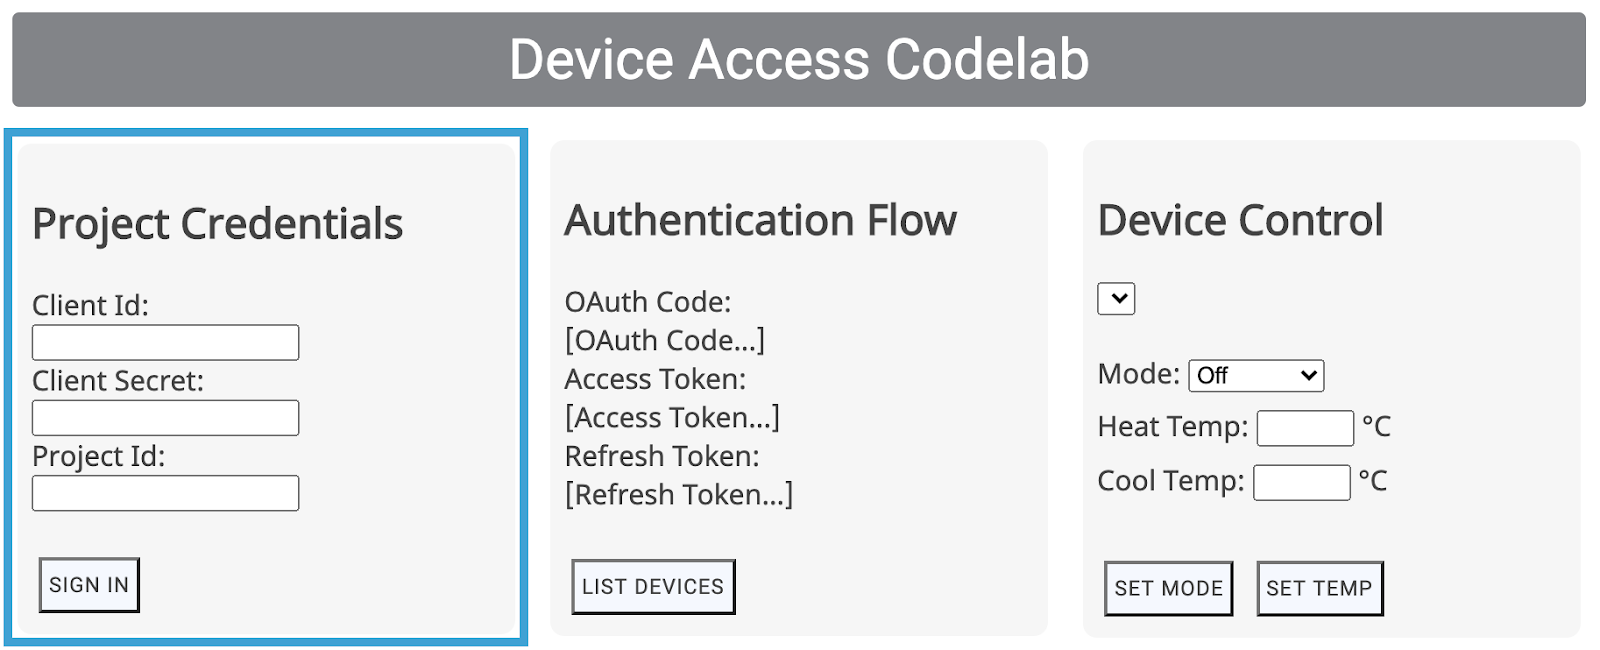
Once Firebase finishes deploying, you should be able to see the Codelab application:
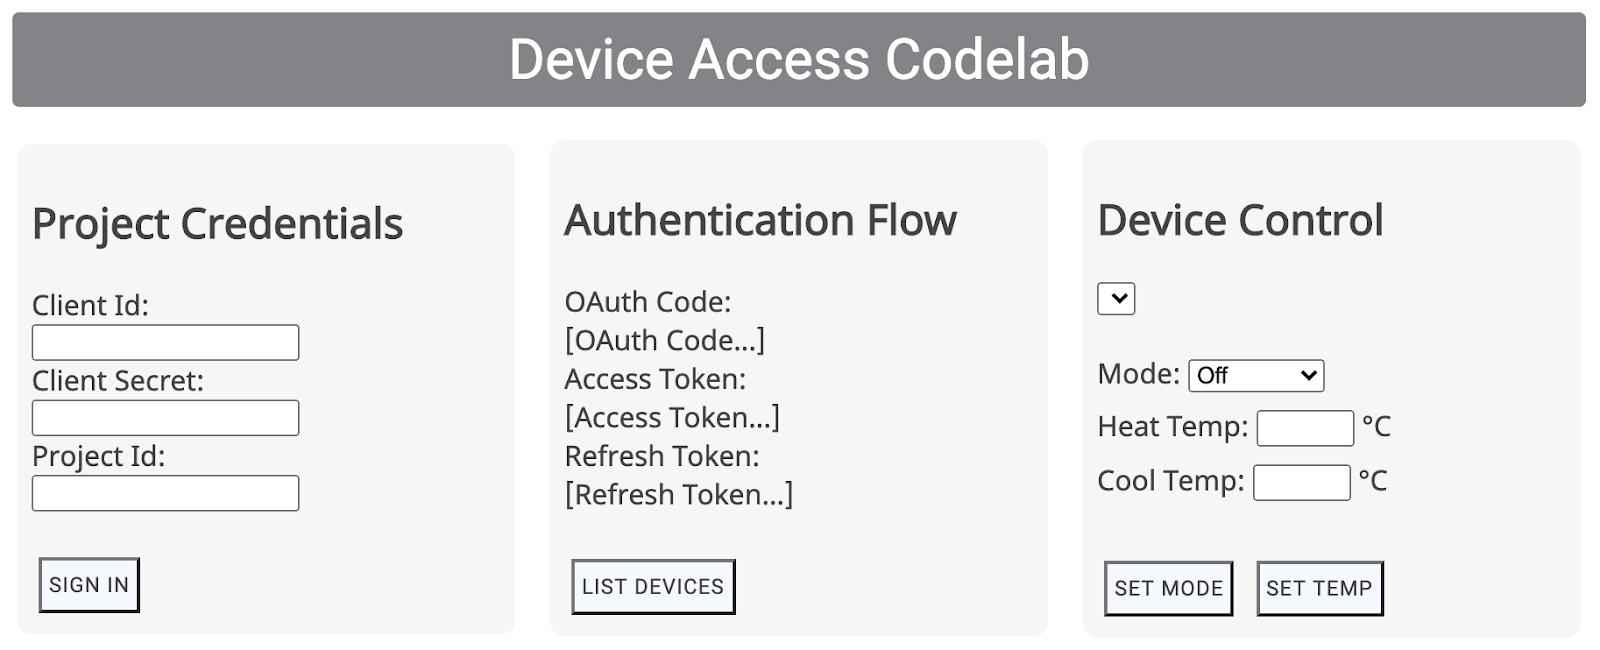
Initiating the auth flow requires partner credentials, which we'll cover in the next section.
5. Handling OAuth
OAuth is the web standard for access delegation, commonly used for users to grant third party applications access to their account information without sharing passwords. We use OAuth 2.0 to enable developers accessing user devices through Device Access.
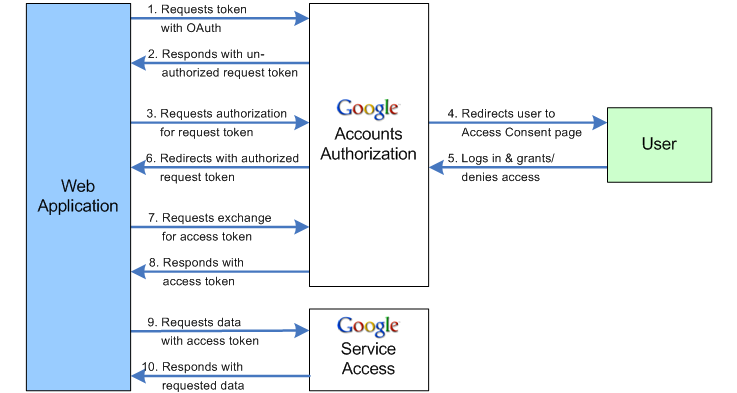
Specify Redirect URI
First step of the OAuth flow involves passing a set of parameters to Google OAuth 2.0 endpoint. After getting user consent, Google OAuth servers will issue a request with an authorization code to your Redirect URI.
Update the SERVER_URI constant (line 19) with your own Hosting URL in scripts.js:
const SERVER_URI = "https://[GCP-Project-Id].web.app";
Redeploying the app with this change will update your Redirect URI used for your project.
$ firebase deploy
Enable Redirect URI
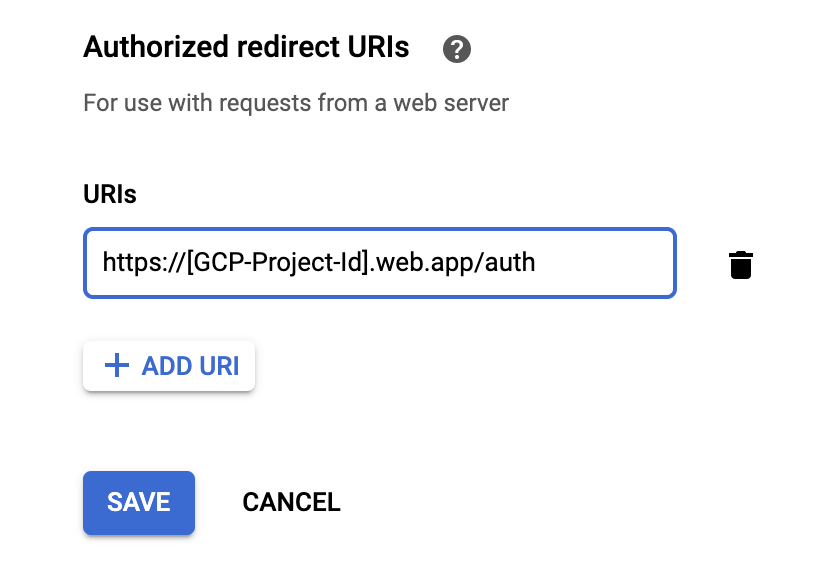
Once you update the Redirect URI in the scripts file, you must also add it to the list of allowed Redirect URIs for the Client Id you have created for your project. Navigate to Credentials Page in Google Cloud Platform, which will list all credentials created for your project:
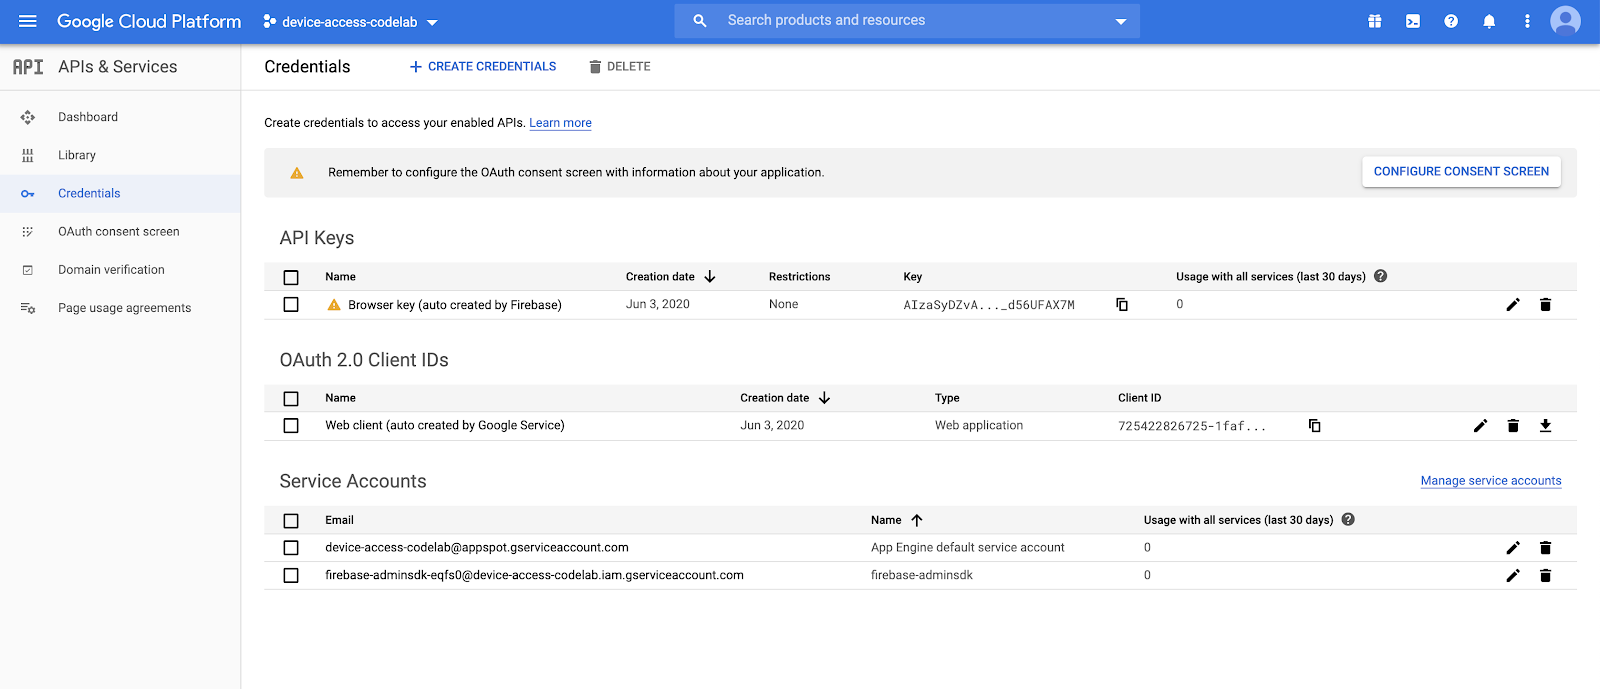
Under the list of OAuth 2.0 Client Ids, select, select the Client Id you have created at Project Creation step. Add the redirect URI of your app to the list of Authorized Redirect URIs for your project.
Try Signing In!
Go to the Hosting URL you set up with Firebase, enter your partner credentials and click the SIGN IN button. Client Id and Client Secret are the credentials you obtained from Google Cloud Platform, the Project Id is from Device Access Console.
The SIGN IN button will take your users through the OAuth flow for your enterprise, starting with the login screen to their Google Account. Once logged in, users will be asked to provide permissions for your project to access their Nest devices.
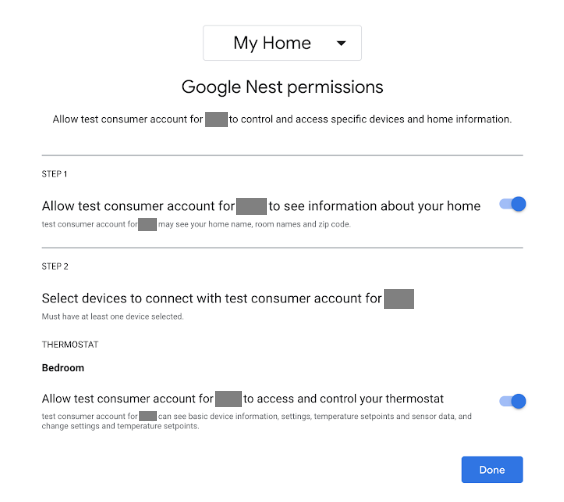
Since this is a mock app, Google will issue a warning before issuing a redirect!

Click "Advanced", then select "Go to web.app (unsafe)" to complete the redirection to your app.
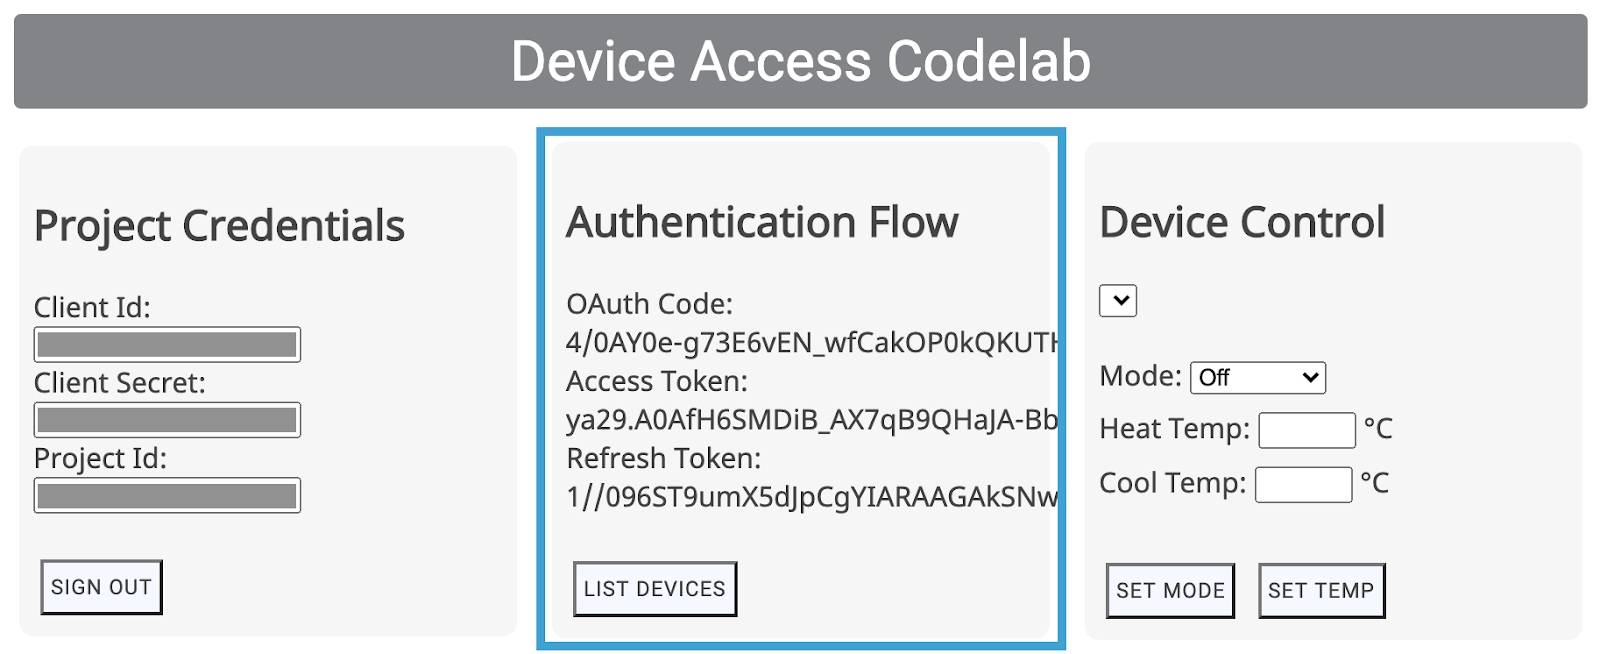
This will provide an OAuth Code as part of the incoming GET request, which the app will then exchange for an Access Token and a Refresh Token.
6. Device Control
The Device Access sample app uses Smart Device Management REST API calls to control Google Nest devices. These calls involve passing the access token in the header of a GET or POST request, alongside a payload required for certain commands.
We wrote a generic access request function to handle these calls. However, you will need to provide the correct endpoint, as well as the payload object when needed, to this function!
function deviceAccessRequest(method, call, localpath, payload = null) {...}
- method — Type of HTTP request (
GETorPOST) - call — A string representing our API call, used to route responses (
listDevices,thermostatMode,temperatureSetpoint) - localpath — The endpoint the request is made to, containing Project Id and Device Id (appended after
https://smartdevicemanagement.googleapis.com/v1) - payload (*) — Additional data required for the API call (for example, a numeric value representing temperature for a setpoint)
We will build sample UI controls (List Devices, Set Mode, Set Temp) to control a Nest Thermostat:
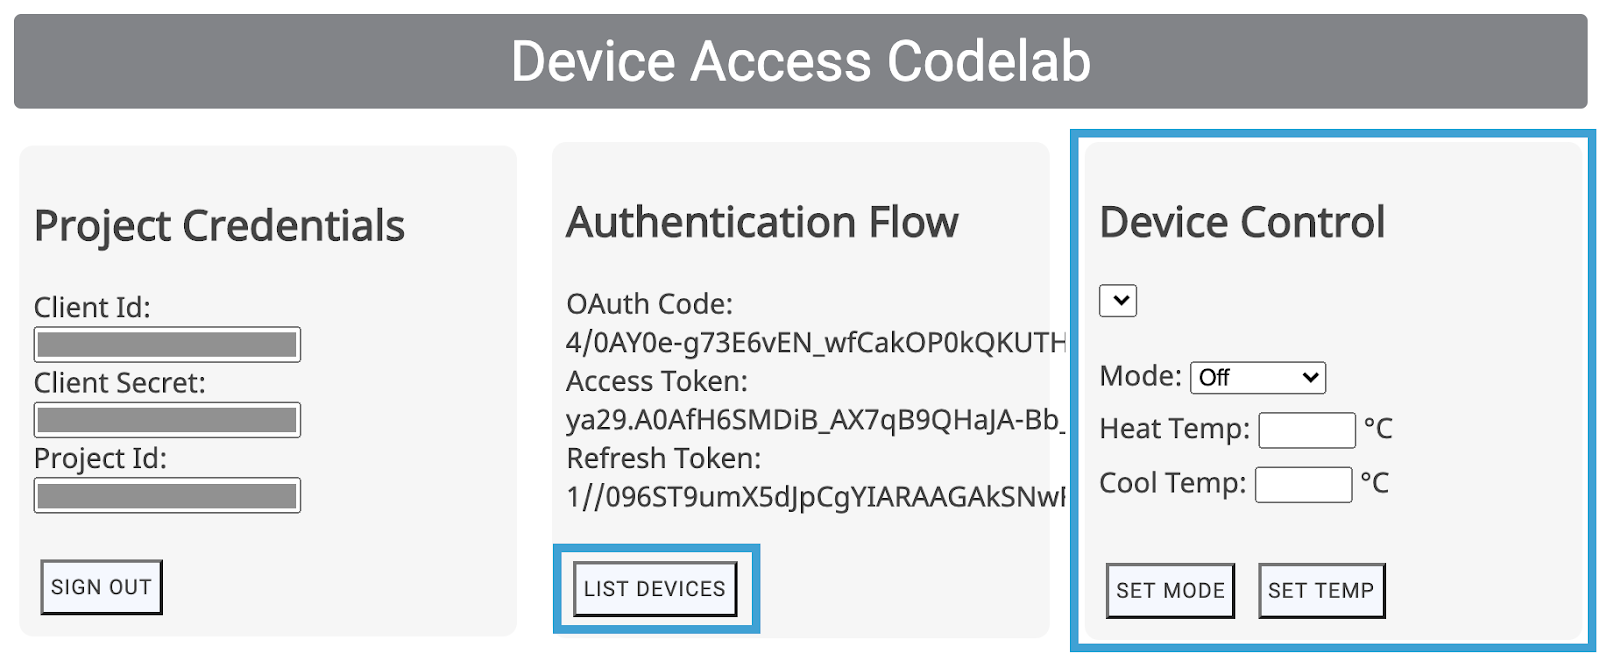
These UI controls will call corresponding functions (listDevices(), postThermostatMode(), postTemperatureSetpoint()) from scripts.js. They are left blank for you to implement! The goal is to pick the correct method/path and pass the payload to deviceAccessRequest(...) function.
List Devices
The simplest Device Access call is listDevices. It uses a GET request and requires no payload. The endpoint needs to be structured using the projectId. Complete your listDevices() function as the following:
function listDevices() {
  var endpoint = "/enterprises/" + projectId + "/devices";
  deviceAccessRequest('GET', 'listDevices', endpoint);
}
Save your changes and deploy your Firebase project again with the following command:
$ firebase deploy
Once the new version of the app is deployed, try reloading the page and click LIST DEVICES. This should populate the list under Device Control, which you should see the ID of your thermostat:
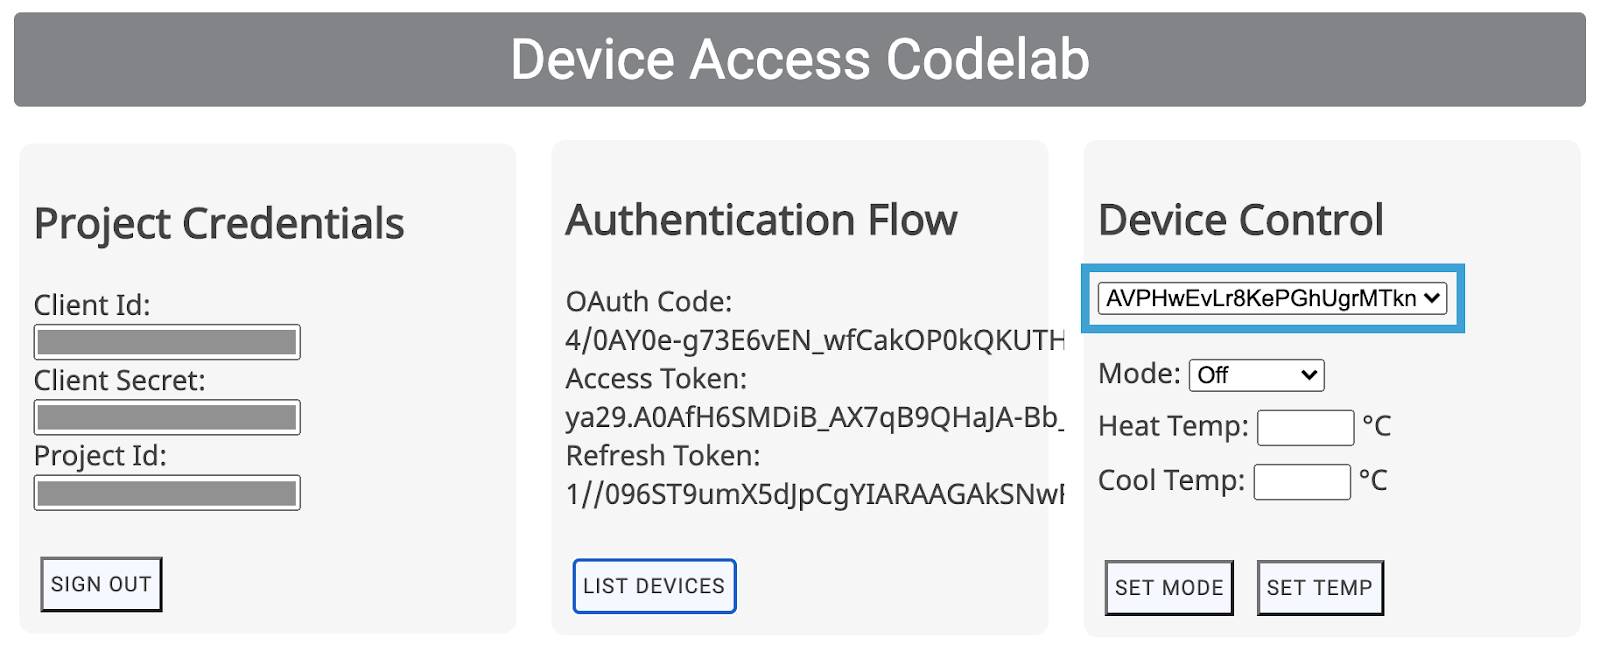
Picking devices from the list will update the deviceId field in scripts.js file. For the next two controls, we'll need to specify the deviceId for the specific device we want to control.
Thermostat Control
There are two traits for basic control of a Nest Thermostat in the Smart Device Management API. ThermostatMode and TemperatureSetpoint. ThermostatMode sets the mode for your Nest Thermostat to one of the possible four different modes: {Off, Heat, Cool, HeatCool}. We then need to provide the selected mode as part of the payload.
Replace your postThermostatMode() function in scripts.js with the following:
function postThermostatMode() {
  var endpoint = "/enterprises/" + projectId + "/devices/" + deviceId + ":executeCommand";
  var tempMode = id("tempMode").value;
  var payload = {
    "command": "sdm.devices.commands.ThermostatMode.SetMode",
    "params": {
      "mode": tempMode
    }
  };
  deviceAccessRequest('POST', 'thermostatMode', endpoint, payload);
}
The next function, postTemperatureSetpoint(), handles setting the temperature (in Celsius) for your Nest Thermostat. There are two parameters that can be set in the payload, heatCelsius and coolCelsius, depending on the selected thermostat mode.
function postTemperatureSetpoint() {
  var endpoint = "/enterprises/" + projectId + "/devices/" + deviceId + ":executeCommand";
  var heatCelsius = parseFloat(id("heatCelsius").value);
  var coolCelsius = parseFloat(id("coolCelsius").value);

  var payload = {
    "command": "",
    "params": {}
  };

  if ("HEAT" === id("tempMode").value) {
    payload.command = "sdm.devices.commands.ThermostatTemperatureSetpoint.SetHeat";
    payload.params["heatCelsius"] = heatCelsius;
  }
  else if ("COOL" === id("tempMode").value) {
    payload.command = "sdm.devices.commands.ThermostatTemperatureSetpoint.SetCool";
    payload.params["coolCelsius"] = coolCelsius;
  }
  else if ("HEATCOOL" === id("tempMode").value) {
    payload.command = "sdm.devices.commands.ThermostatTemperatureSetpoint.SetRange";
    payload.params["heatCelsius"] = heatCelsius;
    payload.params["coolCelsius"] = coolCelsius;
  } else {
    console.log("Off and Eco mode don't allow this function");
    return;
  }
  deviceAccessRequest('POST', 'temperatureSetpoint', endpoint, payload);
}
7. Node.js Server (Optional)
Congratulations! You have built a client side web application that can make Smart Device Management API requests from a browser. For those of you who want to build on the server side, we want to jump-start your effort with a proxy server that can redirect your requests from the browser.
For this proxy server, we will use Firebase cloud functions, Node.js and Express.
Initialize Cloud Functions
Open up a new terminal window, navigate into your project directory and run the following:
$ firebase init functions
Firebase will ask you a set of questions to initialize cloud functions:
- What language would you like to use to write Cloud Functions? — JavaScript
- Do you want to use ESLint to catch probable bugs and enforce style? — No
- Do you want to install dependencies with npm now? — Yes
This will initialize a functions folder in your project, as well as to install the necessary dependencies. You will see that your project folder contains a functions directory, with an index.js file to define our cloud functions, package.json to define the settings and a node_modules directory to contain the dependencies.
We will use two npm libraries to build the server-side functionality: express and xmlhttprequest. You will need to add following entries to the list of dependencies in package.json file:
"xmlhttprequest": "^1.8.0",
"express": "^4.17.0"
Then running npm install from the functions directory should install dependencies for your project:
$ npm install
In case npm experiences an issue with downloading packages, you can try to save xmlhttprequest and express explicitly with the following command:
$ npm install express xmlhttprequest --save
Upgrade to Blaze Plan
Using the firebase deploy command will require you to upgrade to Blaze plan, which requires you to add a payment method to your account. Go to Project Overview > Usage and billing and make sure to select the Blaze plan for your project.

Build Express Server
An Express server follows a simple framework to respond to incoming GET and POST requests. We have built a servlet that listens for POST requests, transmit them to a destination URL specified in the payload, and respond with the response received from the transfer.
Modify your index.js file in functions directory to look like this:
const XMLHttpRequest = require("xmlhttprequest").XMLHttpRequest;
const functions = require('firebase-functions');
const express = require('express');
const http = require('http');

const app = express();
app.use(express.json());


//***** Device Access - Proxy Server *****//

// Serving Get Requests (Not used)
app.get('*', (request, response) => {
  response.status(200).send("Hello World!");
});
// Serving Post Requests
app.post('*', (request, response) => {

  setTimeout(() => {
    // Read the destination address from payload:
    var destination = request.body.address;

    // Create a new proxy post request:
    var xhr = new XMLHttpRequest();
    xhr.open('POST', destination);

    // Add original headers to proxy request:
    for (var key in request.headers) {
            var value = request.headers[key];
      xhr.setRequestHeader(key, value);
    }

    // Add command/parameters to proxy request:
    var newBody = {};
    newBody.command = request.body.command;
    newBody.params = request.body.params;

    // Respond to original request with the response coming
    // back from proxy request (to Device Access Endpoint)
    xhr.onload = function () {
      response.status(200).send(xhr.responseText);
    };

    // Send the proxy request!
    xhr.send(JSON.stringify(newBody));
  }, 1000);
});

// Export our app to firebase functions:
exports.app = functions.https.onRequest(app);
In order to route requests to our server, we need to adjust rewrites from firebase.json as the following:
{
  "hosting": {
    "public": "public",
    "ignore": [
      "firebase.json",
      "**/.*",
      "**/node_modules/**"
    ],
    "rewrites": [{
        "source": "/proxy**",
        "function": "app"
      },{
        "source": "**",
        "destination": "/index.html"
      }
    ]
  }
}
This will route URLs starting with /proxy to our Express server, and the rest will continue to go to our index.html.
Proxy API Calls
Now that we have our server ready, let's define a proxy URI in scripts.js for our browser to send requests to this address:
const PROXY_URI = SERVER_URI + "/proxy";
Then add a proxyRequest function is scripts.js, which has the same signature as the deviceAccessRequest(...) function, for indirect Device Access calls.
function proxyRequest(method, call, localpath, payload = null) {
    var xhr = new XMLHttpRequest();

    // We are doing our post request to our proxy server:
    xhr.open(method, PROXY_URI);
    xhr.setRequestHeader('Authorization', 'Bearer ' + accessToken);
    xhr.setRequestHeader('Content-Type', 'application/json;charset=UTF-8');
    xhr.onload = function () {
      // Response is passed to deviceAccessResponse function:
      deviceAccessResponse(call, xhr.response);
    };

    // We are passing the device access endpoint in address field of the payload:
    payload.address = "https://smartdevicemanagement.googleapis.com/v1" + localpath;
    if ('POST' === method && payload)
        xhr.send(JSON.stringify(payload));
    else
        xhr.send();
}
The last step is to replace the deviceAccessRequest(...) calls with the proxyRequest(...) function, in postThermostatMode() and postTemperatureSetpoint() functions within scripts.js.
Run firebase deploy to update the app.
$ firebase deploy
With this, you now have a running Node.js proxy server using Express on Cloud Functions.
Provide Cloud Function Permissions
The last step is to review access permissions for your cloud functions and making sure that your client side application will be able to call them.
From Google Cloud Platform, go to Cloud Functions tab from the menu, then select your cloud function:
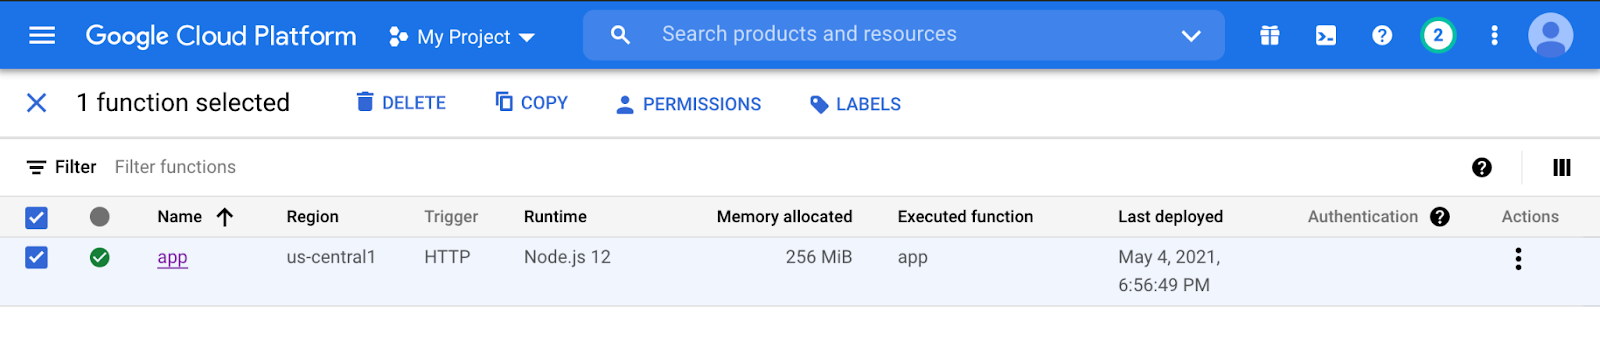
Click Permissions, then Add Member. Write allUsers to the new member field, and select Cloud Functions > Cloud Functions Invoker as the role. Clicking Save will display a warning message:
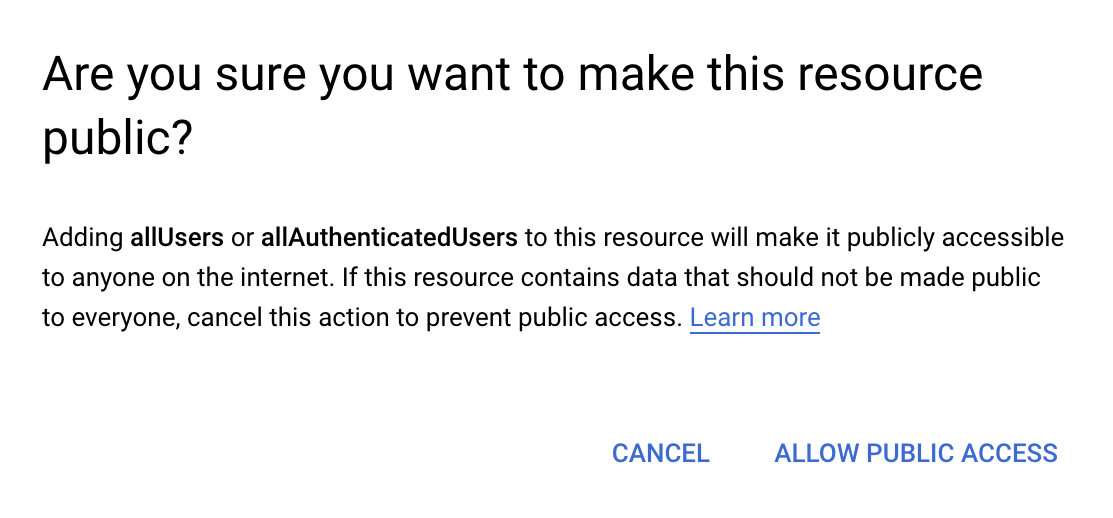
Selecting Allow Public Access will make your client side application able to use your cloud function.
Congratulations – you have completed all the steps. You can now go to your web app and give device controls routed via your proxy server a go!
Next Steps
Looking for ways to expand your expertise on Device Access? Check out traits documentation to find out more about controlling other Nest devices, and the certification process for learning the steps to launch your product to the world!
Take your skills further with the Device Access web application sample app where you'll build on your Codelab experience and deploy a functioning web application to control Nest cameras, doorbells, and thermostats.