
1. 准备工作
在开始编写代码之前,您需要设置一些前提条件。
Xcode
本教程使用 Apple 的 Xcode 工具以及 Objective-C 语言来创建一个在模拟器中运行的简单 iOS 应用。您无需使用实体设备。您可以访问 https://developer.apple.com/xcode/ 获取 Xcode
CocoaPods
Places SDK for iOS 以 CocoaPods pod 的形式提供。CocoaPods 是一种用于 Swift 和 Objective-C 项目的开源依赖项管理工具。如果您还没有此工具,则需要先安装它,然后才能继续操作。您可以从终端安装它,如下所示:
sudo gem install cocoapods
如需详细了解 CocoaPods,请参阅 CocoaPods 入门指南。
安装 SDK
如需安装 SDK,您需要在项目目录中创建一个 Podfile,CocoaPods 将使用该文件下载并配置所需的依赖项。最简单的方法是在 Xcode 中创建一个新项目,向其中添加 Podfile,然后在其中安装 pod。
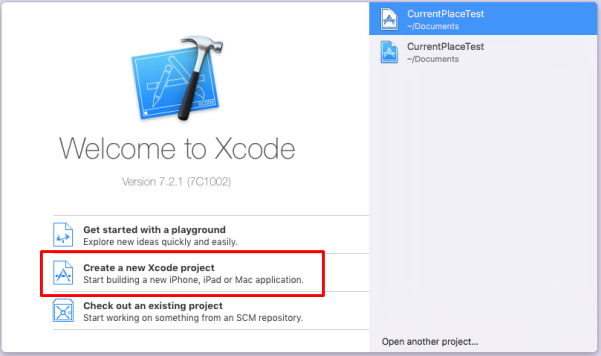
打开 Xcode,您会看到“欢迎使用 Xcode”界面。在此处,选择“Create a new Xcode project”(新建 Xcode 项目)
在下一个界面中,系统会要求您为新项目选择模板。为 iOS 选择“Single View Application”,然后按“Next”
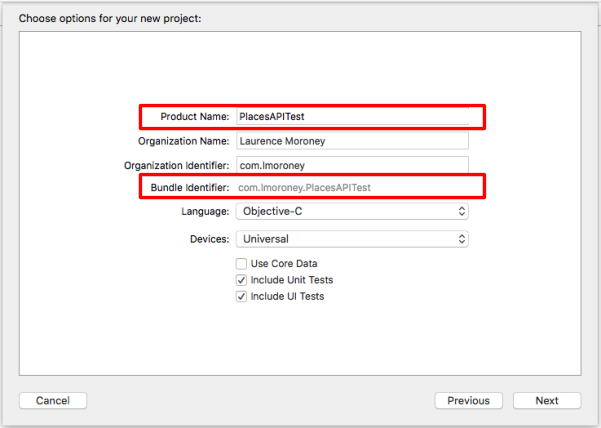
当系统要求您提供商品名称时,您可以选择任何喜欢的名称,但请务必记下为您生成的软件包标识符。您稍后会用到此内容。
按“下一步”,系统将为您创建项目。记下创建该文件的目录。关闭 Xcode,然后使用终端导航到该目录。
使用终端,输入以下命令:
pod init
系统将为您创建一个名为 Podfile 的文件。修改该文件,添加 GoogleMaps 的 pod,如下所示:
target '{YOUR APP NAME}' do
pod 'GoogleMaps'
end
保存该文件,然后关闭 Xcode。请务必关闭该项目,因为在下一步中,您将修改底层项目。完成后,您将打开另一个项目文件,如果开发者之前未关闭 Xcode,很容易混淆所有内容的位置!现在,在终端中,前往您的项目目录,然后运行“pod install”,如下所示:
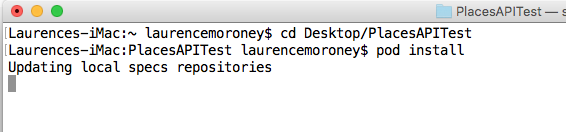
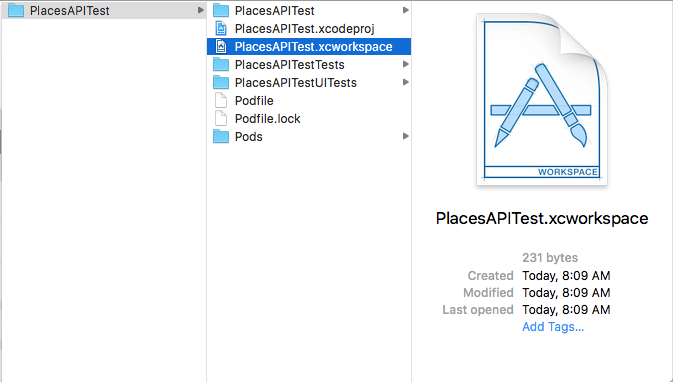
完成后,系统会安装 pod 并创建一个新的 .xcworkspace 文件。从现在开始,请在项目中改用此账号。不过,在编码之前,您还需要一个 API 密钥。
2. 获取 API 密钥
为了完成以下启用步骤,请启用 Maps SDK for iOS。
设置 Google Maps Platform
如果您还没有已启用结算功能的 Google Cloud Platform 账号和项目,请参阅 Google Maps Platform 使用入门指南,创建结算账号和项目。
- 在 Cloud Console 中,点击项目下拉菜单,选择要用于此 Codelab 的项目。

3. 创建 Places API 应用
现在,您已创建控制台项目,并在其中激活 Places API,还获取了 API 密钥,接下来就可以开始编写您的第一个 Places API 应用了。
之前在安装 pod 文件时,系统为您创建了一个新的 .xcworkspace 文件。双击此文件将其打开。
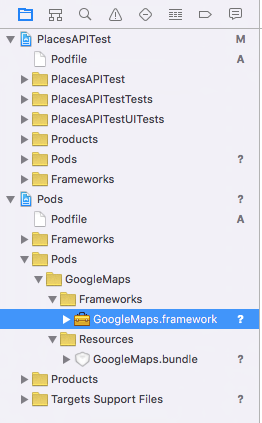
您会在项目资源管理器中看到,现在多了一个名为“Pods”的新文件夹。如果此操作成功,您会在其中看到一个包含框架的 GoogleMaps 文件夹。
4. 修改 Info.plist 文件。
首次运行应用时,iOS 会显示一个对话框,要求用户授予访问位置信息服务的权限。此对话框将提供您定义的字符串,您只需将其放入 Info.plist 文件中即可。如果不存在此字符串,则不会显示对话框,并且应用将无法正常运行。
您可以在项目资源管理器中找到 Info.plist 文件,如下所示:
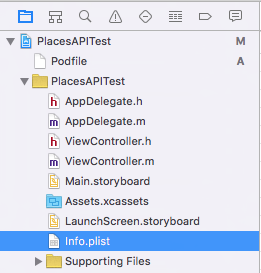
选择该文件,您会看到 plist 编辑器。
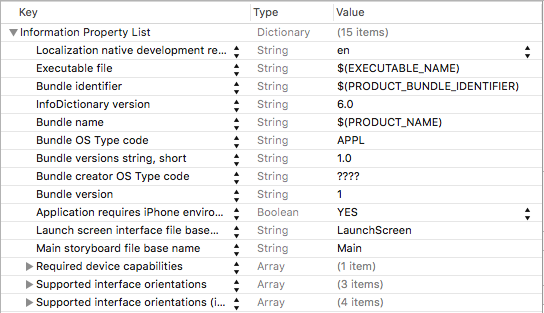
将鼠标悬停在任意元素上,您会看到“+”图标。按一下,您会看到出现一个新条目。在此框中输入值“NSLocationAlwaysUsageDescription”。
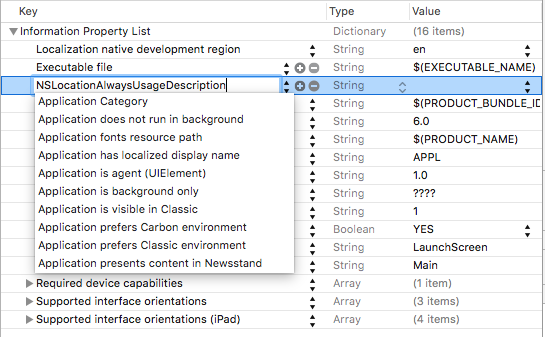
按 Enter 键即可添加新密钥。然后,双击相应键的“值”列,并添加一个字符串:
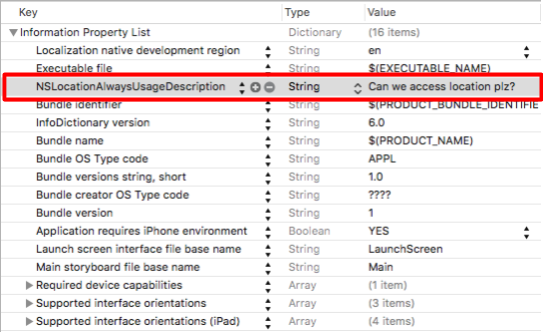
如需详细了解此字符串,请参阅 Apple 开发者文档(点击此处)。
5. 修改应用委托
在项目浏览器中,找到并打开 AppDelegate.m。您将使用此文件添加 API 密钥。
在文件顶部,在 #import 行下方立即添加以下内容:
@import GoogleMaps;
然后,在 didFinishLaunchingWithOptions: 函数中,在“return YES”行上方添加以下代码:
[GMSServices provideAPIKey:@"<Add your API Key>"];
请务必使用您之前生成的 API 密钥。
6. 修改故事板文件
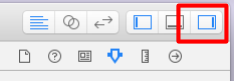
在项目浏览器中,打开 Main.storyboard 文件。按右上角的边栏按钮,确保边栏处于活动状态。
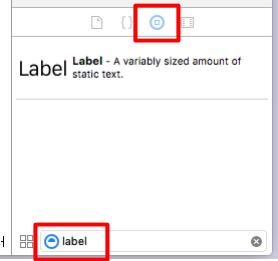
然后,在边栏底部,确保已选择“对象库”,找到“标签控件”。
在左侧的视图控制器场景中,确保已选择“视图”:
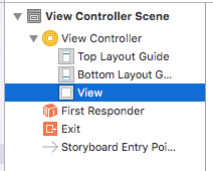
然后,将 7 个标签拖放到视图中。按此处所示的顺序排列。请务必拖动其大小,使其与显示的尺寸一致。您可以双击标签中的文字,然后输入所需的值,以修改标签中的文字:
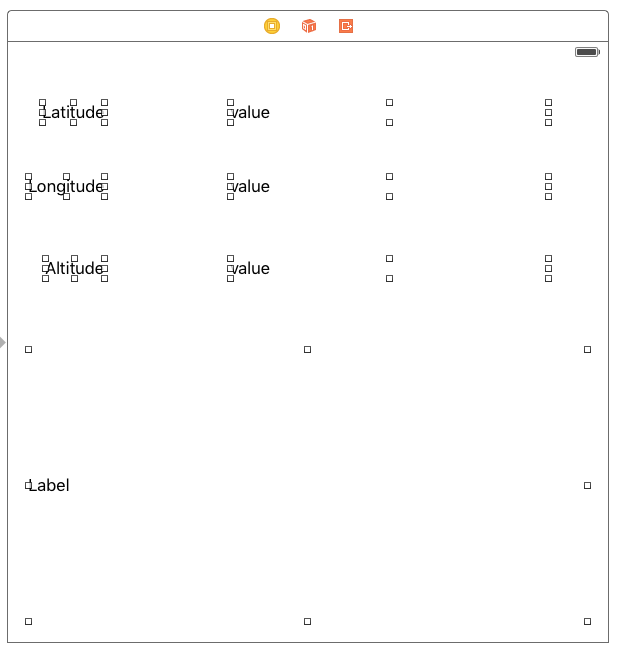
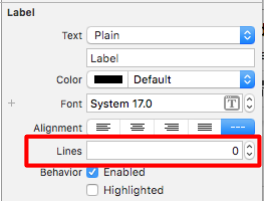
对于最底部的标签(非常大的标签),请前往属性编辑器,并确保将其设置为 0 行(默认值为 1)。这样,标签就可以呈现多行。
7. 为值创建 Outlet
对于这 3 个“值”标签,您需要创建一个插座。这样,您就可以使用代码更改这些变量的值。为此,您需要先激活助理编辑器。为此,请先点击属性边栏的按钮将其移除,以关闭该边栏。(此按钮在上一步中显示过)
然后,选择 Google 助理按钮(即此处显示的双圆圈按钮):

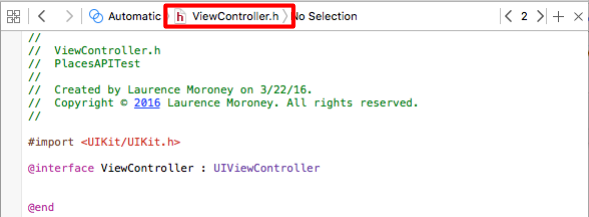
确保它正在渲染 ViewController.h 文件。如果不是,您可以使用助理窗口顶部的编辑器将其更改为是:
然后,按住 CONTROL 键,将每个标签拖放到助理中的 ViewController.h 文件内的 @interface 行下方。系统会弹出一个对话框,询问您要建立哪种类型的连接:
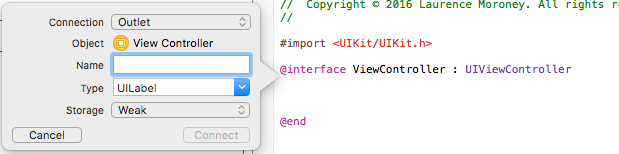
确保设置如图所示(连接:Outlet;类型:UILabel;存储:Weak),然后为每个设置命名。在此 Codelab 中,我将经度、纬度和海拔标签分别命名为 lblLongitude、lblLatitude 和 lblAltidude。另外,从底部拖动大标签,并将其命名为 lblPlaces。
完成后,您的 ViewController.h 文件应如下所示:
#import <UIKit/UIKit.h>
@import GoogleMaps;

@interface ViewController : UIViewController
@property (weak, nonatomic) IBOutlet UILabel *lblLatitude;
@property (weak, nonatomic) IBOutlet UILabel *lblLongitude;
@property (weak, nonatomic) IBOutlet UILabel *lblAltitude;
@property (weak, nonatomic) IBOutlet UILabel *lblPlaces;

@end
8. 修改位置信息和 Google 客户端 API 的头文件
在最后一步(构建应用以使用 Places API)之前,您需要在头文件 (ViewController.h) 中设置一些其他变量。以下是核心位置信息管理器和核心位置信息对象:
@property (strong, nonatomic) CLLocationManager *locationManager;
@property (strong, nonatomic) CLLocation *location;
您还需要一个 Google API 客户端:
@property GMSPlacesClient *placesClient;
最后,您需要更新头文件,以便该类实现 CLLocationManagerDelegate:
@interface ViewController : UIViewController<CLLocationManagerDelegate>
完成后,您的头文件应如下所示:
#import <UIKit/UIKit.h>
#import <CoreLocation/CoreLocation.h>
#import <GoogleMaps/GoogleMaps.h>


@interface ViewController : UIViewController<CLLocationManagerDelegate>
@property (strong, nonatomic) CLLocationManager *locationManager;
@property (strong, nonatomic) CLLocation *location;
@property (weak, nonatomic) IBOutlet UILabel *lblLongitude;
@property (weak, nonatomic) IBOutlet UILabel *lblLatitude;
@property (weak, nonatomic) IBOutlet UILabel *lblAltitude;
@property (weak, nonatomic) IBOutlet UILabel *lblPlaces;

@property GMSPlacesClient *placesClient;
@end
9. 修改视图控制器
第一步是修改 viewDidLoad 函数,以初始化位置管理器、请求用户授权访问位置信息,并最终启动位置管理器,以便其跟踪当前位置。您还将初始化 Google Places API 客户端。
- (void)viewDidLoad {
    [super viewDidLoad];
    self.locationManager = [[CLLocationManager alloc]init];
    self.locationManager.desiredAccuracy = kCLLocationAccuracyBest;
    if([self.locationManager respondsToSelector:@selector(requestAlwaysAuthorization)]) {
        [self.locationManager requestAlwaysAuthorization];
        // Or [self.locationManager requestWhenInUseAuthorization];
    }
    [self.locationManager startUpdatingLocation];

    self.locationManager.delegate = self;
    self.location = [[CLLocation alloc] init];
    self.placesClient = [GMSPlacesClient sharedClient];
}
10. 处理位置信息更新
位置信息管理器将通过调用 didUpdateLocations 函数来回调您的视图控制器,并提供位置信息更新。您需要将此函数添加到 ViewController.m 中。该函数如下所示:
-(void)locationManager:(CLLocationManager *)manager didUpdateLocations:(NSArray<CLLocation *> *)locations{
    // Enter code here
}
此函数需要执行多项操作。
首先,它会缓存上次收到的位置信息:
self.location = locations.lastObject;
接下来,应更新纬度、经度和海拔这三个标签:
self.lblLatitude.text = [NSString stringWithFormat:@"%f", self.location.coordinate.latitude];

self.lblLongitude.text = [NSString stringWithFormat:@"%f", self.location.coordinate.longitude];

self.lblAltitude.text = [NSString stringWithFormat:@"%f", self.location.altitude];
接下来,您将使用 Places 客户端调用 Places API。为此,您可以指定回调函数,该函数将获取地点似然性列表。Places API 会根据您的位置信息确定您身处特定地点的可能性。它会返回可能的地点的名称,以及一个介于 0 到 1 之间的值,其中包含您在该地点的概率。
[self.placesClient currentPlaceWithCallback:^(GMSPlaceLikelihoodList *likelihoodList, NSError *error) {
然后,您可以实现回调。此代码将遍历可能性列表,并添加地点和这些地点的可能性。
[self.placesClient currentPlaceWithCallback:^(GMSPlaceLikelihoodList *likelihoodList, NSError *error) {

  if (error != nil) {
    NSLog(@"Current Place error %@", [error localizedDescription]);
    return;
  }
  NSMutableString *strPlaces = [NSMutableString stringWithString:@""];

  for (GMSPlaceLikelihood *likelihood in likelihoodList.likelihoods) {
    GMSPlace* place = likelihood.place;
    NSLog(@"Current Place name %@ at likelihood %g", place.name,
            likelihood.likelihood);
    NSLog(@"Current Place address %@", place.formattedAddress);
    NSLog(@"Current Place attributions %@", place.attributions);
    NSLog(@"Current PlaceID %@", place.placeID);
    [strPlaces appendString:place.name];
    [strPlaces appendString:@" "];
    [strPlaces appendFormat:@"%g",likelihood.likelihood];
    [strPlaces appendString:@"\n"];
  }
  self.lblPlaces.text = strPlaces;
}];
完成后,您的 didUpdateLocations 函数应如下所示:
-(void)locationManager:(CLLocationManager *)manager didUpdateLocations:(NSArray<CLLocation *> *)locations{

    self.location = locations.lastObject;
    self.lblLatitude.text = [NSString stringWithFormat:@"%f", self.location.coordinate.latitude];
    self.lblLongitude.text = [NSString stringWithFormat:@"%f", self.location.coordinate.longitude];
    self.lblAltitude.text = [NSString stringWithFormat:@"%f", self.location.altitude];

    NSLog(@"%@", self.location.description);

    [self.placesClient currentPlaceWithCallback:^(GMSPlaceLikelihoodList *likelihoodList, NSError *error) {

        if (error != nil) {
            NSLog(@"Current Place error %@", [error localizedDescription]);
            return;
        }
        NSMutableString *strPlaces = [NSMutableString stringWithString:@""];

        for (GMSPlaceLikelihood *likelihood in likelihoodList.likelihoods)
        {
            GMSPlace* place = likelihood.place;
            NSLog(@"Current Place name %@ at likelihood %g", place.name, likelihood.likelihood);
            NSLog(@"Current Place address %@", place.formattedAddress);
            NSLog(@"Current Place attributions %@", place.attributions);
            NSLog(@"Current PlaceID %@", place.placeID);
            [strPlaces appendString:place.name];
            [strPlaces appendString:@" "];
            [strPlaces appendFormat:@"%g",likelihood.likelihood];
            [strPlaces appendString:@"\n"];
        }
        self.lblPlaces.text = strPlaces;
    }];
}
您现在可以运行应用并进行测试了!
11. 在模拟器中运行应用
您可以使用标题栏中的“运行”按钮运行应用。您还可以选择运行类型,如您在此处看到的,我正在使用模拟器在 iPhone 6 上进行测试。

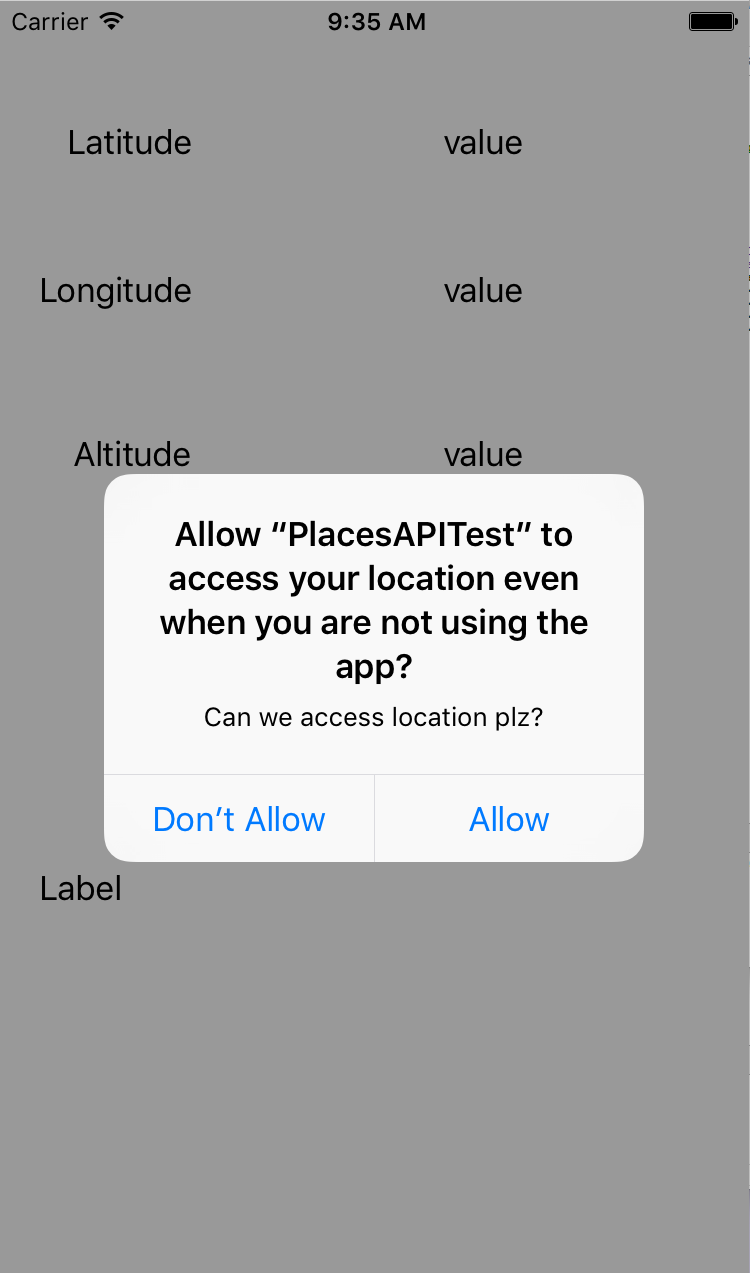
当您按下运行按钮时,应用将构建并启动。您会看到允许应用访问位置信息的请求,其中包含您之前指定的自定义字符串。
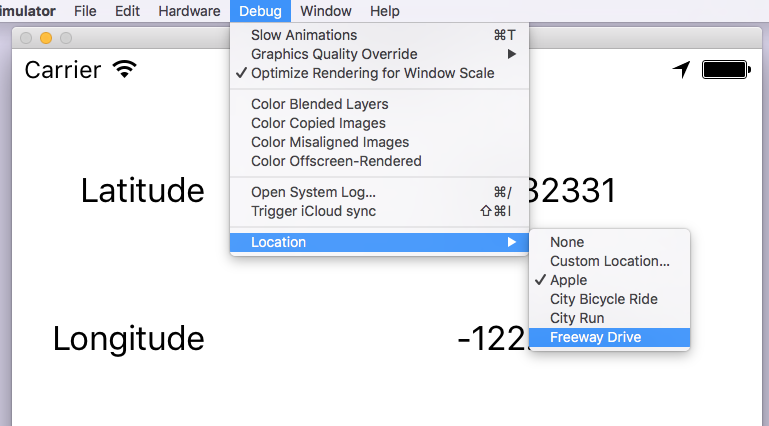
完成此操作后,您会看到纬度和经度更新。如需更改位置,请选择“调试”菜单,然后选择一个位置。例如,您可以选择“高速公路驾驶”
执行此操作后,您会看到位置信息及其可能的位置在更新,模拟高速公路驾驶。
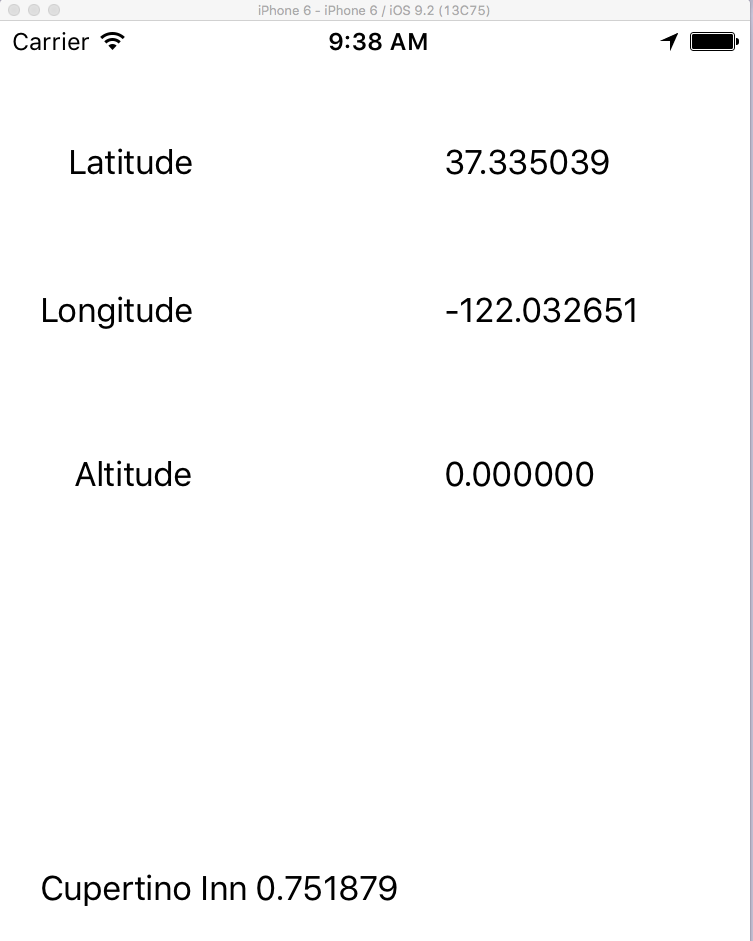
这样就大功告成了!您已成功在 iOS 上使用 Google Places API 访问当前地点的详细信息。