
1. 始める前に
ウェブサイトで最も一般的な機能のひとつは、ビジネス拠点や施設など、物理的に存在する場所を示した Google マップを表示することです。地図の実装方法は、場所の数や変更頻度などの要件によって大きく異なります。
この Codelab では、最もシンプルな事例(店舗チェーンがあるビジネスなど、数が少なく変更がほとんど行われない場所の店舗検索機能)について説明します。この事例では、サーバー側でのプログラミングの必要がなく、あまり高い技術力が求められない手法を使用できます。かといって、カスタマイズできないわけではありません。GeoJSON データ形式を利用して、地図上の各店舗の情報の保存とレンダリングを行ったり、マーカーと地図そのものの全体的なスタイルをカスタマイズしたりすることができます。
さらに、Cloud Shell を使用して、店舗検索を開発したりホストしたりすることもできます。必ずしも必須ではありませんが、このツールを使用すれば、ウェブブラウザを搭載したあらゆるデバイスから店舗検索を開発し、オンラインで一般公開することができます。
前提条件
- HTML と JavaScript の基本的な知識
演習内容
- GeoJSON 形式で保存された店舗の場所と情報の一式を含む地図を表示します。
- マーカーと地図自体をカスタマイズします。
- マーカーがクリックされたときに、店舗についての追加情報を表示します。
- Place Autocomplete 検索バーをウェブページに追加します。
- ユーザーが指定した出発地に最も近い店舗の場所を特定します。
2. 準備
この Codelab で使用する、以下 3 つの API を有効にします(次のセクションの手順 3 で詳述)。
- Maps JavaScript API
- Places API
- Distance Matrix API
Google Maps Platform の利用を始める
Google Maps Platform を初めて使用する場合は、Google Maps Platform スタートガイドを参照するか、再生リスト「Getting Started with Google Maps Platform」を視聴して、以下の手順を行ってください。
- 請求先アカウントを作成します。
- プロジェクトを作成します。
- Google Maps Platform の API と SDK(前セクションに記載のもの)を有効化します。
- API キーを生成します。
Cloud Shell をアクティブにする
この Codelab では、Cloud Shell(Google Cloud で実行するコマンドライン環境)を使用します。この環境を使用すると、Google Cloud で実行しているプロダクトとリソースにアクセスできるため、ウェブブラウザからプロジェクトを完全にホストして実行できます。
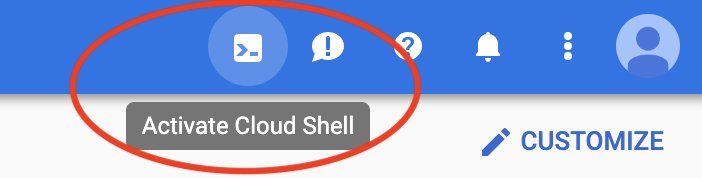
Cloud Console から Cloud Shell を有効にするには、[Cloud Shell をアクティブにする]  をクリックします(プロビジョニングと対象環境への接続にはそれほど時間はかかりません)。
クリックすると、紹介インタースティシャルが表示された後、ブラウザの下部に新しいシェルが表示されます。
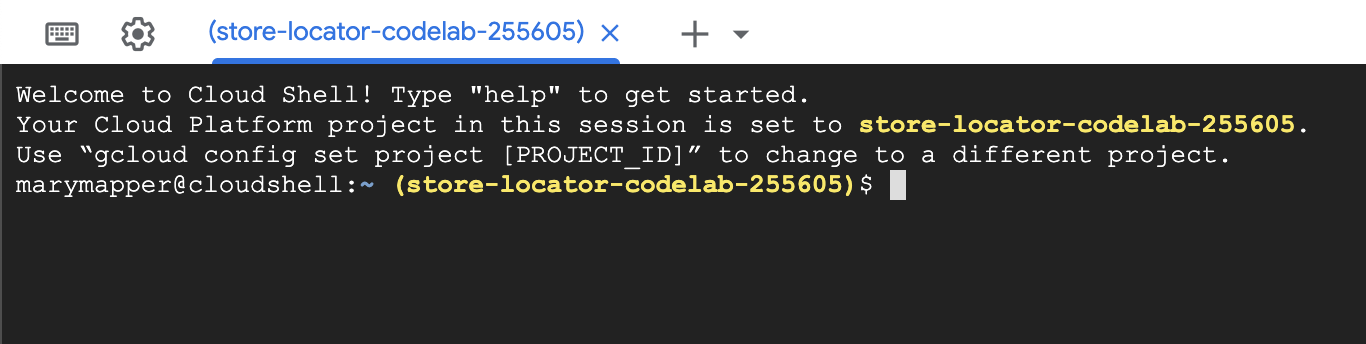
Cloud Shell が接続されると、認証が完了していることと、設定時に選択したプロジェクト ID にプロジェクトがすでに設定されていることがわかります。
$ gcloud auth list
Credentialed Accounts:
ACTIVE  ACCOUNT
  *     <myaccount>@<mydomain>.com
$ gcloud config list project
[core]
project = <YOUR_PROJECT_ID>
なんらかの理由でプロジェクトが設定されていない場合は、次のコマンドを実行します。
$ gcloud config set project <YOUR_PROJECT_ID>
3. Hello World: 地図の作成
地図の作成を始める
Cloud Shell で、まずはこの Codelab の今後のベースとなる HTML ページを作成します。
- Cloud Shell のツールバーで、[エディタを開く]
 をクリックして、新しいタブでコードエディタを開きます。
ウェブベースのこのコードエディタを使用すると、Cloud Shell のファイルを簡単に編集できます。

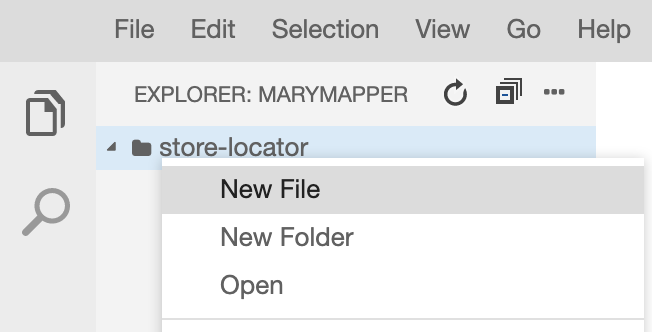
- [File] > [New Folder] をクリックして、コードエディタにアプリ用の新しい
store-locatorディレクトリを作成します。

- 新しいフォルダの名前を
store-locatorとします。
次に、地図を備えたウェブページを作成します。
store-locatorディレクトリにindex.htmlという名前のファイルを作成します。
- 次のコンテンツを
index.htmlファイルに追加します。
index.html
<html>

<head>
    <title>Store Locator</title>
    <style>
        #map {
            height: 100%;
        }

        html,
        body {
            height: 100%;
            margin: 0;
            padding: 0;
        }
    </style>
</head>

<body>
    <!-- The div to hold the map -->
    <div id="map"></div>

    <script src="app.js"></script>
    <script async defer src="https://maps.googleapis.com/maps/api/js?key=YOUR_API_KEY&libraries=places&callback=initMap&solution_channel=GMP_codelabs_simplestorelocator_v1_a">
    </script>
</body>

</html>
これは、地図を表示する HTML ページです。このページには、地図がページ全体に表示されるようにするための CSS、地図を保持する <div> タグ、<script> タグのペアが含まれています。最初のスクリプトタグは、app.js という名前の JavaScript ファイルを読み込みます。このファイルには、すべての JavaScript コードが含まれます。2 番目のスクリプトタグは API キーを読み込みます。このキーで、後で追加するオートコンプリート機能用の Places Library を利用し、Maps JavaScript API が読み込まれた後に実行する JavaScript 関数の名前(initMap)を指定します。
- コード スニペットのテキスト
YOUR_API_KEYを、この Codelab で生成した API キーに置き換えます。 - 最後に、次のコードを含む
app.jsという名前の別のファイルを作成します。
app.js
function initMap() {
   // Create the map.
    const map = new google.maps.Map(document.getElementById('map'), {
        zoom: 7,
        center: { lat: 52.632469, lng: -1.689423 },
    });

}
これは、地図を作成するために必要な最小限のコードです。地図を保持する <div> タグへの参照を渡して、地図の中心とズームレベルを指定します。
このアプリをテストするには、シンプルな Python HTTP サーバーを Cloud Shell で実行します。
- Cloud Shell に移動し、以下を入力します。
$ cd store-locator
$ python -m SimpleHTTPServer 8080
数行のログ出力が表示されます。これは、localhost のポート 8080 でリッスンするウェブアプリを使って、シンプルな HTTP サーバーを Cloud Shell で実行していることを示しています。
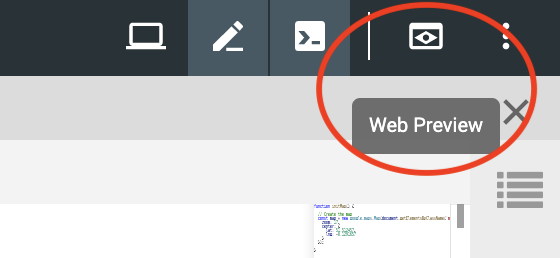
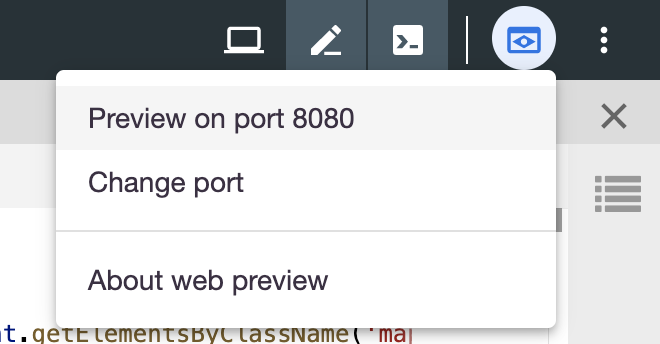
- Cloud Console のツールバーで [ウェブでプレビュー] アイコン
 をクリックし、[プレビューのポート: 8080] を選択して、このアプリでウェブブラウザのタブを開きます。
このメニュー項目をクリックするとウェブブラウザに新しいタブが開き、シンプルな Python HTTP サーバーから配信される HTML の内容が表示されます。問題がなければ、イギリスのロンドンを中心とした地図が表示されます。
シンプルな HTTP サーバーを停止するには、Cloud Shell で Control+C キーを押します。
4. 地図に GeoJSON を読み込む
では、店舗のデータについて考えてみましょう。GeoJSON は、地図上のポイント、ライン、ポリゴンなどのシンプルな地理的対象物を表すデータ形式です。対象物には任意のデータを含めることもできるため、GeoJSON は店舗(基本的に、店舗名、営業時間、電話番号などの少しの追加データを含む地図上のポイントとして表される)を表すのに最適です。GeoJSON が最適である最も重要な理由は、Google マップに非常に高いレベルで対応しているため、GeoJSON ドキュメントを Google マップに送信すると、地図上に適切に表示することができることです。
stores.jsonという名前の新しいファイルを作成し、次のコードを貼り付けます。
stores.json
{
    "type": "FeatureCollection",
    "features": [{
            "geometry": {
                "type": "Point",
                "coordinates": [-0.1428115,
                    51.5125168
                ]
            },
            "type": "Feature",
            "properties": {
                "category": "patisserie",
                "hours": "10am - 6pm",
                "description": "Modern twists on classic pastries. We're part of a larger chain of patisseries and cafes.",
                "name": "Josie's Patisserie Mayfair",
                "phone": "+44 20 1234 5678",
                "storeid": "01"
            }
        },
        {
            "geometry": {
                "type": "Point",
                "coordinates": [-2.579623,
                    51.452251
                ]
            },
            "type": "Feature",
            "properties": {
                "category": "patisserie",
                "hours": "10am - 6pm",
                "description": "Come and try our award-winning cakes and pastries. We're part of a larger chain of patisseries and cafes.",
                "name": "Josie's Patisserie Bristol",
                "phone": "+44 117 121 2121",
                "storeid": "02"
            }
        },
        {
            "geometry": {
                "type": "Point",
                "coordinates": [
                    1.273459,
                    52.638072
                ]
            },
            "type": "Feature",
            "properties": {
                "category": "patisserie",
                "hours": "10am - 6pm",
                "description": "Whatever the occasion, whether it's a birthday or a wedding, Josie's Patisserie has the perfect treat for you. We're part of a larger chain of patisseries and cafes.",
                "name": "Josie's Patisserie Norwich",
                "phone": "+44 1603 123456",
                "storeid": "03"
            }
        },
        {
            "geometry": {
                "type": "Point",
                "coordinates": [-1.9912838,
                    50.8000418
                ]
            },
            "type": "Feature",
            "properties": {
                "category": "patisserie",
                "hours": "10am - 6pm",
                "description": "A gourmet patisserie that will delight your senses. We're part of a larger chain of patisseries and cafes.",
                "name": "Josie's Patisserie Wimborne",
                "phone": "+44 1202 343434",
                "storeid": "04"
            }
        },
        {
            "geometry": {
                "type": "Point",
                "coordinates": [-2.985933,
                    53.408899
                ]
            },
            "type": "Feature",
            "properties": {
                "category": "patisserie",
                "hours": "10am - 6pm",
                "description": "Spoil yourself or someone special with our classic pastries. We're part of a larger chain of patisseries and cafes.",
                "name": "Josie's Patisserie Liverpool",
                "phone": "+44 151 444 4444",
                "storeid": "05"
            }
        },
        {
            "geometry": {
                "type": "Point",
                "coordinates": [-1.689423,
                    52.632469
                ]
            },
            "type": "Feature",
            "properties": {
                "category": "patisserie",
                "hours": "10am - 6pm",
                "description": "Come and feast your eyes and tastebuds on our delicious pastries and cakes. We're part of a larger chain of patisseries and cafes.",
                "name": "Josie's Patisserie Tamworth",
                "phone": "+44 5555 55555",
                "storeid": "06"
            }
        },
        {
            "geometry": {
                "type": "Point",
                "coordinates": [-3.155305,
                    51.479756
                ]
            },
            "type": "Feature",
            "properties": {
                "category": "patisserie",
                "hours": "10am - 6pm",
                "description": "Josie's Patisserie is family-owned, and our delectable pastries, cakes, and great coffee are renowed. We're part of a larger chain of patisseries and cafes.",
                "name": "Josie's Patisserie Cardiff",
                "phone": "+44 29 6666 6666",
                "storeid": "07"
            }
        },
        {
            "geometry": {
                "type": "Point",
                "coordinates": [-0.725019,
                    52.668891
                ]
            },
            "type": "Feature",
            "properties": {
                "category": "cafe",
                "hours": "8am - 9:30pm",
                "description": "Oakham's favorite spot for fresh coffee and delicious cakes. We're part of a larger chain of patisseries and cafes.",
                "name": "Josie's Cafe Oakham",
                "phone": "+44 7777 777777",
                "storeid": "08"
            }
        },
        {
            "geometry": {
                "type": "Point",
                "coordinates": [-2.477653,
                    53.735405
                ]
            },
            "type": "Feature",
            "properties": {
                "category": "cafe",
                "hours": "8am - 9:30pm",
                "description": "Enjoy freshly brewed coffe, and home baked cakes in our homely cafe. We're part of a larger chain of patisseries and cafes.",
                "name": "Josie's Cafe Blackburn",
                "phone": "+44 8888 88888",
                "storeid": "09"
            }
        },
        {
            "geometry": {
                "type": "Point",
                "coordinates": [-0.211363,
                    51.108966
                ]
            },
            "type": "Feature",
            "properties": {
                "category": "cafe",
                "hours": "8am - 9:30pm",
                "description": "A delicious array of pastries with many flavours, and fresh coffee in an snug cafe. We're part of a larger chain of patisseries and cafes.",
                "name": "Josie's Cafe Crawley",
                "phone": "+44 1010 101010",
                "storeid": "10"
            }
        },
        {
            "geometry": {
                "type": "Point",
                "coordinates": [-0.123559,
                    50.832679
                ]
            },
            "type": "Feature",
            "properties": {
                "category": "cafe",
                "hours": "8am - 9:30pm",
                "description": "Grab a freshly brewed coffee, a decadent cake and relax in our idyllic cafe. We're part of a larger chain of patisseries and cafes.",
                "name": "Josie's Cafe Brighton",
                "phone": "+44 1313 131313",
                "storeid": "11"
            }
        },
        {
            "geometry": {
                "type": "Point",
                "coordinates": [-3.319575,
                    52.517827
                ]
            },
            "type": "Feature",
            "properties": {
                "category": "cafe",
                "hours": "8am - 9:30pm",
                "description": "Come in and unwind at this idyllic cafe with fresh coffee and home made cakes. We're part of a larger chain of patisseries and cafes.",
                "name": "Josie's Cafe Newtown",
                "phone": "+44 1414 141414",
                "storeid": "12"
            }
        },
        {
            "geometry": {
                "type": "Point",
                "coordinates": [
                    1.158167,
                    52.071634
                ]
            },
            "type": "Feature",
            "properties": {
                "category": "cafe",
                "hours": "8am - 9:30pm",
                "description": "Fresh coffee and delicious cakes in an snug cafe. We're part of a larger chain of patisseries and cafes.",
                "name": "Josie's Cafe Ipswich",
                "phone": "+44 1717 17171",
                "storeid": "13"
            }
        }
    ]
}
これはかなりの量のデータですが、一度理解すると、店舗ごとに同じ構造を繰り返しているにすぎないことがわかります。各店舗は、座標および properties キーに含まれてる追加のデータとともに GeoJSON Point として表現されます。興味深いことに、GeoJSON は任意の名前のキーを properties キーに含めることができます。この Codelab では、category、hours、description、name、phone でのキーを使用しています。
- 次に、
app.jsを編集して、stores.jsの GeoJSON を地図に読み込みます。
app.js
function initMap() {
  // Create the map.
  const map = new google.maps.Map(document.getElementById('map'), {
    zoom: 7,
    center: {lat: 52.632469, lng: -1.689423},
  });

  // Load the stores GeoJSON onto the map.
  map.data.loadGeoJson('stores.json', {idPropertyName: 'storeid'});

  const apiKey = 'YOUR_API_KEY';
  const infoWindow = new google.maps.InfoWindow();

  // Show the information for a store when its marker is clicked.
  map.data.addListener('click', (event) => {
    const category = event.feature.getProperty('category');
    const name = event.feature.getProperty('name');
    const description = event.feature.getProperty('description');
    const hours = event.feature.getProperty('hours');
    const phone = event.feature.getProperty('phone');
    const position = event.feature.getGeometry().get();
    const content = `
      <h2>${name}</h2><p>${description}</p>
      <p><b>Open:</b> ${hours}<br/><b>Phone:</b> ${phone}</p>
    `;

    infoWindow.setContent(content);
    infoWindow.setPosition(position);
    infoWindow.setOptions({pixelOffset: new google.maps.Size(0, -30)});
    infoWindow.open(map);
  });
}
コードサンプルでは、loadGeoJson を呼び出して JSON ファイルの名前を渡すことで、GeoJSON を地図に読み込みました。また、マーカーがクリックされるたびに実行する関数も定義しました。これで、関数はマーカーがクリックされた店舗の追加のデータにアクセスし、情報ウィンドウの情報を使用して、それを表示できるようになります。このアプリをテストするには、以前と同じコマンドを使用してシンプルな Python HTTP サーバーを実行できます。
- Cloud Shell に戻り、次のように入力します。
$ python -m SimpleHTTPServer 8080
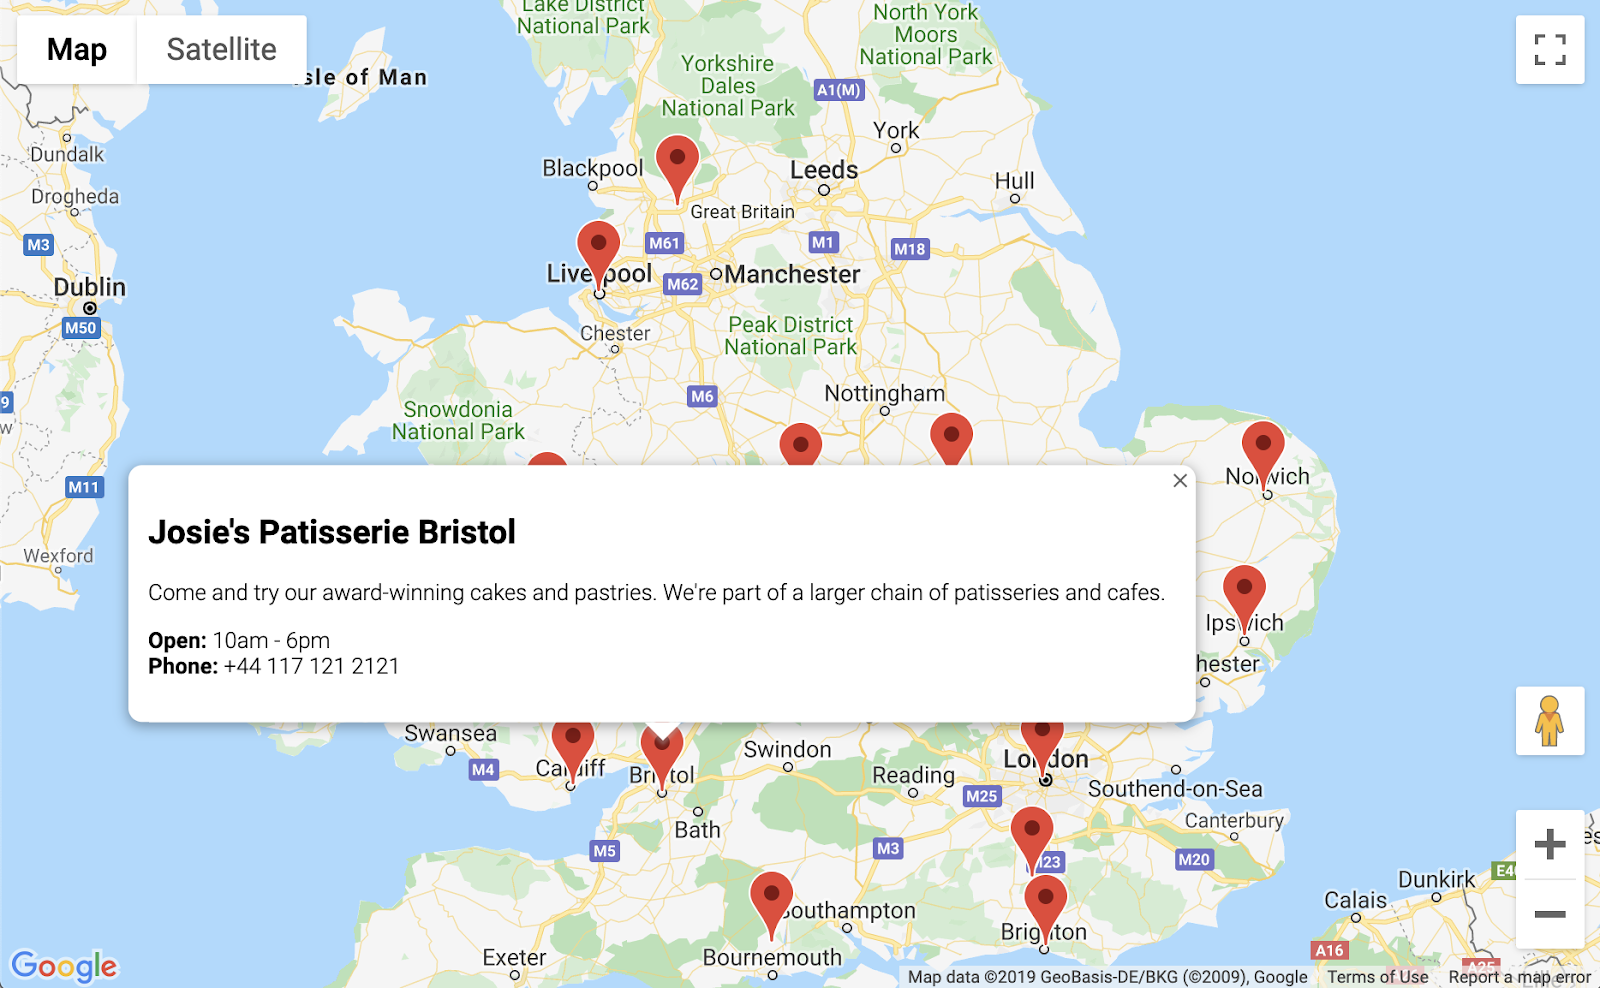
- [ウェブでプレビュー] > [プレビューのポート: 8080] を再度クリックすると、マーカーの付いた地図が表示されます。各マーカーをクリックすると、以下の例ように各店舗の詳細情報が表示されます。地図がずいぶん仕上がってきました。
5. 地図をカスタマイズする
もう少しで完了です。すべての店舗のマーカーと、クリックすると表示される追加情報を備えた地図が作成できました。ただし、外観は Google マップの他の地図と変わりありません。では、カスタムの地図スタイル、マーカー、ロゴ、ストリートビュー画像を加えて、地図を魅力的にしましょう。
カスタム スタイルが追加された app.js の新しいバージョンは次のとおりです。
app.js
const mapStyle = [{
  'featureType': 'administrative',
  'elementType': 'all',
  'stylers': [{
    'visibility': 'on',
  },
  {
    'lightness': 33,
  },
  ],
},
{
  'featureType': 'landscape',
  'elementType': 'all',
  'stylers': [{
    'color': '#f2e5d4',
  }],
},
{
  'featureType': 'poi.park',
  'elementType': 'geometry',
  'stylers': [{
    'color': '#c5dac6',
  }],
},
{
  'featureType': 'poi.park',
  'elementType': 'labels',
  'stylers': [{
    'visibility': 'on',
  },
  {
    'lightness': 20,
  },
  ],
},
{
  'featureType': 'road',
  'elementType': 'all',
  'stylers': [{
    'lightness': 20,
  }],
},
{
  'featureType': 'road.highway',
  'elementType': 'geometry',
  'stylers': [{
    'color': '#c5c6c6',
  }],
},
{
  'featureType': 'road.arterial',
  'elementType': 'geometry',
  'stylers': [{
    'color': '#e4d7c6',
  }],
},
{
  'featureType': 'road.local',
  'elementType': 'geometry',
  'stylers': [{
    'color': '#fbfaf7',
  }],
},
{
  'featureType': 'water',
  'elementType': 'all',
  'stylers': [{
    'visibility': 'on',
  },
  {
    'color': '#acbcc9',
  },
  ],
},
];

function initMap() {
  // Create the map.
  const map = new google.maps.Map(document.getElementById('map'), {
    zoom: 7,
    center: {lat: 52.632469, lng: -1.689423},
    styles: mapStyle,
  });

  // Load the stores GeoJSON onto the map.
  map.data.loadGeoJson('stores.json', {idPropertyName: 'storeid'});

  // Define the custom marker icons, using the store's "category".
  map.data.setStyle((feature) => {
    return {
      icon: {
        url: `img/icon_${feature.getProperty('category')}.png`,
        scaledSize: new google.maps.Size(64, 64),
      },
    };
  });

  const apiKey = 'YOUR_API_KEY';
  const infoWindow = new google.maps.InfoWindow();

  // Show the information for a store when its marker is clicked.
  map.data.addListener('click', (event) => {
    const category = event.feature.getProperty('category');
    const name = event.feature.getProperty('name');
    const description = event.feature.getProperty('description');
    const hours = event.feature.getProperty('hours');
    const phone = event.feature.getProperty('phone');
    const position = event.feature.getGeometry().get();
    const content = `
      <img style="float:left; width:200px; margin-top:30px" src="img/logo_${category}.png">
      <div style="margin-left:220px; margin-bottom:20px;">
        <h2>${name}</h2><p>${description}</p>
        <p><b>Open:</b> ${hours}<br/><b>Phone:</b> ${phone}</p>
        <p><img src="https://maps.googleapis.com/maps/api/streetview?size=350x120&location=${position.lat()},${position.lng()}&key=${apiKey}&solution_channel=GMP_codelabs_simplestorelocator_v1_a"></p>
      </div>
      `;

    infoWindow.setContent(content);
    infoWindow.setPosition(position);
    infoWindow.setOptions({pixelOffset: new google.maps.Size(0, -30)});
    infoWindow.open(map);
  });

}
以下を追加しました。
mapStyle変数には、地図のスタイル設定に関するすべての情報が含まれています(さらに、必要に応じて独自のスタイルを作成することもできます)。map.data.setStyleメソッドを使用して、カスタム マーカー(GeoJSON の各category用とは異なる)を適用しました。content変数を変更し、ロゴ(GeoJSON のcategoryをここでも使用)と店舗の場所のストリートビュー画像を追加しました。
上記をデプロイする前に、次の手順を完了する必要があります。
app.jsの'YOUR_API_KEY'文字列を、前の手順で取得した API キー(index.htmlで貼り付けたキー。引用符はそのまま残す)に置き換えることで、apiKey変数に正しい値を設定します。- Cloud Shell で次のコマンドを実行して、マーカーとロゴのグラフィックを
store-locatorディレクトリにダウンロードします。シンプルな HTTP サーバーが実行されている場合は、Control+Cを使用してそれを停止します。
$ mkdir -p img; cd img
$ wget https://github.com/googlecodelabs/google-maps-simple-store-locator/raw/master/src/img/icon_cafe.png
$ wget https://github.com/googlecodelabs/google-maps-simple-store-locator/raw/master/src/img/icon_patisserie.png
$ wget https://github.com/googlecodelabs/google-maps-simple-store-locator/raw/master/src/img/logo_cafe.png
$ wget https://github.com/googlecodelabs/google-maps-simple-store-locator/raw/master/src/img/logo_patisserie.png
- 次のコマンドを実行して、完成した店舗検索をプレビューします。
$ python -m SimpleHTTPServer 8080
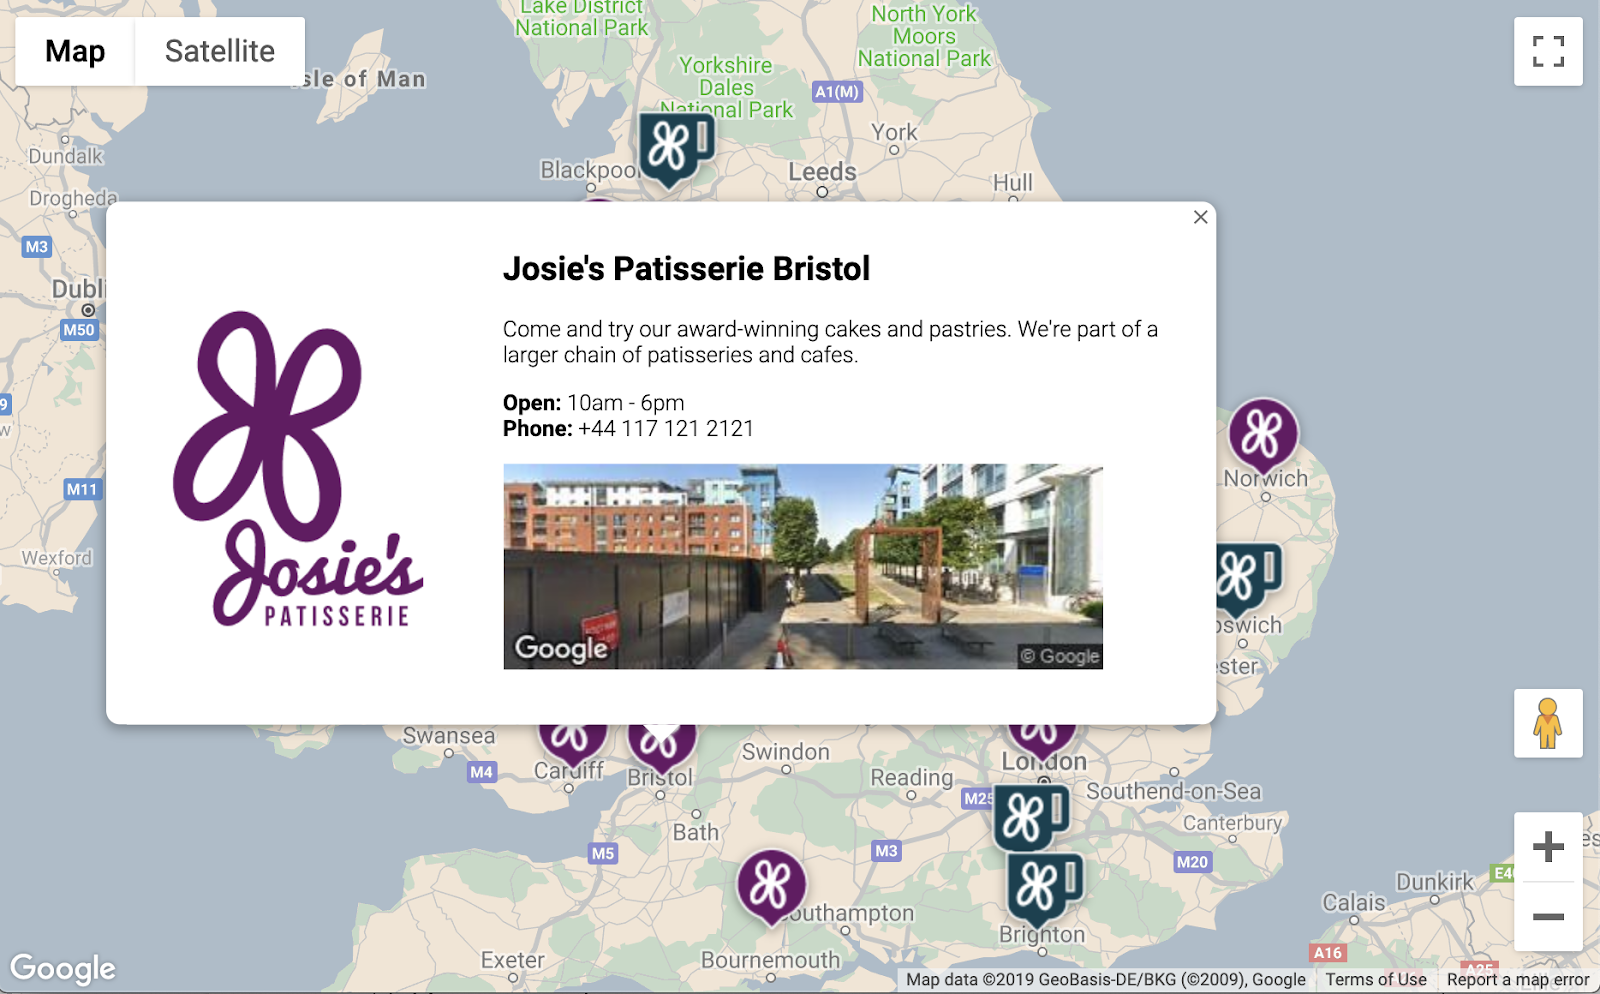
プレビューを再読み込みすると、カスタム スタイル、カスタム マーカー画像、改善された情報ウィンドウ形式、それぞれの場所のストリートビュー画像を含む次のような地図が表示されます。
6 ユーザー入力を取得する
店舗検索の使用目的は通常、現在地または出発予定の住所から最も近い店舗を見つけることです。Place Autocomplete 検索バーを追加して、ユーザーが出発住所を簡単に入力できるようにしましょう。Place Autocomplete は、他の Google 検索バーでのオートコンプリートと同じように機能しますが、Google Maps Platform のすべての Place から予測されるという点が異なります。
- 再び
index.htmlを編集して、Autocomplete 検索バーと検索結果を表示する関連サイドパネルのスタイルを追加します。古いコードに貼り付けた場合は、API キーを必ず置き換えてください。
index.html
<html>

<head>
  <title>Store Locator</title>
  <style>
    #map {
      height: 100%;
    }

    html,
    body {
      height: 100%;
      margin: 0;
      padding: 0;
    }

    /* Styling for Autocomplete search bar */
    #pac-card {
      background-color: #fff;
      border-radius: 2px 0 0 2px;
      box-shadow: 0 2px 6px rgba(0, 0, 0, 0.3);
      box-sizing: border-box;
      font-family: Roboto;
      margin: 10px 10px 0 0;
      -moz-box-sizing: border-box;
      outline: none;
    }

    #pac-container {
      padding-top: 12px;
      padding-bottom: 12px;
      margin-right: 12px;
    }

    #pac-input {
      background-color: #fff;
      font-family: Roboto;
      font-size: 15px;
      font-weight: 300;
      margin-left: 12px;
      padding: 0 11px 0 13px;
      text-overflow: ellipsis;
      width: 400px;
    }

    #pac-input:focus {
      border-color: #4d90fe;
    }

    #title {
      color: #fff;
      background-color: #acbcc9;
      font-size: 18px;
      font-weight: 400;
      padding: 6px 12px;
    }

    .hidden {
      display: none;
    }

    /* Styling for an info pane that slides out from the left.
     * Hidden by default. */
    #panel {
      height: 100%;
      width: null;
      background-color: white;
      position: fixed;
      z-index: 1;
      overflow-x: hidden;
      transition: all .2s ease-out;
    }

    .open {
      width: 250px;
    }

    .place {
      font-family: 'open sans', arial, sans-serif;
      font-size: 1.2em;
      font-weight: 500;
      margin-block-end: 0px;
      padding-left: 18px;
      padding-right: 18px;
    }

    .distanceText {
      color: silver;
      font-family: 'open sans', arial, sans-serif;
      font-size: 1em;
      font-weight: 400;
      margin-block-start: 0.25em;
      padding-left: 18px;
      padding-right: 18px;
    }
  </style>
</head>

<body>
  <!-- The div to hold the map -->
  <div id="map"></div>

  <script src="app.js"></script>
  <script async defer src="https://maps.googleapis.com/maps/api/js?key=YOUR_API_KEY&libraries=places&callback=initMap&solution_channel=GMP_codelabs_simplestorelocator_v1_a">
  </script>
</body>

</html>
Autocomplete 検索バーとスライドアウト パネルは、どちらも必要になるまでは非表示になっています。
- ここで、
app.jsのinitMap関数の最後にある右中括弧の直前に、Autocomplete ウィジェットを追加します。
app.js
  // Build and add the search bar
  const card = document.createElement('div');
  const titleBar = document.createElement('div');
  const title = document.createElement('div');
  const container = document.createElement('div');
  const input = document.createElement('input');
  const options = {
    types: ['address'],
    componentRestrictions: {country: 'gb'},
  };

  card.setAttribute('id', 'pac-card');
  title.setAttribute('id', 'title');
  title.textContent = 'Find the nearest store';
  titleBar.appendChild(title);
  container.setAttribute('id', 'pac-container');
  input.setAttribute('id', 'pac-input');
  input.setAttribute('type', 'text');
  input.setAttribute('placeholder', 'Enter an address');
  container.appendChild(input);
  card.appendChild(titleBar);
  card.appendChild(container);
  map.controls[google.maps.ControlPosition.TOP_RIGHT].push(card);

  // Make the search bar into a Places Autocomplete search bar and select
  // which detail fields should be returned about the place that
  // the user selects from the suggestions.
  const autocomplete = new google.maps.places.Autocomplete(input, options);

  autocomplete.setFields(
      ['address_components', 'geometry', 'name']);
このコードで、Autocomplete の候補が住所だけを返すよう制限します(Place Autocomplete は、施設名や管理事務所と一致する可能性があるため)。また、返される住所をイギリス国内の住所に限定します。この仕様は省略可能とは言え、追加するならば、必要な住所を表示するための候補を少ない入力文字数で絞り込むことができます。その後、作成した Autocomplete div を地図の右上に移動し、レスポンスに含める各 Place に関して返すフィールドを指定します。
- サーバーを再起動し、次のコマンドを実行してプレビューを更新します。
$ python -m SimpleHTTPServer 8080
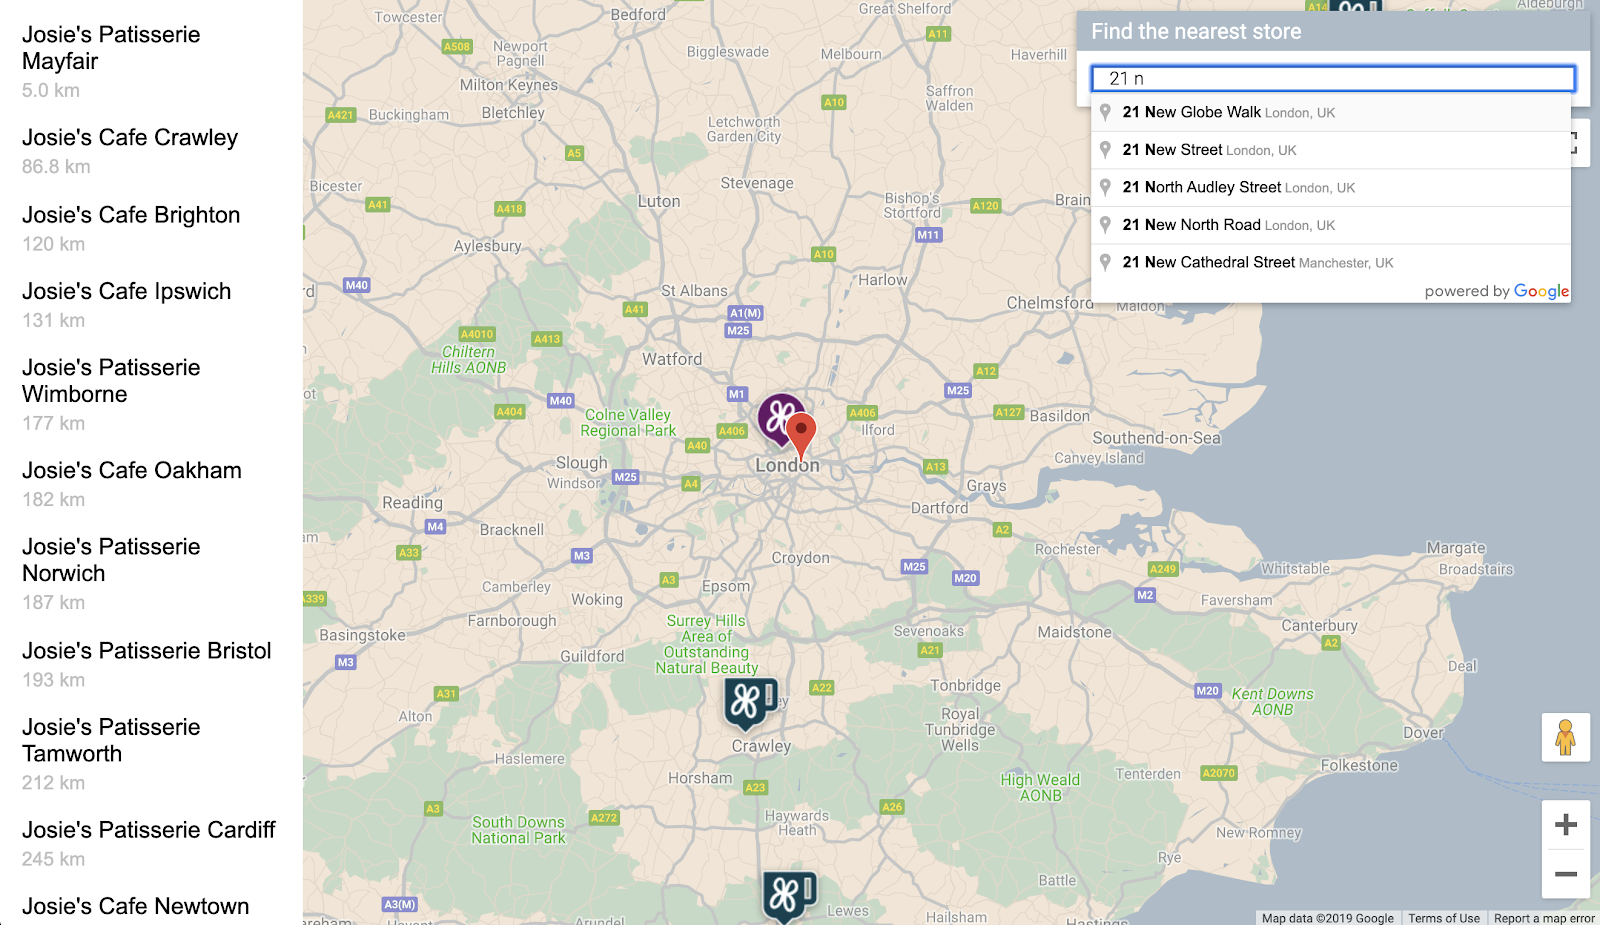
地図の右上に Autocomplete ウィジェットが表示されます。このウィジェットには、入力した内容と一致する英国の住所が表示されます。

次に、ユーザーが Autocomplete ウィジェットから選択した予測住所に基づいて、店舗までの距離が計算されるようにする必要があります。
- 貼り付けたコードの後、
app.jsのinitMapの最後に次のコードを追加します。
app.js
 // Set the origin point when the user selects an address
  const originMarker = new google.maps.Marker({map: map});
  originMarker.setVisible(false);
  let originLocation = map.getCenter();

  autocomplete.addListener('place_changed', async () => {
    originMarker.setVisible(false);
    originLocation = map.getCenter();
    const place = autocomplete.getPlace();

    if (!place.geometry) {
      // User entered the name of a Place that was not suggested and
      // pressed the Enter key, or the Place Details request failed.
      window.alert('No address available for input: \'' + place.name + '\'');
      return;
    }

    // Recenter the map to the selected address
    originLocation = place.geometry.location;
    map.setCenter(originLocation);
    map.setZoom(9);
    console.log(place);

    originMarker.setPosition(originLocation);
    originMarker.setVisible(true);

    // Use the selected address as the origin to calculate distances
    // to each of the store locations
    const rankedStores = await calculateDistances(map.data, originLocation);
    showStoresList(map.data, rankedStores);

    return;
  });
このコードによりリスナーが追加され、ユーザーがいずれかの候補をクリックすると、選択された住所が地図の中心となり、距離計算の基準としての起点が設定されます。距離の計算は次のステップで実装します。
7. 最寄りの店舗のリストを表示する
Directions API は、Google マップ アプリでのルートのリクエストと同じように機能します。出発地と目的地を 1 つずつ入力することで、2 つの地点間のルートが返されます。Distance Matrix API はこのコンセプトをさらに掘り下げ、移動時間と距離に基づいて、複数の出発地と目的地の候補から最適な組み合わせを特定します。この場合、選択した住所に最も近い店舗をユーザーが見つけることができるように、1 つの出発地と店舗の場所の配列(目的地)を提供します。
calculateDistancesと呼ばれる新しい関数をapp.jsに追加します。
app.js
async function calculateDistances(data, origin) {
  const stores = [];
  const destinations = [];

  // Build parallel arrays for the store IDs and destinations
  data.forEach((store) => {
    const storeNum = store.getProperty('storeid');
    const storeLoc = store.getGeometry().get();

    stores.push(storeNum);
    destinations.push(storeLoc);
  });

  // Retrieve the distances of each store from the origin
  // The returned list will be in the same order as the destinations list
  const service = new google.maps.DistanceMatrixService();
  const getDistanceMatrix =
    (service, parameters) => new Promise((resolve, reject) => {
      service.getDistanceMatrix(parameters, (response, status) => {
        if (status != google.maps.DistanceMatrixStatus.OK) {
          reject(response);
        } else {
          const distances = [];
          const results = response.rows[0].elements;
          for (let j = 0; j < results.length; j++) {
            const element = results[j];
            const distanceText = element.distance.text;
            const distanceVal = element.distance.value;
            const distanceObject = {
              storeid: stores[j],
              distanceText: distanceText,
              distanceVal: distanceVal,
            };
            distances.push(distanceObject);
          }

          resolve(distances);
        }
      });
    });

  const distancesList = await getDistanceMatrix(service, {
    origins: [origin],
    destinations: destinations,
    travelMode: 'DRIVING',
    unitSystem: google.maps.UnitSystem.METRIC,
  });

  distancesList.sort((first, second) => {
    return first.distanceVal - second.distanceVal;
  });

  return distancesList;
}
この関数は、1 つの出発地(出発地)と店舗の場所の配列(目的地)を使用する Distance Matrix API を呼び出します。次に、店舗の ID、人が読み取れる文字列で表現された距離、数値(メートル単位)としての距離を格納するオブジェクトの配列を構築し、配列を並べ替えます。
一番近い店舗から順に表示するには、店舗の表示順序を知らせる calculateDistances 関数から返されるリストを使います。この関数を使うと、各店舗がサイドパネルに一覧表示されます。
showStoresListと呼ばれる新しい関数をapp.jsに追加します。
app.js
function showStoresList(data, stores) {
  if (stores.length == 0) {
    console.log('empty stores');
    return;
  }

  let panel = document.createElement('div');
  // If the panel already exists, use it. Else, create it and add to the page.
  if (document.getElementById('panel')) {
    panel = document.getElementById('panel');
    // If panel is already open, close it
    if (panel.classList.contains('open')) {
      panel.classList.remove('open');
    }
  } else {
    panel.setAttribute('id', 'panel');
    const body = document.body;
    body.insertBefore(panel, body.childNodes[0]);
  }

  // Clear the previous details
  while (panel.lastChild) {
    panel.removeChild(panel.lastChild);
  }

  stores.forEach((store) => {
    // Add store details with text formatting
    const name = document.createElement('p');
    name.classList.add('place');
    const currentStore = data.getFeatureById(store.storeid);
    name.textContent = currentStore.getProperty('name');
    panel.appendChild(name);
    const distanceText = document.createElement('p');
    distanceText.classList.add('distanceText');
    distanceText.textContent = store.distanceText;
    panel.appendChild(distanceText);
  });

  // Open the panel
  panel.classList.add('open');

  return;
}
- サーバーを再起動し、次のコマンドを実行してプレビューを更新します。
$ python -m SimpleHTTPServer 8080
- 最後に、Autocomplete 検索バーに英国の住所を入力し、候補のいずれかをクリックします。
その住所が地図の中心に表示され、サイドバーには選択した住所からの距離順で店舗の場所の一覧が表示されます。以下の図はその例です。
8. 省略可: ウェブページをホストする
ここまでは、地図を表示するには Python HTTP サーバーを稼働する必要がありました。有効な Cloud Shell セッションを以外で地図を表示する場合や、地図の URL を他のユーザーと共有するには、Cloud Storage を使用してウェブページをホストします。Cloud Storage は、Google のインフラストラクチャ上のデータを保存したりそのデータにアクセスしたりするためのオンライン ファイル ストレージ ウェブサービスです。このサービスには、Google Cloud のパフォーマンスとスケーラビリティに加え、高度なセキュリティ機能および共有機能が備えられています。また、無料枠も提供されているため、シンプルな店舗検索アプリケーションに最適です。
Cloud Storage では、ファイルはコンピュータのディレクトリに似たバケットに保存されます。ウェブページをホストするには、まずバケットを作成し、一意の名前をバケット名として指定する必要があります(バケット名の一部にご自分の名前を使用することもできます)。
- 名前を決めたら、Cloud Shell で次のコマンドを実行します。
$ gsutil mb gs://yourname-store-locator
gsutil は Cloud Storage とやり取りを行うためのツールです。mb コマンドは「バケットを作成(make bucket)」を表します。使用可能なすべてのコマンドについて詳しくは、gsutil ツールをご覧ください。
Cloud Storage でホストされているバケットとファイルは、デフォルトでは非公開です。ただし、店舗検索の場合は、インターネット上のすべてのユーザーがアクセスできるように、すべてのファイルを公開することができます。アップロードした後にファイルごとに公開することもできますが、煩雑な作業となるため、作成したバケットにデフォルトのアクセスレベルを設定するとよいでしょう。そうすることで、そのバケットにアップロードしたすべてのファイルはそのアクセスレベルを継承することができます。
yourname-store-locatorをバケットに選択した名前に置き換えて、次のコマンドを実行します。
$ gsutil defacl ch -u AllUsers:R gs://yourname-store-locator
- 次のコマンドを使用すると、現在のディレクトリ内のすべてのファイル(現時点では、
index.htmlファイルとapp.jsファイル)をアップロードできます。
$ gsutil -h "Cache-Control:no-cache" cp * gs://yourname-store-locator
これで、オンライン地図を含むウェブページができました。この地図を表示する URL は http://storage.googleapis.com/yourname-store-locator/index.html となります。ここでも、yourname-store-locator の部分は先ほど選択したバケット名に置き換えてください。
クリーンアップ
このプロジェクトで作成されたすべてのリソースをクリーンアップする最も簡単な方法は、このチュートリアルの開始時に作成した Google Cloud プロジェクトをシャットダウンすることです。
- Cloud Console で [設定] ページを開きます。
- [プロジェクトの選択] をクリックします。
- このチュートリアルの冒頭で作成したプロジェクトを選択し、[開く] をクリックします。
- プロジェクトの ID を入力し、[シャットダウン] をクリックします。
9. 完了
以上で、このコードラボは終了です。
学習した内容
- Maps JavaScript API を使用してカスタム スタイルの地図を追加する
- データレイヤを GeoJSON 形式の地図に読み込む
- Street View Static API を使用して、ストリートビュー画像をウェブページに表示する
- Places Library を使用して、Places Autocomplete 検索バーをページに追加する
- Distance Matrix サービスを使って 1 回の API 呼び出しで複数の距離を計算する
- ブラウザベースの Cloud Shell コマンドライン インターフェースを使用して、Google Cloud Platform でのウェブ開発プロジェクトの管理とテストを行う
- Cloud Storage でウェブサイトをホスティングする
さらに学びましょう
- Codelab のニューヨーク市の地下鉄の地図を作成するで Google App Engine を使って、ウェブ地図をホストする別の方法について学びます。
- 付近のビジネスの検索サービスの作成など、Google Maps Platform の Codelab を確認します。
- 次の質問に答えて、役立つコンテンツの作成にご協力ください。
他にどのような Codelab をご希望ですか。
ご希望の Codelab が上記にない場合、こちらからリクエストしてください。
コードについて詳しくは、ソースコード リポジトリ(https://github.com/googlecodelabs/google-maps-simple-store-locator)をご覧ください。