
1. Before you begin
Typing out code is a great way to build muscle memory and deepen your understanding of the material. While copy-pasting can be a time-saver, investing in this practice can lead to greater efficiency and stronger coding skills in the long run.
In this codelab, you'll learn how to build an Android application that performs real-time image segmentation on a live camera feed using Google's new runtime for TensorFlow Lite, LiteRT. You'll take a starter Android application and add image segmentation capabilities to it. We will also go through the preprocessing, inference, and postprocessing steps as well. You will:
- Build an Android app that segments images in real-time.
- Integrate a pre-trained LiteRT image segmentation model.
- Preprocess the input image for the model.
- Use the LiteRT runtime for CPU and GPU acceleration.
- Understand how to process the model's output to display the segmentation mask.
- Understand how to adjust for the front-facing camera.
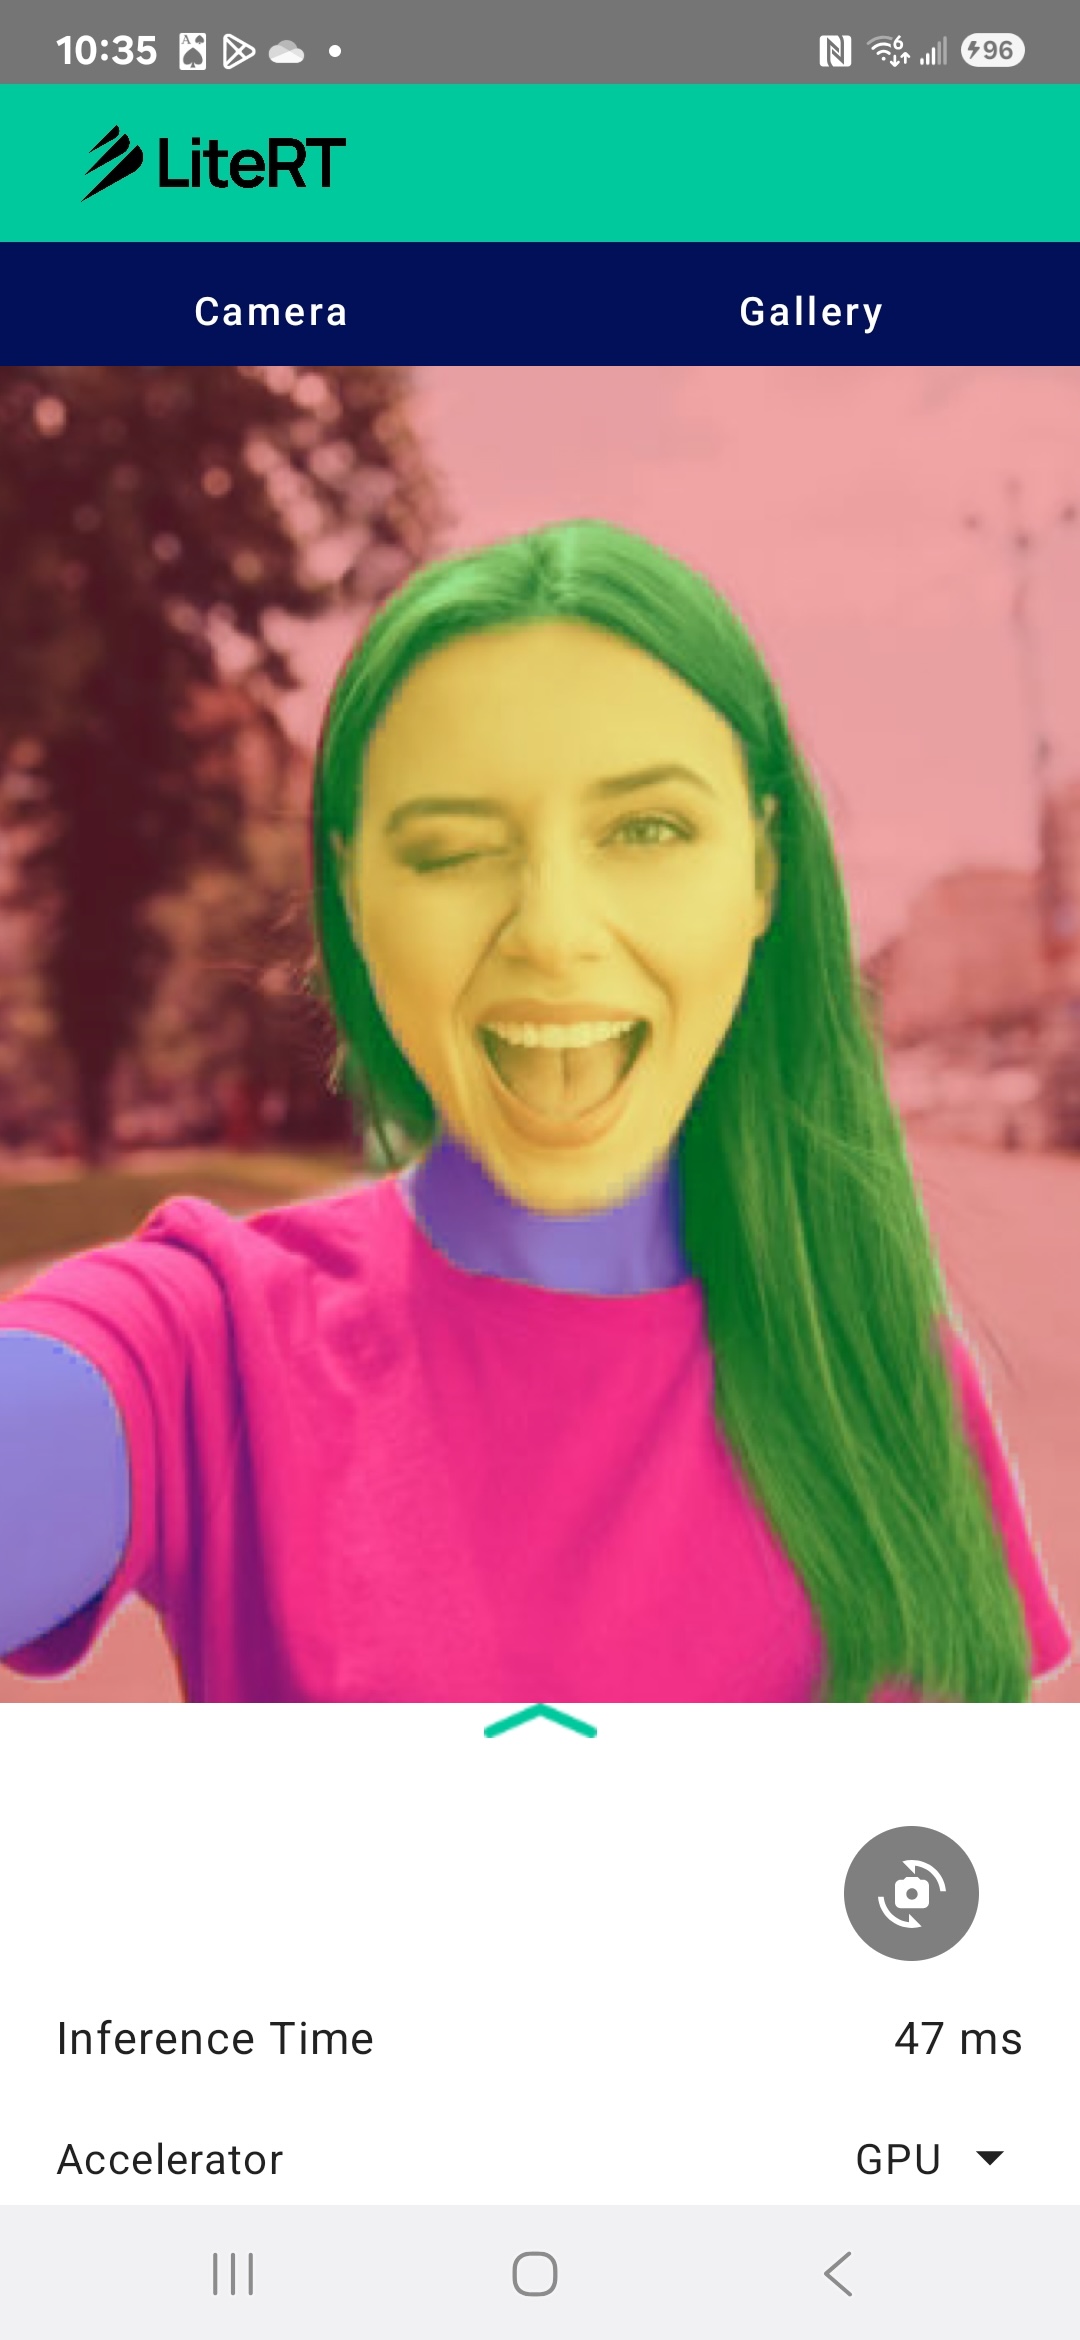
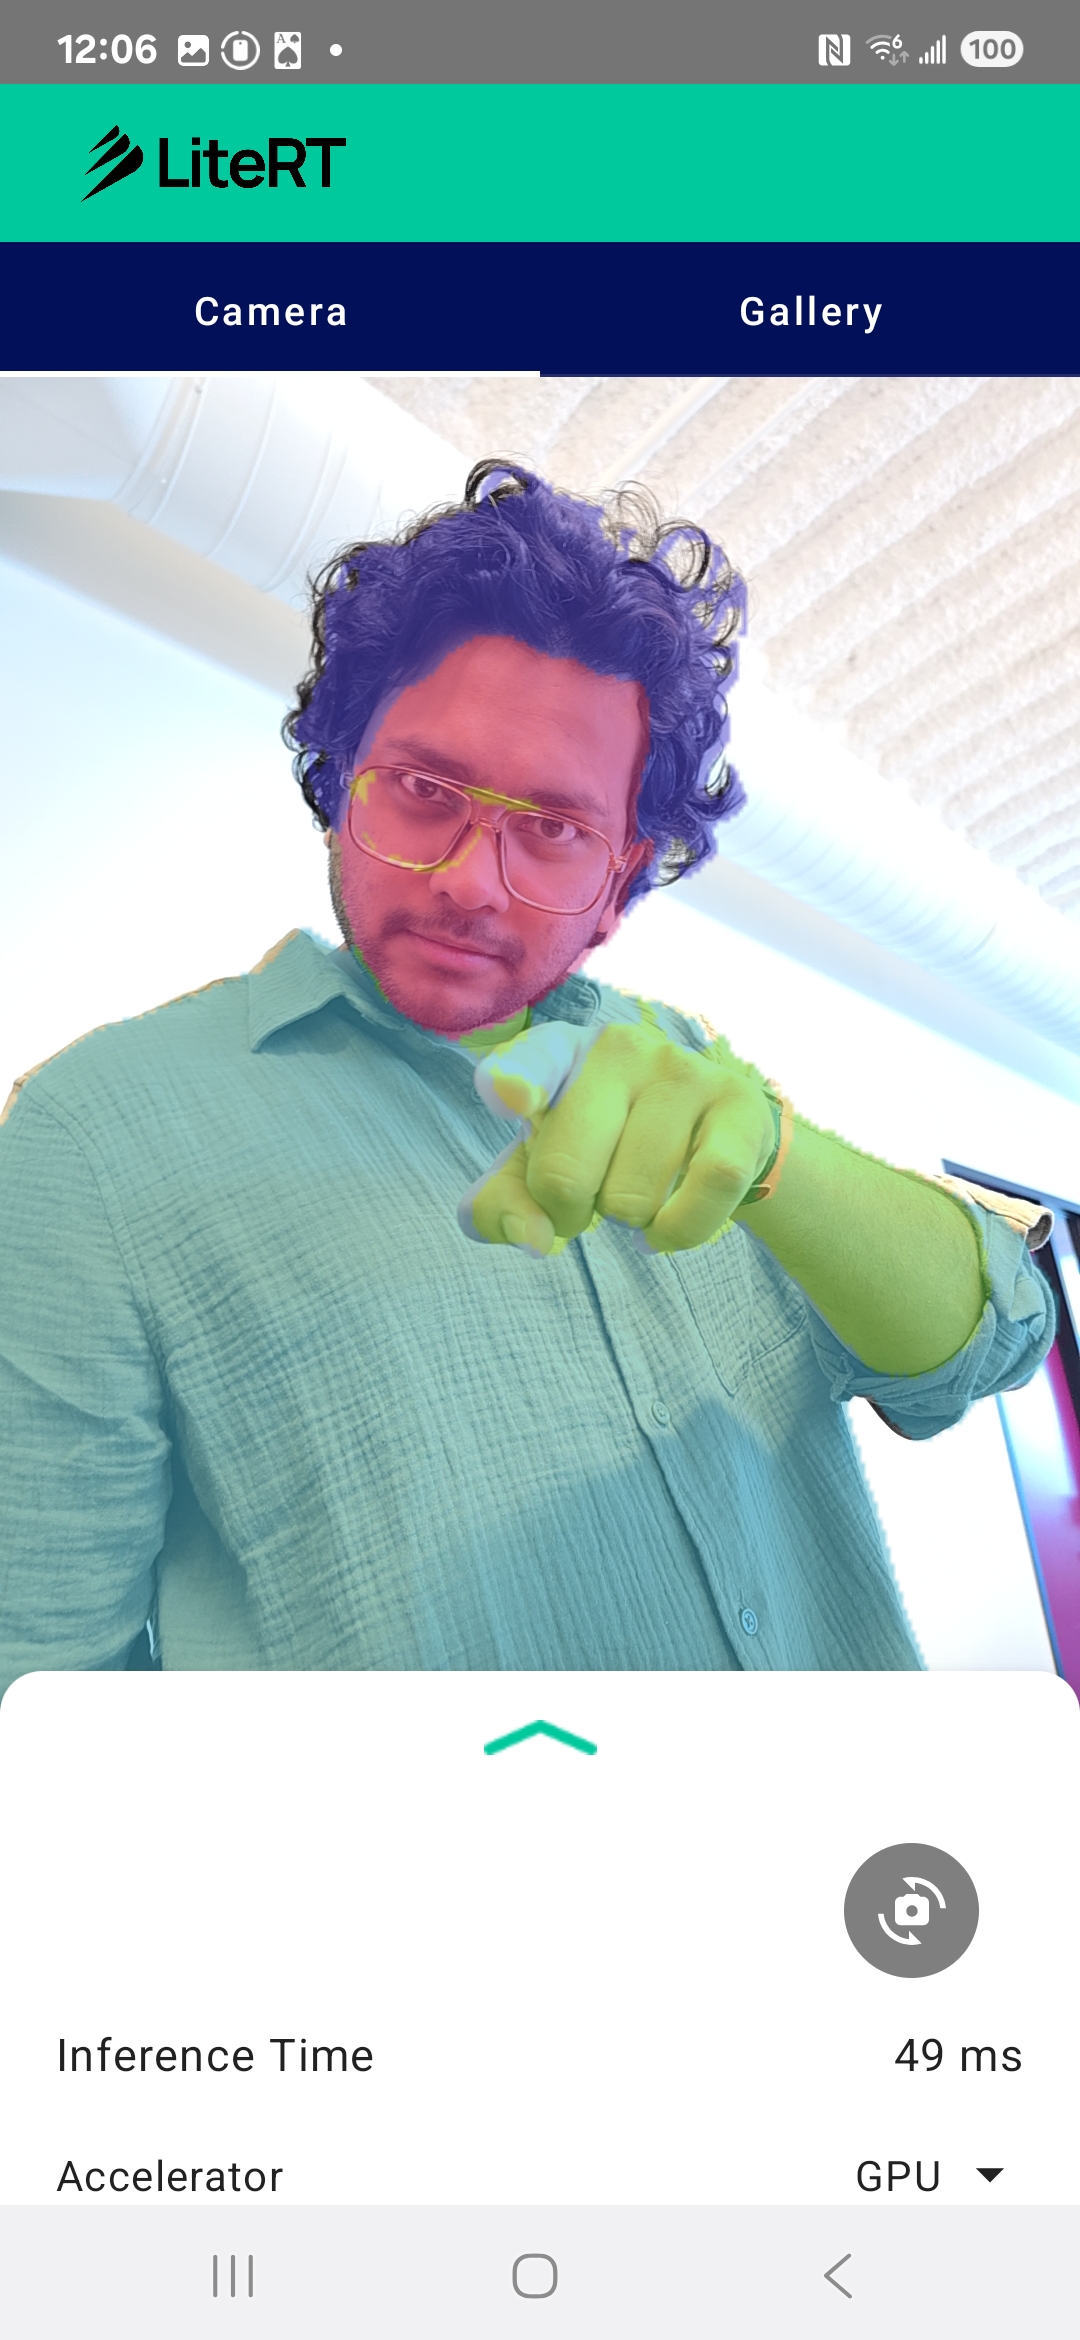
In the end, you'll create something similar to the image below:
Prerequisites
This codelab has been designed for experienced mobile developers who want to gain experience with Machine Learning. You should be familiar with:
- Android development using Kotlin and Android Studio
- Basic concepts of image processing
What you'll learn
- How to integrate and use the LiteRT runtime in an Android application.
- How to perform image segmentation using a pre-trained LiteRT model.
- How to preprocess the input image for the model.
- How to run inference for the model.
- How to process the output of a segmentation model to visualize the results.
- How to use CameraX for real-time camera feed processing.
What you'll need
- A recent version of Android Studio (tested on v2025.1.1).
- A physical Android device. It is best tested on Galaxy and Pixel devices.
- The sample code (from GitHub).
- Basic knowledge of Android development in Kotlin.
2. Image Segmentation
Image segmentation is a computer vision task that involves partitioning an image into multiple segments or regions. Unlike object detection, which draws a bounding box around an object, image segmentation assigns a specific class or label to every single pixel in the image. This provides a much more detailed and granular understanding of the image's contents, allowing you to know the exact shape and boundary of each object.
For example, instead of just knowing a ‘person' is in a box, you can know exactly which pixels belong to that person. This tutorial demonstrates how to perform real-time image segmentation on an Android device using a pre-trained machine learning model.
LiteRT: Pushing the Edge of On-Device ML
A key technology enabling real-time, high-fidelity segmentation on mobile devices is LiteRT. As Google's next-generation, high-performance runtime for TensorFlow Lite, LiteRT is engineered to get the absolute best performance from the underlying hardware.
It achieves this through intelligent and optimized use of hardware accelerators like the GPU (Graphics Processing Unit) and NPU (Neural Processing Unit). By offloading the intense computational workload of the segmentation model from the general-purpose CPU to these specialized processors, LiteRT dramatically reduces inference time. This acceleration is what makes it possible to run complex models smoothly on a live camera feed, expanding the edge of what we can achieve with machine learning directly on your phone. Without this level of performance, real-time segmentation would be too slow and choppy for a good user experience.
3. Get set up
Clone the repository
First, clone the repository for LiteRT:
git clone https://github.com/google-ai-edge/litert-samples.git
litert-samples/compiled_model_api/image_segmentation is the directory with all of the resources you will need. For this codelab, you will only need the kotlin_cpu_gpu/android_starter project. You may want to review the finished project if you get stuck: kotlin_cpu_gpu/android
A note on file paths
This tutorial specifies file paths in the Linux/macOS format. If you are on Windows, you will need to adjust the paths accordingly.
It's also important to note the distinction between the Android Studio project view and a standard file system view. The Android Studio project view is a structured representation of your project's files, organized for Android development. The file paths in this tutorial refer to the file system paths, not the paths in the Android Studio project view.
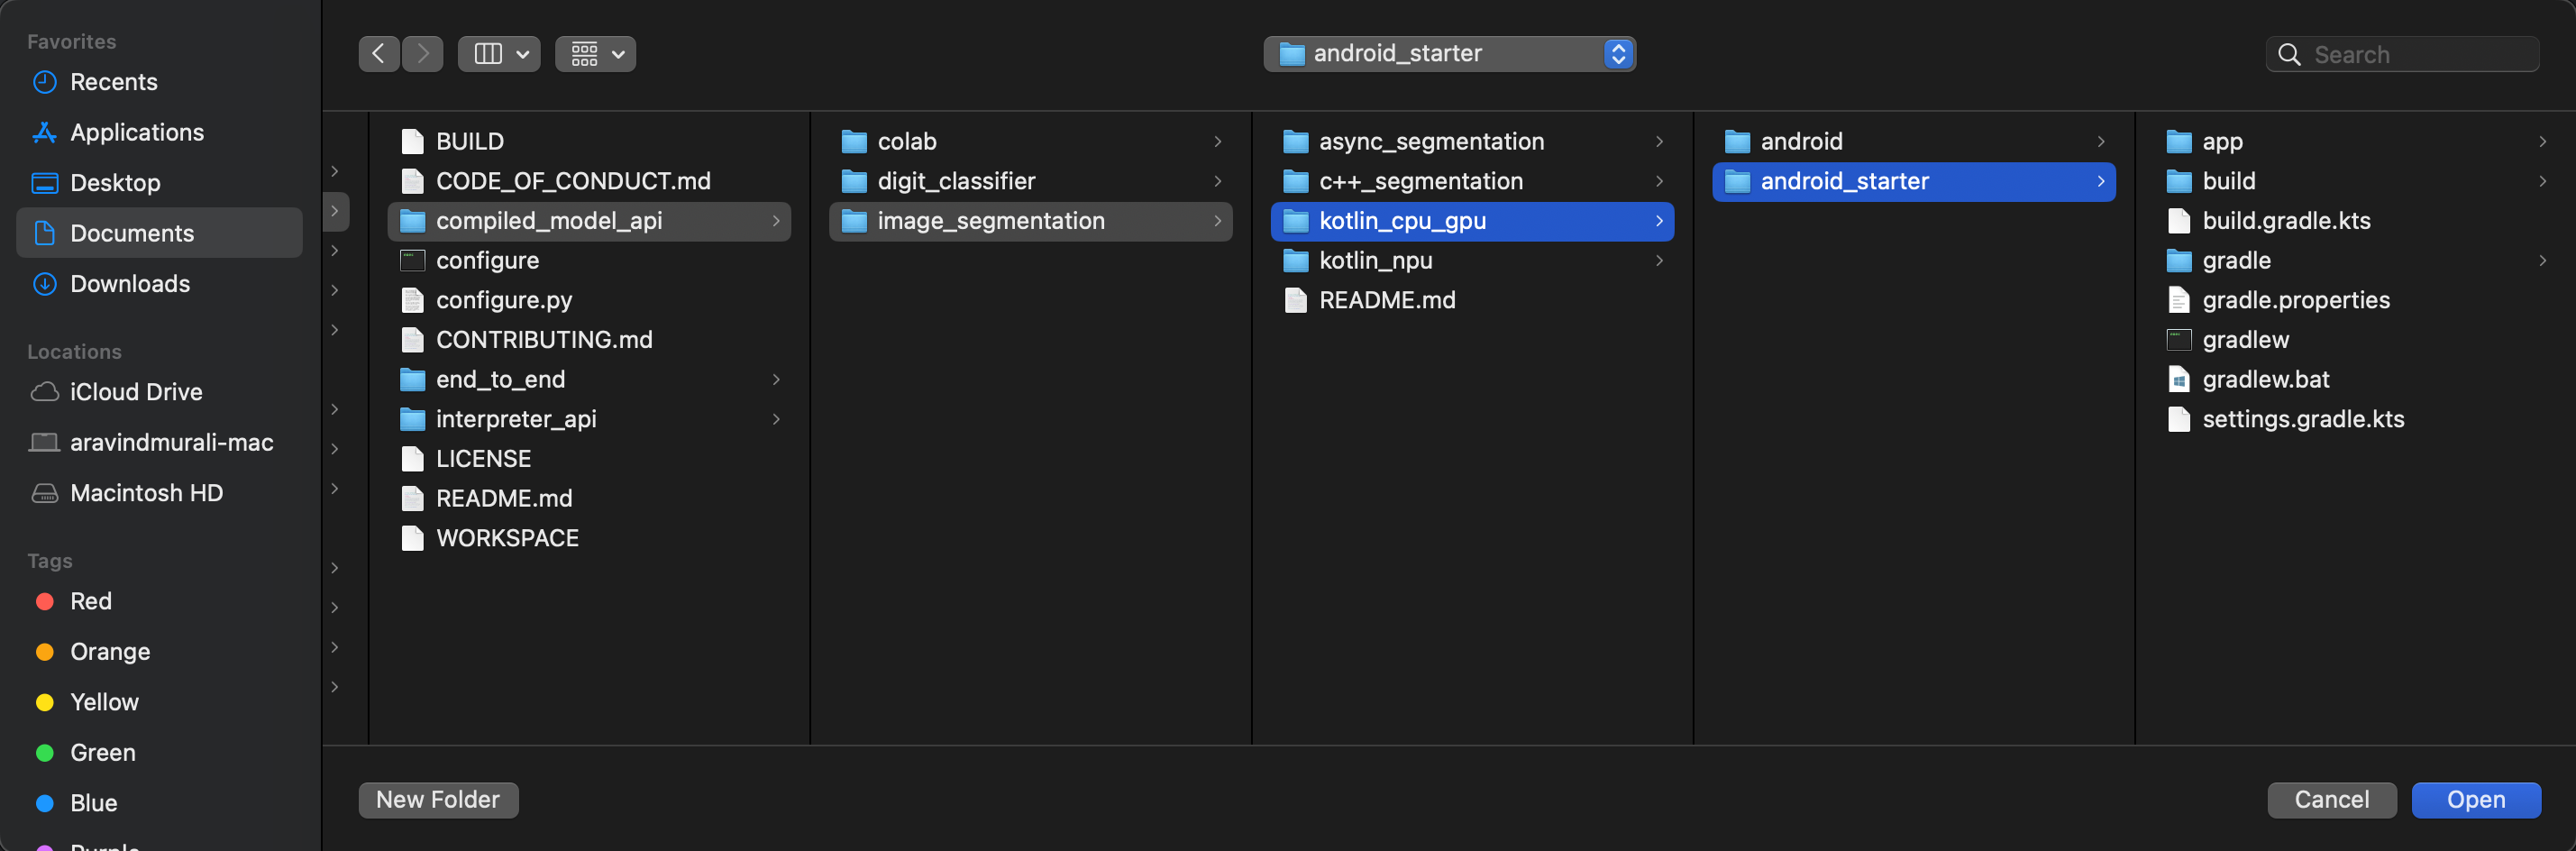
Import the starter app
Let's start by importing the starter app into Android Studio.
- Open Android Studio and select Open.
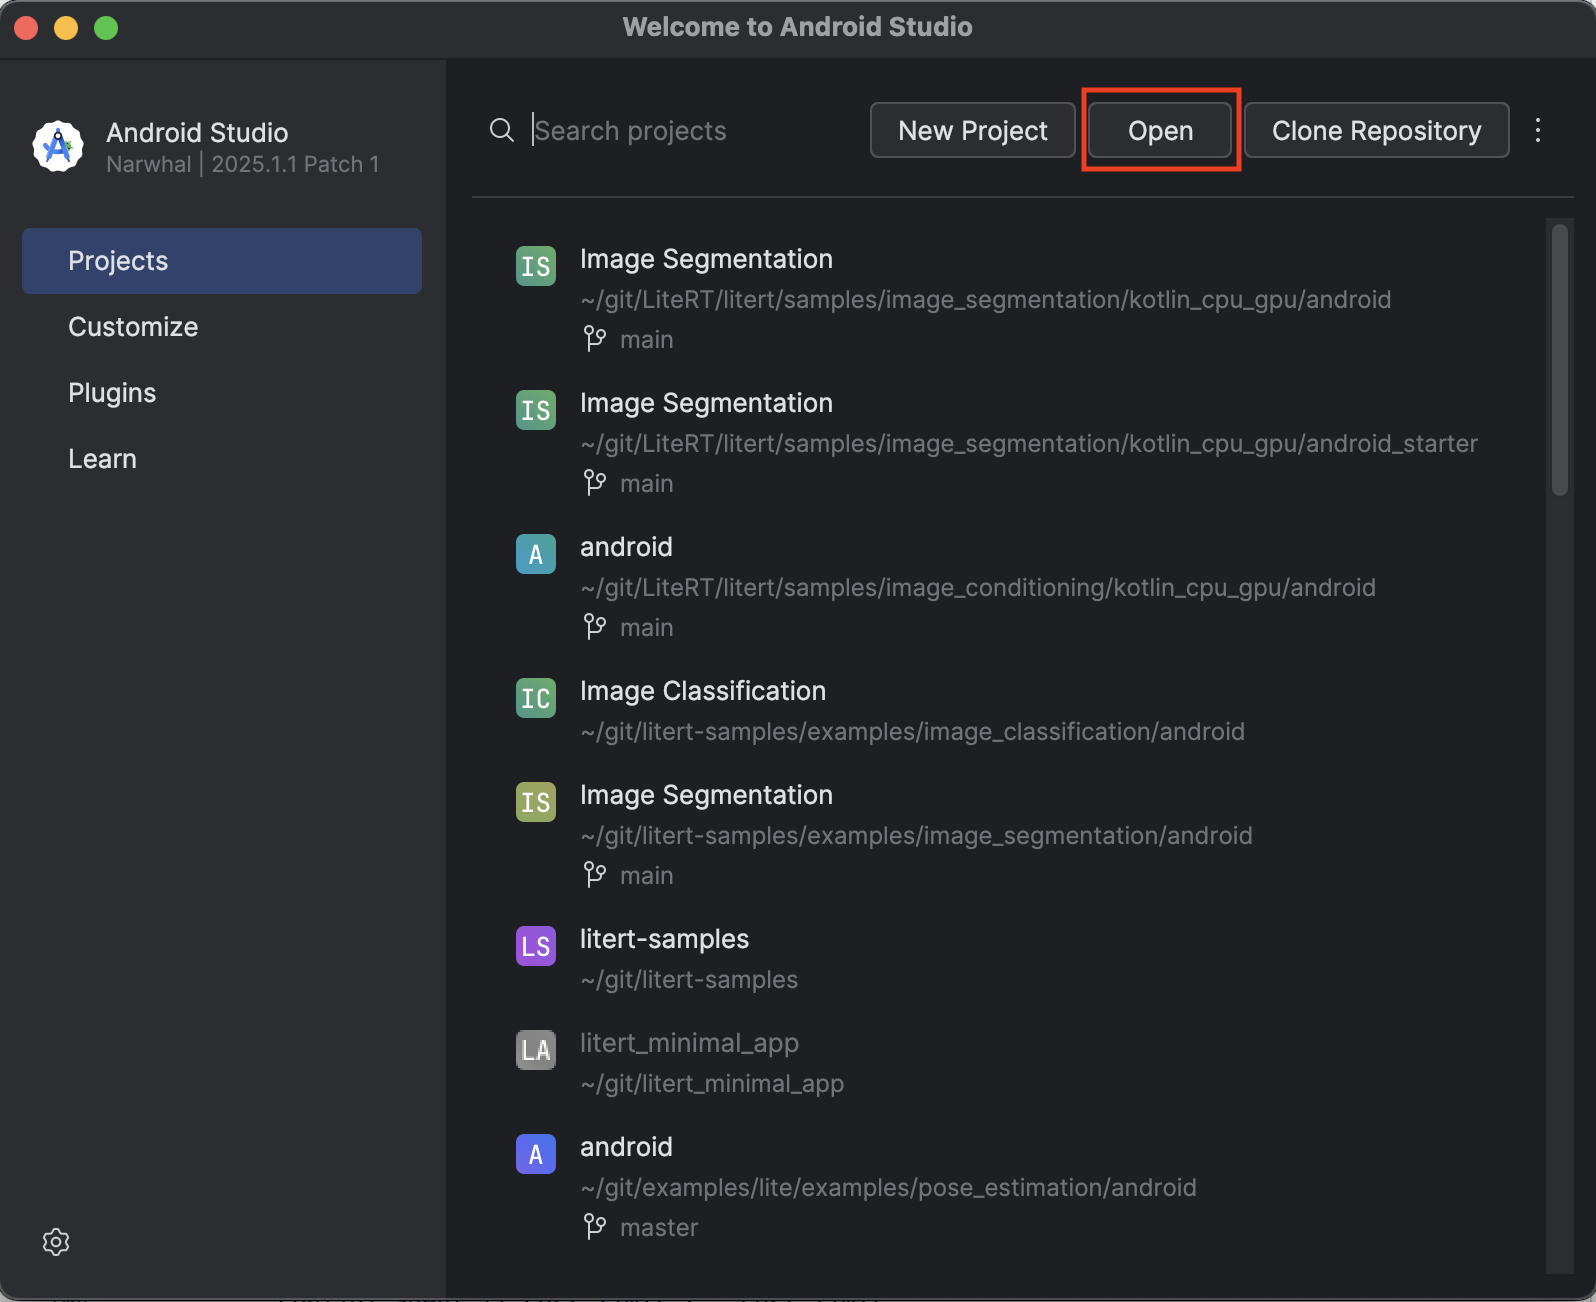
- Navigate to the
kotlin_cpu_gpu/android_starterdirectory and open it.
To be sure that all dependencies are available to your app, you should sync your project with gradle files when the import process has finished.
- Select Sync Project with Gradle Files from the Android Studio toolbar.
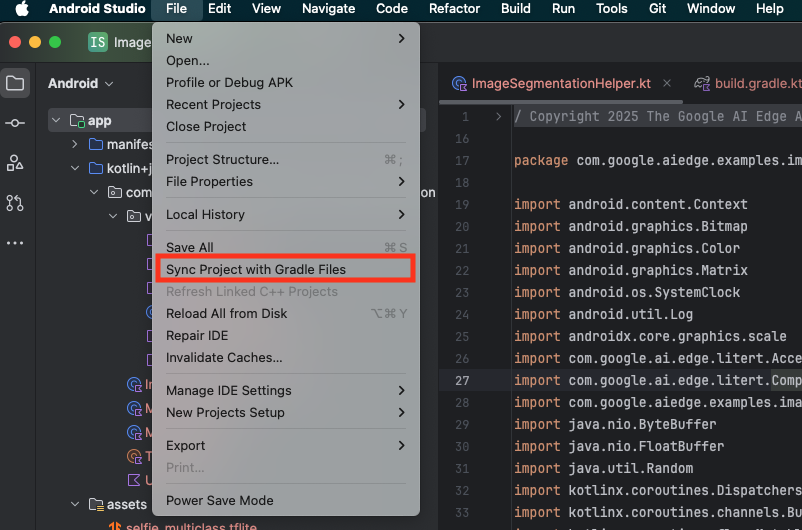
- Please do not skip this step – if this does not work the rest of the tutorial will not make sense.
Run the starter app
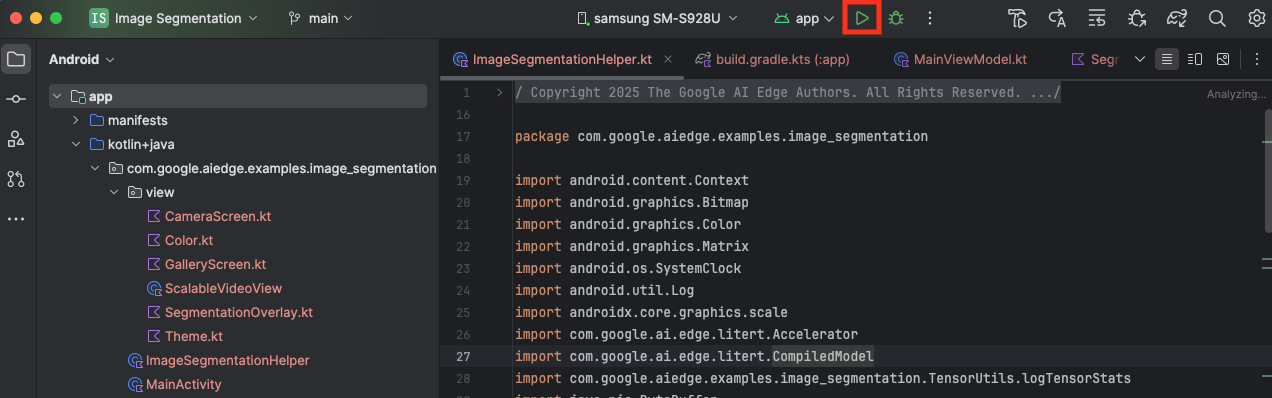
Now that you have imported the project into Android Studio, you're ready to run the app for the first time.
Connect your Android device via USB to your computer and click Run in the Android Studio toolbar.
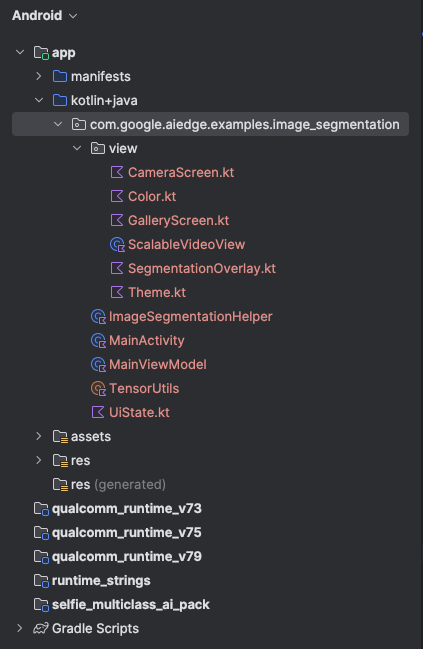
The app should launch on your device. You'll see a live camera feed, but no segmentation will be happening yet. All the file edits you will make in this tutorial will be under the litert-samples/compiled_model_api/image_segmentation/kotlin_cpu_gpu/android_starter/app/src/main/java/com/google/ai/edge/examples/image_segmentation directory (now you know why Android Studio restructures this 😃).
You will also see TODO comments in the ImageSegmentationHelper.kt, MainViewModel.kt, and view/SegmentationOverlay.kt files. In the following steps, you will implement the image segmentation functionality by filling in these TODOs.
4. Understand the starter app
The starter app already has a basic UI and camera handling logic. Here's a quick overview of the key files:
app/src/main/java/com/google/ai/edge/examples/image_segmentation/MainActivity.kt: This is the main entry point of the application. It sets up the UI using Jetpack Compose and handles the camera permissions.app/src/main/java/com/google/ai/edge/examples/image_segmentation/MainViewModel.kt: This ViewModel manages the UI state and orchestrates the image segmentation process.app/src/main/java/com/google/ai/edge/examples/image_segmentation/ImageSegmentationHelper.kt: This is where we'll add the core logic for image segmentation. It will handle loading the model, processing the camera frames, and running the inference.app/src/main/java/com/google/ai/edge/examples/image_segmentation/view/CameraScreen.kt: This Composable function displays the camera preview and the segmentation overlay.app/download_model.gradle: This script downloadsselfie_multiclass.tflite. This is the pre-trained TensorFlow Lite image segmentation model that we'll be using.
5. Understanding LiteRT and Adding Dependencies
Now, let's add the image segmentation functionality to the starter app.
1. Add the LiteRT Dependency
First, you must add the LiteRT library to your project. This is the crucial first step to enable on-device machine learning with Google's optimized runtime.
Open the app/build.gradle.kts file and add the following line to the dependencies block:
// LiteRT for on-device ML
implementation(libs.litert)
After adding the dependency, sync your project with the Gradle files by clicking the Sync Now button that appears in the top-right corner of Android Studio.

2. Understand Key LiteRT APIs
Open ImageSegmentationHelper.kt
Before writing the implementation code, it's important to understand the core components of the LiteRT API that you will be using. Make sure you are importing from the com.google.ai.edge.litert package, add the following imports to the top of ImageSegmentationHelper.kt:
import com.google.ai.edge.litert.Accelerator
import com.google.ai.edge.litert.CompiledModel
CompiledModel: This is the central class for interacting with your TFLite model. It represents a model that has been pre-compiled and optimized for a specific hardware accelerator (like the CPU or GPU). This pre-compilation is a key feature of LiteRT that leads to faster and more efficient inference.CompiledModel.Options: You use this builder class to configure theCompiledModel. The most important setting is specifying the hardware accelerator you want to use for running your model.Accelerator: This enum allows you to choose the hardware for inference. The starter project is already configured to handle these options:Accelerator.CPU: For running the model on the device's CPU. This is the most universally compatible option.Accelerator.GPU: For running the model on the device's GPU. This is often significantly faster than the CPU for image-based models.
- Input and Output Buffers (
TensorBuffer): LiteRT usesTensorBufferfor model inputs and outputs. This gives you fine-grained control over memory and avoids unnecessary data copies. You will get these buffers directly from yourCompiledModelinstance usingmodel.createInputBuffers()andmodel.createOutputBuffers()and then write your input data to them and read the results from them. model.run(): This is the function that executes the inference. You pass the input and output buffers to it, and LiteRT handles the complex task of running the model on the selected hardware accelerator.
6. Finish the Initial ImageSegmentationHelper Implementation
Now it's time to write some code. You will complete the initial implementation of ImageSegmentationHelper.kt. This involves setting up the Segmenter private class to hold the LiteRT model and implementing the cleanup() function to release it properly.
- Finish the
Segmenterclass andcleanup()function: In theImageSegmentationHelper.ktfile, you'll find a skeleton for a private class namedSegmenterand a function namedcleanup(). First, complete theSegmenterclass by defining its constructor to hold the model, creating properties for the input/output buffers, and adding aclose()method to release the model. Then, implement thecleanup()function to call this newclose()method.Replace the existingSegmenterclass andcleanup()function with the following: (~line 83)private class Segmenter( // Add this argument private val model: CompiledModel, private val coloredLabels: List<ColoredLabel>, ) { // Add these private vals private val inputBuffers = model.createInputBuffers() private val outputBuffers = model.createOutputBuffers() fun cleanup() { // cleanup buffers inputBuffers.forEach { it.close() } outputBuffers.forEach { it.close() } // cleanup model model.close() } } - Define the toAccelerator Method: This method maps the defined accelerator enums from the accelerator menu to the accelerator enums specific to the imported LiteRT modules (~line 225):
fun toAccelerator(acceleratorEnum: AcceleratorEnum): Accelerator { return when (acceleratorEnum) { AcceleratorEnum.CPU -> Accelerator.CPU AcceleratorEnum.GPU -> Accelerator.GPU } } - Initialize the
CompiledModel: Now find theinitSegmenterfunction. This is where you will create theCompiledModelinstance and use it to instantiate your now-definedSegmenterclass. This code sets up the model with the specified accelerator (CPU or GPU) and prepares it for inference. Replace theTODOininitSegmenterwith the following implementation (Cmd/Ctrl+f ‘initSegmenter` or ~line 62):cleanup() try { withContext(singleThreadDispatcher) { val model = CompiledModel.create( context.assets, "selfie_multiclass.tflite", CompiledModel.Options(toAccelerator(acceleratorEnum)), null, ) segmenter = Segmenter(model, coloredLabels) Log.d(TAG, "Created an image segmenter") } } catch (e: Exception) { Log.i(TAG, "Create LiteRT from selfie_multiclass is failed: ${e.message}") _error.emit(e) }
7. Start Segmentation and Preprocessing
Now that we have a model, we need to trigger the segmentation process and prepare the input data for the model.
Trigger Segmentation
The segmentation process starts in MainViewModel.kt, which receives frames from the camera.
Open MainViewModel.kt
- Trigger Segmentation from Camera Frames: The
segmentfunctions inMainViewModelare the entry point for our segmentation task. They are called whenever a new image is available from the camera or selected from the gallery. These functions then call thesegmentmethod in ourImageSegmentationHelper. Replace theTODOs in bothsegmentfunctions with the following (line ~107):// For ImageProxy (from CameraX) fun segment(imageProxy: ImageProxy) { segmentJob = viewModelScope.launch { imageSegmentationHelper.segment(imageProxy.toBitmap(), imageProxy.imageInfo.rotationDegrees) imageProxy.close() } } // For Bitmaps (from gallery) fun segment(bitmap: Bitmap, rotationDegrees: Int) { segmentJob = viewModelScope.launch { val argbBitmap = bitmap.copy(Bitmap.Config.ARGB_8888, true) imageSegmentationHelper.segment(argbBitmap, rotationDegrees) } }
Preprocess the Image
Now let's go back to ImageSegmentationHelper.kt to handle the image preprocessing.
Open ImageSegmentationHelper.kt
- Implement the Public
segmentFunction: This function serves as a wrapper that calls the privatesegmentfunction within theSegmenterclass. Replace theTODOwith (~line 95):try { withContext(singleThreadDispatcher) { segmenter?.segment(bitmap, rotationDegrees)?.let { if (isActive) _segmentation.emit(it) } } } catch (e: Exception) { Log.i(TAG, "Image segment error occurred: ${e.message}") _error.emit(e) } - Implement Pre-processing: The private
segmentfunction inside theSegmenterclass is where we'll perform the necessary transformations on the input image to prepare it for the model. This includes scaling, rotating, and normalizing the image. This function will then call another privatesegmentfunction to perform the inference. Replace theTODOin thesegment(bitmap: Bitmap, ...)function with (~line 121):val totalStartTime = SystemClock.uptimeMillis() val rotation = -rotationDegrees / 90 val (h, w) = Pair(256, 256) // Preprocessing val preprocessStartTime = SystemClock.uptimeMillis() var image = bitmap.scale(w, h, true) image = rot90Clockwise(image, rotation) val inputFloatArray = normalize(image, 127.5f, 127.5f) Log.d(TAG, "Preprocessing time: ${SystemClock.uptimeMillis() - preprocessStartTime} ms") // Inference val inferenceStartTime = SystemClock.uptimeMillis() val segmentResult = segment(inputFloatArray) Log.d(TAG, "Inference time: ${SystemClock.uptimeMillis() - inferenceStartTime} ms") Log.d(TAG, "Total segmentation time: ${SystemClock.uptimeMillis() - totalStartTime} ms") return SegmentationResult(segmentResult, SystemClock.uptimeMillis() - inferenceStartTime)
8. Primary Inference with LiteRT
With the input data preprocessed, we can now run the core inference using LiteRT.
Open ImageSegmentationHelper.kt
- Implement Model Execution: The private
segment(inputFloatArray: FloatArray)function is where we directly interact with the LiteRTrun()method. We write our preprocessed data to the input buffer, run the model, and read the results from the output buffer. Replace theTODOin this function with (~line 188):val (h, w, c) = Triple(256, 256, 6) // MODEL EXECUTION PHASE val modelExecStartTime = SystemClock.uptimeMillis() // Write input data - measure time val bufferWriteStartTime = SystemClock.uptimeMillis() inputBuffers[0].writeFloat(inputFloatArray) val bufferWriteTime = SystemClock.uptimeMillis() - bufferWriteStartTime Log.d(TAG, "Buffer write time: $bufferWriteTime ms") // Optional tensor inspection logTensorStats("Input tensor", inputFloatArray) // Run model inference - measure time val modelRunStartTime = SystemClock.uptimeMillis() model.run(inputBuffers, outputBuffers) val modelRunTime = SystemClock.uptimeMillis() - modelRunStartTime Log.d(TAG, "Model.run() time: $modelRunTime ms") // Read output data - measure time val bufferReadStartTime = SystemClock.uptimeMillis() val outputFloatArray = outputBuffers[0].readFloat() val outputBuffer = FloatBuffer.wrap(outputFloatArray) val bufferReadTime = SystemClock.uptimeMillis() - bufferReadStartTime Log.d(TAG, "Buffer read time: $bufferReadTime ms") val modelExecTime = SystemClock.uptimeMillis() - modelExecStartTime Log.d(TAG, "Total model execution time: $modelExecTime ms") // Optional tensor inspection logTensorStats("Output tensor", outputFloatArray) // POSTPROCESSING PHASE val postprocessStartTime = SystemClock.uptimeMillis() // Process mask from model output val inferenceData = InferenceData(width = w, height = h, channels = c, buffer = outputBuffer) val mask = processImage(inferenceData) val postprocessTime = SystemClock.uptimeMillis() - postprocessStartTime Log.d(TAG, "Postprocessing time (mask creation): $postprocessTime ms") return Segmentation( listOf(Mask(mask, inferenceData.width, inferenceData.height)), coloredLabels, )
9. Post-processing and Displaying the Overlay
After running inference, we get a raw output from the model. We need to process this output to create a visual segmentation mask and then display it on the screen.
Open ImageSegmentationHelper.kt
- Implement Output Processing: The
processImagefunction converts the raw floating-point output from the model into aByteBufferthat represents the segmentation mask. It does this by finding the class with the highest probability for each pixel. Replace itsTODOwith (~line 238):val mask = ByteBuffer.allocateDirect(inferenceData.width * inferenceData.height) for (i in 0 until inferenceData.height) { for (j in 0 until inferenceData.width) { val offset = inferenceData.channels * (i * inferenceData.width + j) var maxIndex = 0 var maxValue = inferenceData.buffer.get(offset) for (index in 1 until inferenceData.channels) { if (inferenceData.buffer.get(offset + index) > maxValue) { maxValue = inferenceData.buffer.get(offset + index) maxIndex = index } } mask.put(i * inferenceData.width + j, maxIndex.toByte()) } } return mask
Open MainViewModel.kt
- Collect and Process Segmentation Results: Now we go back to the
MainViewModelto process the segmentation results from theImageSegmentationHelper. ThesegmentationUiShareFlowcollects theSegmentationResult, converts the mask into a colorfulBitmap, and provides it to the UI. Replace theTODOin thesegmentationUiShareFlowproperty with (~line 63) – don't replace the code already there, just fill the body:viewModelScope.launch { imageSegmentationHelper.segmentation .filter { it.segmentation.masks.isNotEmpty() } .map { val segmentation = it.segmentation val mask = segmentation.masks[0] val maskArray = mask.data val width = mask.width val height = mask.height val pixelSize = width * height val pixels = IntArray(pixelSize) val colorLabels = segmentation.coloredLabels.mapIndexed { index, coloredLabel -> ColorLabel(index, coloredLabel.label, coloredLabel.argb) } // Set color for pixels for (i in 0 until pixelSize) { val colorLabel = colorLabels[maskArray[i].toInt()] val color = colorLabel.getColor() pixels[i] = color } // Get image info val overlayInfo = OverlayInfo(pixels = pixels, width = width, height = height) val inferenceTime = it.inferenceTime Pair(overlayInfo, inferenceTime) } .collect { flow.emit(it) } }
Open view/SegmentationOverlay.kt
The final piece is to correctly orient the segmentation overlay when the user flips to the front-facing camera. The camera feed is naturally mirrored for the front camera, so we need to apply the same horizontal flip to our overlay Bitmap to ensure it aligns correctly with the camera preview.
- Handle Overlay Orientation: Find the
TODOin theSegmentationOverlay.ktfile and replace it with the following code. This code checks if the front-facing camera is active and, if so, applies a horizontal flip to the overlayBitmapbefore it's drawn on theCanvas. (~line 42):val orientedBitmap = if (lensFacing == CameraSelector.LENS_FACING_FRONT) { // Create a matrix for horizontal flipping val matrix = Matrix().apply { preScale(-1f, 1f) } Bitmap.createBitmap(image, 0, 0, image.width, image.height, matrix, false).also { image.recycle() } } else { image }
10. Run and Use the Final App
You have now completed all the necessary code changes. It's time to run the app and see your work in action!
- Run the App: Connect your Android device and click Run in the Android Studio toolbar.
- Test the Features: Once the app launches, you should see the live camera feed with a colorful segmentation overlay.
- Switch Cameras: Tap the camera flip icon at the top to switch between the front and back cameras. Notice how the overlay correctly orients itself.
- Change Accelerator: Tap the "CPU" or "GPU" button at the bottom to switch the hardware accelerator. Observe the change in the Inference Time displayed at the bottom of the screen. The GPU should be significantly faster.
- Use a Gallery Image: Tap the "Gallery" tab at the top to select an image from your device's photo gallery. The app will run segmentation on the selected static image.
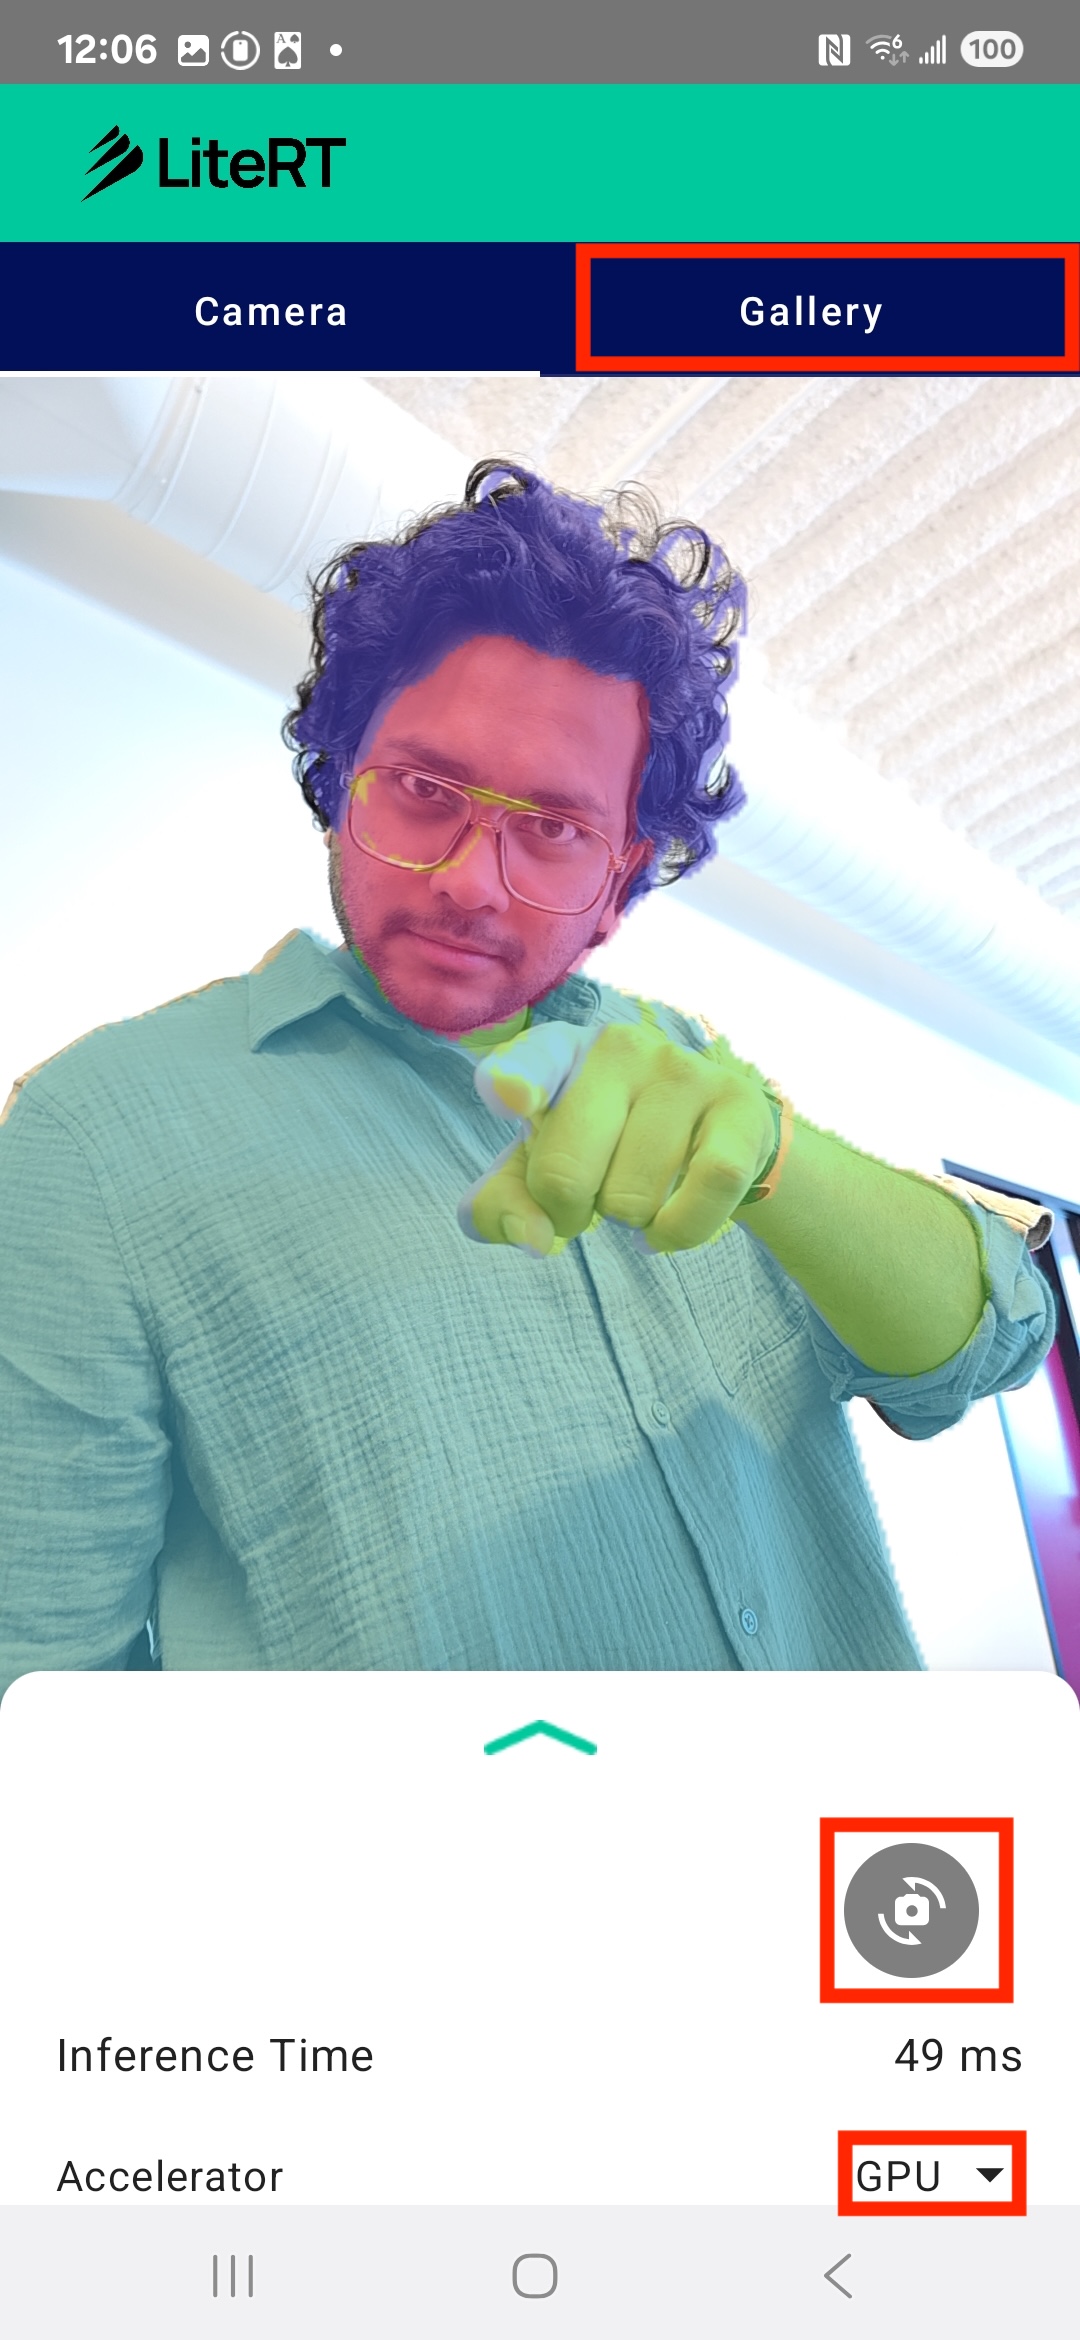
You now have a fully functional, real-time image segmentation app powered by LiteRT!
11. Advanced (Optional): Using the NPU
This repository also contains a version of the app that is optimized for Neural Processing Units (NPUs). The NPU version can provide a significant performance boost on devices that have a compatible NPU.
To try the NPU version, open the kotlin_npu/android project in Android Studio. The code is very similar to the CPU/GPU version and is configured to use the NPU delegate.
To use the NPU delegate, you will need to enroll in the Early Access Program.
12. Congratulations!
You have successfully built an Android app that performs real-time image segmentation using LiteRT. You've learned how to:
- Integrate the LiteRT runtime into an Android app.
- Load and run a TFLite image segmentation model.
- Preprocess the input of the model.
- Process the output of the model to create a segmentation mask.
- Use CameraX for a real-time camera app.
Next Steps
- Try a different image segmentation model.
- Experiment with different LiteRT delegates (CPU, GPU, NPU).