
1. 概要
この Codelab では、いくつかの ML API を簡単に紹介します。使用するもの:
- Cloud Vision を使用して画像の内容を理解する
- 音声をテキストに変換する Cloud Speech-to-Text
- Cloud Translation: 任意の文字列をサポートされている任意の言語に翻訳する
- Cloud Natural Language を使用してテキストから情報を抽出する
作成するアプリの概要
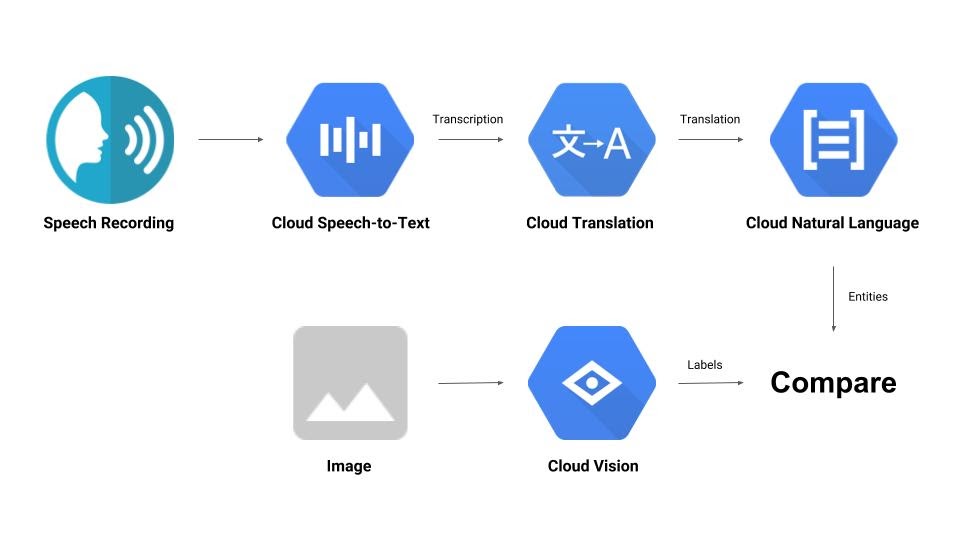
音声録音と画像を比較し、相互の関連性を判断するパイプラインを構築します。以下に、その方法の概要を示します。
学習内容
- Vision API、Speech-to-Text API、Translation API、Natural Language API の使用方法
- コードサンプルの場所
必要なもの
2. 設定と要件
セルフペース型の環境設定
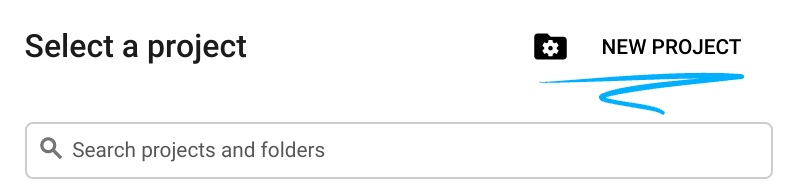
- Cloud コンソールにログインして、新しいプロジェクトを作成するか、既存のプロジェクトを再利用しますGmail アカウントも Google Workspace アカウントもまだお持ちでない場合は、アカウントを作成してください。

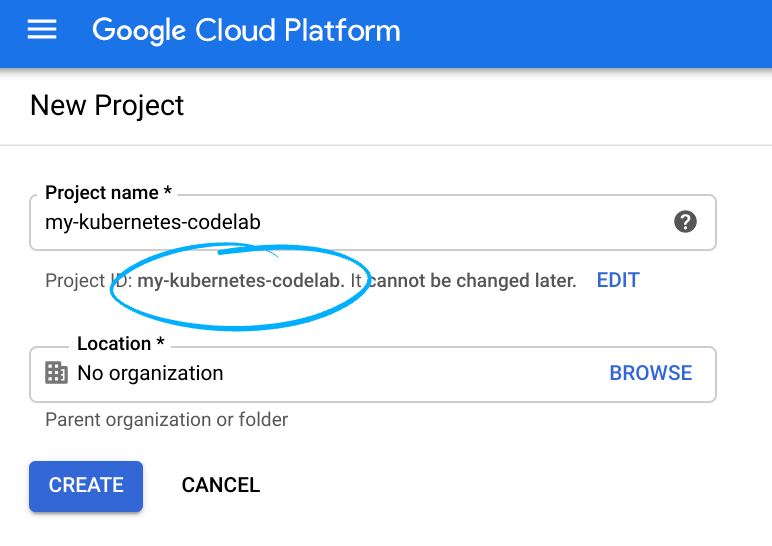
プロジェクト ID を忘れないようにしてください。プロジェクト ID はすべての Google Cloud プロジェクトを通じて一意の名前にする必要があります(上記の名前はすでに使用されているので使用できません)。以降、このコードラボでは PROJECT_ID と呼びます。
- 次に、Google Cloud リソースを使用するために、Cloud Console で課金を有効にする必要があります。
このコードラボを実行しても、費用はほとんどかからないはずです。このチュートリアル以外で請求が発生しないように、リソースのシャットダウン方法を説明する「クリーンアップ」セクションの手順に従うようにしてください。Google Cloud の新規ユーザーは、300 米ドル分の無料トライアル プログラムをご利用いただけます。
API を有効にする
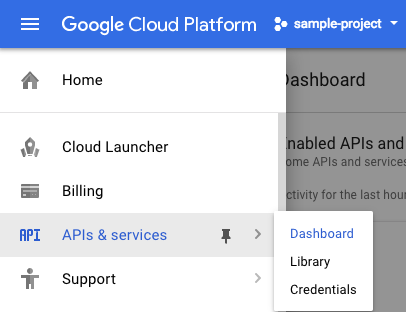
このリンクをクリックして、必要なすべての API を有効にできます。その後、認証の設定手順は無視してください。認証の設定は後ほど行います。または、各 API を個別に有効にすることもできます。これを行うには、画面の左上にあるメニュー アイコンをクリックします。

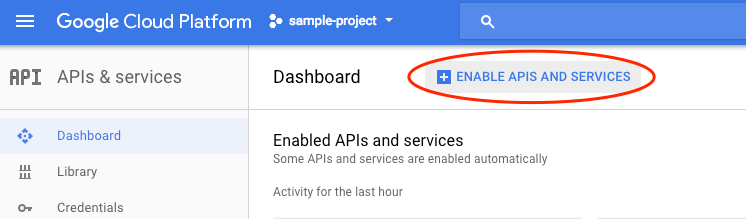
プルダウンから [API とサービス] を選択し、[ダッシュボード] をクリックします。
[API とサービスの有効化] をクリックします。
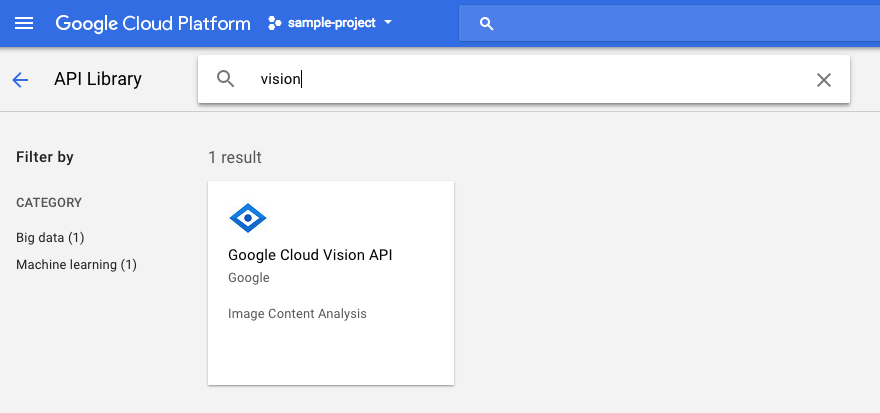
検索ボックスで「vision」を検索します。[Google Cloud Vision API] をクリックします。
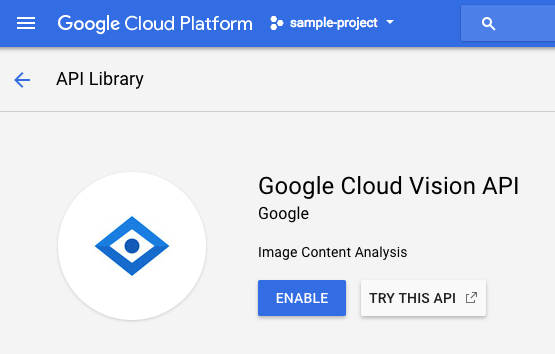
[有効にする] をクリックして、Cloud Vision API を有効にします。
有効になるまで数秒待ちます。有効にすると、次のように表示されます。
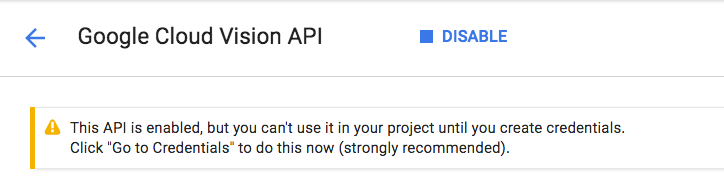
同じ手順を繰り返して、Cloud Speech、Cloud Translation、Cloud Natural Language API を有効にします。
Cloud Shell
Google Cloud Shell は、 Cloud 上で動作するコマンドライン環境です。この Debian ベースの仮想マシンには、必要な開発ツール(gcloud、bq、git など)がすべて用意され、永続的な 5 GB のホーム ディレクトリが提供されています。Cloud Shell を使用して、Machine Learning API へのリクエストを作成します。
Cloud Shell を開始するには、ヘッダーバーの右上にある [Google Cloud Shell をアクティブにする]  アイコンをクリックします。

コンソールの下部の新しいフレーム内で Cloud Shell セッションが開き、コマンドライン プロンプトが表示されます。user@project:~$ プロンプトが表示されるまで待ちます。
省略可: コードエディタ
コマンドラインの操作に慣れている場合は、Cloud Shell バーの右上にある [コードエディタを起動]  アイコンをクリックします。

サービス アカウント
認証にはサービス アカウントが必要です。作成するには、[NAME] をサービス アカウントの目的の名前に置き換え、Cloud Shell で次のコマンドを実行します。
gcloud iam service-accounts create [NAME]
次に、そのサービス アカウントを使用するためのキーを生成する必要があります。[FILE_NAME] は鍵の目的の名前に、[NAME] は上記のサービス アカウント名に、[PROJECT_ID] はプロジェクトの ID に置き換えます。次のコマンドを実行すると、鍵が [FILE_NAME].json として作成され、ダウンロードされます。
gcloud iam service-accounts keys create [FILE_NAME].json --iam-account [NAME]@[PROJECT_ID].iam.gserviceaccount.com
サービス アカウントを使用するには、変数 GOOGLE_APPLICATION_CREDENTIALS をキーのパスに設定する必要があります。これを行うには、[PATH_TO_FILE] と [FILE_NAME] を置き換えて、次のコマンドを実行します。
export GOOGLE_APPLICATION_CREDENTIALS=[PATH_TO_FILE]/[FILE_NAME].json
3. Cloud Vision
Python クライアント
Cloud Vision 用の Python クライアントが必要です。インストールするには、Cloud Shell に次のように入力します。
pip install --upgrade google-cloud-vision --user
試してみましょう
Cloud Vision API のコードサンプルを見てみましょう。指定された画像の内容を把握したい。このため、detect.py が役立ちそうなので、取得しましょう。1 つの方法は、detect.py の内容をコピーし、Cloud Shell で vision.py という名前の新しいファイルを作成して、すべてのコードを vision.py に貼り付けることです。この操作は、Cloud Shell コードエディタで手動で行うか、Cloud Shell で次の curl コマンドを実行して行います。
curl https://raw.githubusercontent.com/GoogleCloudPlatform/python-docs-samples/master/vision/cloud-client/detect/detect.py -o vision.py
完了したら、Cloud Shell で次のコマンドを実行して API を使用します。
python vision.py labels-uri gs://cloud-samples-data/ml-api-codelab/birds.jpg
分析された画像(https://storage.googleapis.com/cloud-samples-data/ml-api-codelab/birds.jpg)に関する鳥とダチョウの出力が表示されます。
どうしましたか?
vision.py に 2 つの引数を渡しました。
- labels-uri は、実行する
detect_labels_uri()関数を選択します。 - gs://cloud-samples-data/ml-api-codelab/birds.jpg は Google Cloud Storage 上のイメージの場所であり、
detect_labels_uri()に uri として渡されます。
detect_labels_uri() について詳しく見ていきましょう。挿入された追加のコメントを確認します。
def detect_labels_uri(uri):
    """Detects labels in the file located in Google Cloud Storage or on the
    Web."""
    # relevant import from above
    # from google.cloud import vision

    # create ImageAnnotatorClient object
    client = vision.ImageAnnotatorClient()

    # create Image object
    image = vision.types.Image()

    # specify location of image
    image.source.image_uri = uri

    # get label_detection response by passing image to client
    response = client.label_detection(image=image)

    # get label_annotations portion of response
    labels = response.label_annotations
    print('Labels:')

    for label in labels:
        # print the label descriptions
        print(label.description)
4. Cloud Speech-to-Text
Python クライアント
Cloud Speech-to-Text 用の Python クライアントが必要です。インストールするには、Cloud Shell に次のように入力します。
sudo pip install --upgrade google-cloud-speech
試してみましょう
Cloud Speech-to-Text のコードサンプルに進みましょう。音声の文字起こしに関心があります。transcribe.py は開始するのに適しているため、これを使用します。transcribe.py の内容をコピーし、Cloud Shell で speech2text.py という名前の新しいファイルを作成して、すべてのコードを speech2text.py に貼り付けます。この操作は、Cloud Shell コードエディタで手動で行うか、Cloud Shell で次の curl コマンドを実行して行います。
curl https://raw.githubusercontent.com/GoogleCloudPlatform/python-docs-samples/master/speech/cloud-client/transcribe.py -o speech2text.py
完了したら、Cloud Shell で次のコマンドを実行して API を使用します。
python speech2text.py gs://cloud-samples-data/ml-api-codelab/tr-ostrich.wav
エンコードとサンプリング レートが間違っているというエラーが表示されます。ご心配なく。コードの transcribe_gcs() に移動し、RecognitionConfig() から encoding と sampe_hertz_rate の設定を削除してください。また、tr-ostrich.wav はトルコ語の音声録音であるため、言語コードを「tr-TR」に変更します。
config = types.RecognitionConfig(language_code='tr-TR')
speech2text.py を再度実行します。分析された音声は https://storage.googleapis.com/cloud-samples-data/ml-api-codelab/tr-ostrich.wav であるため、出力はトルコ語のテキストになります。
状況:
Google Cloud Storage 上の音声ファイルの場所である gs://cloud-samples-data/ml-api-codelab/tr-ostrich.wav を speech2text.py に渡し、speech2text.py から transcribe_uri() に gcs_uri として渡します。
変更した transcribe_uri() を詳しく見てみましょう。
def transcribe_gcs(gcs_uri):
    """Transcribes the audio file specified by the gcs_uri."""

    from google.cloud import speech
    # enums no longer used
    # from google.cloud.speech import enums
    from google.cloud.speech import types

    # create ImageAnnotatorClient object
    client = speech.SpeechClient()

    # specify location of speech
    audio = types.RecognitionAudio(uri=gcs_uri)

    # set language to Turkish
    # removed encoding and sample_rate_hertz
    config = types.RecognitionConfig(language_code='tr-TR')

    # get response by passing config and audio settings to client
    response = client.recognize(config, audio)

    # Each result is for a consecutive portion of the audio. Iterate through
    # them to get the transcripts for the entire audio file.
    for result in response.results:
        # The first alternative is the most likely one for this portion.
        # get the transcript of the first alternative
        print(u'Transcript: {}'.format(result.alternatives[0].transcript))
5. Cloud Translation
Python クライアント
Cloud Translation 用の Python クライアントが必要です。インストールするには、Cloud Shell に次のように入力します。
sudo pip install --upgrade google-cloud-translate
試してみましょう
次に、Cloud Translation のコードサンプルを確認します。この Codelab では、テキストを英語に翻訳します。snippets.py は、まさに私たちが求めているものです。snippets.py の内容をコピーし、Cloud Shell に translate.py という新しいファイルを作成して、すべてのコードを translate.py に貼り付けます。この操作は、Cloud Shell コードエディタで手動で行うか、Cloud Shell で次の curl コマンドを実行して行います。
curl https://raw.githubusercontent.com/GoogleCloudPlatform/python-docs-samples/master/translate/cloud-client/snippets.py -o translate.py
完了したら、Cloud Shell で次のコマンドを実行して API を使用します。
python translate.py translate-text en '你有沒有帶外套'
翻訳は「上着はありますか?」になります。
状況:
translate.py に 3 つの引数を渡しました。
- translate-text は、実行する
translate_text()関数を選択します。 - en は
translate_text()に target として渡され、翻訳先の言語を指定するために使用されます。 - 「你有沒有帶外套」は翻訳される文字列で、
translate_text()に text として渡されます。
translate_text() について詳しく見ていきましょう。追加されたコメントを確認します。
def translate_text(target, text):
    """Translates text into the target language.

    Target must be an ISO 639-1 language code.
    See https://g.co/cloud/translate/v2/translate-reference#supported_languages
    """
    # relevant imports from above
    # from google.cloud import translate
    # import six

    # create Client object
    translate_client = translate.Client()

    # decode text if it's a binary type
    # six is a python 2 and 3 compatibility library
    if isinstance(text, six.binary_type):
        text = text.decode('utf-8')

    # get translation result by passing text and target language to client
    # Text can also be a sequence of strings, in which case this method
    # will return a sequence of results for each text.
    result = translate_client.translate(text, target_language=target)

    # print original text, translated text and detected original language
    print(u'Text: {}'.format(result['input']))
    print(u'Translation: {}'.format(result['translatedText']))
    print(u'Detected source language: {}'.format(
        result['detectedSourceLanguage']))
6. Cloud Natural Language
Python クライアント
Cloud Natural Language 用の Python クライアントが必要です。インストールするには、Cloud Shell に次のように入力します。
sudo pip install --upgrade google-cloud-language
試してみましょう
最後に、Cloud Natural Language API のコードサンプルを見てみましょう。テキスト内のエンティティを検出します。snippets.py には、そのためのコードが含まれているようです。snippets.py の内容をコピーし、Cloud Shell に natural_language.py という新しいファイルを作成して、すべてのコードを natural_language.py に貼り付けます。この操作は、Cloud Shell コードエディタで手動で行うか、Cloud Shell で次の curl コマンドを実行して行います。
curl https://raw.githubusercontent.com/GoogleCloudPlatform/python-docs-samples/master/language/cloud-client/v1/snippets.py -o natural_language.py
完了したら、Cloud Shell で次のコマンドを実行して API を使用します。
python natural_language.py entities-text 'where did you leave my bike'
API は「自転車」をエンティティとして識別する必要があります。エンティティは、固有名詞(著名人、ランドマークなど)または普通名詞(レストラン、競技場など)です。
状況:
natural_language.py に 2 つの引数を渡しました。
- entities-text は、実行する
entities_text()関数を選択します。 - 「自転車をどこに置いたか」は、エンティティを分析する文字列で、
entities_text()に text として渡されます。
entities_text() について詳しく見ていきましょう。挿入された新しいコメントを確認します。
def entities_text(text):
    """Detects entities in the text."""
    # relevant imports from above
    # from google.cloud import language
    # from google.cloud.language import enums
    # from google.cloud.language import types
    # import six

    # create LanguageServiceClient object
    client = language.LanguageServiceClient()

    # decode text if it's a binary type
    # six is a python 2 and 3 compatibility library
    if isinstance(text, six.binary_type):
        text = text.decode('utf-8')

    # Instantiates a plain text document.
    document = types.Document(
        content=text,
        type=enums.Document.Type.PLAIN_TEXT)

    # Detects entities in the document. You can also analyze HTML with:
    #   document.type == enums.Document.Type.HTML
    entities = client.analyze_entities(document).entities

    # entity types from enums.Entity.Type
    entity_type = ('UNKNOWN', 'PERSON', 'LOCATION', 'ORGANIZATION',
                   'EVENT', 'WORK_OF_ART', 'CONSUMER_GOOD', 'OTHER')

    # print information for each entity found
    for entity in entities:
        print('=' * 20)
        print(u'{:<16}: {}'.format('name', entity.name))
        print(u'{:<16}: {}'.format('type', entity_type[entity.type]))
        print(u'{:<16}: {}'.format('metadata', entity.metadata))
        print(u'{:<16}: {}'.format('salience', entity.salience))
        print(u'{:<16}: {}'.format('wikipedia_url',
              entity.metadata.get('wikipedia_url', '-')))
7. 統合してみましょう
作成するものを確認しましょう。
では、すべてをまとめてみましょう。solution.py ファイルを作成し、前の手順で取得した detect_labels_uri()、transcribe_gcs()、translate_text()、entities_text() を solution.py にコピーして貼り付けます。
インポート ステートメント
コメントを解除して、import ステートメントを一番上に移動します。speech.types と language.types の両方がインポートされていることに注意してください。競合が発生するため、これらを削除し、transcribe_gcs() と entities_text() の types の各インスタンスをそれぞれ speech.types と language.types に変更します。次のようになります。
from google.cloud import vision
from google.cloud import speech
from google.cloud import translate
from google.cloud import language
from google.cloud.language import enums
import six
Return results
出力する代わりに、関数が結果を返すようにします。次のような出力が表示されます。
# import statements

def detect_labels_uri(uri):
    # code

    # we only need the label descriptions
    label_descriptions = []
    for label in labels:
        label_descriptions.append(label.description)

    return label_descriptions

def transcribe_gcs(gcs_uri):
    # code

    # naive assumption that audio file is short
    return response.results[0].alternatives[0].transcript

def translate_text(target, text):
    # code

    # only interested in translated text
    return result['translatedText']

def entities_text(text):
    # code

    # we only need the entity names
    entity_names = []
    for entity in entities:
        entity_names.append(entity.name)

    return entity_names
関数を使用する
これだけの作業を終えたら、これらの関数を呼び出すことができます。さあ、やってみましょう。次の例をご覧ください。
def compare_audio_to_image(audio, image):
    """Checks whether a speech audio is relevant to an image."""

    # speech audio -> text
    transcription = transcribe_gcs(audio)

    # text of any language -> english text
    translation = translate_text('en', transcription)

    # text -> entities
    entities = entities_text(translation)

    # image -> labels
    labels = detect_labels_uri(image)

    # naive check for whether entities intersect with labels
    has_match = False
    for entity in entities:
        if entity in labels:
            # print result for each match
            print('The audio and image both contain: {}'.format(entity))
            has_match = True

    # print if there are no matches
    if not has_match:
        print('The audio and image do not appear to be related.')
複数言語に対応
以前は、トルコ語を transcribe_gcs() にハードコードしていました。compare_audio_to_image() から言語を指定できるように変更しましょう。必要な変更は次のとおりです。
def transcribe_gcs(language, gcs_uri):
    ...
    config = speech.types.RecognitionConfig(language_code=language)
def compare_audio_to_image(language, audio, image):
    transcription = transcribe_gcs(language, audio)
試してみる
最終的なコードは、この GitHub リポジトリの solution.py にあります。それを取得する curl コマンドは次のとおりです。
curl https://raw.githubusercontent.com/googlecodelabs/integrating-ml-apis/master/solution.py -O
GitHub のバージョンには argparse が含まれており、コマンドラインから次の操作が可能です。
python solution.py tr-TR gs://cloud-samples-data/ml-api-codelab/tr-ball.wav gs://cloud-samples-data/ml-api-codelab/football.jpg
見つかったアイテムごとに、「音声と画像の両方に含まれているもの: 」という文字列を出力します。上記の例では、「音声と画像の両方に含まれているもの: ball」となります。
ボーナス: その他の機能
音声ファイルと画像ファイルの場所をさらにいくつかご紹介します。
8. 完了
このチュートリアルでは、4 つの ML API を調べて統合し、音声サンプルが提供された画像について話しているかどうかを判断しました。このパイプラインには改善の余地がまだたくさんあります。
学習した内容
- Cloud Vision API へのリクエストの作成
- Cloud Speech-to-Text API へのリクエストの作成
- Cloud Translation API へのリクエストの作成
- Cloud Natural Language API へのリクエストの作成
- 上記の API をすべて組み合わせて使用する
次のステップ
- 単語の比較をより適切に行うには、word2vec をご覧ください。
- Vision API、Speech-to-Text API、Translation API 、Natural Language API の詳細な Codelab をご覧ください。
- Cloud Vision を Cloud Video Intelligence に置き換えてみてください。
- Cloud Text-to-Speech API を使用して音声音声を合成する
- Cloud Storage にオブジェクトをアップロードする方法を学習する