
1. 简介


上次更新日期:2021 年 9 月 13 日
收款!
通过 Business Messages 收款,让您在对话平台中开启全新的商机。设想一下,当潜在客户想向您询问某款产品时,他们会向您发送询问。对方回答问题后,您可以在对话中提供支付网关,以结束交易。

怎样才算良好的付款体验?
良好的付款体验让用户能够按照自己习惯的方式付款。
用户对付款方式的偏好程度不同,在世界不同地区,不同的付款方式更为普遍。借助 Business Messages,您可以与多个付款处理方集成,从而为用户提供最大程度的便利。
当用户完成付款流程后,您需要告知他们您已成功收到其付款。大多数付款处理方都包含一个成功或失败回调,该回调会在付款流程完成后将 HTTP 请求发送到您选择的网址。
构建内容
在本 Codelab 系列的上一部分中,您扩展了 Bonjour Meal 代理以展示一个目录、创建了一个允许用户添加和移除商品的购物车,并计算了购物车的总价格。在本部分中,您将进一步扩展代理,使其能够根据购物车中的内容处理付款。
在本 Codelab 中,您的应用将实现下列功能:
- 与 Stripe 支付网关集成
- 允许用户根据购物车价格完成付款流程
- 将通知发送回对话界面,以告知用户付款状态
您应执行的操作
- 与 Stripe 付款处理方集成。
- 向 Stripe 发送请求以发起付款会话。
- 处理 Stripe 的付款成功或失败响应。
所需条件
- 已注册并获准与 Business Messages 配合使用的 GCP 项目
- 访问我们的开发者网站,获取相关说明
- 一部搭载 Android 5 或更高版本的 Android 设备或一部安装了 Google 地图应用的 iOS 设备
- 具有 Web 应用编程方面的经验
- 已连接到互联网!
2. 添加依赖项
正在更新 required.txt
由于我们将与 Stripe 付款处理器集成,因此我们可以使用 Stripe Python 客户端库。将 stripe 添加到 required.txt(不带版本),以获取最新版本的依赖项。
要让 Google Cloud App Engine Python 运行时包含条纹 Python 模块,必须这样做。
requirements.txt
...
stripe
...
准备 bopis/views.py
在 bopis/views.py 顶部,从 django.shortcuts 导入 render,并从 django.http 导入 JsonResponse。此外,我们还需要导入 stripe 以支持对 Stripe Python 客户端库的调用。
...
from django.shortcuts import render
from django.http import JsonResponse
import stripe
...
3. 使用 Stripe
在 Stripe.com 上创建帐号
在此 Codelab 中,我们刚好使用的是 Stripe,但您可以与任何支持 Web 集成的处理器集成。在 stripe.com 上创建帐号。我们会使用此个人资料进行测试和教育目的,了解如何直接与任何第三方付款处理方集成。
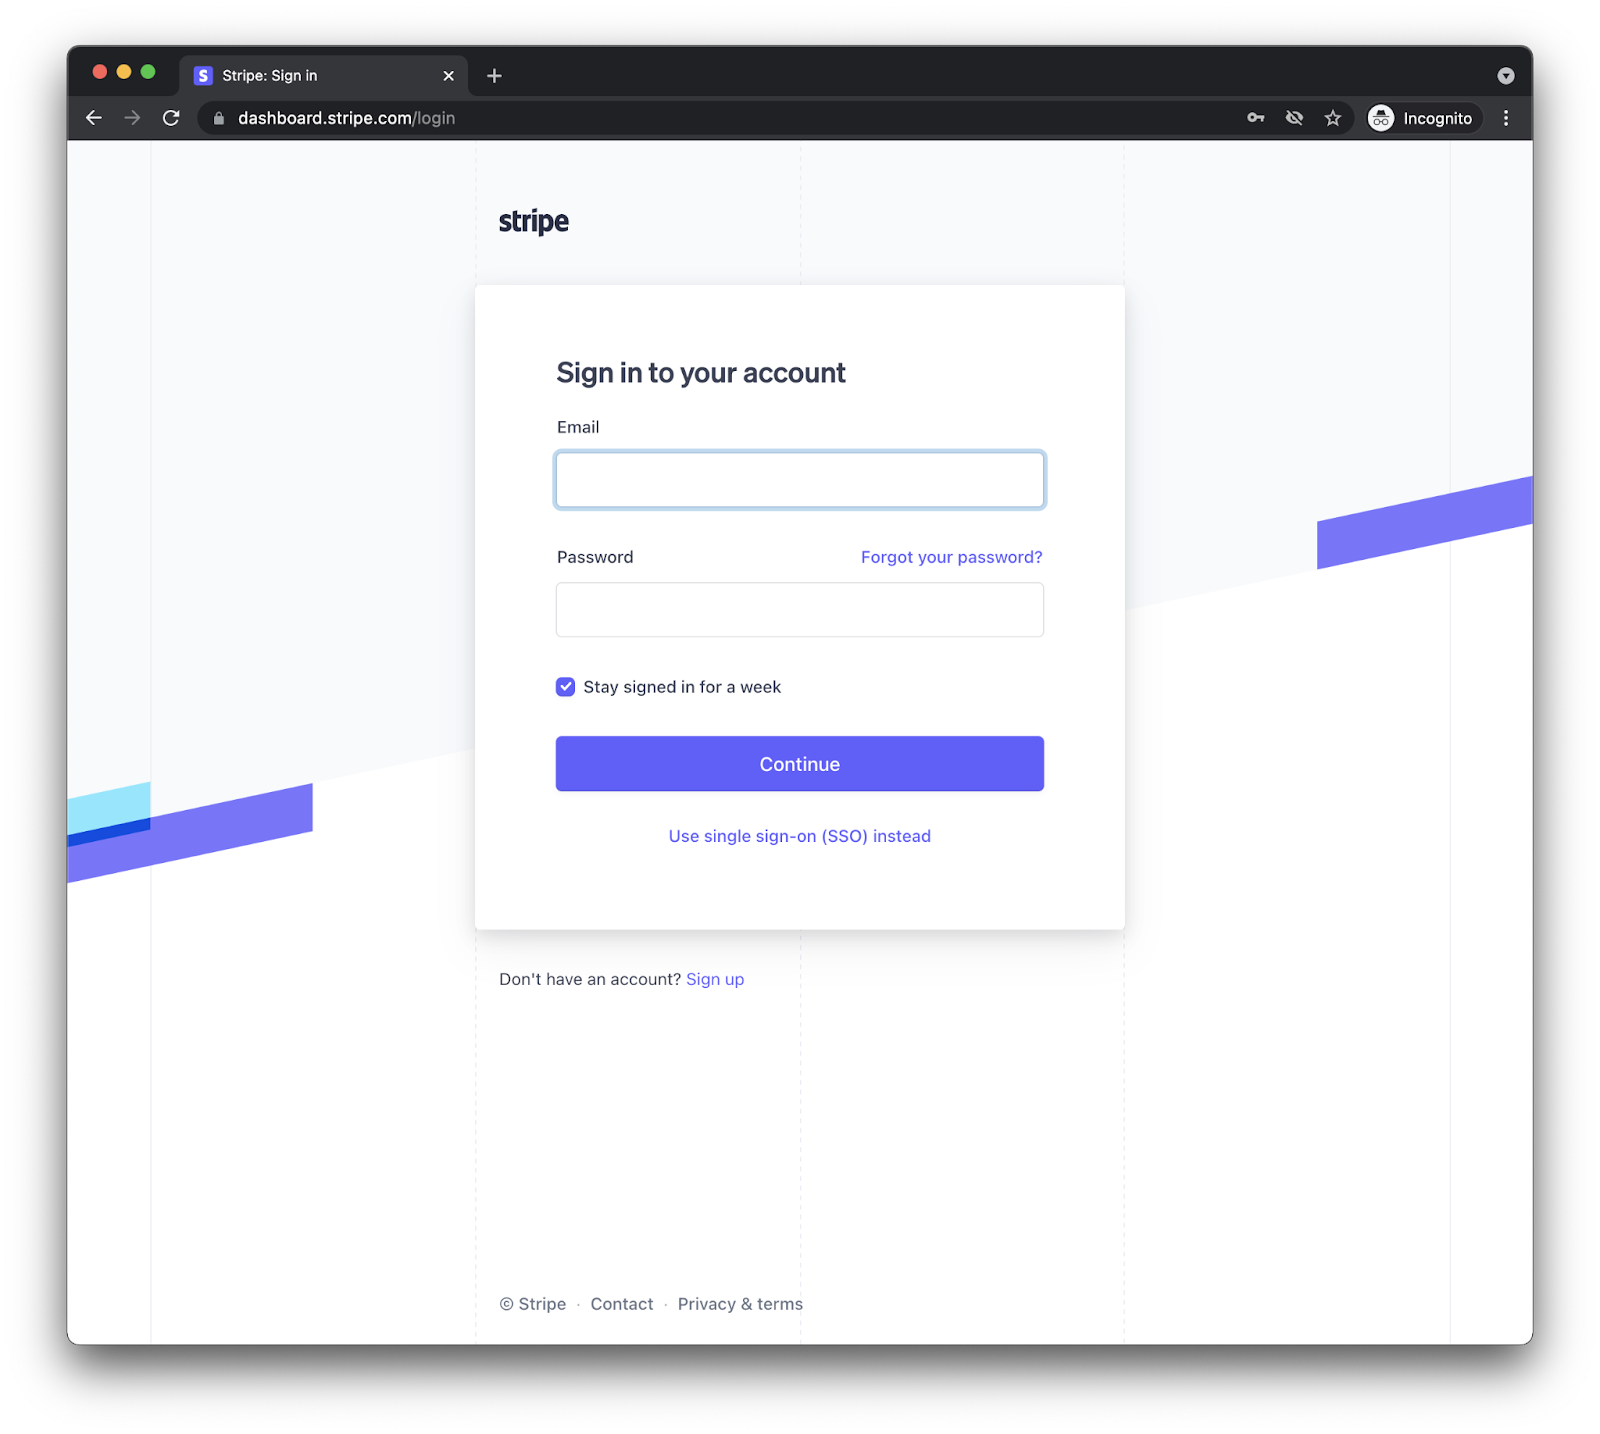
创建帐号并登录后,您应该会看到如下所示的信息中心。

确保您在“测试模式”下运行,然后点击上方屏幕截图中所述的开发者按钮,以查找您的 API 密钥。您应该会看到两组 API 密钥:可发布的密钥和机密密钥。您需要同时使用这两个密钥才能通过 Stripe 进行付款交易。
更新 bopis/views.py
您的应用需要两组密钥,因此请在 view.py 中对其进行更新。
您可以直接在 tripe.api_key 属性上设置密钥,并为其分配在 Stripe 开发者信息中心内找到的密钥值。然后,创建一个名为 STRIPE_PUBLIC_KEY 的全局变量并将其设置为可发布的键。
此外,Stripe 需要重定向回您管理的网页,因此我们要额外创建一个全局变量,用以包含您的应用的可公开访问的域。
在完成这些修改后,您将获得如下内容:
stripe.api_key = 'sk_test_abcde-12345'
STRIPE_PUBLIC_KEY = 'pk_test_edcba-54321'
YOUR_DOMAIN = 'https://<GCP_PROJECT_ID>.appspot.com'
这就是 Stripe 设置的所有操作。
4. 结账功能
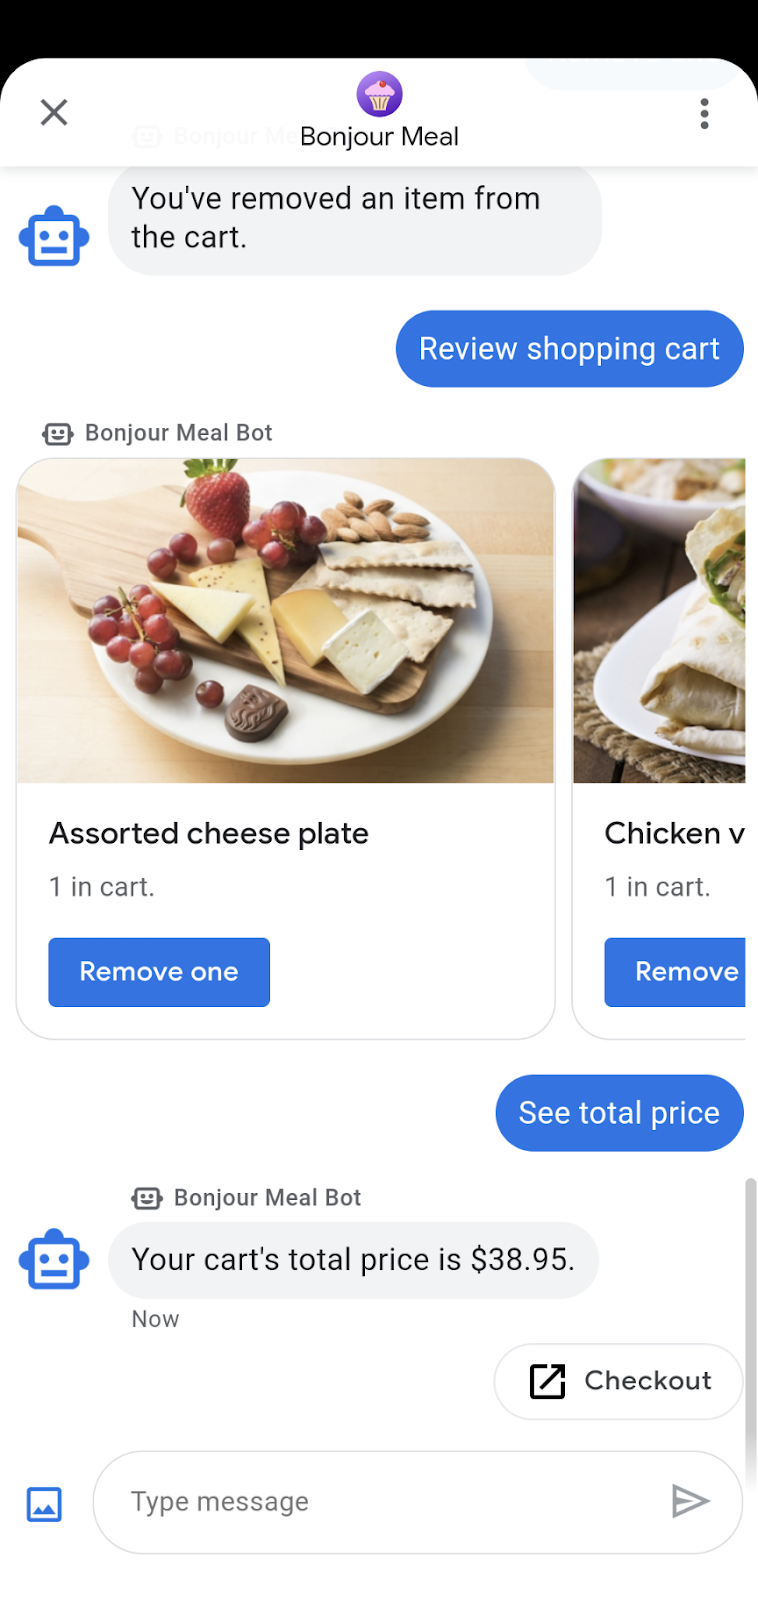
更新购物车总价函数
目前,send_shopping_cart_total_price 函数仅发送指明购物车价格的消息。我们来添加一项建议操作,以便打开结账页面的网址。
def send_shopping_cart_total_price(conversation_id):
  """Sends shopping cart price to the user through Business Messages.

  Args:
    conversation_id (str): The unique id for this user and agent.
  """
  cart_price = get_cart_price(conversation_id)

  message_obj = BusinessMessagesMessage(
      messageId=str(uuid.uuid4().int),
      representative=BOT_REPRESENTATIVE,
      text=f'Your cart\'s total price is ${cart_price}.',
      suggestions=[
          BusinessMessagesSuggestion(
              action=BusinessMessagesSuggestedAction(
                  text='Checkout',
                  postbackData='checkout',
                  openUrlAction=BusinessMessagesOpenUrlAction(
                      url=f'{YOUR_DOMAIN}/checkout/{conversation_id}'))),
      ]
    )

  send_message(message_obj, conversation_id)
当用户点按此建议操作时,系统会将其定向到显示总价的网页,以及使用 Stripe 启动付款的按钮。
让我们来构建一个支持此流程的简单网页。
在项目源代码中,找到名为 bopis 的目录。在 bopi 中创建一个名为 templates 的新目录,并在模板中创建名为 bopis 的另一个目录。这是一个 Django 设计模式,用于在模板目录中指定应用名称。这有助于减少 Django 应用之间的模板混淆。
您现在应该有一个路径为 bopis/templates/bopis/ 的目录。您可在此目录中创建 HTML 文件来提供网页。Django 将这些模板称为渲染到浏览器的模板。让我们从 checkout.html 开始。
在此目录中,创建 checkout.html。以下代码段显示了结账按钮和购物车价格。它还包含用于启动 Stripe 结账的 JavaScript。
{% load static %}

<!DOCTYPE html>
<html>
  <head>
    <title>Purchase from Bonjour Meal</title>

    <script src="https://js.stripe.com/v3/"></script>
    <style>
      .description{
        font-size: 4em;
      }
      button {
        color: red;
        padding: 40px;
        font-size: 4em;
      }
    </style>
  </head>
  <body>
    <section>
      <img
        src="https://www.google.com/images/branding/googlelogo/2x/googlelogo_color_272x92dp.png"
        alt="Bonjour Meal Restaurant"
      />
      <div class="product">
        <div class="description">
          <h3>Your Bonjour Meal Total</h3>
          <h5>${{cart_price}}</h5>
        </div>
      </div>
      <button type="button" id="checkout-button">Checkout</button>
    </section>
  </body>
  <script type="text/javascript">
    // Create an instance of the Stripe object with your publishable API key
    var stripe = Stripe("{{stripe_public_key}}");
    var checkoutButton = document.getElementById("checkout-button");

    checkoutButton.addEventListener("click", function () {
      fetch("/create-checkout-session/{{conversation_id}}", {
        method: "POST",
      })
        .then(function (response) {
          return response.json();
        })
        .then(function (session) {
          return stripe.redirectToCheckout({ sessionId: session.id });
        })
        .then(function (result) {
          // If redirectToCheckout fails due to a browser or network
          // error, you should display the localized error message to your
          // customer using error.message.
          if (result.error) {
            alert(result.error.message);
          }
        })
        .catch(function (error) {
          console.error("Error:", error);
        });
    });
  </script>
</html>
请求网址时需要指向此网页的路线。结算建议 Action 的 openUrlAction 值设置为 {YOUR_DOMAIN}/checkout/{conversation_id}。这相当于 https://<GCP-Project-ID>.appspot.com/checkout/abc123-cba321-abc123-cba321。在创建此路线之前,我们先来看看在 HTML 模板中找到的 JavaScript。
...
  <script type="text/javascript">
    // Create an instance of the Stripe object with your publishable API key
    var stripe = Stripe("{{stripe_public_key}}");
    var checkoutButton = document.getElementById("checkout-button");

    checkoutButton.addEventListener("click", function () {
      fetch("/create-checkout-session/{{conversation_id}}", {
        method: "POST",
      })
        .then(function (response) {
          return response.json();
        })
        .then(function (session) {
          return stripe.redirectToCheckout({ sessionId: session.id });
        })
        .then(function (result) {
          // If redirectToCheckout fails due to a browser or network
          // error, you should display the localized error message to your
          // customer using error.message.
          if (result.error) {
            alert(result.error.message);
          }
        })
        .catch(function (error) {
          console.error("Error:", error);
        });
    });
  </script>
...
让我们一起看一下上面的代码段。
- 首先,它使用公钥从视图函数(另一个 Django 范式)传入 Stripe 实体。
- 然后,代码段在网页上查找 ID 为
checkout-button的元素。 - 系统会向该元素添加事件监听器。
当用户点击或点按该按钮后,系统会通过向您指定的网址发送 POST 请求来触发此事件监听器:{YOUR_DOMAIN}/create-checkout-session/{conversation_id}.
下面的代码段显示了网络服务器逻辑。当用户点按 ID 为“checkout-button”的按钮时,它可能会返回使用指定 Stripe API 的 Stripe API 创建的 Stripe 会话 ID。
如果您的服务器能够生成有效的会话 ID,应用逻辑会将用户重定向到 Stripe 结账页,否则它会使用标准 JavaScript 消息提醒用户发生了问题。
我们先向 urlpatterns 数组添加新路径,以支持结账页和生成会话 ID。将以下内容添加到 urls.py 中的 urlpatterns 数组中。
...
path('checkout/<str:conversation_id>', bopis_views.payment_checkout),
path('create-checkout-session/<str:conversation_id>', bopis_views.create_checkout_session),
...
然后,我们在 views.py 中创建视图函数,以返回 checkout.html 模板并生成 Stripe 结账会话。
...

def payment_checkout(request, conversation_id):
  """Sends the user to a payment confirmation page before the payment portal.

  Args:
    request (HttpRequest): Incoming Django request object
    conversation_id (str): The unique id for this user and agent.

  Returns:
    Obj (HttpResponse): Returns an HTTPResponse to the browser
  """

  cart_price = get_cart_price(conversation_id)
  context = {'conversation_id': conversation_id,
             'stripe_public_key': STRIPE_PUBLIC_KEY,
             'cart_price': cart_price
            }
  return render(request, 'bopis/checkout.html', context)


@csrf_exempt
def create_checkout_session(request, conversation_id):
  """Creates a Stripe session to start a payment from the conversation.

  Args:
    request (HttpRequest): Incoming Django request object
    conversation_id (str): The unique id for this user and agent.

  Returns:
    Obj (HttpResponse): Returns an HTTPResponse to the browser
  """
  cart_price = get_cart_price(conversation_id)
  try:
    checkout_session = stripe.checkout.Session.create(
        payment_method_types=['card'],
        line_items=[
            {
                'price_data': {
                    'currency': 'usd',
                    'unit_amount': int(cart_price*100),
                    'product_data': {
                        'name': 'Bonjour Meal Checkout',
                        'images': ['https://storage.googleapis.com/bonjour-rail.appspot.com/apple-walnut-salad.png'],
                    },
                },
                'quantity': 1,
            },
        ],
        mode='payment',
        success_url=YOUR_DOMAIN + '/success/' + conversation_id,
        cancel_url=YOUR_DOMAIN + '/cancel/' + conversation_id,
    )

    return JsonResponse({
        'id': checkout_session.id
    })

  except Exception as e:
    # Handle exceptions according to your payment processor's documentation
    # https://stripe.com/docs/api/errors/handling?lang=python
    return HttpResponse(e)

...
这两个函数都使用 session_id 将购物车与用户相关联,然后确定 Stripe 应向用户收取的价格。
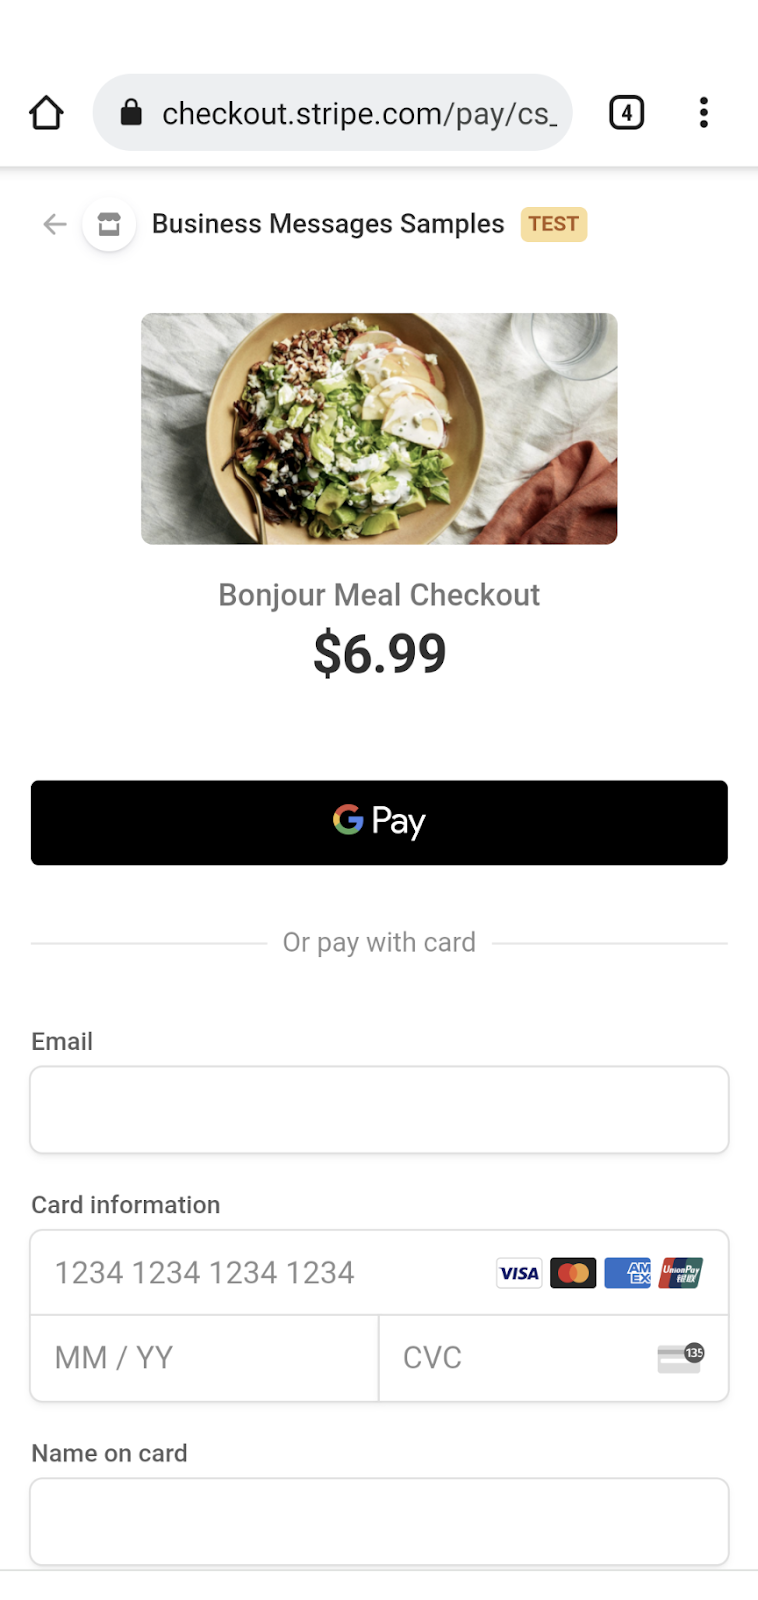
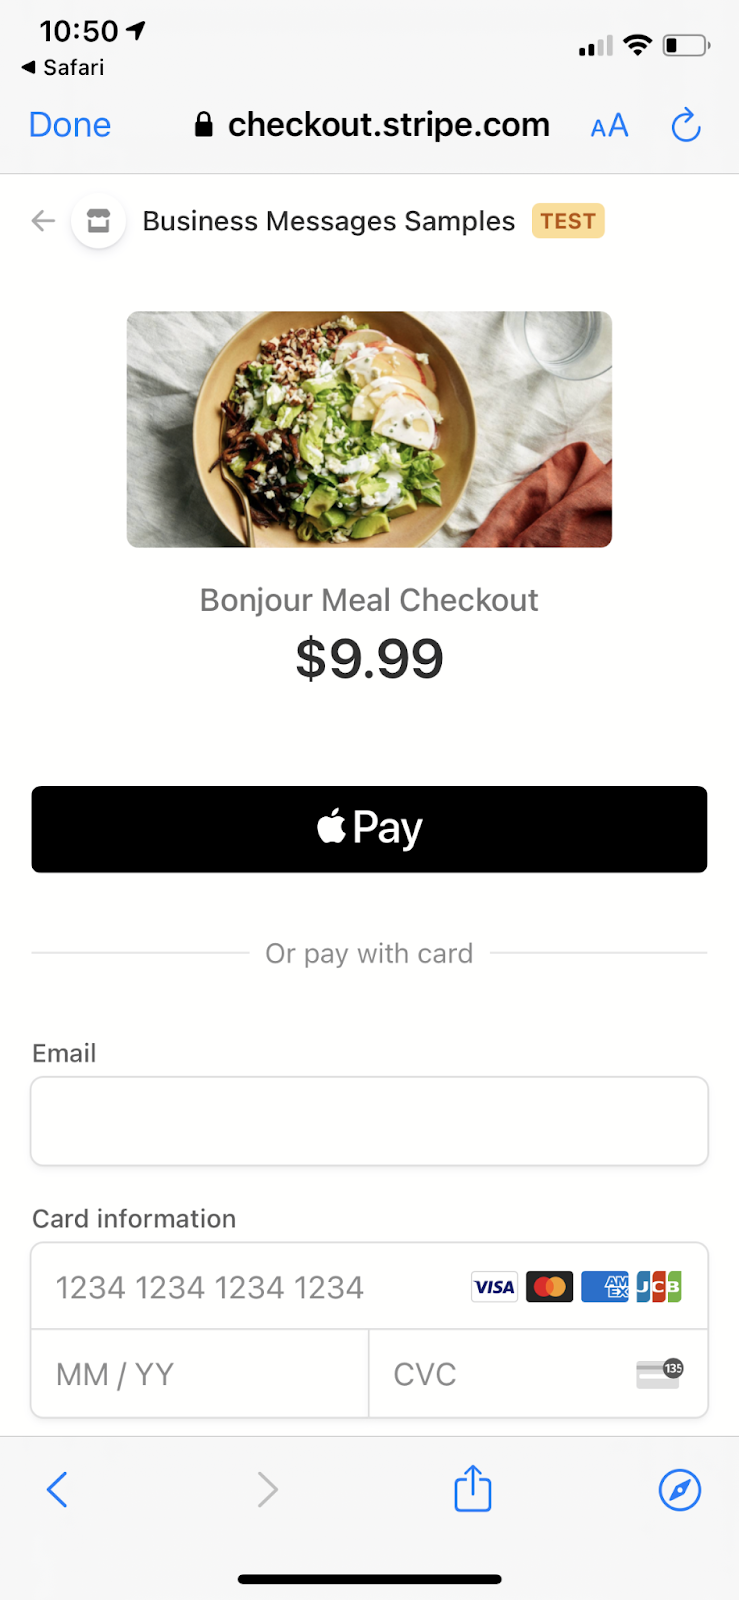
这两种方法构成了付款流程的前半部分。如果您部署此 SDK 并测试体验,则会看到 Stripe 结算表单。根据测试 Visa 结账中的 Stripe 开发者文档中的说明,您可以使用该信用卡完成测试。
流程的后半部分是我们在收到 Stripe 关于用户付款的回复后将用户带回对话的方式。
5. Stripe 响应
用户进入付款流程后,要么成功,要么无法完成。在 create_checkout_session 函数中,我们定义了 success_url 和 cancel_url。Stripe 会根据付款状态重定向到这两个网址之一。让我们在 urls.py 中定义这两个路由,然后向 bopis/views.py 添加两个视图函数,即可支持这两个可能的数据流。
将这些代码行添加到 urls.py 文件中。
...
    path('success/<str:conversation_id>', bopis_views.payment_success),
    path('cancel/<str:conversation_id>', bopis_views.payment_cancel),
...
对应的视图将如下所示:
...

def payment_success(request, conversation_id):
  """Sends a notification to the user prompting them back into the conversation.

  Args:
    request (HttpRequest): Incoming Django request object
    conversation_id (str): The unique id for this user and agent.

  Returns:
    Obj (HttpResponse): Returns an HTTPResponse to the browser
  """
  message_obj = BusinessMessagesMessage(
      messageId=str(uuid.uuid4().int),
      representative=BOT_REPRESENTATIVE,
      suggestions=[
          BusinessMessagesSuggestion(
              reply=BusinessMessagesSuggestedReply(
                  text='Check on order', postbackData='check-order')),
      ],
      text='Awesome it looks like we\'ve received your payment.')

  send_message(message_obj, conversation_id)

  return render(request, 'bopis/success.html')


def payment_cancel(request, conversation_id):
  """Sends a notification to the user prompting them back into the conversation.

  Args:
    request (HttpRequest): Incoming Django request object
    conversation_id (str): The unique id for this user and agent.

  Returns:
    Obj (HttpResponse): Returns an HTTPResponse to the browser
  """
  message_obj = BusinessMessagesMessage(
      messageId=str(uuid.uuid4().int),
      representative=BOT_REPRESENTATIVE,
      suggestions=[
          BusinessMessagesSuggestion(
              action=BusinessMessagesSuggestedAction(
                  text='Checkout',
                  postbackData='checkout',
                  openUrlAction=BusinessMessagesOpenUrlAction(
                      url=f'{YOUR_DOMAIN}/checkout/{conversation_id}'))),
      ],
      text='It looks like there was a problem with checkout. Try again?')

  send_message(message_obj, conversation_id)

  return render(request, 'bopis/cancel.html')

...
Stripe 会按照您在 DOMAIN 常量中指定的方式重定向回网域,这意味着您需要通过模板呈现 HTML 响应,否则网站会显得十分简单。让我们在 bopis/templates/bopis/ 目录中创建两个简单的 HTML 文件以及 checkout.html。
bm-django-echo-bot/bopis/ templates/bopis/success.html
{% load static %}

<html>
<head>
  <title>Business Messages Payment Integration Sample!</title>
  <style>
    p{
      font-size: 4em;
    }
  </style>
</head>
<body>
  <section>

    <p>
      Checkout succeeded - We appreciate your business!
      <br/><br/>
      For support related questions, please email
      <a href="mailto:bm-support@google.com">bm-support@google.com</a>.

    </p>
  </section>
</body>
</html>
bm-django-echo-bot/bopis/ templates/bopis/cancel.html
{% load static %}

<html>
<head>
  <title>Checkout canceled</title>
  <style>
    p{
      font-size: 4em;
    }
    </style>
</head>
<body>
  <section>
    <p>Checkout canceled - Forgot to add something to your cart? Shop around then come back to pay!</p>
  </section>
</body>
</html>
有了这两个模板,当用户使用您的 Stripe 集成完成付款流程时,系统会重定向到相应的网址,并向其显示相应的模板。他们还会通过 Business Messages 接收消息,以便返回对话。
6. 接收付款!
恭喜,您已成功将付款处理方集成到 Business Messages 代理中!
在本系列中,您将 Web 应用部署到 Google Cloud App Engine,在 Business Communications Developer Console 上设置网络钩子,扩展该应用以支持通过静态数据库查找商品目录,以及使用 Google Datastore 创建了购物车。在本系列文章的最后,您将与 Stripe 集成。Stripe 是一个支持网络集成和体验的支付处理商。现在,您可以与其他付款处理方等平台集成了!
后续操作
完成上述操作后,请查看以下一些主题,了解您可以在 Business Messages 中实现哪些更复杂的互动:
参考文档
- SuggestedReply
- Business Messages 消息参考文档
- RichCard 的 JSON 定义