
אם תוסף Google Workspace מתחבר לשירות או ל-API של צד שלישי שנדרשת עבורם הרשאה, התוסף יכול לבקש מהמשתמשים להיכנס לחשבון ולאשר גישה.
בדף הזה מוסבר איך לאמת משתמשים באמצעות תהליך הרשאה (כמו OAuth), שכולל את השלבים הבאים:
- זיהוי המקרים שבהם נדרשת הרשאה.
- החזרת ממשק כרטיס שמבקש מהמשתמשים להיכנס לשירות.
- מרעננים את התוסף כדי שהמשתמשים יוכלו לגשת לשירות או למשאב המוגן.
אם התוסף שלכם דורש רק את זהות המשתמש, אתם יכולים לאמת את המשתמשים ישירות באמצעות המזהה או כתובת האימייל שלהם ב-Google Workspace. כדי להשתמש בכתובת האימייל לאימות, אפשר לעיין במאמר בנושא אימות בקשות JSON. אם יצרתם את התוסף באמצעות Google Apps Script, תוכלו להשתמש בספריית OAuth2 ל-Google Apps Script כדי לפשט את התהליך (יש גם גרסת OAuth1).
זיהוי הצורך בהרשאה
כשמשתמשים בתוסף, יכול להיות שלמשתמשים אין הרשאה לגשת למשאב מוגן מסיבות שונות, למשל:
- אסימון גישה להתחברות לשירות של צד שלישי עדיין לא נוצר או שתוקפו פג.
- אסימון הגישה לא כולל את המשאב המבוקש.
- טוקן הגישה לא כולל את ההיקפים הנדרשים של הבקשה.
התוסף צריך לזהות את המקרים האלה כדי שהמשתמשים יוכלו להיכנס לשירות שלכם ולגשת אליו.
אם אתם מפתחים ב-Apps Script, הפונקציה hasAccess בספריית OAuth יכולה להראות לכם אם יש לכם גישה לשירות.
לחלופין, כשמשתמשים בבקשות UrlFetchApp.fetch, אפשר להגדיר את הפרמטר muteHttpExceptions ל-true. הפעולה הזו מונעת את יצירת החריגה בבקשה אם הבקשה נכשלת, ומאפשרת לבדוק את קוד התגובה של הבקשה ואת התוכן באובייקט HttpResponse שמוחזר.
בקשה מהמשתמשים להיכנס לשירות שלכם
כשהתוסף מזהה שנדרש אישור, הוא צריך להחזיר ממשק כרטיס כדי להציג למשתמשים בקשה להיכנס לשירות. כרטיס הכניסה צריך להפנות את המשתמשים להשלמת תהליך האימות וההרשאה של הצד השלישי בתשתית שלכם.
כשמפתחים תוסף באמצעות נקודות קצה של HTTP, מומלץ להגן על אפליקציית היעד באמצעות כניסה לחשבון Google, ולקבל את מזהה המשתמש באמצעות אסימון הזהות שהונפק במהלך הכניסה. התביעה המשנית מכילה את המזהה הייחודי של המשתמש, ואפשר לקשר אותה למזהה מהתוסף.
בנייה והחזרה של כרטיס כניסה
בכרטיס הכניסה לשירות, אפשר להשתמש בכרטיס ההרשאה הבסיסי של Google, או להתאים אישית כרטיס כדי להציג מידע נוסף, כמו הלוגו של הארגון. אם אתם מפרסמים את התוסף שלכם באופן ציבורי, אתם חייבים להשתמש בכרטיס בהתאמה אישית.
כרטיס הרשאה בסיסי
בתמונה הבאה מוצגת דוגמה לכרטיס ההרשאה הבסיסי של Google:
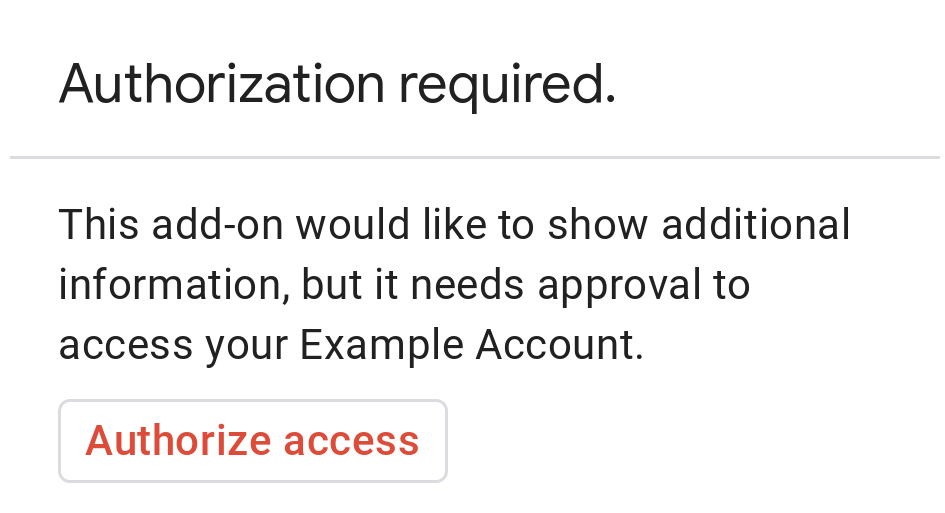
כדי להציג למשתמשים כרטיס הרשאה בסיסי, צריך להחזיר את האובייקט AuthorizationError. בדוגמה הבאה מוצג אובייקט AuthorizationError:
Apps Script
CardService.newAuthorizationException()
    .setAuthorizationUrl('AUTHORIZATION_URL')
    .setResourceDisplayName('RESOURCE_DISPLAY_NAME')
    .throwException();
JSON
מחזירה את תגובת ה-JSON הבאה:
{
  "basic_authorization_prompt": {
    "authorization_url": "AUTHORIZATION_URL",
    "resource": "RESOURCE_DISPLAY_NAME"
  }
}
מחליפים את מה שכתוב בשדות הבאים:
-
AUTHORIZATION_URL: כתובת ה-URL של אפליקציית האינטרנט שמטפלת בהרשאה. -
RESOURCE_DISPLAY_NAME: השם המוצג של המשאב או השירות המוגנים. השם הזה מוצג למשתמש בהנחיה לאישור. לדוגמה, אם חשבוןRESOURCE_DISPLAY_NAMEשלכם הואExample Account, בהודעה תופיע השורה: "כדי שהתוסף יוכל להציג מידע נוסף, עליך לאשר לו גישה לחשבון Example שלך".
אחרי השלמת ההרשאה, המשתמש מתבקש לרענן את התוסף כדי לגשת למשאב המוגן.
כרטיסי אישור החזרה ב-Google Chat
אם התוסף מרחיב את Google Chat והמשתמש מפעיל אותו ב-Google Chat, הוא יכול להשלים את תהליך ההרשאה בלי לבצע רענון ידני. ב-Google Chat יש תמיכה בניסיון חוזר אוטומטי של ההפעלה הקודמת אם הטריגר הוא Message, Added to space או App command. בטריגרים האלה, התוסף מקבל completeRedirectUri במטען הייעודי (payload) של האירוע.
כדי להפעיל ניסיון חוזר אוטומטי, צריך לקודד את completeRedirectUri בכתובת ה-URL של ההגדרה. ההפניה האוטומטית לכתובת ה-URL הזו מסמנת ל-Google Chat שהבקשה להגדרה מולאה, ומאפשרת ל-Google Chat לנסות שוב את ההפעלה הקודמת.
כשמשתמש מופנה בהצלחה לכתובת configCompleteRedirectUrl שצוינה בהודעה המקורית, Google Chat מבצע את השלבים הבאים:
- ההודעה שמוצגת למשתמש שמתחיל את השיחה תימחק.
- שולח את אובייקט האירוע המקורי לאותו תוסף בפעם השנייה.
אם לא מקודדים את completeRedirectUri בכתובת ה-URL של ההגדרה, המשתמש עדיין יכול להשלים את תהליך ההרשאה. עם זאת, Google Chat לא מנסה שוב את ההפעלה הקודמת, והמשתמש צריך להפעיל מחדש את התוסף באופן ידני.
בדוגמת הקוד הבאה אפשר לראות איך אפליקציית Chat יכולה לבקש פרטי כניסה ל-OAuth2 אופליין, לאחסן אותם במסד נתונים ולהשתמש בהם כדי לבצע קריאות ל-API עם אימות משתמש.
Apps Script
Node.js
Python
Java
כרטיס הרשאה מותאם אישית
כדי לשנות את בקשת ההרשאה, אתם יכולים ליצור כרטיס בהתאמה אישית לחוויית הכניסה לשירות.
אם אתם מפרסמים את התוסף שלכם באופן ציבורי, אתם צריכים להשתמש בכרטיס הרשאה מותאם אישית לכל אפליקציות המארח של Google Workspace, חוץ מ-Chat. מידע נוסף על דרישות הפרסום ב-Google Workspace Marketplace זמין במאמר מידע על בדיקת אפליקציות.
הכרטיס שמוחזר צריך:
- חשוב להבהיר למשתמש שהתוסף מבקש הרשאה לגשת לשירות שאינו של Google בשמו.
- חשוב להסביר בבירור מה התוסף יכול לעשות אם הוא מקבל הרשאה.
- כוללות לחצן או ווידג'ט דומה שמעביר את המשתמש לכתובת ה-URL של ההרשאה של השירות. חשוב לוודא שהפונקציה של הווידג'ט ברורה למשתמש.
- בווידג'ט הקודם צריך להשתמש בהגדרה
OnClose.RELOADבאובייקטOpenLinkכדי לוודא שהתוסף נטען מחדש אחרי קבלת ההרשאה. - כל הקישורים שנפתחים מההנחיה לאישור צריכים להשתמש ב-HTTPS.
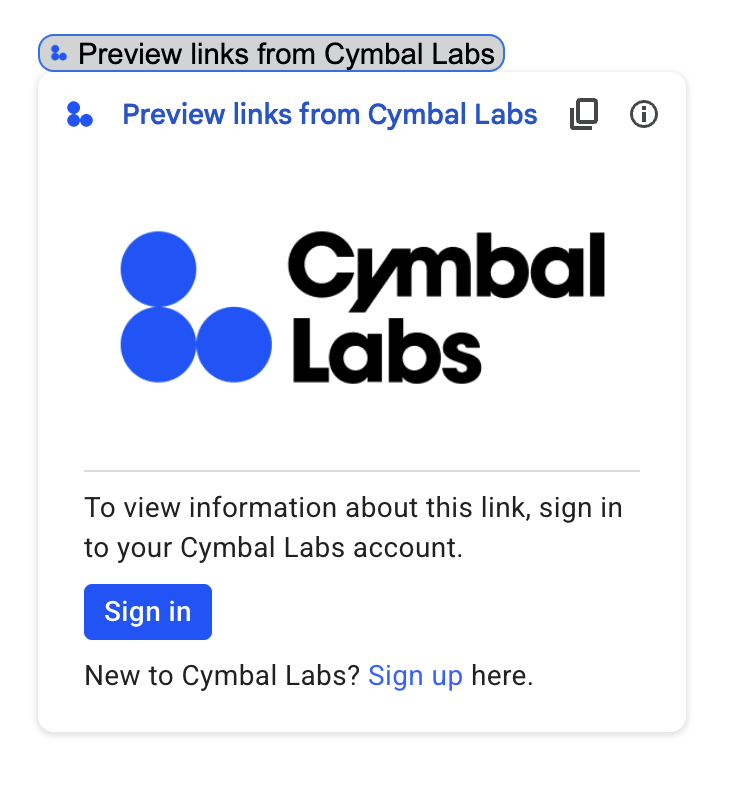
בתמונה הבאה מוצג כרטיס הרשאה מותאם אישית לדף הבית של תוסף. בכרטיס מופיעים לוגו, תיאור ולחצן כניסה:
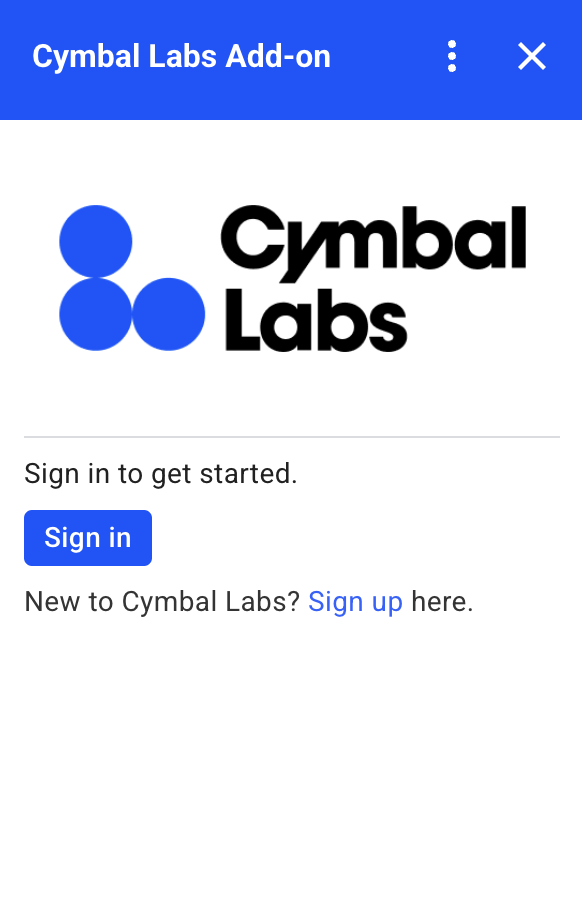
בדוגמת הקוד הבאה אפשר לראות איך משתמשים בכרטיס בהתאמה אישית:
Apps Script
function customAuthorizationCard() {
    let cardSection1Image1 = CardService.newImage()
        .setImageUrl('LOGO_URL')
        .setAltText('LOGO_ALT_TEXT');

    let cardSection1Divider1 = CardService.newDivider();

    let cardSection1TextParagraph1 = CardService.newTextParagraph()
        .setText('DESCRIPTION');

    let cardSection1ButtonList1Button1 = CardService.newTextButton()
        .setText('Sign in')
        .setBackgroundColor('#0055ff')
        .setTextButtonStyle(CardService.TextButtonStyle.FILLED)
        .setAuthorizationAction(CardService.newAuthorizationAction()
            .setAuthorizationUrl('AUTHORIZATION_URL'));

    let cardSection1ButtonList1 = CardService.newButtonSet()
        .addButton(cardSection1ButtonList1Button1);

    let cardSection1TextParagraph2 = CardService.newTextParagraph()
        .setText('TEXT_SIGN_UP');

    let cardSection1 = CardService.newCardSection()
        .addWidget(cardSection1Image1)
        .addWidget(cardSection1Divider1)
        .addWidget(cardSection1TextParagraph1)
        .addWidget(cardSection1ButtonList1)
        .addWidget(cardSection1TextParagraph2);

    let card = CardService.newCardBuilder()
        .addSection(cardSection1)
        .build();
    return [card];
}

function startNonGoogleAuth() {
    CardService.newAuthorizationException()
        .setAuthorizationUrl('AUTHORIZATION_URL')
        .setResourceDisplayName('RESOURCE_DISPLAY_NAME')
        .setCustomUiCallback('customAuthorizationCard')
        .throwException();
  }
JSON
מחזירה את תגובת ה-JSON הבאה:
{
  "custom_authorization_prompt": {
    "action": {
      "navigations": [
        {
          "pushCard": {
            "sections": [
              {
                "widgets": [
                  {
                    "image": {
                      "imageUrl": "LOGO_URL",
                      "altText": "LOGO_ALT_TEXT"
                    }
                  },
                  {
                    "divider": {}
                  },
                  {
                    "textParagraph": {
                      "text": "DESCRIPTION"
                    }
                  },
                  {
                    "buttonList": {
                      "buttons": [
                        {
                          "text": "Sign in",
                          "onClick": {
                            "openLink": {
                              "url": "AUTHORIZATION_URL",
                              "onClose": "RELOAD",
                              "openAs": "OVERLAY"
                            }
                          },
                          "color": {
                            "red": 0,
                            "green": 0,
                            "blue": 1,
                            "alpha": 1,
                          }
                        }
                      ]
                    }
                  },
                  {
                    "textParagraph": {
                      "text": "TEXT_SIGN_UP"
                    }
                  }
                ]
              }
            ]
          }
        }
      ]
    }
  }
}
מחליפים את מה שכתוב בשדות הבאים:
-
LOGO_URL: כתובת ה-URL של לוגו או תמונה. כתובת ה-URL חייבת להיות ציבורית. -
LOGO_ALT_TEXT: הטקסט החלופי של הלוגו או התמונה, כמוCymbal Labs Logo. -
DESCRIPTION: קריאה לפעולה למשתמשים להיכנס לחשבון, כמוSign in to get started. - כדי לעדכן את לחצן הכניסה:
-
AUTHORIZATION_URL: כתובת ה-URL של אפליקציית האינטרנט שמטפלת בהרשאה. - אופציונלי: כדי לשנות את צבע הלחצן, מעדכנים את ערכי הנקודה הצפה של RGBA בשדה
color. ב-Apps Script, מעדכנים את השיטהsetBackgroundColorבאמצעות ערכים הקסדצימליים.
-
-
TEXT_SIGN_UP: טקסט שמבקש מהמשתמשים ליצור חשבון אם אין להם חשבון. לדוגמה,New to Cymbal Labs? <a href=\"https://www.example.com/signup\">Sign up</a> here.
ניהול של כניסות דרך צד שלישי באפליקציות של Google Workspace
אחד השימושים הנפוצים בתוספים ל-Google Workspace הוא לספק ממשק לאינטראקציה עם מערכת של צד שלישי מתוך אפליקציית מארח של Google Workspace.
במערכות של צדדים שלישיים, לעיתים קרובות נדרש מהמשתמש להיכנס באמצעות מזהה משתמש, סיסמה או פרטי כניסה אחרים. כשמשתמש נכנס לשירות צד שלישי בזמן שהוא משתמש באחד ממארחי Google Workspace, אתם צריכים לוודא שהוא לא יצטרך להיכנס שוב כשהוא יעבור למארח אחר של Google Workspace.
אם אתם מפתחים ב-Apps Script, אתם יכולים למנוע בקשות חוזרות להתחברות באמצעות מאפייני משתמש או אסימוני מזהה. הם מוסברים בקטעים הבאים.
מאפייני משתמש
אתם יכולים לאחסן את נתוני הכניסה של משתמש במאפייני המשתמש של Apps Script. לדוגמה, אפשר ליצור אסימון אינטרנט מסוג JSON (JWT) משירות הכניסה שלהם ולתעד אותו במאפיין משתמש, או לתעד את שם המשתמש והסיסמה של השירות שלהם.
היקף מאפייני המשתמשים הוא כזה שרק המשתמש יכול לגשת אליהם בסקריפט של התוסף. משתמשים אחרים ותסריטים אחרים לא יכולים לגשת למאפיינים האלה. לפרטים נוספים, ראו PropertiesService.
אסימונים מזהים
אתם יכולים להשתמש באסימון מזהה של Google כפרטי הכניסה לשירות שלכם. זוהי דרך להשיג כניסה יחידה (SSO). המשתמשים כבר מחוברים ל-Google כי הם נמצאים באפליקציית מארח של Google.
דוגמה להגדרת OAuth בשירות שאינו של Google
בדוגמת הקוד הבאה ב-Apps Script אפשר לראות איך מגדירים תוסף לשימוש ב-API שאינו של Google ודורש OAuth. בדוגמה הזו נעשה שימוש בספריית OAuth2 ל-Apps Script כדי ליצור שירות לגישה ל-API.
Apps Script
/**
* Attempts to access a non-Google API using a constructed service
* object.
*
* If your add-on needs access to non-Google APIs that require OAuth,
* you need to implement this method. You can use the OAuth1 and
* OAuth2 Apps Script libraries to help implement it.
*
* @param {String} url         The URL to access.
* @param {String} method_opt  The HTTP method. Defaults to GET.
* @param {Object} headers_opt The HTTP headers. Defaults to an empty
*                             object. The Authorization field is added
*                             to the headers in this method.
* @return {HttpResponse} the result from the UrlFetchApp.fetch() call.
*/
function accessProtectedResource(url, method_opt, headers_opt) {
  var service = getOAuthService();
  var maybeAuthorized = service.hasAccess();
  if (maybeAuthorized) {
    // A token is present, but it may be expired or invalid. Make a
    // request and check the response code to be sure.

    // Make the UrlFetch request and return the result.
    var accessToken = service.getAccessToken();
    var method = method_opt || 'get';
    var headers = headers_opt || {};
    headers['Authorization'] =
        Utilities.formatString('Bearer %s', accessToken);
    var resp = UrlFetchApp.fetch(url, {
      'headers': headers,
      'method' : method,
      'muteHttpExceptions': true, // Prevents thrown HTTP exceptions.
    });

    var code = resp.getResponseCode();
    if (code >= 200 && code < 300) {
      return resp.getContentText("utf-8"); // Success
    } else if (code == 401 || code == 403) {
      // Not fully authorized for this action.
      maybeAuthorized = false;
    } else {
      // Handle other response codes by logging them and throwing an
      // exception.
      console.error("Backend server error (%s): %s", code.toString(),
                    resp.getContentText("utf-8"));
      throw ("Backend server error: " + code);
    }
  }

  if (!maybeAuthorized) {
    // Invoke the authorization flow using the default authorization
    // prompt card.
    CardService.newAuthorizationException()
        .setAuthorizationUrl(service.getAuthorizationUrl())
        .setResourceDisplayName("Display name to show to the user")
        .throwException();
  }
}

/**
* Create a new OAuth service to facilitate accessing an API.
* This example assumes there is a single service that the add-on needs to
* access. Its name is used when persisting the authorized token, so ensure
* it is unique within the scope of the property store. You must set the
* client secret and client ID, which are obtained when registering your
* add-on with the API.
*
* See the Apps Script OAuth2 Library documentation for more
* information:
*   https://github.com/googlesamples/apps-script-oauth2#1-create-the-oauth2-service
*
*  @return A configured OAuth2 service object.
*/
function getOAuthService() {
  return OAuth2.createService('SERVICE_NAME')
      .setAuthorizationBaseUrl('SERVICE_AUTH_URL')
      .setTokenUrl('SERVICE_AUTH_TOKEN_URL')
      .setClientId('CLIENT_ID')
      .setClientSecret('CLIENT_SECRET')
      .setScope('SERVICE_SCOPE_REQUESTS')
      .setCallbackFunction('authCallback')
      .setCache(CacheService.getUserCache())
      .setPropertyStore(PropertiesService.getUserProperties());
}

/**
* Boilerplate code to determine if a request is authorized and returns
* a corresponding HTML message. When the user completes the OAuth2 flow
* on the service provider's website, this function is invoked from the
* service. In order for authorization to succeed you must make sure that
* the service knows how to call this function by setting the correct
* redirect URL.
*
* The redirect URL to enter is:
* https://script.google.com/macros/d/<Apps Script ID>/usercallback
*
* See the Apps Script OAuth2 Library documentation for more
* information:
*   https://github.com/googlesamples/apps-script-oauth2#1-create-the-oauth2-service
*
*  @param {Object} callbackRequest The request data received from the
*                  callback function. Pass it to the service's
*                  handleCallback() method to complete the
*                  authorization process.
*  @return {HtmlOutput} a success or denied HTML message to display to
*          the user.
*/
function authCallback(callbackRequest) {
  var authorized = getOAuthService().handleCallback(callbackRequest);
  if (authorized) {
    return HtmlService.createHtmlOutput(
      'Success!');
  } else {
    return HtmlService.createHtmlOutput('Denied');
  }
}

/**
* Unauthorizes the non-Google service. This is useful for OAuth
* development/testing.  Run this method (Run > resetOAuth in the script
* editor) to reset OAuth to re-prompt the user for OAuth.
*/
function resetOAuth() {
  getOAuthService().reset();
}