Embedded Connect
當使用者嘗試將 AdSense 連結至您的平台時,嵌入式 Connect 可減少摩擦,並改善轉換漏斗。
嵌入式連結是一小段 JavaScript 程式庫,可為特定使用者決定最佳起點,並引導他們完成所有必要步驟,以便開始放送廣告。這個 API 會處理各種情況,包括判斷使用者是否擁有 AdSense 帳戶、是否已簽署 AdSense 條款及細則、是否已將平台網站加入 AdSense 帳戶,以及網站狀態是否為「就緒」。
使用內嵌的 Connect 並選擇 Google 管理的使用者介面選項,還能處理向使用者顯示帳戶和網站狀態的使用者介面,引導使用者前往 AdSense 中正確的位置,解決任何潛在問題。
為了改善開發人員體驗,程式庫也會向您的平台發出回呼,其中包含使用者的 AdSense 發布商 ID,這項資訊對於正確設定廣告放送至關重要。
Embedded Connect 提供兩種使用者體驗選項:
- Google 代管的使用者體驗。使用嵌入式 Connect 小工具,管理所有使用者體驗。這個小工具可協助使用者完成註冊流程,並在小工具中顯示使用者帳戶和網站狀態的相關資訊。這個選項會在使用者首次連結 AdSense 帳戶時,提供含有 AdSense 發布商 ID 的回呼。
- 自訂使用者體驗:使用嵌入式連結
adsenseEmbeddedConnect.connect(...)方法,在新視窗中觸發註冊流程。這個選項會提供回呼,其中包含 AdSense 發布商 ID 和存取權杖,可用於透過 AdSense Management API 從 AdSense 帳戶擷取其他資訊。您必須自行設計使用者體驗。
實作內嵌 Connect
如要使用 Embedded Connect,請按照下列步驟操作:
- 在 Google Cloud 中建立專案 (或使用現有專案)
- 建立 OAuth 用戶端 ID
- 設定 OAuth 用戶端 ID,以便用於 Embedded Connect
- (選用) 自訂 OAuth 同意畫面
- 將 Embedded Connect JavaScript 程式庫新增至頁面
- 實作 Embedded Connect 程式碼
步驟 1:建立新的 Google Cloud 專案 (或使用現有專案)
如果您有現有的 Google Cloud 專案,歡迎使用該專案。否則,請按照下列指南設定新專案:
https://cloud.google.com/resource-manager/docs/creating-managing-projects
步驟 2:建立 OAuth 用戶端 ID
Google Cloud 專案會有可用的預設 OAuth 用戶端 ID。如要查看這項資訊,請依序前往「API 和服務」>「憑證」。
如要建立專屬的 OAuth 用戶端 ID,請按照下列步驟操作:
步驟 3:設定 OAuth 用戶端 ID,以便與 Embedded Connect 搭配使用
決定要用哪個 OAuth 用戶端 ID 整合 Embedded Connect 後,請設定該 ID。
請按照下列步驟操作:
- 在「憑證」頁面中,找出要設定的用戶端 ID,然後按一下鉛筆圖示
- 在「已授權的 JavaScript 來源」部分,新增可使用用戶端 ID 發出要求的 URI。通常會新增開發伺服器和本機環境的 URI (例如 https://dev.example.com 和 http://localhost:5000)。您還應為正式環境新增 URI (例如 https://example.com)
(選用) 步驟 4:自訂 OAuth 同意畫面
使用者會在 OAuth 同意畫面中授予您的用戶端 ID 存取 AdSense 資料的權限。這是 Embedded Connect 運作方式的重要一環。您可以自訂這個畫面,加入平台名稱、標誌等資訊。請參閱 OAuth 同意畫面頁面,瞭解如何設定自訂內容。按一下頁面頂端的「編輯應用程式」,然後按照精靈的指示操作。
步驟 5:實作嵌入式 Connect JavaScript 程式庫
這個程式庫包含用於啟動 Embedded Connect 的各種方法,並提供用於擷取及遺忘使用者發布商 ID 所需的回呼。請在頁面標頭附近實作這項操作。
Google 管理的使用者體驗:
<script src="https://www.google.com/adsense/js/embedded-connect.js?load=initEmbeddedConnect&hl={language}" async defer></script>
自訂使用者體驗:
<script src="https://www.google.com/adsense/js/embedded-connect.js?load=initEmbeddedConnect&hl={language}&headless=true" async defer></script>
請務必為傳入 load 參數的 JavaScript 函式名稱提供實作項目。adsenseEmbeddedConnect API 可用時,系統會呼叫這個函式。
指令碼標記屬性
請注意,在上述範例中,指令碼標記上設定多個屬性。以下是每個屬性的說明。
src:Embedded Connect API 的載入網址。網址可能包含多個查詢參數,詳情請參閱下文。async:要求瀏覽器以非同步方式下載並執行指令碼。執行後,指令碼會呼叫使用load參數指定的函式。defer:設定後,瀏覽器會並行下載嵌入式 Connect JavaScript 並剖析網頁,並在網頁剖析完成後執行。
src 參數
src 屬性包含啟動 Embedded Connect 所需的多個查詢參數。請參閱下方各項參數的用法。
load是全域 JavaScript 函式的名稱,會在 API 完全載入時呼叫。您可以為這個函式選擇任何名稱。hl可指定所有本地化項目使用的語言,包括註冊彈出式視窗中的文字等。這是選用的查詢參數,如果未提供,或是 AdSense 不支援該語言,小工具就會預設為美國英文。請參閱 AdSense 支援的語言。hl參數值必須遵循 BCP 47 規則,例如針對英式英文使用者,字串會是en-GB。headless=true表示 Embedded Connect 會搭配自訂使用者體驗選項使用,而非 Google 管理的使用者體驗。
您已選擇 Google 管理的使用者體驗和自訂使用者體驗,請繼續查看下方各個方法的程式碼範例。
步驟 6:實作嵌入式連結程式碼
如上所述,使用者體驗有兩種呈現方式:
請選擇最符合平台需求的實作選項。
Google 代管的使用者體驗
請按照下列步驟操作,讓 Google 算繪小工具,觸發註冊流程,並向使用者顯示帳戶和網站狀態的相關資訊。
Embedded Connect 程式碼包含兩個元件。第一個是空白的 <div>,用於指定 Embedded Connect 應在何處顯示註冊小工具。第二個則是設定設定及管理回呼的程式碼。
嵌入 Connect 小工具的 HTML 元素
請將下列 HTML 放在要顯示嵌入式 Connect 小工具的網頁中:
<div id="adsenseEmbeddedConnect"></div>
Embedded Connect 代碼
接著,請在 Embedded Connect 程式庫下方,但在 div 元素上方放置設定程式碼:
function initEmbeddedConnect() {
    adsenseEmbeddedConnect.init({
        // <div> to show the Embedded Connect widget in
        'divId': 'adsenseEmbeddedConnect',

        // OAuth client ID from step 2
        'clientId': 'xxxxxxxxxxxxxxxxxxxx.apps.googleusercontent.com',

        // Access token from the Google Identity APIs, see
        // https://developers.google.com/identity/oauth2/web/guides/use-token-model
        // Use the following scope when requesting the access token:
        // https://www.googleapis.com/auth/adsense.readonly
        'accessToken': 'xxxxxxxxxxxxxxxxxxxxxxx',

        // Login hint, an optional parameter which suppresses the account
        // chooser and either pre-fills the email box on the sign-in form,
        // or selects the proper session (if the user is using multiple
        // sign-in)
        'loginHint': 'user@example.com',

        // Child site (which is added to AdSense as part of the Embedded Connect flow)
        // Consult with your account manager to ensure this value is set correctly for your platform
        'siteUrl': 'site.example.com',

        // Optional parameter, the publisher ID of the user.
        // When set, the Embedded Connect widget will display the state of the user's AdSense account.
        // When unset, the Embedded Connect widget will show the default state which triggers the connection flow.
        'publisherId': "pub-0000000000000000",

        'onConnect': function(pid) {
          // Your custom code to send the publisher ID (pid) to your server for it to be saved.
          // The onConnect function is called when the user has completed all the onboarding steps
        },
        'onDisconnect': function() {
          // Your custom code to forget the publisher ID.
          // This onDisconnect function is called when the user has clicked the "Disconnect" button in the Embedded Connect widget
        },
    });
};
螢幕截圖
嵌入式 Connect 小工具有四種主要狀態:
- (預設) 連結至 AdSense
- 連結至 AdSense
- 查看網站資訊
- 偵測到問題
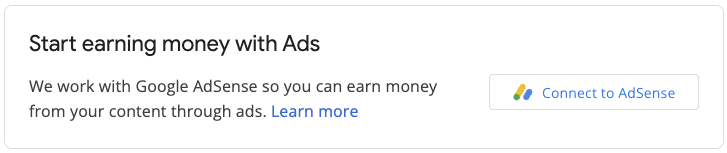
1. (預設) 連結至 AdSense
這是預設狀態,當嵌入式 Connect 程式碼中沒有 publisherId 欄位時,系統會向使用者顯示這個狀態。它會啟動連線流程 (彈出式視窗),並在使用者成功完成流程後,觸發 onConnect 回呼。
2. 連結至 AdSense
當使用者啟動連線流程 (並顯示彈出式視窗) 時,系統會向使用者顯示這個狀態。當彈出式視窗關閉或流程完成時,這個狀態就會變更為其他狀態。

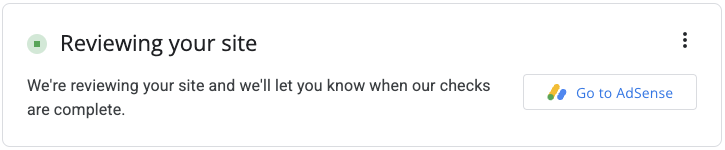
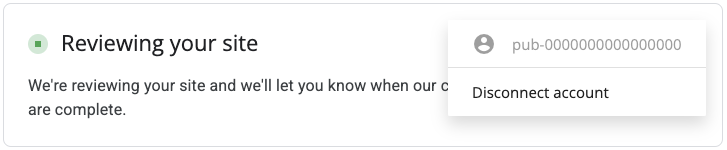
3. 查看網站資訊
將新網站提交給 AdSense 後,系統會進行審查程序。在這段期間內,系統不會放送廣告。
審查過程中的重要環節是擁有權檢查,你可以透過多種方式通過這項檢查,包括:
- ads.txt 檔案中包含子帳戶發布商 ID
- 子帳戶發布商 ID 會顯示在使用者網站上的廣告代碼中
- 使用者的網站上有 google-adsense-child-account 中繼標記。為獲得最佳效果,請務必將代碼放在使用者網站首頁。
最適合的做法取決於網址結構和其他因素。請洽詢客戶經理,瞭解最適合您平台的最佳做法。
4. 偵測到問題
如果使用者的帳戶或網站有任何需要解決的問題,系統就會向使用者顯示這個狀態。


自訂使用者體驗
如果您想自行管理使用者體驗,並使用 API 呼叫手動觸發註冊方法,請按照下列步驟操作。
嵌入式連結 JavaScript 程式庫
如要使用自訂使用者體驗選項,請在 src 屬性中設定 headless=true 參數。例如:
<script src="https://www.google.com/adsense/js/embedded-connect.js?load=initEmbeddedConnect&hl={language}&headless=true" async defer></script>
提供連線和中斷連線按鈕
adsenseEmbeddedConnect API 可供使用後 (由傳遞至 load 參數的 JavaScript 函式驗證),請提供 AdSense 連線和斷線的實作項目。例如提供兩個按鈕:
<button onclick="connectAdSense()">Connect to AdSense</button>
<button onclick="disconnectAdSense()">Disconnect account</button>
視您是否已從使用者儲存發布商 ID 而定,您可以選擇要顯示的按鈕。
連線代碼
function connectAdSense(){
    adsenseEmbeddedConnect.connect({
        // OAuth client ID
        'clientId': 'xxxxxxxxxxxxxxxxxxxx.apps.googleusercontent.com',

        // Access token from the Google Identity APIs, see
        // https://developers.google.com/identity/oauth2/web/guides/use-token-model
        // Use the following scope when requesting the access token:
        // https://www.googleapis.com/auth/adsense.readonly
        'accessToken': 'xxxxxxxxxxxxxxxxxxxxxxx',

        // Child site (which is added to AdSense as part of the Embedded Connect flow)
        // Consult with your account manager to ensure this value is set correctly for your platform
        'siteUrl': 'site.example.com',

        'onConnect': function(response) {
            // Your custom code to send the publisher ID (response[publisherId]) to your server for it to be saved.
            // The onConnect function is called when the user has completed all the onboarding steps
            // Note that you'll additionally receive an OAuth2 access token (response[token]) which can be used with the AdSense Management API to perform other operations
        },
        'onCancel': function() {
            // This callback is called if the user closes the popup window without completing the sign-up flow
        }
    });
}
斷線代碼
function disconnectAdSense(){
    // Your custom code to forget the publisherId from your server.
}