
1. Before you begin
In this codelab, you learn how to run a regression inference from an iOS app using TensorFlow Serving with REST and gRPC.
Prerequisites
- Basic knowledge of iOS development with Swift
- Basic knowledge of machine learning with TensorFlow, such as training and deployment
- Basic knowledge of Colaboratory
- Basic knowledge of terminals, Python, and Docker
What you'll learn
- How to train a regression model with TensorFlow.
- How to build a simple iOS app and make predictions with the trained model through TensorFlow Serving (REST and gRPC).
- How to display the result in the UI.
What you'll need
- Access to Colab
- The latest version of Xcode
- CocoaPods
- Docker
- Bash
- Protocol buffer compiler (only needed if you want to re-generate the gRPC stub by yourself)
- gRPC-swift code-generator plugin (only needed if you want to generate the gRPC stub by yourself)
2. Get set up
To download the code for this codelab:
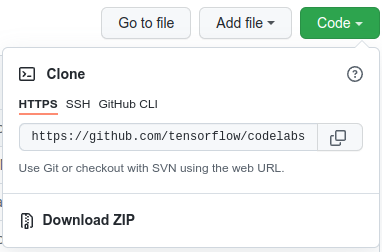
- Navigate to the GitHub repository for this codelab.
- Click Code > Download zip to download all the code for this codelab.
- Unzip the downloaded zip file to unpack a
codelabsroot folder with all of the resources that you need.
For this codelab, you only need the files in the TFServing/RegressioniOS subdirectory in the repository, which contains two folders:
- The
starterfolder contains the starter code that you build upon for this codelab. - The
finishedfolder contains the completed code for the finished sample app.
3. Download the dependencies for the project
Download the required pods
- In the
starter/iOSfolder, run:
pod install
Cocoapods will install all necessary libraries and generate a new regression.xcworkspace file.
4. Run the starter app
- Double-click the
regression.xcworkspacefile to open Xcode.
Run and explore the app
- Change the device target to any iPhone, such as iPhone 13.

- Click
 ‘Run', and then wait for Xcode to compile the project and start the starter app in the Simulator.
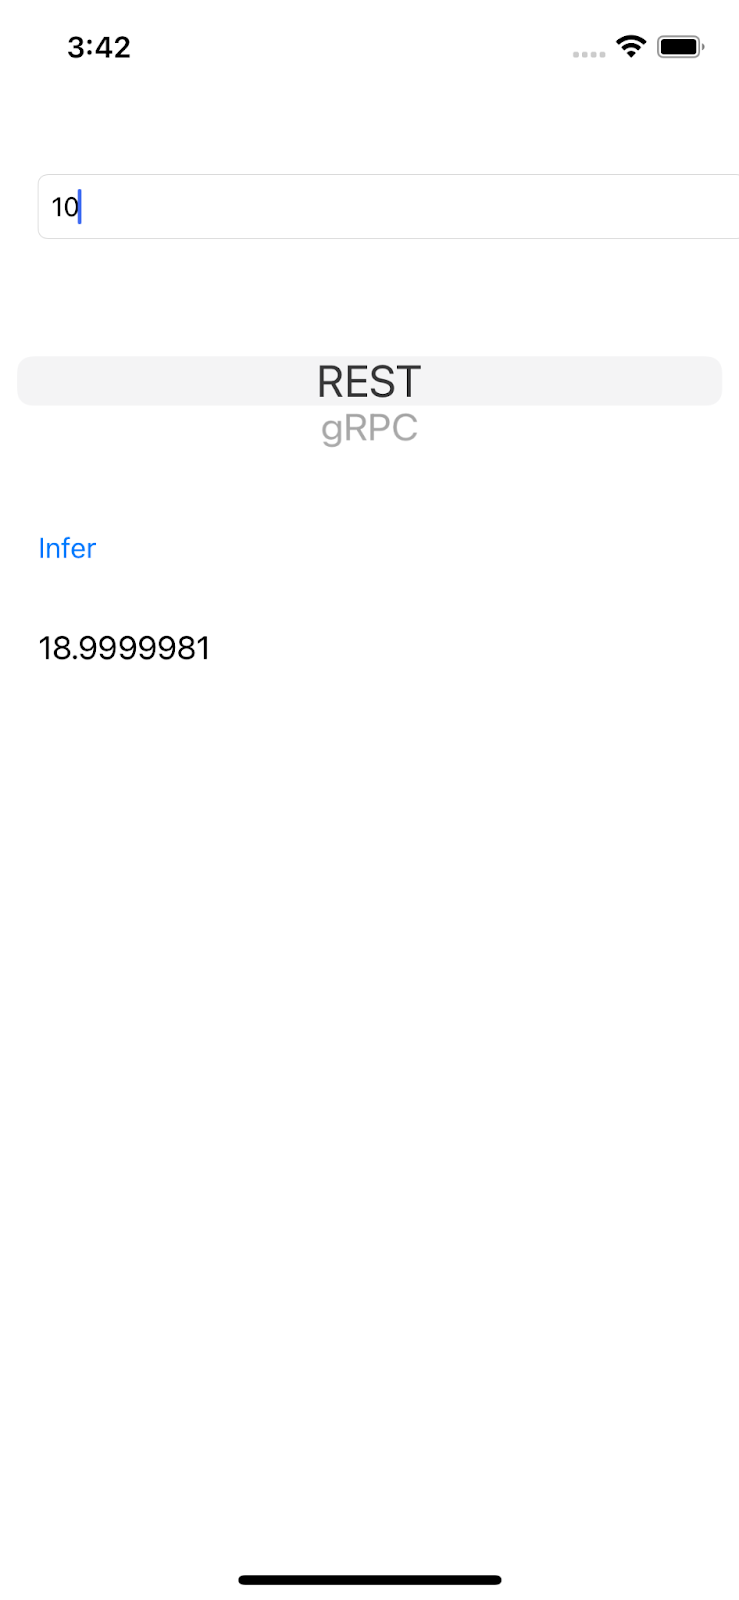
The UI is pretty straightforward. There's a text box in which you can type a number, which is sent to the TensorFlow Serving backend with REST or gRPC. The backend performs regression on the input value and returns the predicted value to the client app, which displays the result in the UI again.
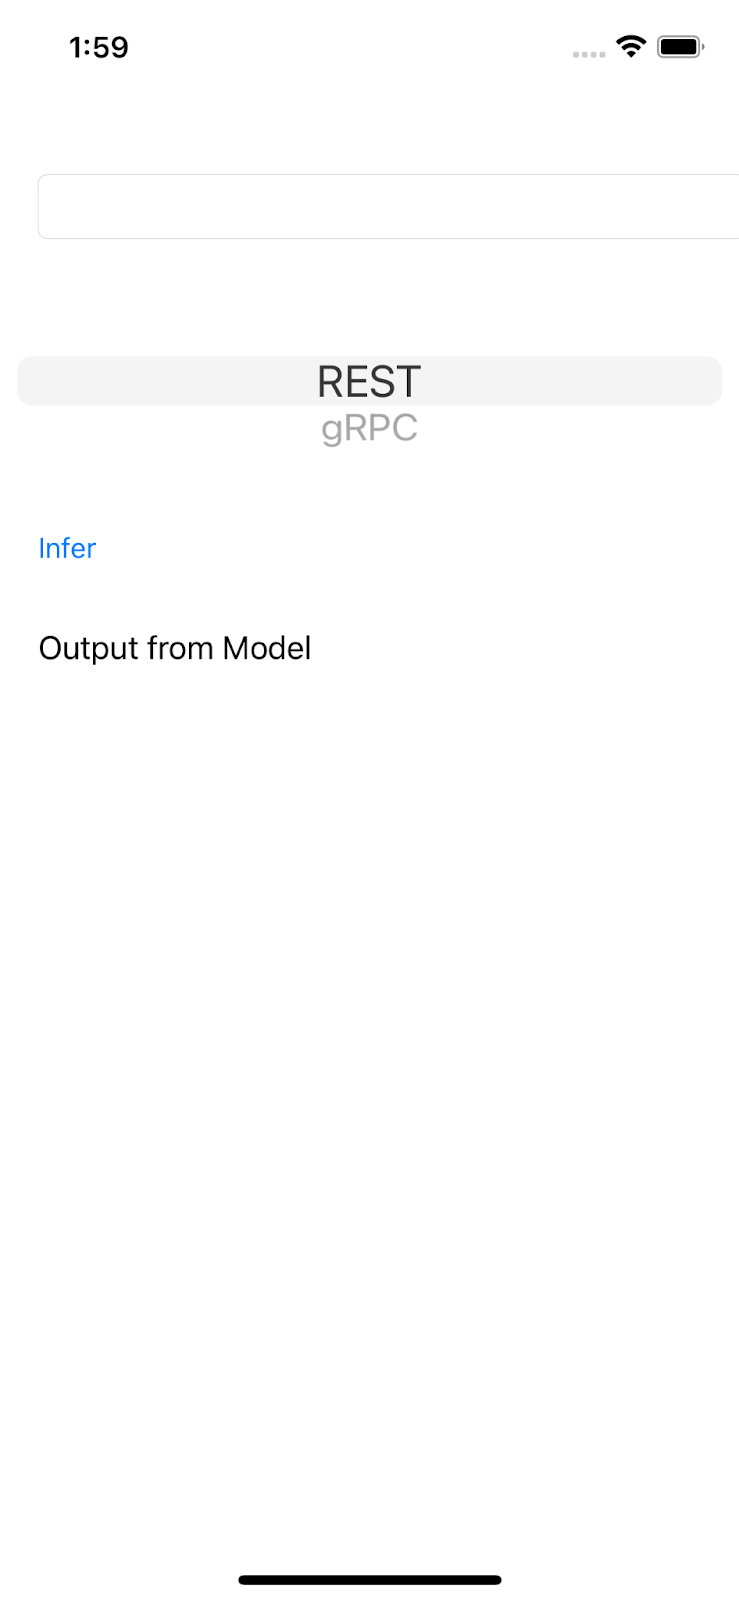
If you input a number and click Infer, nothing happens because the app can't communicate with the backend yet.
5. Train a simple regression model with TensorFlow
Regression is one of the most common ML tasks. Its goal is to predict a single continuous quantity based on the input. For example, based on the weather today, predict the highest temperature tomorrow.
Train a regression model
- Open this link in your browser.
Colab loads the Python notebook.
- In the Python notebook, import the
TensorFlowandNumPylibraries, and then create six pairs of training data withxsas input andysas labels.
If you plot these data points on a graph, they actually lie in a straight line because they're generated from the y = 2x -1 equation.

- Use the Keras API to create a simple two-layer neural network to predict the
yvalue based on thexinput, and then compile and fit the model.
xs = np.array([-1.0,  0.0, 1.0, 2.0, 3.0, 4.0], dtype=float)
ys = np.array([-3.0, -1.0, 1.0, 3.0, 5.0, 7.0], dtype=float)

model = tf.keras.Sequential([
   tf.keras.layers.Dense(units=10, input_shape=[1]),
   tf.keras.layers.Dense(units=1),
   ])

model.compile(optimizer='sgd',
             loss='mean_squared_error')

history = model.fit(xs, ys, epochs=500, verbose=0)

print("Finished training the model")

print(model.predict([10.0]))
The model takes a few seconds to train and you can see the predicted value for the 10 input is 18.999996, which is a pretty good prediction since the ground truth is 2 * 10 -1 = 19.
- Export the model:
model_dir = './regression/'
version = 123
export_path = os.path.join(model_dir, str(version))
model.save(export_path, save_format="tf")
print('\nexport_path = {}'.format(export_path))
!ls -l {export_path}
- Zip the exported SavedModel into a single
regression.zipfile:
!zip -r regression.zip ./regression
- Click Runtime > Run all in the navigation menu to run the notebook and then wait for the run to finish.
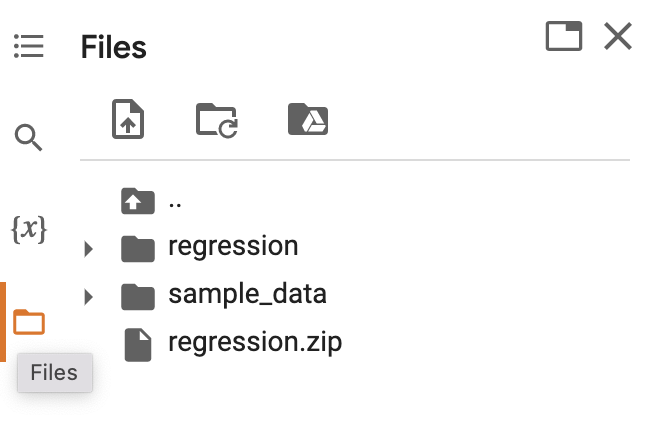
- Click
 Files and then download the
 regression.zipfile.
6. Deploy a regression model with TensorFlow Serving
- To deploy the model with TensorFlow Serving, uncompress the downloaded
regression.zipfile with a decompression tool, such as 7-Zip.
The folder structure should look like this image:
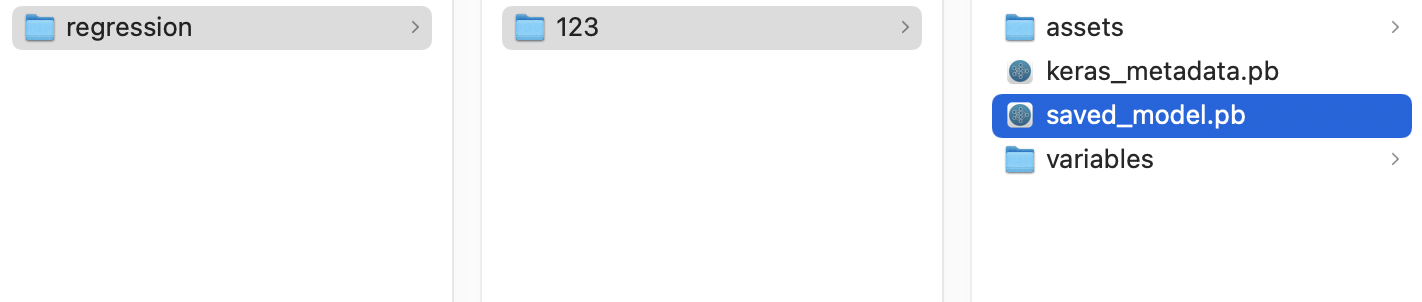
You can refer to the regression folder as the SavedModel folder. 123 is an example version number. If you'd like, you can pick another number.
Start TensorFlow Serving
- In your terminal, start TensorFlow Serving with Docker, but replace the
PATH/TO/SAVEDMODELplaceholder with the absolute path of theregressionfolder on your computer.
docker pull tensorflow/serving

docker run -it --rm -p 8500:8500 -p 8501:8501 -v "PATH/TO/SAVEDMODEL:/models/regression" -e MODEL_NAME=regression tensorflow/serving
Docker automatically downloads the TensorFlow Serving image first, which takes a minute. Afterward, TensorFlow Serving should start. The log should look like this code snippet:
2022-02-25 06:01:12.513231: I external/org_tensorflow/tensorflow/cc/saved_model/loader.cc:206] Restoring SavedModel bundle.
2022-02-25 06:01:12.585012: I external/org_tensorflow/tensorflow/core/platform/profile_utils/cpu_utils.cc:114] CPU Frequency: 3000000000 Hz
2022-02-25 06:01:13.395083: I external/org_tensorflow/tensorflow/cc/saved_model/loader.cc:190] Running initialization op on SavedModel bundle at path: /models/ssd_mobilenet_v2_2/123
2022-02-25 06:01:13.837562: I external/org_tensorflow/tensorflow/cc/saved_model/loader.cc:277] SavedModel load for tags { serve }; Status: success: OK. Took 1928700 microseconds.
2022-02-25 06:01:13.877848: I tensorflow_serving/servables/tensorflow/saved_model_warmup_util.cc:59] No warmup data file found at /models/ssd_mobilenet_v2_2/123/assets.extra/tf_serving_warmup_requests
2022-02-25 06:01:13.929844: I tensorflow_serving/core/loader_harness.cc:87] Successfully loaded servable version {name: regression version: 123}
2022-02-25 06:01:13.985848: I tensorflow_serving/model_servers/server_core.cc:486] Finished adding/updating models
2022-02-25 06:01:13.985987: I tensorflow_serving/model_servers/server.cc:367] Profiler service is enabled
2022-02-25 06:01:13.988994: I tensorflow_serving/model_servers/server.cc:393] Running gRPC ModelServer at 0.0.0.0:8500 ...
[warn] getaddrinfo: address family for nodename not supported
2022-02-25 06:01:14.033872: I tensorflow_serving/model_servers/server.cc:414] Exporting HTTP/REST API at:localhost:8501 ...
[evhttp_server.cc : 245] NET_LOG: Entering the event loop ...
7. Connect the iOS app with TensorFlow Serving through REST
The backend is ready now, so you can send client requests to TensorFlow Serving to make predictions. There are two ways to send requests to TensorFlow Serving:
- REST
- gRPC
Send requests and receive responses with REST
There are three simple steps:
- Create the REST request.
- Send the REST request to TensorFlow Serving.
- Extract the predicted result from the REST response and render the UI.
You achieve these steps in the iOS/regression/ViewController.swift file.
Create the REST request
- Right now, the
doInference()function doesn't send the REST request to TensorFlow Serving. You need to implement this REST branch to create a REST request:
if (connectionMode[picker.selectedRow(inComponent: 0)] == "REST") {
    print("Using REST")
    // TODO: Add code to send a REST request to TensorFlow Serving.

}
TensorFlow Serving expects a POST request that contains a single value, so you need to embed the input value in a JSON, which is the payload of the request.
- Add this code to the REST branch:
//Create the REST request.
let json: [String: Any] = ["signature_name" : "serving_default", "instances" : [[value]]]

let jsonData = try? JSONSerialization.data(withJSONObject: json)

let url = URL(string: "http://localhost:8501/v1/models/regression:predict")!
var request = URLRequest(url: url)
request.httpMethod = "POST"

// Insert JSON data into the request.
request.httpBody = jsonData
Send the REST request to TensorFlow Serving
- Add this code immediately after the code in the REST branch:
// Send the REST request.
let task = URLSession.shared.dataTask(with: request) { data, response, error in
    guard let data = data, error == nil else {
        print(error?.localizedDescription ?? "No data")
        return
    }

    // TODO: Add code to process the response.
}

task.resume()
Process the REST response from TensorFlow Serving
- Add this code to the previous code snippet immediately after the
TODO: Add code to process the response.comment:
// Process the REST response.
let results: RESTResults = try! JSONDecoder().decode(RESTResults.self, from: data)
DispatchQueue.main.async{
    self.txtOutput.text = String(results.predictions[0][0])
}
Now the postprocessing function extracts predicted values from the response and displays the result in the UI.
Run it
- Click ‘Run' and then wait for Xcode to launch the app in Simulator.
- Enter a number in the text box and then click Infer.
Now you see a predicted value in the UI.
8. Connect the iOS app with TensorFlow Serving through gRPC
In addition to REST, TensorFlow Serving also supports gRPC.
gRPC is a modern, open source, high-performance Remote Procedure Call (RPC) framework that can run in any environment. It can efficiently connect services in, and across, data centers with pluggable support for load balancing, tracing, health checking, and authentication. It's been observed that gRPC is more performant than REST in practice.
Send requests and receive responses with gRPC
There are four simple steps:
- Optional: Generate the gRPC client stub code.
- Create the gRPC request.
- Send the gRPC request to TensorFlow Serving.
- Extract the predicted result from the gRPC response and render the UI.
You achieve these steps in the iOS/regression/ViewController.swift file.
Optional: Generate the gRPC client stub code
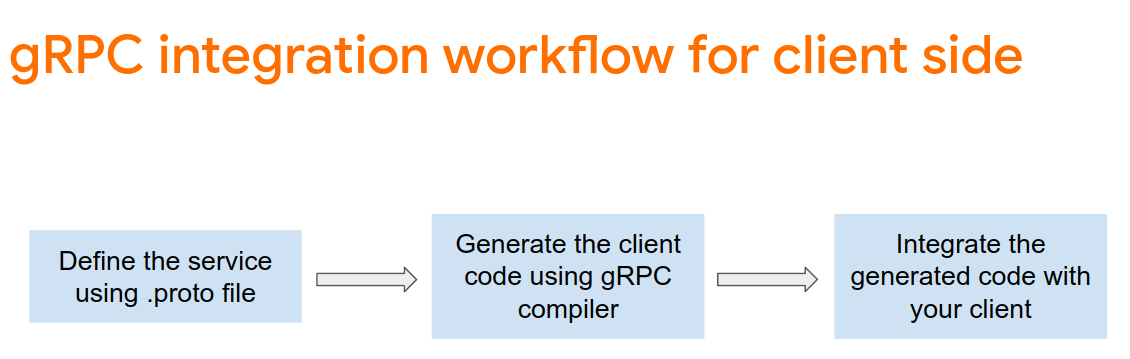
To use gRPC with TensorFlow Serving, you need to follow the gRPC workflow. To learn more about the details, see the gRPC documentation.
TensorFlow Serving and TensorFlow define the .proto files for you. As of TensorFlow and TensorFlow Serving 2.8, these .proto files are the ones needed:
tensorflow/core/example/example.proto
tensorflow/core/example/feature.proto
tensorflow/core/protobuf/struct.proto
tensorflow/core/protobuf/saved_object_graph.proto
tensorflow/core/protobuf/saver.proto
tensorflow/core/protobuf/trackable_object_graph.proto
tensorflow/core/protobuf/meta_graph.proto
tensorflow/core/framework/node_def.proto
tensorflow/core/framework/attr_value.proto
tensorflow/core/framework/function.proto
tensorflow/core/framework/types.proto
tensorflow/core/framework/tensor_shape.proto
tensorflow/core/framework/full_type.proto
tensorflow/core/framework/versions.proto
tensorflow/core/framework/op_def.proto
tensorflow/core/framework/graph.proto
tensorflow/core/framework/tensor.proto
tensorflow/core/framework/resource_handle.proto
tensorflow/core/framework/variable.proto

tensorflow_serving/apis/inference.proto
tensorflow_serving/apis/classification.proto
tensorflow_serving/apis/predict.proto
tensorflow_serving/apis/regression.proto
tensorflow_serving/apis/get_model_metadata.proto
tensorflow_serving/apis/input.proto
tensorflow_serving/apis/prediction_service.proto
tensorflow_serving/apis/model.proto
To generate the gRPC client stub code:
- In your terminal, navigate to the
starter/src/proto/folder and then generate the stub:
bash generate_grpc_stub_swift.sh
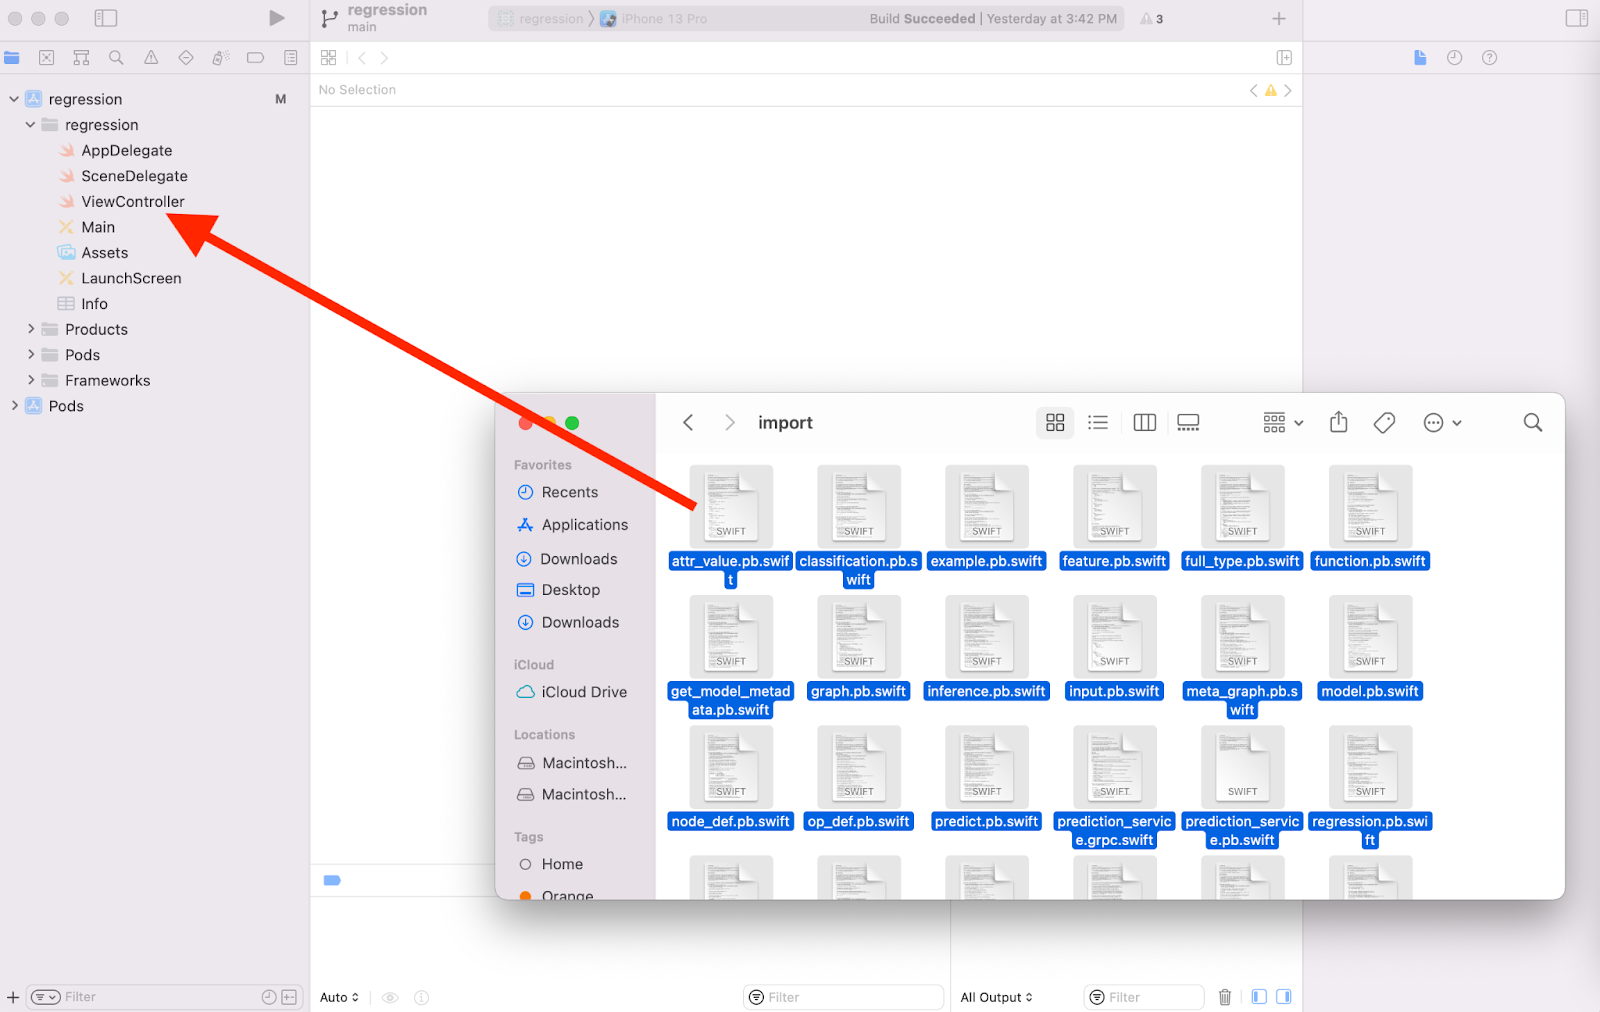
A number of .swift files are generated in the starter/src/proto/generated/import folder.
- If they're not copied into your project yet, drag all the generated
.swiftfiles into your project in Xcode.
Create the gRPC request
Similar to the REST request, you create the gRPC request in the gRPC branch.
if (connectionMode[picker.selectedRow(inComponent: 0)] == "REST") {

}
else {
    print("Using gRPC")
    // TODO: add code to send a gRPC request to TF Serving

}
- To create the gRPC request, add this code to the gRPC branch:
//Create the gRPC request.
let group = MultiThreadedEventLoopGroup(numberOfThreads: 1)
let channel = ClientConnection.insecure(group: group).connect(host: "localhost", port: 8500)
let stub = Tensorflow_Serving_PredictionServiceClient(channel: channel)

var modelSpec = Tensorflow_Serving_ModelSpec()
modelSpec.name = "regression"
modelSpec.signatureName = "serving_default"

// Prepare the input tensor.
var batchDim = Tensorflow_TensorShapeProto.Dim()
batchDim.size = 1
var inputDim = Tensorflow_TensorShapeProto.Dim()
inputDim.size = 1
var inputTensorShape = Tensorflow_TensorShapeProto()
inputTensorShape.dim = [batchDim, inputDim]
var inputTensor = Tensorflow_TensorProto()
inputTensor.dtype = Tensorflow_DataType.dtFloat
inputTensor.tensorShape = inputTensorShape
inputTensor.floatVal = [Float(value)]

var request = Tensorflow_Serving_PredictRequest()
request.modelSpec = modelSpec
request.inputs = ["dense_input" : inputTensor]

let callOptions = CallOptions(timeLimit: .timeout(.seconds(15)))
Send the gRPC request to TensorFlow Serving
- Add this code to the gRPC branch immediately after the code in the previous code snippet:
// Send the gRPC request.
let call = stub.predict(request, callOptions: callOptions)
Process the gRPC response from TensorFlow Serving
- Add this code immediately after the code in the previous code snippet:
// Process the response.
call.response.whenSuccess { response in
    let result = response.outputs["dense_1"]?.floatVal[0]
    DispatchQueue.main.async{
        self.txtOutput.text = String(describing: result!)
    }
}
call.response.whenFailure { error in
    print("Call failed with error\n\(error)")
}
Now the postprocessing function extracts predicted values from the response and displays the result in the UI.
Run it
- Click ‘Run' in the navigation menu and then wait for Xcode to launch the app in the Simulator.
- Enter a number in the text box and then click Infer.
Now you see a predicted value in the UI.
9. Congratulations
You used TensorFlow Serving to add regression capabilities to your app!