
1. Introduction
Use the Recorder panel to record, replay and measure user flows.
Take a glance at the new Recorder panel (preview feature) with the video below.
What you'll learn
- Record a user flow
- Replay a user flow
- Edit a user flow
- Measure a user flow
What you'll need
- A working computer and realiable wifi
- Chrome 101 and above.
2. Open the Recorder panel
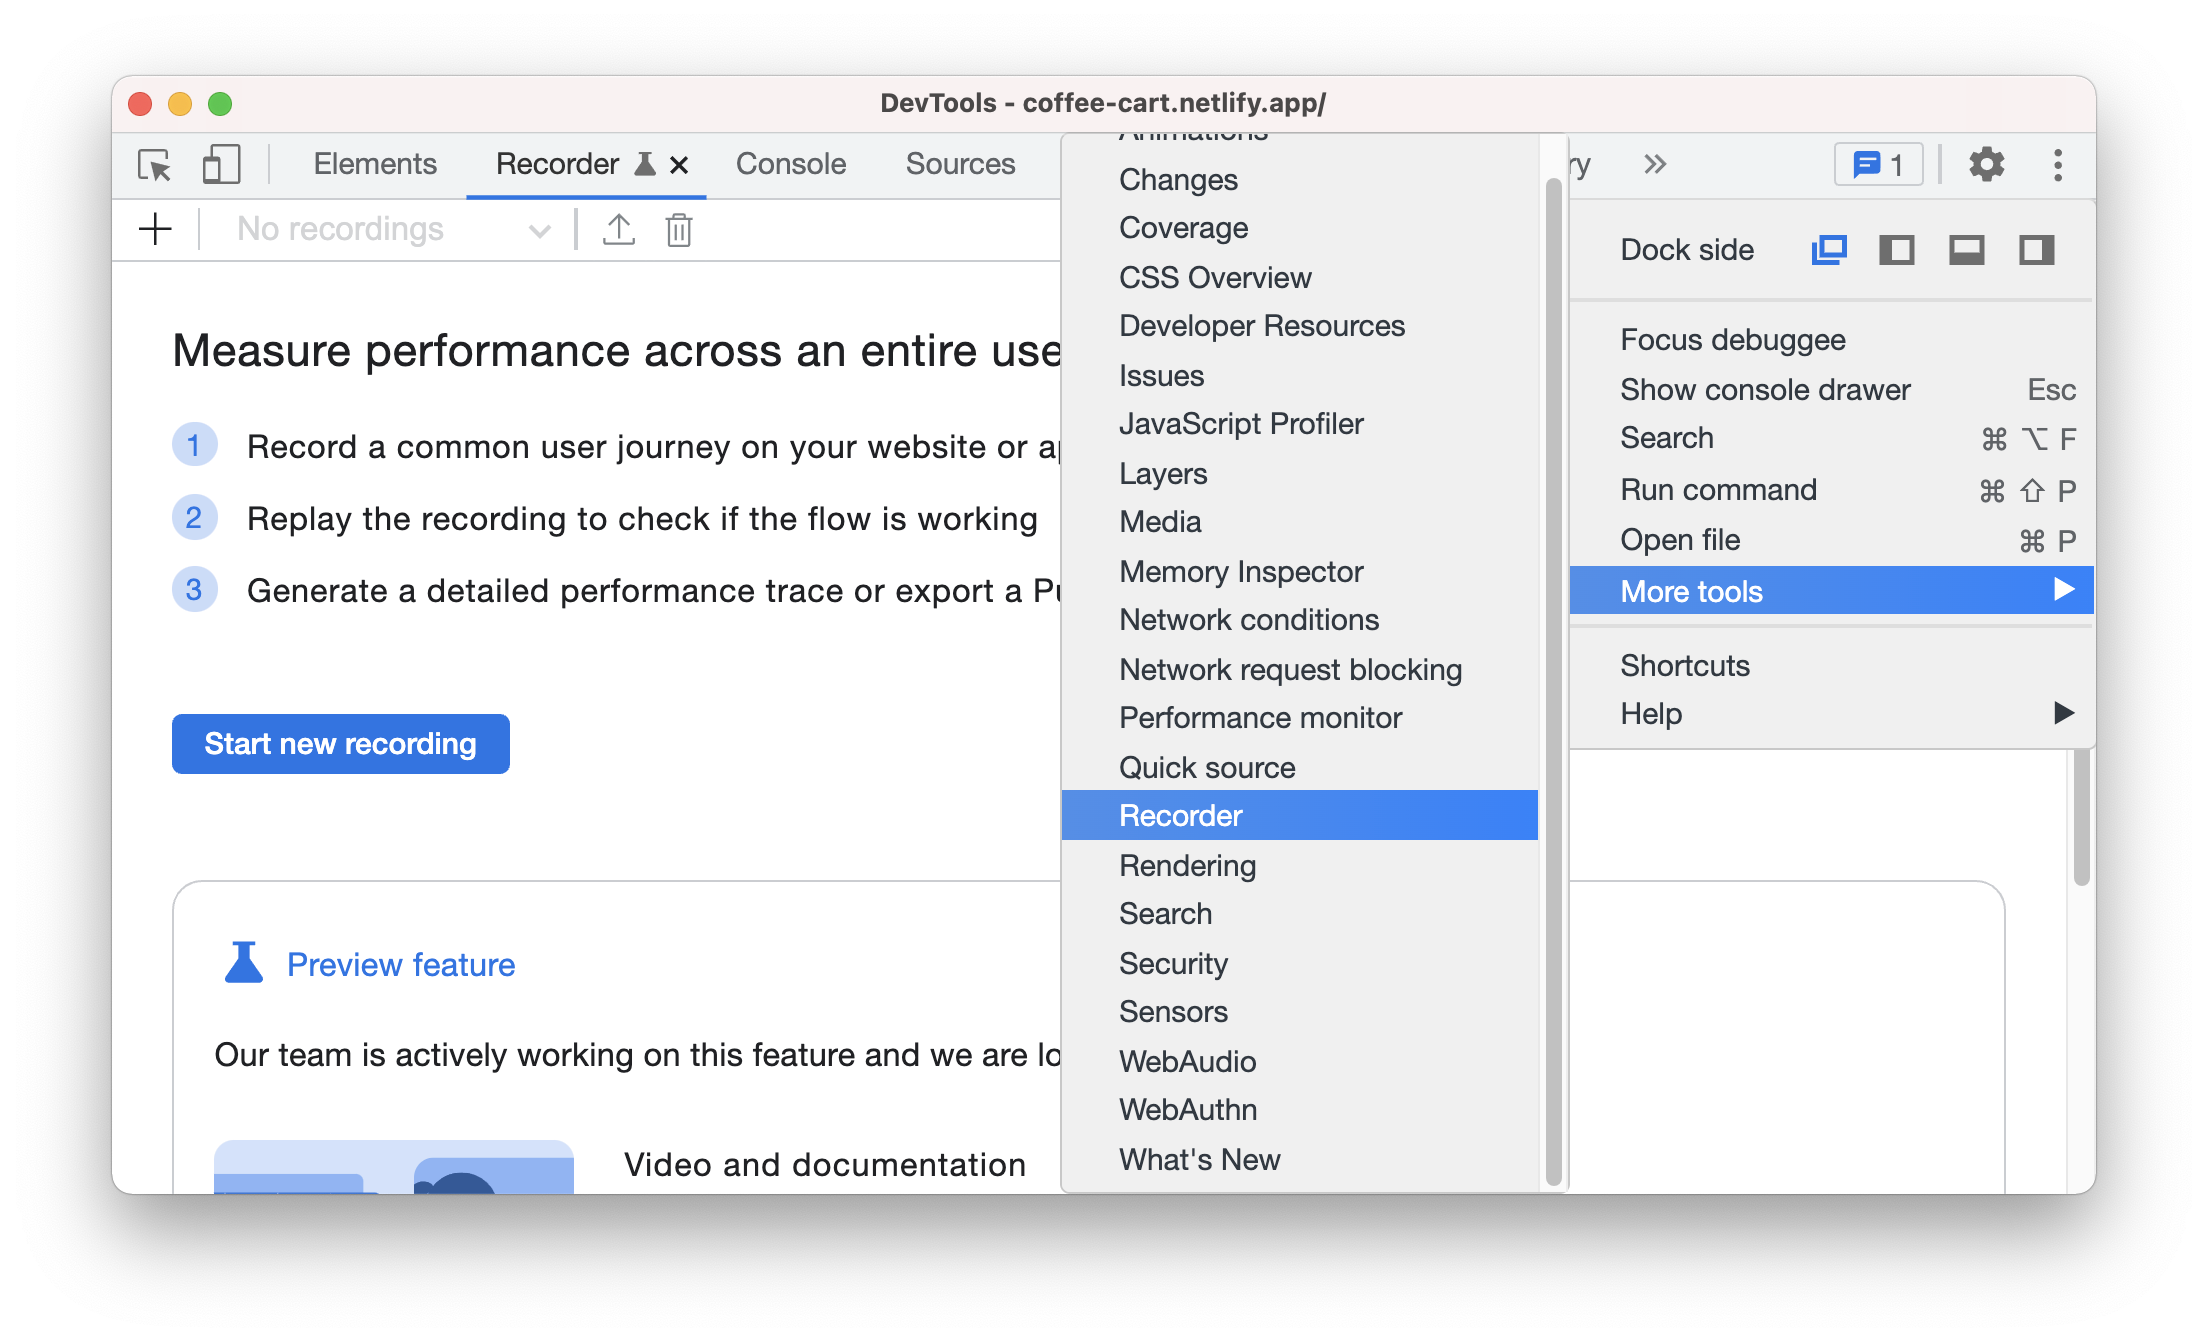
Open the Recorder panel with the following steps
- Open DevTools.
- Click on More options > More tools > Recorder.
 Alternatively, use the Command Menu to open the Recorder panel.
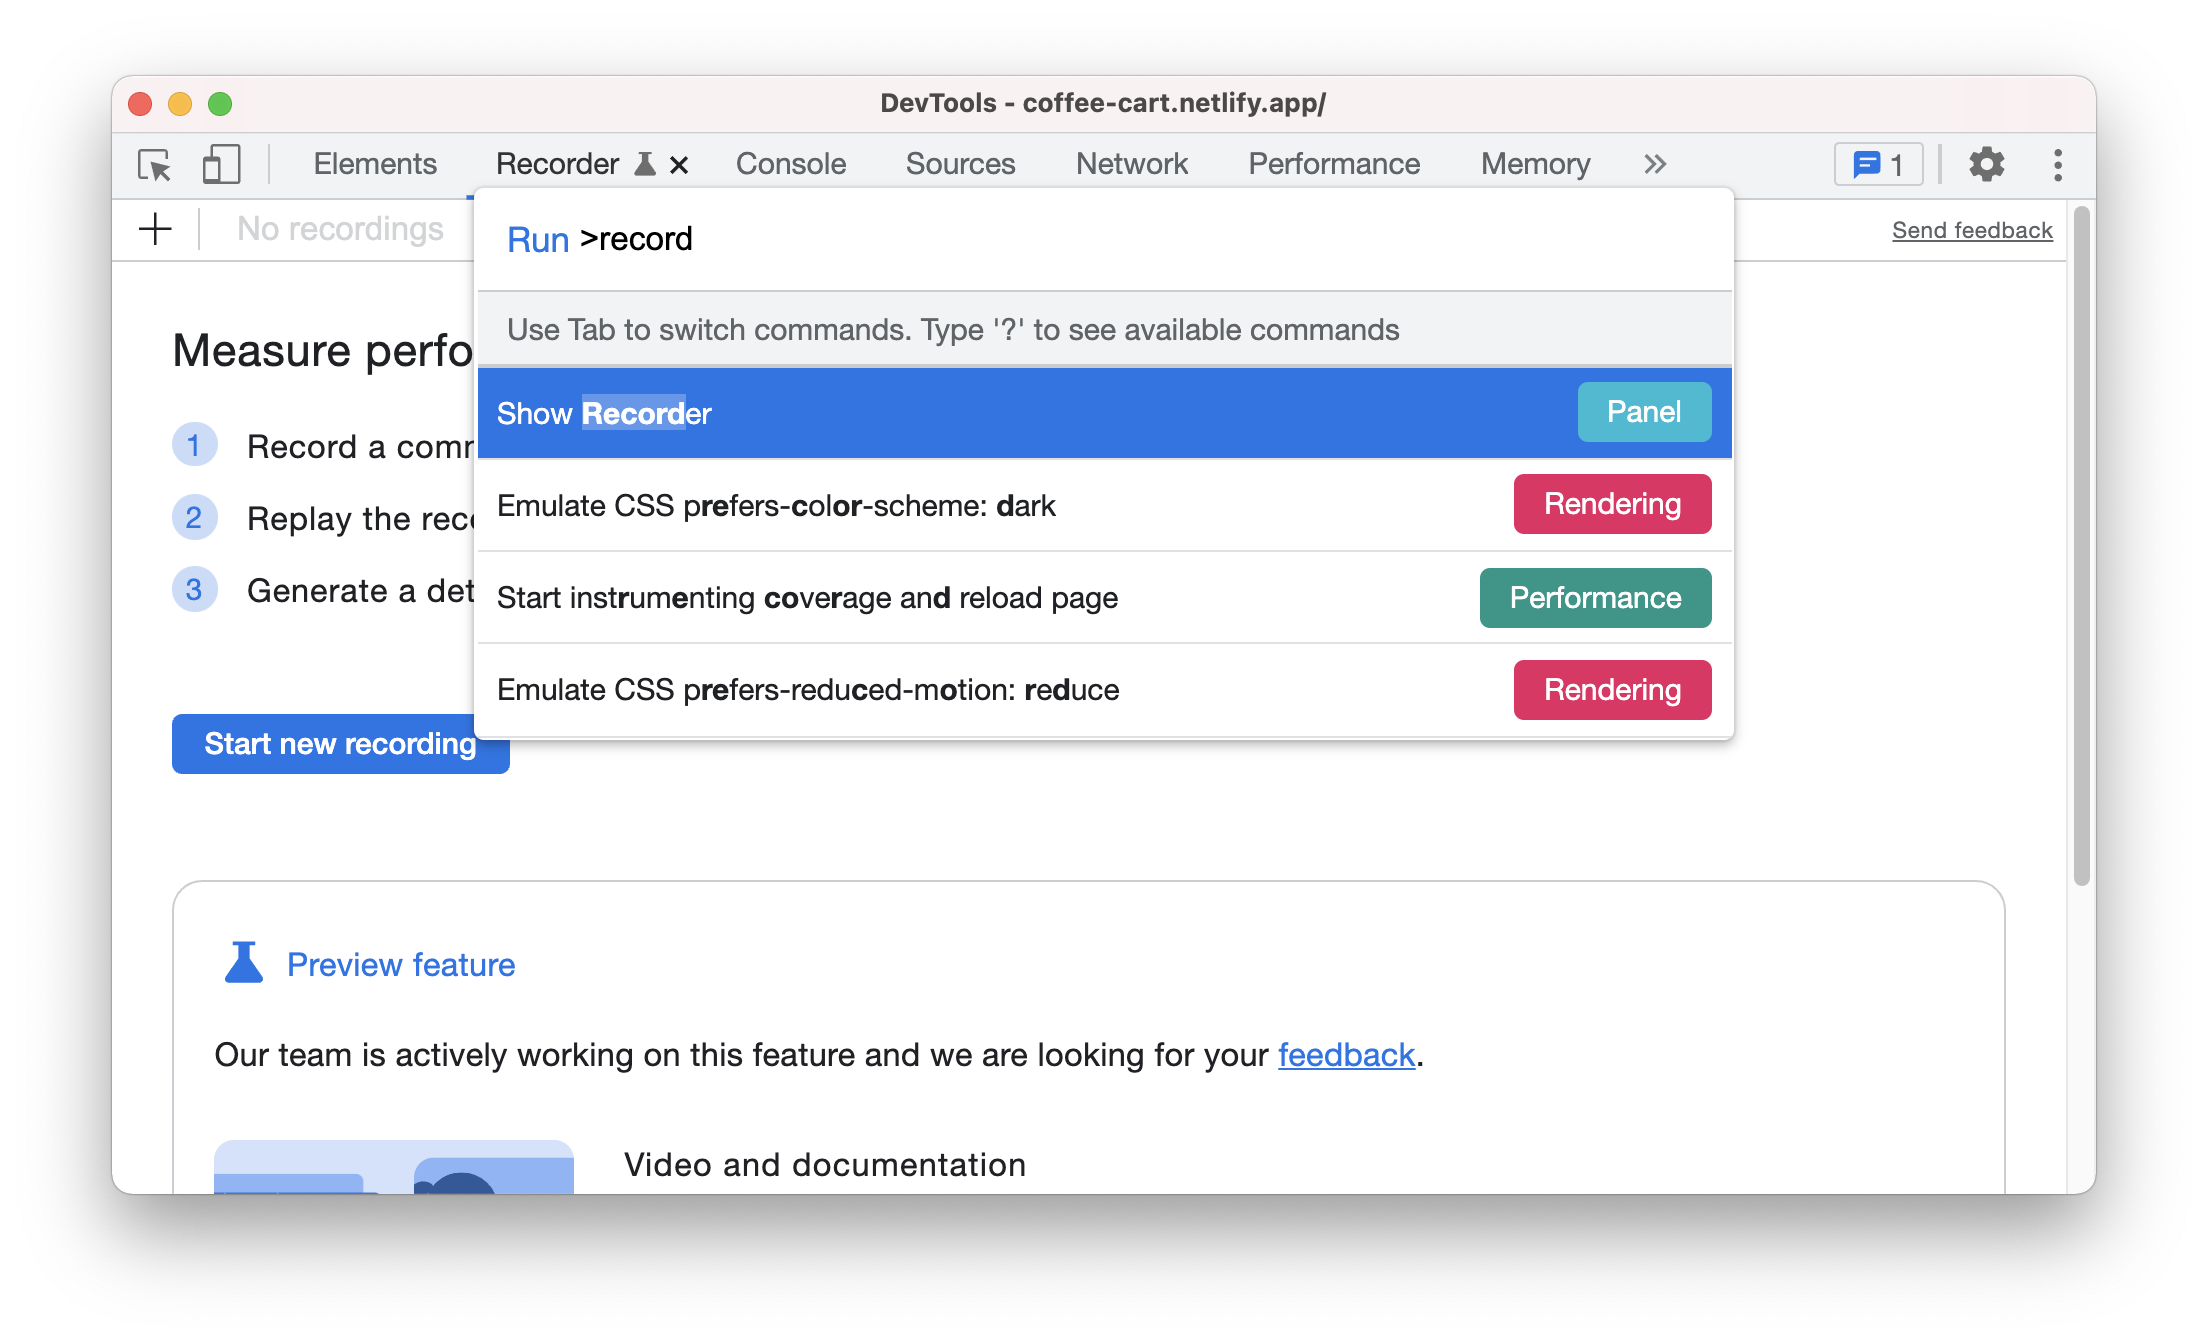
3. Start
We will be using this coffee ordering demo page. Checkout is a common user flow among shopping websites.
In the next sections, we will walk you through how to record, replay and measure the following checkout flow with the Recorder panel:
- Add a coffee to the cart.
- Add another coffee to the cart.
- Go to the cart page.
- Remove one coffee from the cart.
- Start the checkout process.
- Fill in payment details.
- Check out.
4. Record a user flow
- Open the demo page. Click on the Start new recording button to begin.
- Enter "coffee checkout" in the Recording name textbox.
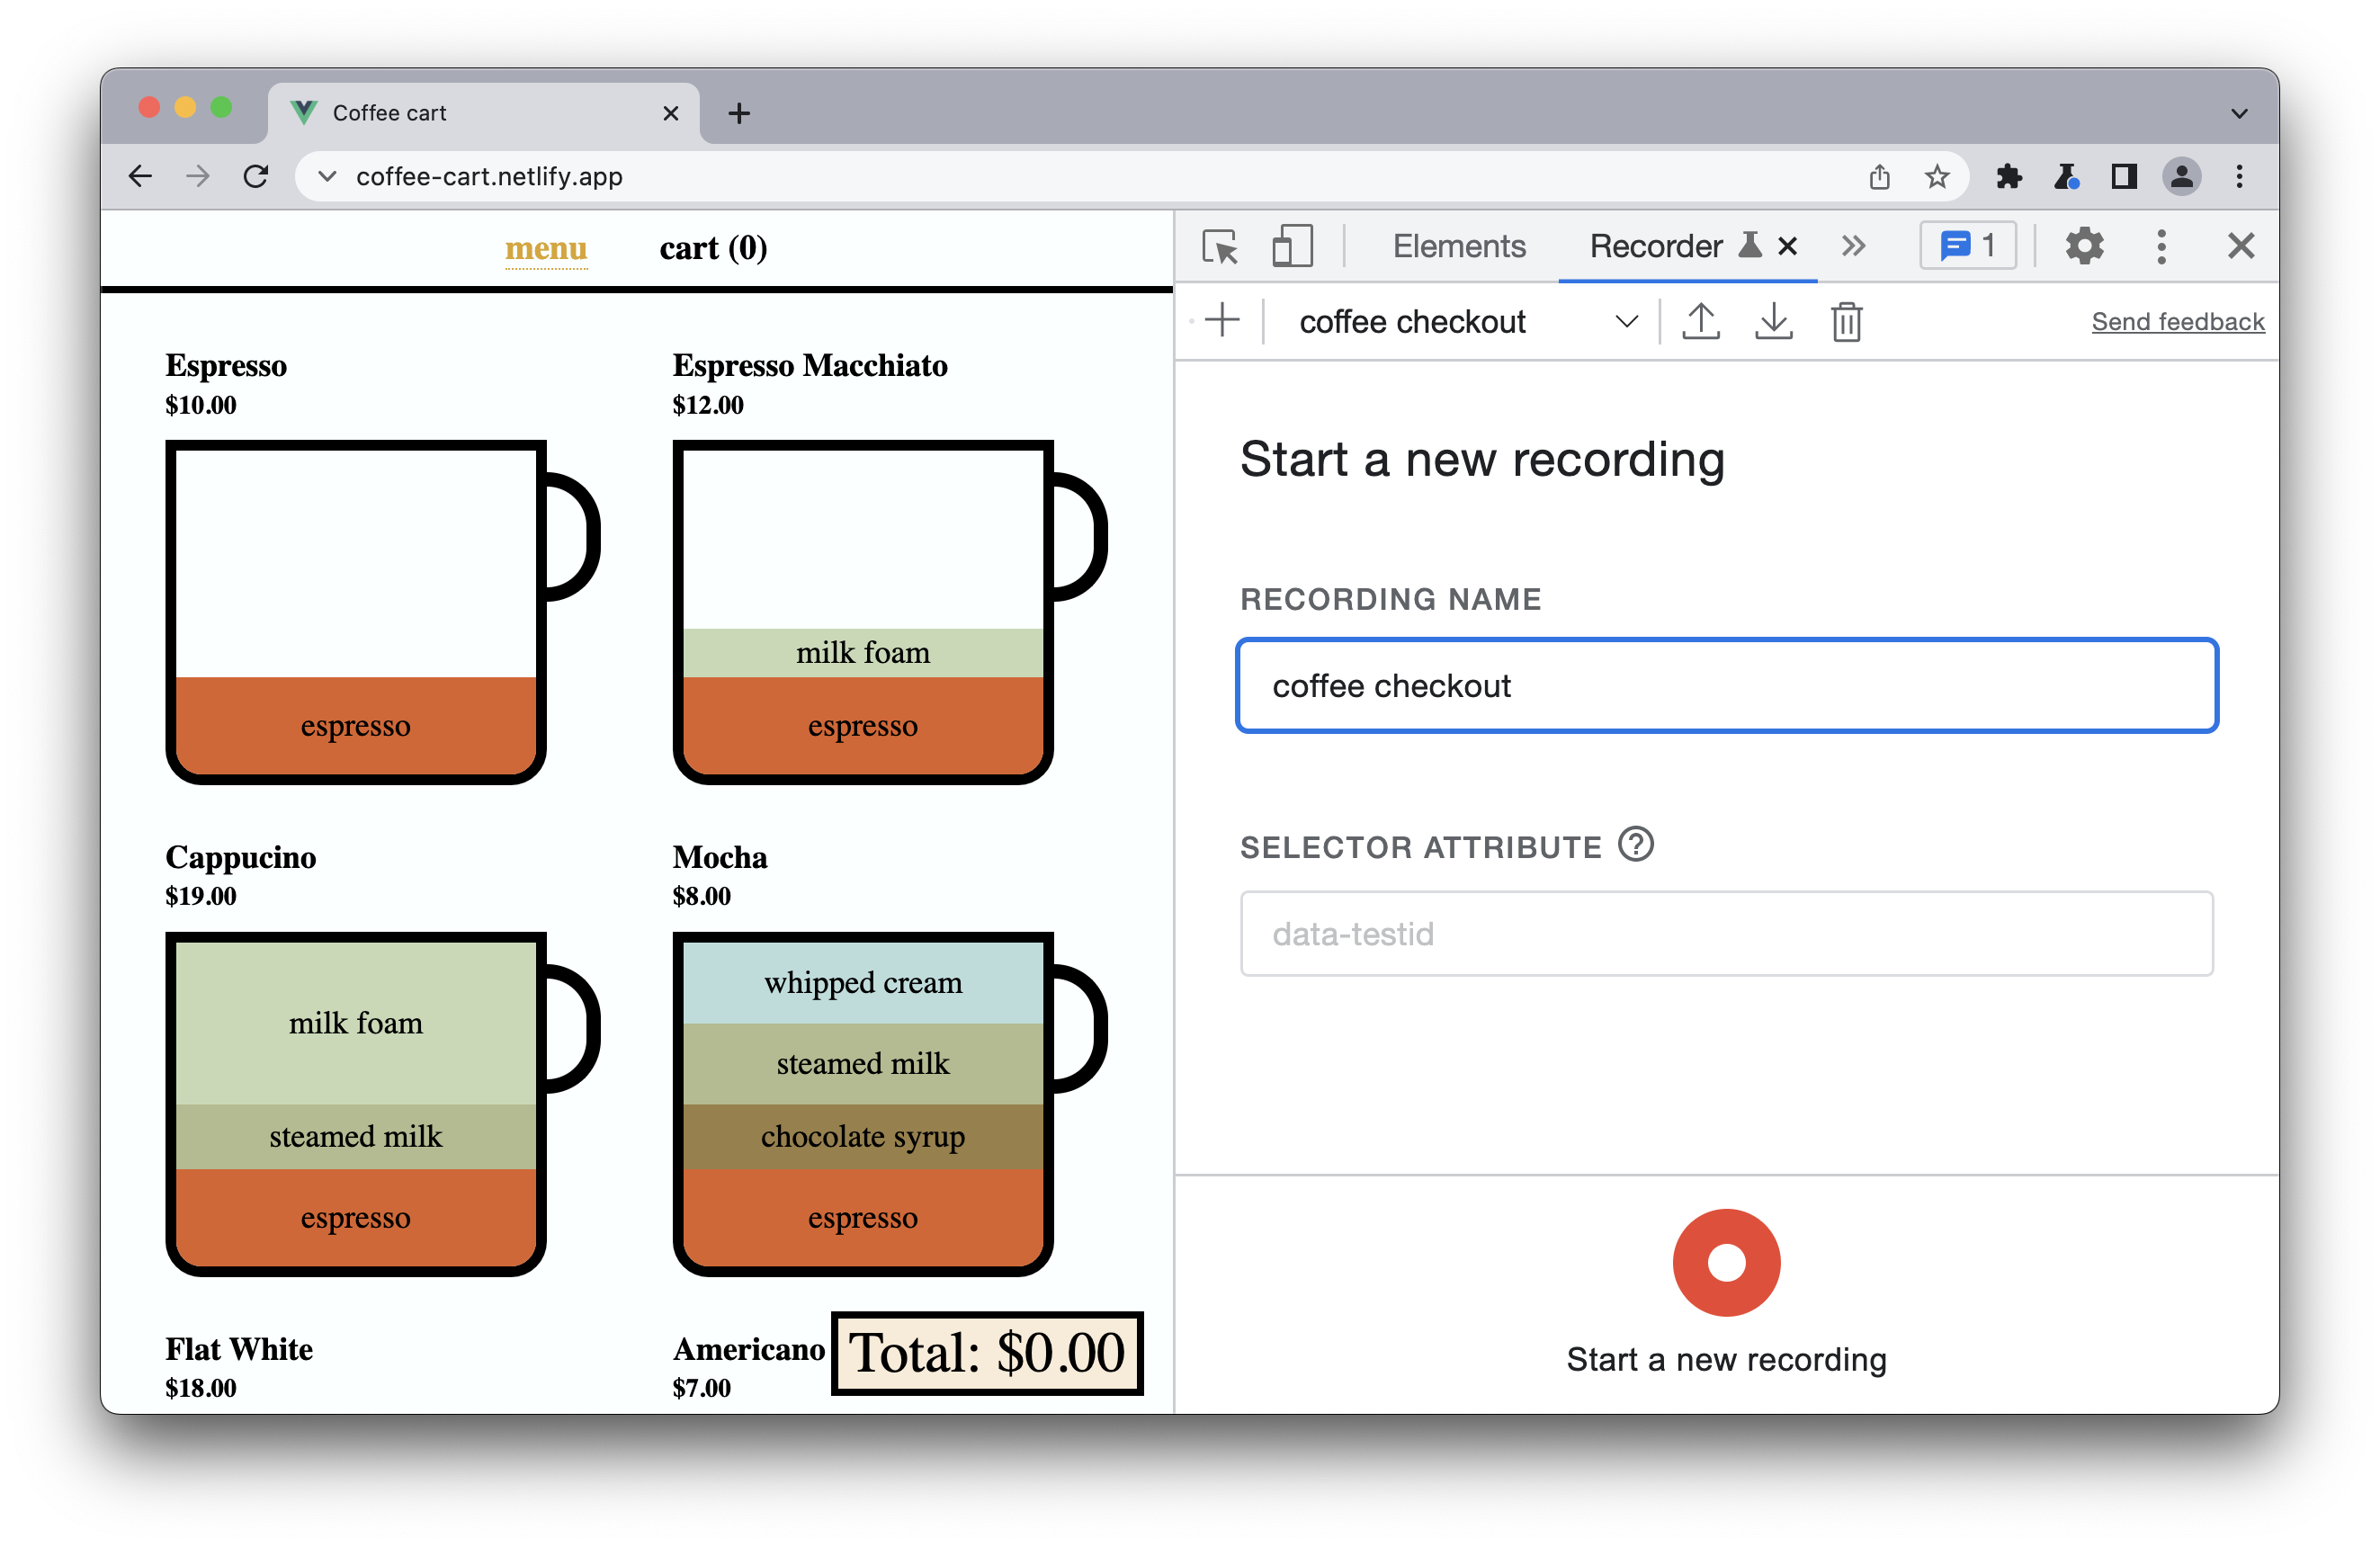
- Click on the Start a new recording button. The recording is started. The panel is showing Recording... indicating the recording is in progress.
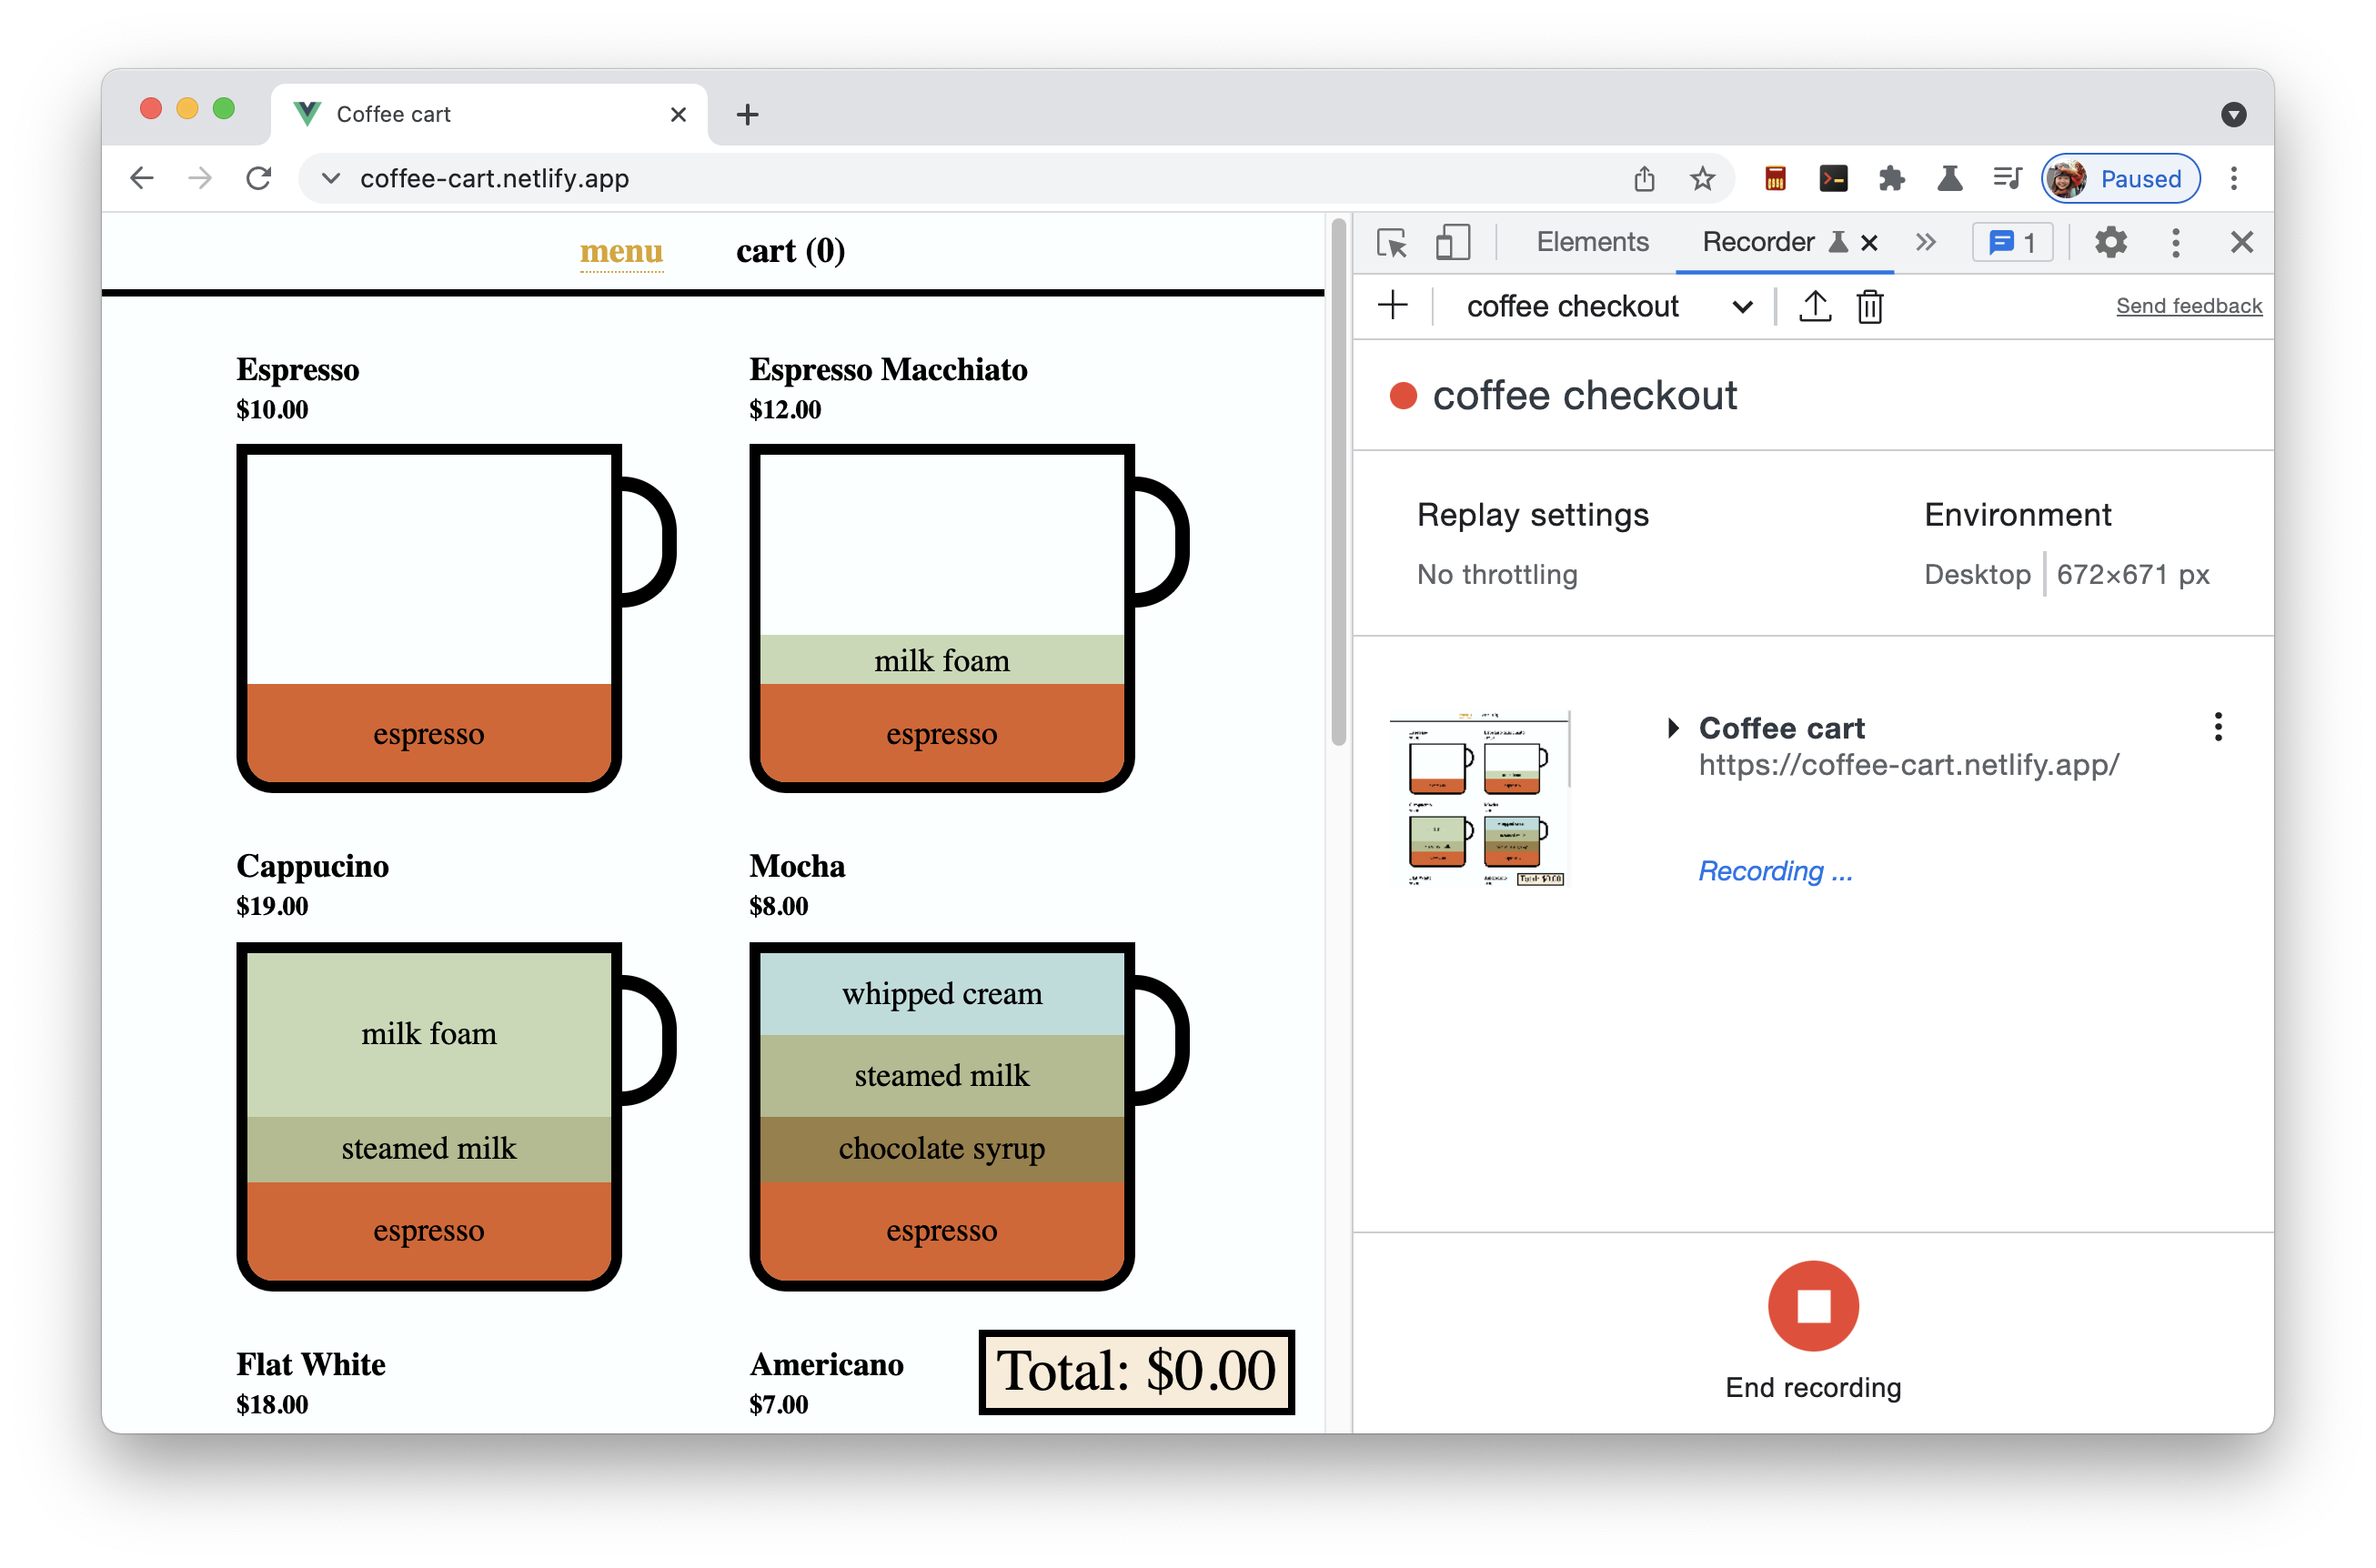
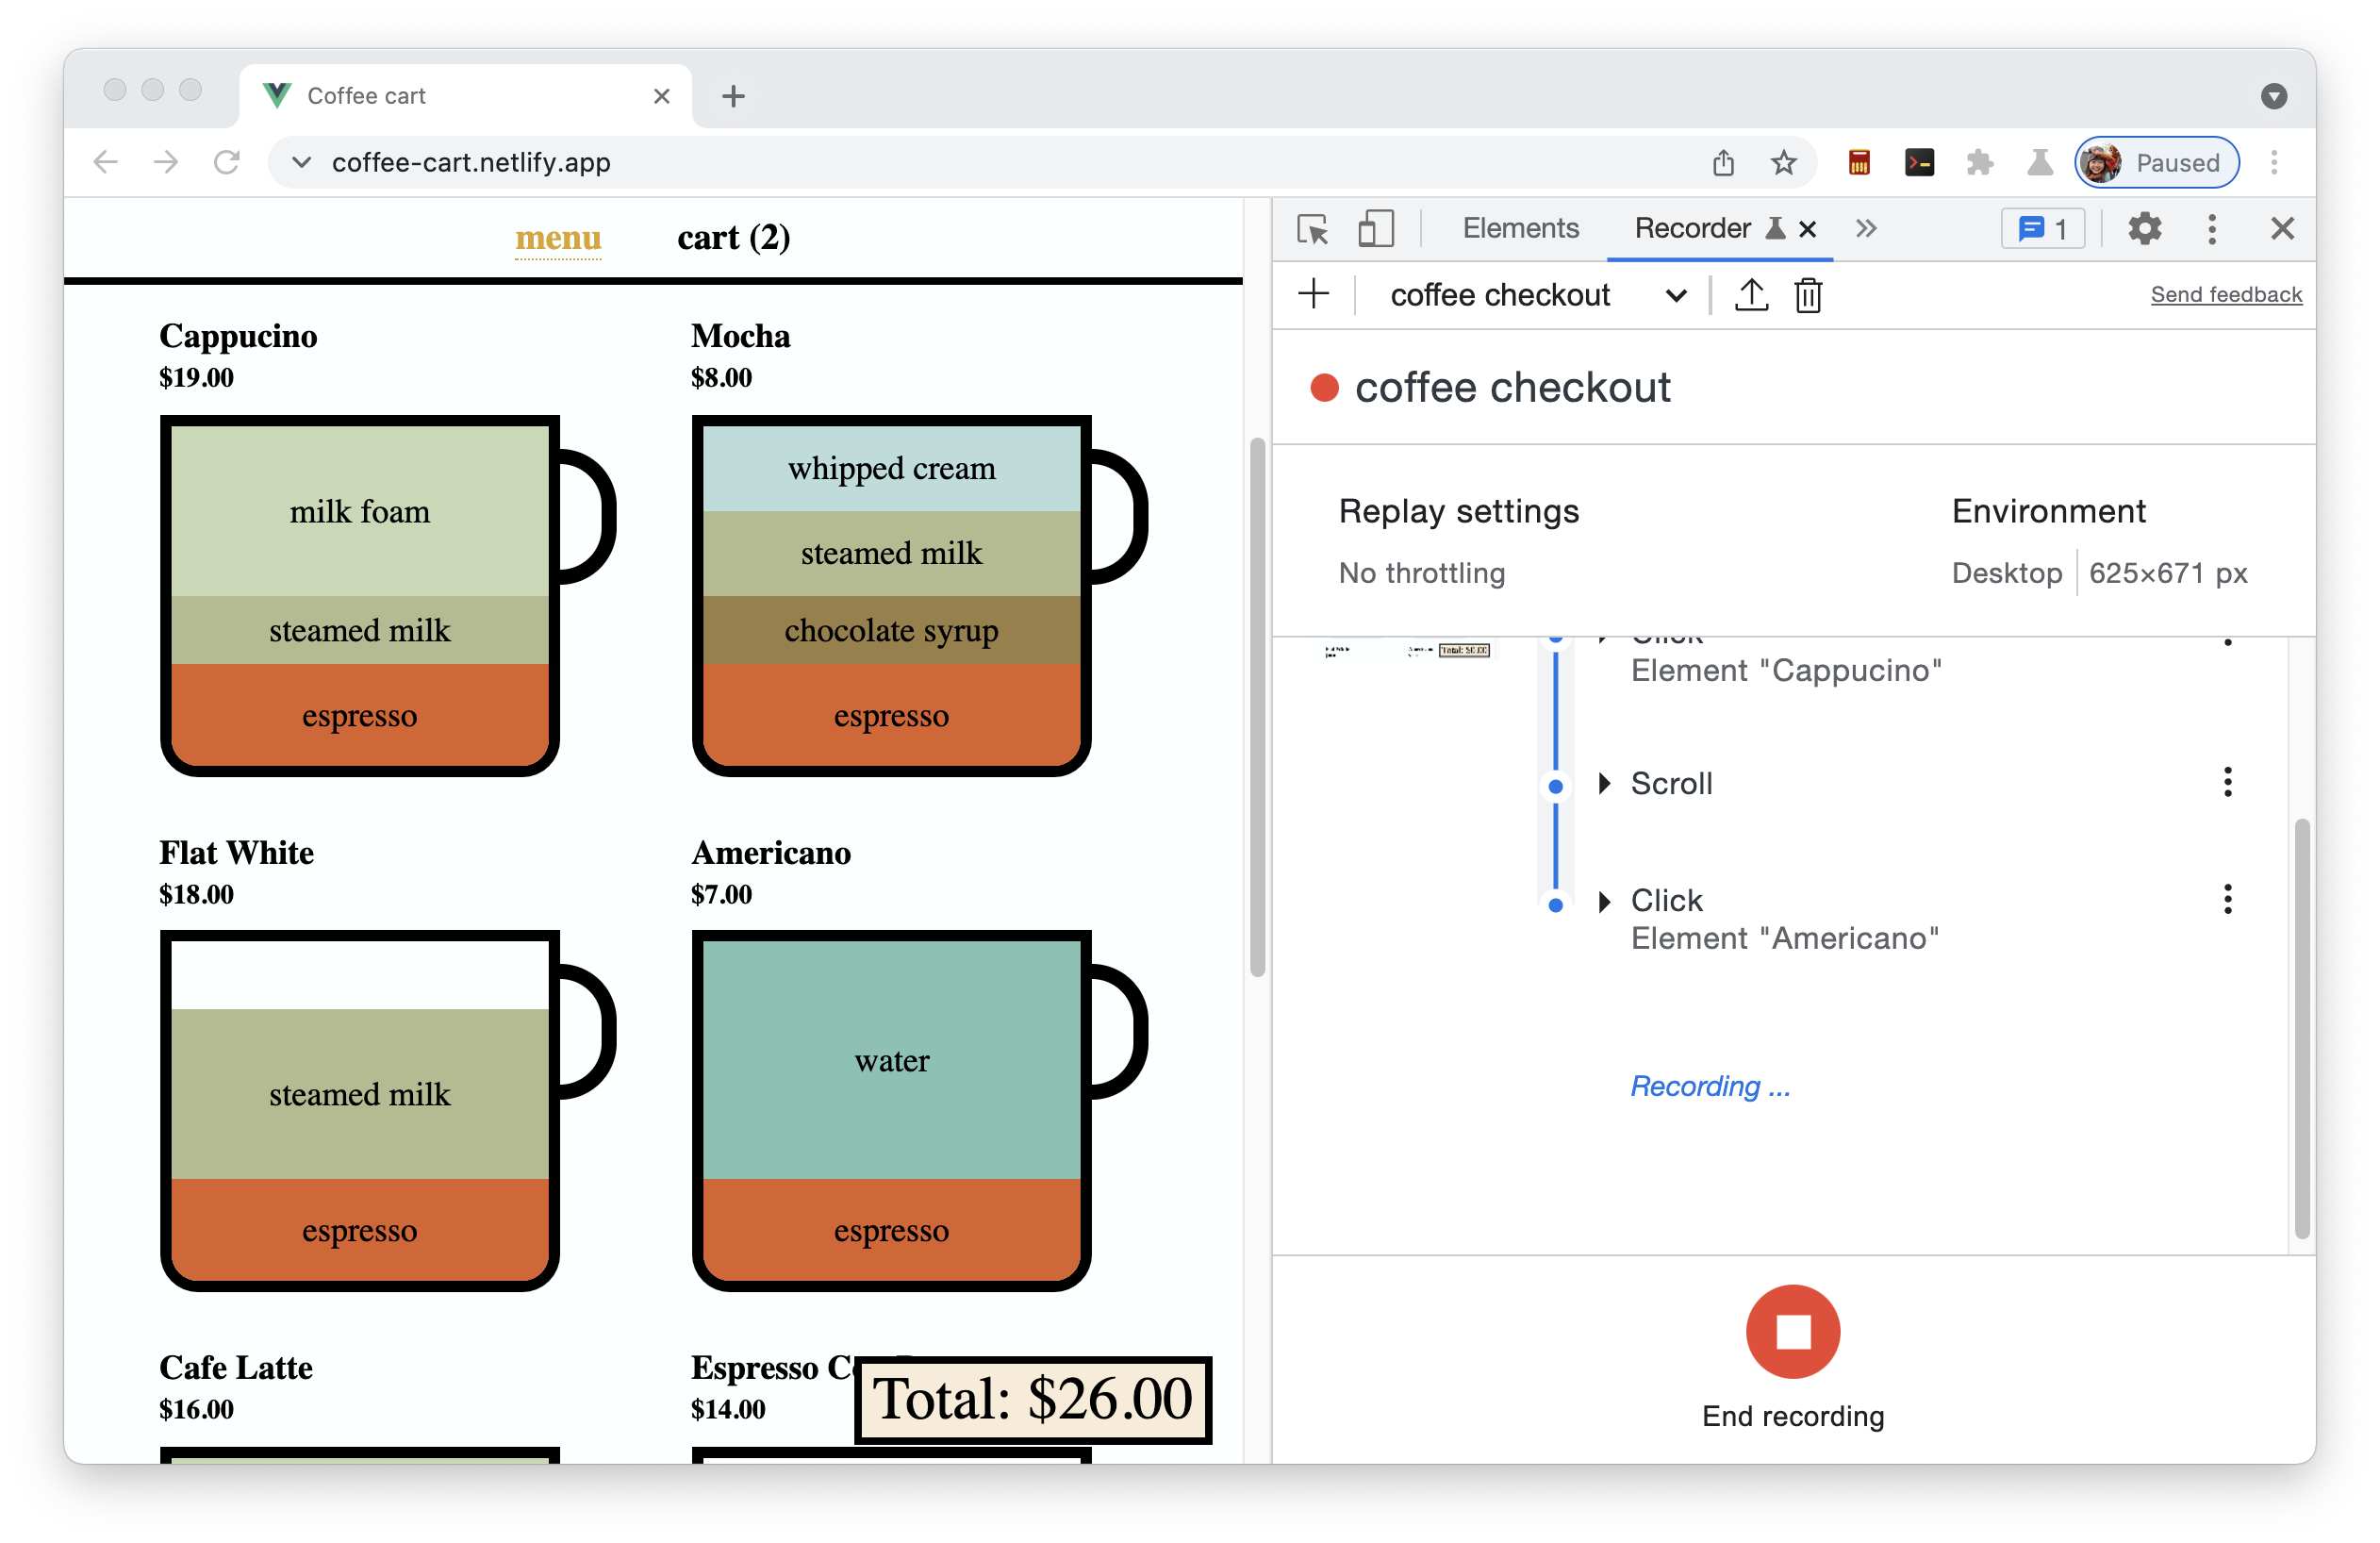
- Click on Cappuccino to add it to the cart.
- Click on Americano to add it to the cart. Notice that the Recorder shows the steps that you have performed so far.
- Go to the cart page.
- Remove Americano from the cart.
- Click on the Total: $19.00 button to start the checkout process.
- In the payment details form, fill in the Name and Email textboxes, and check the I would like to receive order updates and promotional messages. checkbox.
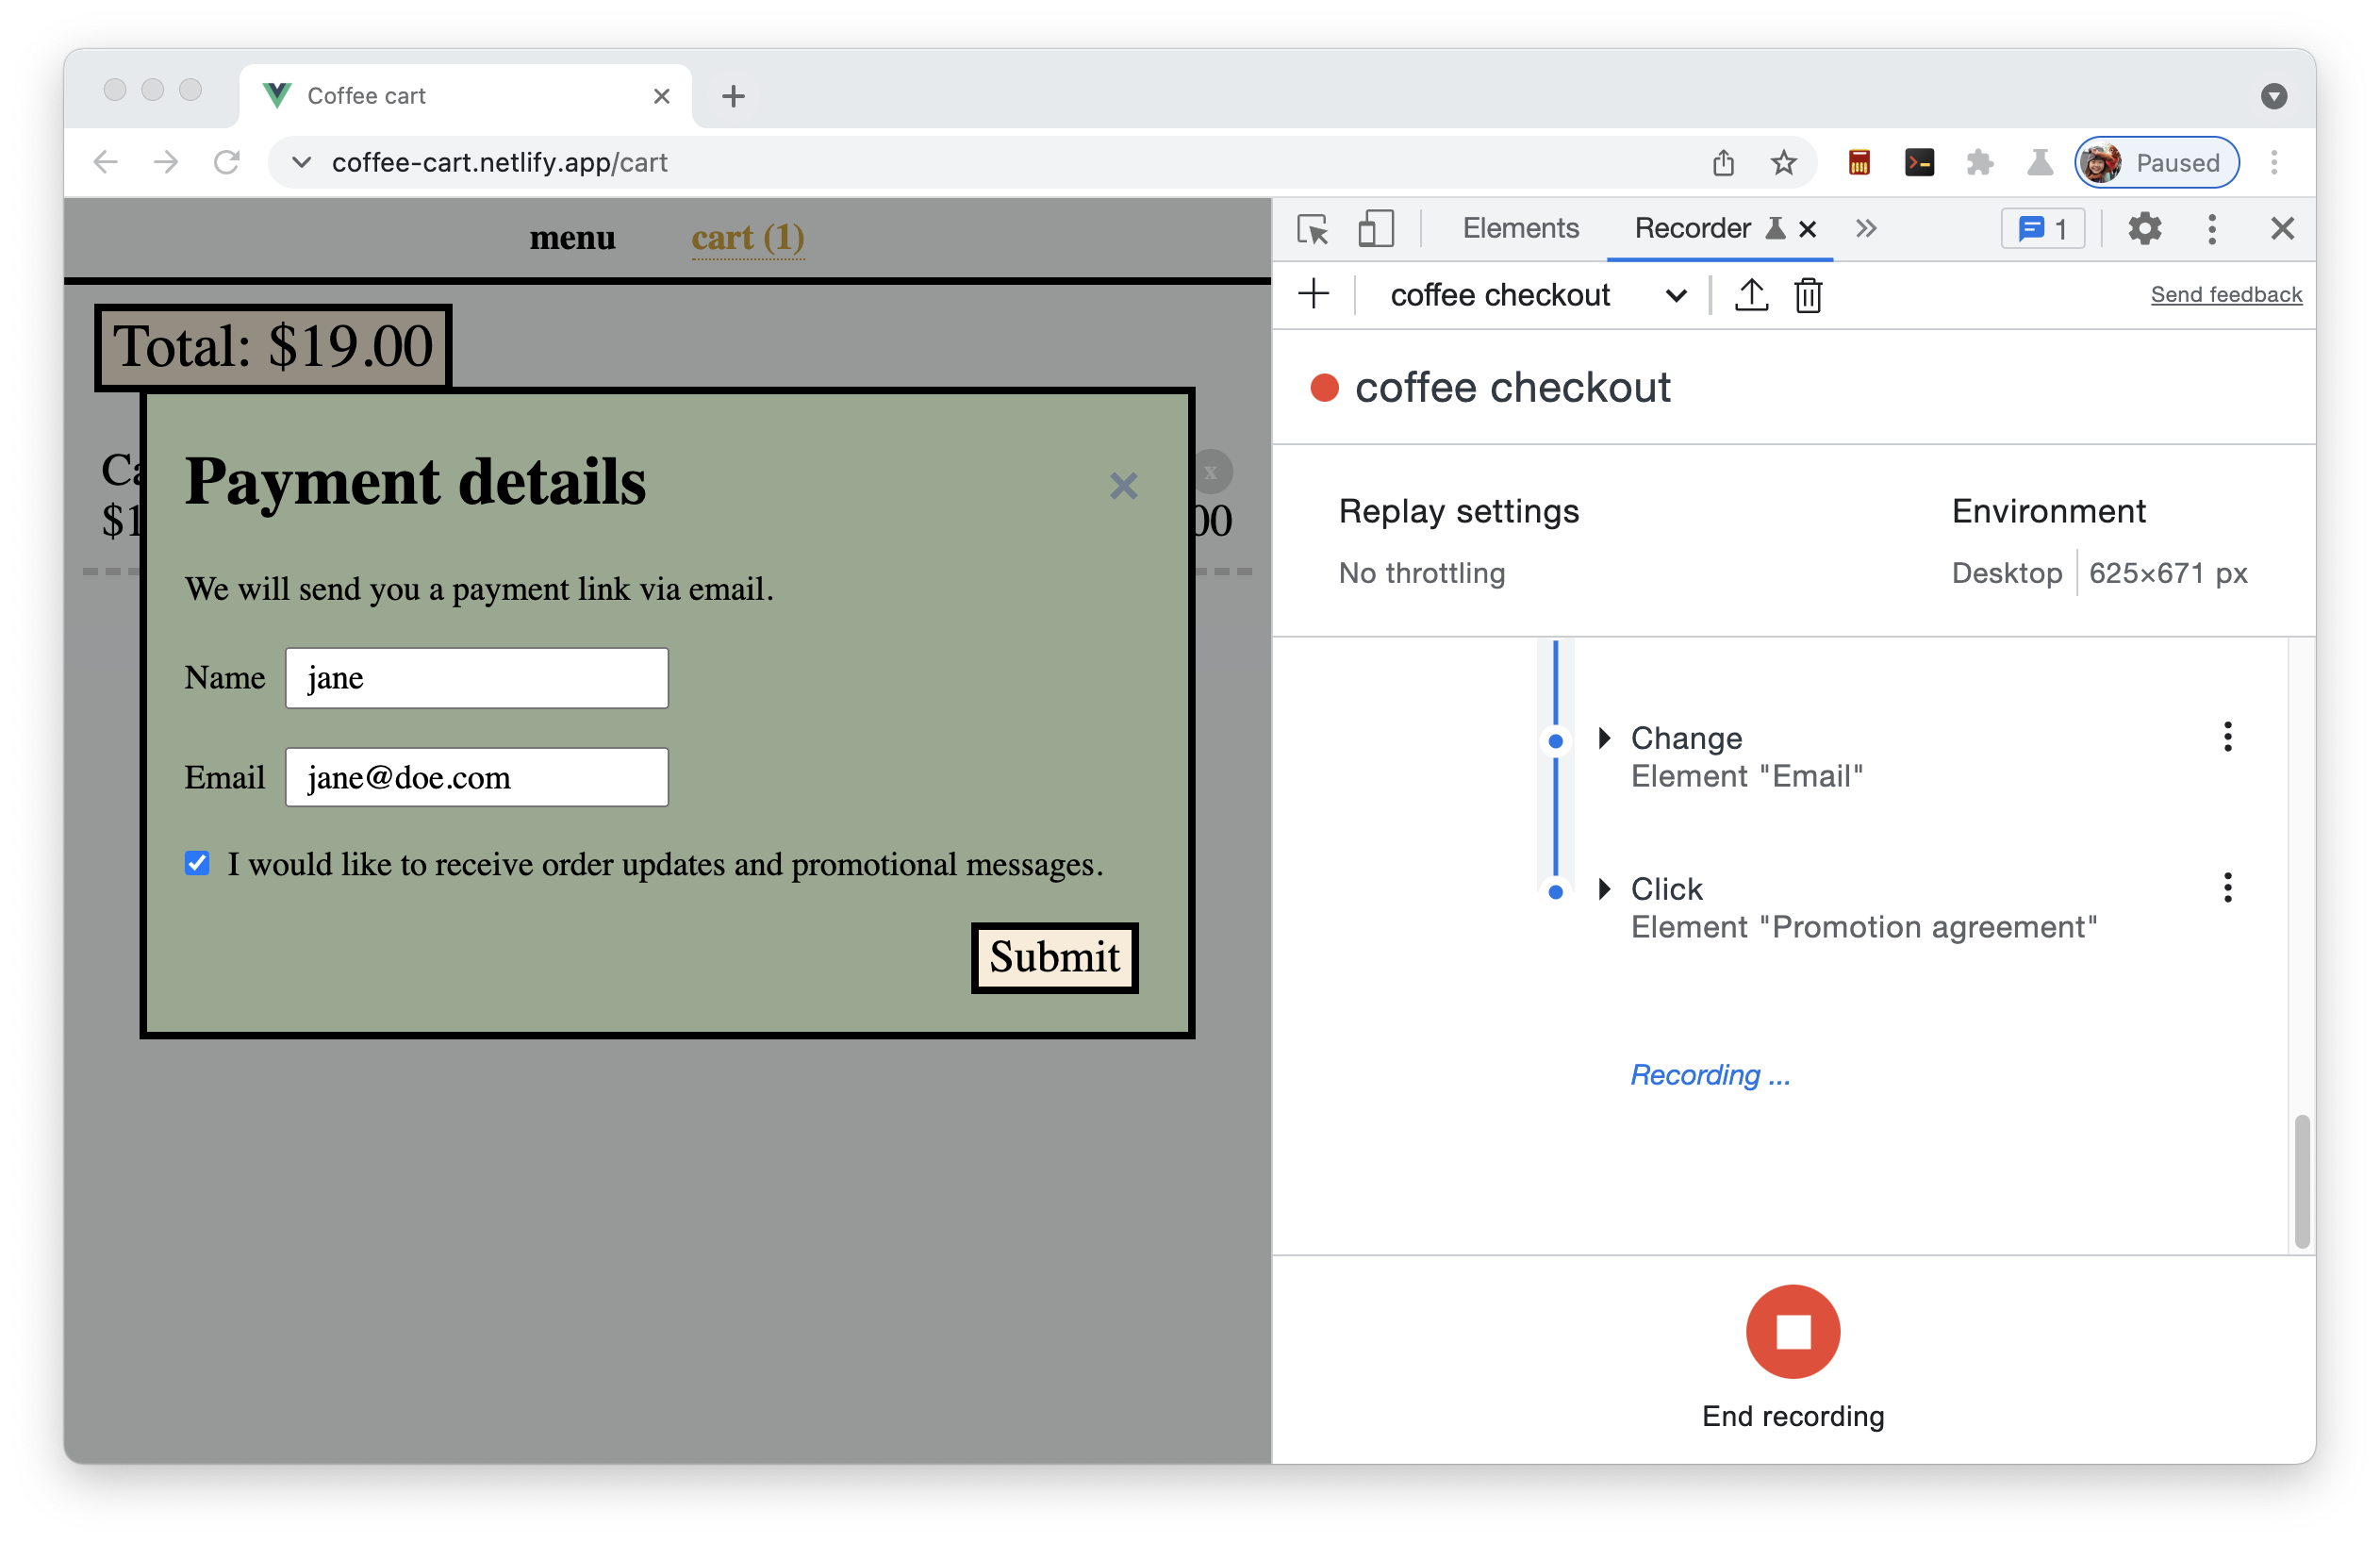
- Click on the Submit button to complete the checkout process.
- In the Recorder panel. Click End recording button to end the recording.
5. Replay a user flow
After recording a user flow, you can replay it by clicking on the Replay button.
You can see the user flow replay on the page. The replay progress is shown in the Recorder panel as well.
You can simulate a slow network connection by configuring the Replay settings. For example, expand the Replay settings, select Slow 3G in the Network dropdown. 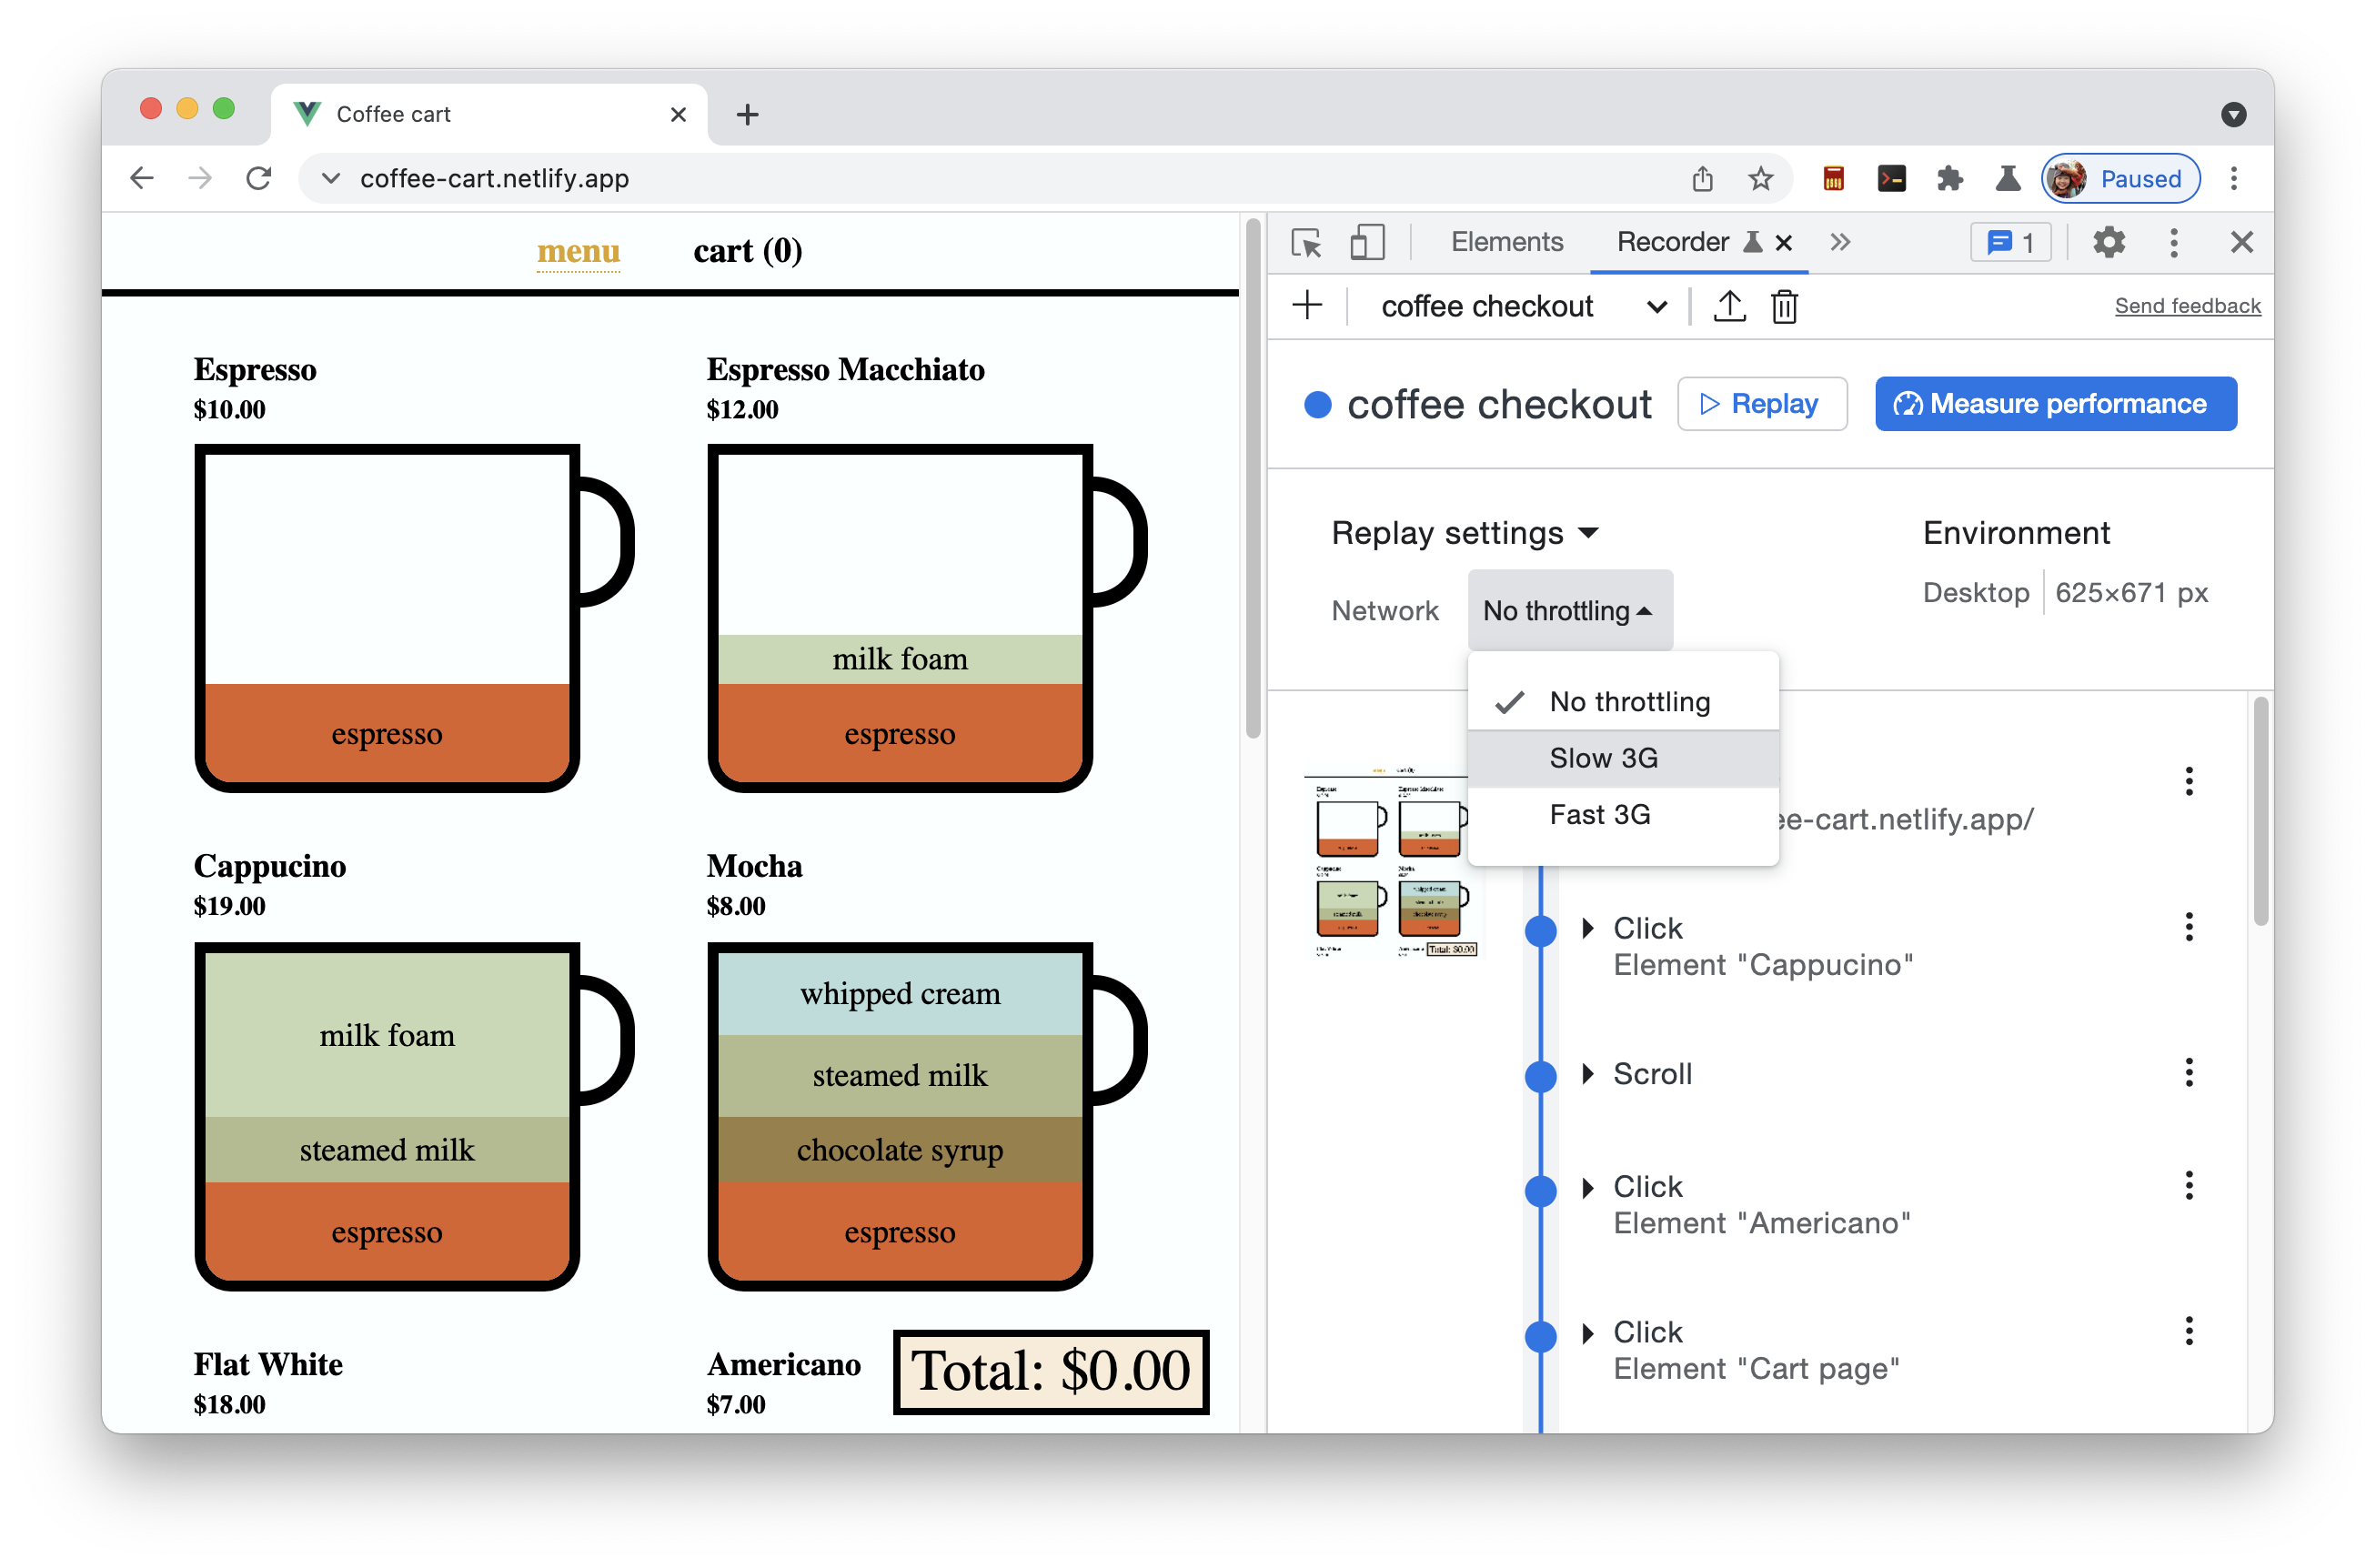
You can set longer timeout for all the steps too.
More settings might be supported in the future. Share with us the replay settings you would like to have!
6. Measure a user flow
You can measure the performance of a user flow by clicking on the Measure performance button. For example, checkout is a critical user flow of a shopping website. With the Recorder panel, you can record the checkout flow once and measure it regularly.
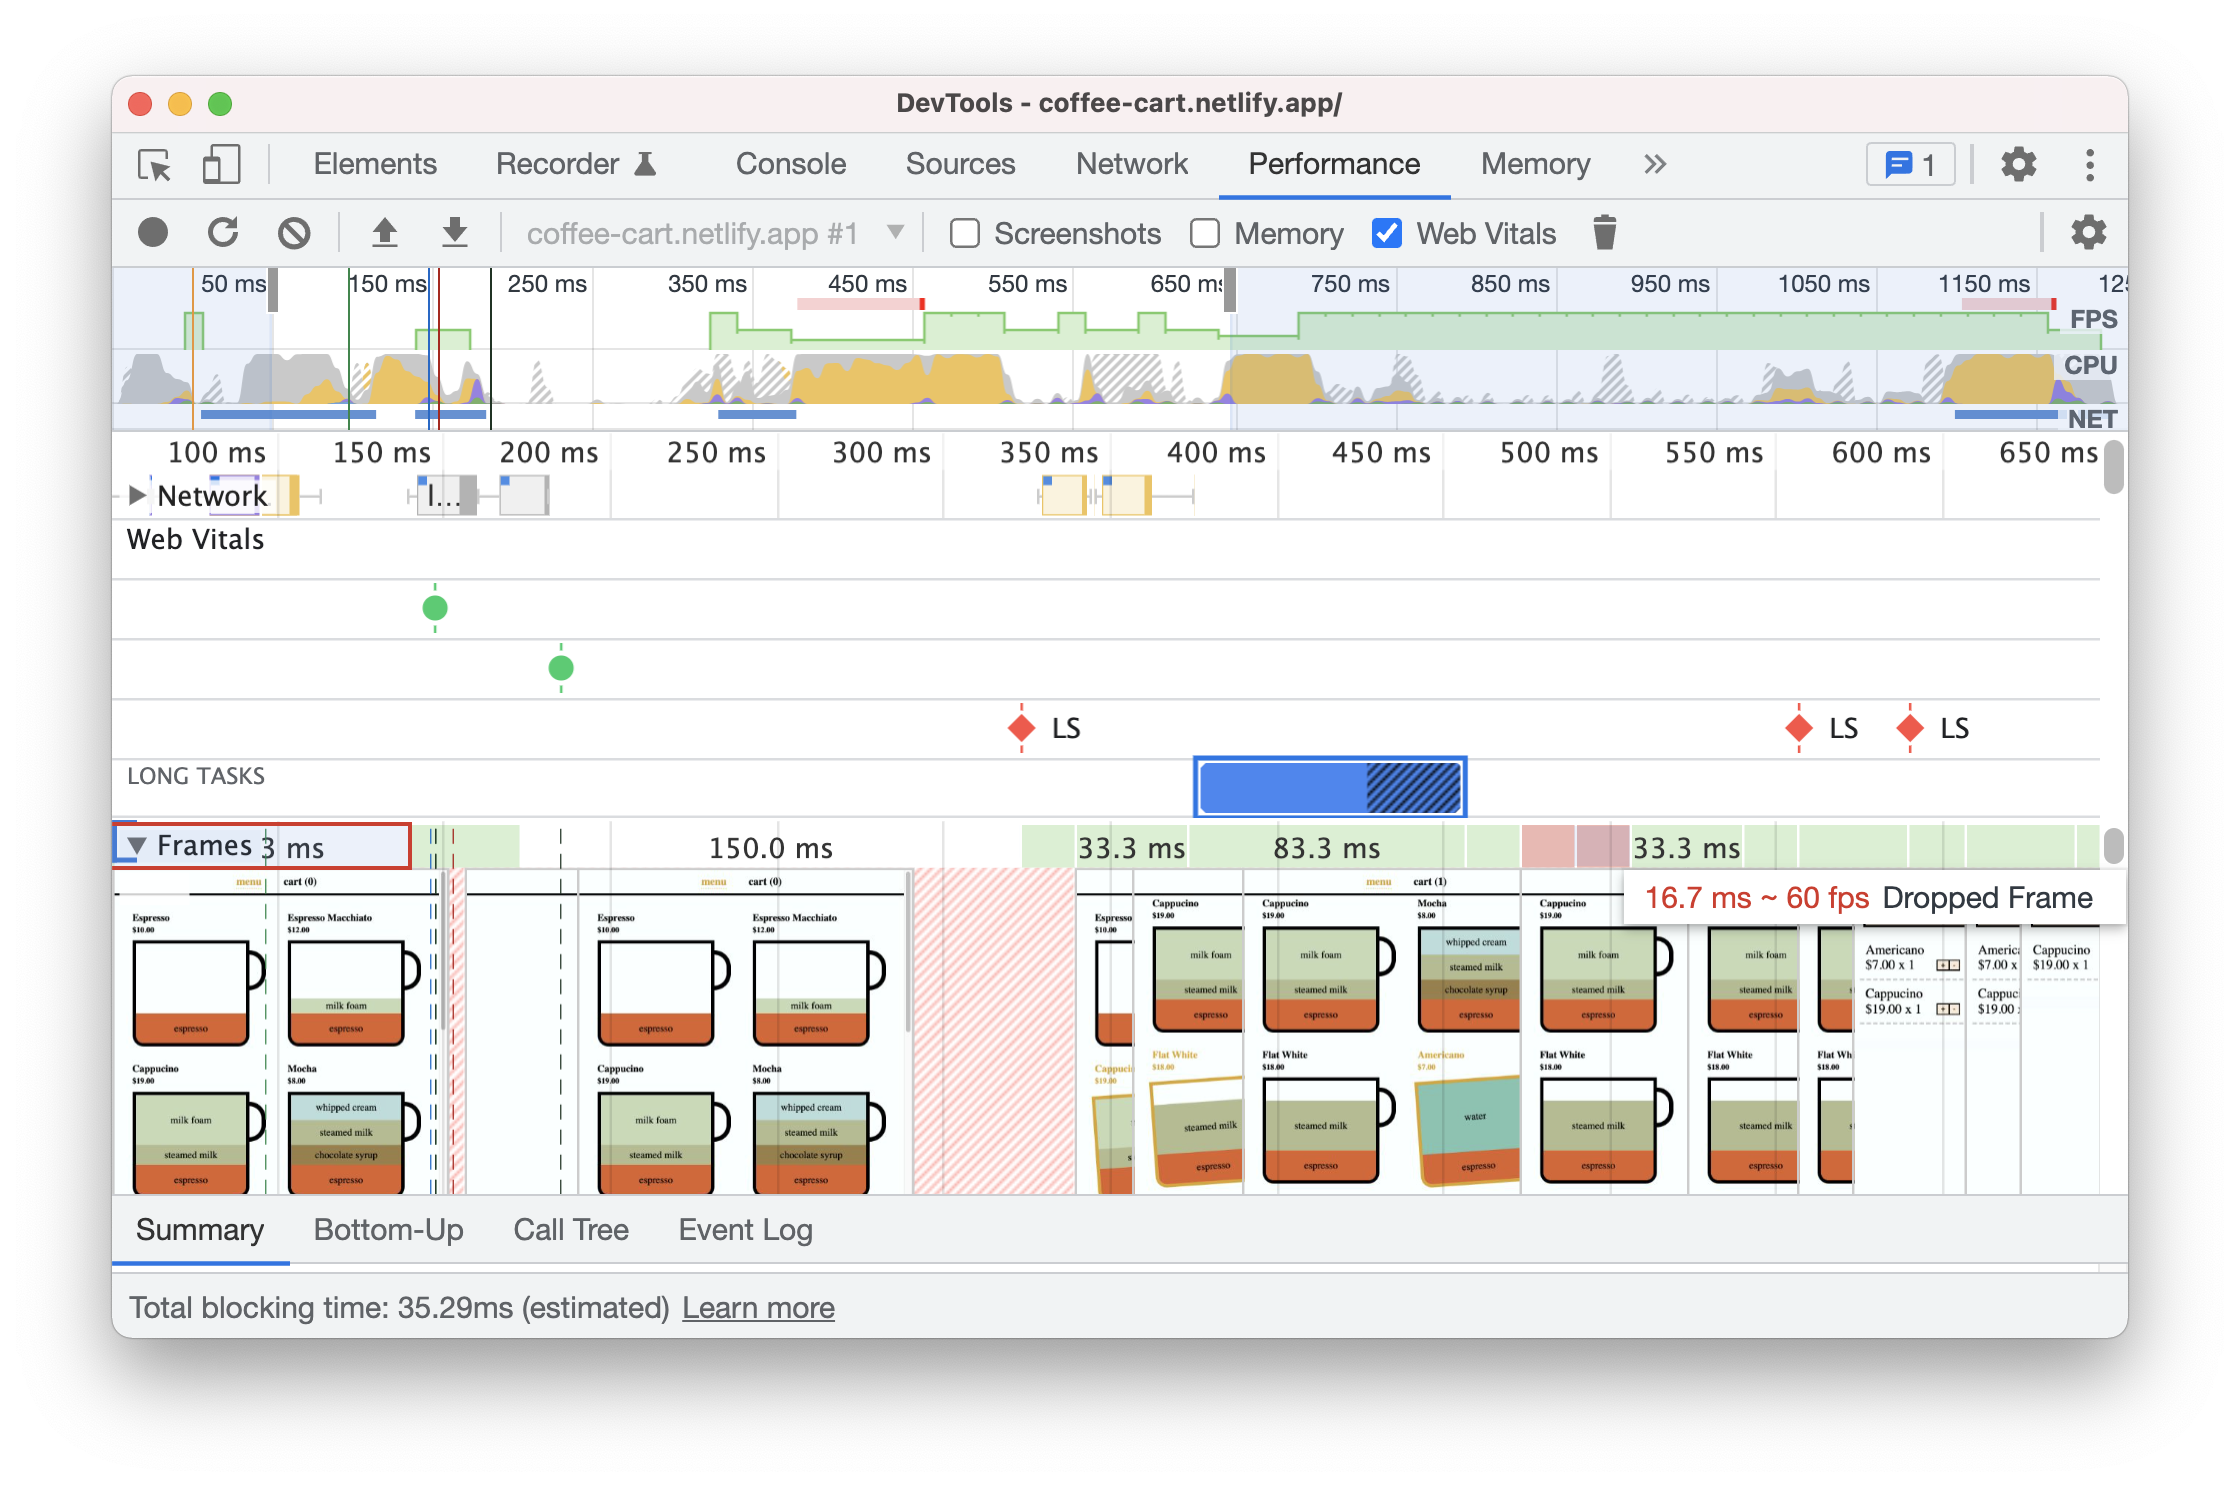
Clicking on the Measure performance button will first trigger a replay of the user flow, then open the performance trace in the Performance panel.
Learn how to analyze your page's runtime performance with the Performance panel. You can enable the Web Vitals checkbox in the Performance panel, to view the Web Vitals metrics, identify opportunities to improve your user browsing experience.
7. Edit user flows
Let's walk through the options to edit the user flows.
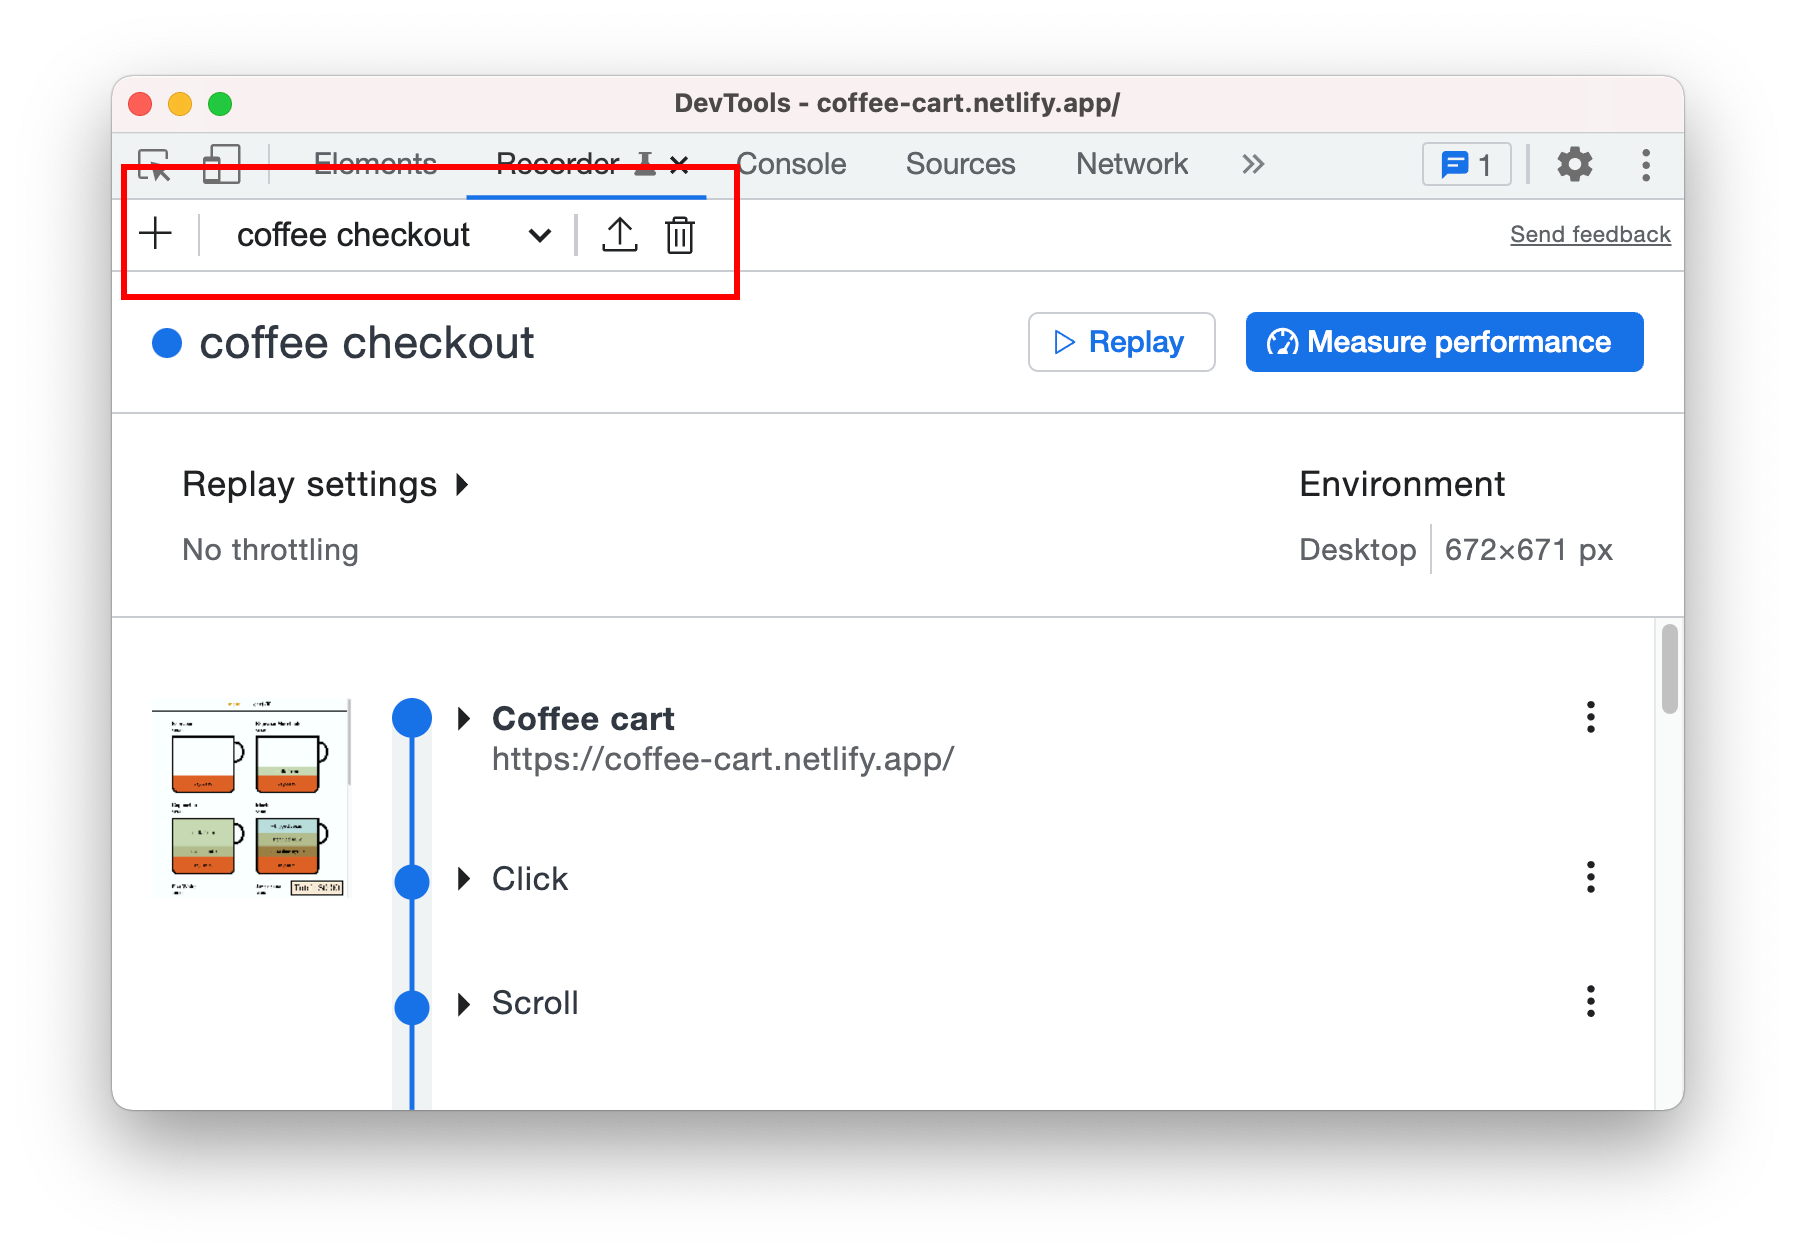
On the top of the Recorder panel, there are options for you to:
- Add a new recording. Click on the + icon to add a new recording.
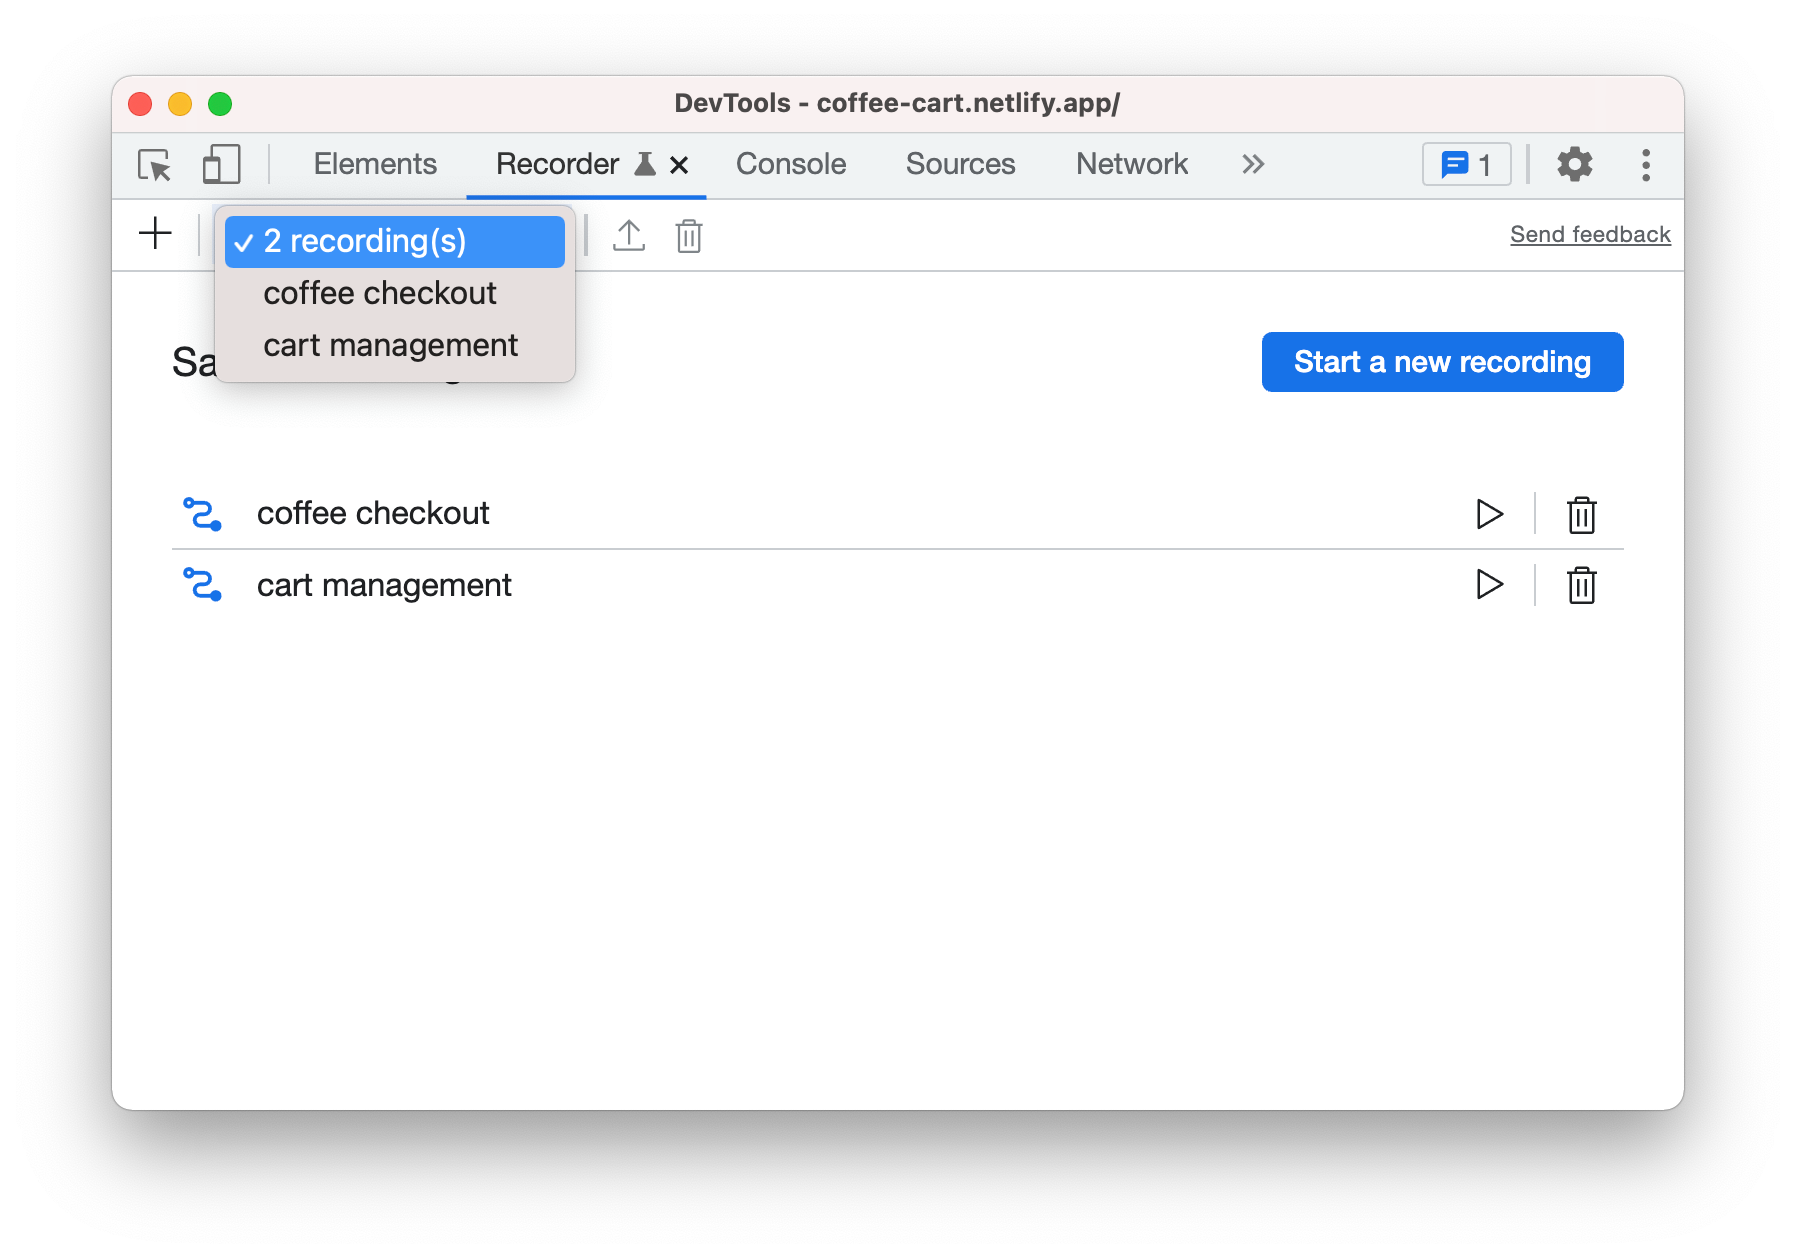
- View all recordings. The dropdown shows the list of saved recordings. Select the [number] recording(s) option to expand and manage the list of saved recordings.
- Export a recording. You can export the user flow as Puppeteer script to customize the script further.
- Delete a recording. Delete the selected recording.
You can also edit the recording's name by clicking the edit button next to it.
8. Edit steps
Let's walk through the options to edit the steps within a workflow.
Expand steps
- Expand each step to see the details of the action. For example, expand the Click Element "Cappuccino" step.
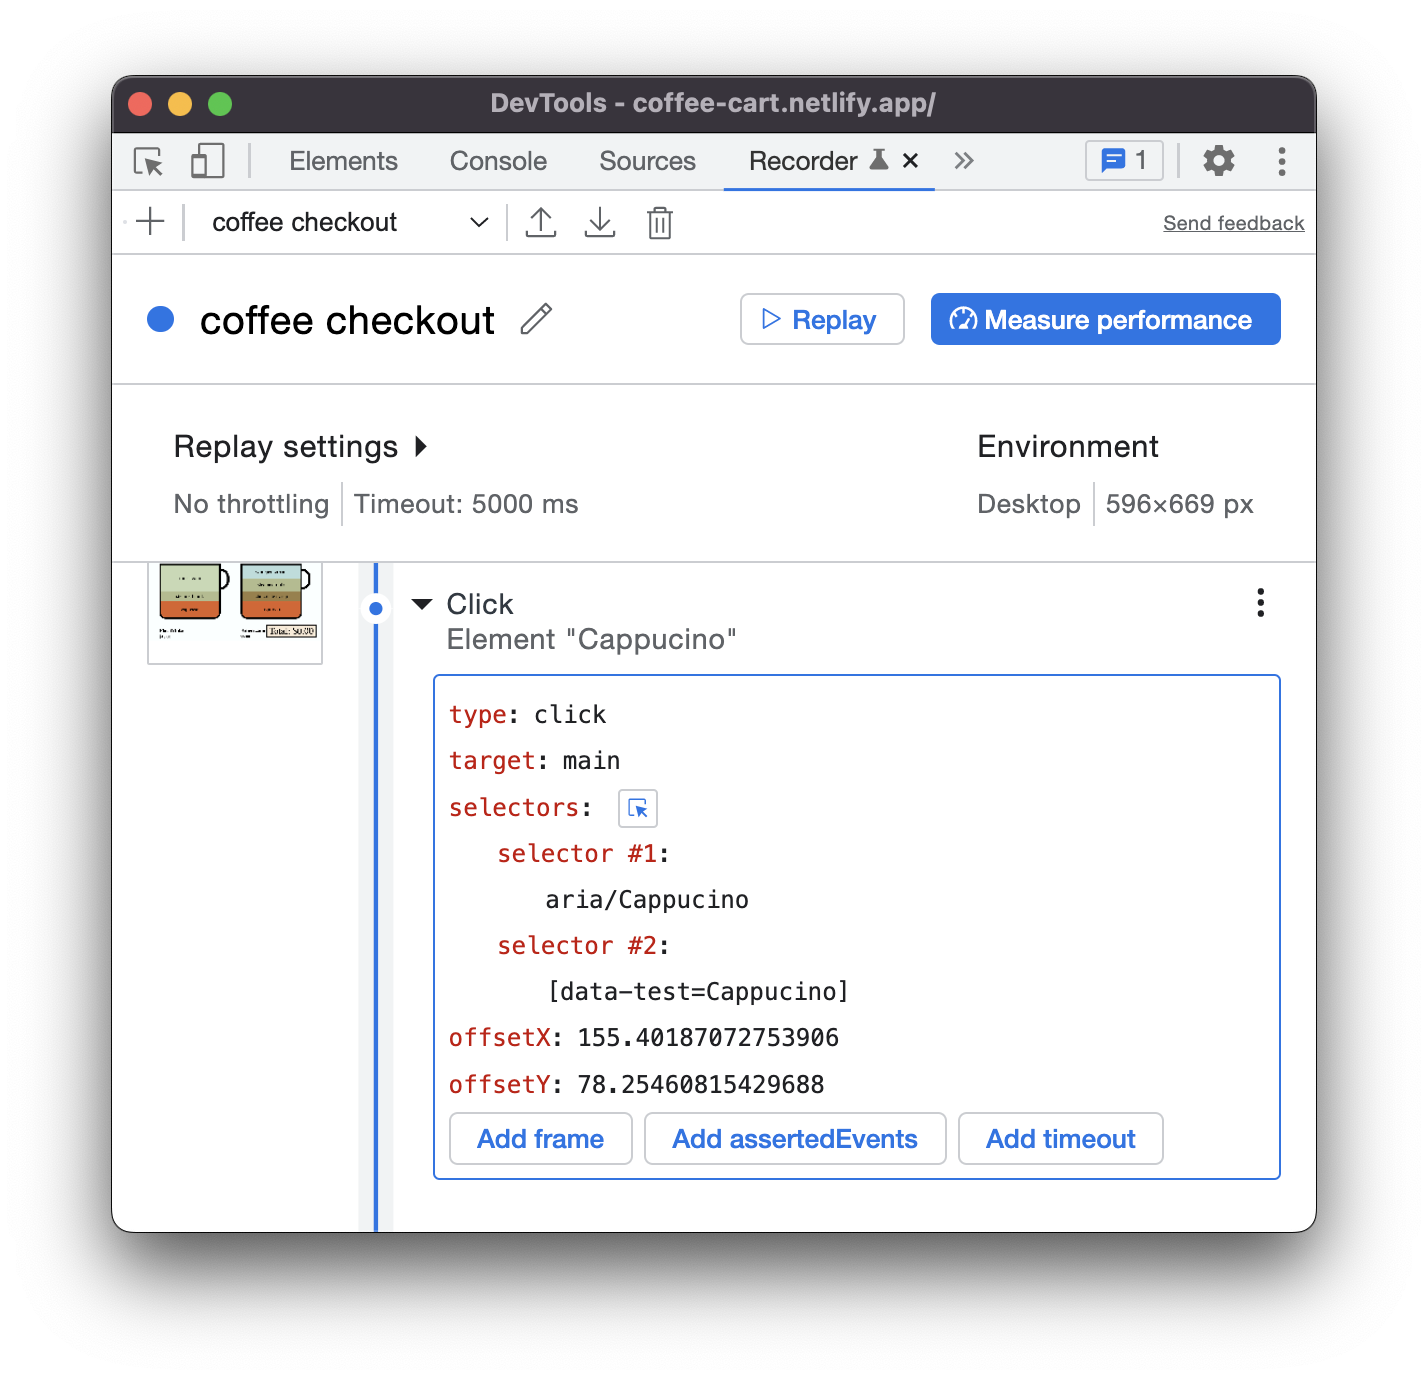
- The step above shows two selectors. For more information, see Selector priority. When replaying the user flow, the Recorder tries to query the element with one of the selectors by sequence. For example, if the Recorder successfully queries the element with the first selector, it will skip the second selector and proceed to the next step.
- You can add or remove any selectors. For example, you can remove the selector #2 because just
aria/Cappuccinois sufficient in this case. Hover over the selector #2 and click on - to remove it.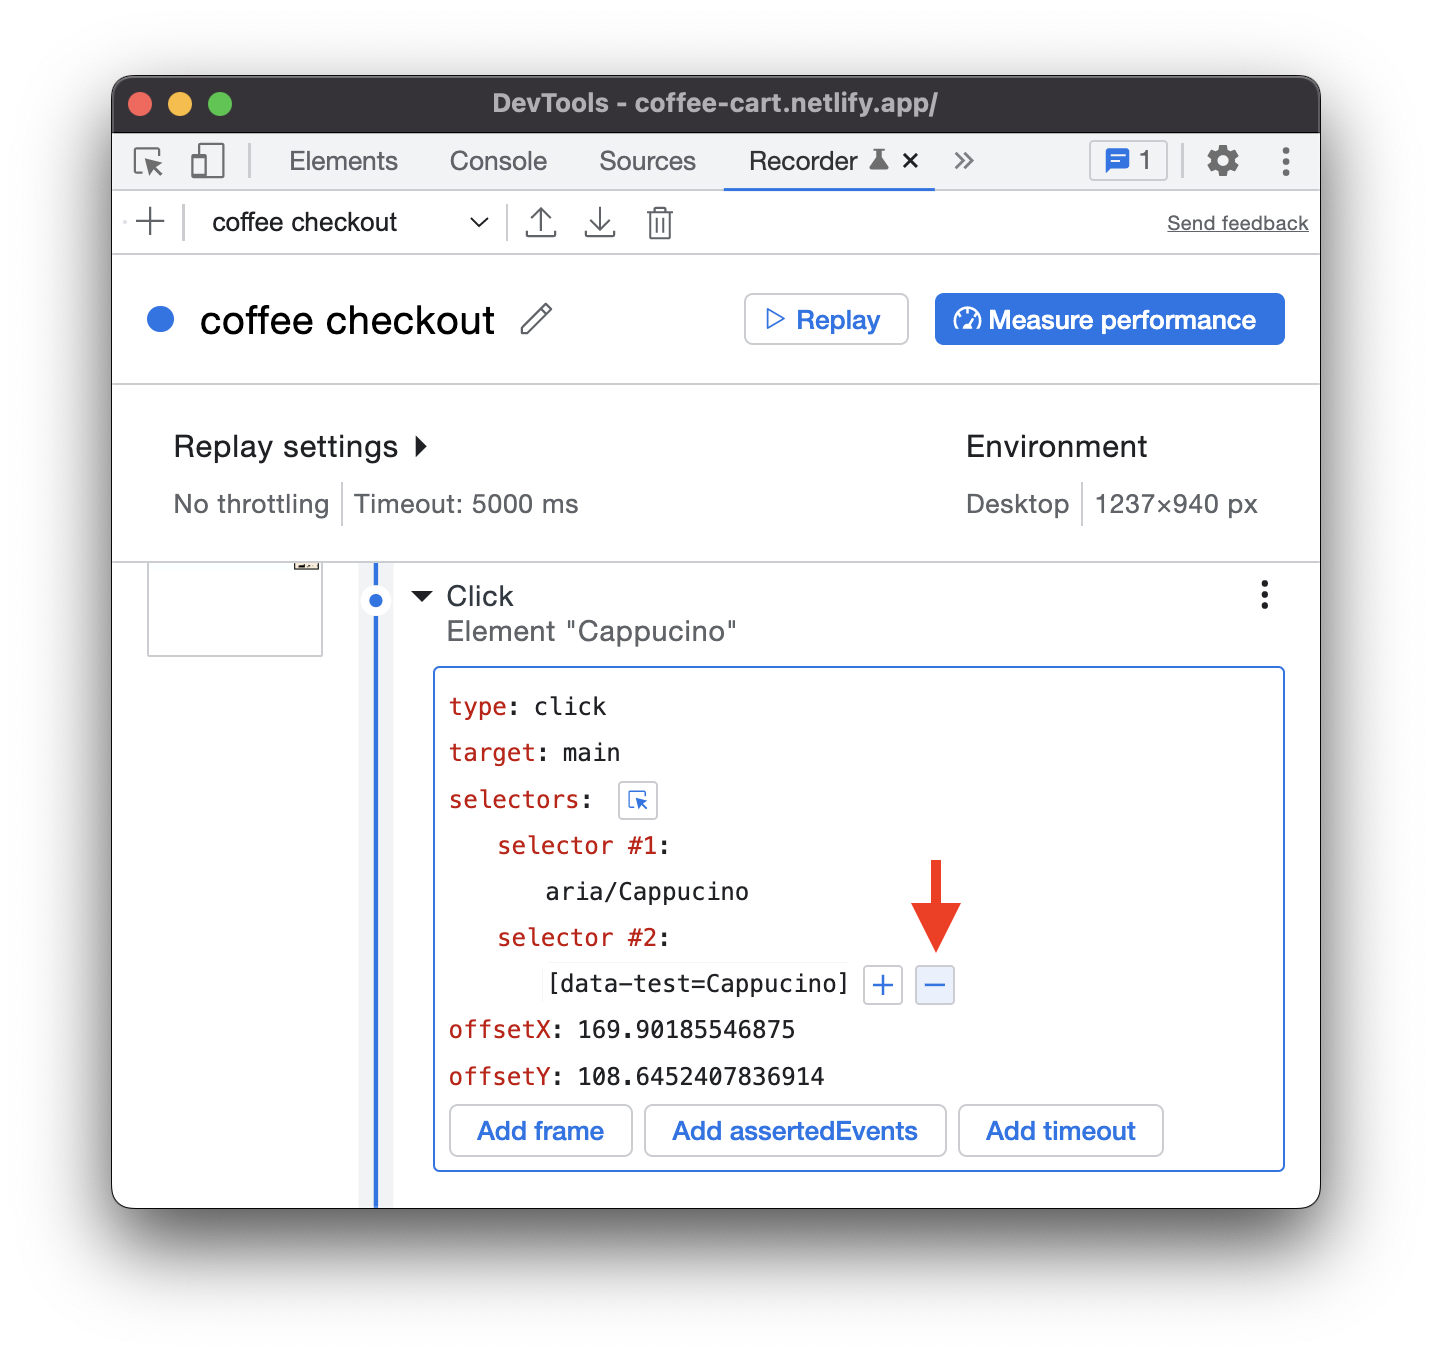
- The selector is editable too. For example, if you want to select Mocha instead of Cappuccino, you can edit the selector value to aria/Mocha instead.
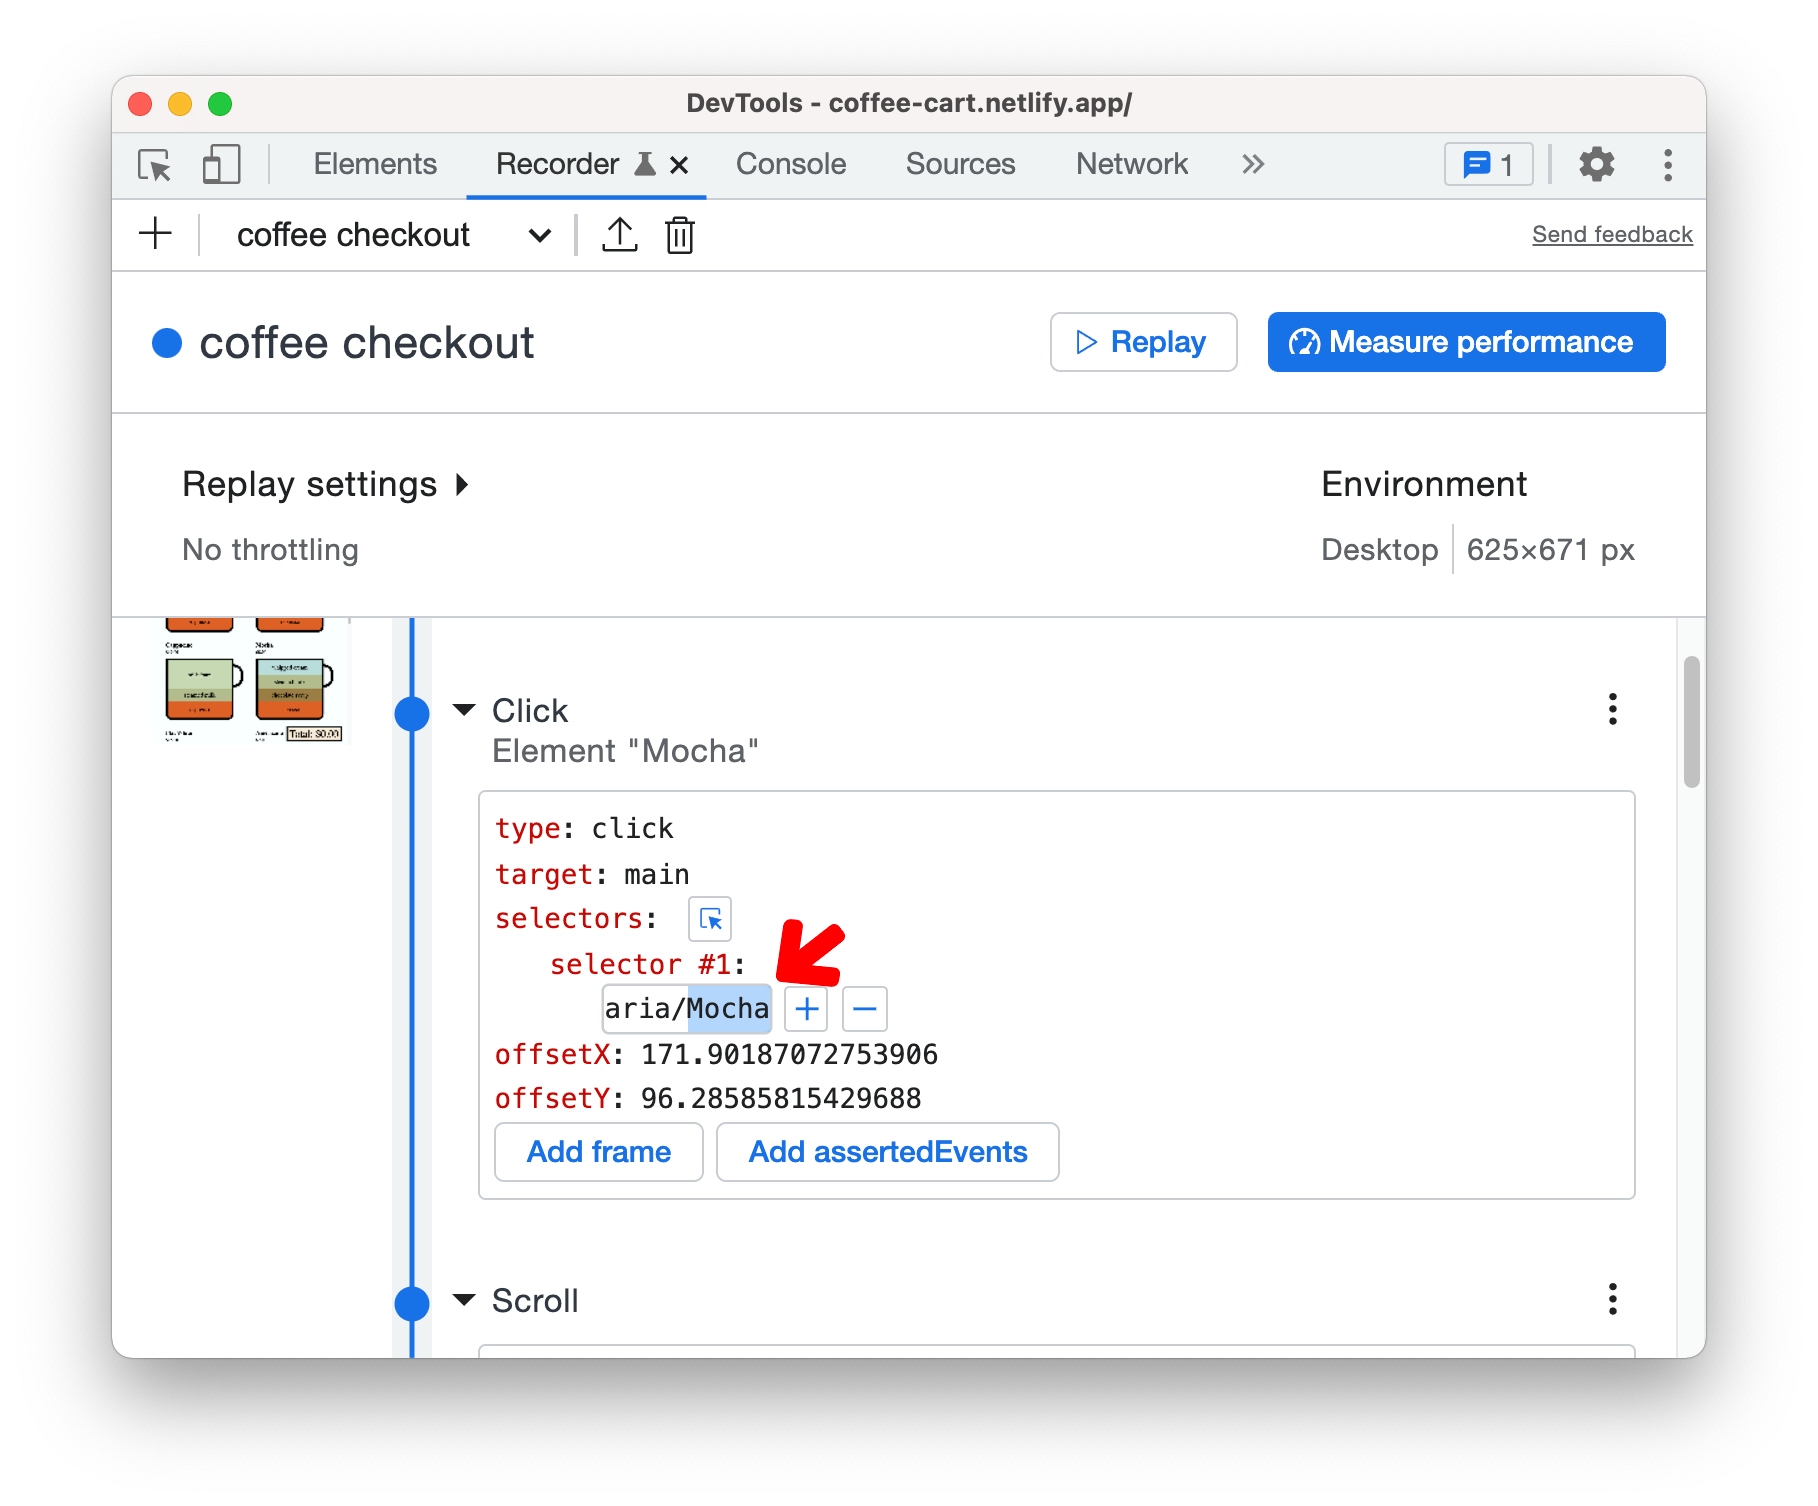 Alternatively, click the Select button and then click Mocha on the page.
 - Replay the flow now, it should select Mocha instead of Cappuccino.
- Try to edit other step properties such as type, target, value and more.
Add and remove steps
There are options to add and remove steps too. This is useful if you want to add an extra step or remove an accidentally added step. Instead of re-recording the user flow, you can just edit it. Click on the 3-dot kebab menu next to the step to open the menu.
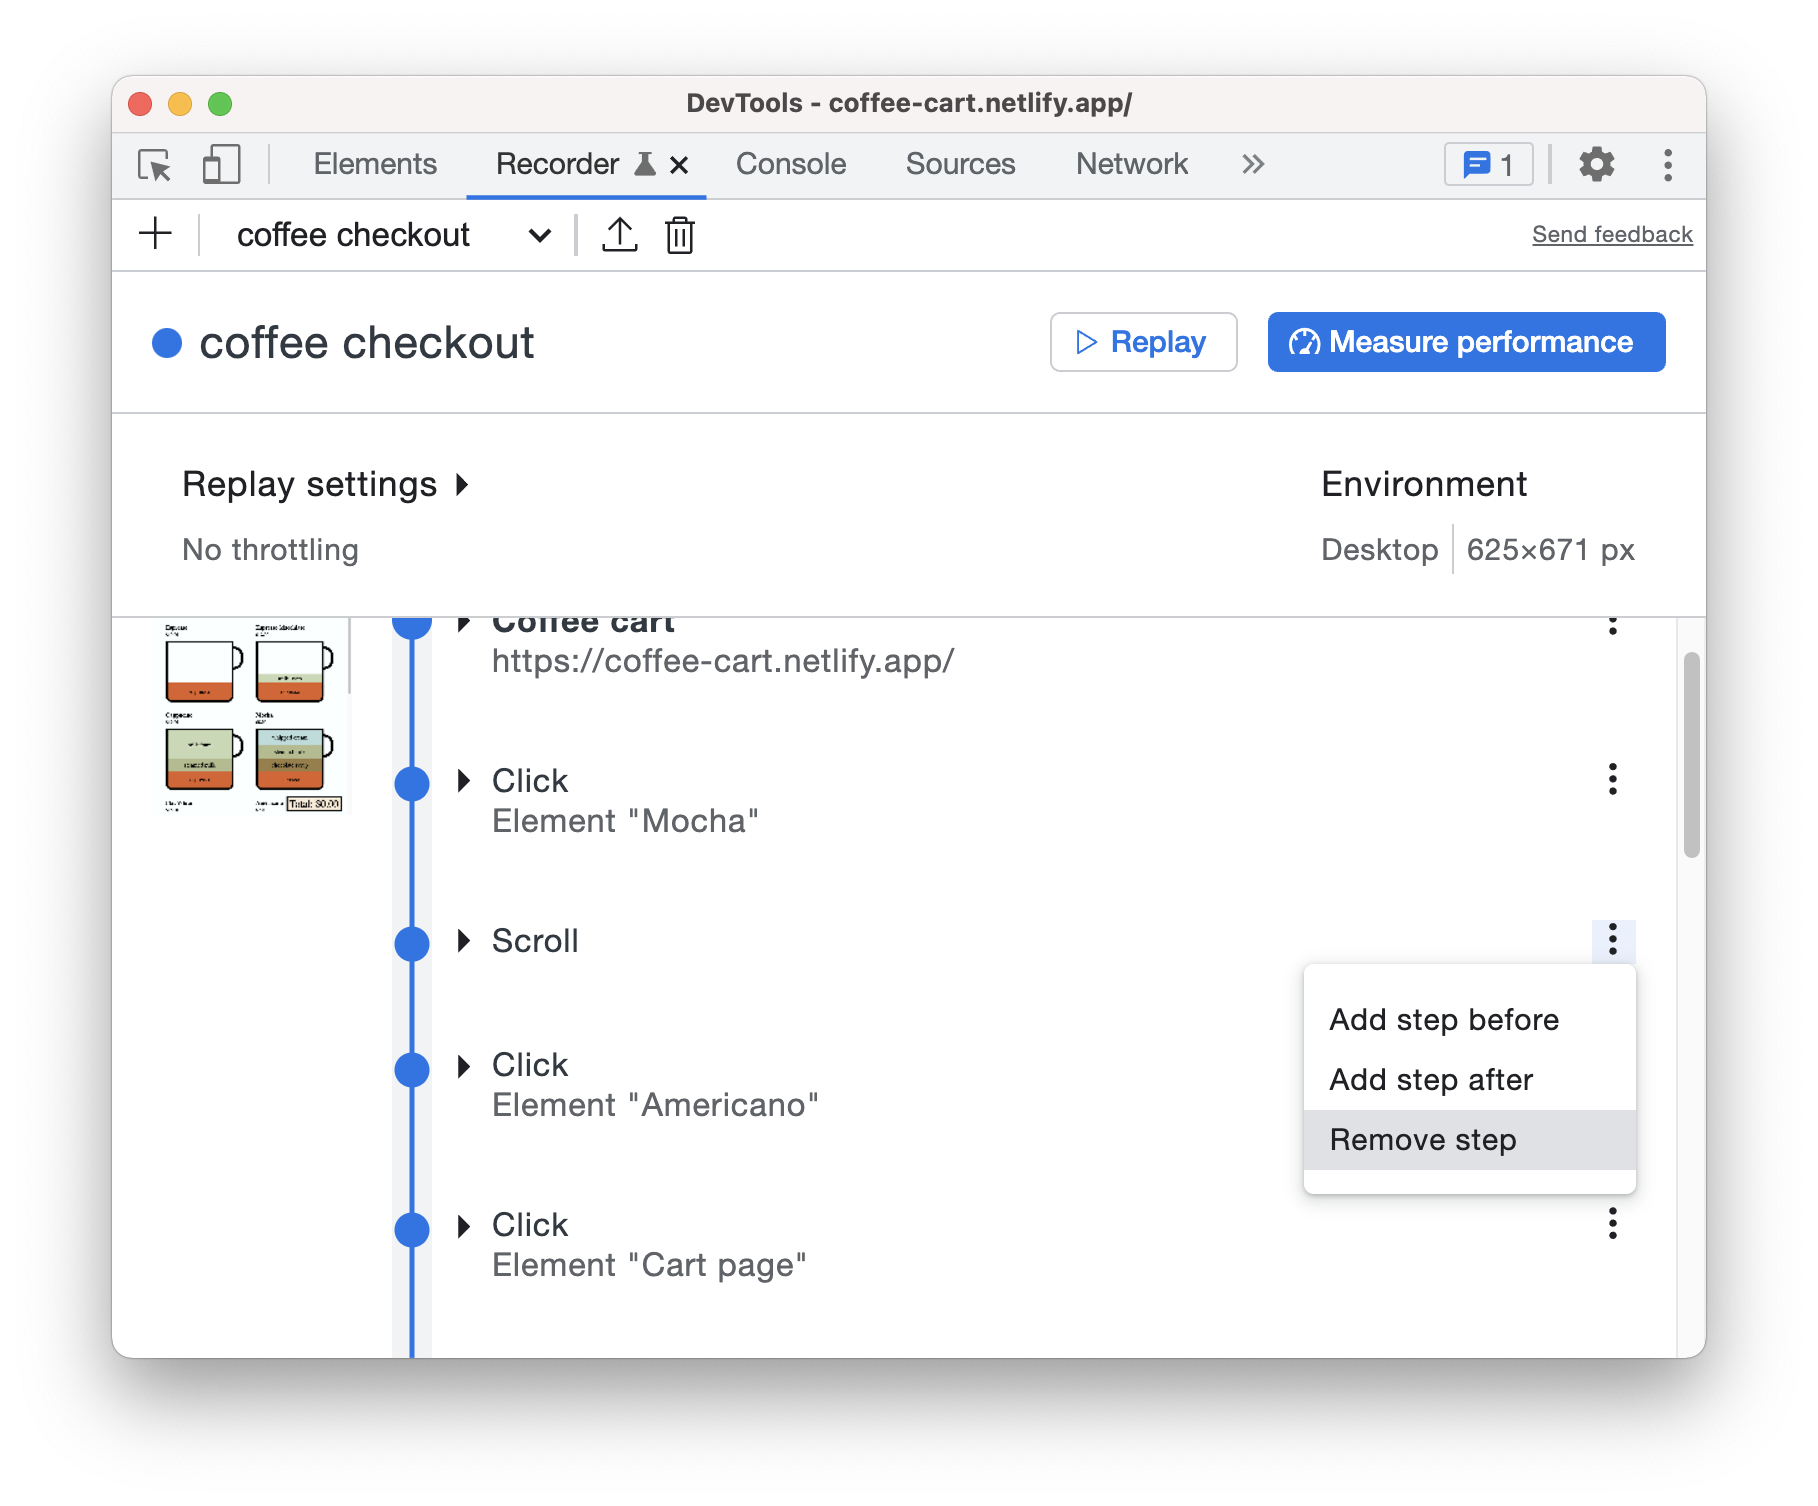
- For example, the Scroll event after the Mocha step is not necessary. You can select Remove step to remove it.
- Say you want to wait until the 9 coffees display on the page before performing any steps.
- In the Mocha step menu, select Add step before.
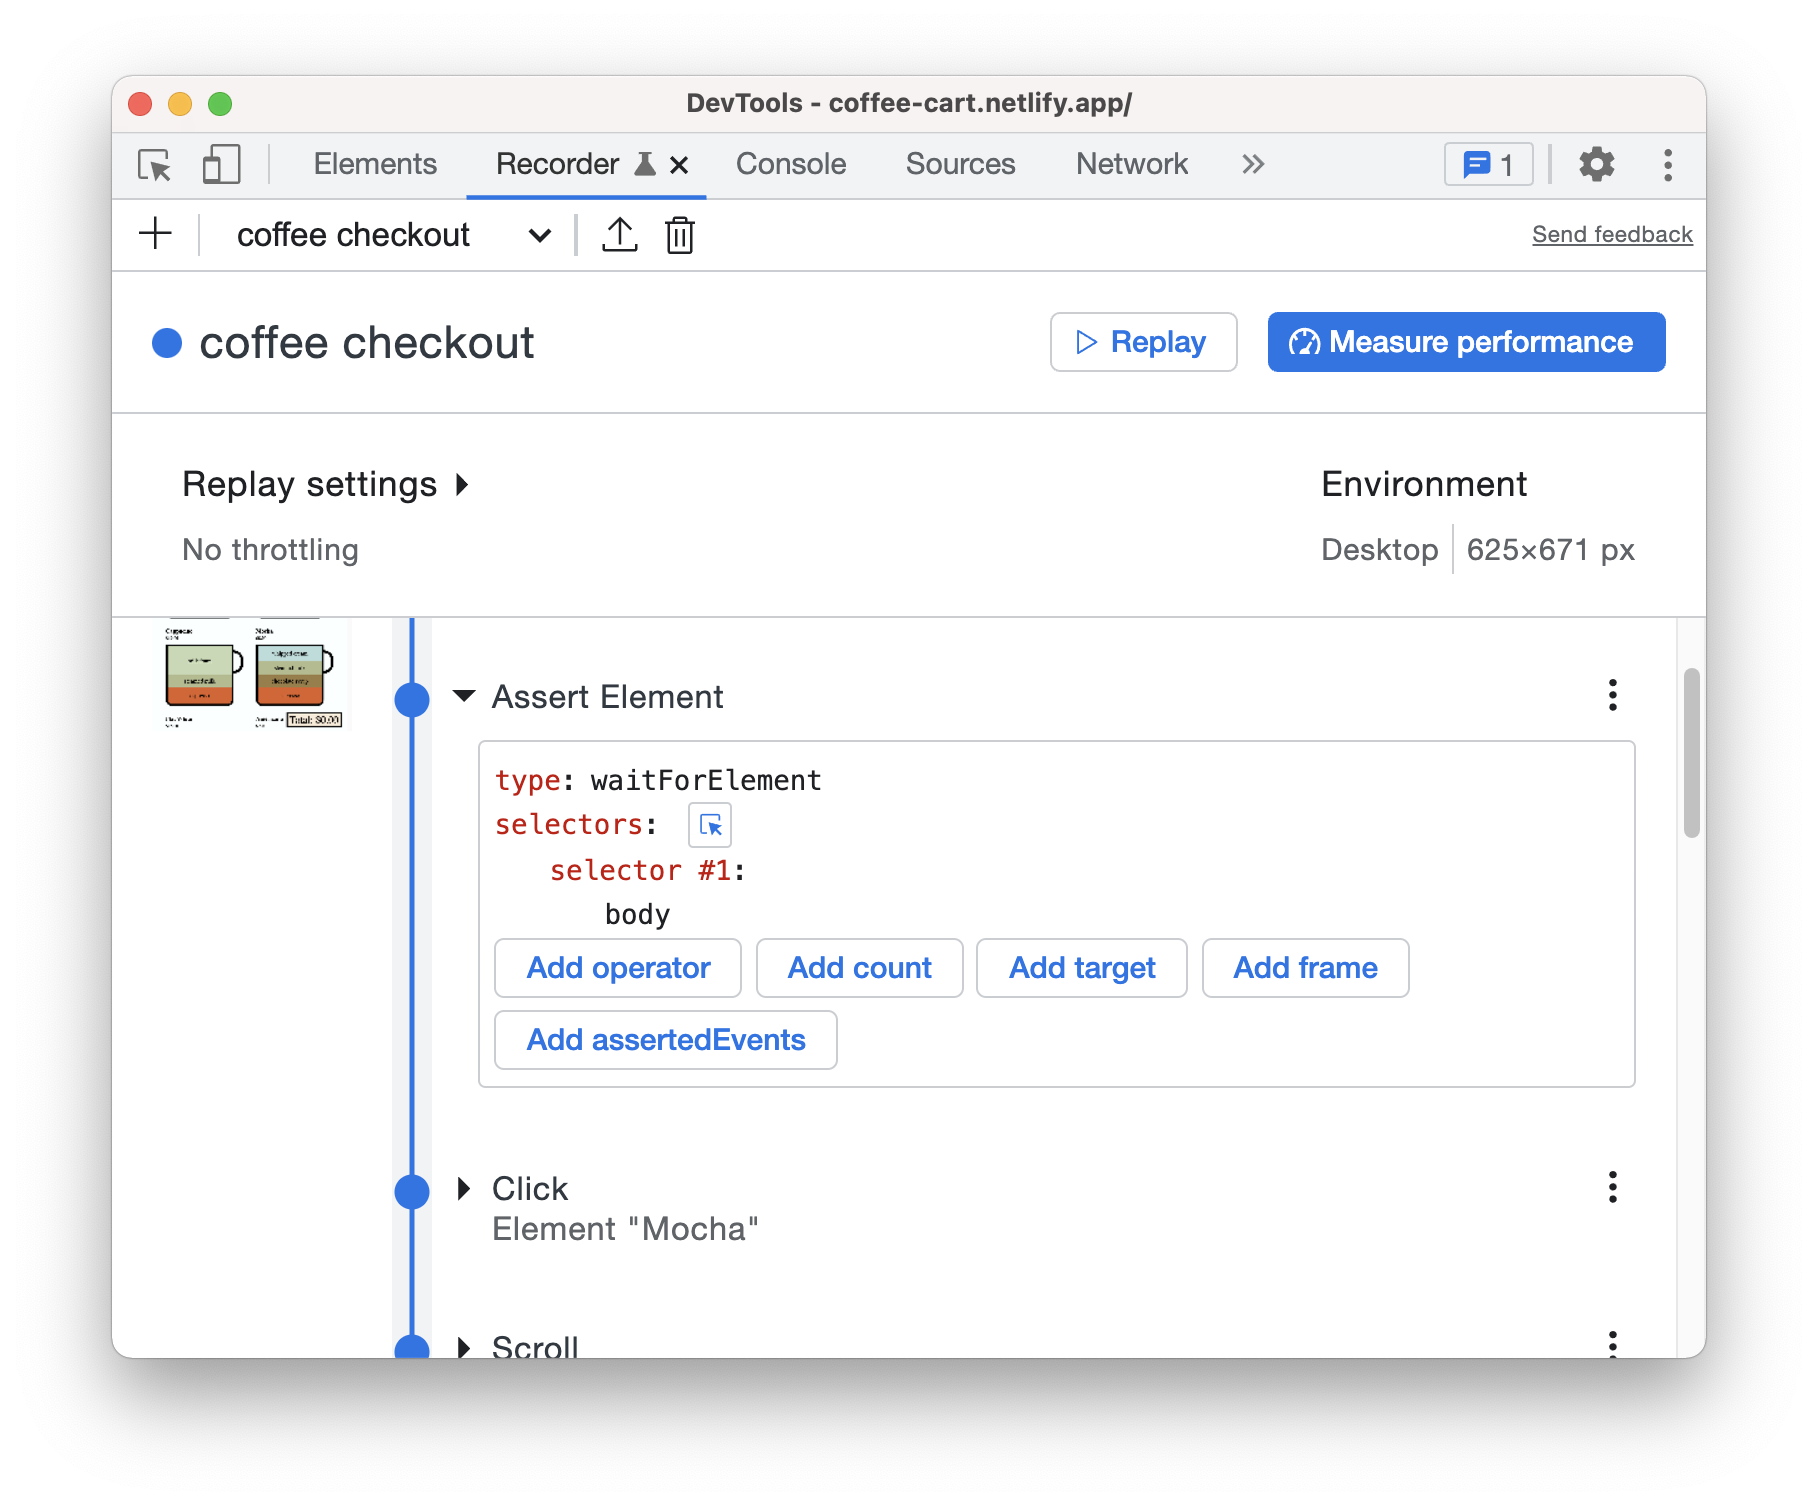
- In Assert Element, edit the new step with the following details:
- type: waitForElement
- selector #1: .cup
- operator: == (click add operator button)
- count: 9 (click add count button)
- Replay the flow now to see the changes.
9. Congratulations!
Congratulations. You've successfully completed this codelab!
By the way, you can customize the selector for recordings as well. Go to our documentation to learn more.