
1. Başlamadan önce
Bu codelab'de, REST ve gRPC ile TensorFlow Serving kullanarak bir Android uygulamasından nesne algılama çıkarımı çalıştırmayı öğreneceksiniz.
Ön koşullar
- Java ile Android geliştirme hakkında temel bilgiler
- Eğitim ve dağıtım gibi TensorFlow ile makine öğrenimi hakkında temel bilgiler
- Terminaller ve Docker hakkında temel bilgiler
Neler öğreneceksiniz?
- TensorFlow Hub'da önceden eğitilmiş nesne algılama modellerini bulma
- Basit bir Android uygulaması oluşturma ve TensorFlow Serving (REST ve gRPC) aracılığıyla indirilen nesne algılama modeliyle tahmin yapma
- Algılama sonucunu kullanıcı arayüzünde nasıl oluşturacağınız.
İhtiyacınız olanlar
- Android Studio'nun en son sürümü
- Docker
- Bash
2. Hazırlanın
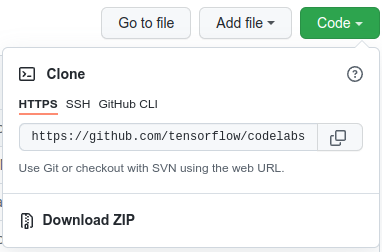
Bu codelab'in kodunu indirmek için:
- Bu codelab'in GitHub deposuna gidin.
- Bu codelab'in tüm kodunu indirmek için Code > Download zip'i (Kod > Zip dosyasını indir) tıklayın.
- İndirilen ZIP dosyasını açarak ihtiyacınız olan tüm kaynakların bulunduğu bir
codelabskök klasörünü çıkarın.
Bu codelab için depodaki TFServing/ObjectDetectionAndroid alt dizinindeki dosyalar yeterlidir. Bu dizinde iki klasör bulunur:
starterklasörü, bu codelab'de temel alacağınız başlangıç kodunu içerir.finishedklasöründe, tamamlanmış örnek uygulamanın kodu yer alır.
3. Bağımlılıkları projeye ekleyin
Başlangıç uygulamasını Android Studio'ya aktarma
- Android Studio'da File > New > Import project'i (Dosya > Yeni > Projeyi içe aktar) tıklayın ve daha önce indirdiğiniz kaynak kodundan
starterklasörünü seçin.
OkHttp ve gRPC için bağımlılıkları ekleyin
- Projenizin
app/build.gradledosyasında bağımlılıkların bulunduğunu doğrulayın.
dependencies {
  // ...
    implementation 'com.squareup.okhttp3:okhttp:4.9.0'
    implementation 'javax.annotation:javax.annotation-api:1.3.2'
    implementation 'io.grpc:grpc-okhttp:1.29.0'
    implementation 'io.grpc:grpc-protobuf-lite:1.29.0'
    implementation 'io.grpc:grpc-stub:1.29.0'
}
Projenizi Gradle dosyalarıyla senkronize etme
- Gezinme menüsünden
 Sync Project with Gradle Files'ı (Projeyi Gradle dosyalarıyla senkronize et) seçin.
4. Başlangıç uygulamasını çalıştırma
- Android Emulator'ı başlatın ve gezinme menüsünde
 "app" uygulamasını çalıştır'ı tıklayın.
Uygulamayı çalıştırıp keşfetme
Uygulama, Android cihazınızda başlatılmalıdır. Kullanıcı arayüzü oldukça basittir: Nesneleri algılamak istediğiniz bir kedi resmi vardır ve kullanıcı, verileri arka uca gönderme yöntemini REST veya gRPC ile seçebilir. Arka uç, resimde nesne algılama işlemi gerçekleştirir ve algılama sonuçlarını istemci uygulamasına döndürür. İstemci uygulaması da kullanıcı arayüzünü tekrar oluşturur.
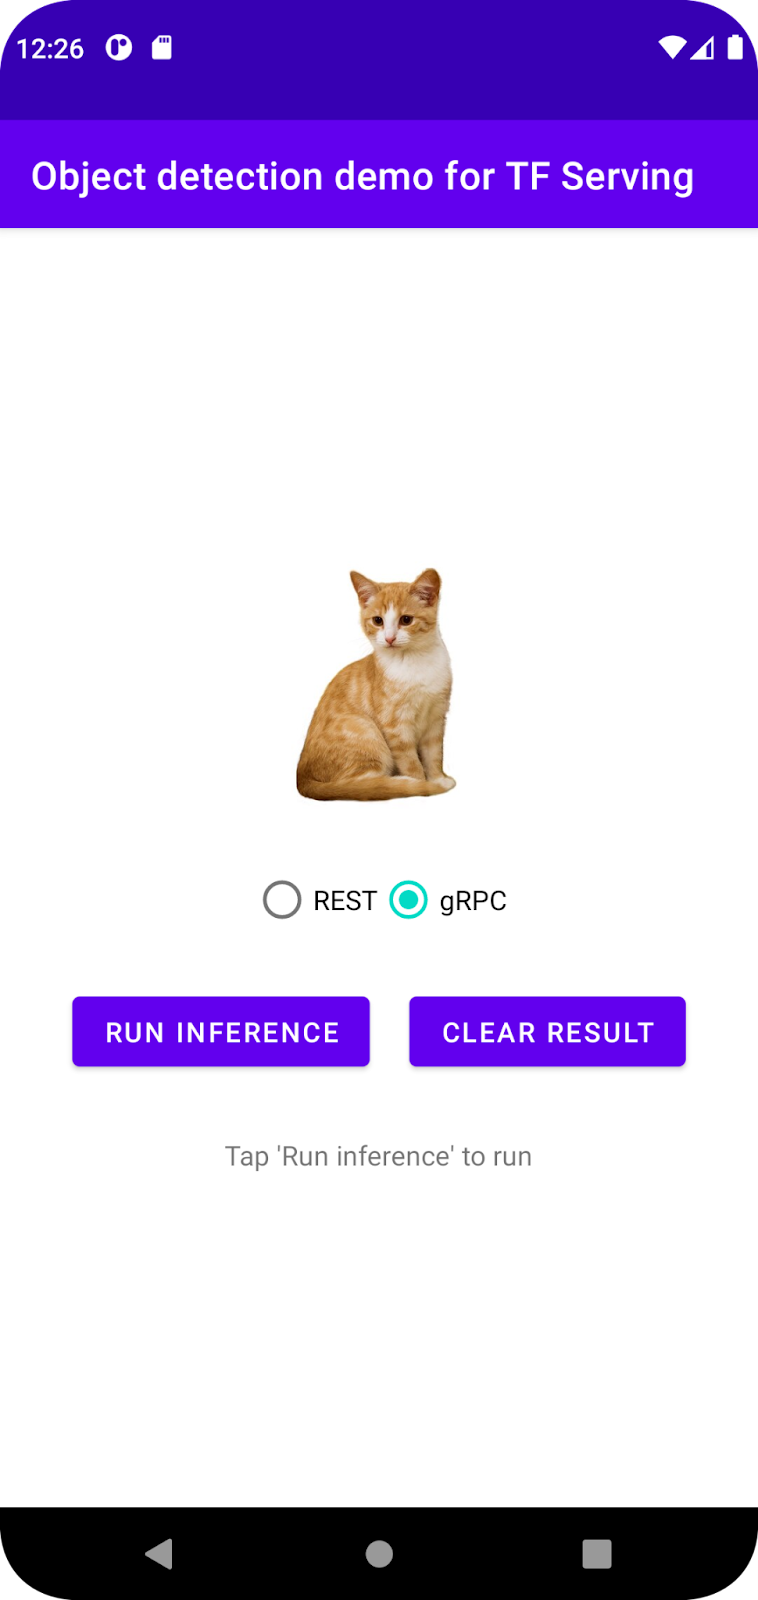
Şu anda Run inference'ı (Çıkarım çalıştır) tıkladığınızda hiçbir şey olmaz. Bunun nedeni, arka uçla henüz iletişim kurulamamasıdır.
5. TensorFlow Serving ile nesne algılama modeli dağıtma
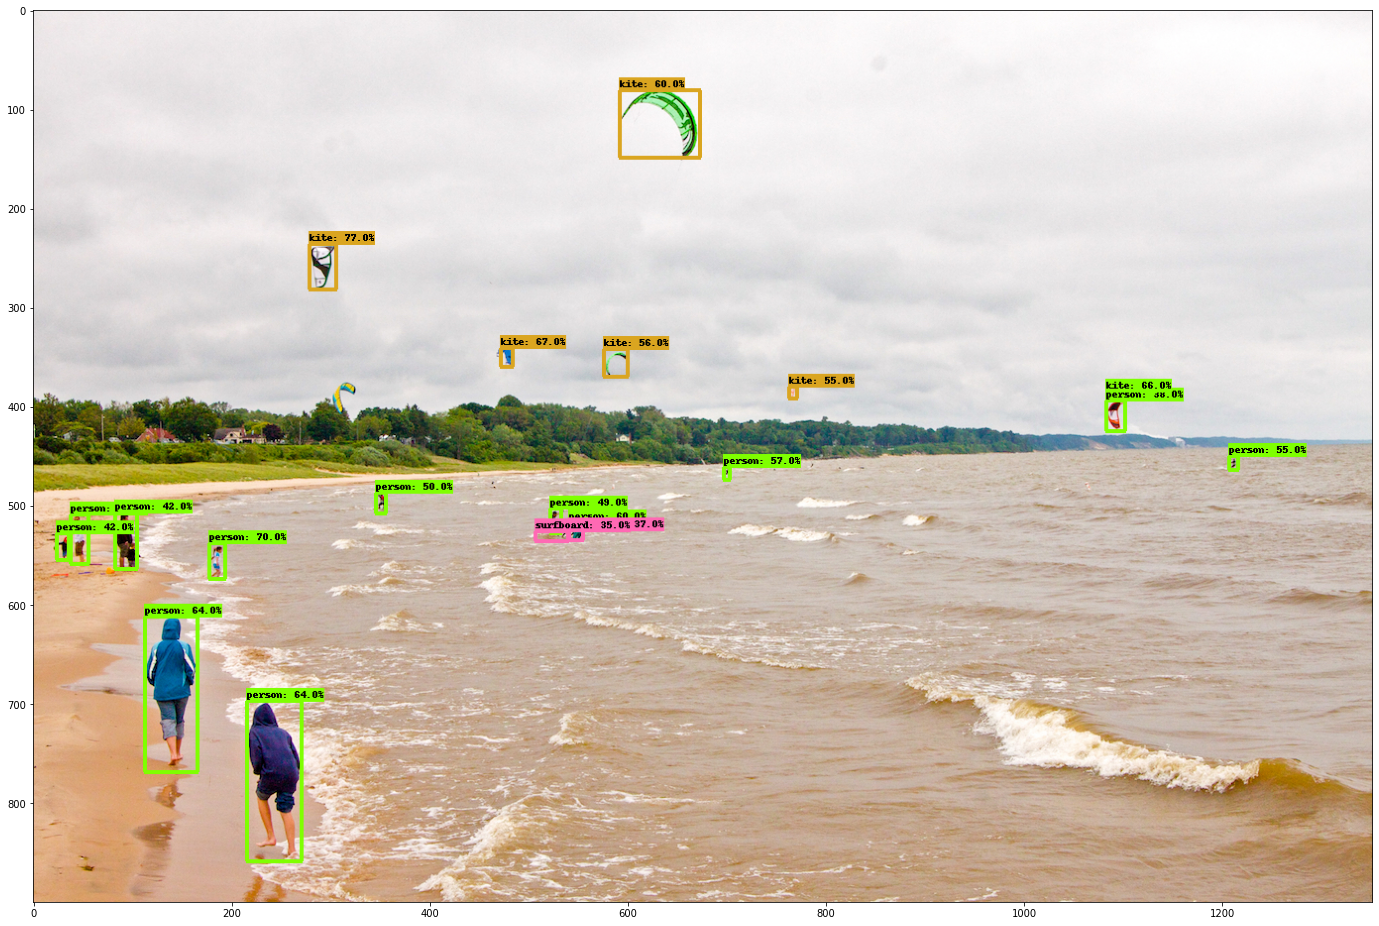
Nesne algılama, çok yaygın bir makine öğrenimi görevidir. Amacı, görüntülerdeki nesneleri algılamak, yani nesnelerin olası kategorilerini ve etraflarındaki sınırlayıcı kutuları tahmin etmektir. Algılama sonucuna bir örnek:
Google, TensorFlow Hub'da önceden eğitilmiş çeşitli modeller yayınlamıştır. Listenin tamamını görmek için object_detection sayfasını ziyaret edin. Bu codelab'de, çalıştırmak için GPU kullanmanız gerekmeyecek şekilde nispeten hafif olan SSD MobileNet V2 FPNLite 320x320 modelini kullanacaksınız.
Nesne algılama modelini TensorFlow Serving ile dağıtmak için:
- Model dosyasını indirin.
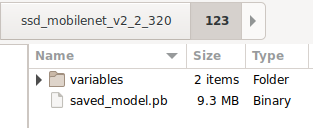
- İndirilen
.tar.gzdosyasını 7-Zip gibi bir sıkıştırma açma aracıyla açın. ssd_mobilenet_v2_2_320klasörü oluşturun ve bu klasörün içinde123alt klasörünü oluşturun.- Ayıklanan
variablesklasörünü vesaved_model.pbdosyasını123alt klasörüne yerleştirin.
ssd_mobilenet_v2_2_320 klasörünü SavedModel klasörü olarak adlandırabilirsiniz. 123, örnek bir sürüm numarasıdır. İsterseniz başka bir numara seçebilirsiniz.
Klasör yapısı aşağıdaki resimdeki gibi olmalıdır:
TensorFlow Serving'i başlatma
- Terminalinizde Docker ile TensorFlow Serving'i başlatın ancak
PATH/TO/SAVEDMODELyer tutucusunu bilgisayarınızdakissd_mobilenet_v2_2_320klasörünün mutlak yoluyla değiştirin.
docker pull tensorflow/serving

docker run -it --rm -p 8500:8500 -p 8501:8501 -v "PATH/TO/SAVEDMODEL:/models/ssd_mobilenet_v2_2" -e MODEL_NAME=ssd_mobilenet_v2_2 tensorflow/serving
Docker, önce TensorFlow Serving görüntüsünü otomatik olarak indirir. Bu işlem bir dakika sürer. Ardından TensorFlow Serving başlatılmalıdır. Günlük, aşağıdaki kod snippet'i gibi görünmelidir:
2022-02-25 06:01:12.513231: I external/org_tensorflow/tensorflow/cc/saved_model/loader.cc:206] Restoring SavedModel bundle.
2022-02-25 06:01:12.585012: I external/org_tensorflow/tensorflow/core/platform/profile_utils/cpu_utils.cc:114] CPU Frequency: 3000000000 Hz
2022-02-25 06:01:13.395083: I external/org_tensorflow/tensorflow/cc/saved_model/loader.cc:190] Running initialization op on SavedModel bundle at path: /models/ssd_mobilenet_v2_2/123
2022-02-25 06:01:13.837562: I external/org_tensorflow/tensorflow/cc/saved_model/loader.cc:277] SavedModel load for tags { serve }; Status: success: OK. Took 1928700 microseconds.
2022-02-25 06:01:13.877848: I tensorflow_serving/servables/tensorflow/saved_model_warmup_util.cc:59] No warmup data file found at /models/ssd_mobilenet_v2_2/123/assets.extra/tf_serving_warmup_requests
2022-02-25 06:01:13.929844: I tensorflow_serving/core/loader_harness.cc:87] Successfully loaded servable version {name: ssd_mobilenet_v2_2 version: 123}
2022-02-25 06:01:13.985848: I tensorflow_serving/model_servers/server_core.cc:486] Finished adding/updating models
2022-02-25 06:01:13.985987: I tensorflow_serving/model_servers/server.cc:367] Profiler service is enabled
2022-02-25 06:01:13.988994: I tensorflow_serving/model_servers/server.cc:393] Running gRPC ModelServer at 0.0.0.0:8500 ...
[warn] getaddrinfo: address family for nodename not supported
2022-02-25 06:01:14.033872: I tensorflow_serving/model_servers/server.cc:414] Exporting HTTP/REST API at:localhost:8501 ...
[evhttp_server.cc : 245] NET_LOG: Entering the event loop ...
6. Android uygulamasını REST üzerinden TensorFlow Serving'e bağlama
Arka uç artık hazır. Bu nedenle, görüntülerdeki nesneleri algılamak için TensorFlow Serving'e istemci istekleri gönderebilirsiniz. TensorFlow Serving'e istek göndermenin iki yolu vardır:
- REST
- gRPC
REST üzerinden istek gönderme ve yanıt alma
Üç basit adım vardır:
- REST isteğini oluşturun.
- REST isteğini TensorFlow Serving'e gönderin.
- Tahmin edilen sonucu REST yanıtından çıkarın ve kullanıcı arayüzünü oluşturun.
Bu hedeflere MainActivity.java. içinde ulaşacaksınız.
REST isteğini oluşturma
Şu anda MainActivity.java dosyasında boş bir createRESTRequest() işlevi var. REST isteği oluşturmak için bu işlevi uygularsınız.
private Request createRESTRequest() {
}
TensorFlow Serving, kullandığınız SSD MobileNet modeli için görüntü tensörünü içeren bir POST isteği bekler. Bu nedenle, görüntünün her pikselinden RGB değerlerini bir diziye çıkarmanız ve ardından diziyi isteğin yükü olan bir JSON'a sarmalamanız gerekir.
- Bu kodu
createRESTRequest()işlevine ekleyin:
//Create the REST request.
int[] inputImg = new int[INPUT_IMG_HEIGHT * INPUT_IMG_WIDTH];
int[][][][] inputImgRGB = new int[1][INPUT_IMG_HEIGHT][INPUT_IMG_WIDTH][3];
inputImgBitmap.getPixels(inputImg, 0, INPUT_IMG_WIDTH, 0, 0, INPUT_IMG_WIDTH, INPUT_IMG_HEIGHT);
int pixel;
for (int i = 0; i < INPUT_IMG_HEIGHT; i++) {
    for (int j = 0; j < INPUT_IMG_WIDTH; j++) {
    // Extract RBG values from each pixel; alpha is ignored
    pixel = inputImg[i * INPUT_IMG_WIDTH + j];
    inputImgRGB[0][i][j][0] = ((pixel >> 16) & 0xff);
    inputImgRGB[0][i][j][1] = ((pixel >> 8) & 0xff);
    inputImgRGB[0][i][j][2] = ((pixel) & 0xff);
    }
}

RequestBody requestBody =
    RequestBody.create("{\"instances\": " + Arrays.deepToString(inputImgRGB) + "}", JSON);

Request request =
    new Request.Builder()
        .url("http://" + SERVER + ":" + REST_PORT + "/v1/models/" + MODEL_NAME + ":predict")
        .post(requestBody)
        .build();

return request;
REST isteğini TensorFlow Serving'e gönderme
Uygulama, kullanıcının TensorFlow Serving ile iletişim kurmak için REST veya gRPC'yi seçmesine olanak tanır. Bu nedenle, onClick(View view) dinleyicisinde iki dal vardır.
predictButton.setOnClickListener(
    new View.OnClickListener() {
        @Override
        public void onClick(View view) {
            if (requestRadioGroup.getCheckedRadioButtonId() == R.id.rest) {
                // TODO: REST request
            }
            else {

            }
        }
    }
)
- İsteği TensorFlow Serving'e göndermek için OkHttp'yi kullanmak üzere bu kodu
onClick(View view)dinleyicisinin REST dalına ekleyin:
// Send the REST request.
Request request = createRESTRequest();
try {
    client =
        new OkHttpClient.Builder()
            .connectTimeout(20, TimeUnit.SECONDS)
            .writeTimeout(20, TimeUnit.SECONDS)
            .readTimeout(20, TimeUnit.SECONDS)
            .callTimeout(20, TimeUnit.SECONDS)
            .build();
    Response response = client.newCall(request).execute();
    JSONObject responseObject = new JSONObject(response.body().string());
    postprocessRESTResponse(responseObject);
} catch (IOException | JSONException e) {
    Log.e(TAG, e.getMessage());
    responseTextView.setText(e.getMessage());
    return;
}
TensorFlow Serving'den gelen REST yanıtını işleme
SSD MobileNet modeli, aşağıdakiler de dahil olmak üzere bir dizi sonuç döndürür:
num_detections: algılama sayısıdetection_scores: algılama puanlarıdetection_classes: algılama sınıfı dizinidetection_boxes: sınırlayıcı kutu koordinatları
Yanıtı işlemek için postprocessRESTResponse() işlevini uygularsınız.
private void postprocessRESTResponse(Predict.PredictResponse response) {

}
- Bu kodu
postprocessRESTResponse()işlevine ekleyin:
// Process the REST response.
JSONArray predictionsArray = responseObject.getJSONArray("predictions");
//You only send one image, so you directly extract the first element.
JSONObject predictions = predictionsArray.getJSONObject(0);
// Argmax
int maxIndex = 0;
JSONArray detectionScores = predictions.getJSONArray("detection_scores");
for (int j = 0; j < predictions.getInt("num_detections"); j++) {
    maxIndex =
        detectionScores.getDouble(j) > detectionScores.getDouble(maxIndex + 1) ? j : maxIndex;
}
int detectionClass = predictions.getJSONArray("detection_classes").getInt(maxIndex);
JSONArray boundingBox = predictions.getJSONArray("detection_boxes").getJSONArray(maxIndex);
double ymin = boundingBox.getDouble(0);
double xmin = boundingBox.getDouble(1);
double ymax = boundingBox.getDouble(2);
double xmax = boundingBox.getDouble(3);
displayResult(detectionClass, (float) ymin, (float) xmin, (float) ymax, (float) xmax);
Şimdi, son işlem işlevi yanıttan tahmin edilen değerleri çıkarır, nesnenin en olası kategorisini ve sınırlayıcı kutu köşelerinin koordinatlarını belirler ve son olarak algılama sınırlayıcı kutusunu kullanıcı arayüzünde oluşturur.
Çalıştırın
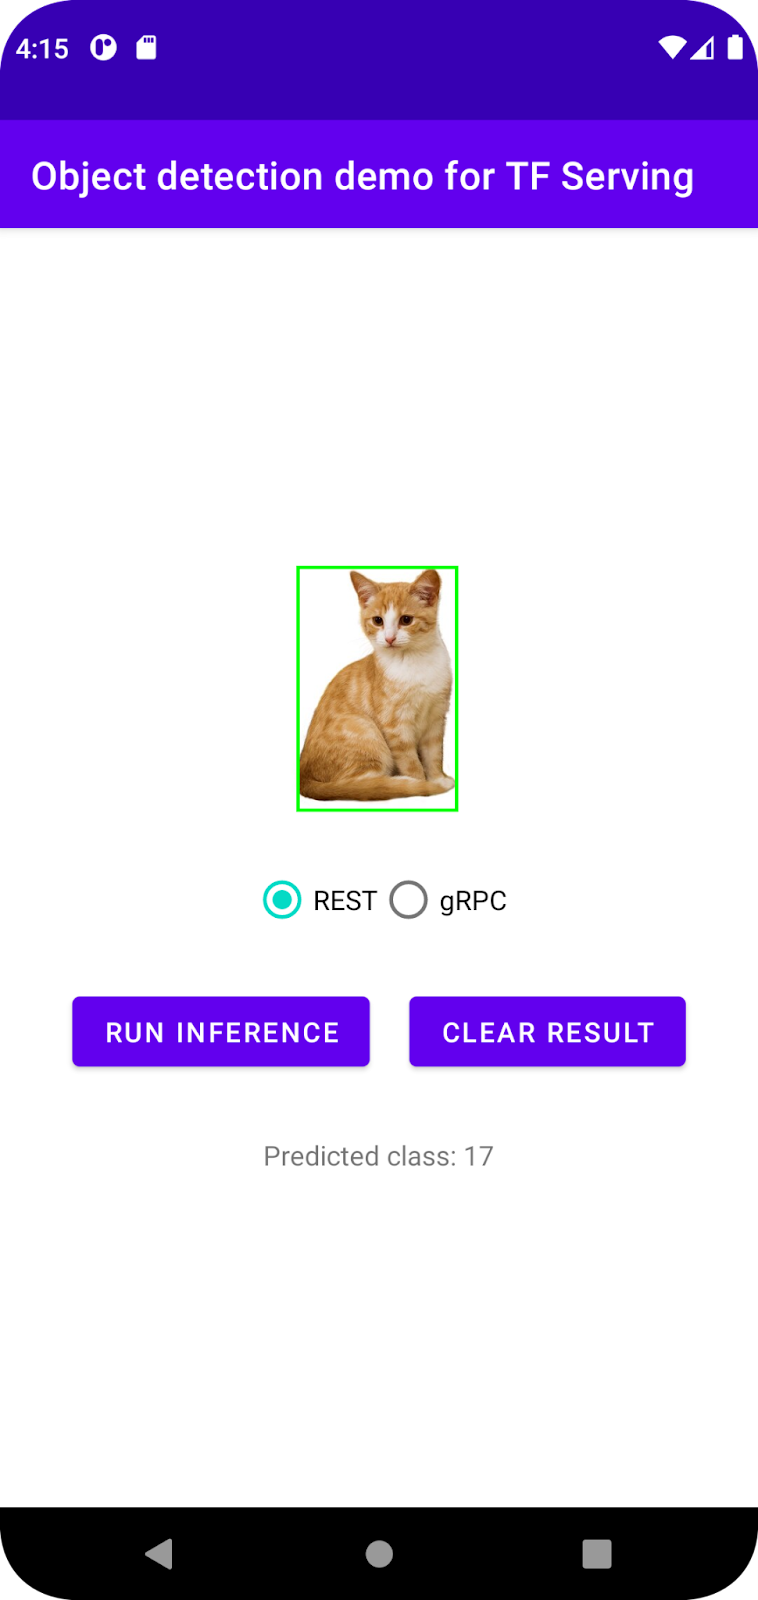
- Gezinme menüsünde "Uygulama"yı çalıştır'ı tıklayın ve uygulamanın yüklenmesini bekleyin.
- REST > Run inference'ı (REST > Çıkarım çalıştırma) seçin.
Uygulamanın kedinin sınırlayıcı kutusunu oluşturması ve nesne kategorisi olarak 17 simgesini göstermesi birkaç saniye sürer. Bu simge, COCO veri kümesindeki cat nesnesine karşılık gelir.
7. Android uygulamasını gRPC aracılığıyla TensorFlow Serving'e bağlama
TensorFlow Serving, REST'in yanı sıra gRPC'yi de destekler.
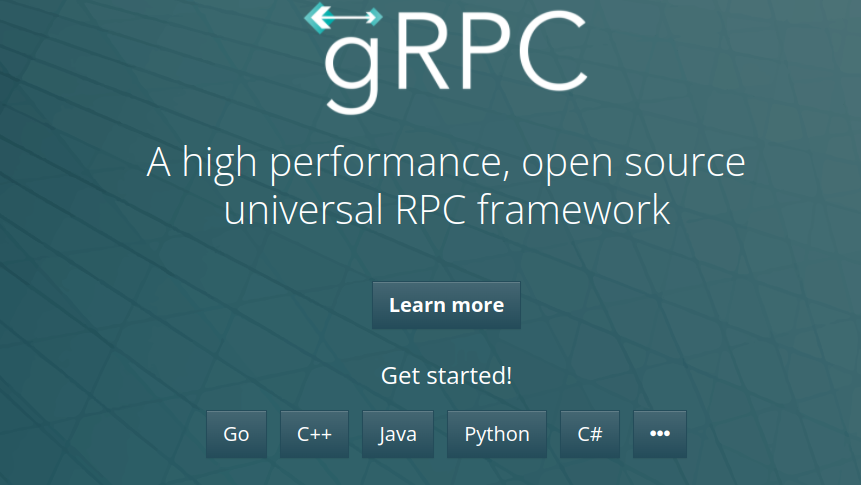
gRPC, herhangi bir ortamda çalışabilen modern, açık kaynaklı ve yüksek performanslı bir Uzak Prosedür Çağrısı (RPC) çerçevesidir. Yük dengeleme, izleme, sağlık kontrolü ve kimlik doğrulama için takılabilir destekle veri merkezlerindeki ve veri merkezleri arasındaki hizmetleri verimli bir şekilde bağlayabilir. gRPC'nin pratikte REST'ten daha iyi performans gösterdiği gözlemlenmiştir.
gRPC ile istek gönderme ve yanıt alma
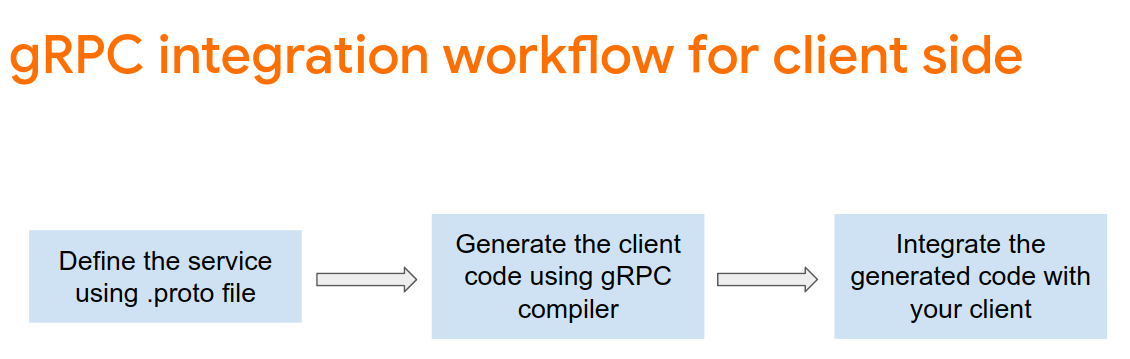
Dört basit adım vardır:
- [İsteğe bağlı] gRPC istemci taslağı kodunu oluşturun.
- gRPC isteğini oluşturun.
- gRPC isteğini TensorFlow Serving'e gönderin.
- Tahmin edilen sonucu gRPC yanıtından çıkarın ve kullanıcı arayüzünü oluşturun.
Bu hedeflere MainActivity.java. içinde ulaşacaksınız.
İsteğe bağlı: gRPC istemci taslağı kodunu oluşturma
TensorFlow Serving ile gRPC'yi kullanmak için gRPC iş akışını uygulamanız gerekir. Ayrıntılar hakkında daha fazla bilgi edinmek için gRPC belgelerine bakın.
TensorFlow Serving ve TensorFlow, .proto dosyalarını sizin için tanımlar. TensorFlow ve TensorFlow Serving 2.8'den itibaren şu .proto dosyaları gereklidir:
tensorflow/core/example/example.proto
tensorflow/core/example/feature.proto
tensorflow/core/protobuf/struct.proto
tensorflow/core/protobuf/saved_object_graph.proto
tensorflow/core/protobuf/saver.proto
tensorflow/core/protobuf/trackable_object_graph.proto
tensorflow/core/protobuf/meta_graph.proto
tensorflow/core/framework/node_def.proto
tensorflow/core/framework/attr_value.proto
tensorflow/core/framework/function.proto
tensorflow/core/framework/types.proto
tensorflow/core/framework/tensor_shape.proto
tensorflow/core/framework/full_type.proto
tensorflow/core/framework/versions.proto
tensorflow/core/framework/op_def.proto
tensorflow/core/framework/graph.proto
tensorflow/core/framework/tensor.proto
tensorflow/core/framework/resource_handle.proto
tensorflow/core/framework/variable.proto

tensorflow_serving/apis/inference.proto
tensorflow_serving/apis/classification.proto
tensorflow_serving/apis/predict.proto
tensorflow_serving/apis/regression.proto
tensorflow_serving/apis/get_model_metadata.proto
tensorflow_serving/apis/input.proto
tensorflow_serving/apis/prediction_service.proto
tensorflow_serving/apis/model.proto
- Sap oluşturmak için bu kodu
app/build.gradledosyasına ekleyin.
apply plugin: 'com.google.protobuf'

protobuf {
    protoc { artifact = 'com.google.protobuf:protoc:3.11.0' }
    plugins {
        grpc { artifact = 'io.grpc:protoc-gen-grpc-java:1.29.0'
        }
    }
    generateProtoTasks {
        all().each { task ->
            task.builtins {
                java { option 'lite' }
            }
            task.plugins {
                grpc { option 'lite' }
            }
        }
    }
}
gRPC isteğini oluşturma
REST isteğine benzer şekilde, gRPC isteğini createGRPCRequest() işlevinde oluşturursunuz.
private Request createGRPCRequest() {

}
- Bu kodu
createGRPCRequest()işlevine ekleyin:
if (stub == null) {
  channel = ManagedChannelBuilder.forAddress(SERVER, GRPC_PORT).usePlaintext().build();
  stub = PredictionServiceGrpc.newBlockingStub(channel);
}

Model.ModelSpec.Builder modelSpecBuilder = Model.ModelSpec.newBuilder();
modelSpecBuilder.setName(MODEL_NAME);
modelSpecBuilder.setVersion(Int64Value.of(MODEL_VERSION));
modelSpecBuilder.setSignatureName(SIGNATURE_NAME);

Predict.PredictRequest.Builder builder = Predict.PredictRequest.newBuilder();
builder.setModelSpec(modelSpecBuilder);

TensorProto.Builder tensorProtoBuilder = TensorProto.newBuilder();
tensorProtoBuilder.setDtype(DataType.DT_UINT8);
TensorShapeProto.Builder tensorShapeBuilder = TensorShapeProto.newBuilder();
tensorShapeBuilder.addDim(TensorShapeProto.Dim.newBuilder().setSize(1));
tensorShapeBuilder.addDim(TensorShapeProto.Dim.newBuilder().setSize(INPUT_IMG_HEIGHT));
tensorShapeBuilder.addDim(TensorShapeProto.Dim.newBuilder().setSize(INPUT_IMG_WIDTH));
tensorShapeBuilder.addDim(TensorShapeProto.Dim.newBuilder().setSize(3));
tensorProtoBuilder.setTensorShape(tensorShapeBuilder.build());
int[] inputImg = new int[INPUT_IMG_HEIGHT * INPUT_IMG_WIDTH];
inputImgBitmap.getPixels(inputImg, 0, INPUT_IMG_WIDTH, 0, 0, INPUT_IMG_WIDTH, INPUT_IMG_HEIGHT);
int pixel;
for (int i = 0; i < INPUT_IMG_HEIGHT; i++) {
    for (int j = 0; j < INPUT_IMG_WIDTH; j++) {
    // Extract RBG values from each pixel; alpha is ignored.
    pixel = inputImg[i * INPUT_IMG_WIDTH + j];
    tensorProtoBuilder.addIntVal((pixel >> 16) & 0xff);
    tensorProtoBuilder.addIntVal((pixel >> 8) & 0xff);
    tensorProtoBuilder.addIntVal((pixel) & 0xff);
    }
}
TensorProto tensorProto = tensorProtoBuilder.build();

builder.putInputs("input_tensor", tensorProto);

builder.addOutputFilter("num_detections");
builder.addOutputFilter("detection_boxes");
builder.addOutputFilter("detection_classes");
builder.addOutputFilter("detection_scores");

return builder.build();
gRPC isteğini TensorFlow Serving'e gönderme
Artık onClick(View view) dinleyicisini tamamlayabilirsiniz.
predictButton.setOnClickListener(
    new View.OnClickListener() {
        @Override
        public void onClick(View view) {
            if (requestRadioGroup.getCheckedRadioButtonId() == R.id.rest) {

            }
            else {
                // TODO: gRPC request
            }
        }
    }
)
- Bu kodu gRPC dalına ekleyin:
try {
    Predict.PredictRequest request = createGRPCRequest();
    Predict.PredictResponse response = stub.predict(request);
    postprocessGRPCResponse(response);
} catch (Exception e) {
    Log.e(TAG, e.getMessage());
    responseTextView.setText(e.getMessage());
    return;
}
TensorFlow Serving'den gelen gRPC yanıtını işleme
gRPC'ye benzer şekilde, yanıtı işlemek için postprocessGRPCResponse() işlevini uygularsınız.
private void postprocessGRPCResponse(Predict.PredictResponse response) {

}
- Bu kodu
postprocessGRPCResponse()işlevine ekleyin:
// Process the response.
float numDetections = response.getOutputsMap().get("num_detections").getFloatValList().get(0);
List<Float> detectionScores =    response.getOutputsMap().get("detection_scores").getFloatValList();
int maxIndex = 0;
for (int j = 0; j < numDetections; j++) {
    maxIndex = detectionScores.get(j) > detectionScores.get(maxIndex + 1) ? j : maxIndex;
}
Float detectionClass =    response.getOutputsMap().get("detection_classes").getFloatValList().get(maxIndex);
List<Float> boundingBoxValues =    response.getOutputsMap().get("detection_boxes").getFloatValList();
float ymin = boundingBoxValues.get(maxIndex * 4);
float xmin = boundingBoxValues.get(maxIndex * 4 + 1);
float ymax = boundingBoxValues.get(maxIndex * 4 + 2);
float xmax = boundingBoxValues.get(maxIndex * 4 + 3);
displayResult(detectionClass.intValue(), ymin, xmin, ymax, xmax);
Artık son işleme işlevi, yanıttan tahmin edilen değerleri çıkarabilir ve algılama sınırlayıcı kutusunu kullanıcı arayüzünde oluşturabilir.
Çalıştırın
- Gezinme menüsünde "Uygulama"yı çalıştır'ı tıklayın ve uygulamanın yüklenmesini bekleyin.
- gRPC > Çıkarım çalıştırma'yı seçin.
Uygulamanın kedinin sınırlayıcı kutusunu oluşturması ve nesnenin kategorisi olarak 17 simgesini göstermesi birkaç saniye sürer. Bu simge, COCO veri kümesindeki cat kategorisine karşılık gelir.
8. Tebrikler
Uygulamanıza nesne algılama özellikleri eklemek için TensorFlow Serving'i kullandınız.