
1. Overview
This codelab will give you a quick tour of a few machine learning APIs. You'll use:
- Cloud Vision to understand the content of an image
- Cloud Speech-to-Text to transcribe audio to text
- Cloud Translation to translate an arbitrary string to any supported language
- Cloud Natural Language to extract information from text
What you'll build
You'll construct a pipeline that compares an audio recording with an image and determines their relevance to each other. Here is a sneak peek of how you'll accomplish that:
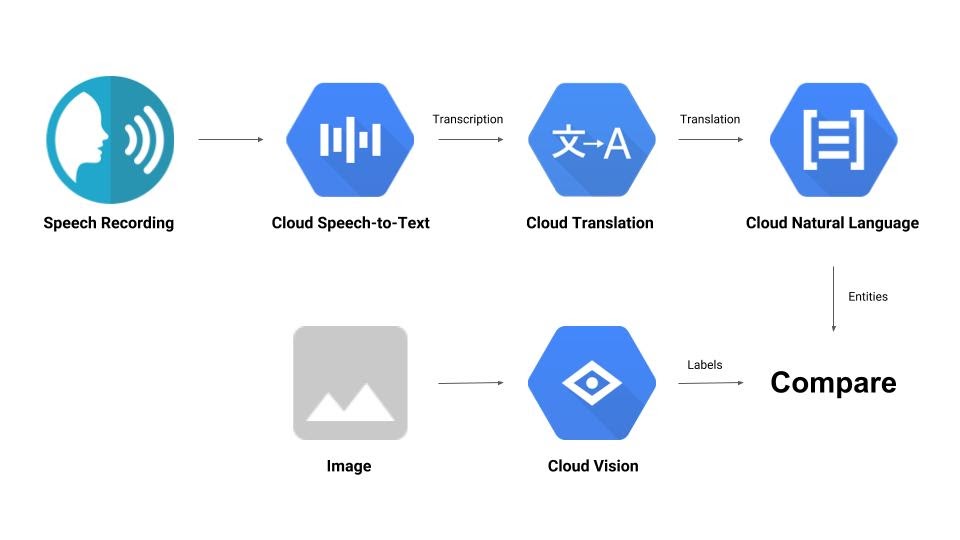
What you'll learn
- How to use the Vision, Speech-to-Text, Translation and Natural Language APIs
- Where to find code samples
What you'll need
2. Setup and Requirements
Self-paced environment setup
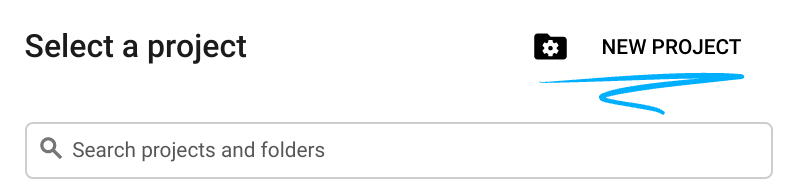
- Sign in to Cloud Console and create a new project or reuse an existing one. If you don't already have a Gmail or Google Workspace account, you must create one.

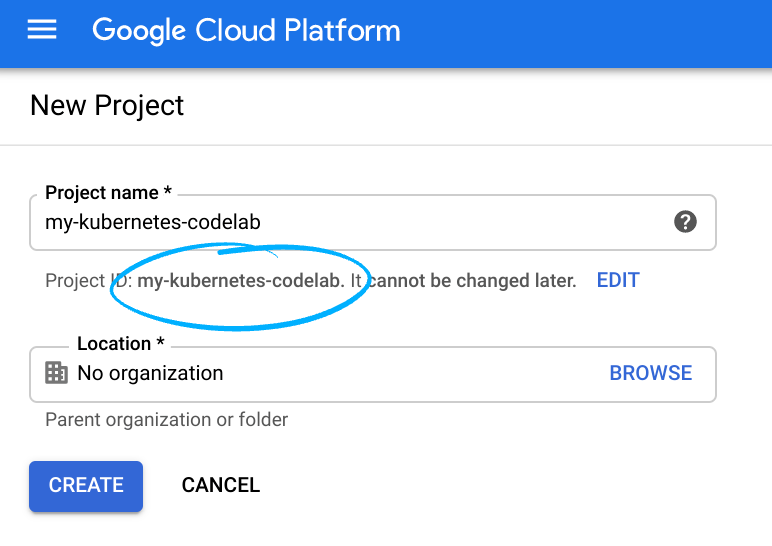
Remember the project ID, a unique name across all Google Cloud projects (the name above has already been taken and will not work for you, sorry!). It will be referred to later in this codelab as PROJECT_ID.
- Next, you'll need to enable billing in Cloud Console in order to use Google Cloud resources.
Running through this codelab shouldn't cost much, if anything at all. Be sure to to follow any instructions in the "Cleaning up" section which advises you how to shut down resources so you don't incur billing beyond this tutorial. New users of Google Cloud are eligible for the $300 USD Free Trial program.
Enable the APIs
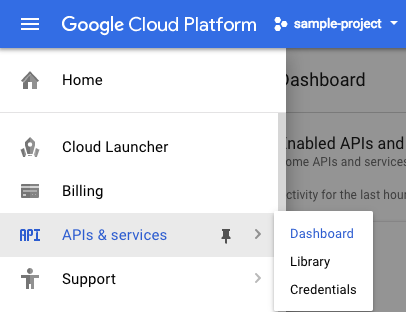
You can click on this link to enable all the necessary APIs. After you do so, feel free to ignore instructions for setting up authentication; we'll do that in a moment. Alternatively, you can enable each API individually. To do so, click on the menu icon in the top left of the screen.

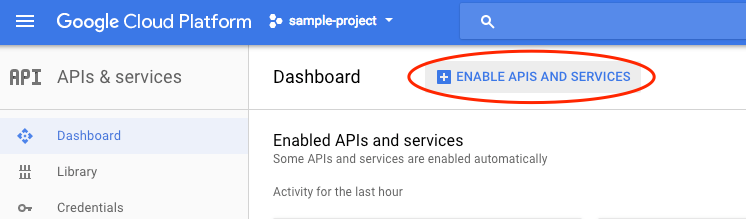
Select APIs & services from the drop down and click on Dashboard
Click on Enable APIs and services.
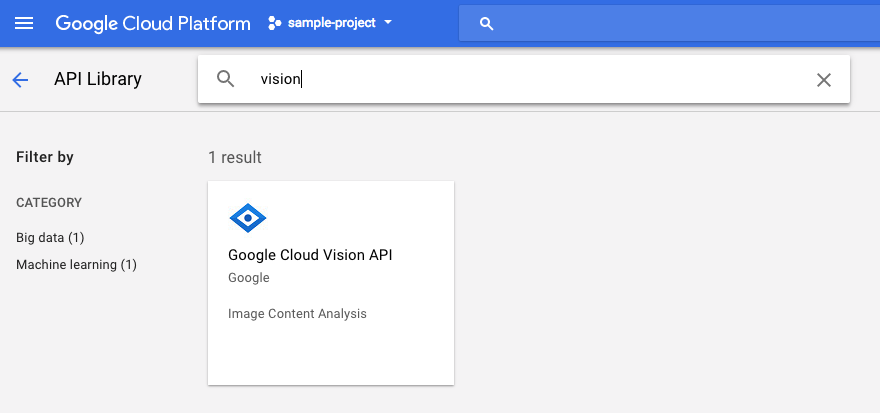
Then, search for "vision" in the search box. Click on Google Cloud Vision API:
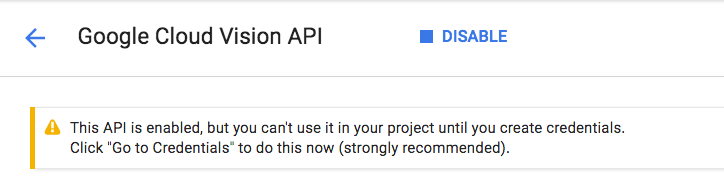
Click Enable to enable the Cloud Vision API:

Wait for a few seconds for it to enable. You will see this once it's enabled:
Repeat the same process to enable the Cloud Speech, Cloud Translation and Cloud Natural Language APIs.
Cloud Shell
Google Cloud Shell is a command line environment running in the Cloud. This Debian-based virtual machine is loaded with all the development tools you'll need (gcloud, bq, git and others) and offers a persistent 5GB home directory. We'll use Cloud Shell to create our request to the machine learning APIs.
To get started with Cloud Shell, click on the "Activate Google Cloud Shell"  icon in the top right hand corner of the header bar

A Cloud Shell session opens inside a new frame at the bottom of the console and displays a command-line prompt. Wait until the user@project:~$ prompt appears.
Optional: Code Editor
Depending with your comfort with the command line, you may want to click on "Launch Code Editor"  icon in the top right hand corner of the Cloud Shell bar

Service Account
You will need a service account to authenticate. To make one, replace [NAME] with desired name of service account and run the following command in Cloud Shell:
gcloud iam service-accounts create [NAME]
Now you'll need to generate a key to use that service account. Replace [FILE_NAME] with desired name of key, [NAME] with the service account name from above and [PROJECT_ID] with the ID of your project. The following command will create and download the key as [FILE_NAME].json:
gcloud iam service-accounts keys create [FILE_NAME].json --iam-account [NAME]@[PROJECT_ID].iam.gserviceaccount.com
To use the service account, you'll have to set the variable GOOGLE_APPLICATION_CREDENTIALS to the path of the key. To do this, run the following command after replacing [PATH_TO_FILE] and [FILE_NAME]:
export GOOGLE_APPLICATION_CREDENTIALS=[PATH_TO_FILE]/[FILE_NAME].json
3. Cloud Vision
Python client
You'll need the Python client for Cloud Vision. To install, type the following into cloud shell:
pip install --upgrade google-cloud-vision --user
Let's try it
Let's take a look at the code samples for the Cloud Vision API. We're interested in finding out what's in a specified image. detect.py seems to be useful for this so let's grab that. One way is to copy the contents of detect.py, create a new file in Cloud Shell called vision.py and paste all the code into vision.py. You can do this manually in Cloud Shell code editor or you can run this curl command in Cloud Shell:
curl https://raw.githubusercontent.com/GoogleCloudPlatform/python-docs-samples/master/vision/cloud-client/detect/detect.py -o vision.py
After you've done that, use the API by running the following in Cloud Shell:
python vision.py labels-uri gs://cloud-samples-data/ml-api-codelab/birds.jpg
You should see an output about birds and ostriches as this was the image analysed: https://storage.googleapis.com/cloud-samples-data/ml-api-codelab/birds.jpg
What's going on?
You passed 2 arguments to vision.py:
- labels-uri selects the
detect_labels_uri()function to run - gs://cloud-samples-data/ml-api-codelab/birds.jpg is the location of an image on Google Cloud Storage and is passed as uri into
detect_labels_uri()
Let's take a closer look at detect_labels_uri(). Note the additional comments that have been inserted.
def detect_labels_uri(uri):
    """Detects labels in the file located in Google Cloud Storage or on the
    Web."""
    # relevant import from above
    # from google.cloud import vision

    # create ImageAnnotatorClient object
    client = vision.ImageAnnotatorClient()

    # create Image object
    image = vision.types.Image()

    # specify location of image
    image.source.image_uri = uri

    # get label_detection response by passing image to client
    response = client.label_detection(image=image)

    # get label_annotations portion of response
    labels = response.label_annotations
    print('Labels:')

    for label in labels:
        # print the label descriptions
        print(label.description)
4. Cloud Speech-to-Text
Python client
You'll need the Python client for Cloud Speech-to-Text. To install, type the following into cloud shell:
sudo pip install --upgrade google-cloud-speech
Let's try it
Let's head to the code samples for Cloud Speech-to-Text. We're interested in transcribing speech audio. transcribe.py looks to be a good place to get started so let's use that. Copy the contents of transcribe.py, create a new file in Cloud Shell called speech2text.py and paste all the code into speech2text.py. You can do this manually in Cloud Shell code editor or you can run this curl command in Cloud Shell:
curl https://raw.githubusercontent.com/GoogleCloudPlatform/python-docs-samples/master/speech/cloud-client/transcribe.py -o speech2text.py
After you've done that, use the API by running the following in Cloud Shell:
python speech2text.py gs://cloud-samples-data/ml-api-codelab/tr-ostrich.wav
There should be errors complaining about the wrong encoding and sample hertz rate. Don't worry, go into transcribe_gcs()in the code and delete encoding and sampe_hertz_rate settings from RecognitionConfig(). While you're at it, change the language code to ‘tr-TR' as tr-ostrich.wav is a speech recording in Turkish.
config = types.RecognitionConfig(language_code='tr-TR')
Now, run speech2text.py again. The output should be some Turkish text as this was the audio analysed: https://storage.googleapis.com/cloud-samples-data/ml-api-codelab/tr-ostrich.wav
What's going on?
You passed gs://cloud-samples-data/ml-api-codelab/tr-ostrich.wav, the location of an audio file on Google Cloud Storage to speech2text.py, which is then passed as gcs_uri into transcribe_uri()
Let's take a closer look at our modified transcribe_uri().
def transcribe_gcs(gcs_uri):
    """Transcribes the audio file specified by the gcs_uri."""

    from google.cloud import speech
    # enums no longer used
    # from google.cloud.speech import enums
    from google.cloud.speech import types

    # create ImageAnnotatorClient object
    client = speech.SpeechClient()

    # specify location of speech
    audio = types.RecognitionAudio(uri=gcs_uri)

    # set language to Turkish
    # removed encoding and sample_rate_hertz
    config = types.RecognitionConfig(language_code='tr-TR')

    # get response by passing config and audio settings to client
    response = client.recognize(config, audio)

    # Each result is for a consecutive portion of the audio. Iterate through
    # them to get the transcripts for the entire audio file.
    for result in response.results:
        # The first alternative is the most likely one for this portion.
        # get the transcript of the first alternative
        print(u'Transcript: {}'.format(result.alternatives[0].transcript))
5. Cloud Translation
Python client
You'll need the Python client for Cloud Translation. To install, type the following into Cloud Shell:
sudo pip install --upgrade google-cloud-translate
Let's try it
Now let's check out the code samples for Cloud Translation. For the purpose of this codelab, we want to translate text to English. snippets.py looks like what we want. Copy the contents of snippets.py, create a new file in Cloud Shell called translate.py and paste all the code into translate.py. You can do this manually in Cloud Shell code editor or you can run this curl command in Cloud Shell:
curl https://raw.githubusercontent.com/GoogleCloudPlatform/python-docs-samples/master/translate/cloud-client/snippets.py -o translate.py
After you've done that, use the API by running the following in Cloud Shell:
python translate.py translate-text en '你有沒有帶外套'
The translation should be "Do you have a jacket?".
What's going on?
You passed 3 arguments to translate.py:
- translate-text selects the
translate_text()function to run - en is passed as target into
translate_text()and serves to specify the language to be translated to - ‘你有沒有帶外套' is the string to be translated and is passed as text into
translate_text()
Let's take a closer look at translate_text(). Note the comments that have been added.
def translate_text(target, text):
    """Translates text into the target language.

    Target must be an ISO 639-1 language code.
    See https://g.co/cloud/translate/v2/translate-reference#supported_languages
    """
    # relevant imports from above
    # from google.cloud import translate
    # import six

    # create Client object
    translate_client = translate.Client()

    # decode text if it's a binary type
    # six is a python 2 and 3 compatibility library
    if isinstance(text, six.binary_type):
        text = text.decode('utf-8')

    # get translation result by passing text and target language to client
    # Text can also be a sequence of strings, in which case this method
    # will return a sequence of results for each text.
    result = translate_client.translate(text, target_language=target)

    # print original text, translated text and detected original language
    print(u'Text: {}'.format(result['input']))
    print(u'Translation: {}'.format(result['translatedText']))
    print(u'Detected source language: {}'.format(
        result['detectedSourceLanguage']))
6. Cloud Natural Language
Python client
You'll need the Python client for Cloud Natural Language. To install, type the following into cloud shell:
sudo pip install --upgrade google-cloud-language
Let's try it
Finally, let's look at the code samples for the Cloud Natural Language API. We want to detect entities in the text. snippets.py seems to contain code that does that. Copy the contents of snippets.py, create a new file in Cloud Shell called natural_language.py and paste all the code into natural_language.py. You can do this manually in Cloud Shell code editor or you can run this curl command in Cloud Shell:
curl https://raw.githubusercontent.com/GoogleCloudPlatform/python-docs-samples/master/language/cloud-client/v1/snippets.py -o natural_language.py
After you've done that, use the API by running the following in Cloud Shell:
python natural_language.py entities-text 'where did you leave my bike'
The API should identify "bike" as an entity. Entities are can be proper nouns (public figures, landmarks, etc.) or common nouns (restaurant, stadium, etc.).
What's going on?
You passed 2 arguments to natural_language.py:
- entities-text selects the
entities_text()function to run - ‘where did you leave my bike' is the string to be analysed for entities and is passed as text into
entities_text()
Let's take a closer look at entities_text(). Note the new comments that have been inserted.
def entities_text(text):
    """Detects entities in the text."""
    # relevant imports from above
    # from google.cloud import language
    # from google.cloud.language import enums
    # from google.cloud.language import types
    # import six

    # create LanguageServiceClient object
    client = language.LanguageServiceClient()

    # decode text if it's a binary type
    # six is a python 2 and 3 compatibility library
    if isinstance(text, six.binary_type):
        text = text.decode('utf-8')

    # Instantiates a plain text document.
    document = types.Document(
        content=text,
        type=enums.Document.Type.PLAIN_TEXT)

    # Detects entities in the document. You can also analyze HTML with:
    #   document.type == enums.Document.Type.HTML
    entities = client.analyze_entities(document).entities

    # entity types from enums.Entity.Type
    entity_type = ('UNKNOWN', 'PERSON', 'LOCATION', 'ORGANIZATION',
                   'EVENT', 'WORK_OF_ART', 'CONSUMER_GOOD', 'OTHER')

    # print information for each entity found
    for entity in entities:
        print('=' * 20)
        print(u'{:<16}: {}'.format('name', entity.name))
        print(u'{:<16}: {}'.format('type', entity_type[entity.type]))
        print(u'{:<16}: {}'.format('metadata', entity.metadata))
        print(u'{:<16}: {}'.format('salience', entity.salience))
        print(u'{:<16}: {}'.format('wikipedia_url',
              entity.metadata.get('wikipedia_url', '-')))
7. Let's Integrate Them
Let's remind ourselves what you're building.
Now let's put everything together. Create a solution.py file; copy and paste detect_labels_uri(), transcribe_gcs(), translate_text() and entities_text() from previous steps into solution.py.
Import statements
Uncomment and move the import statements to the top. Note that both speech.types and language.types are being imported. This is going to cause conflict, so let's just remove them and change each individual occurrence of types in transcribe_gcs() and entities_text() to speech.types and language.types respectively. You should be left with:
from google.cloud import vision
from google.cloud import speech
from google.cloud import translate
from google.cloud import language
from google.cloud.language import enums
import six
Return results
Instead of printing, have the functions return the results. You should have something similar to:
# import statements

def detect_labels_uri(uri):
    # code

    # we only need the label descriptions
    label_descriptions = []
    for label in labels:
        label_descriptions.append(label.description)

    return label_descriptions

def transcribe_gcs(gcs_uri):
    # code

    # naive assumption that audio file is short
    return response.results[0].alternatives[0].transcript

def translate_text(target, text):
    # code

    # only interested in translated text
    return result['translatedText']

def entities_text(text):
    # code

    # we only need the entity names
    entity_names = []
    for entity in entities:
        entity_names.append(entity.name)

    return entity_names
Use the functions
After all that hard work, you get to call those functions. Go ahead, do it! Here's an example:
def compare_audio_to_image(audio, image):
    """Checks whether a speech audio is relevant to an image."""

    # speech audio -> text
    transcription = transcribe_gcs(audio)

    # text of any language -> english text
    translation = translate_text('en', transcription)

    # text -> entities
    entities = entities_text(translation)

    # image -> labels
    labels = detect_labels_uri(image)

    # naive check for whether entities intersect with labels
    has_match = False
    for entity in entities:
        if entity in labels:
            # print result for each match
            print('The audio and image both contain: {}'.format(entity))
            has_match = True

    # print if there are no matches
    if not has_match:
        print('The audio and image do not appear to be related.')
Support multiple languages
We previously hardcoded Turkish into transcribe_gcs(). Let's change that so the language is specifiable from compare_audio_to_image(). Here are the changes required:
def transcribe_gcs(language, gcs_uri):
    ...
    config = speech.types.RecognitionConfig(language_code=language)
def compare_audio_to_image(language, audio, image):
    transcription = transcribe_gcs(language, audio)
Try it
The final code can be found in solution.py of this GitHub repository. Here is a curl command to grab that:
curl https://raw.githubusercontent.com/googlecodelabs/integrating-ml-apis/master/solution.py -O
The version on GitHub contains argparse, which allows the following from command line:
python solution.py tr-TR gs://cloud-samples-data/ml-api-codelab/tr-ball.wav gs://cloud-samples-data/ml-api-codelab/football.jpg
For each item found, the code should output "The audio and image both contain: ". In the example above, it would be "The audio and image both contain: ball".
Bonus: try more
Here are more audio and image file locations to try.
8. Congratulations!
You've explored and integrated four machine learning APIs to determine whether a speech sample is talking about the provided image. This is just the beginning as there are many more ways for this pipeline to improve!
What we've covered
- Making requests to the Cloud Vision API
- Making requests to the Cloud Speech-to-Text API
- Making requests to the Cloud Translation API
- Making requests to the Cloud Natural Language API
- Using all of the above APIs together
Next Steps
- For better comparison of words, take a look at word2vec
- Check out the more in-depth codelabs on Vision API, Speech-to-Text API, Translation API and Natural Language API
- Try substituting Cloud Vision with Cloud Video intelligence
- Synthesise speech audio with Cloud Text-to-Speech API
- Learn how to upload objects to Cloud Storage