
1. 簡介


上次更新時間: 2021 年 9 月 13 日
正在收取款項!
在 Business Messages 中收集款項,你就能在對話平台中獲得全新商機。想像一下,潛在客戶向您詢問了想要進一步瞭解的產品。對方回答問題後,可以直接在對話中提供付款閘道,藉此完成交易。

哪些要素可以提供良好的付款體驗?
良好的付款體驗是能讓使用者以自己習慣的方式付款。
當使用者付款時,使用者會偏好偏好的付款方式,且付款方式與世界上其他地區更常見。透過 Business Messages,您可以與多個付款處理方整合,讓使用者享有最便利的操作體驗。
使用者完成付款流程後,您會想通知他們已成功收到付款。大部分付款處理方都順利完成成功或失敗的回呼,在付款流程完成後將 HTTP 要求傳送至您選擇的網址。
建構項目
在本程式碼研究室系列的上一節,您將擴充 Bonjour Meal 代理程式呈現產品目錄、建立購物車來新增和移除購物車的購物車,以及計算購物車的總價格。在本節中,您將進一步擴充代理程式,以便根據購物車內容處理付款。
在本程式碼研究室中,您的應用程式將
- 與 Stripe 付款閘道整合
- 允許使用者根據購物車價格完成付款流程
- 將對話內容傳回對話式,通知使用者付款狀態
執行步驟
- 整合 Stripe 付款處理方。
- 向 Stripe 提出要求以啟動付款工作階段。
- 處理 Stripe 的付款成功或失敗回應。
軟硬體需求
- 已註冊並獲準用於 Business Messages 的 GCP 專案
- 請前往開發人員網站,瞭解相關操作說明
- 搭載 Android 5 以上版本的裝置,或搭載 Google 地圖應用程式的 iOS 裝置
- 具備網頁應用程式程式設計經驗
- 已連上網際網路!
2. 新增依附元件
更新 requirements.txt
由於我們會與 Stripe 付款處理方整合,因此可以使用 Stripe Python 用戶端程式庫。將 stripe 新增至 requirements.txt,但不保留版本,藉此取得最新版本的依附元件。
您必須啟用此功能,才能讓 Google Cloud App Engine Python 執行階段納入條紋 Python 模組。
requirements.txt
...
stripe
...
準備 bopis/views.py
在 bopis/views.py 頂端,從 django.shortcuts 匯入 render 以及從 django.http 匯入 JsonResponse。此外,我們需要匯入 stripe,以支援呼叫 Stripe Python 用戶端程式庫。
...
from django.shortcuts import render
from django.http import JsonResponse
import stripe
...
3. 使用 Stripe
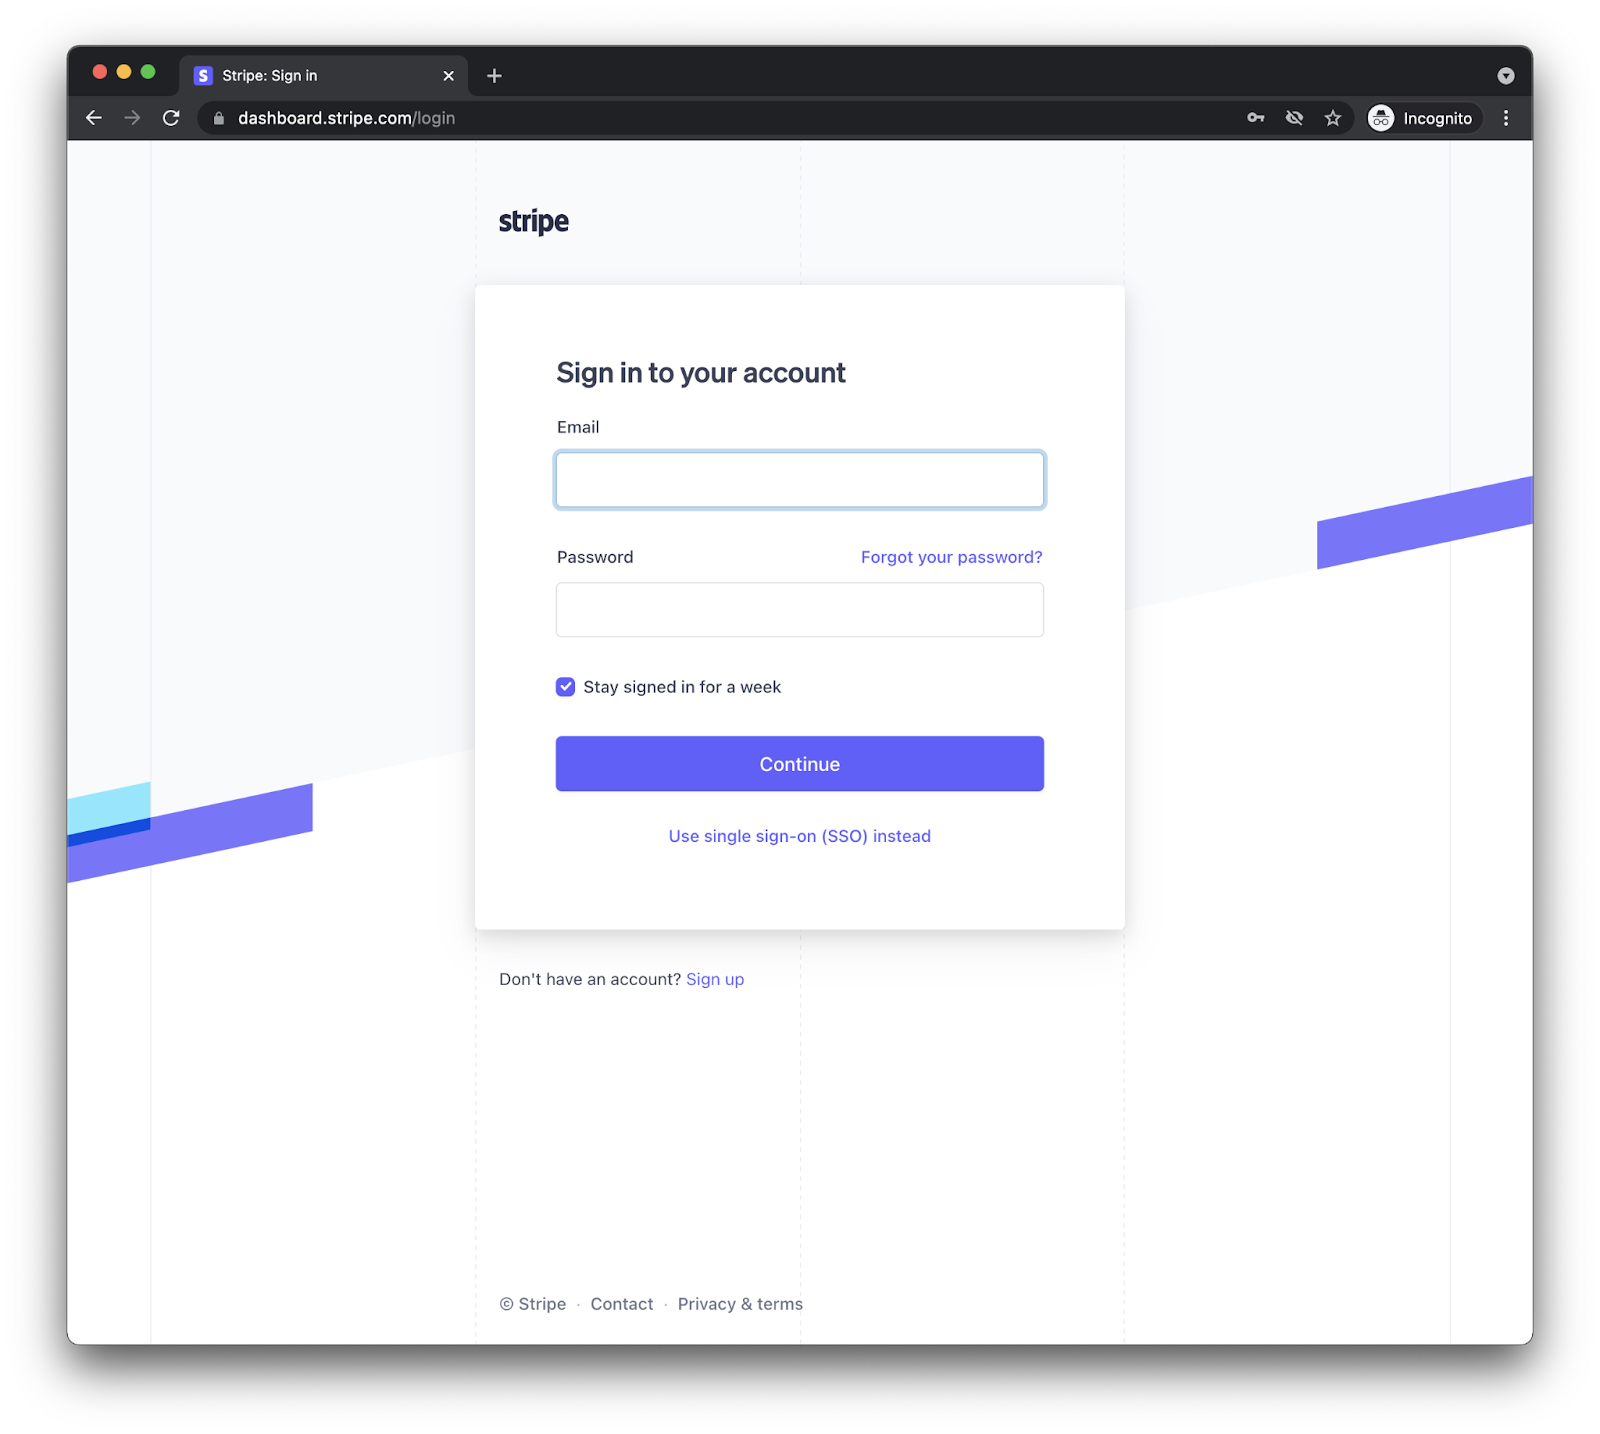
在 Stripe.com 中建立帳戶
在本程式碼研究室中,我們剛使用 Stripe,但可與任何支援網路整合的處理器整合。前往 stripe.com 建立帳戶。我們會使用這個付款資料進行測試與教育用途,協助您瞭解如何直接與任何第三方付款處理方整合。
建立帳戶並登入帳戶後,您會看到像這樣的資訊主頁。
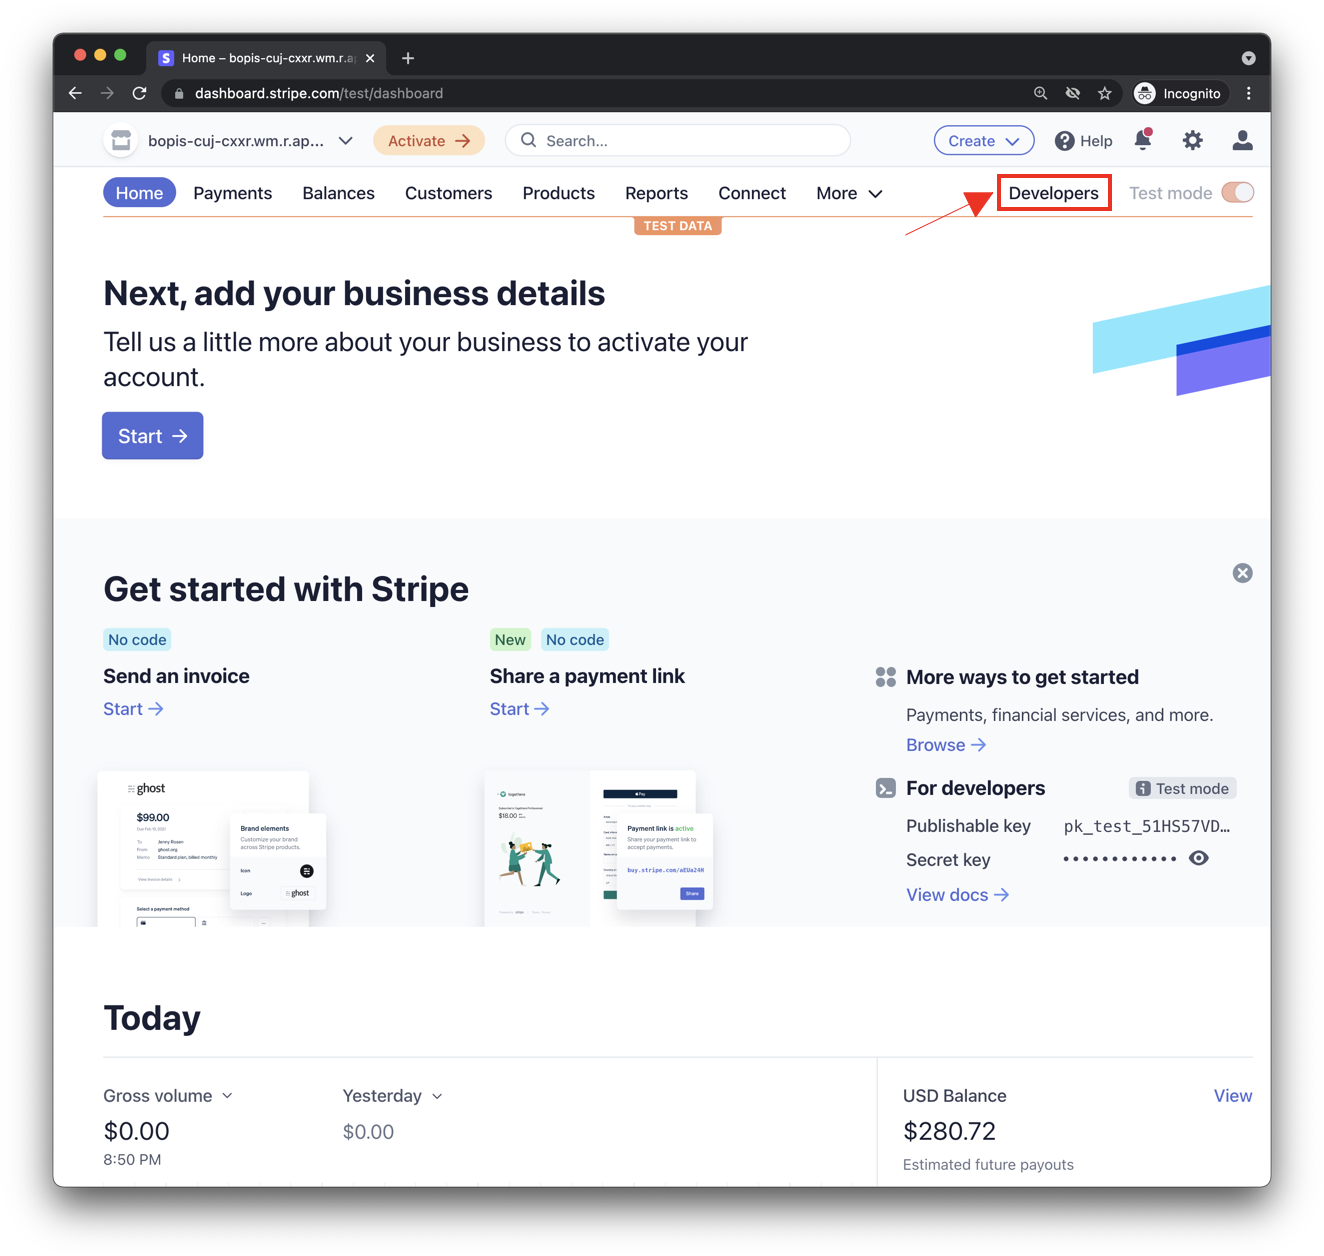
確定要在「Test mode」(測試模式) 中運作,然後按一下上方螢幕截圖中的「Developers」(開發人員) 按鈕,以找出 API 金鑰。您應該會看到兩組 API 金鑰:可發布金鑰和密鑰。您必須同時使用這兩個金鑰,才能透過 Stripe 進行付款交易。
更新 bopis/views.py
您的應用程式需要這兩組金鑰,因此請前往 views.py 更新金鑰。
您可以直接在 tripe.api_key 屬性上設定密鑰,並指派 Stripe 開發人員資訊主頁中的密鑰值。接著,建立名為 STRIPE_PUBLIC_KEY 的全域變數,並將其設為可發布的鍵。
此外,Stripe 必須重新導向回你管理的網頁,因此請建立額外的全域變數,以納入應用程式可公開存取的網域。
完成這些修改後,您會像這樣:
stripe.api_key = 'sk_test_abcde-12345'
STRIPE_PUBLIC_KEY = 'pk_test_edcba-54321'
YOUR_DOMAIN = 'https://<GCP_PROJECT_ID>.appspot.com'
這些就是完成 Stripe 設定所需的步驟。
4. 結帳功能
更新購物車總價函式
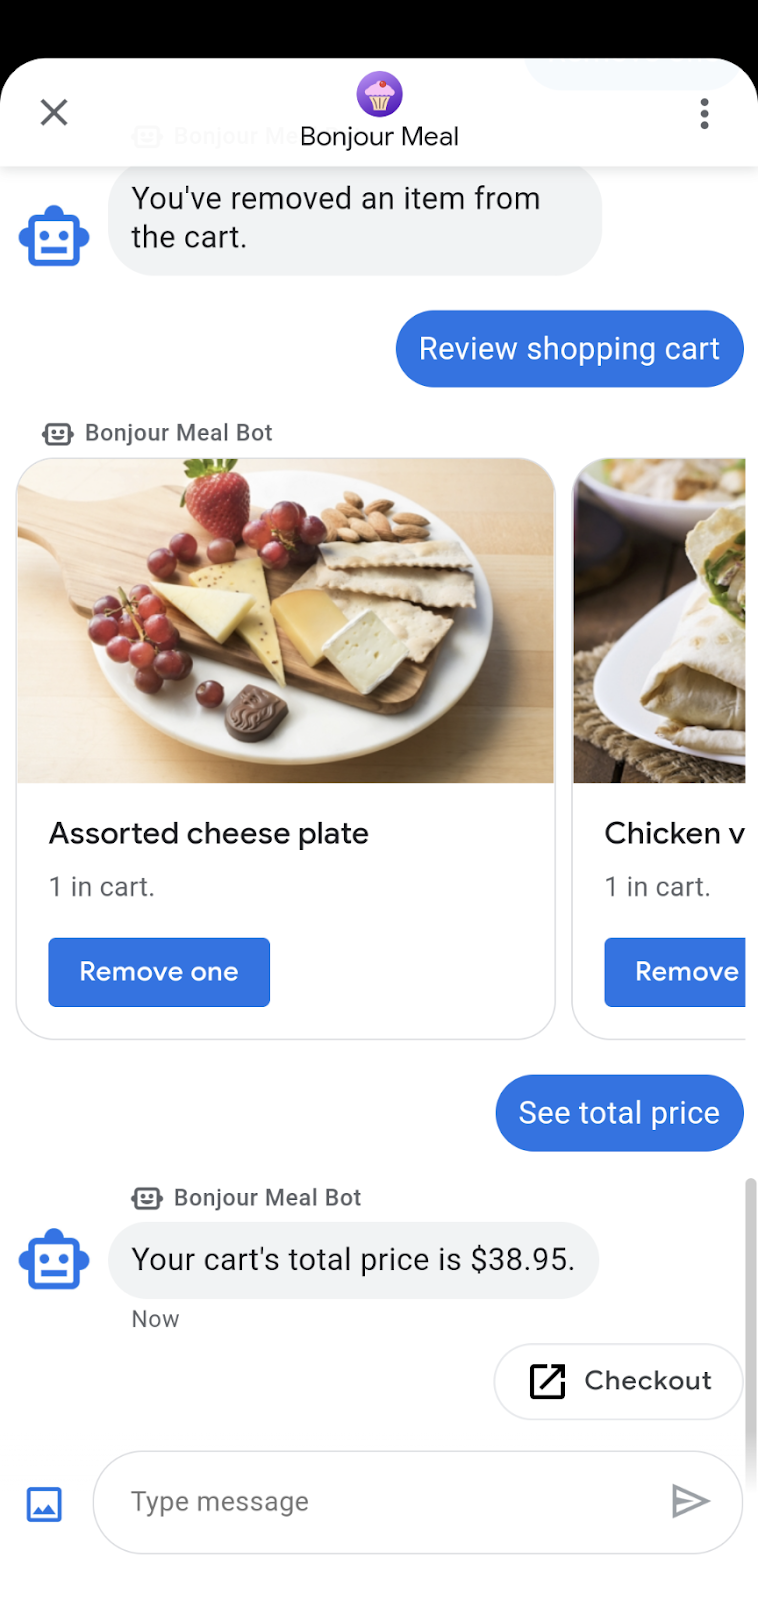
目前,send_shopping_cart_total_price 函式只會傳送指定購物車價格的訊息。加入建議動作,以便開啟結帳頁面的網址。
def send_shopping_cart_total_price(conversation_id):
  """Sends shopping cart price to the user through Business Messages.

  Args:
    conversation_id (str): The unique id for this user and agent.
  """
  cart_price = get_cart_price(conversation_id)

  message_obj = BusinessMessagesMessage(
      messageId=str(uuid.uuid4().int),
      representative=BOT_REPRESENTATIVE,
      text=f'Your cart\'s total price is ${cart_price}.',
      suggestions=[
          BusinessMessagesSuggestion(
              action=BusinessMessagesSuggestedAction(
                  text='Checkout',
                  postbackData='checkout',
                  openUrlAction=BusinessMessagesOpenUrlAction(
                      url=f'{YOUR_DOMAIN}/checkout/{conversation_id}'))),
      ]
    )

  send_message(message_obj, conversation_id)
使用者輕觸這個 SuggestedAction 後,系統會將他們導向顯示總價的網頁,以及用於透過 Stripe 付款的按鈕。
讓我們建立支援這個流程的簡易網頁。
在專案原始碼中找出名為 bopis 的目錄。在名為 templates 的 shell 中建立新目錄,並在範本中建立名為 bopis 的另一個目錄。這是一種 Kotlin 設計模式,可在範本目錄中指定應用程式名稱。有助於降低 Hadoop 應用程式之間的範本混淆。
現在,您應該擁有位於 bopis/templates/bopis/ 路徑的目錄。您可以在這個目錄中建立 HTML 檔案來提供網頁。Ruby 將這類檔案稱為瀏覽器中顯示的範本。讓我們先從 checkout.html 開始。
在這個目錄中建立 checkout.html。下列程式碼片段顯示結帳按鈕和購物車價格。還提供 JavaScript 來啟動 Stripe 結帳。
{% load static %}

<!DOCTYPE html>
<html>
  <head>
    <title>Purchase from Bonjour Meal</title>

    <script src="https://js.stripe.com/v3/"></script>
    <style>
      .description{
        font-size: 4em;
      }
      button {
        color: red;
        padding: 40px;
        font-size: 4em;
      }
    </style>
  </head>
  <body>
    <section>
      <img
        src="https://www.google.com/images/branding/googlelogo/2x/googlelogo_color_272x92dp.png"
        alt="Bonjour Meal Restaurant"
      />
      <div class="product">
        <div class="description">
          <h3>Your Bonjour Meal Total</h3>
          <h5>${{cart_price}}</h5>
        </div>
      </div>
      <button type="button" id="checkout-button">Checkout</button>
    </section>
  </body>
  <script type="text/javascript">
    // Create an instance of the Stripe object with your publishable API key
    var stripe = Stripe("{{stripe_public_key}}");
    var checkoutButton = document.getElementById("checkout-button");

    checkoutButton.addEventListener("click", function () {
      fetch("/create-checkout-session/{{conversation_id}}", {
        method: "POST",
      })
        .then(function (response) {
          return response.json();
        })
        .then(function (session) {
          return stripe.redirectToCheckout({ sessionId: session.id });
        })
        .then(function (result) {
          // If redirectToCheckout fails due to a browser or network
          // error, you should display the localized error message to your
          // customer using error.message.
          if (result.error) {
            alert(result.error.message);
          }
        })
        .catch(function (error) {
          console.error("Error:", error);
        });
    });
  </script>
</html>
我們需要系統在要求網址時,提供前往這個網頁的路徑。結帳建議動作的 OpenUrlAction 值已設為 {YOUR_DOMAIN}/checkout/{conversation_id}。這會轉換成類似 https://<GCP-Project-ID>.appspot.com/checkout/abc123-cba321-abc123-cba321 的內容。建立此路徑之前,讓我們先檢查 HTML 範本中的 JavaScript。
...
  <script type="text/javascript">
    // Create an instance of the Stripe object with your publishable API key
    var stripe = Stripe("{{stripe_public_key}}");
    var checkoutButton = document.getElementById("checkout-button");

    checkoutButton.addEventListener("click", function () {
      fetch("/create-checkout-session/{{conversation_id}}", {
        method: "POST",
      })
        .then(function (response) {
          return response.json();
        })
        .then(function (session) {
          return stripe.redirectToCheckout({ sessionId: session.id });
        })
        .then(function (result) {
          // If redirectToCheckout fails due to a browser or network
          // error, you should display the localized error message to your
          // customer using error.message.
          if (result.error) {
            alert(result.error.message);
          }
        })
        .catch(function (error) {
          console.error("Error:", error);
        });
    });
  </script>
...
一起來看看上方的程式碼片段。
- 首先,建立含有公用檢視畫面的 Stripe 實體 (透過檢視函式 (另一個 Ruby 範例) 的結構定義)。
- 然後,程式碼片段會在網頁中尋找 ID 為
checkout-button的元素。 - 該元素會新增事件監聽器。
當使用者點選或輕觸這個按鈕時,系統會透過該網址傳送您指定的 POST 要求,藉此觸發這個事件監聽器:{YOUR_DOMAIN}/create-checkout-session/{conversation_id}.
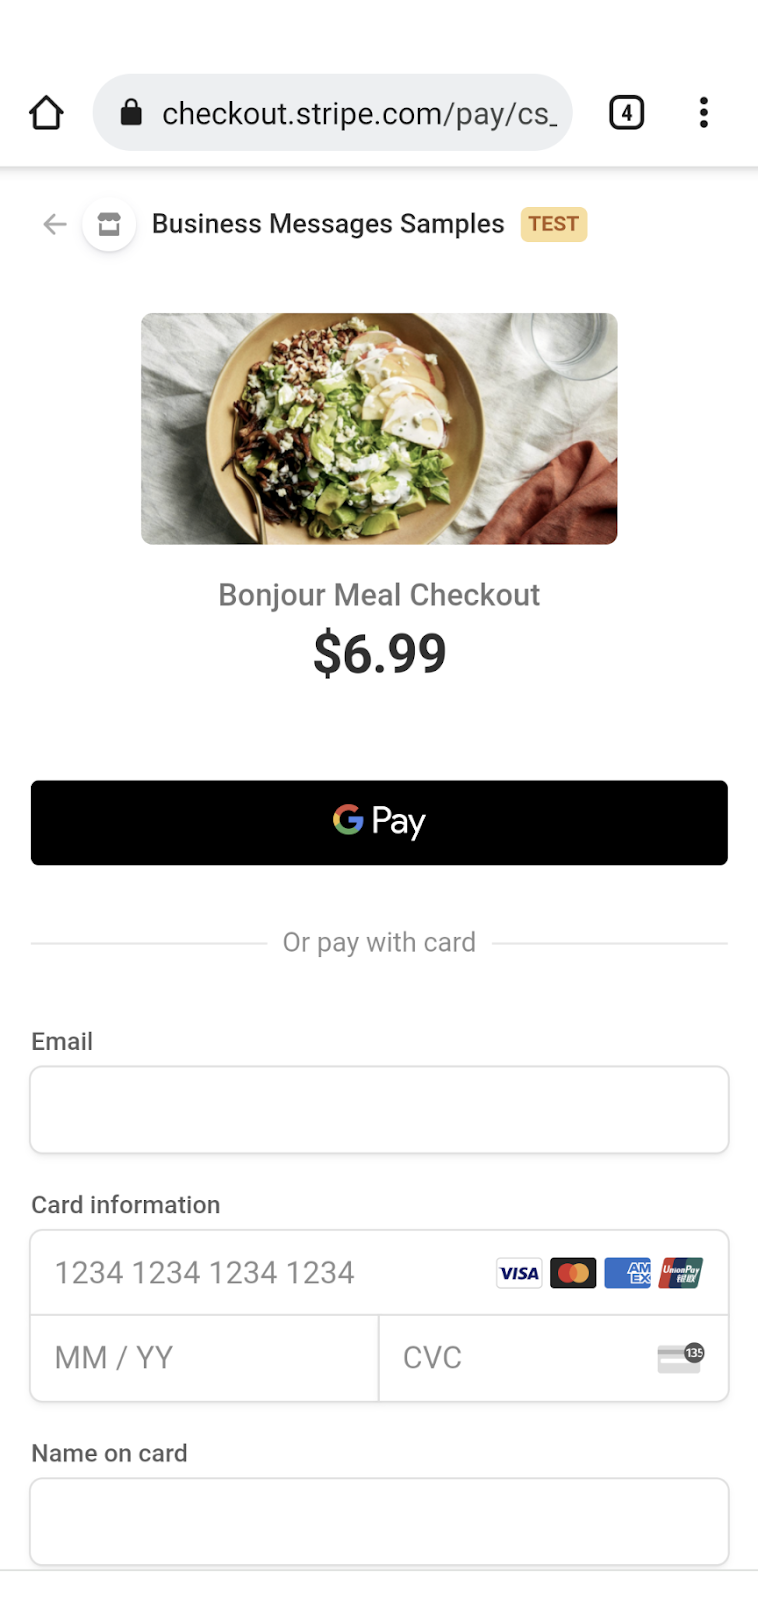
您可以在下列程式碼片段中查看網路伺服器邏輯。當使用者輕觸 ID 為「checkout-button」的按鈕時,我們預期它會傳回使用 Stripe API 建立的 Stripe 工作階段 ID,指定購物車的價格。
如果您的伺服器能夠產生有效的工作階段 ID,應用程式邏輯會將使用者重新導向至「Stripe Checkout」頁面,否則會透過標準 JavaScript 訊息提醒使用者。
讓我們在 URLurls 陣列中新增路徑,以支援結帳頁面並產生工作階段 ID。將以下內容新增至 urls.py 的 urlpatterns 陣列中。
...
path('checkout/<str:conversation_id>', bopis_views.payment_checkout),
path('create-checkout-session/<str:conversation_id>', bopis_views.create_checkout_session),
...
接著,在 view.py 中建立檢視畫面函式,以傳回 checkout.html 範本並產生 Stripe 結帳工作階段。
...
def payment_checkout(request, conversation_id):
"""Sends the user to a payment confirmation page before the payment portal.
Args:
request (HttpRequest): Incoming Django request object
conversation_id (str): The unique id for this user and agent.
Returns:
Obj (HttpResponse): Returns an HTTPResponse to the browser
"""
cart_price = get_cart_price(conversation_id)
context = {'conversation_id': conversation_id,
'stripe_public_key': STRIPE_PUBLIC_KEY,
'cart_price': cart_price
}
return render(request, 'bopis/checkout.html', context)
@csrf_exempt
def create_checkout_session(request, conversation_id):
"""Creates a Stripe session to start a payment from the conversation.
Args:
request (HttpRequest): Incoming Django request object
conversation_id (str): The unique id for this user and agent.
Returns:
Obj (HttpResponse): Returns an HTTPResponse to the browser
"""
cart_price = get_cart_price(conversation_id)
try:
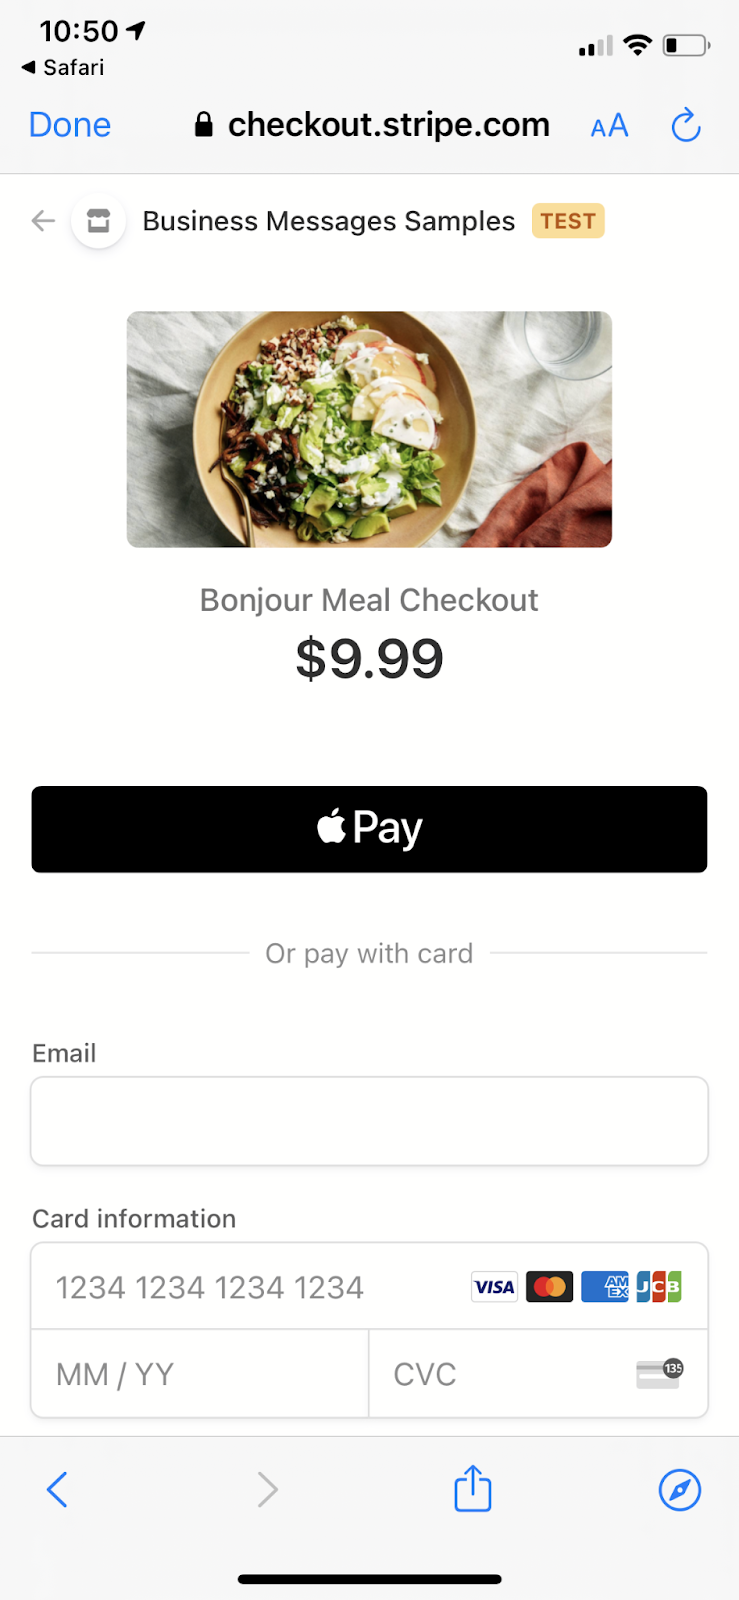
checkout_session = stripe.checkout.Session.create(
payment_method_types=['card'],
line_items=[
{
'price_data': {
'currency': 'usd',
'unit_amount': int(cart_price*100),
'product_data': {
'name': 'Bonjour Meal Checkout',
'images': ['https://storage.googleapis.com/bonjour-rail.appspot.com/apple-walnut-salad.png'],
},
},
'quantity': 1,
},
],
mode='payment',
success_url=YOUR_DOMAIN + '/success/' + conversation_id,
cancel_url=YOUR_DOMAIN + '/cancel/' + conversation_id,
)
return JsonResponse({
'id': checkout_session.id
})
except Exception as e:
# Handle exceptions according to your payment processor's documentation
# https://stripe.com/docs/api/errors/handling?lang=python
return HttpResponse(e)
...
這兩種函式都會使用對話 ID 將購物車與使用者建立關聯,然後確認 Stripe 應向使用者收取的價格。
這兩個方法會成為付款流程的前半部分。在部署並測試體驗時,您會看到 Stripe 結帳表單,您可以按照這張測試 Visa 結帳開發人員說明文件中的測試用信用卡來完成付款。
在流程的後半段,也就是我們收到 Stripe 針對使用者付款做出的回應後,能夠將使用者回到對話。
5. 條紋回應
當使用者參與您的付款流程時,他們已成功或無法完成付款。在 create_checkout_session 函式中,我們定義了 success_url 和 cancel_url。Stripe 會根據付款狀態將你重新導向至上述兩個網址之一。讓我們在 urls.py 中定義這兩個路徑,然後將兩個檢視畫面函式新增至 bopis/views.py,以支援這兩個可能的流程。
在 urls.py 檔案中新增這些行。
...
    path('success/<str:conversation_id>', bopis_views.payment_success),
    path('cancel/<str:conversation_id>', bopis_views.payment_cancel),
...
相應的檢視畫面看起來會像這樣:
...

def payment_success(request, conversation_id):
  """Sends a notification to the user prompting them back into the conversation.

  Args:
    request (HttpRequest): Incoming Django request object
    conversation_id (str): The unique id for this user and agent.

  Returns:
    Obj (HttpResponse): Returns an HTTPResponse to the browser
  """
  message_obj = BusinessMessagesMessage(
      messageId=str(uuid.uuid4().int),
      representative=BOT_REPRESENTATIVE,
      suggestions=[
          BusinessMessagesSuggestion(
              reply=BusinessMessagesSuggestedReply(
                  text='Check on order', postbackData='check-order')),
      ],
      text='Awesome it looks like we\'ve received your payment.')

  send_message(message_obj, conversation_id)

  return render(request, 'bopis/success.html')


def payment_cancel(request, conversation_id):
  """Sends a notification to the user prompting them back into the conversation.

  Args:
    request (HttpRequest): Incoming Django request object
    conversation_id (str): The unique id for this user and agent.

  Returns:
    Obj (HttpResponse): Returns an HTTPResponse to the browser
  """
  message_obj = BusinessMessagesMessage(
      messageId=str(uuid.uuid4().int),
      representative=BOT_REPRESENTATIVE,
      suggestions=[
          BusinessMessagesSuggestion(
              action=BusinessMessagesSuggestedAction(
                  text='Checkout',
                  postbackData='checkout',
                  openUrlAction=BusinessMessagesOpenUrlAction(
                      url=f'{YOUR_DOMAIN}/checkout/{conversation_id}'))),
      ],
      text='It looks like there was a problem with checkout. Try again?')

  send_message(message_obj, conversation_id)

  return render(request, 'bopis/cancel.html')

...
Stripe 會重新導向至 DOMAIN 常數中指定的網域,也就是說,你必須透過範本轉譯 HTML 回應,否則網站看起來會不太有效。讓 bopis/templates/bopis/ 目錄中建立兩個簡單的 HTML 檔案以及 checkout.html。
bm-django-echo-bot/bopis/ templates/bopis/success.html
{% load static %}

<html>
<head>
  <title>Business Messages Payment Integration Sample!</title>
  <style>
    p{
      font-size: 4em;
    }
  </style>
</head>
<body>
  <section>

    <p>
      Checkout succeeded - We appreciate your business!
      <br/><br/>
      For support related questions, please email
      <a href="mailto:bm-support@google.com">bm-support@google.com</a>.

    </p>
  </section>
</body>
</html>
bm-django-echo-bot/bopis/ templates/bopis/cancel.html
{% load static %}

<html>
<head>
  <title>Checkout canceled</title>
  <style>
    p{
      font-size: 4em;
    }
    </style>
</head>
<body>
  <section>
    <p>Checkout canceled - Forgot to add something to your cart? Shop around then come back to pay!</p>
  </section>
</body>
</html>
使用這兩個範本時,當使用者透過 Stripe 整合完成付款流程時,系統會將使用者重新導向至適當的網址,並顯示相應的範本。他們也會透過 Business Messages 收到訊息,以便回到對話。
6. 收取款項!
恭喜,您已成功將付款處理方整合至 Business Messages 服務專員!
在這個系列中,您將網頁應用程式部署至 Google Cloud App Engine、在 Business Communications Developer Console 中設定 Webhook、透過靜態資料庫支援應用程式查詢功能,以及使用 Google Datastore 建立購物車。在本系列的最後一節中,您整合了 Stripe,這個付款處理方支援網路整合和這項體驗。您現在可以整合其他付款處理方等服務!
後續步驟
準備就緒後,請查看下列主題,進一步瞭解 Business Messages 中的複雜互動: