# Convert an existing tag
In this guide, you will learn how to convert an existing custom HTML tag to
use sandboxed JavaScript.
This tutorial will leverage the [`injectScript`](https://developers.google.com/tag-platform/tag-manager/templates/api#injectscript) API. `injectScript` is a common
API used to convert an existing tag that relies on third-party scripts. These
tags often set up basic functionality while a script loads, then augment it with
additional functionality after the script loads.
> [!NOTE]
> **Note:** In practice, you should avoid `injectScript()` and instead implement the target script directly in sandboxed JavaScript. This requires less on trust in a 3rd party, which makes it more likely to be allowed by enforced [Policies](https://developers.google.com/tag-platform/tag-manager/templates/policies).
### Original tag
> [!CAUTION]
> **Caution:** The `analytics.js` script is used as an example here, but this should not be used in production. Instead, follow [Deploy Google Analytics with Tag Manager](https://support.google.com/tagmanager/answer/6107124).
### Convert the code
Consider the JavaScript portion of the above tag:
window.ga=window.ga||function(){(ga.q=ga.q||[]).push(arguments)};ga.l=+new Date;
ga('create', 'GA-XXXXXX-1', 'auto');
ga('send', 'pageview');
To create the necessary sandboxed JavaScript, look at what native JavaScript
APIs this script uses, and convert your code to use the equivalent sandboxed
JavaScript APIs.
For example, in the `analytics.js` tag, these native JavaScript APIs are used:
| Native JavaScript | Sandboxed JavaScript |
|---|---|
| `window.ga` | `setInWindow` |
| `arguments` | `createArgumentsQueue` |
| `+ new Date` | `getTimestamp` |
To use the sandboxed JavaScript APIs in your script, you need to `require` them.
For example, to use the `setInWindow()` API, add it to the top of your script:
const setInWindow = require('setInWindow');
Next, convert `window.ga`:
window.ga=window.ga||function(){(ga.q=ga.q||[]).push(arguments)}
// becomes
const createArgumentsQueue = require('createArgumentsQueue');
const ga = createArgumentsQueue('ga', 'ga.q');
Then, convert the `ga.l` assignment:
ga.l=+new Date;
// becomes
const getTimestamp = require('getTimestamp');
setInWindow('ga.l', getTimestamp(), true);
Finally, convert the two calls to `ga()`:
ga('create', 'GA-XXXXXX-1', 'auto');
ga('send', 'pageview');
// becomes
const trackingId = data.trackingId;
ga('create', trackingId, 'auto');
ga('send', 'pageview');
In order to use `data.trackingId`, add a field to your template:
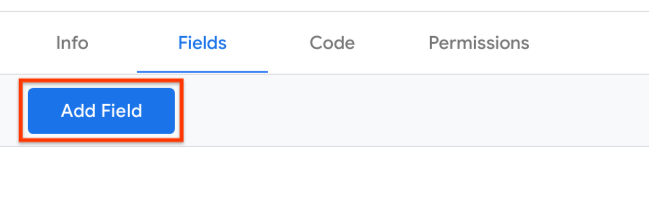
1. Navigate to the `Fields` tab, and click `Add Field`.
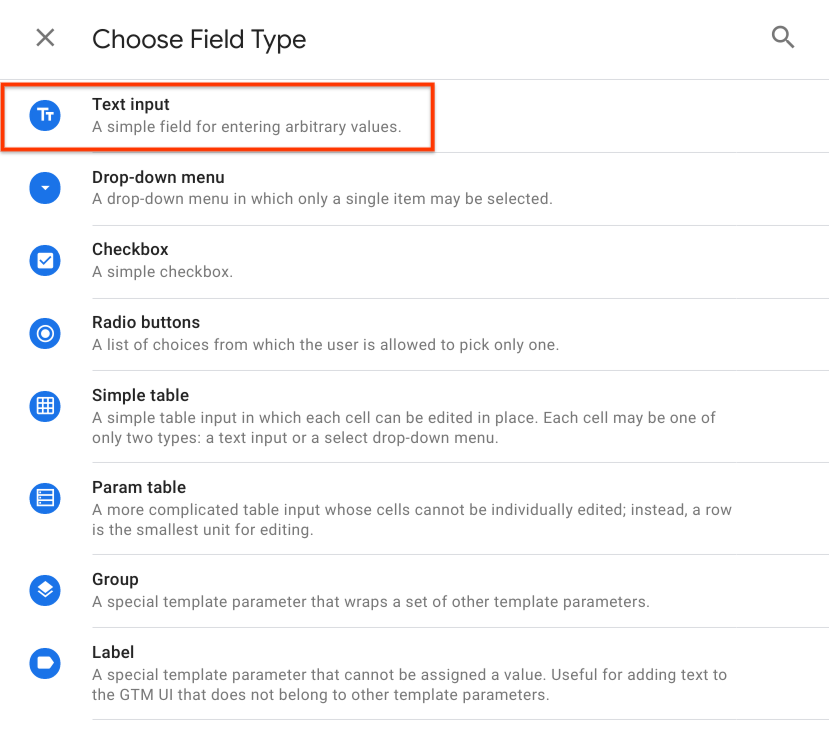
2. Choose the `Text input` field type.
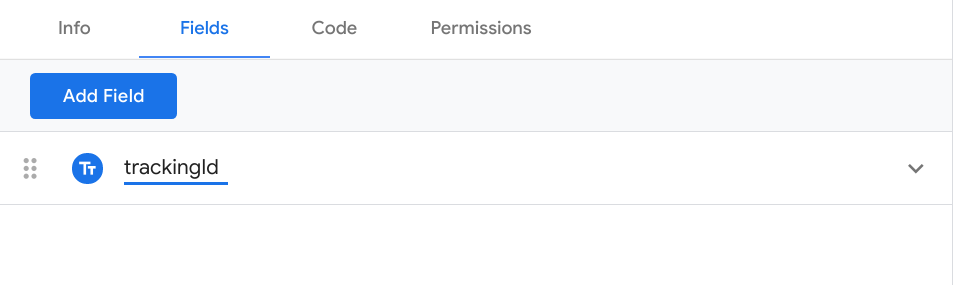
3. Change the id from `text1` to `trackingId`.
At this point, you have converted the first `` tag, but you also need
to load in the supporting script.
To do this:
// becomes
const injectScript = require('injectScript');
const url = 'https://www.google-analytics.com/analytics.js';
injectScript(url, data.gtmOnSuccess, data.gtmOnFailure, url);
> [!NOTE]
> **Note:** The URL of the script is typically a good `cacheToken` value.
Passing a `cacheToken` to `injectScript()` enables an optimization. For the
following scenarios, the `analytics.js` script will only be loaded once:
- A tag that runs multiple times
- More than one tag from this custom template in the same container.
- Other custom templates using `injectScript()` with the same `cacheToken`
> [!CAUTION]
> **Caution:** Make sure you don't forget to supply the `data.gtmOnSuccess` callback to `injectScript()`. `data.gtmOnSuccess` must be called for all custom templates. If you provide your own success callback, ensure it calls `data.gtmOnSuccess`.
### Permissions
If you tried to run this code before this point you might have noticed some
errors in the console.
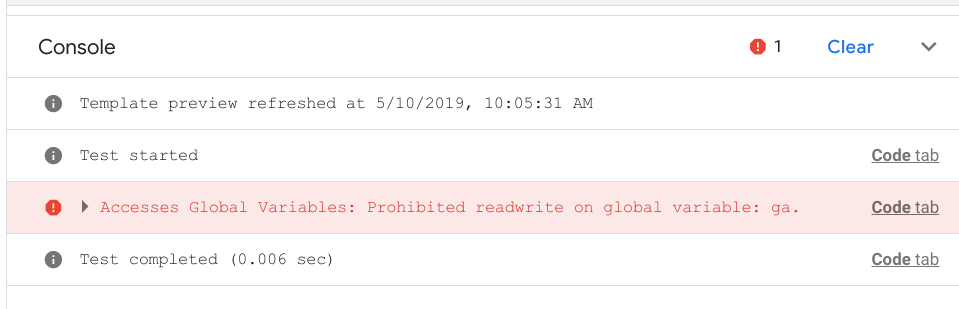
These errors appear because sandboxed JavaScript requires you to declare the
values and URLs you access. In this example, you need to access the `ga.q`,
`ga.l`, and `ga` global variables, and you want to inject a script that's hosted
at `https://www.google-analytics.com/analytics.js`.
To configure the `Global Variables` permissions:
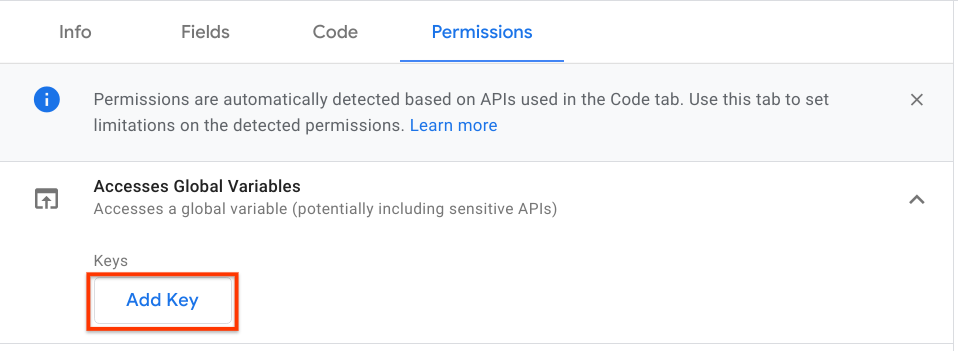
1. Navigate to the `Permissions` tab, Expand `Accesses Global Variables`, and
then click `Add Key`.
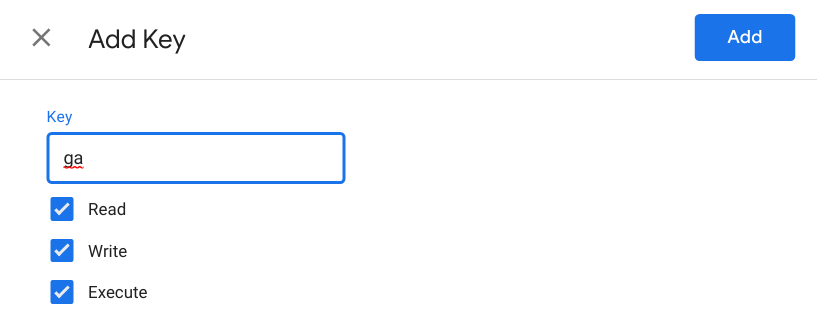
2. Use `ga` for the key, and check the boxes for `Read`, `Write`, and
`Execute`.
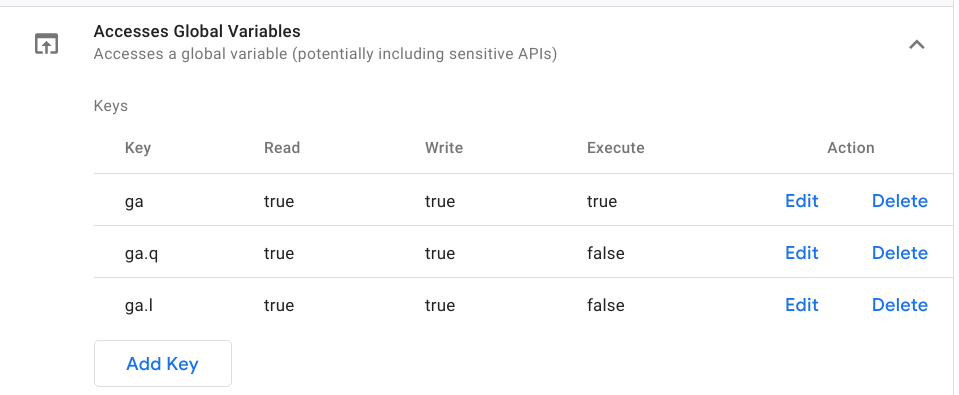
3. Repeat this process for `ga.q` and `ga.l`. Note that these fields don't need
the `Execute` permission.
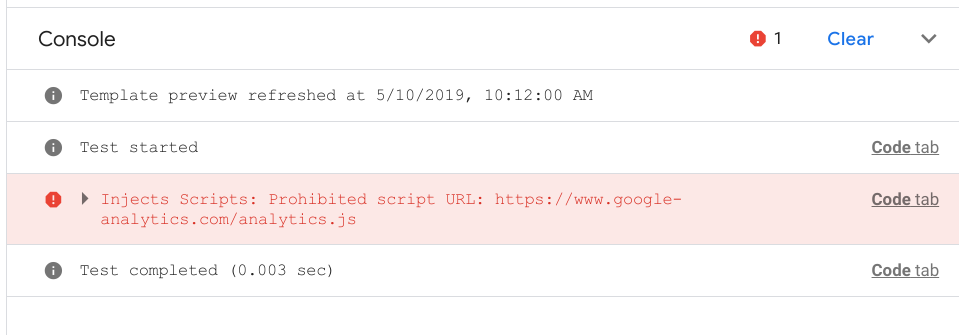
At this point if you click **Run Code** again, you'll get a new error in the console.
This time, the error mentions `Inject Scripts`.
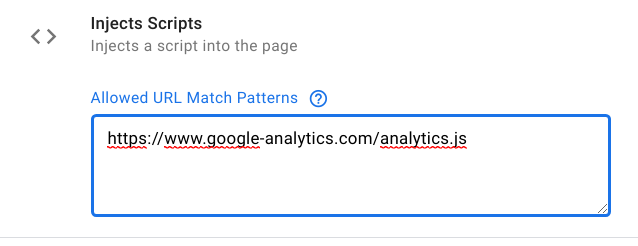
To configure the `Inject Scripts` permission:
1. Add `https://www.google-analytics.com/analytics.js` to the `Allowed URL
Match Patterns`.
> [!NOTE]
> **Note:** The `URL Match Patterns` allow wildcards for the subdomain and path, so you could have used `https://www.google-analytics.com/*`. However, more specific match patterns are preferred if possible. See the [inject_script Policy](https://developers.google.com/tag-platform/tag-manager/templates/permissions#inject_script) for the full policy details.
Now when you click **Run Code** , there should be no errors in the console. You have
successfully converted the tag into a custom template. Click `Save`
and use your new tag just like any other Tag in Google Tag Manager.
### Fully converted tag
Your final sandboxed JavaScript result should look like this:
const setInWindow = require('setInWindow');
const copyFromWindow = require('copyFromWindow');
const createArgumentsQueue = require('createArgumentsQueue');
const getTimestamp = require('getTimestamp');
const injectScript = require('injectScript');
const trackingId = data.trackingId;
const ga = createArgumentsQueue('ga', 'ga.q');
setInWindow('ga.l', getTimestamp(), false);
ga('create', trackingId, 'auto');
ga('send', 'pageview');
const url = 'https://www.google-analytics.com/analytics.js';
injectScript(url, data.gtmOnSuccess, data.gtmOnFailure, url);