Kullanıcıların günlük ihtiyaç duyduğu öğelere hızlı ve güvenli bir şekilde erişmesini sağlayın
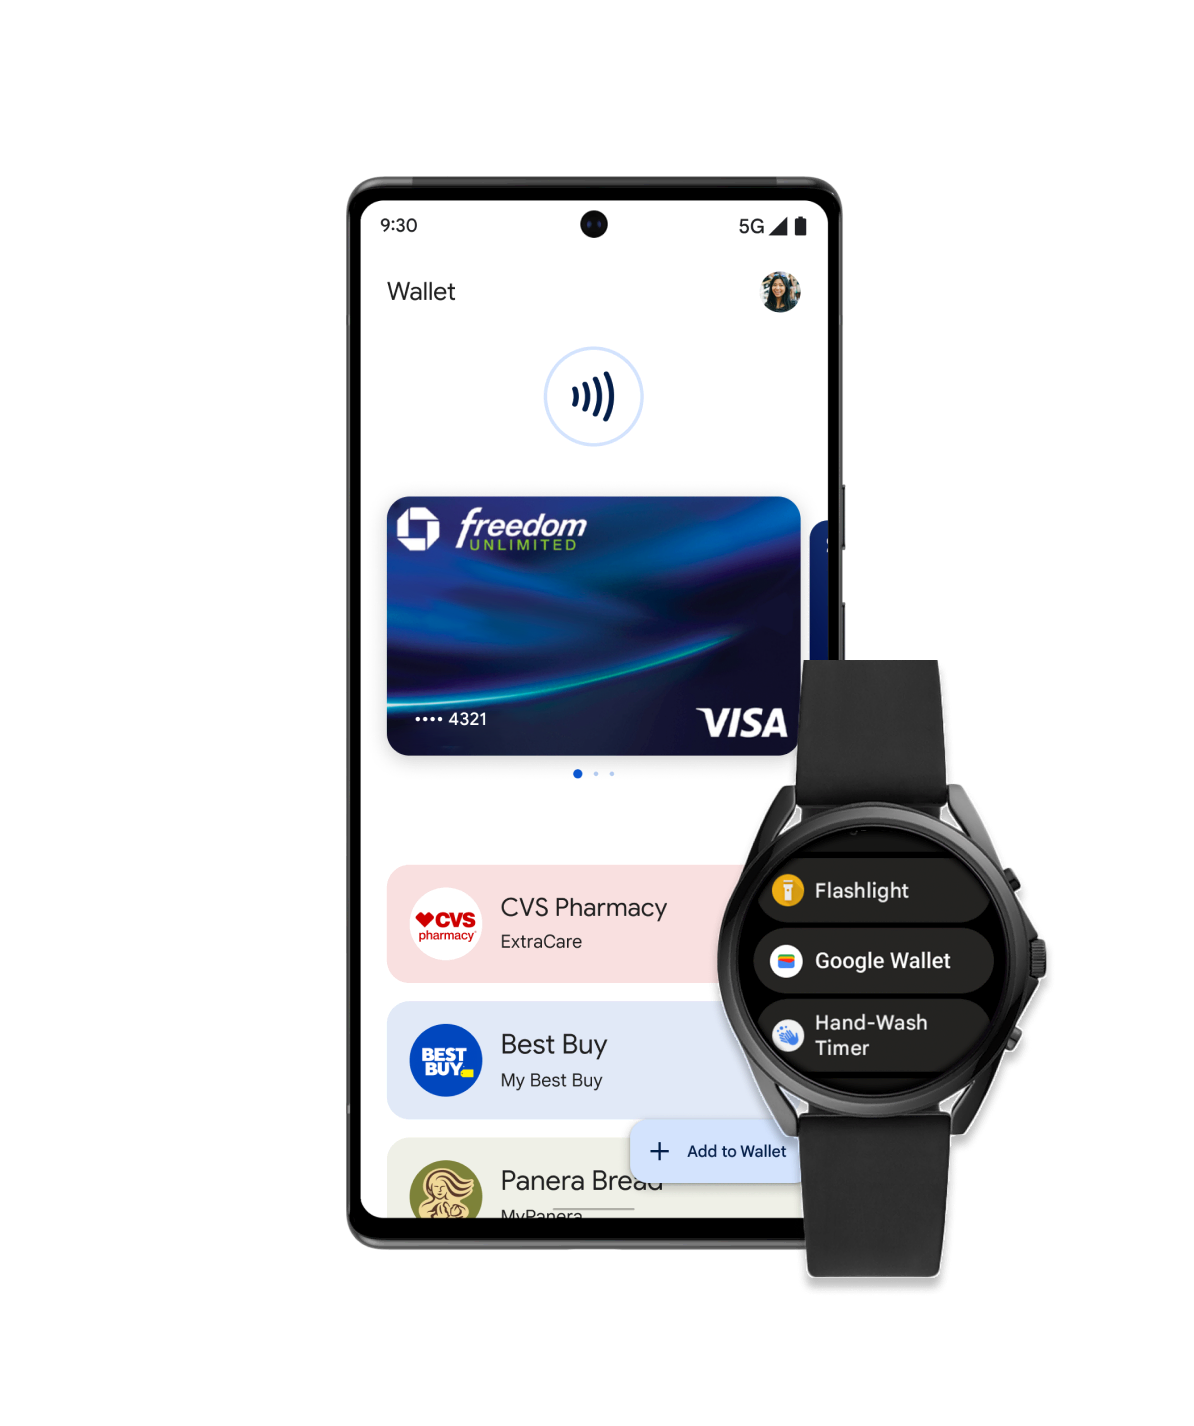
Google Cüzdan sayesinde müşterileriniz, Google Pay'in kabul edildiği her yerde temassız ödeme özelliğinden yararlanabilir, bağlılık kartlarıyla alışveriş yapabilir, biniş kartı alabilir ve daha birçok işlem için Android telefonlarını kullanabilir.
Google Cüzdan ve geliştirici API özelliklerinin tanıtımı
Google, Android ve Chrome kullanıcıları için güvenli, özel bir dijital cüzdan oluşturuyor. Değişiklikler hakkında daha fazla bilgi edinin.
Herhangi bir cüzdan nesnesini Google Cüzdan API'si ile dijitalleştirin
Google Cüzdan API'sini kullanarak herhangi bir cüzdan nesnesinin nasıl dijitalleştirileceğine ilişkin adım adım atölyeyi izleyin.
Kullanım alanları
Geliştirici kılavuzlarımızı özel ihtiyaçlarınıza uyacak şekilde özelleştirdik. Başlamak için kullanım alanınızı seçin.
Perakende
Müşterilerinizin mobil cihazlarını kullanarak bağlılık kartları, teklifler ve hediye kartları eklemesini veya mağazada ödeme yapmasını kolaylaştırın. Cüzdan'ı Google Cüzdan'la entegre edin. Konuma dayalı bildirimler, gerçek zamanlı güncellemeler ve daha fazlasıyla kullanıcılarla etkileşimde bulunun.
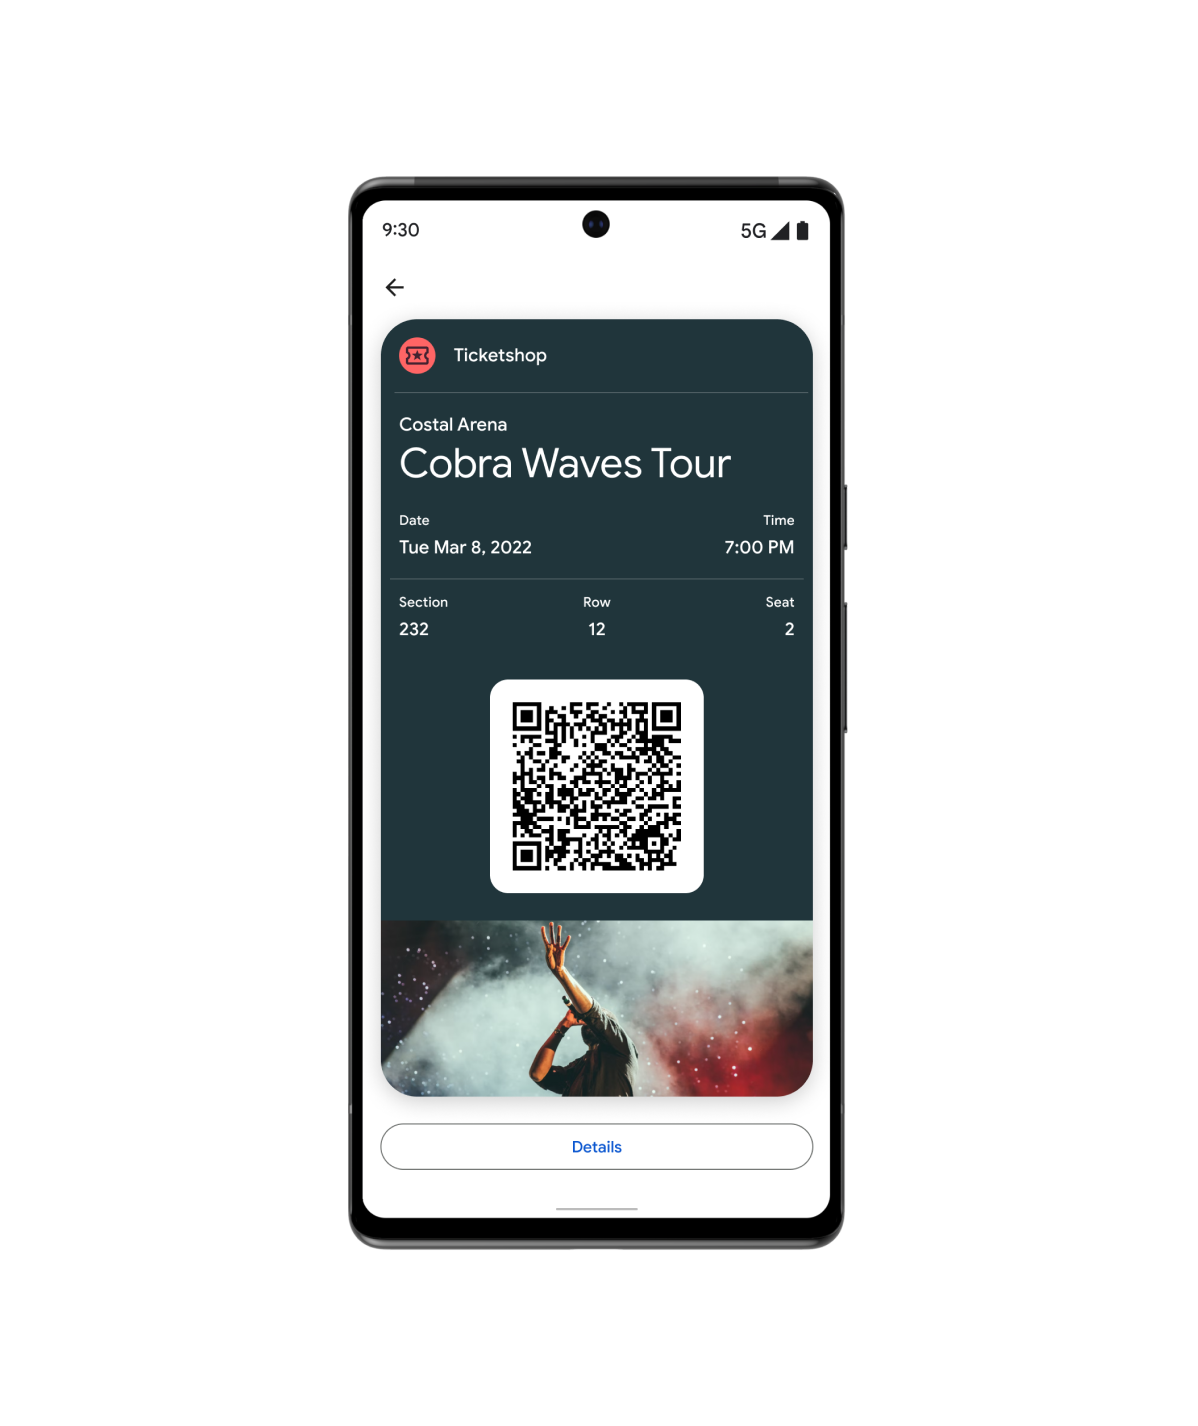
Biletler
Kullanıcılarınız doğrudan Google Cüzdan'da filmler, uçuşlar ve daha fazlası için bilet ve kart ekleyebilir.

Erişim
Google Cüzdan basit, güvenli ve kullanışlıdır. Kullanıcılarınız dijital araba anahtarlarından kampüs kimlik kartlarına kadar tüm bunları Google Cüzdan'a ekleyebilir.
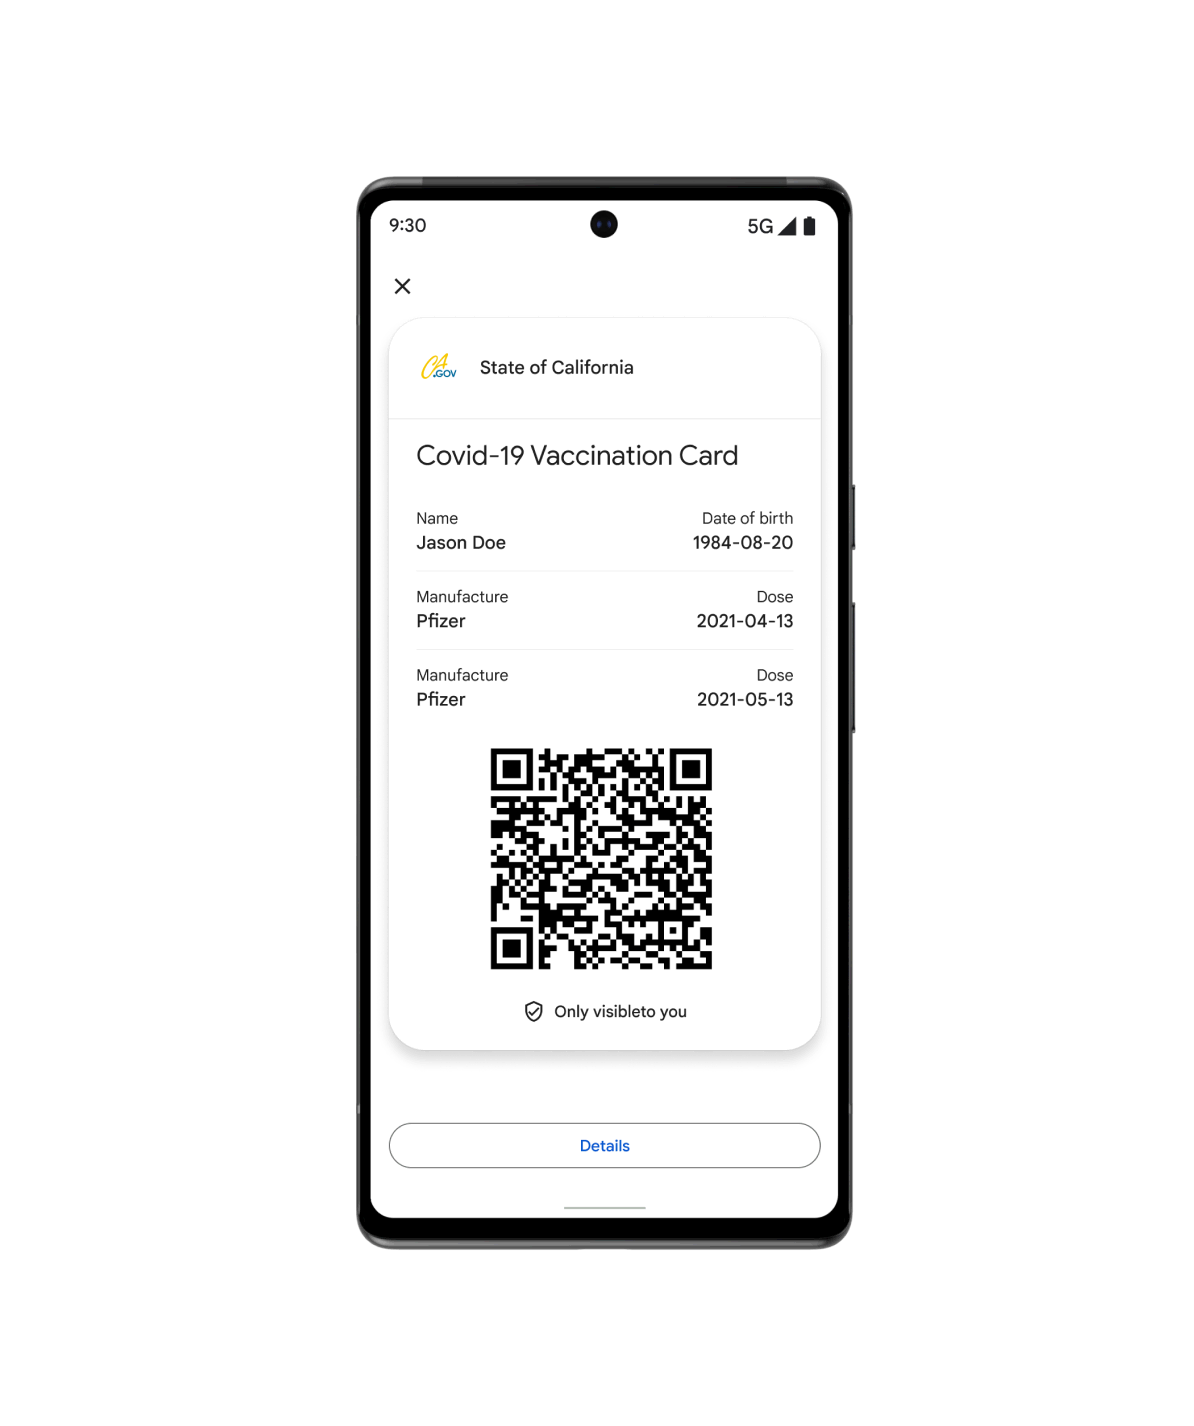
Sağlık
Google Cüzdan ile hastalarınıza korunan sağlık hizmetlerine hızlı ve güvenli erişim imkanı sunun. Kullanıcılar, aşı kartlarından test kayıtlarına kadar her şeyi cihazlarına ekleyerek Android ana ekranlarına ekleyebilirler.
Ve daha fazlası...
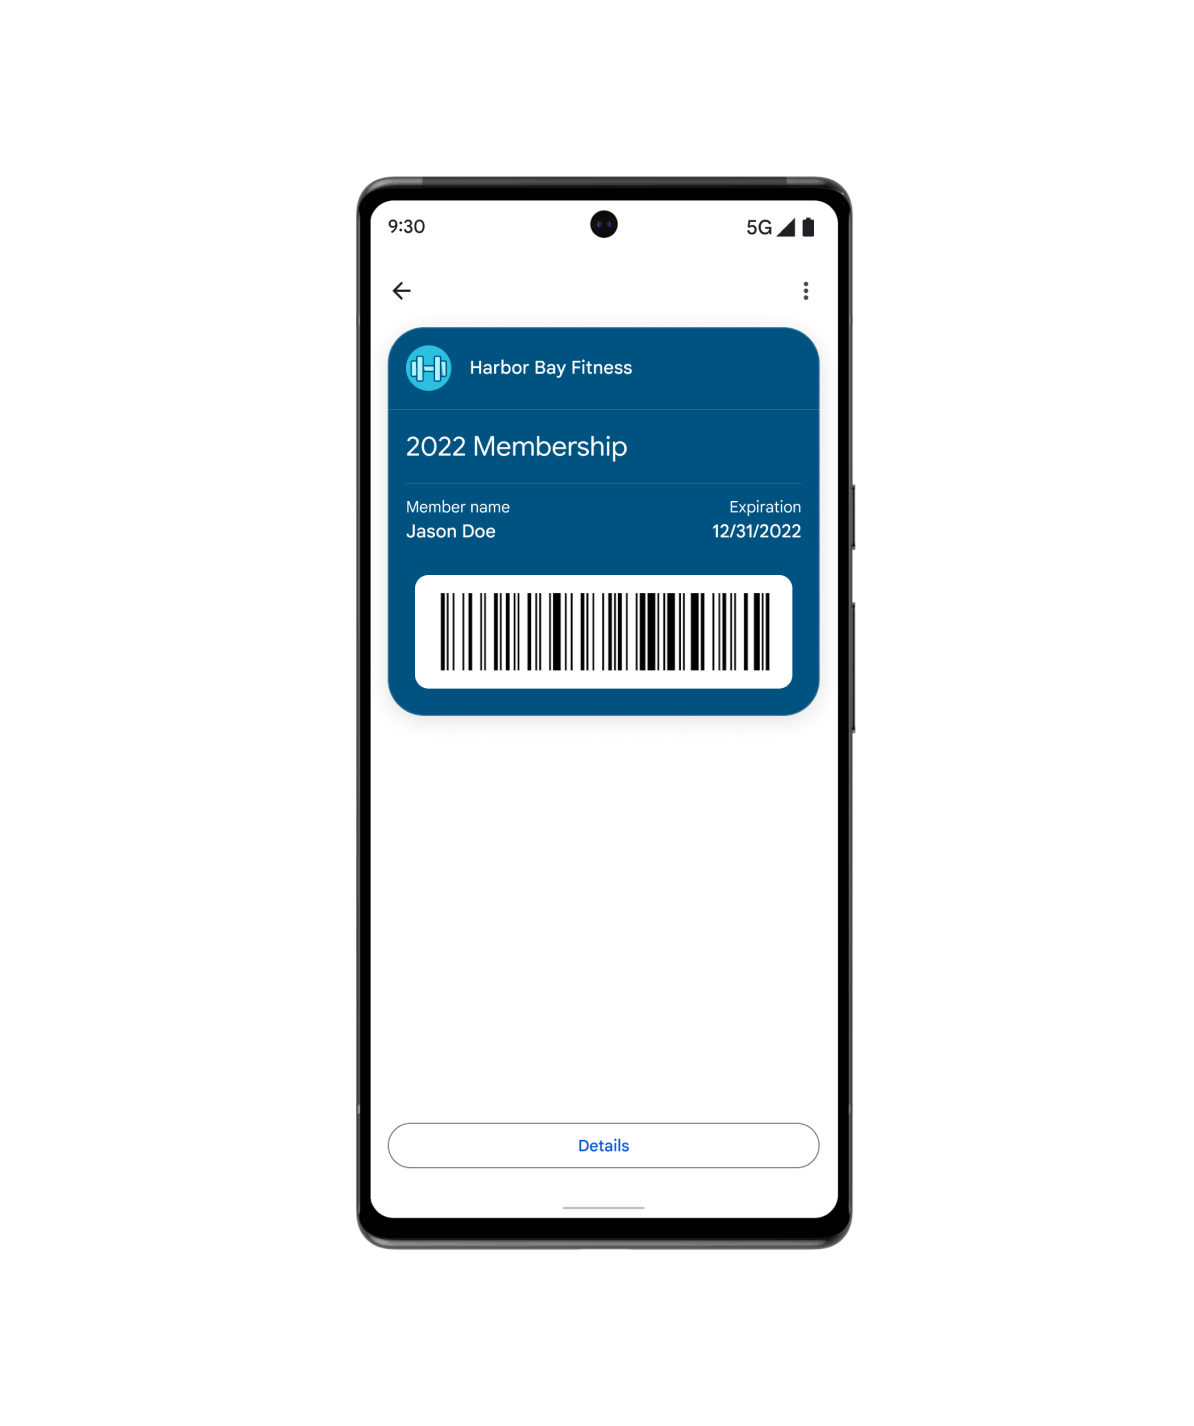
Kullanım alanınız önceden tanımlanmış diğer türlerimizden hiçbirine uygun değilse Genel geçiş seçeneğini kullanın. Spor salonu üyeliklerinden kütüphane kartlarına, sigorta kartlarına ve otopark kartlarına kadar genel kartları müşterilerinizin ihtiyaçlarına göre özelleştirebilirsiniz.
Öne çıkan kaynaklar
Cüzdan nesneleri oluşturmanıza yardımcı olacak en yeni geliştirici araçlarını ve örnekleri bulun.

Başarılı görsel demo
Google Cüzdan'da bağlılık kartınızın tasarımında hızlı ayarlamalar yapın ve kod snippet'ini tercih ettiğiniz dilde alın.

Kod örnekleri
Her sektör ve programlama dili (Java, C#, Python, PHP, JavaScript) için örnek entegrasyonlara göz atın ve klonlayın

Codelab uygulamaları
Kullanıcı tarafından gerçekleştirilen codelab'leri keşfedin ve Google Cüzdan API'lerini kullanarak deneyim kazanın.
Ürün haberleri
Google Cüzdan geliştiricileriyle ilgili haberleri kaçırmayın.
Pass Dönüştürücü ile platformlar arası benimseme oranını artırın
Pass Converter, mevcut kartları bir cüzdan uygulaması için almanıza, dönüştürmenize ve bunları mobil uygulamanızda veya web uygulamanızda başka bir cüzdan platformunda kullanıma sunmanıza olanak tanır.
Yeni Google Cüzdan API'si kod örneklerini deneyin
Google Cüzdan API'si kod örnekleri deposunda sınıfların, nesnelerin, Google Cüzdan'a ekle bağlantılarının nasıl oluşturulacağı ve kartı veren hesapların nasıl yönetileceği gösterilir. Desteklenen her dil, en popüler IDE'lerle uyumlu ayrıntılı doküman yorumları içerir.
Android geliştiricileri için daha basit Google Cüzdan entegrasyonu
Android'de cüzdan nesnelerini dijitalleştirmek için yeni Google Cüzdan Android SDK'sını kullanmanın avantajlarını öğrenin ve entegrasyon yapmanıza yardımcı olacak geliştirici kaynaklarını keşfedin.
Google Pay ve Cüzdan Konsolu
Android uygulamanızda veya web sitenizde hızlı ve kolay ödeme, kartlar ve daha fazlasını etkinleştirin.