Introduction
This Hello World! tutorial uses MediaPipe Framework to develop an Android application that runs a MediaPipe graph on Android.
What you will build
A simple camera app for real-time Sobel edge detection applied to a live video stream on an Android device.
Setup
- Install MediaPipe Framework on your system, see Framework installation guide for details.
- Install Android Development SDK and Android NDK. See how to do so also in [Framework installation guide].
- Enable developer options on your Android device.
- Setup Bazel on your system to build and deploy the Android app.
Graph for edge detection
We will be using the following graph, edge_detection_mobile_gpu.pbtxt:
# MediaPipe graph that performs GPU Sobel edge detection on a live video stream.
# Used in the examples in
# mediapipe/examples/android/src/java/com/mediapipe/apps/basic and
# mediapipe/examples/ios/edgedetectiongpu.

# Images coming into and out of the graph.
input_stream: "input_video"
output_stream: "output_video"

# Converts RGB images into luminance images, still stored in RGB format.
node: {
  calculator: "LuminanceCalculator"
  input_stream: "input_video"
  output_stream: "luma_video"
}

# Applies the Sobel filter to luminance images stored in RGB format.
node: {
  calculator: "SobelEdgesCalculator"
  input_stream: "luma_video"
  output_stream: "output_video"
}
A visualization of the graph is shown below:
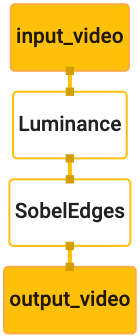
This graph has a single input stream named input_video for all incoming frames
that will be provided by your device's camera.
The first node in the graph, LuminanceCalculator, takes a single packet (image
frame) and applies a change in luminance using an OpenGL shader. The resulting
image frame is sent to the luma_video output stream.
The second node, SobelEdgesCalculator applies edge detection to incoming
packets in the luma_video stream and outputs results in output_video output
stream.
Our Android application will display the output image frames of the
output_video stream.
Initial minimal application setup
We first start with an simple Android application that displays "Hello World!"
on the screen. You may skip this step if you are familiar with building Android
applications using bazel.
Create a new directory where you will create your Android application. For
example, the complete code of this tutorial can be found at
mediapipe/examples/android/src/java/com/google/mediapipe/apps/basic. We will
refer to this path as $APPLICATION_PATH throughout the codelab.
Note that in the path to the application:
- The application is named
helloworld. - The
$PACKAGE_PATHof the application iscom.google.mediapipe.apps.basic. This is used in code snippets in this tutorial, so please remember to use your own$PACKAGE_PATHwhen you copy/use the code snippets.
Add a file activity_main.xml to $APPLICATION_PATH/res/layout. This displays
a TextView on the full screen of the application with the string Hello
World!:
<?xml version="1.0" encoding="utf-8"?>
<android.support.constraint.ConstraintLayout xmlns:android="http://schemas.android.com/apk/res/android"
xmlns:app="http://schemas.android.com/apk/res-auto"
xmlns:tools="http://schemas.android.com/tools"
android:layout_width="match_parent"
android:layout_height="match_parent">
<TextView
android:layout_width="wrap_content"
android:layout_height="wrap_content"
android:text="Hello World!"
app:layout_constraintBottom_toBottomOf="parent"
app:layout_constraintLeft_toLeftOf="parent"
app:layout_constraintRight_toRightOf="parent"
app:layout_constraintTop_toTopOf="parent" />
</android.support.constraint.ConstraintLayout>
Add a simple MainActivity.java to $APPLICATION_PATH which loads the content
of the activity_main.xml layout as shown below:
package com.google.mediapipe.apps.basic;
import android.os.Bundle;
import androidx.appcompat.app.AppCompatActivity;
/** Bare-bones main activity. */
public class MainActivity extends AppCompatActivity {
@Override
protected void onCreate(Bundle savedInstanceState) {
super.onCreate(savedInstanceState);
setContentView(R.layout.activity_main);
}
}
Add a manifest file, AndroidManifest.xml to $APPLICATION_PATH, which
launches MainActivity on application start:
<?xml version="1.0" encoding="utf-8"?>
<manifest xmlns:android="http://schemas.android.com/apk/res/android"
package="com.google.mediapipe.apps.basic">
<uses-sdk
android:minSdkVersion="19"
android:targetSdkVersion="19" />
<application
android:allowBackup="true"
android:label="${appName}"
android:supportsRtl="true"
android:theme="@style/AppTheme">
<activity
android:name="${mainActivity}"
android:exported="true"
android:screenOrientation="portrait">
<intent-filter>
<action android:name="android.intent.action.MAIN" />
<category android:name="android.intent.category.LAUNCHER" />
</intent-filter>
</activity>
</application>
</manifest>
In our application we are using a Theme.AppCompat theme in the app, so we need
appropriate theme references. Add colors.xml to
$APPLICATION_PATH/res/values/:
<?xml version="1.0" encoding="utf-8"?>
<resources>
<color name="colorPrimary">#008577</color>
<color name="colorPrimaryDark">#00574B</color>
<color name="colorAccent">#D81B60</color>
</resources>
Add styles.xml to $APPLICATION_PATH/res/values/:
<resources>
<!-- Base application theme. -->
<style name="AppTheme" parent="Theme.AppCompat.Light.DarkActionBar">
<!-- Customize your theme here. -->
<item name="colorPrimary">@color/colorPrimary</item>
<item name="colorPrimaryDark">@color/colorPrimaryDark</item>
<item name="colorAccent">@color/colorAccent</item>
</style>
</resources>
To build the application, add a BUILD file to $APPLICATION_PATH, and
${appName} and ${mainActivity} in the manifest will be replaced by strings
specified in BUILD as shown below.
android_library(
name = "basic_lib",
srcs = glob(["*.java"]),
manifest = "AndroidManifest.xml",
resource_files = glob(["res/**"]),
deps = [
"//third_party:android_constraint_layout",
"//third_party:androidx_appcompat",
],
)
android_binary(
name = "helloworld",
manifest = "AndroidManifest.xml",
manifest_values = {
"applicationId": "com.google.mediapipe.apps.basic",
"appName": "Hello World",
"mainActivity": ".MainActivity",
},
multidex = "native",
deps = [
":basic_lib",
],
)
The android_library rule adds dependencies for MainActivity, resource files
and AndroidManifest.xml.
The android_binary rule, uses the basic_lib Android library generated to
build a binary APK for installation on your Android device.
To build the app, use the following command:
bazel build -c opt --config=android_arm64 $APPLICATION_PATH:helloworld
Install the generated APK file using adb install. For example:
adb install bazel-bin/$APPLICATION_PATH/helloworld.apk
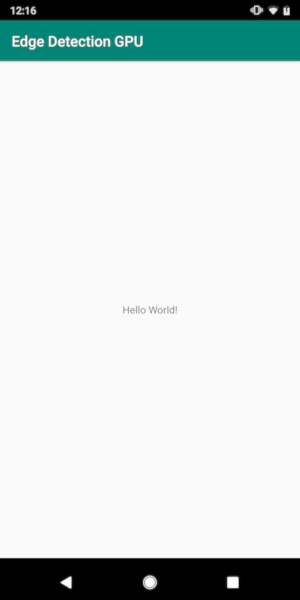
Open the application on your device. It should display a screen with the text
Hello World!.
Using the camera via CameraX
Camera Permissions
To use the camera in our application, we need to request the user to provide
access to the camera. To request camera permissions, add the following to
AndroidManifest.xml:
<!-- For using the camera -->
<uses-permission android:name="android.permission.CAMERA" />
<uses-feature android:name="android.hardware.camera" />
Change the minimum SDK version to 21 and target SDK version to 27 in the
same file:
<uses-sdk
    android:minSdkVersion="21"
    android:targetSdkVersion="27" />
This ensures that the user is prompted to request camera permission and enables us to use the CameraX library for camera access.
To request camera permissions, we can use a utility provided by MediaPipe Framework
components, namely PermissionHelper. To use it, add a dependency
"//mediapipe/java/com/google/mediapipe/components:android_components" in the
mediapipe_lib rule in BUILD.
To use the PermissionHelper in MainActivity, add the following line to the
onCreate function:
PermissionHelper.checkAndRequestCameraPermissions(this);
This prompts the user with a dialog on the screen to request for permissions to use the camera in this application.
Add the following code to handle the user response:
@Override
public void onRequestPermissionsResult(
    int requestCode, String[] permissions, int[] grantResults) {
  super.onRequestPermissionsResult(requestCode, permissions, grantResults);
  PermissionHelper.onRequestPermissionsResult(requestCode, permissions, grantResults);
}

@Override
protected void onResume() {
  super.onResume();
  if (PermissionHelper.cameraPermissionsGranted(this)) {
    startCamera();
  }
}

public void startCamera() {}
We will leave the startCamera() method empty for now. When the user responds
to the prompt, the MainActivity will resume and onResume() will be called.
The code will confirm that permissions for using the camera have been granted,
and then will start the camera.
Rebuild and install the application. You should now see a prompt requesting access to the camera for the application.
Camera Access
With camera permissions available, we can start and fetch frames from the camera.
To view the frames from the camera we will use a SurfaceView. Each frame
from the camera will be stored in a SurfaceTexture object. To use these, we
first need to change the layout of our application.
Remove the entire TextView code block from
$APPLICATION_PATH/res/layout/activity_main.xml and add the following code
instead:
<FrameLayout
    android:id="@+id/preview_display_layout"
    android:layout_width="fill_parent"
    android:layout_height="fill_parent"
    android:layout_weight="1">
    <TextView
        android:id="@+id/no_camera_access_view"
        android:layout_height="fill_parent"
        android:layout_width="fill_parent"
        android:gravity="center"
        android:text="@string/no_camera_access" />
</FrameLayout>
This code block has a new FrameLayout named preview_display_layout and a
TextView nested inside it, named no_camera_access_preview. When camera
access permissions are not granted, our application will display the
TextView with a string message, stored in the variable no_camera_access.
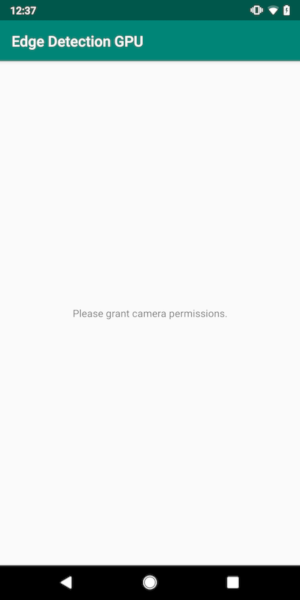
Add the following line in the $APPLICATION_PATH/res/values/strings.xml file:
<string name="no_camera_access" translatable="false">Please grant camera permissions.</string>
When the user doesn't grant camera permission, the screen will now look like this:
Now, we will add the SurfaceTexture and SurfaceView objects to
MainActivity:
private SurfaceTexture previewFrameTexture;
private SurfaceView previewDisplayView;
In the onCreate(Bundle) function, add the following two lines before
requesting camera permissions:
previewDisplayView = new SurfaceView(this);
setupPreviewDisplayView();
And now add the code defining setupPreviewDisplayView():
private void setupPreviewDisplayView() {
  previewDisplayView.setVisibility(View.GONE);
  ViewGroup viewGroup = findViewById(R.id.preview_display_layout);
  viewGroup.addView(previewDisplayView);
}
We define a new SurfaceView object and add it to the
preview_display_layout FrameLayout object so that we can use it to display
the camera frames using a SurfaceTexture object named previewFrameTexture.
To use previewFrameTexture for getting camera frames, we will use CameraX.
Framework provides a utility named CameraXPreviewHelper to use CameraX.
This class updates a listener when camera is started via
onCameraStarted(@Nullable SurfaceTexture).
To use this utility, modify the BUILD file to add a dependency on
"//mediapipe/java/com/google/mediapipe/components:android_camerax_helper".
Now import CameraXPreviewHelper and add the following line to
MainActivity:
private CameraXPreviewHelper cameraHelper;
Now, we can add our implementation to startCamera():
public void startCamera() {
  cameraHelper = new CameraXPreviewHelper();
  cameraHelper.setOnCameraStartedListener(
    surfaceTexture -> {
      previewFrameTexture = surfaceTexture;
      // Make the display view visible to start showing the preview.
      previewDisplayView.setVisibility(View.VISIBLE);
    });
}
This creates a new CameraXPreviewHelper object and adds an anonymous
listener on the object. When cameraHelper signals that the camera has started
and a surfaceTexture to grab frames is available, we save that
surfaceTexture as previewFrameTexture, and make the previewDisplayView
visible so that we can start seeing frames from the previewFrameTexture.
However, before starting the camera, we need to decide which camera we want to
use. CameraXPreviewHelper inherits from CameraHelper which provides two
options, FRONT and BACK. We can pass in the decision from the BUILD file
as metadata such that no code change is required to build another version of the
app using a different camera.
Assuming we want to use BACK camera to perform edge detection on a live scene
that we view from the camera, add the metadata into AndroidManifest.xml:
      ...
      <meta-data android:name="cameraFacingFront" android:value="${cameraFacingFront}"/>
  </application>
</manifest>
and specify the selection in BUILD in the helloworld android binary rule
with a new entry in manifest_values:
manifest_values = {
    "applicationId": "com.google.mediapipe.apps.basic",
    "appName": "Hello World",
    "mainActivity": ".MainActivity",
    "cameraFacingFront": "False",
},
Now, in MainActivity to retrieve the metadata specified in manifest_values,
add an ApplicationInfo object:
private ApplicationInfo applicationInfo;
In the onCreate() function, add:
try {
  applicationInfo =
      getPackageManager().getApplicationInfo(getPackageName(), PackageManager.GET_META_DATA);
} catch (NameNotFoundException e) {
  Log.e(TAG, "Cannot find application info: " + e);
}
Now add the following line at the end of the startCamera() function:
CameraHelper.CameraFacing cameraFacing =
    applicationInfo.metaData.getBoolean("cameraFacingFront", false)
        ? CameraHelper.CameraFacing.FRONT
        : CameraHelper.CameraFacing.BACK;
cameraHelper.startCamera(this, cameraFacing, /*unusedSurfaceTexture=*/ null);
At this point, the application should build successfully. However, when you run
the application on your device, you will see a black screen (even though camera
permissions have been granted). This is because even though we save the
surfaceTexture variable provided by the CameraXPreviewHelper, the
previewSurfaceView doesn't use its output and display it on screen yet.
Since we want to use the frames in a MediaPipe graph, we will not add code to view the camera output directly in this tutorial. Instead, we skip ahead to how we can send camera frames for processing to a MediaPipe graph and display the output of the graph on the screen.
ExternalTextureConverter setup
A SurfaceTexture captures image frames from a stream as an OpenGL ES
texture. To use a MediaPipe graph, frames captured from the camera should be
stored in a regular Open GL texture object. The Framework provides a class,
ExternalTextureConverter to convert the image stored in a SurfaceTexture
object to a regular OpenGL texture object.
To use ExternalTextureConverter, we also need an EGLContext, which is
created and managed by an EglManager object. Add a dependency to the BUILD
file to use EglManager, "//mediapipe/java/com/google/mediapipe/glutil".
In MainActivity, add the following declarations:
private EglManager eglManager;
private ExternalTextureConverter converter;
In the onCreate(Bundle) function, add a statement to initialize the
eglManager object before requesting camera permissions:
eglManager = new EglManager(null);
Recall that we defined the onResume() function in MainActivity to confirm
camera permissions have been granted and call startCamera(). Before this
check, add the following line in onResume() to initialize the converter
object:
converter = new ExternalTextureConverter(eglManager.getContext());
This converter now uses the GLContext managed by eglManager.
We also need to override the onPause() function in the MainActivity so that
if the application goes into a paused state, we close the converter properly:
@Override
protected void onPause() {
  super.onPause();
  converter.close();
}
To pipe the output of previewFrameTexture to the converter, add the
following block of code to setupPreviewDisplayView():
previewDisplayView
 .getHolder()
 .addCallback(
     new SurfaceHolder.Callback() {
       @Override
       public void surfaceCreated(SurfaceHolder holder) {}

       @Override
       public void surfaceChanged(SurfaceHolder holder, int format, int width, int height) {
         // (Re-)Compute the ideal size of the camera-preview display (the area that the
         // camera-preview frames get rendered onto, potentially with scaling and rotation)
         // based on the size of the SurfaceView that contains the display.
         Size viewSize = new Size(width, height);
         Size displaySize = cameraHelper.computeDisplaySizeFromViewSize(viewSize);

         // Connect the converter to the camera-preview frames as its input (via
         // previewFrameTexture), and configure the output width and height as the computed
         // display size.
         converter.setSurfaceTextureAndAttachToGLContext(
             previewFrameTexture, displaySize.getWidth(), displaySize.getHeight());
       }

       @Override
       public void surfaceDestroyed(SurfaceHolder holder) {}
     });
In this code block, we add a custom SurfaceHolder.Callback to
previewDisplayView and implement the surfaceChanged(SurfaceHolder holder, int
format, int width, int height) function to compute an appropriate display size
of the camera frames on the device screen and to tie the previewFrameTexture
object and send frames of the computed displaySize to the converter.
We are now ready to use camera frames in a MediaPipe graph.
Using a MediaPipe graph in Android
Add relevant dependencies
To use a MediaPipe graph, we need to add dependencies to the MediaPipe framework
on Android. We will first add a build rule to build a cc_binary using JNI code
of the MediaPipe framework and then build a cc_library rule to use this binary
in our application. Add the following code block to your BUILD file:
cc_binary(
    name = "libmediapipe_jni.so",
    linkshared = 1,
    linkstatic = 1,
    deps = [
        "//mediapipe/java/com/google/mediapipe/framework/jni:mediapipe_framework_jni",
    ],
)

cc_library(
    name = "mediapipe_jni_lib",
    srcs = [":libmediapipe_jni.so"],
    alwayslink = 1,
)
Add the dependency ":mediapipe_jni_lib" to the mediapipe_lib build rule in
the BUILD file.
Next, we need to add dependencies specific to the MediaPipe graph we want to use in the application.
First, add dependencies to all calculator code in the libmediapipe_jni.so
build rule:
"//mediapipe/graphs/edge_detection:mobile_calculators",
MediaPipe graphs are .pbtxt files, but to use them in the application, we need
to use the mediapipe_binary_graph build rule to generate a .binarypb file.
In the helloworld android binary build rule, add the mediapipe_binary_graph
target specific to the graph as an asset:
assets = [
  "//mediapipe/graphs/edge_detection:mobile_gpu_binary_graph",
],
assets_dir = "",
In the assets build rule, you can also add other assets such as TensorFlowLite
models used in your graph.
In addition, add additional manifest_values for properties specific to the
graph, to be later retrieved in MainActivity:
manifest_values = {
    "applicationId": "com.google.mediapipe.apps.basic",
    "appName": "Hello World",
    "mainActivity": ".MainActivity",
    "cameraFacingFront": "False",
    "binaryGraphName": "mobile_gpu.binarypb",
    "inputVideoStreamName": "input_video",
    "outputVideoStreamName": "output_video",
},
Note that binaryGraphName indicates the filename of the binary graph,
determined by the output_name field in the mediapipe_binary_graph target.
inputVideoStreamName and outputVideoStreamName are the input and output
video stream name specified in the graph respectively.
Now, the MainActivity needs to load the MediaPipe framework. Also, the
framework uses OpenCV, so MainActvity should also load OpenCV. Use the
following code in MainActivity (inside the class, but not inside any function)
to load both dependencies:
static {
  // Load all native libraries needed by the app.
  System.loadLibrary("mediapipe_jni");
  System.loadLibrary("opencv_java3");
}
Use the graph in MainActivity
First, we need to load the asset which contains the .binarypb compiled from
the .pbtxt file of the graph. To do this, we can use a MediaPipe utility,
AndroidAssetUtil.
Initialize the asset manager in onCreate(Bundle) before initializing
eglManager:
// Initialize asset manager so that MediaPipe native libraries can access the app assets, e.g.,
// binary graphs.
AndroidAssetUtil.initializeNativeAssetManager(this);
Now, we need to setup a FrameProcessor object that sends camera frames
prepared by the converter to the MediaPipe graph and runs the graph, prepares
the output and then updates the previewDisplayView to display the output. Add
the following code to declare the FrameProcessor:
private FrameProcessor processor;
and initialize it in onCreate(Bundle) after initializing eglManager:
processor =
    new FrameProcessor(
        this,
        eglManager.getNativeContext(),
        applicationInfo.metaData.getString("binaryGraphName"),
        applicationInfo.metaData.getString("inputVideoStreamName"),
        applicationInfo.metaData.getString("outputVideoStreamName"));
The processor needs to consume the converted frames from the converter for
processing. Add the following line to onResume() after initializing the
converter:
converter.setConsumer(processor);
The processor should send its output to previewDisplayView To do this, add
the following function definitions to our custom SurfaceHolder.Callback:
@Override
public void surfaceCreated(SurfaceHolder holder) {
  processor.getVideoSurfaceOutput().setSurface(holder.getSurface());
}

@Override
public void surfaceDestroyed(SurfaceHolder holder) {
  processor.getVideoSurfaceOutput().setSurface(null);
}
When the SurfaceHolder is created, we had the Surface to the
VideoSurfaceOutput of the processor. When it is destroyed, we remove it from
the VideoSurfaceOutput of the processor.
And that's it! You should now be able to successfully build and run the application on the device and see Sobel edge detection running on a live camera feed! Congrats!
If you ran into any issues, please see the full code of the tutorial here.