
Maps SDK สำหรับ iOS มีวิธีมากมายให้คุณเพิ่มรูปร่างลงในแผนที่ รูปทรงต่อไปนี้ได้รับการสนับสนุน
- เส้นประกอบคือกลุ่มส่วนของเส้นตรงที่ประกอบกันเป็นรูปร่างใดก็ได้ตามที่คุณต้องการ และสามารถใช้เพื่อทำเครื่องหมายเส้นทางและเส้นทางบนแผนที่
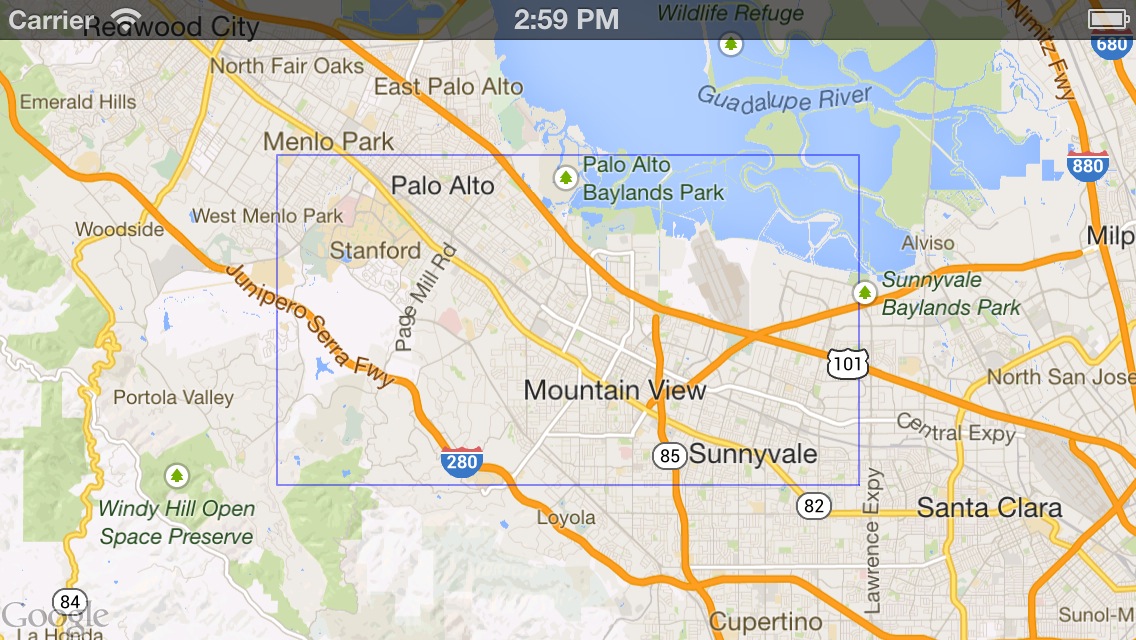
- รูปหลายเหลี่ยมเป็นรูปร่างปิดล้อม ซึ่งสามารถใช้เพื่อทำเครื่องหมายพื้นที่ต่างๆ บนแผนที่
- วงกลมคือการฉายภาพวงกลมบนพื้นผิวโลกที่แม่นยำทางภูมิศาสตร์
คุณสามารถแก้ไขรูปลักษณ์ของแต่ละรูปร่างได้หลายวิธี
เส้นประกอบ
เส้นประกอบจะช่วยให้คุณวาดเส้นบนแผนที่ได้ ออบเจ็กต์ GMSPolyline แสดงลำดับตำแหน่งตามลำดับ ซึ่งแสดงเป็นชุดส่วนของเส้นตรง คุณกำหนดสีของเส้นประกอบได้ด้วย GMSStrokeStyle
หากต้องการสร้างเส้นประกอบ คุณต้องระบุเส้นทางโดยการสร้างออบเจ็กต์ GMSMutablePath ที่สอดคล้องกันซึ่งมีจุด 2 จุดขึ้นไป
CLLocationCoordinate2D แต่ละอันแทนจุดหนึ่งบนพื้นผิวโลก ระบบจะลากส่วนของเส้นตรงระหว่างจุดตามลำดับที่คุณเพิ่มจุดลงในเส้นทาง คุณสามารถเพิ่มจุดลงในเส้นทางด้วยเมธอด addCoordinate: หรือ addLatitude:longitude:
Swift
let path = GMSMutablePath()
path.add(CLLocationCoordinate2D(latitude: -33.85, longitude: 151.20))
path.add(CLLocationCoordinate2D(latitude: -33.70, longitude: 151.40))
path.add(CLLocationCoordinate2D(latitude: -33.73, longitude: 151.41))
let polyline = GMSPolyline(path: path)
Objective-C
GMSMutablePath *path = [GMSMutablePath path];
[path addCoordinate:CLLocationCoordinate2DMake(-33.85, 151.20)];
[path addCoordinate:CLLocationCoordinate2DMake(-33.70, 151.40)];
[path addCoordinate:CLLocationCoordinate2DMake(-33.73, 151.41)];
GMSPolyline *polyline = [GMSPolyline polylineWithPath:path];
การเพิ่มเส้นประกอบ
- สร้างออบเจ็กต์
GMSMutablePath - กำหนดจุดในเส้นทางด้วยเมธอด
addCoordinate:หรือaddLatitude:longitude: - สร้างอินสแตนซ์ของออบเจ็กต์
GMSPolylineใหม่โดยใช้เส้นทางเป็นอาร์กิวเมนต์ - ตั้งค่าพร็อพเพอร์ตี้อื่นๆ เช่น
strokeWidthและstrokeColorตามต้องการ - ตั้งค่าพร็อพเพอร์ตี้
mapของGMSPolyline - เส้นประกอบจะปรากฏในแผนที่
ข้อมูลโค้ดต่อไปนี้จะเพิ่มรูปสี่เหลี่ยมผืนผ้าลงในแผนที่
Swift
let rectanglePath = GMSMutablePath()
rectanglePath.add(CLLocationCoordinate2D(latitude: 37.36, longitude: -122.0))
rectanglePath.add(CLLocationCoordinate2D(latitude: 37.45, longitude: -122.0))
rectanglePath.add(CLLocationCoordinate2D(latitude: 37.45, longitude: -122.2))
rectanglePath.add(CLLocationCoordinate2D(latitude: 37.36, longitude: -122.2))
rectanglePath.add(CLLocationCoordinate2D(latitude: 37.36, longitude: -122.0))

let rectangle = GMSPolyline(path: path)
rectangle.map = mapView
Objective-C
GMSMutablePath *rectanglePath = [GMSMutablePath path];
[rectanglePath addCoordinate:CLLocationCoordinate2DMake(37.36, -122.0)];
[rectanglePath addCoordinate:CLLocationCoordinate2DMake(37.45, -122.0)];
[rectanglePath addCoordinate:CLLocationCoordinate2DMake(37.45, -122.2)];
[rectanglePath addCoordinate:CLLocationCoordinate2DMake(37.36, -122.2)];
[rectanglePath addCoordinate:CLLocationCoordinate2DMake(37.36, -122.0)];

GMSPolyline *rectangle = [GMSPolyline polylineWithPath:path];
rectangle.map = mapView;
การนำเส้นประกอบออก
คุณสามารถนำเส้นประกอบออกจากแผนที่ได้โดยการตั้งค่าพร็อพเพอร์ตี้ map ของ GMSPolyline เป็น nil หรือ คุณสามารถนำการวางซ้อนทั้งหมดออก (รวมถึงเส้นประกอบและรูปร่างอื่นๆ) บนแผนที่โดยเรียกใช้เมธอด GMSMapView
clear
Swift
mapView.clear()
Objective-C
[mapView clear];
การปรับแต่งเส้นประกอบ
ออบเจ็กต์ GMSPolyline มีพร็อพเพอร์ตี้หลายรายการสำหรับควบคุมลักษณะที่ปรากฏของเส้น รองรับตัวเลือกต่อไปนี้
strokeWidth- ความกว้างของเส้นทั้งเส้นในหน่วยจุดบนหน้าจอ ค่าเริ่มต้นคือ 1 ความกว้างไม่ปรับขนาดเมื่อซูมแผนที่
geodesic-
เมื่อค่า
YESแสดงผลขอบเส้นประกอบนี้เป็นเรขาคณิต ส่วนต่างๆ ตามภูมิศาตร์ คือส่วนของเส้นทางที่สั้นที่สุดตามพื้นผิวโลก และอาจปรากฏเป็นเส้นโค้งบนแผนที่ที่มีเส้นโครงเมอร์เคเตอร์ ส่วนที่ไม่มีภูมิศาสตร์จะวาดเป็นเส้นตรงในแผนที่ ค่าเริ่มต้นคือNO spans- ใช้เพื่อระบุสีของเส้นประกอบอย่างน้อย 1 ส่วน พร็อพเพอร์ตี้ spans คืออาร์เรย์ของออบเจ็กต์
GMSStyleSpanรายการ เราขอแนะนำให้ใช้การตั้งค่าพร็อพเพอร์ตี้spansในการเปลี่ยนสีของเส้นประกอบ strokeColor- วัตถุ
UIColorที่ระบุสีของเส้นประกอบ ค่าเริ่มต้นคือblueColorระบบจะละเว้นพร็อพเพอร์ตี้strokeColorหากมีการตั้งค่าspans
ข้อมูลโค้ดต่อไปนี้จะเพิ่มเส้นประกอบแบบหนาจากเมลเบิร์นไปยังเพิร์ท โดยมีการประมาณค่าทางภูมิศาสตร์
Swift
let path = GMSMutablePath()
path.addLatitude(-37.81319, longitude: 144.96298)
path.addLatitude(-31.95285, longitude: 115.85734)
let polyline = GMSPolyline(path: path)
polyline.strokeWidth = 10.0
polyline.geodesic = true
polyline.map = mapView
Objective-C
GMSMutablePath *path = [GMSMutablePath path];
[path addLatitude:-37.81319 longitude:144.96298];
[path addLatitude:-31.95285 longitude:115.85734];
GMSPolyline *polyline = [GMSPolyline polylineWithPath:path];
polyline.strokeWidth = 10.f;
polyline.geodesic = YES;
polyline.map = mapView;
หากต้องการแก้ไขเส้นประกอบหลังจากเพิ่มลงในแผนที่แล้ว อย่าลืมจับออบเจ็กต์ GMSPolyline ไว้
Swift
polyline.strokeColor = .blue
Objective-C
polyline.strokeColor = [UIColor blueColor];
การเปลี่ยนสีของเส้นประกอบ
เส้นประกอบจะวาดเป็นกลุ่มของส่วนต่างๆ บนแผนที่ คุณสามารถเปลี่ยนสีของแต่ละส่วนหรือทั้งเส้นได้ด้วยพร็อพเพอร์ตี้ spans แม้ว่าพร็อพเพอร์ตี้นี้ช่วยให้คุณควบคุมสีของเส้นประกอบอย่างละเอียดได้ แต่ก็ยังมีความสะดวกหลายอย่างที่จะช่วยให้คุณใช้รูปแบบเดียวกับทั้งเส้นได้
ข้อมูลโค้ดด้านล่างใช้เมธอด spanWithColor: เพื่อเปลี่ยนสีของทั้งบรรทัดเป็นสีแดง
Swift
polyline.spans = [GMSStyleSpan(color: .red)]
Objective-C
polyline.spans = @[[GMSStyleSpan spanWithColor:[UIColor redColor]]];
หรือหากคุณมีสิทธิ์เข้าถึงออบเจ็กต์ GMSStrokeStyle อยู่แล้ว คุณจะใช้เมธอด spanWithStyle: ได้
Swift
let solidRed = GMSStrokeStyle.solidColor(.red)
polyline.spans = [GMSStyleSpan(style: solidRed)]
Objective-C
GMSStrokeStyle *solidRed = [GMSStrokeStyle solidColor:[UIColor redColor]];
polyline.spans = @[[GMSStyleSpan spanWithStyle:solidRed]];
ก่อนเวอร์ชัน 1.7 ของ Maps SDK สำหรับ iOS มีพร็อพเพอร์ตี้ strokeColor เพียงอันเดียวที่พร้อมใช้งานเพื่อตั้งค่าสีทั้งหมดของ GMSPolyline พร็อพเพอร์ตี้ spans มีลำดับความสำคัญเหนือกว่า strokeColor
Swift
polyline.strokeColor = .red
Objective-C
polyline.strokeColor = [UIColor redColor];
รูปแบบ
หากแอปใช้สีเส้นเดียวกันหลายครั้ง การกำหนดรูปแบบที่นำมาใช้ใหม่ได้อาจมีประโยชน์สำหรับคุณ รูปแบบเส้นประกอบจะกำหนดโดยใช้ออบเจ็กต์ GMSStrokeStyle สไตล์เส้นโครงร่างอาจเป็นสีทึบ
หรือการไล่ระดับสีจากสีหนึ่งเป็นอีกสีหนึ่งก็ได้ เมื่อสร้างสไตล์แล้ว คุณสามารถนำสไตล์ไปใช้กับ GMSStyleSpan โดยใช้เมธอด spanWithStyle: ได้
Swift
// Create two styles: one that is solid blue, and one that is a gradient from red to yellow
let solidBlue = GMSStrokeStyle.solidColor(.blue)
let solidBlueSpan = GMSStyleSpan(style: solidBlue)
let redYellow = GMSStrokeStyle.gradient(from: .red, to: .yellow)
let redYellowSpan = GMSStyleSpan(style: redYellow)
Objective-C
// Create two styles: one that is solid blue, and one that is a gradient from red to yellow
GMSStrokeStyle *solidBlue = [GMSStrokeStyle solidColor:[UIColor blueColor]];
GMSStyleSpan *solidBlueSpan = [GMSStyleSpan spanWithStyle:solidBlue];
GMSStrokeStyle *redYellow =
    [GMSStrokeStyle gradientFromColor:[UIColor redColor] toColor:[UIColor yellowColor]];
GMSStyleSpan *redYellowSpan = [GMSStyleSpan spanWithStyle:redYellow];
รูปแบบของ span จะดำเนินต่อไปจนถึงจุดสิ้นสุดของเส้นประกอบ หรือจนกว่าจะมีการตั้งค่ารูปแบบใหม่ คุณเปลี่ยนสีของทั้งเส้นได้โดยการตั้งค่าพร็อพเพอร์ตี้ spans ของเส้นประกอบเป็น GMSStyleSpan เส้นเดียว ตัวอย่างนี้จะแสดงวิธีใช้การไล่ระดับสีตลอดความยาวของเส้น
Swift
polyline.spans = [GMSStyleSpan(style: redYellow)]
Objective-C
polyline.spans = @[[GMSStyleSpan spanWithStyle:redYellow]];
การเปลี่ยนสีของส่วนของเส้นตรงแต่ละเส้น
หากต้องการจัดรูปแบบส่วนเส้นตรงแต่ละส่วนแยกกัน คุณจะทำได้โดยการสร้างอาร์เรย์ของออบเจ็กต์ GMSStyleSpan แล้วส่งผ่านค่านี้ไปยังพร็อพเพอร์ตี้ spans โดยค่าเริ่มต้น แต่ละรายการในอาร์เรย์จะกำหนดสีของเส้นตรง หากมีองค์ประกอบในอาร์เรย์มากกว่ากลุ่มในบรรทัด องค์ประกอบเพิ่มเติมจะถูกละเว้น หากมีองค์ประกอบในอาร์เรย์น้อยกว่า GMSStyleSpan สุดท้ายจะอธิบายสีของส่วนที่เหลือของเส้น
คุณใช้บล็อกสีและ/หรือเส้นประกอบแบบไล่ระดับสีเพื่อระบุการเปลี่ยนแปลงตามเส้นประกอบได้ เช่น ระดับความสูงหรือความเร็ว ข้อมูลโค้ดด้านล่างจะกำหนดสีของเส้น 2 ส่วนแรกของเส้นเป็นสีแดง และส่วนที่เหลือของเส้นจะมีการไล่ระดับสีจากสีแดงเป็นสีเหลือง
Swift
polyline.spans = [
  GMSStyleSpan(style: solidRed),
  GMSStyleSpan(style: solidRed),
  GMSStyleSpan(style: redYellow)
]
Objective-C
polyline.spans = @[[GMSStyleSpan spanWithStyle:solidRed],
                   [GMSStyleSpan spanWithStyle:solidRed],
                   [GMSStyleSpan spanWithStyle:redYellow]];
คุณใช้เมธอด spanWithStyle:segments: เพื่อตั้งค่าสไตล์ให้กับหลายกลุ่มพร้อมกันได้ ตัวอย่างเช่น โค้ดต่อไปนี้เทียบเท่ากับโค้ดด้านบน
ระบบจะไม่สนใจความยาวส่วนของ GMSStyleSpan สุดท้ายเสมอเนื่องจากสไตล์จะใช้เพื่ออธิบายส่วนที่เหลือของบรรทัด
Swift
polyline.spans = [
  GMSStyleSpan(style: solidRed, segments:2),
  GMSStyleSpan(style: redYellow, segments:10)
]
Objective-C
polyline.spans = @[[GMSStyleSpan spanWithStyle:solidRed segments:2],
                   [GMSStyleSpan spanWithStyle:redYellow segments:10]];
กลุ่มที่เป็นเศษส่วน
คุณอาจระบุกลุ่มเป็นค่าเศษส่วนได้เช่นกัน วิธีนี้จะใช้รูปแบบกับจำนวนเศษส่วนของกลุ่ม ซึ่งอาจทำให้เกิดการแยกส่วนในกลุ่มเดียว GMSStyleSpan แต่ละรายการจะเริ่มทันทีต่อจากส่วนที่ 2 ในตัวอย่างด้านล่าง สีเทาจะเริ่มจากส่วนที่ 1⁄2 ถึงส่วนที่ 2 และต่อไปยัง 1⁄2 ถึงส่วนที่ 3
Swift
polyline.spans = [
  GMSStyleSpan(style: solidRed, segments: 2.5),
  GMSStyleSpan(color: .gray),
  GMSStyleSpan(color: .purple, segments: 0.75),
  GMSStyleSpan(style: redYellow)
]
Objective-C
polyline.spans = @[[GMSStyleSpan spanWithStyle:solidRed segments:2.5],
                   [GMSStyleSpan spanWithColor:[UIColor grayColor]],
                   [GMSStyleSpan spanWithColor:[UIColor purpleColor] segments:0.75],
                   [GMSStyleSpan spanWithStyle:redYellow]];
การเพิ่มรูปแบบสีที่ซ้ำกันในเส้นประกอบ
หากต้องการเพิ่มรูปแบบลงในเส้นประกอบ ให้ใช้เมธอดยูทิลิตี GMSStyleSpans ใน GMSGeometryUtils เมธอด GMSStyleSpans จะยอมรับ 2 อาร์เรย์ที่ระบุรูปแบบการทำซ้ำ อาร์เรย์หนึ่งจะกำหนดรูปแบบที่ควรใช้ซ้ำ ส่วนอีกชุดจะกำหนดรูปแบบการทำซ้ำ เมื่อใช้ร่วมกัน คุณจะสามารถสร้างรูปแบบที่นำไปใช้กับเส้นประกอบใดก็ได้ ไม่ว่าจะมีความยาวหรือกี่กลุ่มก็ตาม
เช่น ข้อมูลโค้ดด้านล่างกำหนดเส้นประกอบที่มีรูปแบบสลับสีขาวดำ ความยาวของเส้นแบ่งเป็นเมตรตามแนวแร็มบ์ (Mercator เป็นเส้นตรง) ตามที่ระบุประเภทเป็น kGMSLengthRhumb
Swift
let styles = [
  GMSStrokeStyle.solidColor(.white),
  GMSStrokeStyle.solidColor(.black)
]
let lengths: [NSNumber] = [100000, 50000]
polyline.spans = GMSStyleSpans(
  polyline.path!,
  styles,
  lengths,
  GMSLengthKind.rhumb
)
Objective-C
NSArray *styles = @[[GMSStrokeStyle solidColor:[UIColor whiteColor]],
                    [GMSStrokeStyle solidColor:[UIColor blackColor]]];
NSArray *lengths = @[@100000, @50000];
polyline.spans = GMSStyleSpans(polyline.path, styles, lengths, kGMSLengthRhumb);
เส้นประกอบที่ประทับจากสไปรท์
โพลีไลน์ที่ประทับจากสไปรท์ช่วยให้คุณสร้างเส้นประกอบได้โดยใช้รูปภาพบิตแมปซ้ำๆ ตามต้องการ รูปทรงต่างๆ แสดงให้เห็นเส้นโครงร่างพื้นหลังที่ชัดเจน แต่ตราประทับไม่มีการตัดตามมุมของเส้น จึงมีประโยชน์สำหรับสถานการณ์อย่างเช่น การทำเครื่องหมายจุดสำหรับแสดงเส้นทางเดินเท้า
คุณสามารถใช้ฟีเจอร์นี้โดยใช้ GMSSpriteStyle และตั้งค่าให้เป็นสแตมป์โดยใช้พร็อพเพอร์ตี้ stampStyle ของ GMSStrokeStyle
Swift
let path = GMSMutablePath()
path.addLatitude(-37.81319, longitude: 144.96298)
path.addLatitude(-31.95285, longitude: 115.85734)
let polyline = GMSPolyline(path: path)
polyline.strokeWidth = 20
let image = UIImage(named: "imageFromBundleOrAsset")! // Image could be from anywhere
let stampStyle = GMSSpriteStyle(image: image)
let transparentStampStroke = GMSStrokeStyle.transparentStroke(withStamp: stampStyle)
let span = GMSStyleSpan(style: transparentStampStroke)
polyline.spans = [span]
polyline.map = mapView
Objective-C
GMSMutablePath *path = [GMSMutablePath path];
[path addLatitude:-37.81319 longitude:144.96298];
[path addLatitude:-31.95285 longitude:115.85734];
polyline.strokeWidth = 20;
GMSPolyline *polyline = [GMSPolyline polylineWithPath:path];

UIImage *image = [UIImage imageNamed:@"imageFromBundleOrAsset"];
GMSStrokeStyle *transparentStampStroke = [GMSStrokeStyle transparentStrokeWithStampStyle:[GMSSpriteStyle spriteStyleWithImage:image]];

GMSStyleSpan *span = [GMSStyleSpan spanWithStyle:transparentStampStroke];
polyline.spans = @[span];
polyline.map = _mapView;
เส้นประกอบที่ประทับบนพื้นผิว
เส้นประกอบที่พิมพ์ด้วยพื้นผิวช่วยให้คุณสร้างเส้นประกอบได้โดยใช้พื้นผิวที่ซ้ำกันตามต้องการ รูปร่างสามารถแสดงด้วยสีทึบ สีทึบ หรือเส้นพื้นหลังแบบไล่ระดับสี พื้นผิวจะปรับขนาดเมื่อระดับการซูมเปลี่ยนแปลง รูปภาพที่สิ้นสุดหรือจุดเริ่มต้นของเส้นทางหรือจุดเส้นทางจะถูกตัดที่ระดับการซูมบางระดับ
คุณสามารถใช้ฟีเจอร์นี้โดยใช้ GMSTextureStyle และตั้งค่าให้เป็นสแตมป์โดยใช้พร็อพเพอร์ตี้ stampStyle ของ GMSStrokeStyle
Swift
let path = GMSMutablePath()
path.addLatitude(-37.81319, longitude: 144.96298)
path.addLatitude(-31.95285, longitude: 115.85734)
let polyline = GMSPolyline(path: path)
polyline.strokeWidth = 20
let redWithStamp = GMSStrokeStyle.solidColor(.red)
let image = UIImage(named: "imageFromBundleOrAsset")! // Image could be from anywhere
redWithStamp.stampStyle = GMSTextureStyle(image: image)
let span = GMSStyleSpan(style: redWithStamp)
polyline.spans = [span]
polyline.map = mapView
Objective-C
GMSMutablePath *path = [GMSMutablePath path];
[path addLatitude:-37.81319 longitude:144.96298];
[path addLatitude:-31.95285 longitude:115.85734];
GMSPolyline *polyline = [GMSPolyline polylineWithPath:path];
polyline.strokeWidth = 20;
GMSStrokeStyle *redWithStamp = [GMSStrokeStyle solidColor:[UIColor redColor]];

UIImage *image = [UIImage imageNamed:@"imageFromBundleOrAsset"]; // Image could be from anywhere
redWithStamp.stampStyle = [GMSTextureStyle textureStyleWithImage:image];

GMSStyleSpan *span = [GMSStyleSpan spanWithStyle:redWithStamp];
polyline.spans = @[span];
polyline.map = _mapView;
ความสามารถของแผนที่
พร็อพเพอร์ตี้ mapCapabilities บน GMSMapView เพิ่มการตรวจสอบแบบเป็นโปรแกรมสำหรับฟีเจอร์เฉพาะแผนที่ วิธีนี้มีประโยชน์เมื่อต้องการทราบว่าแมป capabilities บางรายการพร้อมใช้งานหรือไม่ก่อนที่จะเรียกใช้ API ที่เฉพาะเจาะจง การค้นหานี้จะกำหนดว่ามุมมองแผนที่รองรับเส้นประกอบที่ประทับตราสไปรท์หรือไม่
Swift
let path = GMSMutablePath()
path.addLatitude(-37.81319, longitude: 144.96298)
path.addLatitude(-31.95285, longitude: 115.85734)
let polyline = GMSPolyline(path: path)
polyline.strokeWidth = 20
let image = UIImage(named: "imageFromBundleOrAsset")! // Image could be from anywhere
let spans: [GMSStyleSpan]
if (mapView.mapCapabilities.contains(.spritePolylines)) {
  let spriteStyle = GMSSpriteStyle(image: image)
  let stroke = GMSStrokeStyle.transparentStroke(withStamp: spriteStyle)
  spans = [ GMSStyleSpan(style: stroke) ]
} else {
  let stroke = GMSStrokeStyle.solidColor(.clear)
  stroke.stampStyle = GMSTextureStyle(image: image)
  spans = [ GMSStyleSpan(style: stroke) ]
}
polyline.spans = spans
polyline.map = mapView
Objective-C
GMSMutablePath *path = [GMSMutablePath path];
[path addLatitude:-37.81319 longitude:144.96298];
[path addLatitude:-31.95285 longitude:115.85734];

UIImage *_Nonnull image = [UIImage imageNamed:@"imageFromBundleOrAsset"]; // Image could be from anywhere

NSArray<GMSStyleSpan *> * spans;
if (_mapView.mapCapabilities & GMSMapCapabilityFlagsSpritePolylines) {
  GMSSpriteStyle *spriteStyle = [GMSSpriteStyle spriteStyleWithImage:image];
  GMSStrokeStyle *stroke = [GMSStrokeStyle transparentStrokeWithStampStyle:spriteStyle];
  spans = @[ [GMSStyleSpan spanWithStyle:stroke] ];
} else {
  GMSStrokeStyle *stroke = [GMSStrokeStyle solidColor:UIColor.clearColor];
  stroke.stampStyle = [GMSTextureStyle textureStyleWithImage:image];
  spans = @[ [GMSStyleSpan spanWithStyle:stroke] ];
}

GMSPolyline *polyline = [GMSPolyline polylineWithPath:path];
polyline.strokeWidth = 20;
polyline.spans = spans;
polyline.map = _mapView;
รูปแบบนี้จะช่วยให้คุณสมัครรับข้อมูลการเปลี่ยนแปลงและตอบสนองต่อการอัปเดตสถานะการดูแผนที่ได้ คุณยังใช้ didChangeMapCapabilities ใน GMSMapViewDelegate เพื่อรับข้อมูลอัปเดตเกี่ยวกับความพร้อมใช้งานของฟีเจอร์ได้ด้วย
รูปหลายเหลี่ยม
รูปหลายเหลี่ยมคล้ายกับเส้นประกอบตรงที่ประกอบด้วยชุดพิกัดตามลำดับ อย่างไรก็ตาม แทนที่จะใช้ส่วนปลายเปิด ระบบจะออกแบบรูปหลายเหลี่ยมให้กำหนดพื้นที่ที่มั่นคงภายในวงปิด รูปหลายเหลี่ยมจะกำหนดไว้ใน Maps SDK สำหรับ iOS โดยคลาส GMSPolygon
คุณสามารถเพิ่ม GMSPolygon ลงในแผนที่ได้ในลักษณะเดียวกันกับการเพิ่ม GMSPolyline ก่อนอื่นให้ระบุเส้นทางโดยการสร้างออบเจ็กต์ GMSMutablePath ที่สอดคล้องกันแล้วเพิ่มจุดลงในวัตถุ
จุดเหล่านี้จะเป็นโครงร่างของรูปหลายเหลี่ยม CLLocationCoordinate2D แต่ละอันแสดงถึงจุดบนพื้นผิวโลก ระบบจะวาดส่วนของเส้นระหว่างจุดต่างๆ ตามลำดับที่คุณป้อนลงในเส้นทาง
เพิ่มรูปหลายเหลี่ยม
- สร้างออบเจ็กต์
GMSMutablePath - กำหนดจุดในเส้นทางด้วยเมธอด
addCoordinate:หรือaddLatitude:longitude:จุดเหล่านี้จะสร้างโครงร่างของรูปหลายเหลี่ยม - สร้างอินสแตนซ์ของออบเจ็กต์
GMSPolygonใหม่โดยใช้เส้นทางเป็นอาร์กิวเมนต์ - ตั้งค่าพร็อพเพอร์ตี้อื่นๆ เช่น
strokeWidth,strokeColorและfillColorได้ตามต้องการ - กำหนดรูปหลายเหลี่ยมให้กับออบเจ็กต์
GMSMapViewโดยการตั้งค่าพร็อพเพอร์ตี้GMSPolygon.map - รูปหลายเหลี่ยมจะปรากฏขึ้นบนแผนที่
ข้อมูลโค้ดต่อไปนี้จะเพิ่มรูปสี่เหลี่ยมผืนผ้าลงในแผนที่
Swift
// Create a rectangular path
let rect = GMSMutablePath()
rect.add(CLLocationCoordinate2D(latitude: 37.36, longitude: -122.0))
rect.add(CLLocationCoordinate2D(latitude: 37.45, longitude: -122.0))
rect.add(CLLocationCoordinate2D(latitude: 37.45, longitude: -122.2))
rect.add(CLLocationCoordinate2D(latitude: 37.36, longitude: -122.2))

// Create the polygon, and assign it to the map.
let polygon = GMSPolygon(path: rect)
polygon.fillColor = UIColor(red: 0.25, green: 0, blue: 0, alpha: 0.05);
polygon.strokeColor = .black
polygon.strokeWidth = 2
polygon.map = mapView
Objective-C
// Create a rectangular path
GMSMutablePath *rect = [GMSMutablePath path];
[rect addCoordinate:CLLocationCoordinate2DMake(37.36, -122.0)];
[rect addCoordinate:CLLocationCoordinate2DMake(37.45, -122.0)];
[rect addCoordinate:CLLocationCoordinate2DMake(37.45, -122.2)];
[rect addCoordinate:CLLocationCoordinate2DMake(37.36, -122.2)];

// Create the polygon, and assign it to the map.
GMSPolygon *polygon = [GMSPolygon polygonWithPath:rect];
polygon.fillColor = [UIColor colorWithRed:0.25 green:0 blue:0 alpha:0.05];
polygon.strokeColor = [UIColor blackColor];
polygon.strokeWidth = 2;
polygon.map = mapView;
คุณสามารถปรับแต่งลักษณะของรูปหลายเหลี่ยมได้ทั้งก่อนเพิ่มลงในแผนที่และหลังจากที่เพิ่มลงในแผนที่แล้ว
การนำรูปหลายเหลี่ยมออก
นำรูปหลายเหลี่ยมออกโดยตั้งค่าพร็อพเพอร์ตี้ GMSPolygon.map เป็น nil และปลด layer ออกจากระดับบนสุด
Swift
 polygon.map = nil
 polygon.layer.removeFromSuperLayer()
Objective-C
 polygon.map = nil;
 [polygon.layer removeFromSuperlayer];
วงกลม
นอกจากคลาส GMSPolygon ทั่วไปแล้ว Maps SDK สำหรับ iOS ยังมี GMSCircle ที่ให้คุณวาดวงกลมบนพื้นผิวโลกได้ด้วย
หากต้องการสร้างวงกลม คุณต้องระบุคุณสมบัติ 2 รายการต่อไปนี้
positionในฐานะCLLocationCoordinate2Dradiusเมตร
จากนั้น วงกลมจะถูกกำหนดให้เป็นชุดของจุดทั้งหมดบนพื้นผิวโลก
ซึ่งอยู่ห่างจาก center ที่กำหนด radius เมตร เนื่องจากวิธีที่ Maps API ใช้แสดงการฉายภาพของทรงกลมบนพื้นผิวราบเรียบ เส้นโครงนี้จะปรากฏเป็นวงกลมที่เกือบสมบูรณ์บนแผนที่เมื่ออยู่ใกล้กับเส้นศูนย์สูตร และจะมีลักษณะไม่เป็นวงกลมเพิ่มขึ้นเรื่อยๆ (บนหน้าจอ) ในขณะที่วงกลมจะเลื่อนออกจากเส้นศูนย์สูตร
การเพิ่มแวดวง
ข้อมูลโค้ดต่อไปนี้จะเพิ่มวงกลมลงในแผนที่
Swift
let circleCenter = CLLocationCoordinate2D(latitude: 37.35, longitude: -122.0)
let circle = GMSCircle(position: circleCenter, radius: 1000)
circle.map = mapView
Objective-C
CLLocationCoordinate2D circleCenter = CLLocationCoordinate2DMake(37.35, -122.0);
GMSCircle *circle = [GMSCircle circleWithPosition:circleCenter
                                         radius:1000];
circle.map = mapView;
คุณสามารถปรับแต่งรูปลักษณ์ของวงกลมได้ทั้งก่อนเพิ่มลงในแผนที่และหลังจากที่เพิ่มลงในแผนที่แล้ว
การกำหนดค่าแวดวง
คุณระบุสีและความกว้างของเส้นโครงร่างได้โดยการแก้ไขคุณสมบัติของ GMSCircle รองรับตัวเลือกต่อไปนี้
fillColor- วัตถุ
UIColorที่ระบุสีภายในของวงกลม ค่าเริ่มต้นคือ "โปร่งใส" strokeColor- ออบเจ็กต์
UIColorที่ระบุสีเส้นขอบของวงกลม ค่าเริ่มต้นคือblackColor strokeWidth- ความหนาของเส้นขอบของวงกลมในหน่วยจุดหน้าจอ ค่าเริ่มต้นคือ 1 ความหนาไม่ปรับขนาดเมื่อซูมแผนที่
ข้อมูลโค้ดต่อไปนี้เพิ่มวงกลมหนาสีแดงที่มีด้านในสีแดงกึ่งโปร่งแสง
Swift
circle.fillColor = UIColor(red: 0.35, green: 0, blue: 0, alpha: 0.05)
circle.strokeColor = .red
circle.strokeWidth = 5
Objective-C
circle.fillColor = [UIColor colorWithRed:0.25 green:0 blue:0 alpha:0.05];
circle.strokeColor = [UIColor redColor];
circle.strokeWidth = 5;
การสร้างรูปหลายเหลี่ยมกลวง
คุณรวมเส้นทางหลายเส้นทางไว้ในวัตถุ GMSPolygon รายการเดียวเพื่อสร้างรูปร่างที่ซับซ้อนได้ เช่น วงกลมที่เติมสีหรือโดนัท (โดยที่พื้นที่รูปหลายเหลี่ยมจะปรากฏภายในรูปหลายเหลี่ยมเป็นรูปร่างแยกกัน) รูปร่างที่ซับซ้อนคือ
องค์ประกอบของเส้นทางหลายเส้นทาง
สร้างรูปหลายเหลี่ยมพร้อมเส้นทางที่ระบุพื้นที่ที่ใหญ่ที่สุดซึ่งปิดด้วยรูปหลายเหลี่ยม จากนั้นระบุพร็อพเพอร์ตี้ holes ของรูปหลายเหลี่ยมเป็นอาร์เรย์ของวัตถุ GMSPath อย่างน้อย 1 รายการซึ่งจะกำหนดรูภายในรูปหลายเหลี่ยม
หากเส้นทางขนาดเล็กถูกล้อมรอบด้วยเส้นทางที่ใหญ่กว่า ก็จะแสดงเหมือนกับว่าชิ้นส่วนของรูปหลายเหลี่ยมนั้นถูกนำออกไปแล้ว
ตัวอย่างโค้ดต่อไปนี้สร้างรูปหลายเหลี่ยมที่มี 2 หลุม
Swift
let hydeParkLocation = CLLocationCoordinate2D(latitude: -33.87344, longitude: 151.21135)
let camera = GMSCameraPosition.camera(withTarget: hydeParkLocation, zoom: 16)
let mapView = GMSMapView.map(withFrame: .zero, camera: camera)
mapView.animate(to: camera)

let hydePark = "tpwmEkd|y[QVe@Pk@BsHe@mGc@iNaAKMaBIYIq@qAMo@Eo@@[Fe@DoALu@HUb@c@XUZS^ELGxOhAd@@ZB`@J^BhFRlBN\\BZ@`AFrATAJAR?rAE\\C~BIpD"
let archibaldFountain = "tlvmEqq|y[NNCXSJQOB[TI"
let reflectionPool = "bewmEwk|y[Dm@zAPEj@{AO"

let hollowPolygon = GMSPolygon()
hollowPolygon.path = GMSPath(fromEncodedPath: hydePark)
hollowPolygon.holes = [GMSPath(fromEncodedPath: archibaldFountain)!, GMSPath(fromEncodedPath: reflectionPool)!]
hollowPolygon.fillColor = UIColor(red: 1.0, green: 0.0, blue: 0.0, alpha: 0.2)
hollowPolygon.strokeColor = UIColor(red: 1.0, green: 0.0, blue: 0.0, alpha: 1.0)
hollowPolygon.strokeWidth = 2
hollowPolygon.map = mapView
Objective-C
CLLocationCoordinate2D hydeParkLocation = CLLocationCoordinate2DMake(-33.87344, 151.21135);
GMSCameraPosition *camera = [GMSCameraPosition cameraWithTarget:hydeParkLocation
                                                           zoom:16];
mapView = [GMSMapView mapWithFrame:CGRectZero camera:camera];

NSString *hydePark = @"tpwmEkd|y[QVe@Pk@BsHe@mGc@iNaAKMaBIYIq@qAMo@Eo@@[Fe@DoALu@HUb@c@XUZS^ELGxOhAd@@ZB`@J^BhFRlBN\\BZ@`AFrATAJAR?rAE\\C~BIpD";
NSString *archibaldFountain = @"tlvmEqq|y[NNCXSJQOB[TI";
NSString *reflectionPool = @"bewmEwk|y[Dm@zAPEj@{AO";

GMSPolygon *hollowPolygon = [[GMSPolygon alloc] init];
hollowPolygon.path = [GMSPath pathFromEncodedPath:hydePark];
hollowPolygon.holes = @[[GMSPath pathFromEncodedPath:archibaldFountain],
                  [GMSPath pathFromEncodedPath:reflectionPool]];
hollowPolygon.fillColor = [UIColor colorWithRed:1.0 green:0.0 blue:0.0 alpha:0.2];
hollowPolygon.strokeColor = [UIColor colorWithRed:1.0 green:0.0 blue:0.0 alpha:1.0];
hollowPolygon.strokeWidth = 2;
hollowPolygon.map = mapView;