קיבוץ הסמנים יאפשר לך להוסיף הרבה סמנים למפה בלי להקשות על הקריאה של המפה.
מבוא
בסרטון הזה מפורט השימוש באשכולות סמנים כאשר הנתונים שלך דורשים מספר רב של נקודות נתונים במפה.
הכלי לקיבוץ סמנים עוזר לנהל מספר סמנים ברמות שונות של מרחק מהתצוגה. למען הדיוק, ה'סמנים' הם למעשה 'פריטים' בשלב הזה, והם הופכים ל'סמנים' רק לאחר רינדור. לשם הבהרה, במסמך זה נציין את השם 'סמנים' לכל אורך המסמך.
כשמשתמש מציג את המפה ברמת זום גבוהה, הסמנים השונים מופיעים במפה. כשמשתמש מקטין את התצוגה, הסמנים מקובצים יחד לאשכולות, כדי שיהיה קל יותר לצפות במפה. כלי השירות לאשכולות סמנים הוא חלק מ-Maps SDK for Android Utility Library. אם עדיין לא הגדרת את הספרייה, היעזר במדריך ההגדרה לפני שתקרא את שאר הדף הזה.
כדי להשתמש בכלי לאשכולות סמנים, עליך להוסיף סמנים כ-ClusterItem אובייקטים ל-ClusterManager. ה-ClusterManager מעביר את הסמנים אל Algorithm, והופך אותם לקבוצה של אשכולות. השדה ClusterRenderer
מטפל בעיבוד באמצעות הוספה והסרה של אשכולות וסמנים
נפרדים. אפשר לחבר את ClusterRenderer ואת Algorithm
להתאמה אישית.
ספריית השירות כוללת אפליקציית הדגמה שמספקת הטמעות לדוגמה של כלי השירות לאסימון סמנים. לקבלת עזרה בהפעלה של אפליקציית ההדגמה, ניתן לעיין במדריך ההגדרה. אפליקציית ההדגמה כוללת את הדוגמאות הבאות לאשכולות סמנים:
ClusteringDemoActivity: פעילות פשוטה שמדגימה אשכולות סמנים.BigClusteringDemoActivity: אשכולות עם 2,000 סמנים.CustomMarkerClusteringDemoActivity: יצירת עיצוב מותאם אישית עבור סמנים מקובצים.
הוספת מקבץ סמנים פשוט
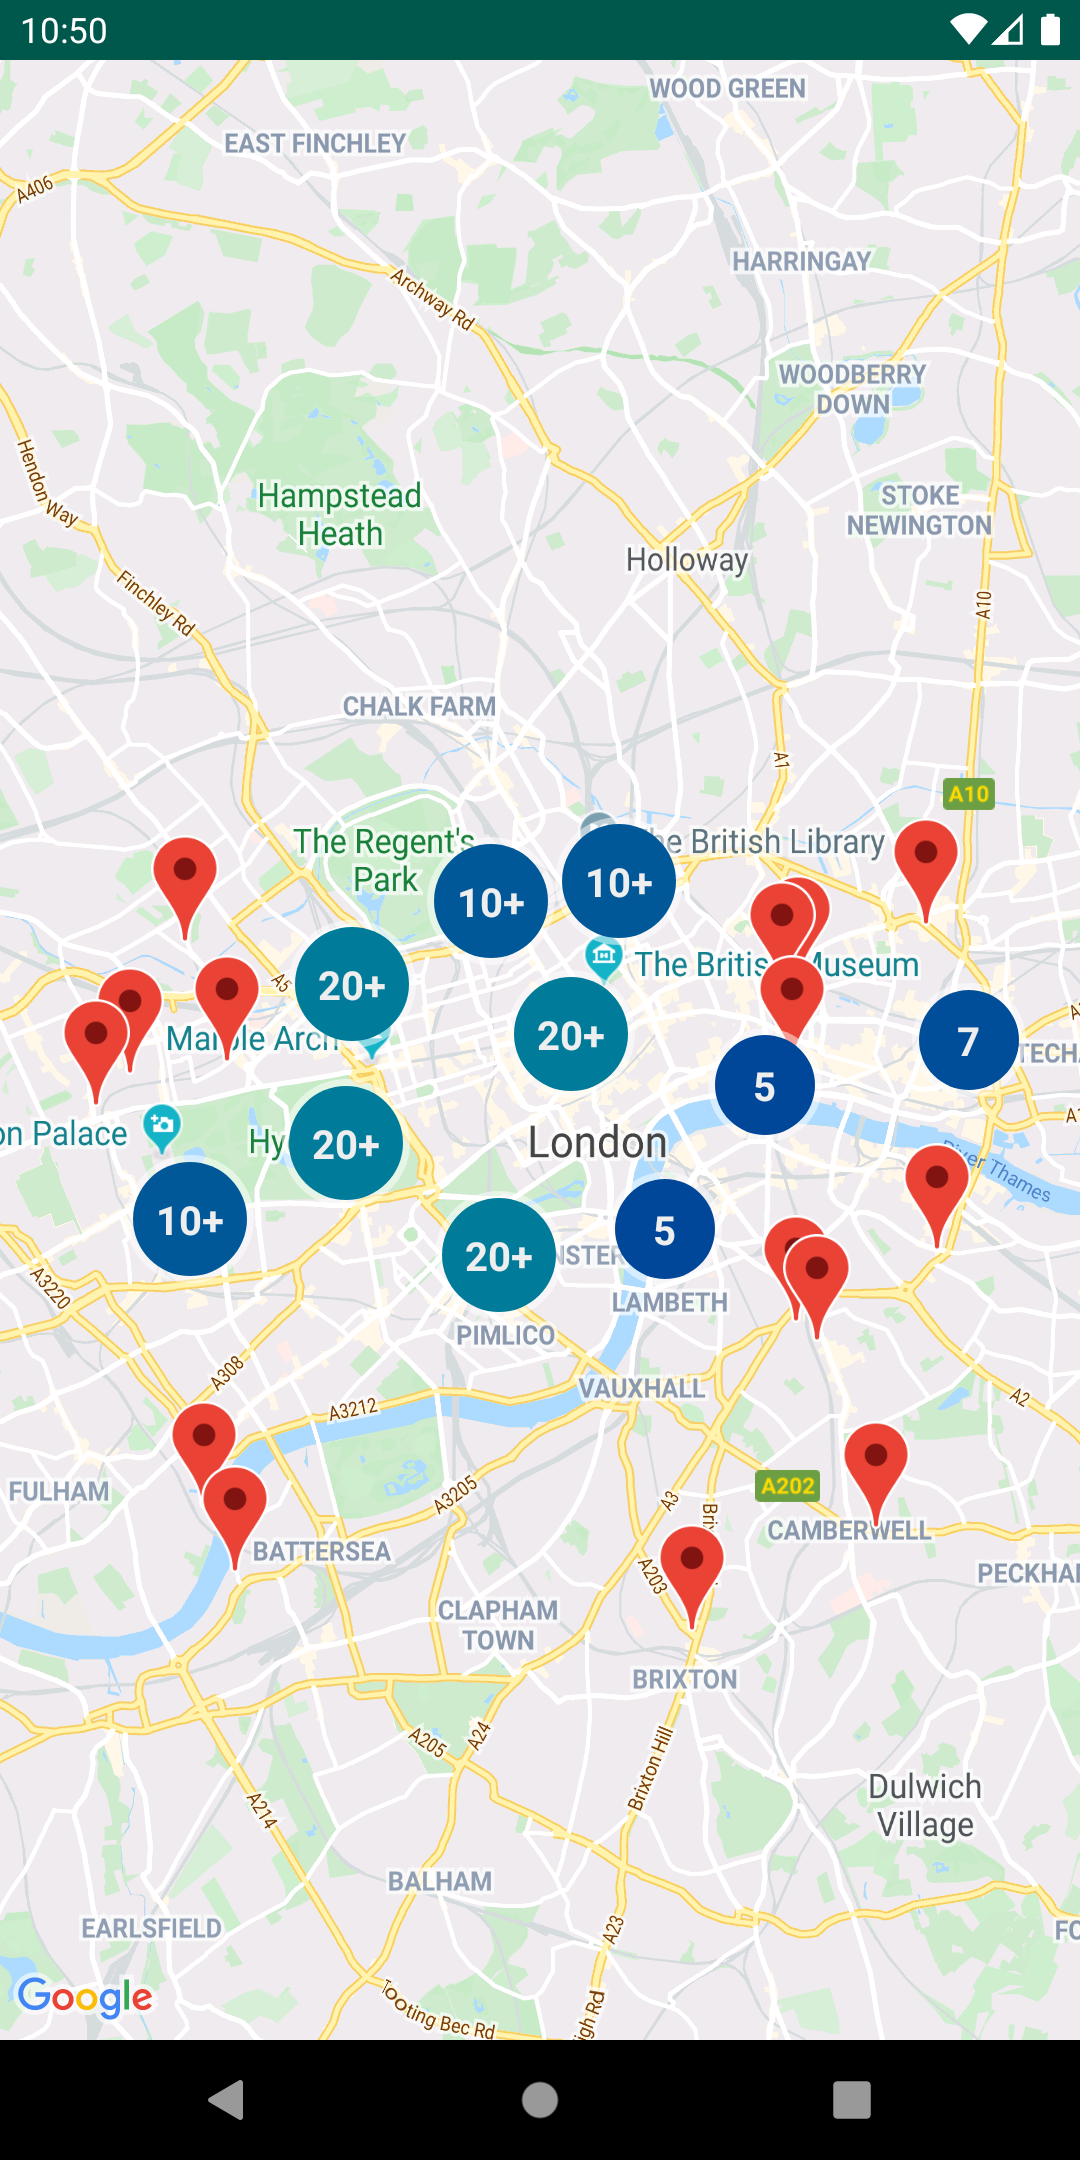
בצע את השלבים הבאים כדי ליצור קבוצה פשוטה של עשרה סמנים. התוצאה תיראה כך, למרות שמספר הסמנים המוצגים/המקובצים ישתנה בהתאם לרמת המרחק מהתצוגה:

לפניכם סיכום של השלבים הנדרשים:
- יש להשתמש
ב-
ClusterItemכדי לייצג סמן במפה. פריט האשכול מחזיר את מיקום הסמן כאובייקט LatLng, ועוד כותרת או קטע טקסט אופציונליים. - אפשר להוסיף
ClusterManagerחדש כדי לקבץ את פריטי האשכול (הסמנים) על סמך המרחק מהתצוגה. - מגדירים את
OnCameraIdleListener()של המפה בתורClusterManager, כיClusterManagerמטמיעה את ה-listener. - אם ברצונך להוסיף פונקציונליות ספציפית בתגובה לאירוע של לחיצה על סמנים, צריך להגדיר את
OnMarkerClickListener()של המפה בהתאם ל-ClusterManager, כיClusterManagerמטמיעה את ה-listener. - צריך להזין את הסמנים ב
ClusterManager.
פירוט השלבים: כדי ליצור את האשכול הפשוט של עשרה
סמנים, צריך קודם ליצור מחלקה MyItem שבה מוטמעת
ClusterItem.
Kotlin
inner class MyItem(
    lat: Double,
    lng: Double,
    title: String,
    snippet: String
) : ClusterItem {

    private val position: LatLng
    private val title: String
    private val snippet: String

    override fun getPosition(): LatLng {
        return position
    }

    override fun getTitle(): String {
        return title
    }

    override fun getSnippet(): String {
        return snippet
    }

    override fun getZIndex(): Float {
        return 0f
    }

    init {
        position = LatLng(lat, lng)
        this.title = title
        this.snippet = snippet
    }
}
Java
public class MyItem implements ClusterItem {
    private final LatLng position;
    private final String title;
    private final String snippet;

    public MyItem(double lat, double lng, String title, String snippet) {
        position = new LatLng(lat, lng);
        this.title = title;
        this.snippet = snippet;
    }

    @Override
    public LatLng getPosition() {
        return position;
    }

    @Override
    public String getTitle() {
        return title;
    }

    @Override
    public String getSnippet() {
        return snippet;
    }

    @Nullable
    @Override
    public Float getZIndex() {
        return 0f;
    }
}
בפעילות במפה, אפשר להוסיף את ClusterManager ולהזין בו את הפריטים באשכול. שימו לב
לארגומנט
type <MyItem>, שמצהיר שה-ClusterManager הוא מסוג MyItem.
Kotlin
// Declare a variable for the cluster manager.
private lateinit var clusterManager: ClusterManager<MyItem>

private fun setUpClusterer() {
    // Position the map.
    map.moveCamera(CameraUpdateFactory.newLatLngZoom(LatLng(51.503186, -0.126446), 10f))

    // Initialize the manager with the context and the map.
    // (Activity extends context, so we can pass 'this' in the constructor.)
    clusterManager = ClusterManager(context, map)

    // Point the map's listeners at the listeners implemented by the cluster
    // manager.
    map.setOnCameraIdleListener(clusterManager)
    map.setOnMarkerClickListener(clusterManager)

    // Add cluster items (markers) to the cluster manager.
    addItems()
}

private fun addItems() {

    // Set some lat/lng coordinates to start with.
    var lat = 51.5145160
    var lng = -0.1270060

    // Add ten cluster items in close proximity, for purposes of this example.
    for (i in 0..9) {
        val offset = i / 60.0
        lat += offset
        lng += offset
        val offsetItem =
            MyItem(lat, lng, "Title $i", "Snippet $i")
        clusterManager.addItem(offsetItem)
    }
}
Java
// Declare a variable for the cluster manager.
private ClusterManager<MyItem> clusterManager;

private void setUpClusterer() {
    // Position the map.
    map.moveCamera(CameraUpdateFactory.newLatLngZoom(new LatLng(51.503186, -0.126446), 10));

    // Initialize the manager with the context and the map.
    // (Activity extends context, so we can pass 'this' in the constructor.)
    clusterManager = new ClusterManager<MyItem>(context, map);

    // Point the map's listeners at the listeners implemented by the cluster
    // manager.
    map.setOnCameraIdleListener(clusterManager);
    map.setOnMarkerClickListener(clusterManager);

    // Add cluster items (markers) to the cluster manager.
    addItems();
}

private void addItems() {

    // Set some lat/lng coordinates to start with.
    double lat = 51.5145160;
    double lng = -0.1270060;

    // Add ten cluster items in close proximity, for purposes of this example.
    for (int i = 0; i < 10; i++) {
        double offset = i / 60d;
        lat = lat + offset;
        lng = lng + offset;
        MyItem offsetItem = new MyItem(lat, lng, "Title " + i, "Snippet " + i);
        clusterManager.addItem(offsetItem);
    }
}
ניתן גם להשבית את האנימציות של הסידור באשכולות כשמגדילים או מקטינים את התצוגה.
אם האנימציה מושבתת, הסמנים מוצמדים למיקום במקום
מועברים לאשכולות ומחוצה להם.
כדי להשבית אנימציות, יש להשתמש ב-setAnimation() ב-ClusterManager
כפי שמוצג בהמשך:
Kotlin
clusterManager.setAnimation(false)
Java
clusterManager.setAnimation(false);
הוספת חלון מידע עבור סמן מקובץ מסוים
כדי להוסיף חלון מידע לסמנים מקובצים ספציפיים, צריך להוסיף מחרוזות כותרת וקטעי טקסט ב-constructor של ההטמעה של ClusterItem.
הדוגמה הבאה מוסיפה סמן עם חלון מידע בשיטה addItems(), על ידי הגדרת כותרת וקטע טקסט:
Kotlin
// Set the lat/long coordinates for the marker.
val lat = 51.5009
val lng = -0.122

// Set the title and snippet strings.
val title = "This is the title"
val snippet = "and this is the snippet."

// Create a cluster item for the marker and set the title and snippet using the constructor.
val infoWindowItem = MyItem(lat, lng, title, snippet)

// Add the cluster item (marker) to the cluster manager.
clusterManager.addItem(infoWindowItem)
Java
// Set the lat/long coordinates for the marker.
double lat = 51.5009;
double lng = -0.122;

// Set the title and snippet strings.
String title = "This is the title";
String snippet = "and this is the snippet.";

// Create a cluster item for the marker and set the title and snippet using the constructor.
MyItem infoWindowItem = new MyItem(lat, lng, title, snippet);

// Add the cluster item (marker) to the cluster manager.
clusterManager.addItem(infoWindowItem);
התאמה אישית של מצבורי הסמנים
הבנאי ClusterManager יוצר DefaultClusterRenderer ו-NonHierarchicalDistanceBasedAlgorithm. אפשר לשנות את
ClusterRenderer ואת Algorithm
באמצעות השיטות setAlgorithm(Algorithm<T> algorithm) ו-setRenderer(ClusterRenderer<T> view) של
ClusterManager.
אפשר ליישם את ClusterRenderer כדי להתאים אישית את הרינדור של האשכולות. DefaultClusterRenderer מספק בסיס טוב
להתחלה. סיווג משנה של DefaultClusterRenderer מאפשר לשנות את ברירות המחדל.
כדי לראות דוגמה מפורטת של התאמה אישית, אפשר לעיין
ב-CustomMarkerClusteringDemoActivity באפליקציית ההדגמה שכלולה
בספרייה.
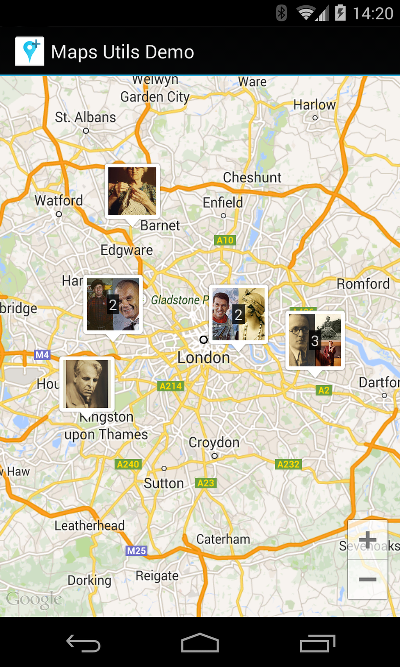
השדה CustomMarkerClusteringDemoActivity מגדיר פריט אשכול משלו, Person, ומעבד אותו על ידי הרחבת הערך של DefaultClusterRenderer בתור PersonRenderer.
ההדגמה מדגימה גם איך להטמיע את הממשק של ClusterManager.OnClusterClickListener<Person> כדי להציג מידע נוסף על המשתמש כשהמשתמש לוחץ על האשכול. אפשר גם
להטמיע את
ClusterManager.OnClusterItemClickListener<Person>
באופן דומה.
לקבלת עזרה בהפעלה של אפליקציית ההדגמה, ניתן לעיין במדריך ההגדרה.