There are tools available to you on this website and on the Actions Center. This page has instructions on how to do data file schema validation, data file upload, and testing.
Validate your feeds
The data feed validation tool verifies the formatting, structure, and properties of your data file. Since the data feed ingestion tool requires specific formatting, like one entity per line, the validation tool ensures that you can upload your data feed.
To validate a preview data feed, follow these steps:
- Navigate to the data feed validation tool.
- Select Validate Single Entity, if your JSON describes only one entity. If your JSON contains multiple entities, select Validate Feed.
- Paste the JSON of the data feed file into the text field.
- Choose whether you want to validate a single entity or your entire feed.
- Click Validate.
Warnings or errors present in the data feed file will show up above the text field. If you run into errors, make sure to check the reference for potentially missed required fields and invalid property values.
Upload and test your data feed in Quick Testing
After your data feed file is validated, use the Quick Testing tool to upload and test the feed. Quick testing is for fast, iterative development and testing of individual feed files.
To upload and test a data feed in Quick Testing, follow these steps:
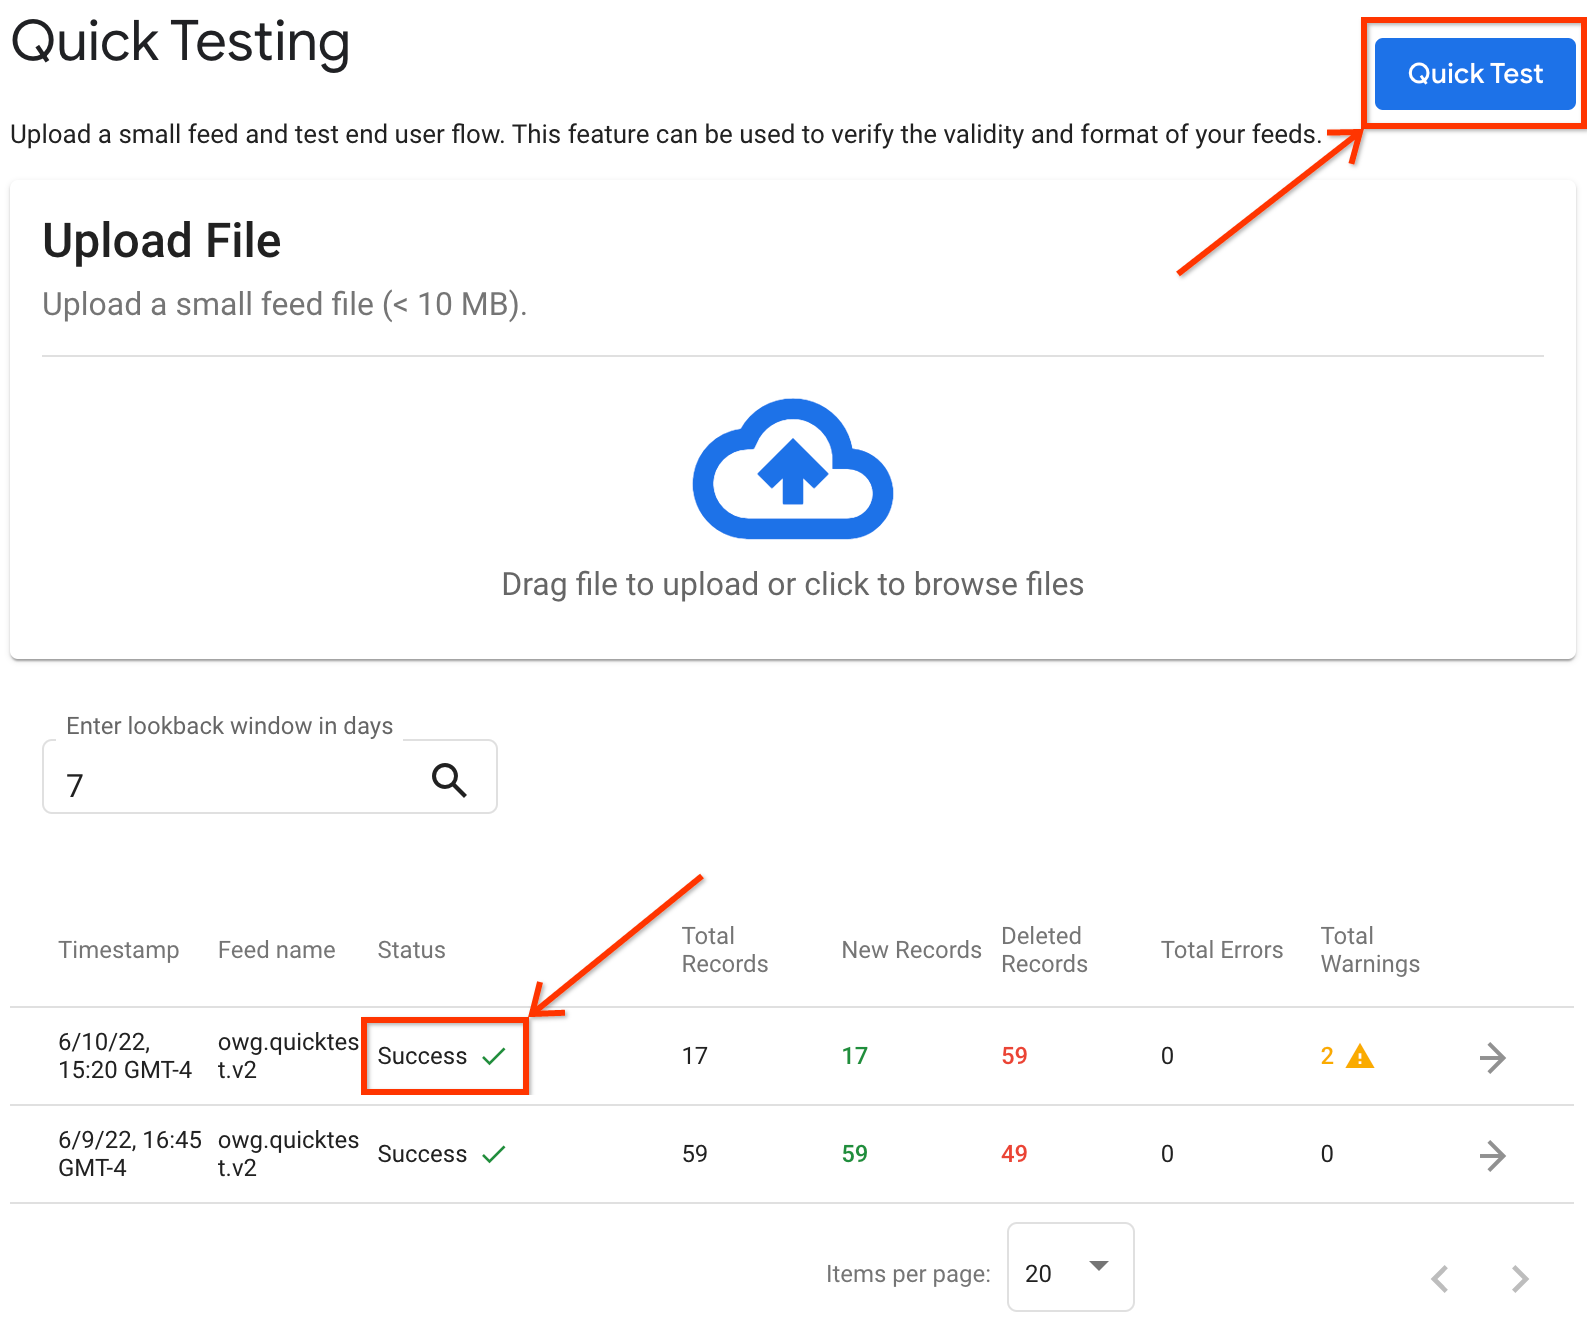
- On the Actions Center, go to Dashboards > Quick Testing.
- Use the Upload File feature to upload the data feed file to test. The file must be in NDJSON format.
After the upload is finished, click Submit.

The system now processes the data feed file. This process can take up to a few minutes. The table automatically refreshes so there's no need to refresh the page.
After the feed is processed, you can see the processing status and results such as errors, warnings and stale entities. To remove stale entities, make sure you are using the latest last modified date.
After your feed is processed with the status Success, click Quick Test.
Fill in a testing fulfillment API and choose whether to use real payments or not during testing. Note that Quick Testing can be used without a fulfillment URL but you won’t be able to checkout your cart and place orders.

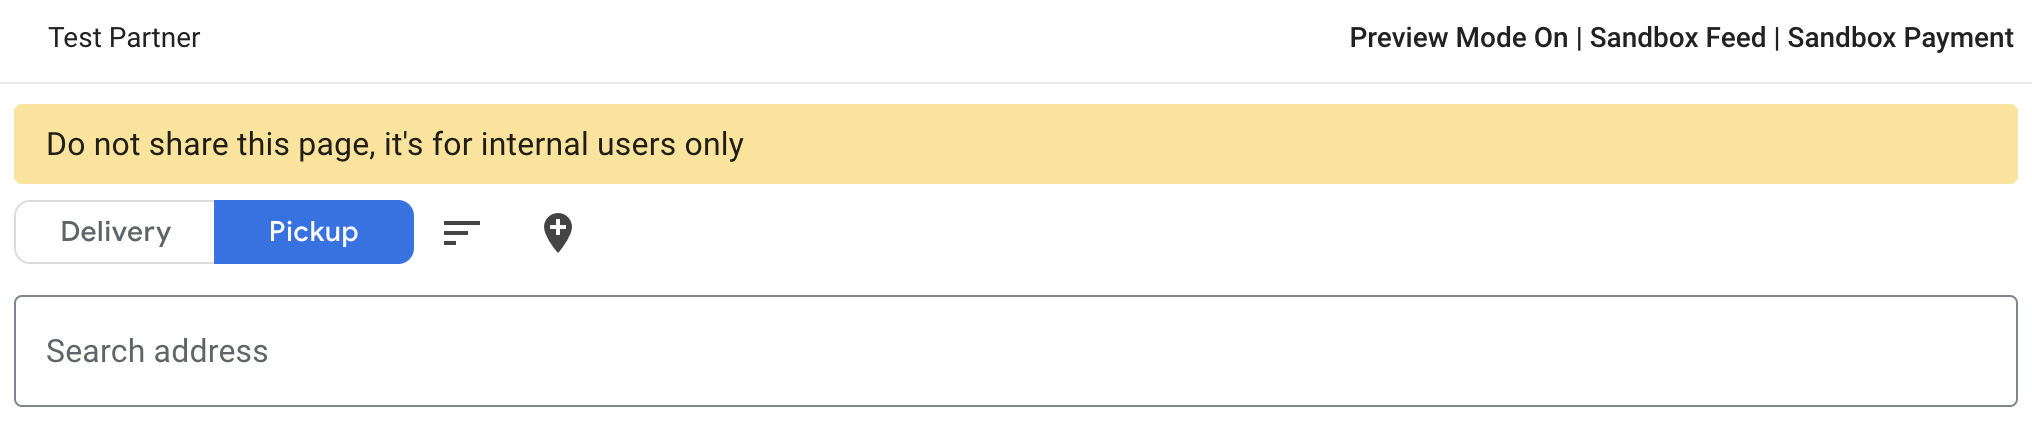
Click Quick Test. This opens a new tab, so make sure that you allow pop- ups so that opening the new tab isn't prevented.

Click the desired restaurant to review its menu and go through the food ordering flow. Verify that your inventory is accurate.
If you wish to upload a new file and test it, you can do so by uploading the feed file. There is no need to launch the test again. You can just refresh the new tab (restaurant search UI) that has been loaded previously.
Testing Sandbox Feeds
Sandbox testing allows end-to-end testing of sandbox feed inventory using the sandbox frontend. Sandbox testing supports full feed ingestion, real-time updates, fulfillment testing and async order updates. In comparison to Quick testing, with Sandbox testing you can run complete end-to-end scenarios across multiple restaurants.
- Configure feed Marker and Data file URLs for the Sandbox environment in Configuration > Feeds.
- Upload feed files to specified locations and verify that the feed is ingested by viewing Feed History.
- Once sandbox feeds have been ingested, you can view the restaurants provided in the sandbox feeds in the Sandbox frontend.
- To access the Sandbox frontend, navigate to Dashboards > Restaurant Status Report.
- Select the Sandbox environment.

- Click on the link titled "click here" at the top of the page.

- Search for the desired restaurant.
Additional resources
In addition to the steps outlined above, you can use debugging tools to further test and troubleshoot your inventory feed.
Refer to the following tools for additional guidance:
- The feed ingestion statistics page provides details on your feed ingestions, including the number of entities with errors. Refer to these statistics to ensure that most (if not all) of your entities validate successfully.
- From the ingestion stats, you can also select specific entity details to troubleshoot entities that fail.
- Use Inventory Viewer to diagnose restaurant-specific issues, such as restaurants not appearing after uploading.