Add a Sign In With Google button to your site to enable users to sign-up or
sign-in to your web app. Use either HTML or JavaScript to render the button and
attributes to customize the button shape, size, text, and theme.
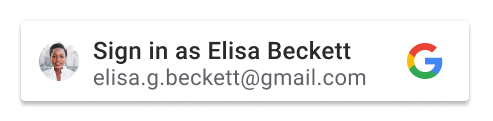
After a user selects a Google Account and provides their consent, Google shares
the user profile using a JSON Web Token (JWT). For an overview of the steps
involved during sign-in and user experience see [How it works](https://developers.google.com/identity/gsi/web/guides/overview#how_it_works).
[Understand the personalized button](https://developers.google.com/identity/gsi/web/guides/personalized-button) reviews the different conditions and
states affecting how the button is displayed to users.
> [!IMPORTANT]
> **Key Point:** Our [Code Generator](https://developers.google.com/identity/gsi/web/tools/configurator) helps you to interactively design your Sign In With Google button and generates the code needed to add it to your web page.
## Prerequisites
Follow the steps described in [Setup](https://developers.google.com/identity/gsi/web/guides/get-google-api-clientid) to configure your OAuth Consent
Screen, obtain a client ID, and load the client library.
## Button rendering
To display the Sign In With Google button, you may choose either HTML or
JavaScript to render the button on your login page:
### HTML
Render the sign-in button using HTML, returning the JWT to your platform's
login endpoint.
An element with a `g_id_signin` class renders as a Sign In With Google button.
The button is customized by the parameters provided in the data attributes.
To display a Sign In With Google button and Google One Tap on the same page,
remove `data-auto_prompt="false"`. This is recommended to reduce friction and
improve sign-in rates.
For the full list of data attributes, see the [`g_id_signin` reference](https://developers.google.com/identity/gsi/web/reference/html-reference#element_with_class_g_id_signin)
page
### JavaScript
Render the sign-in button using JavaScript, returning the JWT to the
browser's JavaScript callback handler.
The element specified as the first parameter to `renderButton` displays as a
Sign In With Google button. In this example `buttonDiv` is used to render
the button on the page. The button is customized using the attributes
specified in the second parameter to `renderButton`.
To minimize user friction `google.accounts.id.prompt()` is called to display
One Tap as a second alternative to using the button to sign-up or sign-in.
The GIS library parses the HTML doc for elements with an ID attribute set to
`g_id_onload`, or class attributes containing `g_id_signin`. If a matching
element is found, the button is rendered using HTML, regardless if you've
also rendered the button in JavaScript. To avoid displaying the button
twice, possibly with conflicting parameters don't include HTML elements
matching these names in your HTML pages.
> [!WARNING]
> **Warning:** When using the JavaScript API, avoid using `g_id_onload` or `g_id_signin` in your HTML code.
### Button Language
The button language is automatically determined by the browser's default
language or the Google session user's preference. You can also choose the
language manually by adding the `hl` parameter and language code to the src
directive when loading the library and by adding the optional data-locale or
locale parameter [data-locale](https://developers.google.com/identity/gsi/web/reference/html-reference#data-locale) in HTML or [locale](https://developers.google.com/identity/gsi/web/reference/html-reference#data-locale) in JavaScript.
### HTML
The following code snippet shows how to display the button language in French
by adding the `hl` parameter to the client library URL and by setting the
`data-locale` attribute to French:
### JavaScript
The following code snippet shows how to display the button language in French
by adding the `hl` parameter to the client library URL and calling the
`google.accounts.id.renderButton` method with the `locale` parameter set to
French:
## Credential handling
After user consent is given, Google returns a JSON Web Token (JWT) credential
known as an ID token to either the user's browser, or directly to a login
endpoint hosted by your platform.
Where you choose to receive the JWT depends upon if you render the button using
HTML or JavaScript and if popup or redirect UX mode is used.
### Popup mode
Using `popup` UX mode performs the sign-in UX flow in a pop-up window. This is
generally a less intrusive experience for users and is the default UX mode.
When rendering the button using:
### HTML
You can set either:
- `data-callback` to return the JWT to your callback handler, or
- `data-login_uri` for Google to send the JWT directly to your login endpoint using a [POST request](https://developers.google.com/identity/gsi/web/reference/html-reference#server-side).
If both values are set, `data-callback` takes precedence over
`data-login_uri`. Setting both values may be helpful when using a callback
handler for debugging.
### JavaScript
You must specify a `callback`, popup mode does not support redirects
when rending the button in JavaScript. If set, `login_uri` is ignored.
See [handle the returned credential response](https://developers.google.com/identity/gsi/web/guides/handle-credential-responses-js-functions) for more on decoding the
JWT within your JS callback handler.
### Redirect mode
Using `redirect` UX mode performs the sign-in UX flow using full page
redirection of the user's browser, and Google returns the JWT directly to your
login endpoint using a [POST request](https://developers.google.com/identity/gsi/web/reference/html-reference#server-side).
This is generally a more intrusive experience for users, but is considered to
be the most secure sign-in method.
When rendering the button using:
- **HTML** optionally set `data-login_uri` to the URI of your login endpoint.
- **JavaScript** optionally set `login_uri` to the URI of your login endpoint.
If you don't provide a value, Google returns the JWT to the URI of the current
page.
### Your login endpoint URI
Use HTTPS and an absolute URI when setting `data-login_uri` or `login_uri`.
For example, `https://example.com/path`.
HTTP is only allowed when using localhost during development:
`http://localhost/path`.
Refer to [Use secure JavaScript origins and redirect URIs](https://developers.google.com/identity/protocols/oauth2/policies#secure-response-handling)
for a full description of Google's requirements and validation rules.