
This codelab is part of the Android Kotlin Fundamentals course. You'll get the most value out of this course if you work through the codelabs in sequence. All the course codelabs are listed on the Android Kotlin Fundamentals codelabs landing page.
Introduction
In this codelab, you improve the DiceRoller app from the last codelab and learn how to add and use image resources in your app. You also learn about app compatibility with different Android versions and how the Android Jetpack can help.
What you should already know
- How to create a new app project, and run an app on an emulator or a physical device.
- The basic components of an app project, including the resource (
res) directory and Gradle build files. - How to edit the app's layout file.
- How to find and modify view objects in your app's code.
What you'll learn
- How to add files to your app's resources.
- How to use images in your app's layout.
- How to find views more efficiently in your app's code.
- How to use placeholder images in your app's design with XML namespaces.
- About Android API levels for your app, and how to understand the minimum, targeted, and compiled API levels.
- How to use the Jetpack libraries in your app to support older versions of Android.
What you'll do
- Modify the DiceRoller app from the last codelab to include images for the die value, rather than a number.
- Add image files to your app's resources.
- Update the app's layout and code to use images for the die value, rather than a number.
- Update your code to find views more efficiently.
- Update your code to use an empty image when the app starts.
- Update your app to use the Android Jetpack libraries for backward-compatibility with older versions of Android.
In this codelab, you build on the DiceRoller app you started in the previous codelab, and you add dice images that change when the die is rolled. The final DiceRoller app looks like this:
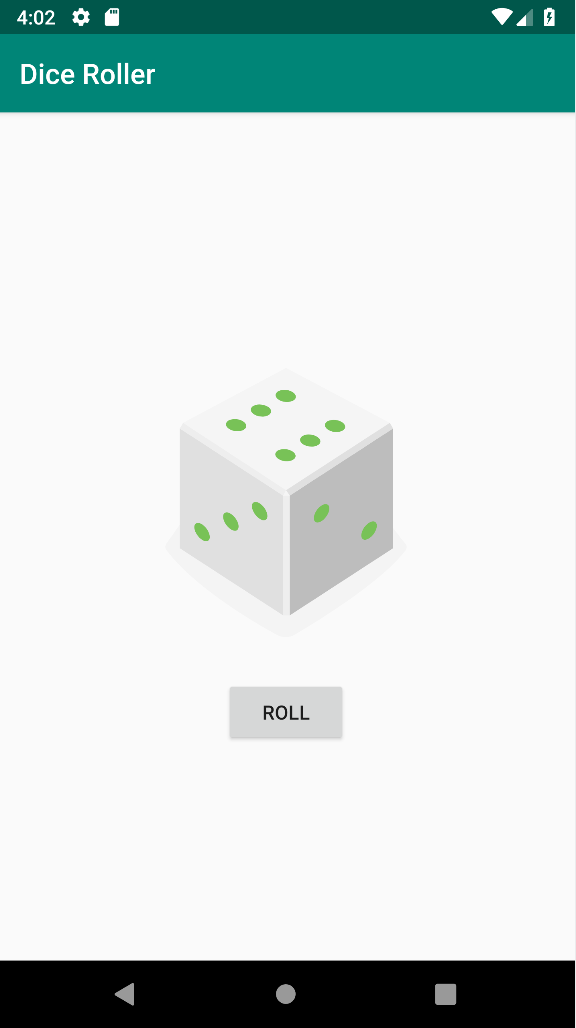
If you did not work through the last codelab, you can download the starting app here: DiceRoller.
At the end of the last codelab, you had an app that updates a text view with a number between 1 and 6 each time the user taps a button. However, the app is called DiceRoller, not 1-6 Number Generator, so it would be nice if the dice actually looked like dice. In this task, you add some dice images to your app. Then instead of updating text when the button is pressed, you swap in a different image for each roll result.
Step 1: Add the images
- Open the DiceRoller app project in Android Studio if it is not already open. If you did not work through the last codelab, you can download the app here: DiceRoller.
- In the Project > Android view, expand the res folder and then expand drawable.

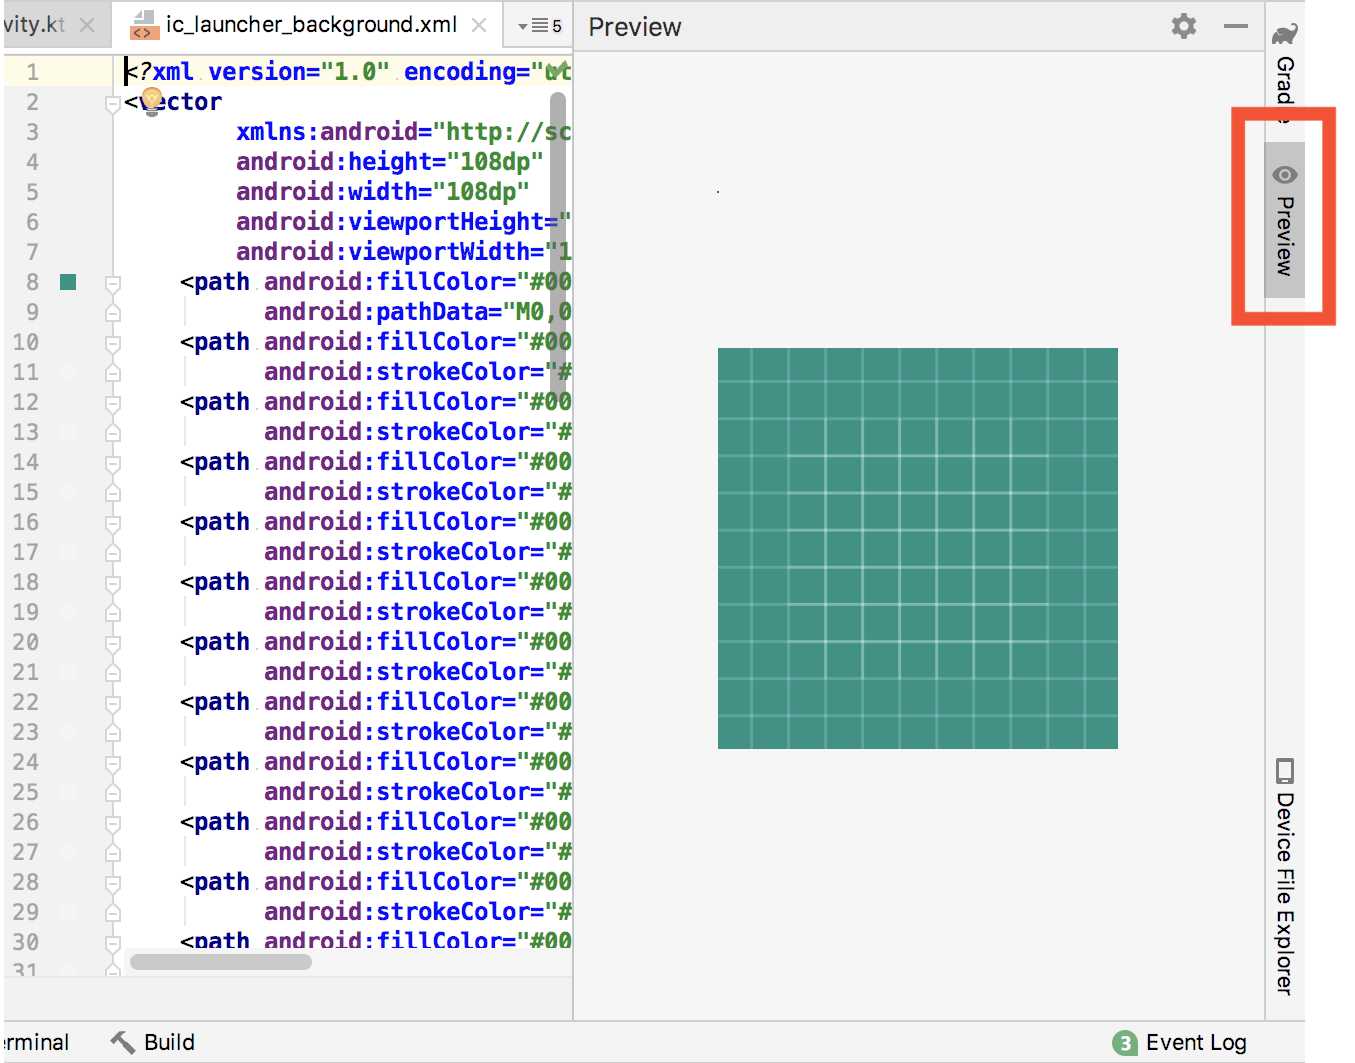
Your app uses many different resources including images and icons, colors, strings, and XML layouts. All those resources are stored in theresfolder. Thedrawablefolder is where you should put all the image resources for your app. Already in thedrawablefolder you can find the resources for the app's launcher icons. - Double-click ic_launcher_background.xml. Note that these are XML files that describe the icon as a vector image. Vectors enable your images to be drawn at many different sizes and resolutions. Bitmap images such as PNG or GIF may need to be scaled for different devices, which can result in some loss of quality.
- Click Preview in the right column of the XML editor to view the vector drawable in visual form.
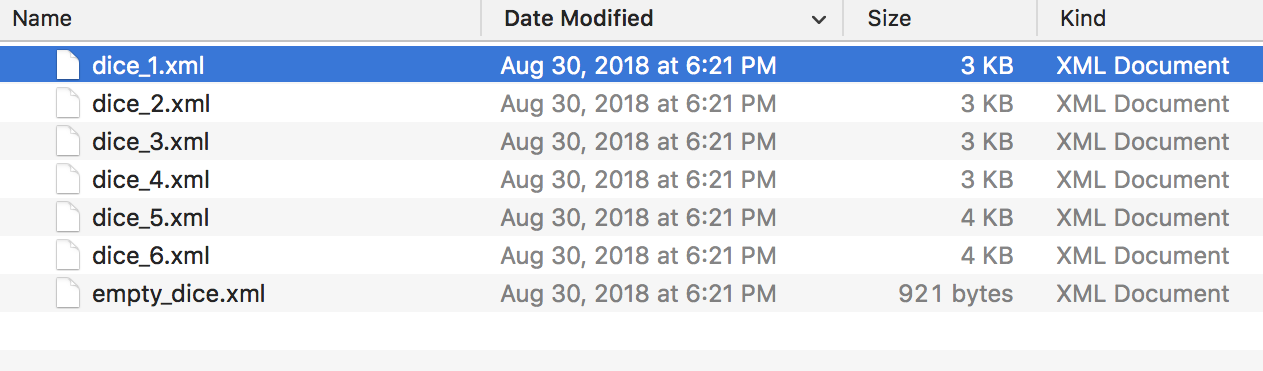
- Download the dice images for your app from DiceImages.zip. Unzip the archive. You should have a folder of XML files that looks like this:
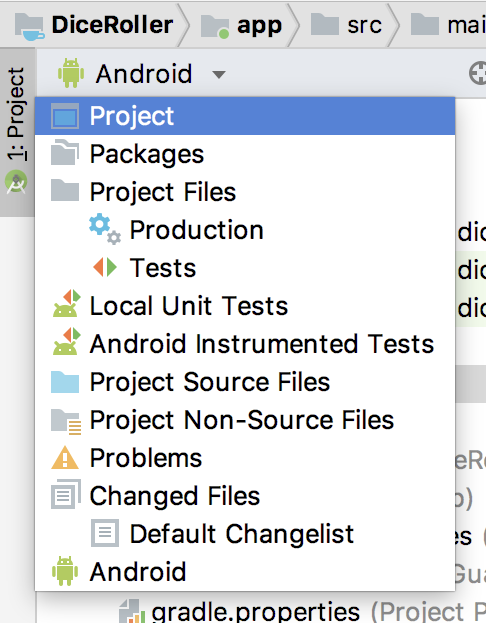
- In Android Studio, click the drop-down menu at the top of the project view that currently says Android, and choose Project. The screenshot below shows what the structure of your app looks like in the file system.
- Expand DiceRoller > app > src > main > res > drawable.
- Drag all the individual XML files from the
DiceImagesfolder into Android Studio and onto the drawable folder. Click OK.
- Switch the project back to Android view, and notice that your dice image XML files are in the drawable folder.
- Double-click
dice_1.xml, and notice the XML code for this image. Click the Preview button to get a preview of what this vector drawable actually looks like.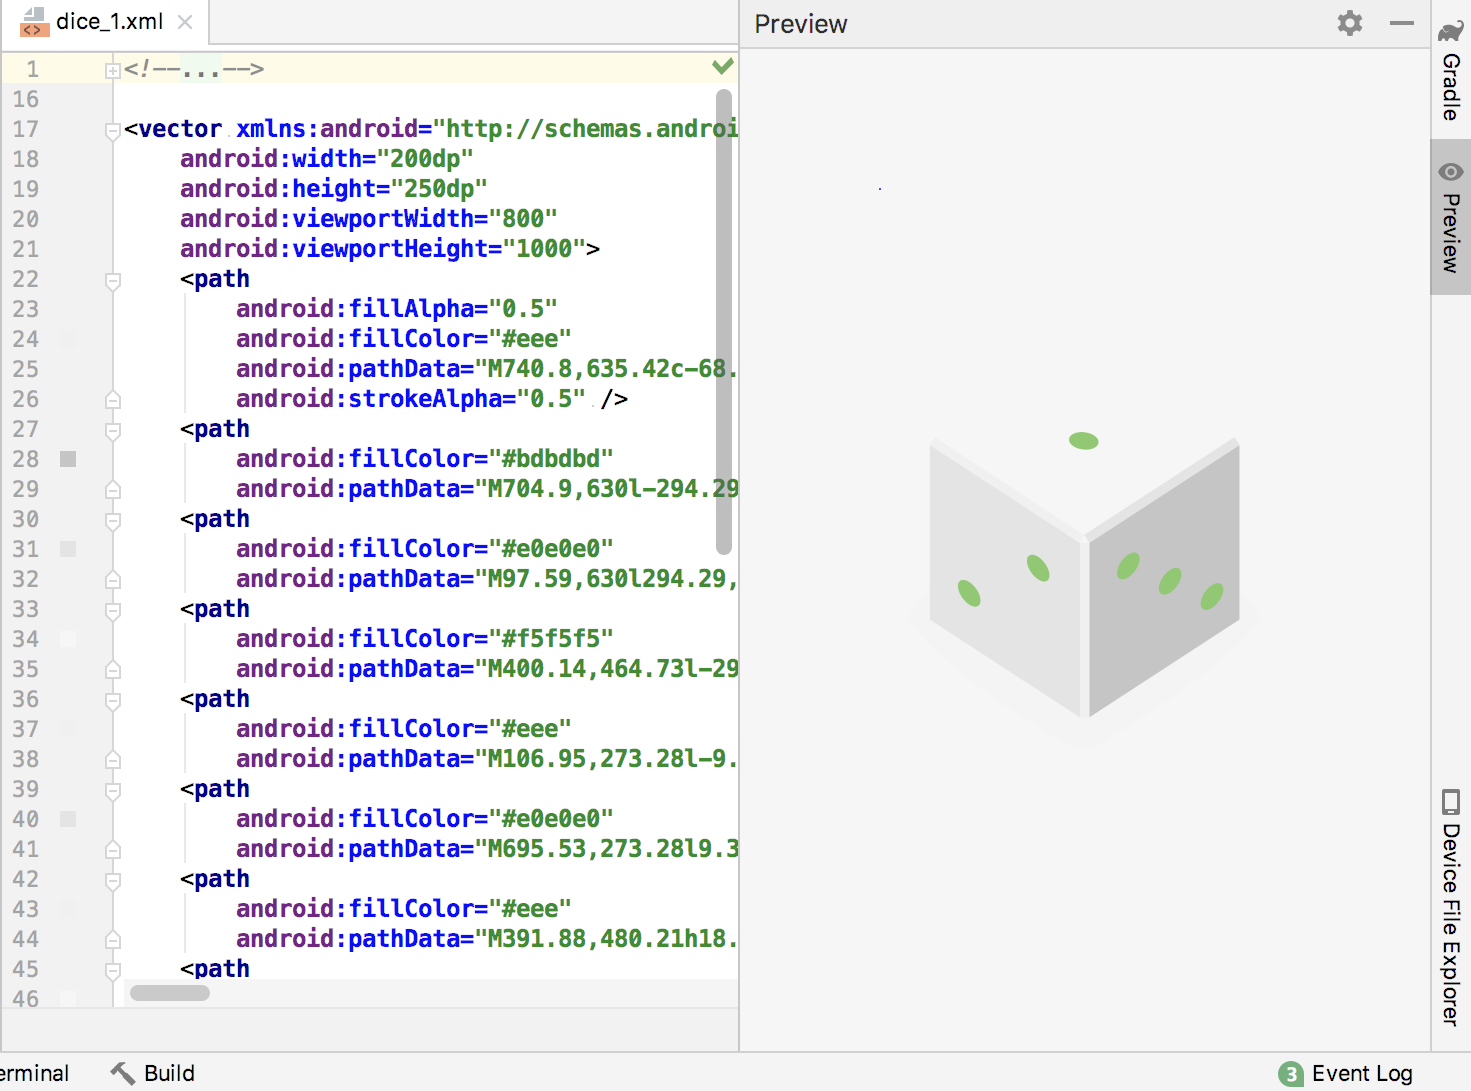
Step 2: Update the layout to use images
Now that you have the dice image files in your res/drawables folder, you can access those files from your app's layout and code. In this step, you replace the TextView that displays the numbers with an ImageView to display the images.
- Open the
activity_main.xmllayout file if it is not already open. Click the Text tab to view the layout's XML code. - Delete the
<TextView>element. - Add an
<ImageView>element with these attributes:
<ImageView
android:id="@+id/dice_image"
android:layout_width="wrap_content"
android:layout_height="wrap_content"
android:layout_gravity="center_horizontal"
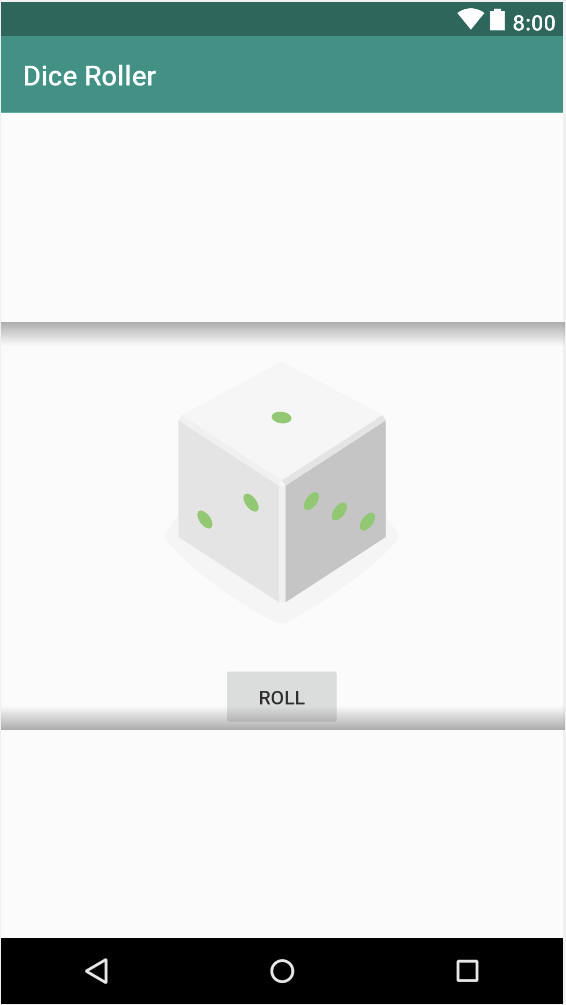
android:src="@drawable/dice_1" />You use an ImageView to display an image in your layout. The only new attribute for this element is android:src, to indicate the source resource for the image. In this case, an image source of @drawable/dice_1 means Android should look in the drawable resources (res/drawable) for the image named dice_1.
- Click the Preview button to preview the layout. It should look like this:
Step 3: Update the code
- Open
MainActivity. Here's what therollDice()function looks like so far:
private fun rollDice() {
   val randomInt = Random().nextInt(6) + 1

   val resultText: TextView = findViewById(R.id.result_text)
   resultText.text = randomInt.toString()
}
Notice that the reference to R.id.result_text may be highlighted in red—that's because you deleted the TextView from the layout, and that ID no longer exists.
- Delete the two lines at the end of the function that define the
resultTextvariable and set its text property. You're no longer using aTextViewin the layout, so you don't need either line. - Use
findViewByID()to get a reference to the newImageViewin the layout by ID (R.id.dice_image), and assign that view to a newdiceImagevariable:
val diceImage: ImageView = findViewById(R.id.dice_image)- Add a
whenblock to choose a specific die image based on the value ofrandomInteger:
val drawableResource = when (randomInt) {
   1 -> R.drawable.dice_1
   2 -> R.drawable.dice_2
   3 -> R.drawable.dice_3
   4 -> R.drawable.dice_4
   5 -> R.drawable.dice_5
   else -> R.drawable.dice_6
}
As with the IDs you can reference the dice images in the drawable folder with the values in the R class. Here R.drawable refers to the app's drawable folder, and dice_1 is a specific die image resource within that folder.
- Update the source of the
ImageViewwith thesetImageResource()method and the reference to the die image you just found.
diceImage.setImageResource(drawableResource)- Compile and run the app. Now when you click the Roll button, the image should update with the appropriate image.
Everything in your app works, but there's more to developing apps than just having code that works. You should also understand how to write performant, well-behaving apps. This means your apps should run well, even if your user doesn't have the most expensive Android device or the best network connectivity. Your apps should also continue to run smoothly as you add more features, and your code should be readable and well organized.
In this task, you learn about one way to make your app more efficient.
- Open
MainActivity, if it is not already open. In therollDice()method, note the declaration for thediceImagevariable:
val diceImage : ImageView = findViewById(R.id.dice_image)Because rollDice() is the click handler for the Roll button, every time the user taps that button, your app calls findViewById() and gets another reference to this ImageView. Ideally, you should minimize the number of calls to findViewById(), because the Android system is searching the entire view hierarchy each time, and that's an expensive operation.
In a small app like this one, it's not a huge problem. If you're running a more complicated app on a slower phone, continually calling findViewById() could cause your app to lag. Instead it is a best practice to just call findViewById() once and store the View object in a field. Keeping the reference to the ImageView in a field allows the system to access the View directly at any time, which improves performance.
- At the top of the class, before
onCreate(), create a field to hold theImageView.
var diceImage : ImageView? = nullIdeally you would initialize this variable up here when it's declared, or in a constructor—but Android activities don't use constructors. In fact, the views in the layout are not accessible objects in memory at all until after they have been inflated in the onCreate() method, by the call to setContentView(). You can't initialize the diceImage variable at all until that happens.
One option is to define the diceImage variable as nullable, as in this example. Set it to null when it's declared, and then assign it to the real ImageView in onCreate() with findViewById(). This will complicate your code, however, because now you have to check for the null value every time you want to use diceImage. There's a better way.
- Change the
diceImagedeclaration to use thelateinitkeyword, and remove thenullassignment:
lateinit var diceImage : ImageViewThe lateinit keyword promises the Kotlin compiler that the variable will be initialized before the code calls any operations on it. Therefore we don't need to initialize the variable to null here, and we can treat it as a non-nullable variable when we use it. It is a best practice to use lateinit with fields that hold views in just this way.
- In
onCreate(), after thesetContentView()method, usefindViewById()to get theImageView.
diceImage = findViewById(R.id.dice_image)- Delete the old line in
rollDice()that declares and gets theImageView. You replaced this line with the field declaration earlier.
val diceImage : ImageView = findViewById(R.id.dice_image)- Run the app again to see that it still works as expected.
Right now you are using dice_1 as the initial image for the die. Instead, say, you wanted to display no image at all until the die is rolled for the first time. There are a few ways to accomplish this.
- Open
activity_layout.xmlin the Text tab. - In the
<ImageView>element, set theandroid:srcattribute to"@drawable/empty_dice":
android:src="@drawable/empty_dice" The empty_dice image was one of the images you downloaded and added to the drawable folder. It's the same size as the other dice images, only it's empty. This image is the one that will be shown when the app first starts.
- Click the Design tab. The die image is empty now, but it's also not visible in the preview either.
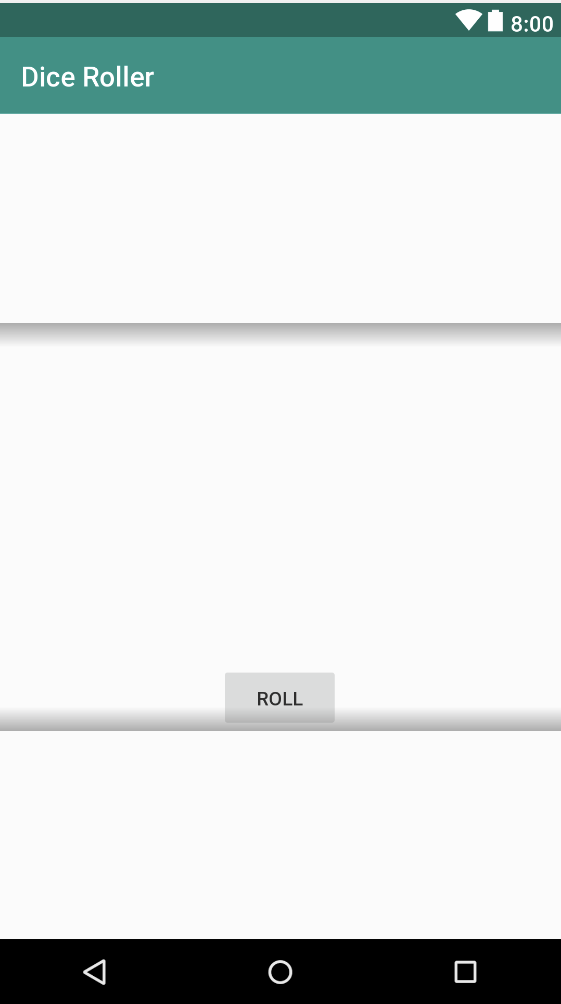
It's fairly common that the contents of a design might be defined dynamically at runtime—for example, any app that grabs data from the internet should probably start with a blank or empty screen. But it's helpful when you're designing an app to have some sort of placeholder data in the layout so you know what you're laying out. - In
activity_layout.xml, copy theandroid:srcline, and paste a second copy. Change the word "android" to "tools", so your two attributes look like this:
android:src="@drawable/empty_dice"
tools:src="@drawable/empty_dice" />
Here you've changed the XML namespace of this attribute from the default android namespace to the tools namespace. The tools namespace is used when you want to define placeholder content that is only used in the preview or the design editor in Android Studio. Attributes using the tools namespace are removed when you compile the app.
Namespaces are used to help resolve ambiguity when referring to attributes that have the same name. For example, both these attributes in the <ImageView> tag have the same name (src), but the namespace is different.
- Examine the
<LinearLayout>element at the root of the layout file, and notice the two namespaces defined here.
<LinearLayout
   xmlns:android="http://schemas.android.com/apk/res/android"
   xmlns:tools="http://schemas.android.com/tools"
...- Change the
tools:srcattribute in theImageViewtag to bedice_1instead ofempty_dice:
android:src="@drawable/empty_dice"
tools:src="@drawable/dice_1" />
Notice that the dice_1 image is in place now as the placeholder image in the preview.
- Compile and run the app. Notice that the die image is empty in the actual app until you click or tap Roll.
One of the great things about developing for Android is the sheer number of devices your code can run on—from the Nexus One to the Pixel, to form factors like tablets, to Pixelbooks, to watches, TVs, and cars.
When you write for Android, you don't write completely separate apps for each of these different devices—even apps that run on radically different form factors such as watches and TVs can share code. But there are still constraints and compatibility strategies that you need to be aware of to support all of this.
In this task, you learn how to target your app for specific Android API levels (versions), and how to use the Android Jetpack libraries to support older devices.
Step 1: Explore API levels
In the previous codelab, when you created your project, you indicated the specific Android API level that your app should support. The Android OS has different version numbers named after tasty treats which are in alphabetical order. Each OS version ships with new features and functionality. For example, Android Oreo shipped with support for Picture-in-picture apps, while Android Pie introduced Slices. The API levels correspond to the Android versions. For example, API 19 corresponds to Android 4.4 (KitKat).
Due to a number of factors, including what the hardware can support, whether users choose to update their devices, and whether manufacturers support different OS levels, users inevitably end up with devices that run different OS versions.
When you create your app project, you specify the minimum API level that your app supports. That is, you specify the oldest Android version your app supports. Your app also has a level to which it is compiled, and a level that it targets. Each of these levels is a configuration parameter in your Gradle build files.
- Expand the Gradle Scripts folder, and open the build.gradle (Module: app) file.
This file defines build parameters and dependencies specific to the app module. The build.gradle (Project: DiceRoller) file defines build parameters for the project as a whole. In many cases, your app module is the only module in your project, so this division may seem arbitrary. But if your app becomes more complex and you split it into several parts, or if your app supports platforms like Android watch, you may encounter different modules in the same project. - Examine the
androidsection towards the top of thebuild.gradlefile. (The sample below is not the entire section, but it contains what you're most interested in for this codelab.)
android {
   compileSdkVersion 28
   defaultConfig {
       applicationId "com.example.android.diceroller"
       minSdkVersion 19
       targetSdkVersion 28
       versionCode 1
       versionName "1.0"
   }
- Examine the
compileSdkVersionparameter.
compileSdkVersion 28This parameter specifies the Android API level that Gradle should use to compile your app. This is the newest version of Android your app can support. That is, your app can use the API features included in this API level and lower. In this case your app supports API 28, which corresponds to Android 9 (Pie).
- Examine the
targetSdkVersionparameter, which is inside thedefaultConfigsection:
targetSdkVersion 28This value is the most recent API that you have tested your app against. In many cases this is the same value as compileSdkVersion.
- Examine the
minSdkVersionparameter.
minSdkVersion 19This parameter is the most important of the three, as it determines the oldest version of Android on which your app will run. Devices that run the Android OS older than this API level cannot run your app at all.
Choosing the minimum API level for your app can be challenging. Set the API level too low, and you miss out on newer features of the Android OS. Set it too high, and your app may only run on newer devices.
When you set up your project and you come to the place where you define the minimum API level for your app, click Help me choose to see the API Version Distribution dialog. The dialog gives information about how many devices use different OS levels, and features that were added or changed in the OS levels. You can also check out the Android documentation release notes and dashboard, which have further information about the implications of supporting different API levels.
Step 2: Explore compatibility
Writing for different Android API levels is a common challenge that app developers face, so the Android framework team has done a lot of work to help you out.
In 2011, the team released the first support library, a Google-developed library that offers backward-compatible classes and helpful functions. In 2018, Google announced Android Jetpack, which is a collection of libraries that includes many of the previous classes and functions of the support library, while also expanding on the support library.
- Open
MainActivity. - Notice that your
MainActivityclass extends not fromActivityitself, but fromAppCompatActivity.
class MainActivity : AppCompatActivity() {
...
AppCompatActivity is a compatibility class that ensures your activity looks the same across different platforms OS levels.
- Click the + symbol next to the line that starts with
importto expand the imports for your class. Note that theAppCompatActivityclass is imported from theandroidx.appcompat.apppackage. The namespace for the Android Jetpack libraries isandroidx. - Open build.gradle (Module: app) and scroll down to the dependencies section.
dependencies {
   implementation fileTree(dir: 'libs', include: ['*.jar'])
   implementation"org.jetbrains.kotlin:kotlin-stdlib-jdk7:$kotlin_version"
   implementation 'androidx.appcompat:appcompat:1.0.0-beta01'
   implementation 'androidx.core:core-ktx:1.0.1'
   implementation 'androidx.constraintlayout:constraintlayout:1.1.2'
   testImplementation 'junit:junit:4.12'
   androidTestImplementation 'androidx.test:runner:1.1.0-alpha4'
   androidTestImplementation
        'androidx.test.espresso:espresso-core:3.1.0-alpha4'
}
Notice the dependency on the appcompat library, which is part of androidx and contains the AppCompatActivity class.
Step 3: Add compatibility for vector drawables
You're going to use your new knowledge about namespaces, Gradle, and compatibility to make one final adjustment to your app, which will optimize your app size on older platforms.
- Expand the res folder and then expand drawable. Double click one of the die images.
As you learned earlier, all the dice images are actually XML files that define the colors and shapes for the dice. These kinds of files are called vector drawables. The nice thing about vector drawables versus bitmap image formats like PNG is that vector drawables can scale without losing quality. Also, a vector drawable is usually a much smaller file than the same image in a bitmap format.
An important thing to note about vector drawables is that they are supported in API 21 onwards. But your app's minimum SDK is set to API 19. If you tried your app on an API 19 device or emulator, you'd see that the app seems to build and run just fine. So how does this work?
When you build your app, the Gradle build process generates a PNG file from each of the vector files, and those PNG files are used on any Android device below 21. These extra PNG files increase the size of your app. Unnecessarily large apps aren't great—they make downloads slower for users and take up more of their devices' limited space. Large apps also have a higher chance of being uninstalled, and of users failing to download or canceling downloads of those apps.
The good news is that there is an Android X compatibility library for vector drawables all the way back to API level 7. - Open build.gradle (Module: app). Add this line to the
defaultConfigsection:
vectorDrawables.useSupportLibrary = true- Click the Sync Now button. Every time that a
build.gradlefile is modified, you need to sync the build files with the project. - Open the
main_activity.xmllayout file. Add this namespace to the root<LinearLayout>tag, underneath thetoolsnamespace:
xmlns:app="http://schemas.android.com/apk/res-auto"The app namespace is for attributes that come from either your custom code or from libraries and not the core Android framework.
- Change the
android:srcattribute in the<ImageView>element to beapp:srcCompat.
app:srcCompat="@drawable/empty_dice"
The app:srcCompat attribute uses the Android X library to support vector drawables in older versions of Android, back to API level 7.
- Build and run your app. You won't see anything different on the screen, but now your app doesn't need to use generated PNG files for the dice images no matter where the runs, which means a smaller app file.
Android Studio project: DiceRollerFinal
Challenge: Modify the DiceRoller app to have two dice. When the user taps the Roll button, each die should have a value independent of the other.
Tip: Create a new private function to get a random drawable image and return an integer for the drawable resource. Use that function for each of the die images.
private fun getRandomDiceImage() : Int { ... }Coding challenge solution code
Android Studio project: DiceRollerFinal-challenge
App resources:
- Your app's resources can include images and icons, standard colors used in the app, strings, and XML layouts. All of those resources are stored in the
resfolder. - The
drawableresources folder is where you should put all the image resources for your app.
Using vector drawables in image views:
- Vector drawables are images described in XML format. Vector drawables are more flexible than bitmap images (such as PNG files) because they can be scaled to any size or resolution.
- To add a drawable to your app's layout, use an
<ImageView>element. The source of the image is in theandroid:srcattribute. To refer to the drawable resource folder, use@drawable, for example"@drawable/image_name". - Use the
ImageViewview in yourMainActivitycode for the image. You can usesetImageResource()to change the view's image to a different resource. UseR.drawableto refer to specific drawables, for examplesetImageResource(R.drawable.image_name).
The lateinit keyword:
- Minimize the calls to
findViewById()in your code by declaring fields to hold those views, and initializing the fields inonCreate(). Use thelateinitkeyword for the field to avoid needing to declare it nullable.
The tools namespace for design-time attributes:
- Use the
tools:srcattribute in the<ImageView>element in your layout to display an image in only Android Studio's preview or design editor. You can then use an empty image forandroid:srcfor the final app. - Use the
toolsnamespace in the Android layout file to create placeholder content or hints for layout in Android Studio. Data declared bytoolsattributes is not used in the final app.
API levels:
- Each Android OS has an official version number and name (for example Android 9.0, "Pie") and an API level (API 28). Use the API levels in your app's Gradle files to indicate the versions of Android your app supports.
- The
compileSdkVersionparameter in thebuild.gradlefile specifies the Android API level that Gradle should use to compile your app. - The
targetSdkVersionparameter specifies the most recent API level that you have tested your app against. In many cases this parameter has the same value ascompileSdkVersion. - The
minSdkVersionparameter specifies the oldest API level your app can run on.
Android Jetpack:
- Android Jetpack is a collection of libraries, developed by Google, that offers backward-compatible classes and helpful functions for supporting older versions of Android. Jetpack replaces and expands on the set of libraries formerly known as the Android Support Library.
- Classes imported from the
androidxpackage refer to the Jetpack libraries. Dependencies to Jetpack in yourbuild.gradlefile also start withandroidx.
Backward compatibility for vector drawables:
- Vector drawables are only natively supported in versions of Android higher than API 21. In older versions, Gradle generates PNG images for those drawables when your app is built.
- You can specify that the Android Support Library should be used for vector drawables in older API versions with the
vectorDrawables.useSupportLibrary = trueconfiguration parameter in thebuild.gradlefile. - Once you've enabled the support library for vector drawables, use the
app:srcCompatattribute in the<ImageView>element (instead ofandroid:src) to specify the vector drawable source for that image.
The app namespace:
- The
appnamespace in your XML layout file is for attributes that come from either your custom code or from libraries, not from the core Android framework.
Udacity course:
Android developer documentation:
ImageView- App resources overview
findViewById()- Tools attributes reference
- Support different platform versions
- Specify API level requirements
- Android Jetpack
Other:
This section lists possible homework assignments for students who are working through this codelab as part of a course led by an instructor. It's up to the instructor to do the following:
- Assign homework if required.
- Communicate to students how to submit homework assignments.
- Grade the homework assignments.
Instructors can use these suggestions as little or as much as they want, and should feel free to assign any other homework they feel is appropriate.
If you're working through this codelab on your own, feel free to use these homework assignments to test your knowledge.
Change an app
Add a Clear button to the DiceRoller app that sets the die image back to the empty image.
Answer these questions
Question 1
Which <ImageView> attribute indicates a source image that should be used only in Android Studio?
android:srcCompatapp:srctools:srctools:sourceImage
Question 2
Which method changes the image resource for an ImageView in Kotlin code? xmx
setImageResource()setImageURI()setImage()setImageRes()
Question 3
What does the lateinit keyword in a variable declaration indicate in Kotlin code?
- The variable is never initialized.
- The variable is only initialized at app runtime.
- The variable is automatically initialized to
null. - The variable will be initialized later. I promise!
Question 4
Which Gradle configuration indicates the most recent API level your app has been tested with?
minSdkVersioncompileSdkVersiontargetSdkVersiontestSdkVersion
Question 5
You see an import line in your code that starts with androidx. What does this mean?
- The class is part of the Android Jetpack libraries.
- The class is in an external library that will be dynamically loaded when the app runs.
- The class is "extra" and optional to your class.
- The class is part of Android's XML support.
Submit your app for grading
Check to make sure the app has the following:
- The app layout should include one image view and two buttons.
- The app's code should set two click handlers, one for each button.
- The click handler for the Clear button should set the die image to
R.drawable.empty_dice.
Start the next lesson:
For links to other codelabs in this course, see the Android Kotlin Fundamentals codelabs landing page.