
Summary
In this codelab you will learn how to deploy a Python Flask web application to the App Engine flexible environment. The example application allows a user to upload a photo of a person's face and learn how likely it is that the person is happy. The application uses Google Cloud APIs for Vision, Storage, and Datastore.
About App Engine
Google App Engine applications are easy to create, easy to maintain, and easy to scale as your traffic and data storage needs change. With App Engine, there are no servers to maintain. You simply upload your application and it's ready to go.
App Engine applications automatically scale based on incoming traffic. Load balancing, microservices, authorization, SQL and NoSQL databases, traffic splitting, logging, search, versioning, roll out and roll backs, and security scanning are all supported natively and are highly customizable.
App Engine's Flexible Environment supports all of the following programming languages: C#, Go, Java, Node.js, PHP, Python, and Ruby. App Engine Flexible runs your application within Docker containers running on Google Compute Engine virtual machines. App Engine's Standard Environment is an alternative option for certain languages including Python. App Engine Standard runs your application in a more restrictive sandbox environment. Read Choosing an App Engine Environment for more information.
What you'll learn
- How to deploy a simple web application to the App Engine Flexible Environment
- How to access the Google Cloud client libraries for Vision, Storage, and Datastore
- How to use the Google Cloud Console and the Google Cloud SDK to manage various cloud resources
- How to use the Cloud Shell
What you'll need
- Familiarity with Python
- Familiarity with standard Linux text editors such as Vim, Emacs, or Nano
Project Creation
If you don't already have a Google Account (Gmail or Google Apps), you must create one. Sign-in to Google Cloud Platform console (console.cloud.google.com) and create a new project:


Remember the project ID, a unique name across all Google Cloud projects (the name above has already been taken and will not work for you, sorry!). It will be referred to later in this codelab as PROJECT_ID.
Billing
Next, you'll need to enable billing in the Cloud Console in order to use Google Cloud resources.
Running through this codelab shouldn't cost you more than a few dollars, but it could be more if you decide to use more resources or if you leave them running.
New users of Google Cloud Platform are eligible for a $300 free trial.
While Google Cloud can be operated remotely from your laptop, in this codelab we will be using Google Cloud Shell, a command line environment running in the Cloud. This Debian-based virtual machine is loaded with all the development tools you'll need (gcloud, python, virtualenv, pip and more), it offers a persistent 5GB home directory, and runs on the Google Cloud, greatly enhancing network performance and authentication. This means that all you will need for this codelab is a browser (yes, it works on a Chromebook).
To activate Google Cloud Shell, from the developer console simply click the button on the top right-hand side (it should only take a few moments to provision and connect to the environment):
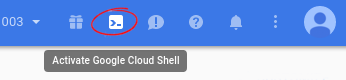

Once connected to the cloud shell, you should see that you are already authenticated and that the project is already set to your PROJECT_ID:
gcloud auth list
Credentialed accounts:
- <myaccount>@<mydomain>.com (active)
gcloud config list project
[core]
Project = <PROJECT_ID>
If for some reason the project is not set, simply issue the following command:
gcloud config set project <PROJECT_ID>
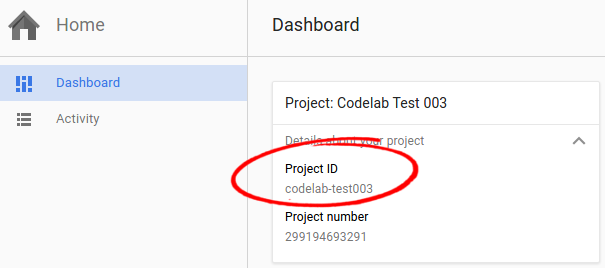
Looking for your PROJECT_ID? Check out what Project ID you used in the setup steps or look it up in the console dashboard:
In Cloud Shell on the command-line, run the following command to clone the Github repository:
git clone https://github.com/GoogleCloudPlatform/python-docs-samples.git
Change directory into python-docs-samples/codelabs/flex_and_vision:
cd python-docs-samples/codelabs/flex_and_vision
Before we can begin using the Vision, Storage, and Datastore APIs, you must enable the APIs with the following commands:
gcloud services enable vision.googleapis.com
gcloud services enable storage-component.googleapis.com
gcloud services enable datastore.googleapis.com
In order to make requests to the Vision, Storage, and Datastore APIs, you will need service account credentials. Service account credentials from your project can be generated using the gcloud tool.
Set an environment variable for your PROJECT_ID, replacing [YOUR_PROJECT_ID] with your own project ID:
export PROJECT_ID=[YOUR_PROJECT_ID]
Create a Service Account to access the Google Cloud APIs when testing locally:
gcloud iam service-accounts create codelab \
  --display-name "My Codelab Service Account"
Give your newly created Service Account appropriate permissions:
gcloud projects add-iam-policy-binding ${PROJECT_ID} \
--member serviceAccount:codelab@${PROJECT_ID}.iam.gserviceaccount.com \
--role roles/owner
After creating your Service Account, create a Service Account key:
gcloud iam service-accounts keys create ~/key.json \
--iam-account codelab@${PROJECT_ID}.iam.gserviceaccount.com
This command generates a service account key stored in a JSON file named key.json in your home directory.
Using the absolute path of the generated key, set an environment variable for your service account key in the Cloud Shell:
export GOOGLE_APPLICATION_CREDENTIALS="/home/${USER}/key.json"
You can read more about authenticating the Vision API.
Starting Your Virtual Environment and Installing Dependencies
Create an isolated Python 3 environment named env with virtualenv:
virtualenv -p python3 env
Enter your newly created virtualenv named env:
source env/bin/activate
Use pip to install dependencies for your project from the requirements.txt file:
pip install -r requirements.txt
The requirements.txt file is a list of package dependencies you need for your project. The above command downloaded all of these listed package dependencies to the virtualenv.
Creating an App Engine App
Next, create an App Engine instance by using:
gcloud app createCreating a Storage Bucket
First, set the environment variable CLOUD_STORAGE_BUCKET equal to the name of your PROJECT_ID. (It is generally recommended to name your bucket the same as your PROJECT_ID for convenience purposes).
export CLOUD_STORAGE_BUCKET=${PROJECT_ID}
Our application uses a Cloud Storage bucket, which you will need to create from Cloud Shell with a tool called gsutil. Run the following command, which creates a bucket with the same name as your PROJECT_ID.
gsutil mb gs://${PROJECT_ID}
Running the Application
python main.py
Once the application starts, click on the Web Preview icon  in the Cloud Shell toolbar and choose "Preview on port 8080."

A tab in your browser opens and connects to the server you just started. You should see something like this:

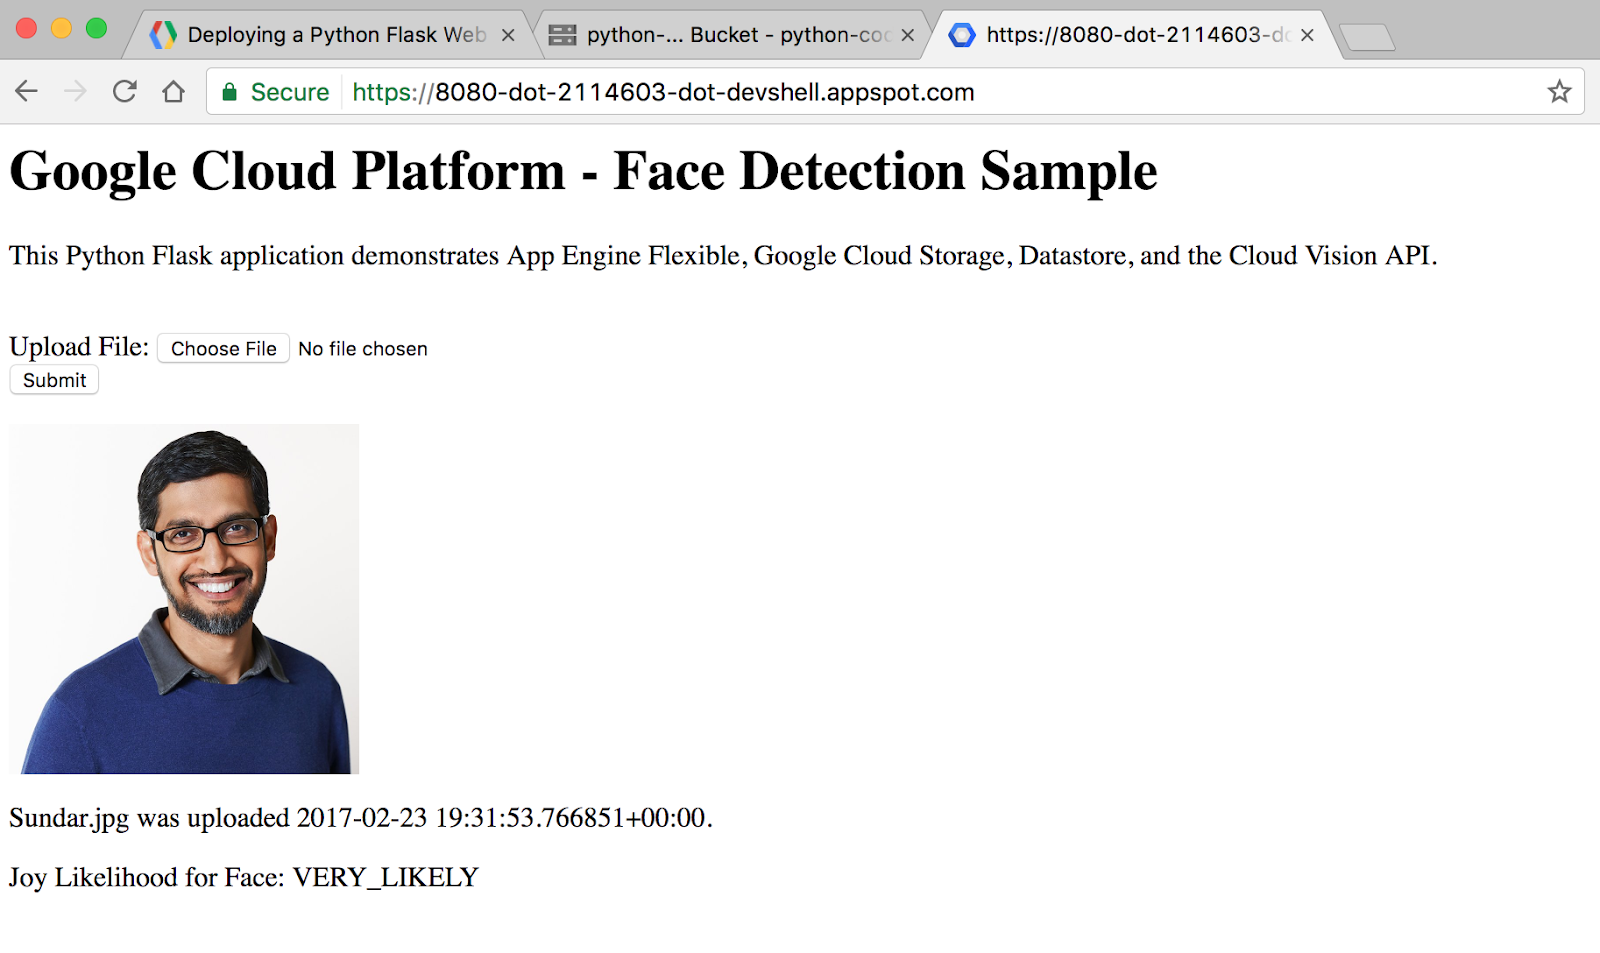
Try uploading a photo that contains a human face. Click the Choose File button, choose an image from your computer, and then click Submit.
After uploading a photo, you should see something like this:
Sample Code Layout
The sample has the following layout:
templates/
  homepage.html   /* HTML template that uses Jinja2 */
app.yaml          /* App Engine application configuration file */
main.py           /* Python Flask web application */
requirements.txt  /* List of dependencies for the project */
main.py
This Python file is a Flask web application. The application allows users to submit photos (preferably of faces), which are stored in Cloud Storage and analyzed using the face detection feature of the Cloud Vision API. Key information about each photo is stored in Datastore, Google Cloud Platform's NoSQL database, where it is accessed each time a user visits the website.
This application uses the Google Cloud Platform client libraries for Storage, Datastore, and Vision. These client libraries make it easy to access Cloud APIs from your favorite programming languages.
Let's take a look at some key snippets of the code.
The imports section at the top is where we import the various packages we need for our code. This is how we import our Google Cloud client libraries for Datastore, Storage, and Vision:
from google.cloud import datastore
from google.cloud import storage
from google.cloud import vision
Here is the code for what happens when a user visits the root URL of the website. We create a Datastore client object, which is used to access the Datastore client library. We then run a query on Datastore for entities of kind Faces. Finally, we render our HTML template, passing in the image_entities we extract from Datastore as a variable.
@app.route('/')
def homepage():
    # Create a Cloud Datastore client.
    datastore_client = datastore.Client()

    # Use the Cloud Datastore client to fetch information from Datastore about
    # each photo.
    query = datastore_client.query(kind='Faces')
    image_entities = list(query.fetch())

    # Return a Jinja2 HTML template and pass in image_entities as a parameter.
    return render_template('homepage.html', image_entities=image_entities)
Let's take a look at how entities are saved to Datastore. Datastore is Google Cloud's NoSQL database solution. Data is stored in objects called entities. Each entity is assigned a unique identifying key, which can be created using a kind and a key name string. A kind is an organizational bucket for what type of entity it is. For example, we might want to set up kinds for Photos, People, and Animals.
Each entity can have multiple developer-defined properties, which can have values of a number of types, including integers, floats, strings, dates, or binary data.
    # Create a Cloud Datastore client.
    datastore_client = datastore.Client()

    # Fetch the current date / time.
    current_datetime = datetime.now()

    # The kind for the new entity.
    kind = 'Faces'

    # The name/ID for the new entity.
    name = blob.name

    # Create the Cloud Datastore key for the new entity.
    key = datastore_client.key(kind, name)

    # Construct the new entity using the key. Set dictionary values for entity
    # keys blob_name, storage_public_url, timestamp, and joy.
    entity = datastore.Entity(key)
    entity['blob_name'] = blob.name
    entity['image_public_url'] = blob.public_url
    entity['timestamp'] = current_datetime
    entity['joy'] = face_joy

    # Save the new entity to Datastore.
    datastore_client.put(entity)
The Storage and Vision client libraries can be accessed programmatically in a similar manner to Datastore. You can open the main.py file yourself using vim, emacs, or nano to explore all of the sample code.
Learn more about Flask at http://flask.pocoo.org/.
Learn more about Client Libraries at https://googlecloudplatform.github.io/google-cloud-python/.
homepage.html
The Flask web framework leverages Jinja2 as a template engine. This allows us to pass in variables and expressions from main.py into homepage.html that get replaced with values once the page is rendered.
Learn more about Jinja2 at http://jinja.pocoo.org/docs/2.9/templates/.
This Jinja2 HTML template displays a form for users to submit photos to the database. It also displays each previously submitted image along with its file name, upload date/time, and the likelihood that the face detected by the Vision API is happy.
homepage.html
<h1>Google Cloud Platform - Face Detection Sample</h1>

<p>This Python Flask application demonstrates App Engine Flexible, Google Cloud
Storage, Datastore, and the Cloud Vision API.</p>

<br>

<html>
  <body>
    <form action="upload_photo" method="POST" enctype="multipart/form-data">
      Upload File: <input type="file" name="file"><br>
      <input type="submit" name="submit" value="Submit">
    </form>

  </body>
</html>
App Engine Flexible uses a file called app.yaml to describe an application's deployment configuration. If this file is not present, App Engine will try to guess the deployment configuration. However, it is a good idea to provide this file.
Next, you will modify app.yaml using an editor of your choice vim, nano, or emacs. We will use the nano editor:
nano app.yamlapp.yaml
runtime: python
env: flex
entrypoint: gunicorn -b :$PORT main:app

runtime_config:
    python_version: 3

env_variables:
    CLOUD_STORAGE_BUCKET: <your-cloud-storage-bucket>
This is the basic configuration needed to deploy a Python 3 App Engine Flex application. You can learn more about configuring App Engine here.
Once you have app.yaml open, replace < your-cloud-storage-bucket > with the name of your Cloud Storage bucket. (If you forgot the name of your Cloud Storage bucket, copy the GCP Project ID from Qwiklabs, which is the same). The env_variables section sets up environment variables that will be used in main.py once the application is deployed.
You can now close save and close the file in nano by using (Ctrl + x), which will prompt:

Type a letter y and then press the ENTER key one more time to confirm the filename for the following prompt:

Deploy your app on App Engine by using gcloud:
gcloud app deployAfter the application is deployed, you can visit it by opening the URL https://< PROJECT_ID >.appspot.com in your web browser.
Summary
In this step, you set up a Python web application and deployed it to the App Engine Flexible environment.
You learned how to write and deploy your first App Engine Flexible web application!
Clean Up
To avoid incurring charges to your Google Cloud Platform account for the resources used in this quickstart:
- Go to the Cloud Platform Console.
- Select the project you want to shut down, then click ‘Delete' at the top: this schedules the project for deletion.
Learn More
- Python on Google Cloud Platform: https://cloud.google.com/python/
- App Engine Flexible Documentation for Python: https://cloud.google.com/appengine/docs/flexible/python/
- Documentation for Python Client Libraries: Datastore, Storage, and Vision
- More Python code samples: https://cloud.google.com/python/samples
License
This work is licensed under a Creative Commons Attribution 2.0 Generic License.