
1. Before you begin
In this codelab, you learn how to run a text-classification inference from a Flutter app with TensorFlow Serving through REST and gRPC.
Prerequisites
- Basic knowledge of Flutter development with Dart
- Basic knowledge of machine learning with TensorFlow, such as training versus deployment
- Basic knowledge of terminals and Docker
- Train a comment-spam detection model with TensorFlow Lite Model Maker codelab
What you'll learn
- How to build a simple Flutter app and classify texts through TensorFlow Serving (REST and gRPC).
- How to display the results in the UI.
What you'll need
- Flutter SDK
- Android or iOS setup for Flutter
- Visual Studio Code (VS Code) setup for Flutter and Dart
- Docker
- Bash
- Protocol buffer compiler and gRPC Dart plugin for protocol compiler (only needed if you want to re-generate the gRPC stub by yourself)
2. Set up your Flutter development environment
For Flutter development, you need two pieces of software to complete this lab—the Flutter SDK and an editor.
You can run the codelab using any of these devices:
- The iOS simulator (requires installing Xcode tools).
- The Android Emulator (requires setup in Android Studio).
- A browser (Chrome is required for debugging).
- As a Windows, Linux, or macOS desktop application. You must develop on the platform where you plan to deploy. So, if you want to develop a Windows desktop app, you must develop on Windows to access the appropriate build chain. There are operating system-specific requirements that are covered in detail on docs.flutter.dev/desktop.
3. Get set up
To download the code for this codelab:
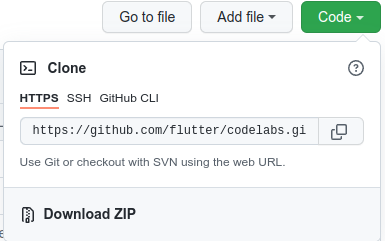
- Navigate to the GitHub repository for this codelab.
- Click Code > Download zip to download all the code for this codelab.
- Unzip the downloaded zip file to unpack a
codelabs-mainroot folder with all the resources that you need.
For this codelab, you only need the files in the tfserving-flutter/codelab2 subdirectory in the repository, which contains two folders:
- The
starterfolder contains the starter code that you build upon for this codelab. - The
finishedfolder contains the completed code for the finished sample app.
4. Download the dependencies for the project
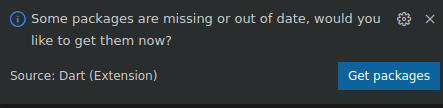
- In VS Code, click File > Open folder and then select the
starterfolder from the source code that you downloaded earlier. - If you see a dialog appear that prompts you to download the required packages for the starter app, click Get packages.
- If you don't see this dialog, open your terminal and then run
flutter pub getcommand in thestarterfolder.
5. Run the starter app
- In VS Code, ensure that the Android Emulator or iOS Simulator is properly set up and appears in the status bar.
For example, here's what you see when you use Pixel 5 with the Android Emulator:

Here's what you see when you use iPhone 13 with the iOS Simulator:

- Click
 Start debugging.
Run and explore the app
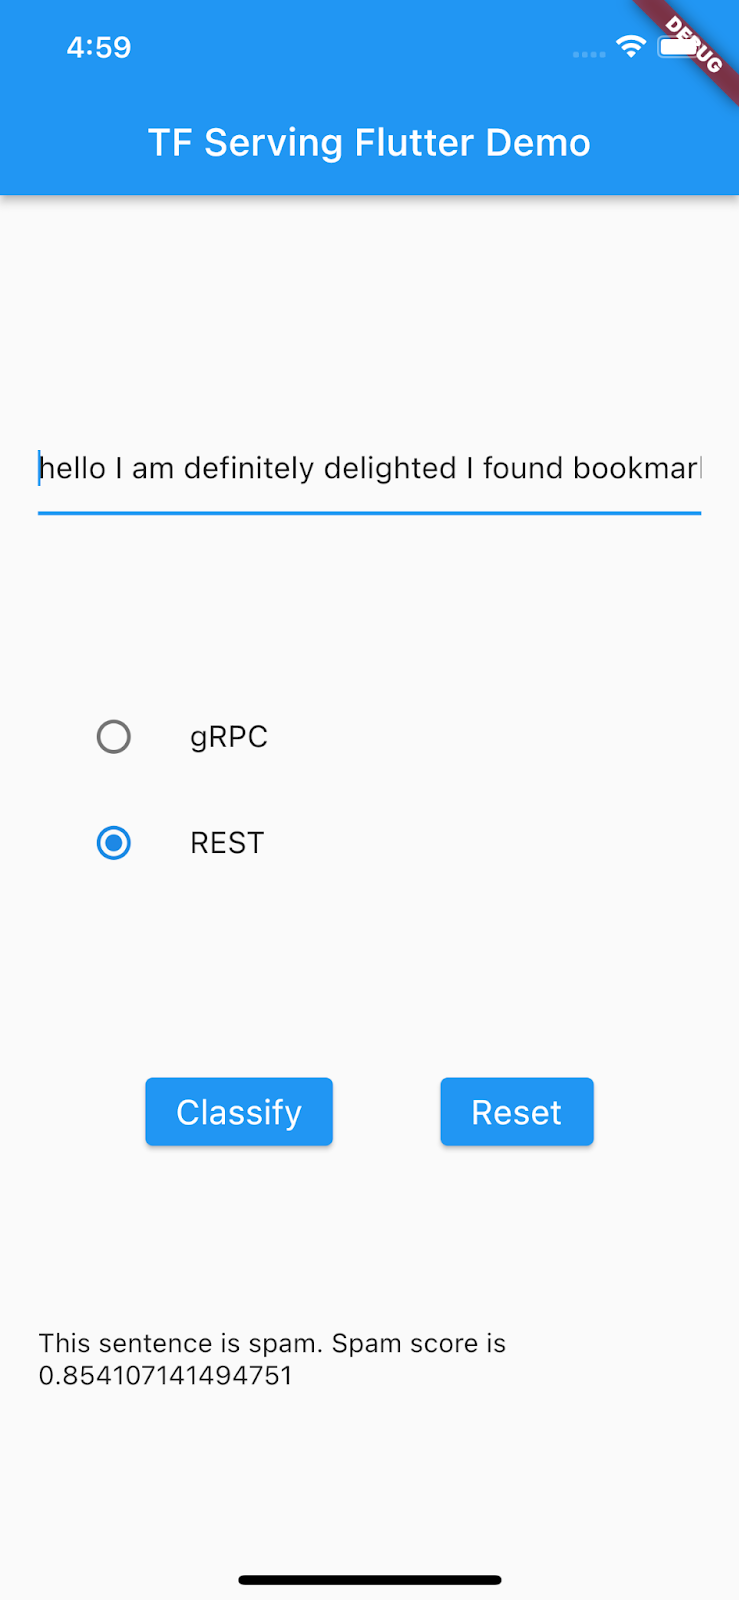
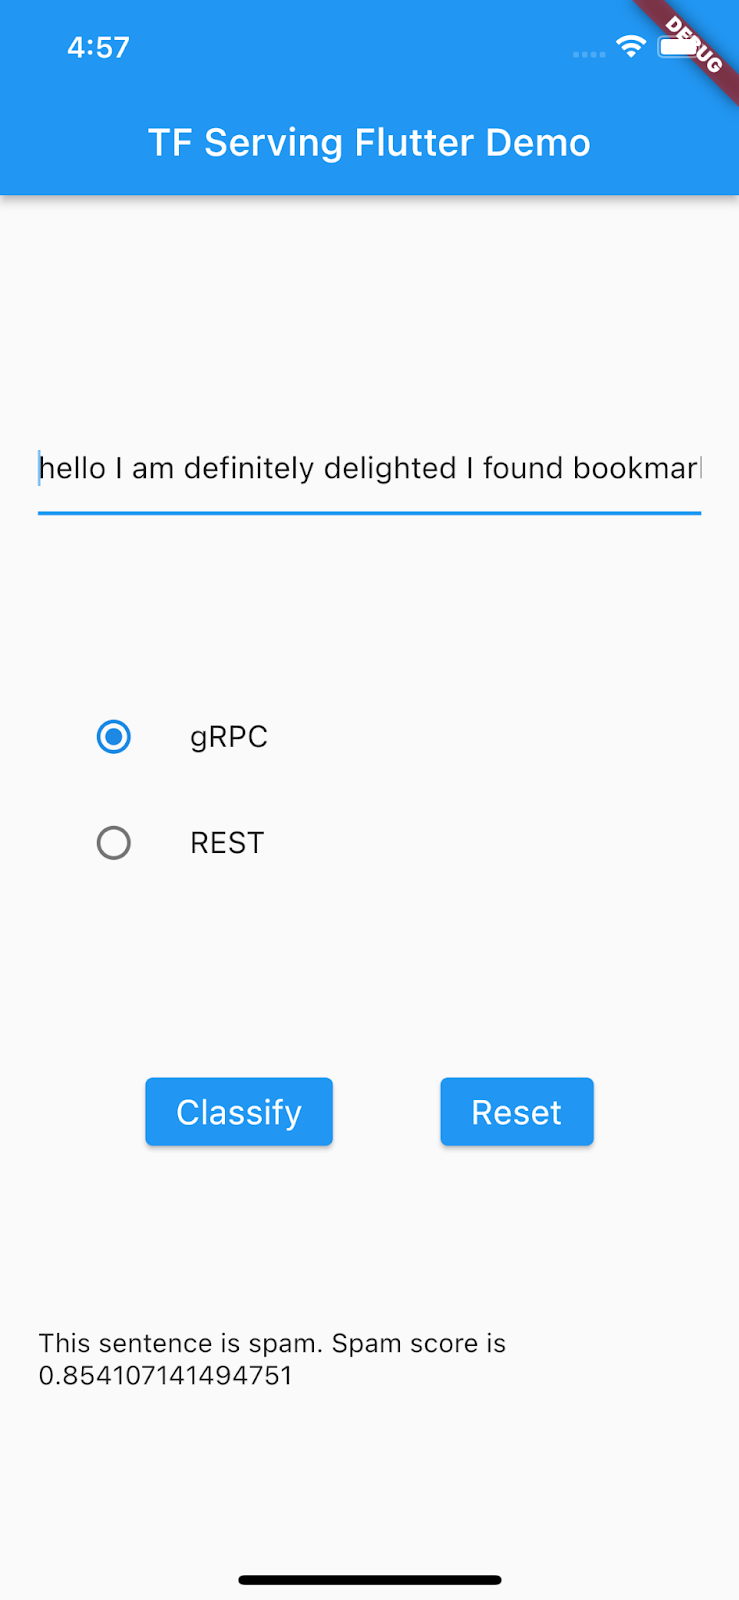
The app should launch on your Android Emulator or iOS Simulator. The UI is pretty straightforward. There's a text field that lets the user type in the text. The user can choose whether to send the data to the backend with REST or gRPC. The backend uses a TensorFlow model to perform text classification on the preprocessed input and returns the classification result to the client app, which updates the UI in turn.

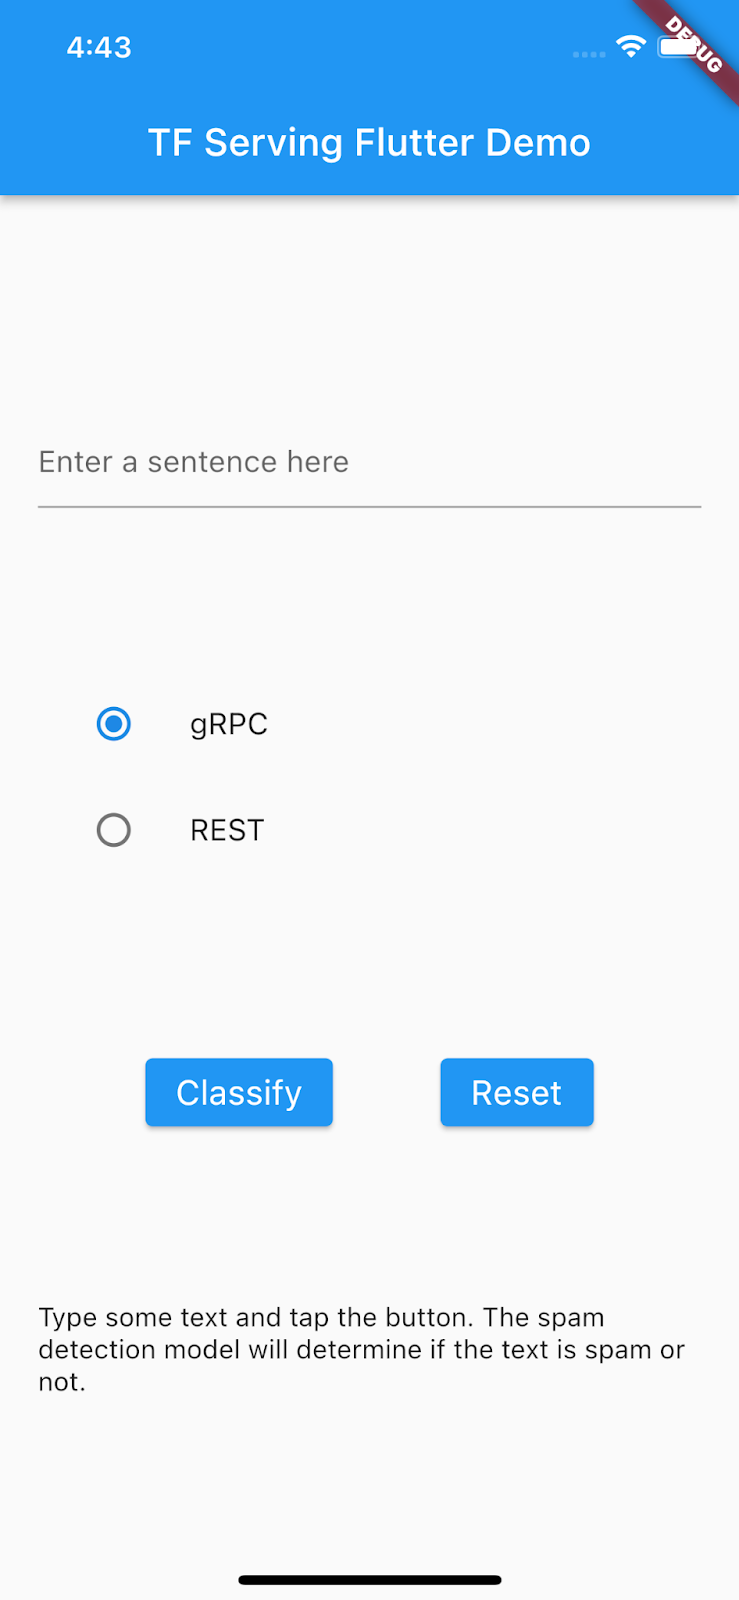
If you click Classify, nothing happens because it can't communicate with the backend yet.
6. Deploy a text-classification model with TensorFlow Serving
Text classification is a very common machine learning task that classifies texts into predefined categories. In this codelab, you deploy the pretrained model from the Train a comment-spam detection model with TensorFlow Lite Model Maker codelab with TensorFlow Serving and call the backend from your Flutter frontend to classify the input text as spam or not spam.
Start TensorFlow Serving
- In your terminal, start TensorFlow Serving with Docker, but replace the
PATH/TO/SAVEDMODELplaceholder with the absolute path of themm_spam_savedmodelfolder on your computer.
docker pull tensorflow/serving

docker run -it --rm -p 8500:8500 -p 8501:8501 -v "PATH/TO/SAVEDMODEL:/models/spam-detection" -e MODEL_NAME=spam-detection tensorflow/serving
Docker automatically downloads the TensorFlow Serving image first, which takes a minute. Afterward, TensorFlow Serving should start. The log should look like this code snippet:
2022-02-25 06:01:12.513231: I external/org_tensorflow/tensorflow/cc/saved_model/loader.cc:206] Restoring SavedModel bundle.
2022-02-25 06:01:12.585012: I external/org_tensorflow/tensorflow/core/platform/profile_utils/cpu_utils.cc:114] CPU Frequency: 3000000000 Hz
2022-02-25 06:01:13.395083: I external/org_tensorflow/tensorflow/cc/saved_model/loader.cc:190] Running initialization op on SavedModel bundle at path: /models/ssd_mobilenet_v2_2/123
2022-02-25 06:01:13.837562: I external/org_tensorflow/tensorflow/cc/saved_model/loader.cc:277] SavedModel load for tags { serve }; Status: success: OK. Took 1928700 microseconds.
2022-02-25 06:01:13.877848: I tensorflow_serving/servables/tensorflow/saved_model_warmup_util.cc:59] No warmup data file found at /models/ssd_mobilenet_v2_2/123/assets.extra/tf_serving_warmup_requests
2022-02-25 06:01:13.929844: I tensorflow_serving/core/loader_harness.cc:87] Successfully loaded servable version {name: spam-detection version: 123}
2022-02-25 06:01:13.985848: I tensorflow_serving/model_servers/server_core.cc:486] Finished adding/updating models
2022-02-25 06:01:13.985987: I tensorflow_serving/model_servers/server.cc:367] Profiler service is enabled
2022-02-25 06:01:13.988994: I tensorflow_serving/model_servers/server.cc:393] Running gRPC ModelServer at 0.0.0.0:8500 ...
[warn] getaddrinfo: address family for nodename not supported
2022-02-25 06:01:14.033872: I tensorflow_serving/model_servers/server.cc:414] Exporting HTTP/REST API at:localhost:8501 ...
[evhttp_server.cc : 245] NET_LOG: Entering the event loop ...
7. Tokenize input sentence
The backend is ready now, so you're almost ready to send client requests to TensorFlow Serving, but first you need to tokenize the input sentence. If you inspect the input tensor of the model, you can see that it expects a list of 20 integer numbers instead of raw strings. Tokenization is when you map the individual words you type in the app to a list of integers based on a vocabulary dictionary before you send them to the backend for classification. For example, if you type buy book online to learn more, the tokenization process maps it to [32, 79, 183, 10, 224, 631, 0, 0, 0, 0, 0, 0, 0, 0, 0, 0, 0, 0, 0, 0]. The specific numbers can vary based on the vocabulary dictionary.
- In the
lib/main.dartfile, add this code to thepredict()method to build the_vocabMapvocabulary dictionary.
// Build _vocabMap if empty.
if (_vocabMap.isEmpty) {
  final vocabFileString = await rootBundle.loadString(vocabFile);
  final lines = vocabFileString.split('\n');
  for (final l in lines) {
    if (l != "") {
      var wordAndIndex = l.split(' ');
      (_vocabMap)[wordAndIndex[0]] = int.parse(wordAndIndex[1]);
    }
  }
}
- Immediately after the previous code snippet, add this code to implement tokenization:
// Tokenize the input sentence.
final inputWords = _inputSentenceController.text
    .toLowerCase()
    .replaceAll(RegExp('[^a-z ]'), '')
    .split(' ');
// Initialize with padding token.
_tokenIndices = List.filled(maxSentenceLength, 0);
var i = 0;
for (final w in inputWords) {
  if ((_vocabMap).containsKey(w)) {
    _tokenIndices[i] = (_vocabMap)[w]!;
    i++;
  }

  // Truncate the string if longer than maxSentenceLength.
  if (i >= maxSentenceLength - 1) {
    break;
  }
}
This code lowercases the sentence string, removes non-alphabet characters, and maps the words to 20 integer indices based on the vocabulary table.
8. Connect the Flutter app with TensorFlow Serving through REST
There are two ways to send requests to TensorFlow Serving:
- REST
- gRPC
Send requests and receive responses through REST
There are three simple steps to send requests and receive responses through REST:
- Create the REST request.
- Send the REST request to TensorFlow Serving.
- Extract the predicted result from the REST response and render the UI.
You complete these steps in the main.dart file.
Create and send the REST request to TensorFlow Serving
- Right now, the
predict()function doesn't send the REST request to TensorFlow Serving. You need to implement the REST branch to create a REST request:
if (_connectionMode == ConnectionModeType.rest) {
  // TODO: Create and send the REST request.

}
- Add this code to the REST branch:
//Create the REST request.
final response = await http.post(
  Uri.parse('http://' +
      _server +
      ':' +
      restPort.toString() +
      '/v1/models/' +
      modelName +
      ':predict'),
  body: jsonEncode(<String, List<List<int>>>{
    'instances': [_tokenIndices],
  }),
);
Process the REST response from TensorFlow Serving
- Add this code right after the previous code snippet to handle the REST response:
// Process the REST response.
if (response.statusCode == 200) {
  Map<String, dynamic> result = jsonDecode(response.body);
  if (result['predictions']![0][1] >= classificationThreshold) {
    return 'This sentence is spam. Spam score is ' +
        result['predictions']![0][1].toString();
  }
  return 'This sentence is not spam. Spam score is ' +
      result['predictions']![0][1].toString();
} else {
  throw Exception('Error response');
}
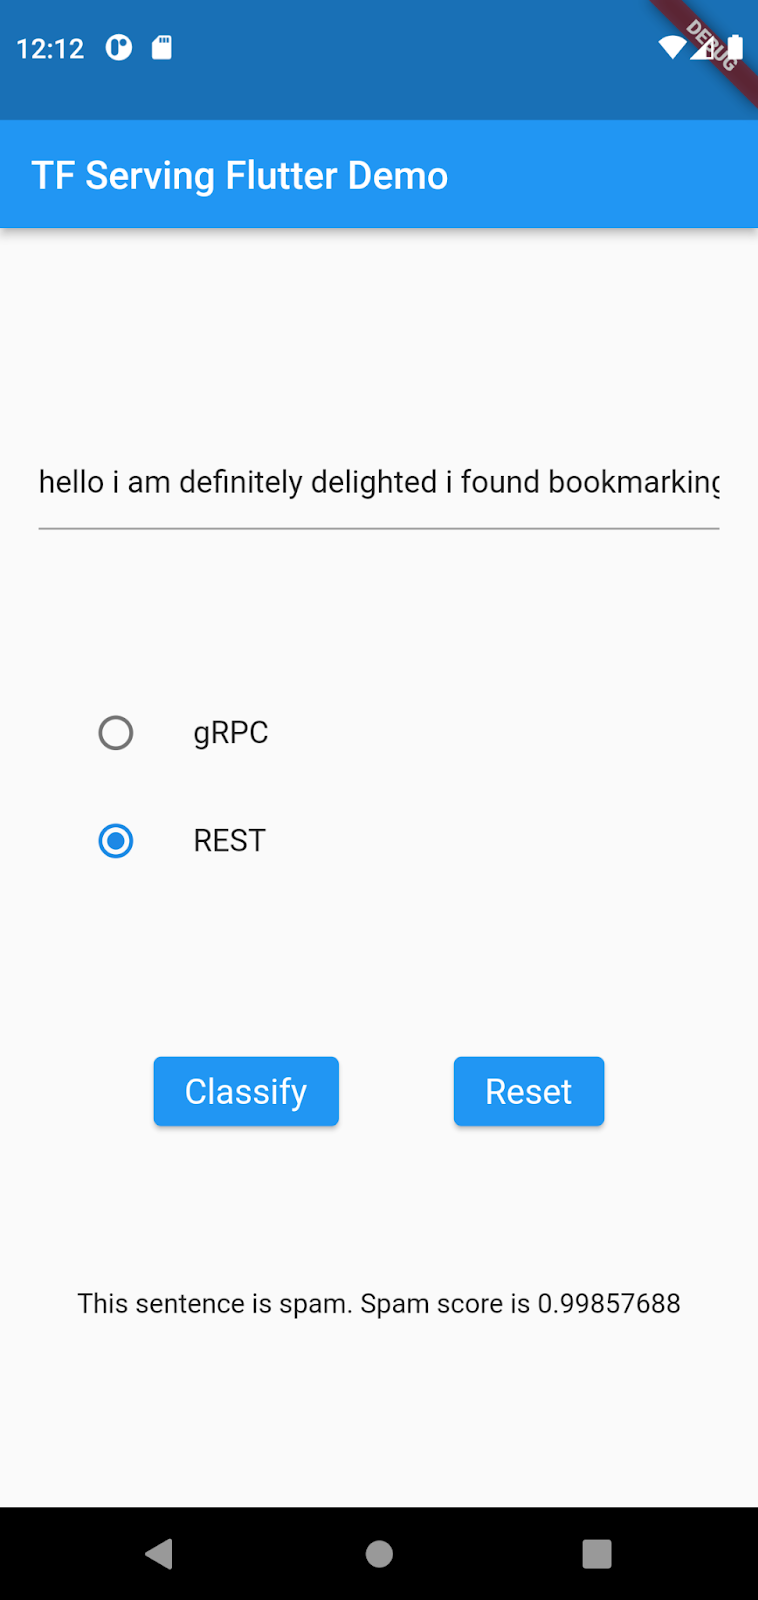
The postprocessing code extracts the probability that the input sentence is a spam message from the response and displays the classification result in the UI.
Run it
- Click Start debugging and then wait for the app to load.
- Enter some text and then select REST > Classify.
9. Connect the Flutter app with TensorFlow Serving through gRPC
In addition to REST, TensorFlow Serving also supports gRPC.

gRPC is a modern, open source, high-performance Remote Procedure Call (RPC) framework that can run in any environment. It can efficiently connect services in, and across, data centers with pluggable support for load balancing, tracing, health checking, and authentication. It's been observed that gRPC is more performant than REST in practice.
Send requests and receive responses with gRPC
There are four simple steps to send requests and receive responses with gRPC:
- Optional: Generate the gRPC client stub code.
- Create the gRPC request.
- Send the gRPC request to TensorFlow Serving.
- Extract the predicted result from the gRPC response and render the UI.
You complete these steps in the main.dart file.
Optional: Generate the gRPC client stub code
To use gRPC with TensorFlow Serving, you need to follow the gRPC workflow. To learn more about the details, see the gRPC documentation.
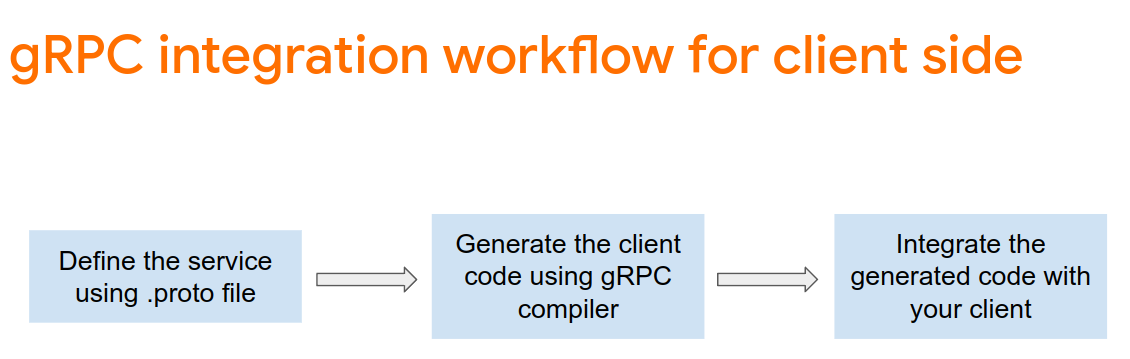
TensorFlow Serving and TensorFlow define the .proto files for you. As of TensorFlow and TensorFlow Serving 2.8, these .proto files are the ones needed:
tensorflow/core/example/example.proto
tensorflow/core/example/feature.proto
tensorflow/core/protobuf/struct.proto
tensorflow/core/protobuf/saved_object_graph.proto
tensorflow/core/protobuf/saver.proto
tensorflow/core/protobuf/trackable_object_graph.proto
tensorflow/core/protobuf/meta_graph.proto
tensorflow/core/framework/node_def.proto
tensorflow/core/framework/attr_value.proto
tensorflow/core/framework/function.proto
tensorflow/core/framework/types.proto
tensorflow/core/framework/tensor_shape.proto
tensorflow/core/framework/full_type.proto
tensorflow/core/framework/versions.proto
tensorflow/core/framework/op_def.proto
tensorflow/core/framework/graph.proto
tensorflow/core/framework/tensor.proto
tensorflow/core/framework/resource_handle.proto
tensorflow/core/framework/variable.proto

tensorflow_serving/apis/inference.proto
tensorflow_serving/apis/classification.proto
tensorflow_serving/apis/predict.proto
tensorflow_serving/apis/regression.proto
tensorflow_serving/apis/get_model_metadata.proto
tensorflow_serving/apis/input.proto
tensorflow_serving/apis/prediction_service.proto
tensorflow_serving/apis/model.proto

google/protobuf/any.proto
google/protobuf/wrappers.proto
- In your terminal, navigate to the
starter/lib/proto/folder and generate the stub:
bash generate_grpc_stub_dart.sh
Create the gRPC request
Similar to the REST request, you create the gRPC request in the gRPC branch.
if (_connectionMode == ConnectionModeType.rest) {

} else {
  // TODO: Create and send the gRPC request.

}
- Add this code to create the gRPC request:
//Create the gRPC request.
final channel = ClientChannel(_server,
    port: grpcPort,
    options:
        const ChannelOptions(credentials: ChannelCredentials.insecure()));
_stub = PredictionServiceClient(channel,
    options: CallOptions(timeout: const Duration(seconds: 10)));

ModelSpec modelSpec = ModelSpec(
  name: 'spam-detection',
  signatureName: 'serving_default',
);

TensorShapeProto_Dim batchDim = TensorShapeProto_Dim(size: Int64(1));
TensorShapeProto_Dim inputDim =
    TensorShapeProto_Dim(size: Int64(maxSentenceLength));
TensorShapeProto inputTensorShape =
    TensorShapeProto(dim: [batchDim, inputDim]);
TensorProto inputTensor = TensorProto(
    dtype: DataType.DT_INT32,
    tensorShape: inputTensorShape,
    intVal: _tokenIndices);

// If you train your own model, update the input and output tensor names.
const inputTensorName = 'input_3';
const outputTensorName = 'dense_5';
PredictRequest request = PredictRequest(
    modelSpec: modelSpec, inputs: {inputTensorName: inputTensor});
Note: The input and output tensor names could differ from model to model, even if the model architectures are the same. Make sure to update them if you train your own model.
Send the gRPC request to TensorFlow Serving
- Add this code after the previous code snippet to send the gRPC request to TensorFlow Serving:
// Send the gRPC request.
PredictResponse response = await _stub.predict(request);
Process the gRPC response from TensorFlow Serving
- Add this code after the previous code snippet to implement the callback functions to handle the response:
// Process the response.
if (response.outputs.containsKey(outputTensorName)) {
  if (response.outputs[outputTensorName]!.floatVal[1] >
      classificationThreshold) {
    return 'This sentence is spam. Spam score is ' +
        response.outputs[outputTensorName]!.floatVal[1].toString();
  } else {
    return 'This sentence is not spam. Spam score is ' +
        response.outputs[outputTensorName]!.floatVal[1].toString();
  }
} else {
  throw Exception('Error response');
}
Now the postprocessing code extracts the classification result from the response and displays it in the UI.
Run it
- Click Start debugging and then wait for the app to load.
- Enter some text and then select gRPC > Classify.

10. Congratulations
You used TensorFlow Serving to add text-classification capabilities to your app!
In the next codelab, you will enhance the model so that you can detect specific spam messages that cannot be detected by the current app.