
This guide explains how to add digital transactions to your conversational Action, so users can purchase your non-consumable digital goods.
Key terms: A non-consumable digital good is a stock-keeping unit (SKU) that can only be purchased once, like paid access to additional content in an Action or Android app. This type of product is different from a consumable digital good which can be purchased, used, and repurchased.
For more information on non-consumable one-time products, refer to the Android documentation on one-time product-specific features.
Restrictions and review guidelines
Additional policies apply to Actions with transactions. It can take us a few weeks to review Actions that include transactions, so factor that time in when planning your release schedule. To ease the review process, make sure you comply with the policies and guidelines for transactions before submitting your Action for review.
Actions that sell digital goods can only be deployed in the following countries:
- Australia
- Brazil
- Canada
- Indonesia
- Japan
- Mexico
- Russia
- Singapore
- Thailand
- Turkey
- United Kingdom
- United States
Transaction flow
This guide outlines each development step as they occur in a digital goods transaction flow. When your Action handles transactions for digital goods, it uses the following flow:
- Set up a digital purchases API client: Your Action uses the digital purchases API to communicate with your Google Play inventory and transact. Before your Action does anything else, it creates a JWT client with a service key to communicate with the digital purchases API.
- Gather information: Your Action gathers basic information about the
user and your Google Play inventory to prepare for a transaction.
- Validate transaction requirements: Your Action uses the digital transactions requirements helper at the start of the purchase flow to make sure the user can transact.
- Gather available inventory: Your Action checks your Google Play inventory and identifies what items are currently available to purchase.
- Build the order: Your Action presents the available digital goods to the user so they can select one to purchase.
- Complete the purchase: Your Action uses the digital purchases API to initiate a purchase with the user’s selection to the Google Play store.
- Handle the result: Your Action receives a status code for the transaction and notifies the user that the purchase was successful (or requires additional steps).
Prerequisites
Before you incorporate digital transactions into your Action, you need the following prerequisites:
A developer account and a merchant account on Google Play, to manage your digital goods in the Google Play console.
A web domain that’s verified in the Google Search Console. This domain doesn’t need to be associated with a publicly launched web site, we just need to reference your web domain.
An Android app with the
com.android.vending.BILLINGpermission in the Google Play console. Your digital goods will be “in-app purchases” associated with this app in the Google Play console.You also need to create a release in the Play console with this app, but if you don’t want the release to be public you can create a closed alpha release.
If you don’t have an Android app already, follow the Associate an Android App instructions.
One or more managed products in the Google Play console, which are the digital goods that you sell with your Action. Note that you can't create managed products in the Play console until you set up the Android app prerequisite.
If you don’t have managed products already, follow the Create your Digital Goods instructions.
Associate an Android App
If you don’t currently have an Android app with the billing permission in the Google Play console, follow these steps:
- In Android Studio or the Android IDE of your choice, create a new project. Choose options in the project setup prompts to create a very basic app.
- Give the project a package name, like
com.mycompany.myapp. Don't leave this name as default, since you can't upload packages that includecom.exampleto the Play console. - Open your app's
AndroidManifest.xmlfile. Add the following line of code inside the
manifestelement:<uses-permission android:name="com.android.vending.BILLING" />Your
AndroidManifest.xmlfile should look like the following code block:<manifest xmlns:android="http://schemas.android.com/apk/res/android" xmlns:tools="http://schemas.android.com/tools" package="com.mycompany.myapp"> <uses-permission android:name="com.android.vending.BILLING" /> <application android:allowBackup="true" android:icon="@mipmap/ic_launcher" android:label="@string/app_name" android:roundIcon="@mipmap/ic_launcher_round" android:supportsRtl="true" android:theme="@style/AppTheme" /> </manifest>Build your app as a signed APK. In Android Studio, follow these steps:
- Go to Build, Generate Signed Bundle / APK.
- Click Next.
- Under Key store path, click Create new.
- Fill each field then click OK. Take note of your Key store password and Key password, and store these in a safe place, since you'll use these later.
- Click Next.
- Select release.
- Select V1 (JAR Signature).
- Click Finish.
- After a few seconds, Android Studio generates an
app-release.apkfile. Locate this file for later use.
In the Google Play console, create a new application.
Go to App releases.
Under Closed tracks, go to Manage then Alpha.
Click the Create Release button.
Under Let Google manage and protect your signing key, enter your signing key information.
Upload your APK file.
Click Save.
Create your Digital Goods
If you don’t currently have any digital goods in the Play console, follow these steps:
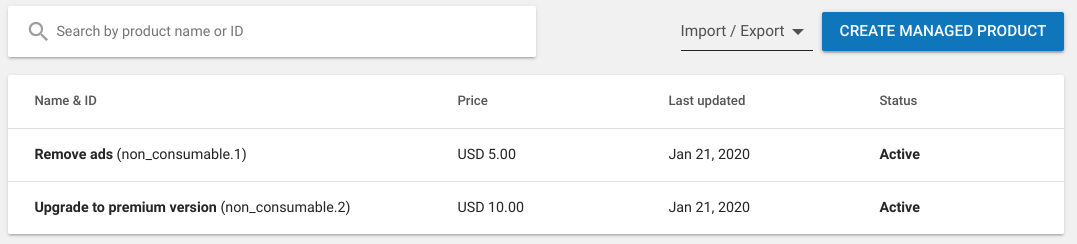
- In the Google Play console, go to In-app products then Managed products. If you see a warning, follow the previous instructions to create an Android app or click the link to create a merchant profile.
- Click Create Managed product.
- Fill out the fields for your digital product. Take note of the Product ID, which is how you’ll reference this product from your Action.
- Click Save.
- Repeat steps 2-4 for each product you want to sell.
Prepare your Actions project
With your digital goods set up in the Google Play console, you must enable digital transactions and associate your Actions project with your Play app.
To turn on digital goods transactions in your Actions project, follow these steps:
- In the Actions console, open your project or create a new one.
- Go to Deploy then Directory information.
- Under Additional information and Transactions, check the Yes box under Do your Actions use the Digital Purchase API to perform transactions of digital goods.
- Click Save.
Create a digital goods API key
To send requests to the digital goods API, you need to download a JSON service account key associated with your Actions console project.
To retrieve your service account key, follow these steps:
- In the Actions console, click the three dots icon in the upper-right corner, then Project settings.
- Find your Action’s Project ID.
- Follow this link, replacing "
<project_id>" with your project's ID:https://console.developers.google.com/apis/credentials?project=project_id - In the main navigation, go to Credentials.
- On the page that appears, click Create credentials, then Service account key.
- Go to Service Account, and click New Service Account.
- Give the service account a name like digitaltransactions.
- Click Create.
- Set the Role to Project > Owner.
- Click Continue.
- Click Create Key.
- Select the JSON key type.
- Click Create key and download the JSON service account key.
Save this service account key in a safe place. You’ll use this key in your fulfillment to create a client for the digital purchases API.
Connect to your Play inventory
In order to access your digital goods from an Actions project, associate your web domain and app with your project as connected properties.
Note: The connection steps may take up to a week to complete while we verify your properties. If your website or app aren’t linked after that time, contact support.
To connect your Play console web domain and app to your Actions project, follow these steps:
- In the Actions console, go to Deploy then Brand verification.
If you haven't connected any properties, first connect a website:
- Click the web property (</>) button.
- Enter the URL for your web domain and click Connect.
Google sends an email with further instructions to the individual who’s verified for that web domain in the Google Search Console. Once the recipient of this email follows those steps, the website should appear under Brand verification.
Once you have at least one connected website, perform the following steps to connect your Android app:
- In the Actions console, go to Deploy then Brand verification.
- Click Connect App.
On the page that appears, follow the instructions to verify your web domain on the Play console. Select the Play app that contains your digital goods, and enter the web domain URL exactly as it’s shown on the Brand verification page.
Once again, Google sends a verification email to the verified owner of the domain. Once they approve the verification, your Play app should appear under Brand verification.
Enable Access Play purchases.

Build your purchase flow
With your Actions project and digital goods inventory prepared, build a digital goods purchase flow in your conversation fulfillment webhook.
1. Set up a digital purchases API client
In your conversation fulfillment webhook, create a JWT client with your service
account JSON key and the
https://www.googleapis.com/auth/actions.purchases.digital scope.
The following Node.js code creates a JWT client for the digital purchases API:
  const serviceAccount = {'my-file.json'};
  const request = require('request');
  const {google} = require('googleapis');

  const jwtClient = new google.auth.JWT(
    serviceAccount.client_email, null, serviceAccount.private_key,
    ['https://www.googleapis.com/auth/actions.purchases.digital'],
    null
  );
2. Gather information
Before the user can make a purchase, your Action gathers information about the user’s ability to make purchases and what goods are available from your inventory.
2. a. Validate transaction requirements
It’s a good practice to make sure the user’s account is set up to perform
transactions, before giving them the option to make a purchase. This step
includes checking that the user has a payment method configured and they’re in a
locale where digital transactions are supported. At the start of the transaction
flow, use the DIGITAL_PURCHASE_CHECK helper to validate the user’s transaction
configuration with the Assistant.
The following Node.js code uses the DIGITAL_PURCHASE_CHECK at the start of the
conversation:
app.intent('Default Welcome Intent', async (conv, { SKU }) => {
  // Immediately invoke digital purchase check intent to confirm
  // purchase eligibility.
  conv.ask(new DigitalPurchaseCheck());
});
Find the result of this check in the conversation arguments as
DIGITAL_PURCHASE_CHECK_RESULT. Based on this result, either continue the
transaction flow or pivot away and prompt them to check their Google Pay
configuration.
The following Node.js code handles the requirements check result :
app.intent('Digital Purchase Check', async (conv) => {
  const arg = conv.arguments.get('DIGITAL_PURCHASE_CHECK_RESULT');
  if (!arg || !arg.resultType) {
    conv.close('Digital Purchase check failed. Please check logs.');
    return;
  }
  // User does not meet necessary conditions for completing a digital purchase
  if (arg.resultType === 'CANNOT_PURCHASE' || arg.resultType === 'RESULT_TYPE_UNSPECIFIED') {
    conv.close(`It looks like you aren't able to make digital purchases. Please check your Google Pay configuration and try again.`);
    return;
  }
  conv.ask('Welcome to the Digital Goods Sample. Would you like to see what I have for sale?');
});
2. b. Gather available inventory
Use the digital purchases API to request your currently available Play store inventory, then build that into an array of JSON objects for each product. You reference this array later to show the user what options are available for purchase.
Each of your digital goods is represented as a SKU in a JSON format. The following Node.js code outlines the expected formatting of each SKU:
body = {
  skus: [
    skuId: {
      skuType: one of "APP" or "UNSPECIFIED"
      id: string,
      packageName: string
    }
    formattedPrice: string,
    title: string,
    description: string
  ]
}
Send a POST request to the
https://actions.googleapis.com/v3/packages/{packageName}/skus:batchGet
endpoint, where {packageName} is your app’s package name in the Google Play
Console (for example, com.myapp.digitalgoods), and format the result into an
array of SKU objects.
To only retrieve specific digital goods in the resulting array, list the product
IDs for digital goods (as shown under each in-app product in the Google Play
Console) that you want to make available for purchase in body.ids.
The following Node.js code requests a list of available goods from the digital purchases API and formats the result as an array of SKUs:
return jwtClient.authorize((err, tokens) => {
    if (err) {
      throw new Error(`Auth error: ${err}`);
    }

    const packageName = 'com.example.projectname';

    request.post(`https://actions.googleapis.com/v3/packages/${packageName}/skus:batchGet`, {
      'auth': {
        'bearer': tokens.access_token,
      },
      'json': true,
      'body': {
        'conversationId': conversationId,
        'skuType': 'APP',
        // This request is filtered to only retrieve SKUs for the following product IDs
        'ids': ['nonconsumable.1']
      },
    }, (err, httpResponse, body) => {
      if (err) {
        throw new Error(`API request error: ${err}`);
      }
      console.log(`${httpResponse.statusCode}: ${httpResponse.statusMessage}`);
      console.log(JSON.stringify(body));
    });
  });
});
3. Build the order
To start the user's digital purchase, present a list of your digital goods available for purchase. You can use a variety of rich response types to represent your stock and prompt the user to make a selection.
The following Node.js code reads an inventory array of SKU objects and creates a list response with one list item for each:
skus.forEach((sku) => {
  const key = `${sku.skuId.skuType},${sku.skuId.id}`
  list.items[key] = {
    title: sku.title,
    description: `${sku.description} | ${sku.formattedPrice}`,
  };
});
4. Complete the purchase
To complete the purchase, use the COMPLETE_PURCHASE helper intent with the
item that the user selected.
The following Node.js code handles the user’s SKU selection from a list response
and requests the COMPLETE_PURCHASE intent with that information:
app.intent('Send Purchase', (conv, params, option) => {
  let [skuType, id] = option.split(',');

  conv.ask(new CompletePurchase({
    skuId: {
      skuType: skuType,
      id: id,
      packageName: <PACKAGE_NAME>,
    },
  }));
});
5. Handle the result
When the purchase completes, it triggers the actions_intent_COMPLETE_PURCHASE
Dialogflow event (or actions.intent.COMPLETE_PURCHASE Actions SDK intent) with
a COMPLETE_PURCHASE_VALUE argument describing the result. Build an intent,
triggered by this event, that communicates the result to the user.
Handle the following possible purchase results:
PURCHASE_STATUS_OK: The purchase was successful. The transaction is complete at this point, so exit the transactional flow and pivot back to your conversation.PURCHASE_STATUS_ALREADY_OWNED: The transaction failed because the user already owns that item. Avoid this error by checking the user's previous purchases and tailoring the items shown so they don't have the option to re-purchase items they already own.PURCHASE_STATUS_ITEM_UNAVAILABLE: The transaction failed because the requested item is not available. Avoid this error by checking the available SKUs closer to the time of purchase.PURCHASE_STATUS_ITEM_CHANGE_REQUESTED: The transaction failed because the user decided to purchase something else. Reprompt with your order building so the user can make another decision right away.PURCHASE_STATUS_USER_CANCELLED: The transaction failed because the user cancelled the purchase flow. Since the user prematurely exited the flow, ask the user if they want to retry the transaction or exit the transaction altogether.PURCHASE_STATUS_ERROR: The transaction failed for an unknown reason. Let the user know the transaction failed, and ask if they want to try again.PURCHASE_STATUS_UNSPECIFIED: The transaction failed for an unknown reason, resulting in an unknown status. Handle this error status by letting the user know the transaction failed, and ask if they want to try again.
The following Node.js code reads the COMPLETE_PURCHASE_VALUE argument and
handles each result:
app.intent('Purchase Result', (conv) => {
  const arg = conv.arguments.get('COMPLETE_PURCHASE_VALUE');
  console.log('User Decision: ' + JSON.stringify(arg));
  if (!arg || !arg.purchaseStatus) {
    conv.close('Purchase failed. Please check logs.');
    return;
  }
  if (arg.purchaseStatus === 'PURCHASE_STATUS_OK') {
    conv.close(`Purchase completed! You're all set!`);
  } else if (arg.purchaseStatus === 'PURCHASE_STATUS_ALREADY_OWNED') {
    conv.close('Purchase failed. You already own this item.');
  } else if (arg.purchaseStatus === 'PURCHASE_STATUS_ITEM_UNAVAILABLE') {
    conv.close('Purchase failed. Item is not available.');
  } else if (arg.purchaseStatus === 'PURCHASE_STATUS_ITEM_CHANGE_REQUESTED') {
    // Reprompt with your item selection dialog
  }  else {
    conv.close('Purchase Failed:' + arg.purchaseStatus);
  }
});
Reflect the user’s purchases
When a user queries your Action, the request JSON's user object includes a list
of their purchases. Check this information and change your Action’s response
based on what content the user has paid for.
The following sample code shows a request’s user object that includes
packageEntitlements of previous in-app purchases they made for the
com.digitalgoods.application package:
  "user": {
    "userId": "xxxx",
    "locale": "en-US",
    "lastSeen": "2018-02-09T01:49:23Z",
    "packageEntitlements": [
      {
        "packageName": "com.digitalgoods.application",
        "entitlements": [
          {
            "sku": "non-consumable.1",
            "skuType": "APP"
          }
          {
            "sku": "consumable.2",
            "skuType": "APP"
          }
        ]
      },
      {
        "packageName": "com.digitalgoods.application",
        "entitlements": [
          {
            "sku": "annual.subscription",
            "skuType": "SUBSCRIPTION",
            "inAppDetails": {
              "inAppPurchaseData": {
                "autoRenewing": true,
                "purchaseState": 0,
                "productId": "annual.subscription",
                "purchaseToken": "12345",
                "developerPayload": "HSUSER_IW82",
                "packageName": "com.digitalgoods.application",
                "orderId": "GPA.233.2.32.3300783",
                "purchaseTime": 1517385876421
              },
              "inAppDataSignature": "V+Q=="
            }
          }
        ]
      }
    ]
  },
  "conversation": {
    "conversationId": "1518141160297",
    "type": "NEW"
  },
  "inputs": [
    {
      "intent": "actions.intent.MAIN",
      "rawInputs": [
        {
          "inputType": "VOICE",
          "query": "Talk to My Test App"
        }
      ]
    }
  ],
  ...
}