
With the zero-touch iframe, you can embed zero-touch directly into your EMM console to allow customers to easily configure zero-touch enabled devices with Android Device Policy. The iframe allows you to set the provisioning extras used during zero-touch device setup.
The first time an IT admin opens the iframe, they’ll be prompted to link their zero-touch account to their enterprise.
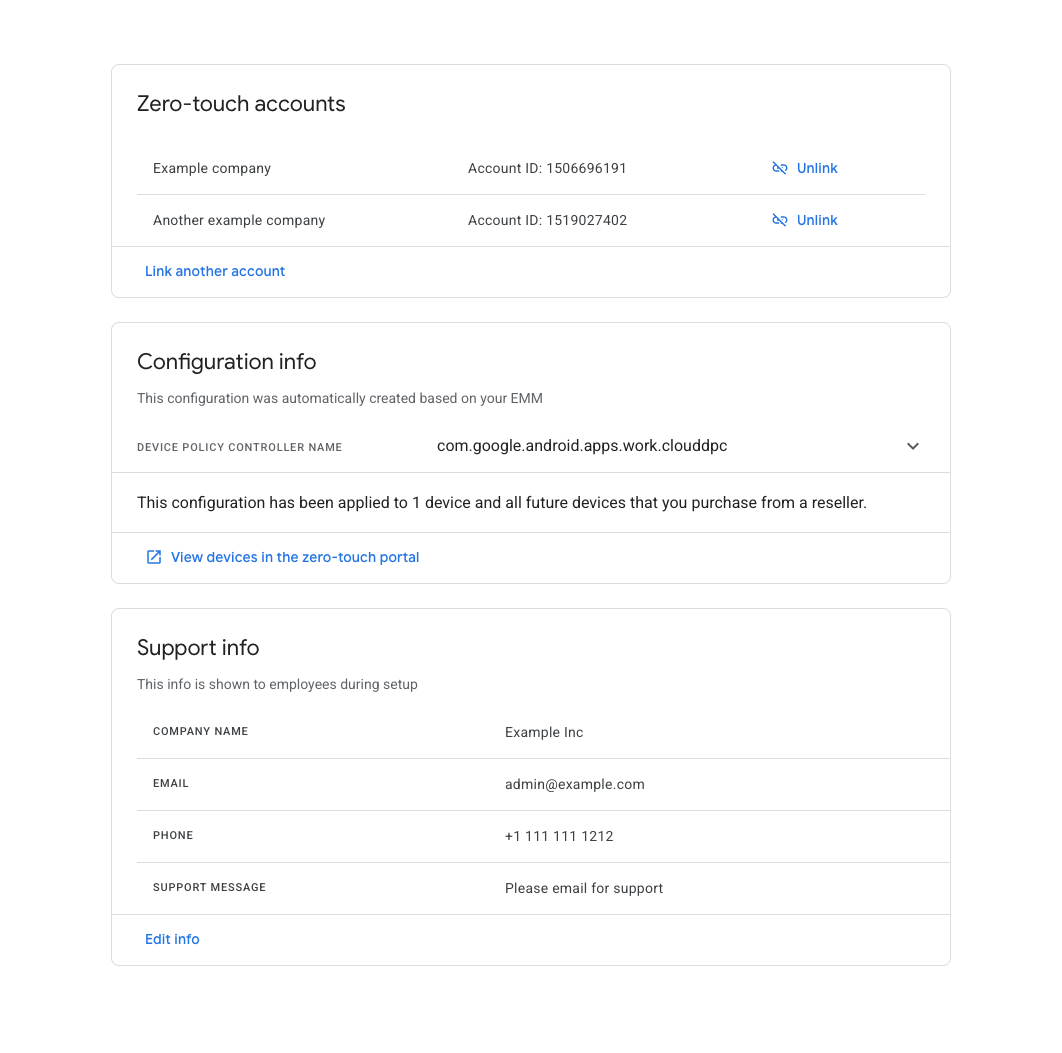
Once an IT admin has linked a zero-touch account to their enterprise, the iframe will display the list of linked zero-touch accounts. They can also see the default zero-touch configuration set for enterprise devices.
Features
This section describes the features available in the zero-touch iframe. For information on how to embed the iframe and implement these features, see Add the iframe to your console.
Link a zero-touch account to an enterprise
The iframe allows an IT admin to link their zero-touch account and their enterprise. As part of this process, the IT admin creates a default zero-touch profile to be used for devices inside of the zero-touch account. This flow is detailed below.
If the IT admin has not previously linked a zero-touch account to their enterprise, they are prompted to do so when they open the iframe.
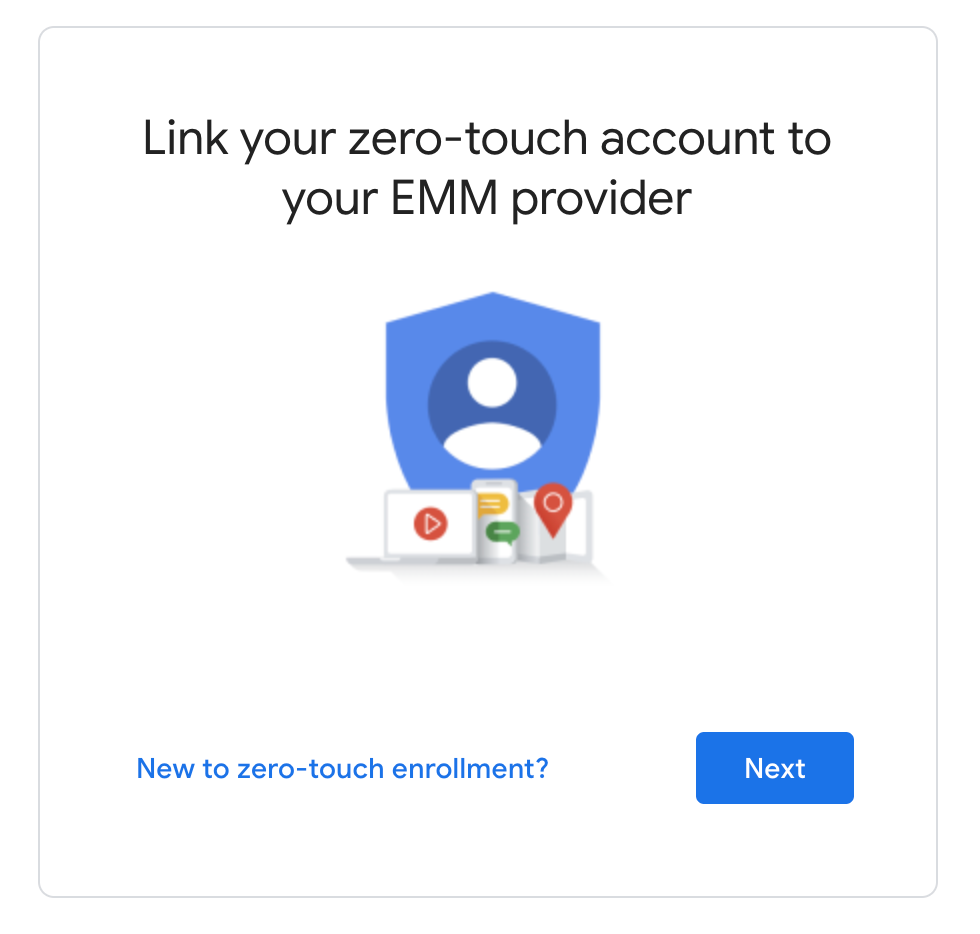
The IT admin sees a list of zero-touch accounts and can choose one or more to link to their enterprise.

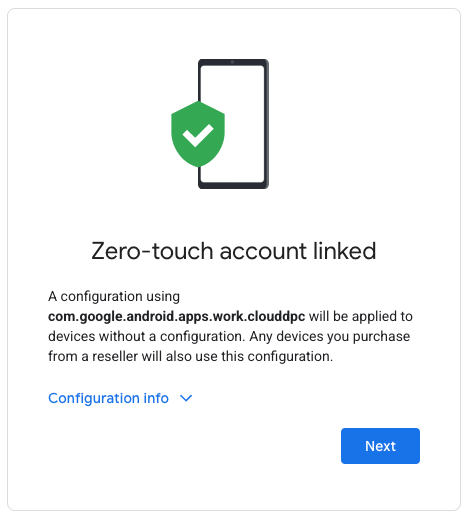
The zero-touch iframe automatically generates a zero-touch configuration. This configuration is not modifiable by the IT admin. You can customize the provisioning extras to be used in this configuration. For more information on how to do this, see iframe URL parameters.
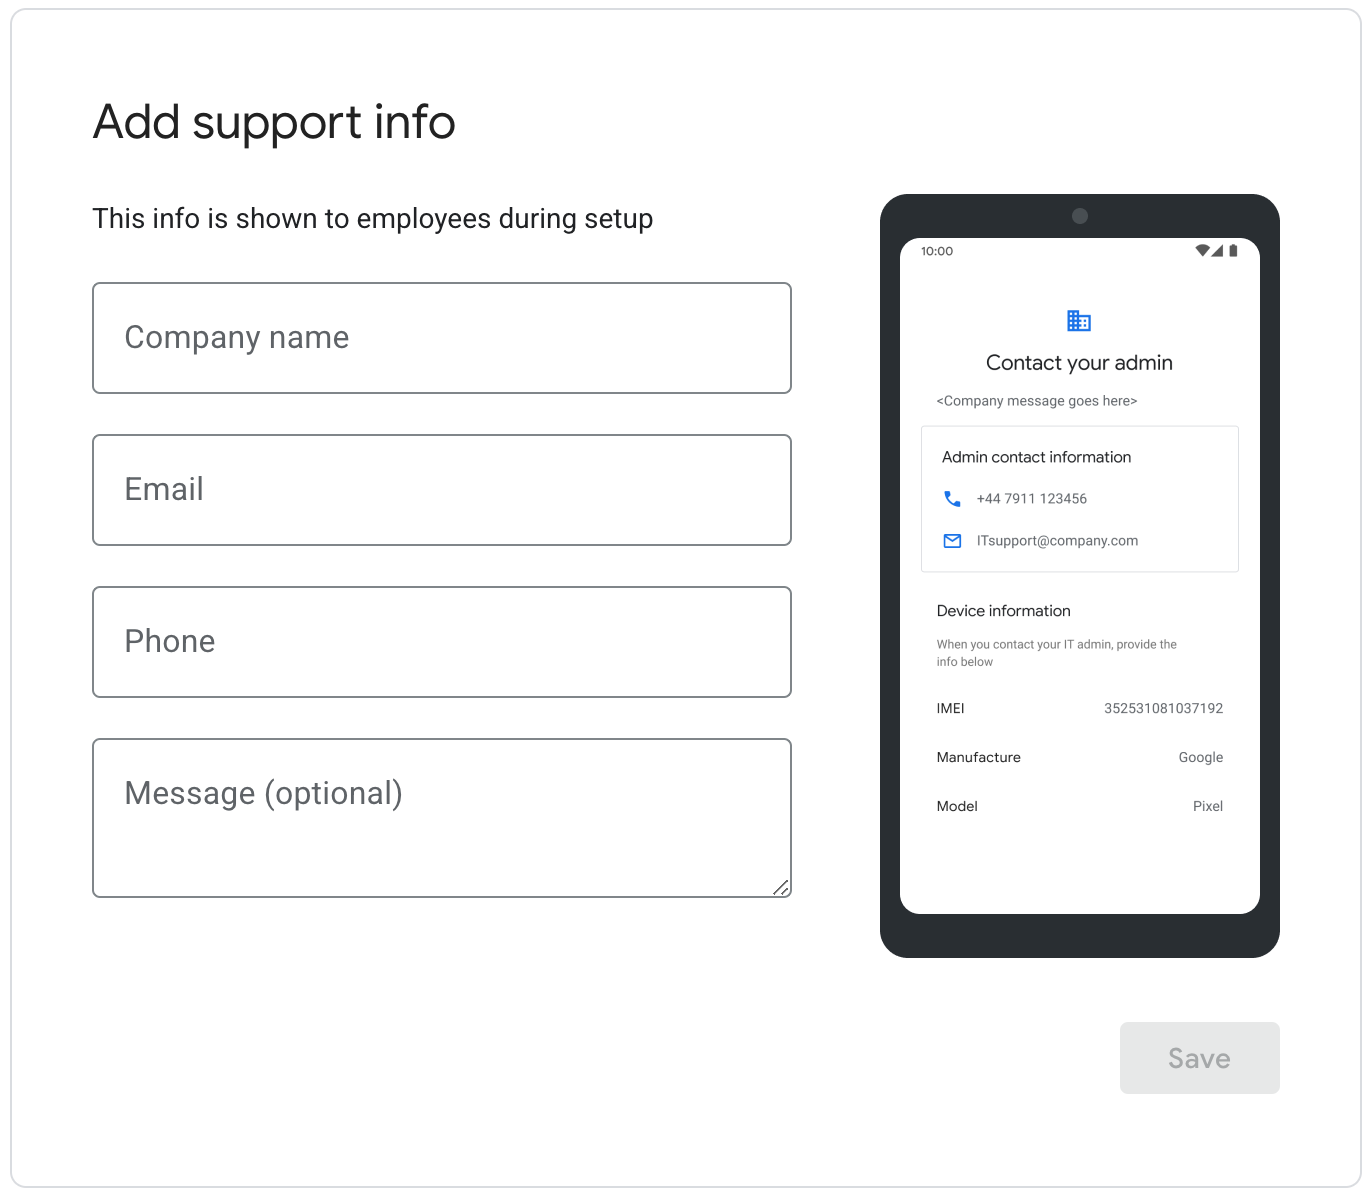
The IT admin enters support information that appears when zero-touch enabled devices are set up. When the IT admin clicks “save”, the linking process completes and the user is redirected to the zero-touch iframe home page, where they can manage their linked accounts.
View and manage linked zero-touch accounts
The iframe allows an IT admin to view their linked zero-touch accounts and their default zero-touch profile and support information. In addition, they can link additional zero-touch accounts and unlink zero-touch accounts.
See Figure 1 for an example view of the Zero-touch iframe home page.
Viewing devices for linked accounts in the zero-touch portal
When a zero-touch account is linked to an enterprise, all devices in the zero-touch account that are not configured with a zero-touch profile are automatically configured with the Enterprise zero-touch profile.
Inside of the zero-touch console, these devices are shown with the “Enterprise default profile” configuration. The IT admin can set and unset this profile on any device in the zero-touch account. However, the profile cannot be modified.
If the zero-touch account is unlinked, all devices configured with the “Enterprise default profile” will have this profile unset. These devices can be configured with a different profile.
Add the iframe to your console
Step 1: Generate a web token
Call enterprises.webTokens.create
to generate a web token that identifies the enterprise. The response contains
the token's value.
- Set
parentFrameUrlto the URL of the parent frame hosting the iframe. - Use
iframeFeatureto specify which features to enable in the iframe: 'ZERO_TOUCH'. IfiframeFeatureis not set, then the iframe enables all features by default.
You need to include the returned token, along with other parameters, when rendering the iframe in your console.
Step 2: Render the iframe
Here’s an example of how to render the zero-touch iframe:
<script src="https://apis.google.com/js/api.js"></script>
<div id="container"></div>
<script>
  gapi.load('gapi.iframes', function() {
    var options = {
      'url': 'https://enterprise.google.com/android/zero-touch/embedded/companyhome?token=web_token&dpcId=com.google.android.apps.work.clouddpc',
      'where': document.getElementById('container'),
      'attributes': { style: 'width: 600px; height:1000px', scrolling: 'yes'}
    }

    var iframe = gapi.iframes.getContext().openChild(options);
  });
</script>
This code generates an iframe inside the container div. Attributes to be applied to the iframe tag can be set with the 'attributes' option, as above.
iframe URL parameters
The table below lists all the available parameters for the iframe that can be added to the URL as URL parameters, e.g.:
https://enterprise.google.com/android/zero-touch/embedded/companyhome?token=TOKEN&dpcId=com.google.android.apps.work.clouddpc
| Parameter | Required | Description |
|---|---|---|
token |
Yes | The token returned from Step 1. |
dpcId |
Yes | The package name of the DPC app. You should always set this to the ID of Android Device Policy, com.google.android.apps.work.clouddpc.
|
dpcExtras |
No | URL-encoded JSON object containing provisioning extras. These are passed to the DPC during device setup. |
Example URL, assuming:
- Web Token from API:
abcde - DPC:
com.google.android.apps.work.clouddpc - DPC Extras:
{“server”:“www.example.com”,“enterprise”:”example_id”}
https://enterprise.google.com/android/zero-touch/embedded/companyhome?token=abcde&dpcId=com.google.android.apps.work.clouddpc&dpcExtras={“server”:“www.example.com”,“enterprise”:”example_id”}
URL encoded, this URL would be:
https://enterprise.google.com/android/zero-touch/embedded/companyhome?token=abcde&dpcId=com.google.android.apps.work.clouddpc&dpcExtras=%7B%E2%80%9Cserver%E2%80%9D%3A%E2%80%9Cwww.example.com%E2%80%9D%2C%E2%80%9Centerprise%E2%80%9D%3A%E2%80%9Dexample_id%E2%80%9D%7D